Wallaby

Home Model Engine Machinist Forum

Help Support Home Model Engine Machinist Forum:

This site may earn a commission from merchant affiliate links, including eBay, Amazon, and others.
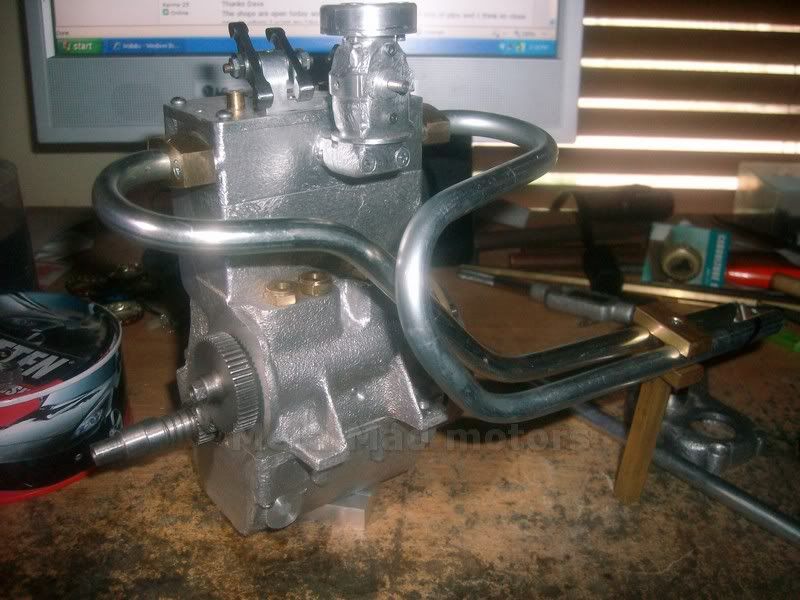
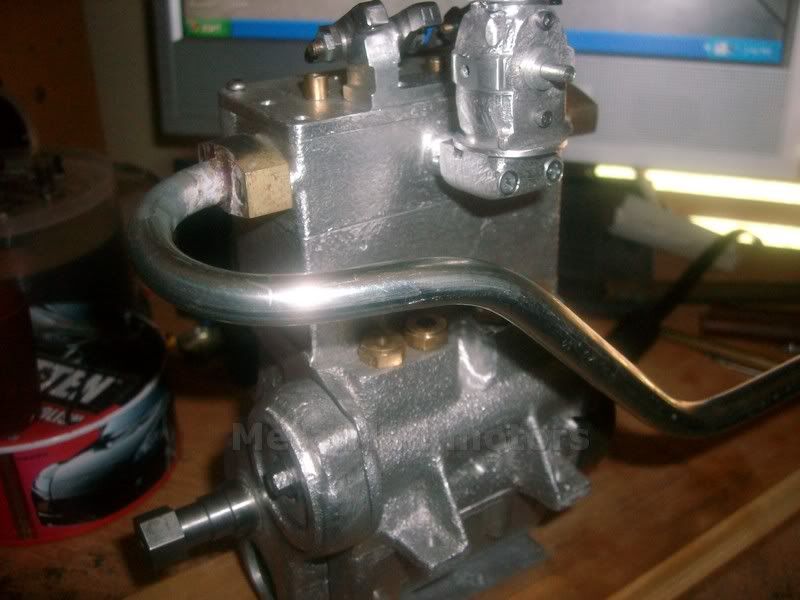
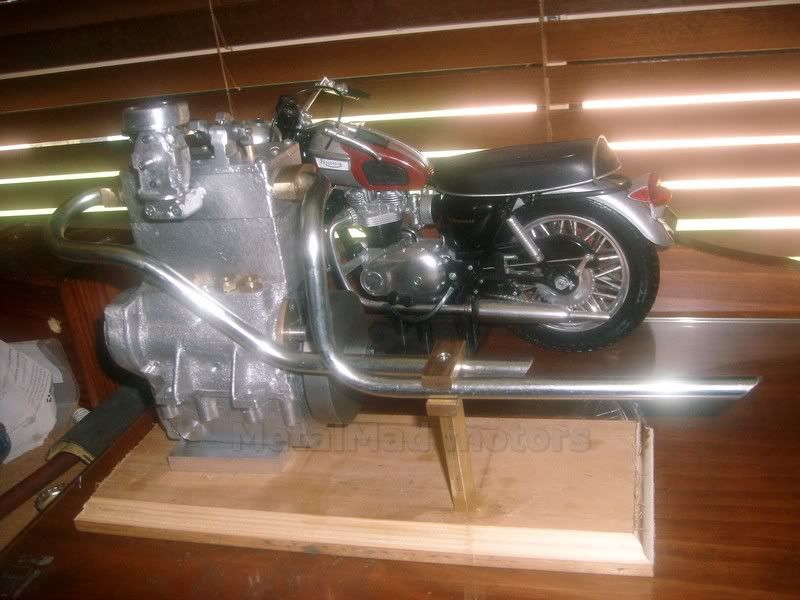
Ya know the one thing I never liked about the Wallaby was the exhaust coming out the ends. I've sketched a bunch of different pipes trying to come up a better look, and I've never liked any of them.....


But what you've done with it is Awesome! it looks great! Completely changes my view of the subject!......Well Done!

:bow:
Dave
 
Hi Dave
I'm glad you like the lake pipes :big:
But I still feel more could have been done.
I'm happy with the front pipe but the flywheel end one needs to come back around towards the engine and then reverse back for both pipes of the same length to end at the same place, unfortunately I ran out of pipe before I worked out what I wanted.
The Base will have to go back onto my scrap wood pile as its not wide enough ;D
Pete
SANY0161.jpg
 
Pete,I've followed your build from the beginning,enjoyed all of it,love the lake pipes, AWESOME as the younger fellas say here.
Is that a real T120 in the back ground of your last pic?
Gimpy
 
i wondered that before about the bike but looik at the scale of the window blinds bloody nice model tho
both of them
ps the little de dion is comming along ok made some changes to the plan for easier maintenance of the valves
 
Hi Gimpy
Thanks Mate
its just a plastic model im afraid but I like cos it reminds me of younger days 8)
Hay John how about a pic?
How far have you got?
Pete
 
took some pics tried to start a thread but pics too large i will resize them and try a gain over sat
too late last night with work next day get up time comes too soon
 
Great news this arvo
A little box from Tel turned up so I rushed out to the shed and did the 10 degree inclusive taper in the 4 jaw.
The pinion on the Crank will probablely be used as the idler, I left the other one on the stick for the time being as it needs a keyway before parting off.
The fit on the Crank is nice and firm, dead nuts in fact ;D and the idler just fits between the gears real nice too.
I guess this means this thing will run :big:
Thanks Tel Top job
Pete
SANY0162.jpg
 
I made the idler stud today and then drilled and bore finished with a 3/8 two flute.
The stud still needs to be drilled in the 4 jaw and the end of the hole blocked, once the stud is pressed in the oil hole to the main has to be redrilled thru the stud for idler pinion oiling as well as mains.
Pete
SANY0163.jpg
 
Hi Dave
Its slowly taking shape I think But today is so hot I did not feel up to doing too much.
I did however drill and plug the idler stud and after a few hours in the freezer pressed it into the block which I left in the sun for a while.
I was not sure if the position of the oil hole mattered so I left it a 90 degrees and left the pinion off in the pic to show.
I also did the keyway in the Crank pinion and drilled the water outlet port in the top plate,
The article shows a dia of 5/8 for the outlet but I believe that to be an error and made it 3/8 in order to use the same bolt centers as the others, which looks the same as the drawing.
Pete
SANY0164.jpg
 
I'm really liking this build. I like that engine...reminds me of a big Wakesha I worked on as a kid with my Dad.

6 cylinder...900 and something cubic inch. Was in a firetruck.

Big, rugged , pourposful. Everything was there for a reason or it wasn't there.

Dave
 
Thanks Dave
The shops are open today and I was able to buy a couple of bits of pipe and I think im close now to where I want my "lake pipes".
Once they are Silver soldered tomorrow ill trim em up a bit ;D
Its stinking hot today
Pete
SANY0167.jpg
 
metalmad said:
I did however drill and plug the idler stud and after a few hours in the freezer pressed it into the block which I left in the sun for a while.
Pete

I wish I could have spent a couple of hours in the freezer today :big:
What a hot day!

Bez

P.S. one missing letter can make a big difference
 
Hi Bez
Its a shocker today :eek:
I need advice which of the extractor versions do you guys think is best,
I want to get something soldered tomorrow but I'm having problems deciding.
Pete
SANY0161.jpg
 
I'm digging the first ones....makes it easier to work on the back of the engine......Looks less motorcycle, and more engine room.....thats my story and Im sticking to it! ;D

Dave
 
A picture of the type of truck I was thinking about....a FWD with a Waukesha in it...though this one is the smaller engine.....ours was a 1955 IIRC....yes FWD does stand for four wheel drive...these trucks were beasts

[ame]http://www.youtube.com/watch?v=5WNoYSh7YHk&feature=related[/ame]


Dave
 
What a Beast wow
and that's the small one :big:
you have sold me, if I can find it, ill use the first one but I'm serious its gone missing
Maybe the boy took it
but theres no point asking big Kev.
He can not talk yet ??? and ive looked everywhere man
Pete
 
I personally like the looks of the equal length pipes. Along with somewhat balancing the performance of both cylinders they give it a 'cool' look with the extra curves.
gbritnell
 
Hi George
I do want the pipes the same length and cool is always good 8)
I had another hick up today that I'm amazed I did not pick up before.
The first pipe was stainless and when I went back the second time they sold me some coated rubbish with a much thicker wall thickness ???
Finally I was able to source some more stainless for the back pipe and then I broke my cheap $30 bender :(
I wonder if Kens bender can be modded to take 3/8
I really need a top notch bender and it does not look that hard to make.
Pete
SANY0169.jpg
 

Latest posts

Back
Top