1" Bore x 1" Stroke Vertical i.c. Engine

Home Model Engine Machinist Forum

Help Support Home Model Engine Machinist Forum:

This site may earn a commission from merchant affiliate links, including eBay, Amazon, and others.
Okay Werowance---Here you go.---Find a piece of wooden dowel that is a "good" fit into the end of the coil, and long enough to stick out thru the hole in the box about 1" when it is seated in the coil. Drill a hole lengthwise thru the piece of wood, big enough to run the insulated coil wire completely thru it. The coil wire should be about 18" long between the sparkplug boot and the bare end which fits into the wood. Cut about 3/4" of insulation away from the non sparkplug end of the coil wire. Coat the last 3" or 4 " of the stripped end of the coil wire and coat it with slow setting glue and push it thru the wood until the bared end sticks out of the wood. Fold the wires back over the outside of the wood, coat them with glue and smooth them against the wood. Now, when dry, you can insert the wood thru the hole in the box into the coil.---If you require a different sparkplug boot, make up a second coil wire assembly. the 1" of wood which extends beyond the side of the box lets you grip the wood in your fingers and pull it completely out, then you can push in a different coil wire assembly.
Brian, im sorry but i am talking about the 1/4 x 32 side of things how did you adapt down to it? i guess what i am asking is i would like to see your coil wire adaptation to the smaller plug. from your description above im getting you are speaking of the coil side and not the plug side? or am i mistaken? sorry but the coil side i have down pat. its the smaller plug side that i am adapting down and my adapter works but something i just want to see more of because just because i made something that works doesnt mean that i did it right or that it cant be done better


but want to say CONGRATS, IT RUNS! and LOOKS GOOD. with all caps because it deserves it!
 
sorry to post again, but after reading what i said i should say -
i really just want to see how you did the plug wire on the spark plug side. not the coil side. photos are good explanations are great to. but dont want to push it with my questions
 
I love these Traxxas 4033 carburetors. They work so well on 1" bore engines. I have built a number of my own carburetors, and they work very well, but they are kind of like sparkplugs.---I can buy them cheap, so why bother building them? This philosophy may not agree with other machinists out there, but it's the way I feel. I have one problem with the 4033 carbs---If left alone on the engine, the engine vibration makes the throttle advance to the point where the engine is screaming wide open, which is somewhat terrifying. I have solved this by machining a throttle lever with a built in compression spring at the pivot point and a link to the Traxxas throttle. This works, but it is always a bit more work and sometimes looks out of place. Does anyone have a simple solution to this issue? Someone suggested that I run some crazy glue into the pivoting throttle body to stiffen it up, but I think that is more likely to ruin the carburetor.----Brian
 
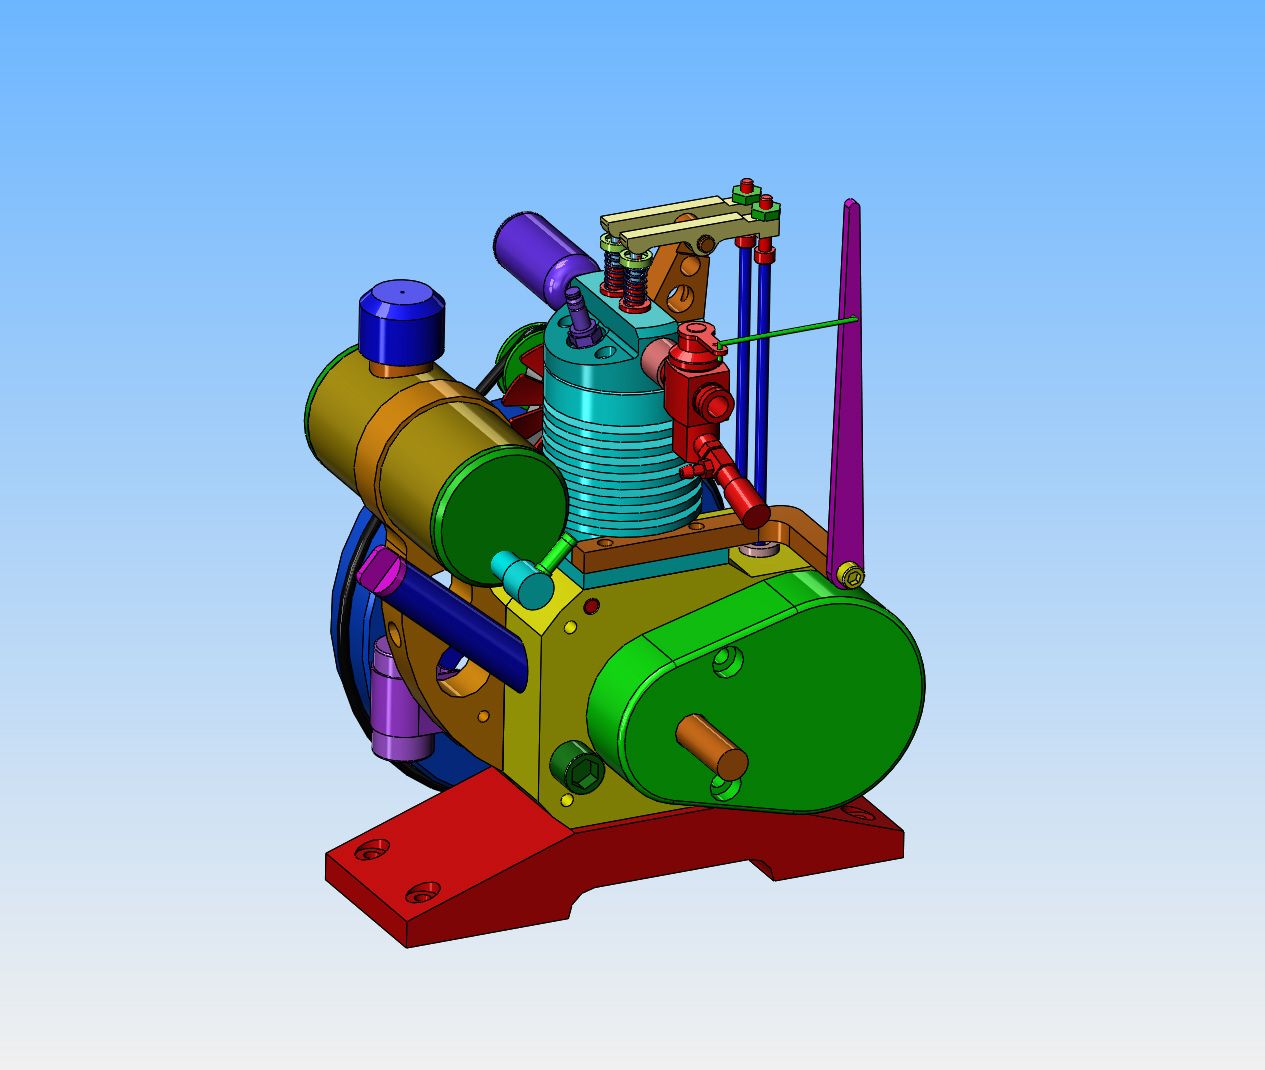
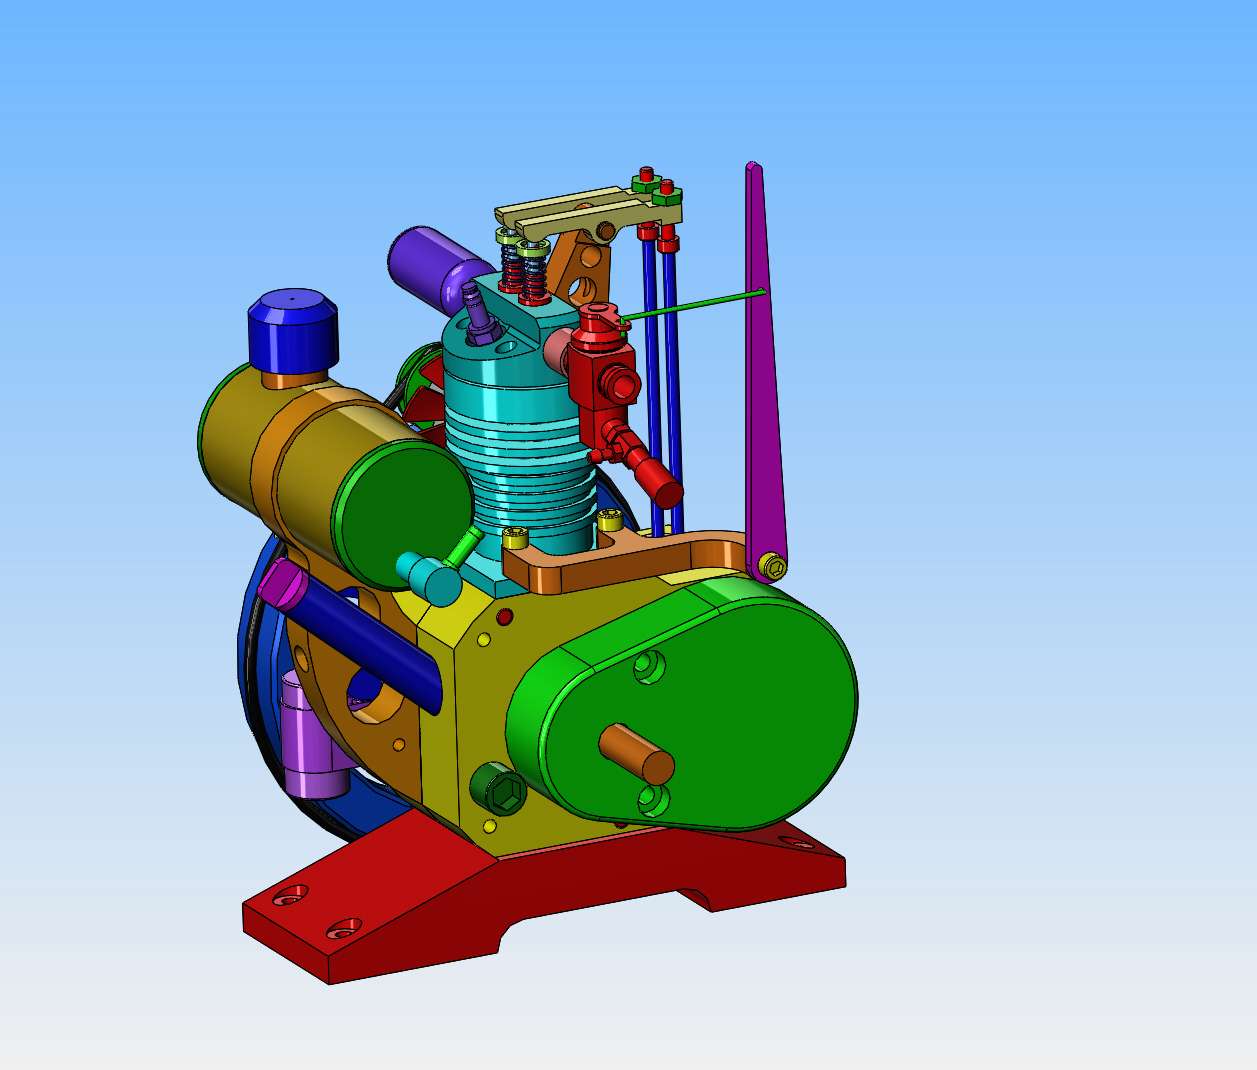
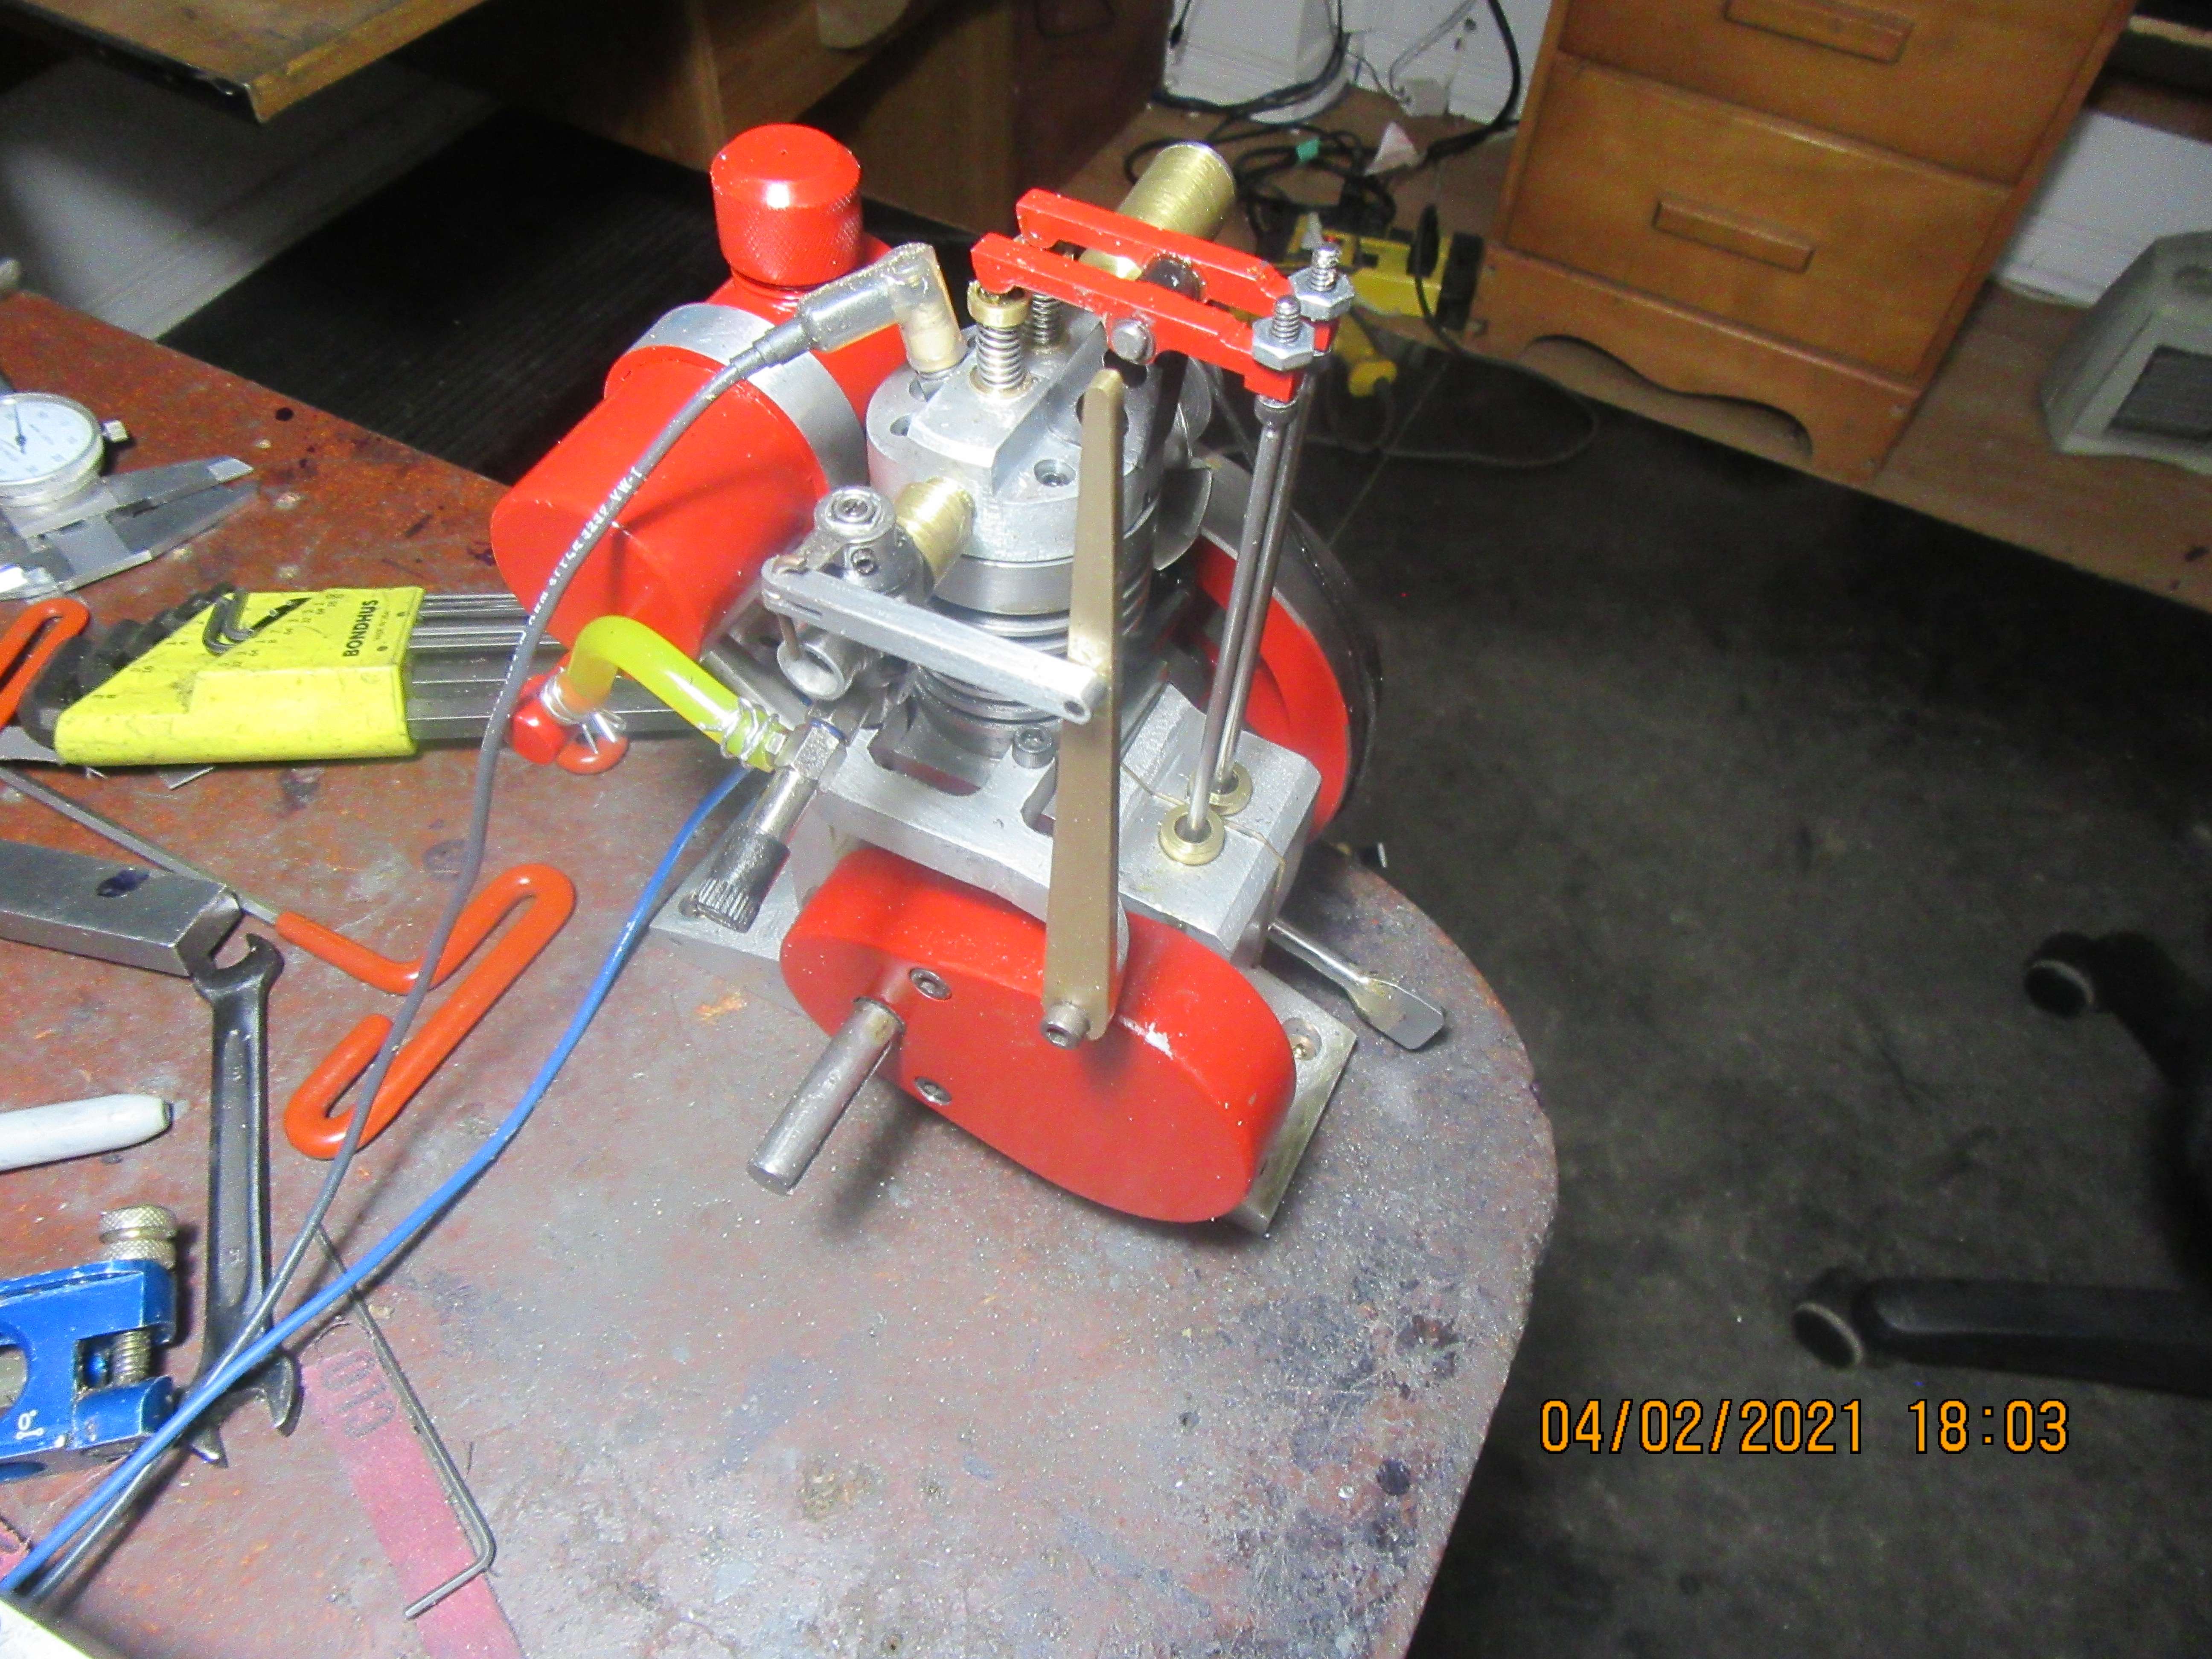
This is my engine with what I call my "Casey Jones throttle lever" A couple of Belleville washers between the throttle arm and the throttle arm mount will keep the throttle arm from moving under vibration. A 1/16" diameter wire link ties it to the throttle lever. That way the throttle doesn't open or close unless I manually move the lever.
DayuDw.jpg
I think I'm going to put one of those onto my Webster. It doesn't vibrate out of place since my modification, but it's not secure either.
 
... I have one problem with the 4033 carbs---If left alone on the engine, the engine vibration makes the throttle advance to the point where the engine is screaming wide open, which is somewhat terrifying. ...

Just looking at a picture of one, it appears to be a bog-standard RC carburetor. Does the throttle arm come off? If you replaced that bellows seal with a right-sized O-ring, or put a spring inside it you may be able to add enough friction to the thing so it'll stay in place. (Or throw the bellows away and replace it with a spring -- I've never seen a bellows in that spot in an RC carb, so I'm not sure if it's really necessary. I think if it were me I'd take it off and see what happens, without recommending that anyone else do so.)

Basically, it's designed to be driven by a servo in an RC car; for that service friction is a bad thing, so to the extent that they're going to exert any effort at all in that area, it'll be to make it as free-moving as possible.
 
Tim---the Traxxas 4033 carb has a very clever design. Turning the throttle arm does two things. First, it opens the main passage for more air flow, as you would expect a throttle type carburetor to do. However, the throttle arm is on a very coarse pitch thread so that when it swings to the open position it also opens up the main fuel jet to allow more fuel to flow along with the increased air flow. That rubber bellows is what allows the throttle arm and inner venturi to both swing and move axially without letting air leak in from the atmosphere.----Brian
 
Tim---the Traxxas 4033 carb has a very clever design. Turning the throttle arm does two things. First, it opens the main passage for more air flow, as you would expect a throttle type carburetor to do. However, the throttle arm is on a very coarse pitch thread so that when it swings to the open position it also opens up the main fuel jet to allow more fuel to flow along with the increased air flow. That rubber bellows is what allows the throttle arm and inner venturi to both swing and move axially without letting air leak in from the atmosphere.----Brian

First: Gotcha on the function of the bellows -- so if you did anything to increase friction, you couldn't touch that.

Second: Twin-needle carbs, as you describe, are the current "bog standard" for RC planes. 20 years ago they were cutting edge. Now, it's only the most entry-level of entry level engines that use air-bleed carburetors -- and those engines are all going south, with the "low power, heavy, easy to use" market segment being swallowed whole by electrics.
 
I've decided that since I have the time, with no other engine builds planned, that I will machine a much swoopier throttle mounting bracket. Since this engine already has a decidedly "swoopy" gas tank mount, it might as well have a "swoopy" throttle mounting bracket as well. Nobody in Barrie carries Belleville spring washers, so I called Brafasco in Barrie and ordered a couple of dozen of them.
JuSVin.jpg
 
Any thoughts on running that carb on a 9 cylinder radial with 1 inch bore ?
 
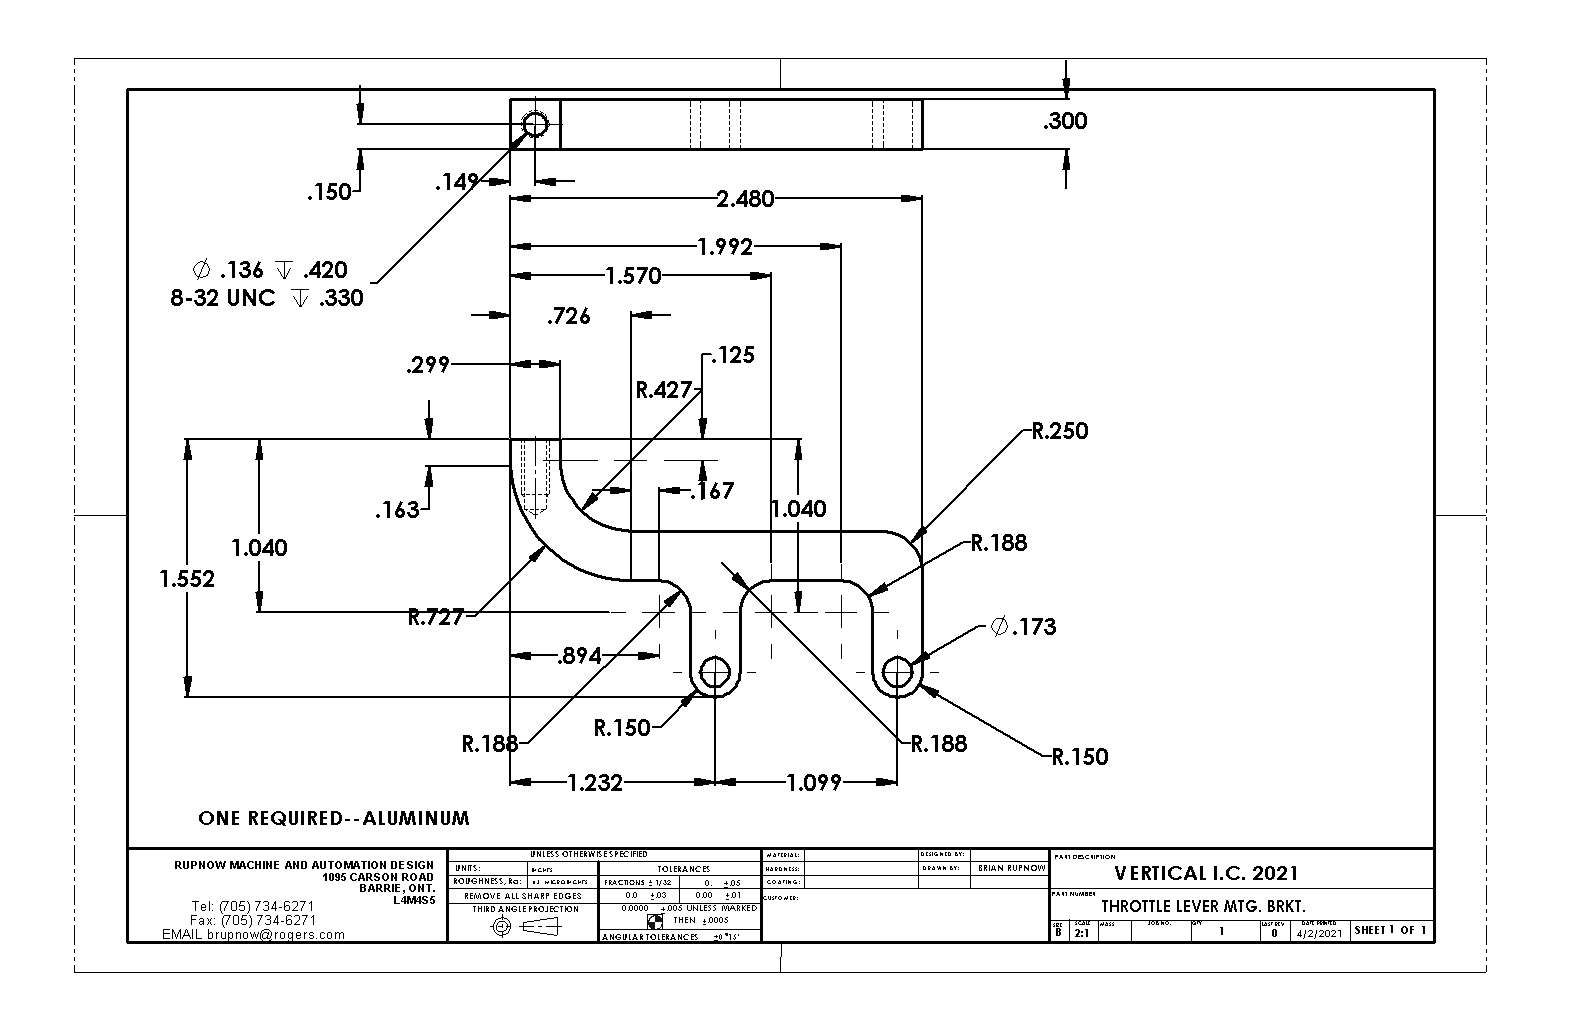
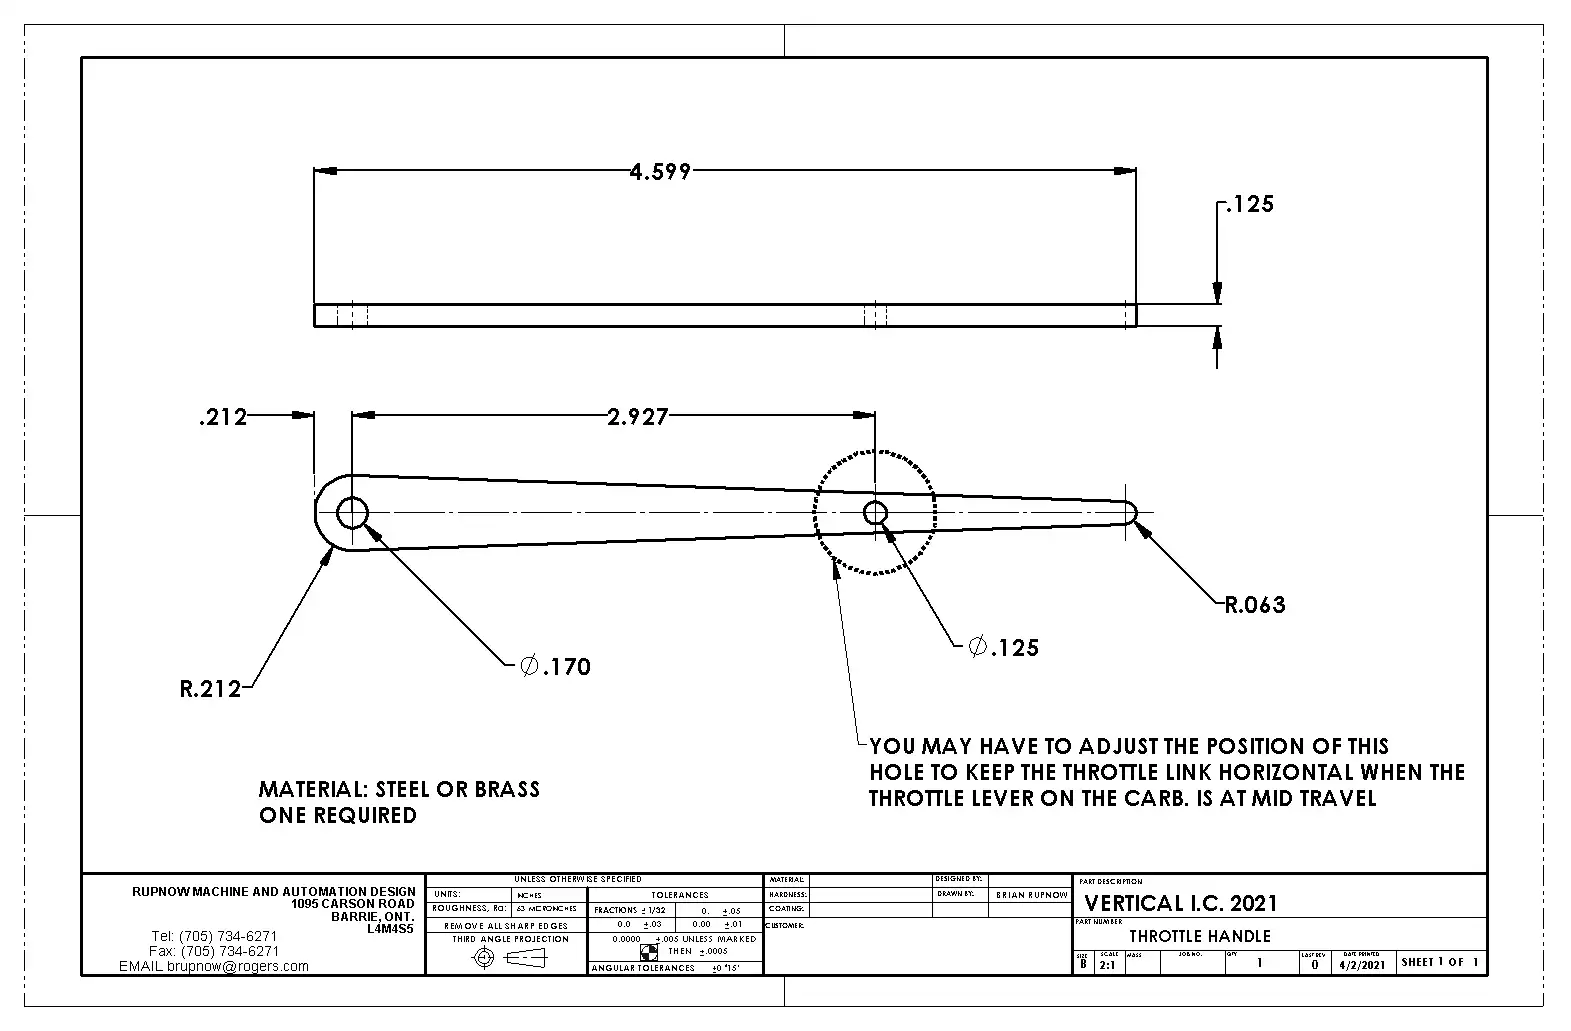
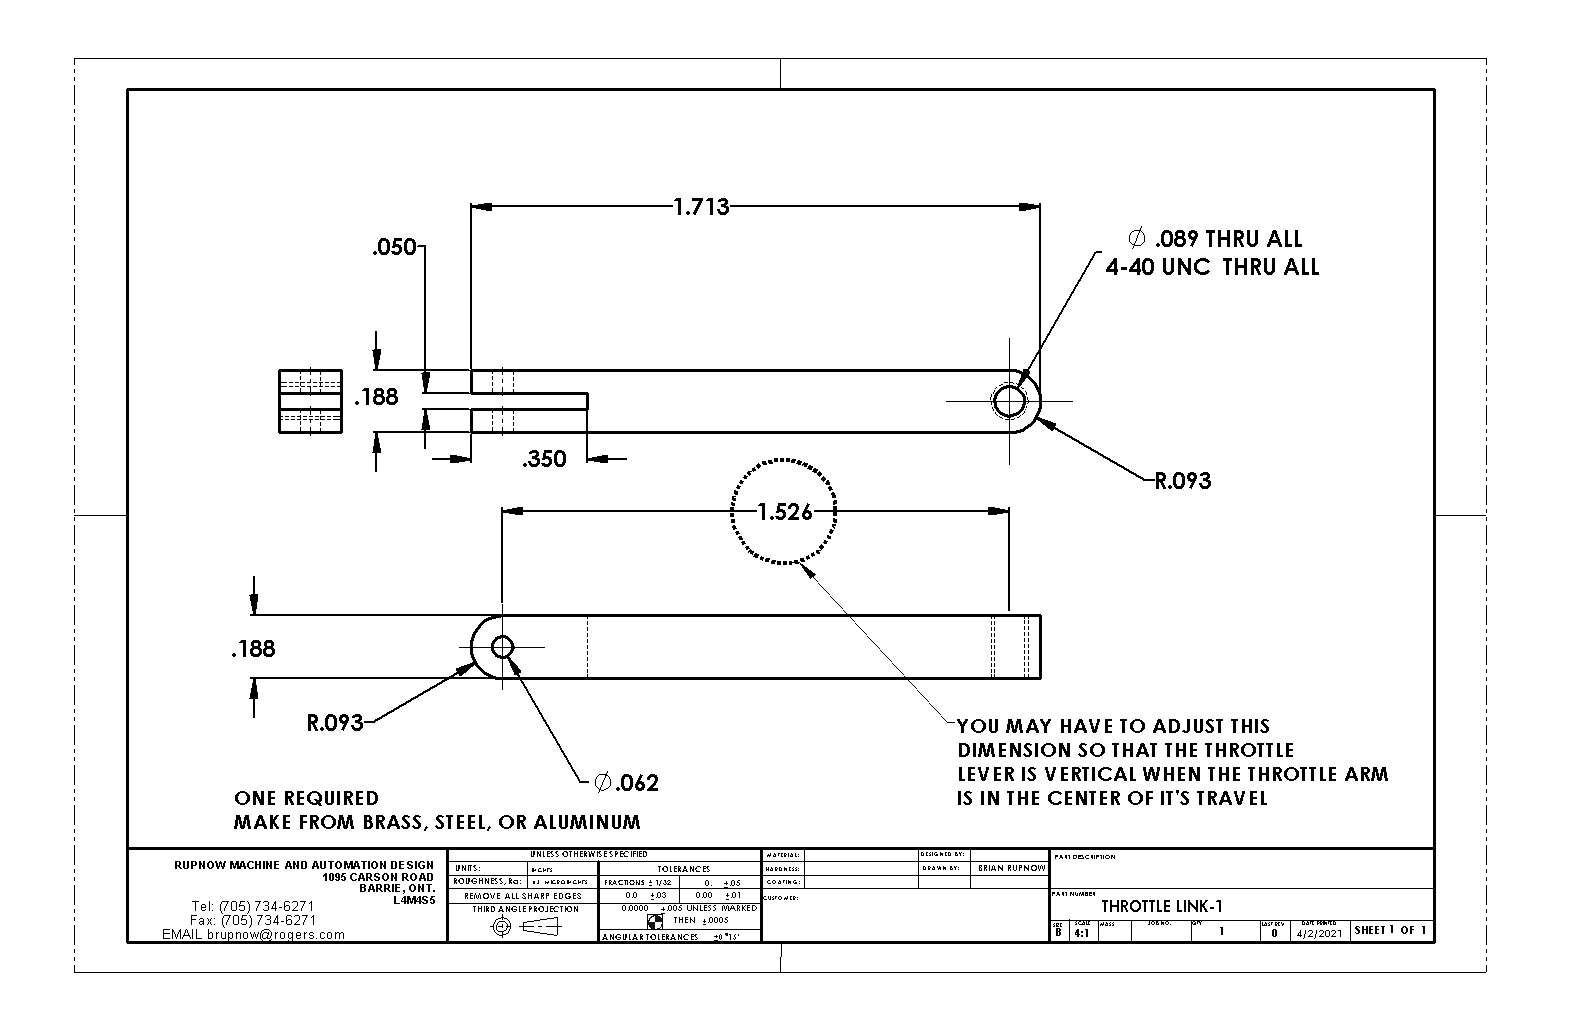
Today I finished up my "Casey Jones" throttle and linkages. I don't have my Belleville washers yet, so I put a small neoprene o-ring in between the throttle arm and the piece it is attached to, to keep the arm from moving out of position. Tomorrow I will test it and make a new video. I have sold quite a few drawing packages of this engine, and I realize that not everyone will use the same carburetor as I did. I will post detail drawings of these three throttle parts, which were not in the original drawing package.
MubSWS.jpg
 
Here we have the throttle lever mounting bracket, which picks up two of the bolts used to hold the cylinder in place.
8s1oaP.jpg
 
A real nice job on this one Brian, I think the paint turned out really nice!

Great work!

John
 
John--The painted engines do look nice.---And every time I touch the damned things the paint gets scraped, nicked, or flakes off. I think that if I was really honest about painted engines, I would only recommend powder coating. Powder painted parts are almost bulletproof. Spray on enamels simply don't stand up to even minor abuse.
 
A two-part epoxy or urethane finish might do.

I think there's even a rattle-can epoxy that you can get. I only saw it on a model airplane forum, so I can't remember whether you do something special to activate it, or if it gets mixed when you buy it. At any rate, once it's activated you have 20 hours or so to finish the job, then it hardens in the can.

If you want to know, I'll ask around for you.
 

Latest posts

Back
Top