Super Tigre G32 1cc diesel - a 5cc version

Home Model Engine Machinist Forum

Help Support Home Model Engine Machinist Forum:

This site may earn a commission from merchant affiliate links, including eBay, Amazon, and others.
Ramon said:
Greg, scaling the engines so far has been a very pleasurable exercise and they have all run well. Are you making anything at the moment?

Well sort of, I'm finishing up a contract to build a pair of electromechanical actuators. After that, I hope to get on to an engine build and the Emco lathe. I have a few RC engine modification projects I should finish as well. I too have dreamed up a variety of complex engine designs, but I' think I'll build a single cylinder diesel out of the Motor Boys book. Then, maybe, I'll look at mounting a block of aluminum on the 4th axis and have the mill produce a crankcase exterior. What I really need to do though is be more productive in the shop.

Greg
 
dieselpilot said:
I' think I'll build a single cylinder diesel out of the Motor Boys book.

Spoilt for choice there Greg ;) I have thoughts on the Vivell 09 at some time and Rons new drawing of the Nalon Viper - next up I think.

Thanks for the confirmation Dave ;) ;)

Hell this thing is so slow tonight - time for another early night

Ramon
 
I am following your build with interest Ramon - as I have all of your other 'adventures' on this and the Model Engineer site.

Your pictures and methods are certainly an inspiration for me to get back out in the workshop sometime soon for some I/C - the only thing I have made recently have been titanium wedding rings for myself and my wife to be. 8)
 
Hi Guys

'LADmachining'
Good to hear you are still holding an interest in I/C Anthony. Never fear you'll get there in the end though your latest project sounds as good a reason as any could be for firing up the lathe ;) BTW (and I have a vague feeling I may have asked you this before but if so call it an age thing) - 'Sparey -(x2) is that 2 off or twice size - that'll swing a good sized prop if it's the latter

Well having wore myself to a standstill in the garden yesterday - just about to wander through to the old comfort zone when "It's a lovely day dear do you think you could just ....... ::) - strike action was called for for today ;D

It's been slow work entailing repeat set ups of R/T, fixtures, vise etc but its beginning to look like a crankcase - one more session, possibly two at most, should see it ready for final fettling and finish. A few more pics to bring it up to date.......

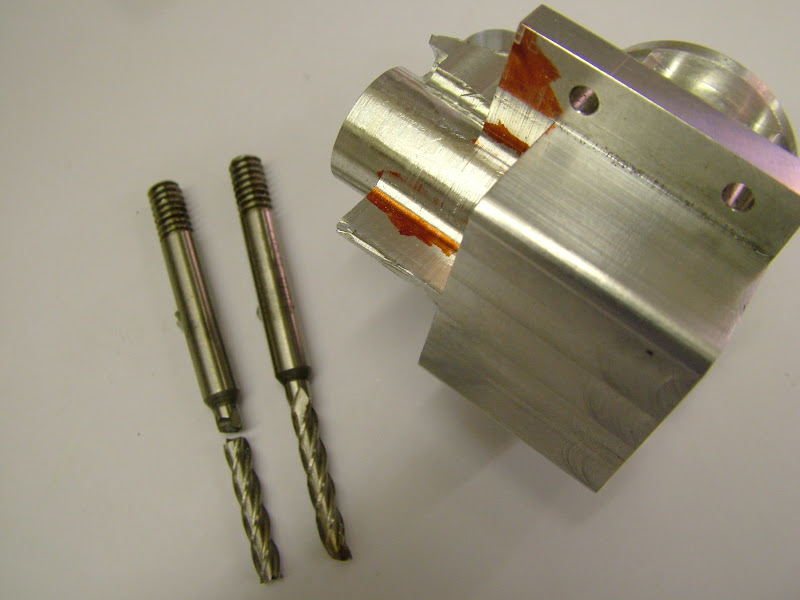
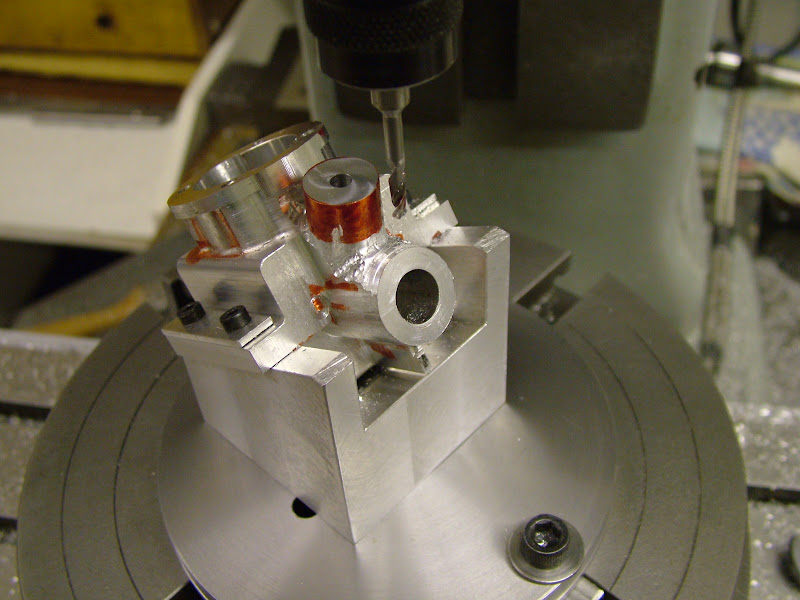
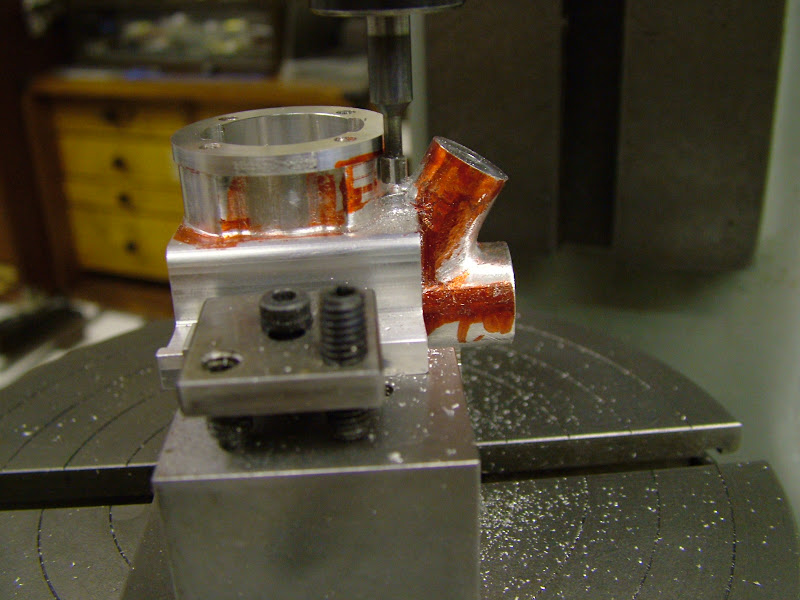
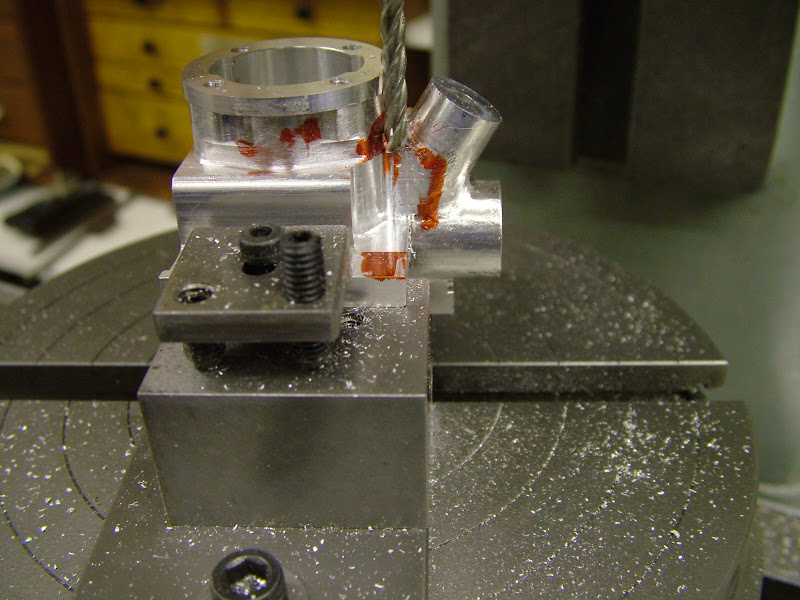
Work began on the rear end by milling the lower faces around the valve housing to near finish size (0.1mm left on for filing) Disaster struck when the long series 4mm endmill plucked the web virtually on the last cut on #1 case. This was commonly referred to as 'Catching a crab' when at work does anyone else use that phrase to describe this sort of mishap? Damage to the case was minimal and will disappear when the web is shaped later but the loss of said, near new, endmill was/is a bit of a blow. There were several 3/16 LS EM's but no 4mm to replace it with however another one but with three broken teeth was found. The jagged bits were ground back and the one tooth used as a flycutter - it worked fine but caution was the byword. Managed to get the second case done with this 'modified' cutter without further breakages
DSCF0110.JPG


DSCF0092.JPG


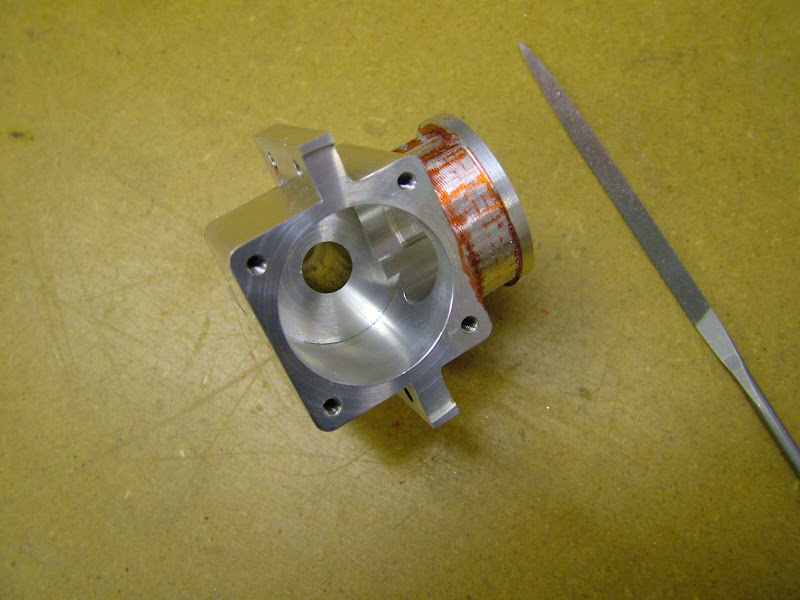
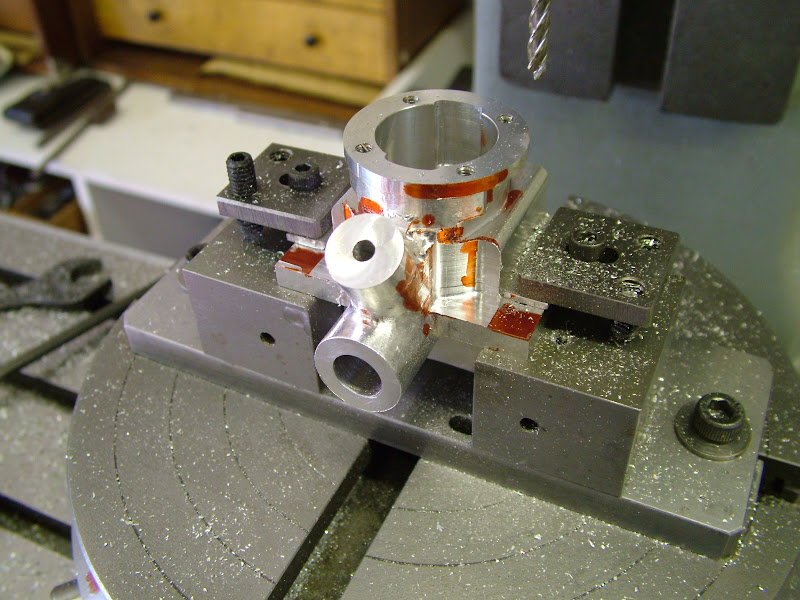
It was now possible to make a few tentative scrapes with a needle file to see how things looked. Coating with felt tipped pen is a good aid to see what needs removing
DSCF0094.JPG


DSCF0098.JPG


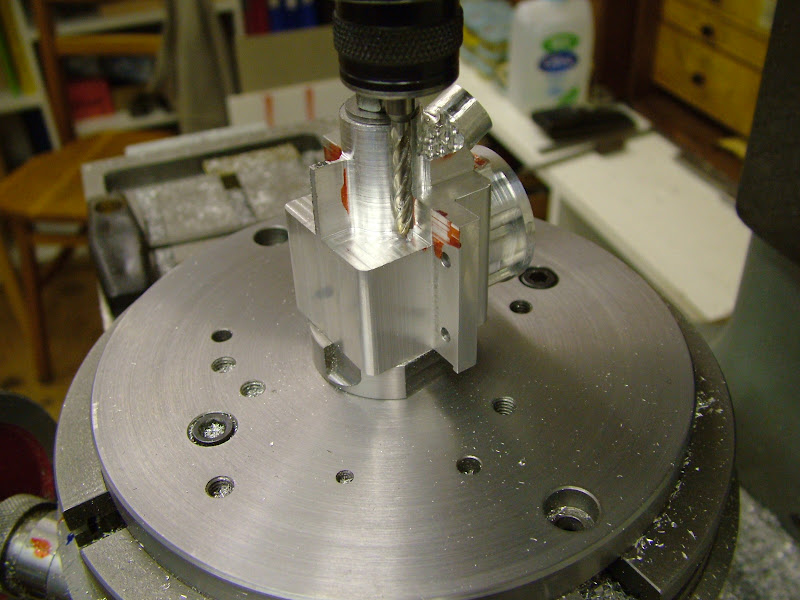
Finally milling could begin around the intake area
DSCF0112.JPG


Another much smaller dia cutter was made from silver steel to do the rear rebate - 4.5 dia with a 2.8 shank, hardened but not tempered as usual (for me)
DSCF0116.JPG


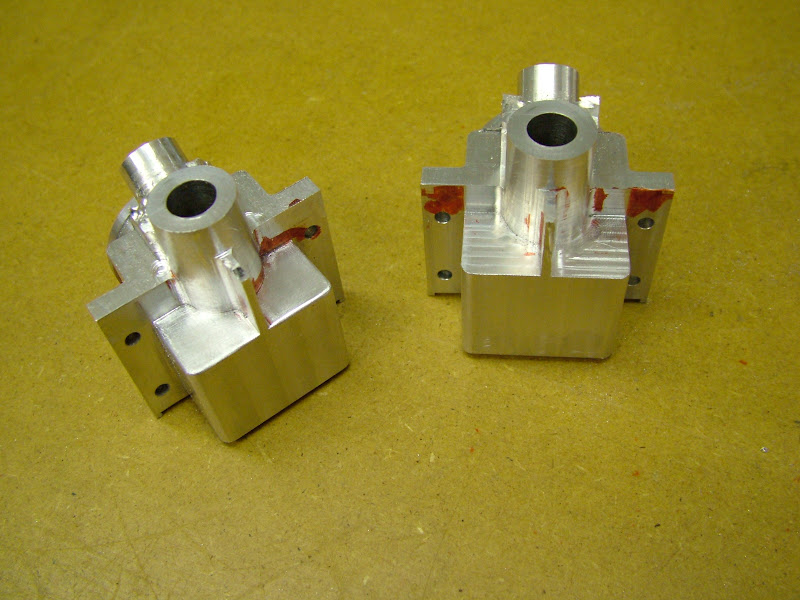
The cases were set in the vise to mill the relief under the bosses and another bit of fettling with a 'dremel' and burrs have them like this so far
DSCF0121.JPG


So far this has taken a fair bit longer than anticipated so I hope it's not getting too boring, I know I'm getting a bit tired of the constant set ups but have to admit that as that shape gradually appears it does give me a bit of a lift

Hopefully however, it will not be too long before that final fettling can begin.

Regards for now - Ramon


Hi Ramon

I am still following your build. I enjoy your setup shots and detailed descriptions.

Vince
 
Ramon, your attention to detail on the Waller build caused me to set new standards for myself. Now with this build you are blowing me away with the technical aspects of the machining ops.

I'm hooked, but my ego is whimpering over in the corner! :)
 
Well on that note Ken :D.....

No pics tonight guys but I can say that the first case has finally been milled around that rear end to a finished state and a good start made on fettling to clean up the shape - so far its cleaning up nicely and should convey the shape of the original reasonably well. The second case is following closely behind with just a small bit left to mill tomorrow - I'm still carefully trying to hold on to the remains of that LS 4mm cutter (which so far is holding out well, fingers crossed) and began to feel quite tired so decided not to push it further.

Brian - I fervently hope that these postings will inspire others with less skill to at least consider the possibilities of attempting likewise. I love my hobby(ies) and will willingly share the knowledge that has been acquired over the years with anyone who's interested enough to view - or ask. I should stress though that I look at work produced by others far, far more skilled and think just the same as you - so it's all relative :)

Dave - you ole 'wordsmith' - May I be so bold Sire as to inform you that truly I hold dearly the notion that you do indeed possess the dexterity to express yourself with a gentile eloquence of such magnitude; ;D ;D ;D

All being well guys there should be some more pics tomorrow :)


Regards - Ramon


Ramon said:
I fervently hope that these postings will inspire others

Ramon, I've been toying with building a glow plug motor like this - so I am following avidly - man that crankcase is a piece of work.

Ken
 
Hi Ken, that's good to hear. Have you got anything specific in mind? Design, capacity, type etc? At some stage I'd like to do a glow too and also a sparkie but that's a bit down the line as yet.

Well that 4mm cutter lasted through to the end and both cases are finish milled as far as the rear end is concerned - here are a few pics of the last ops

Initially the waste was taken out by very tentative plunge milling.......
DSCF0122.JPG


........and very fine radial cuts
DSCF0124.JPG


Finally these ops on both cases were finished
DSCF0127.JPG


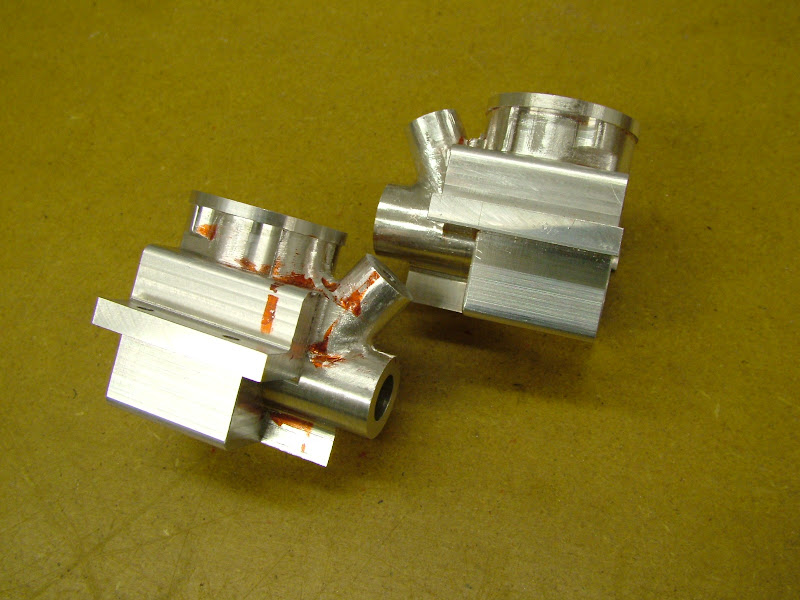
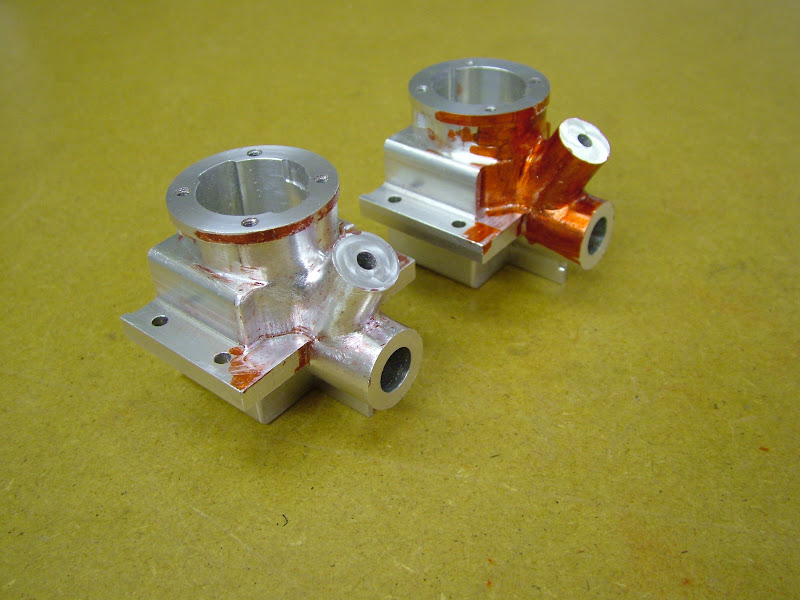
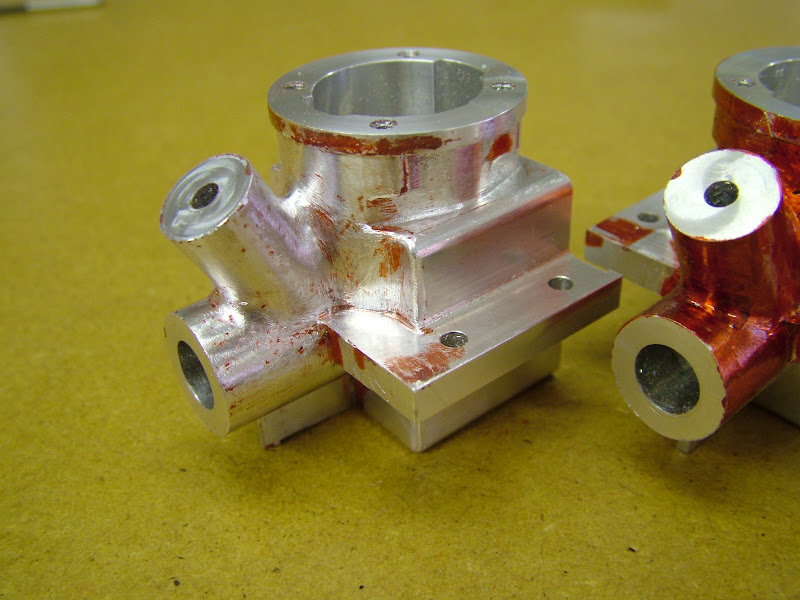
Both cases are now fettled and shaped using a 'dremel' type hand power unit and sundry burrs, files etc
DSCF0136.JPG


Still looking just a 'wee bit rough' the foreground one is now ready for fine filing and smoothing prior to bead blasting, all of which can be done as and when the mood takes whilst the next part (front bearing housing) is underway
DSCF0139.JPG


Obviously the engine lugs will need shaping at some stage and fitting the rear bearing sleeve and boring out the intake as well as cross drilling for the needle valve but those ops wont be tackled until all the finishing is completed.

So far so good then. Getting the main case sorted is a big milestone and means the remainder of the parts can be tackled at a more leisurely approach.

Back soon with the next bit then ;)

Regards - Ramon
 
Hi Guy's been out of it for a while - smitten by yet another dose of 'man-flu' - my immune system seems shot to pieces at the moment - though a speedy recovery. Ha! cold hit on the Wednesday - on the Saturday awoke to find a totally blocked drain. No choice but to fix it - three hours later and a spotlessly clean system it dawned that I hadn't smelt a thing :big: :big: Trouble is that was Saturday week ago and I still have no sense of smell. On visit to the garden centre Friday for new herb plants even stuffing crushed Mint leaves and Orregano up the nostrils had no effect.

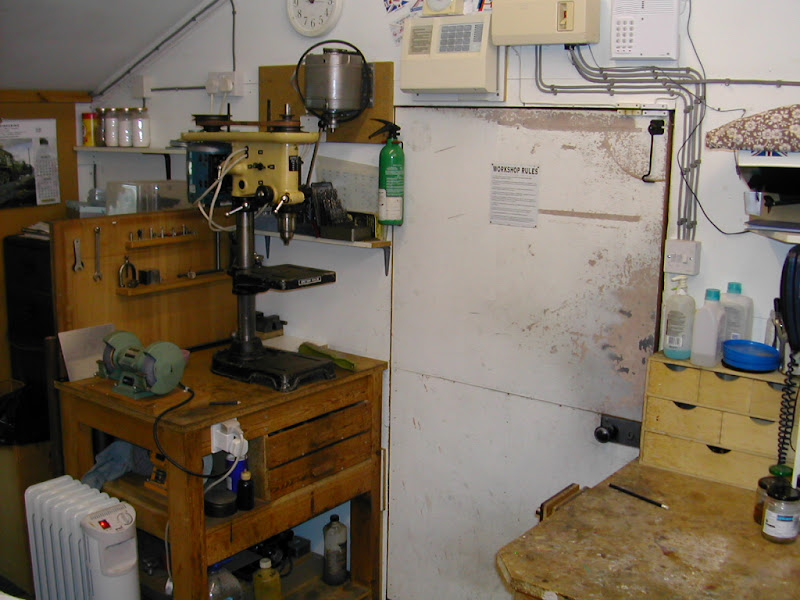
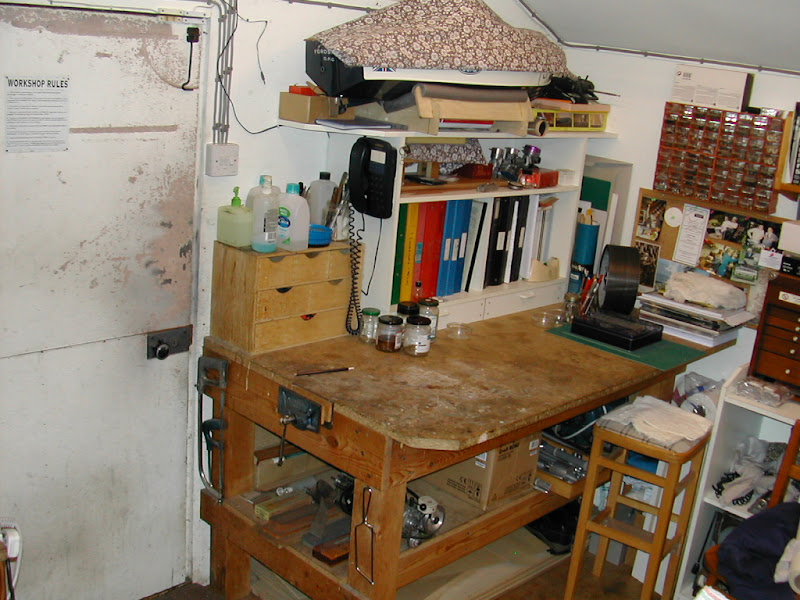
Very little to report on the cases but they are finally shaped and ready for the last machining ops which I hope to get to grips with this week along with the front housings - cut the material off for those this evening. The long period of wet weather finally came to an end which allowed access to the woodworker so this long in the making 'improvement' to the workshop also reached a (near) conclusion but also got in the way - it was worth doing though - looks a lot better, more storage space and a bit more floor space to boot. Now all I have to do is find things in their new places always assuming I can remember where I put them!

I know you like such things so here's the before....

DSCN4576.JPG


DSCN4577.JPG


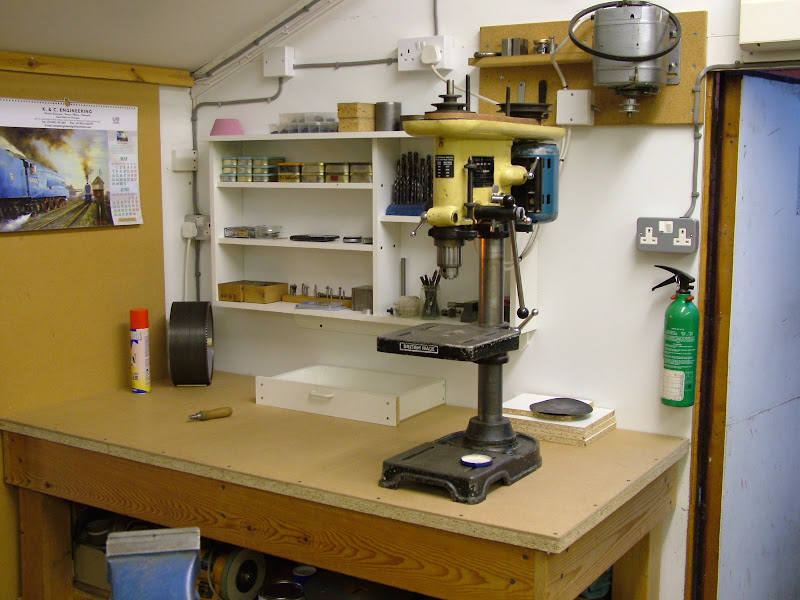
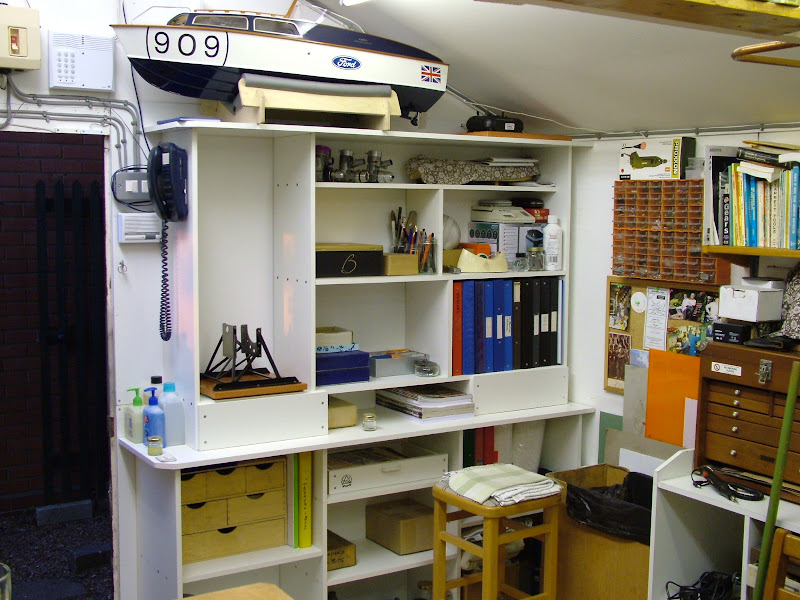
and the after.......

DSCF0146.JPG

Incidentally the motor bolted to the wall is the 'slow speed attachment' for the drill which has a standard low speed of 425 rpm. By 'driving' the drill motor with the secondary one speeds low enough for tapping and reaming are obtained. No reverse though :(

DSCF0144.JPG

Still a way to go before filling this all up but I guess that wont take long and there are still one or two things left to finish off but they can happen as and when - the open area on the left BTW is destined for some glass shelves and a front ;).

Took the opportunity to replace the lighting too - 'cor' what a difference that's made ;D

Couple all this with a couple of day's in the garden in glorious sunshine it hasn't left much for the engine but as said I did manage to finalise the shape....

DSCF0142.JPG


That's the current state of play then, not much further forward but things should move a bit quicker now.

Regards - Ramon


Nice looking bench! Tell me now what the motor is on the wall.....phase converter?

Dave
 
Nicely organized Ramon. How long do you reckon it's going to remain like that? ;D

I see (from the wall plugs) that you are in the UK. For some reason I always assumed you are in the States.

Vince
 
Not too long Vince I guess ;) - though I do like a tidy workshop once things get going then 'stuff' builds up on the bench at an alarming rate into 'bench overload' culminating as always in time out to tidy up and have a fresh start ;D
When I reach the point that I can't see things that are right in front of me then I know it's time for a clean up.

Dave - the motor on the wall is nothing more than that - another 1/4hp 1425 rpm SP motor. Its wired into a double throw 'selector' switch in the junction box which in turn is wired to the switch on the drill itself - switch up to select wall motor, down for the drill motor. By running a belt from it's small pulley to the large one on the drill motor I get considerable reduction of the lowest drill speed. I've never worked it out but it's probably around the 50 -75 rpm area, well slow enough for tapping using a 'Tapmatic' or on occasion with a tap in the chuck though as said with the latter there's no reverse. With this amount of reduction though the spindle stops pretty quickly so it's easy enough to stop in time, release the chuck and finish/remove tap by hand.

Regards - Ramon
 
Managed to get a bt of shop time in yesterday and today and have the two cases virtualy finished and finally begun work on those front housings.

I guess you must be getting fed up with all these case pics - it's gone very quiet out there - but here's the last few for those who may be still be hangin on in there .....

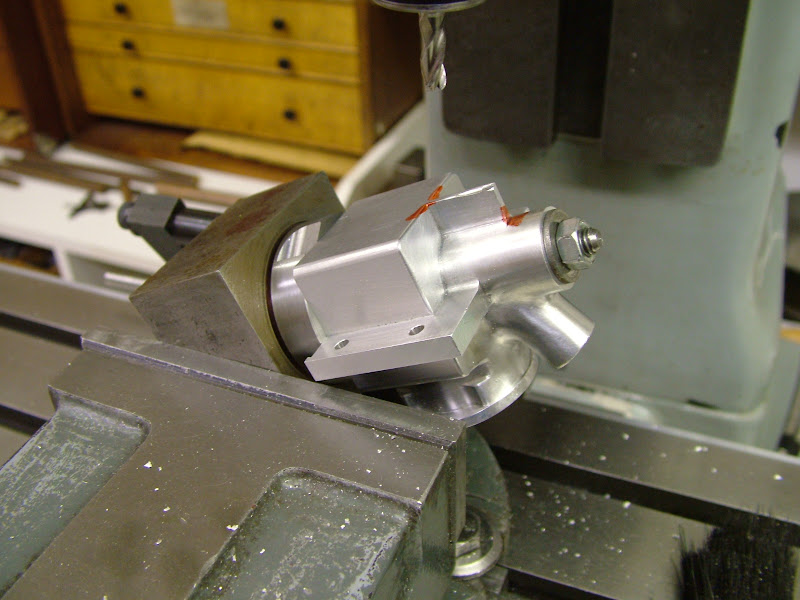
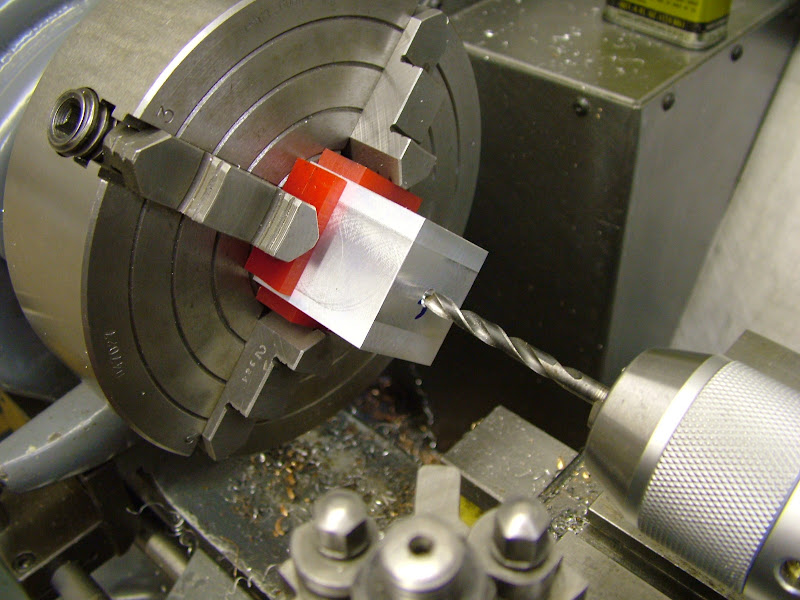
Set that spigot onto a block as a temporary fixture for finally cutting the rear web
DSCF0151.JPG


Also used for trimming the lugs to profile
DSCF0152.JPG


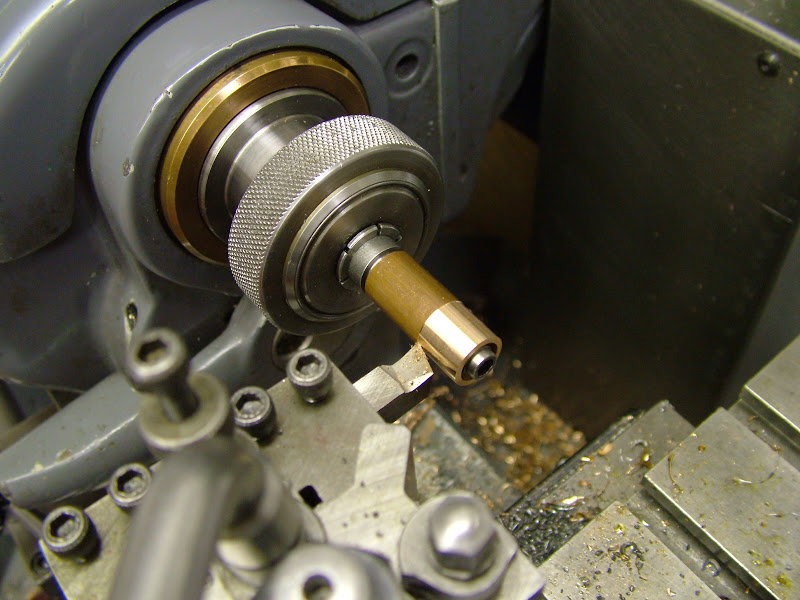
The rear sleeves were drilled bored and reamed then set on an expanding mandrel for taking the OD's down (.5mmwall thickness). The pic makes it look like brass but it is in fact drawn Phos Bronze. It proved a real pig to drill despite freshly sharpend drills and got extremely hot but bored and reamed the last .2mm without a hitch
DSCF0154.JPG


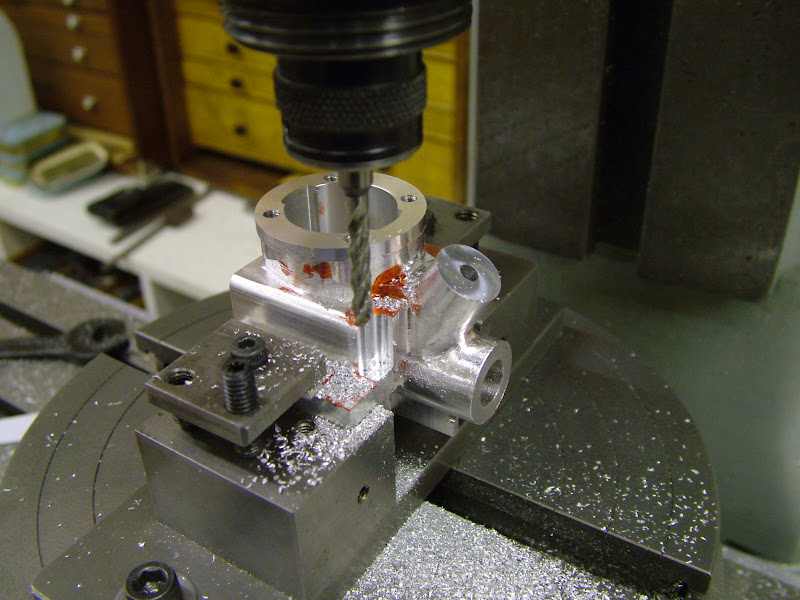
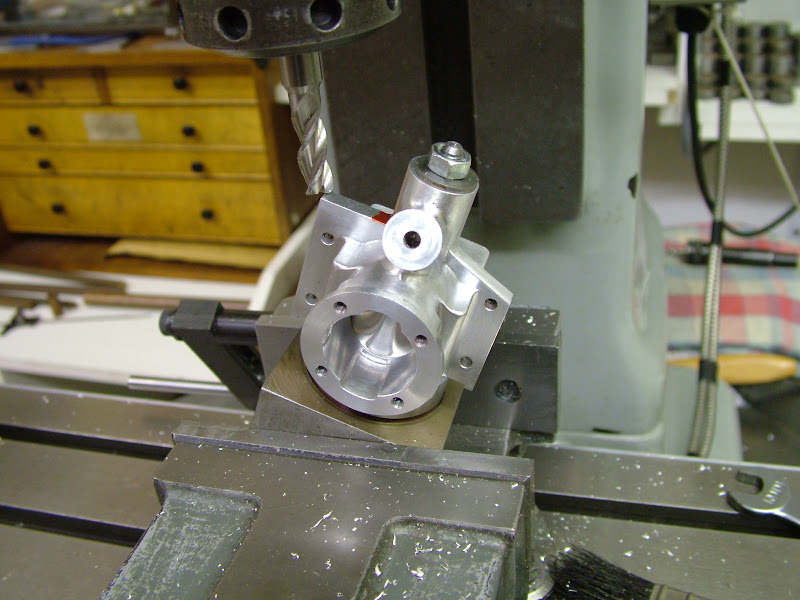
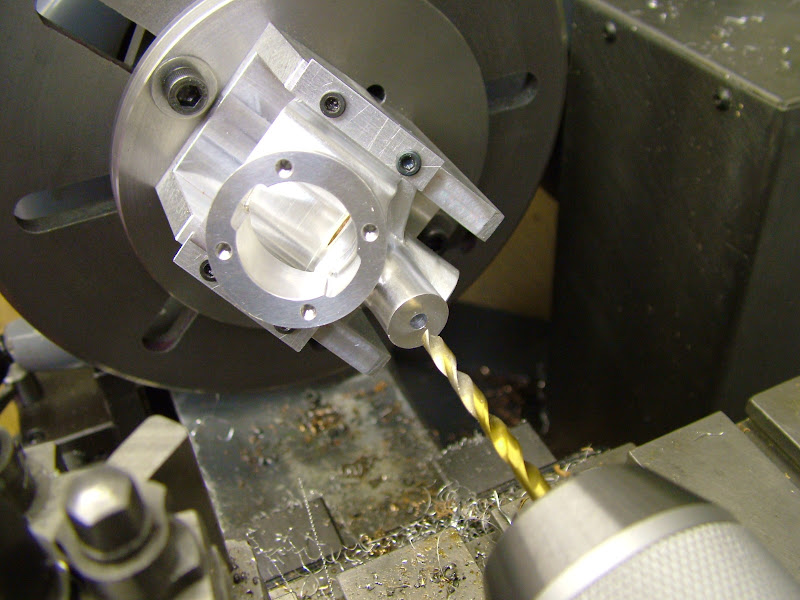
Back on the angle fixture the 4mm hole previously drilled was indicated then the intake drilled through..
DSCF0159.JPG


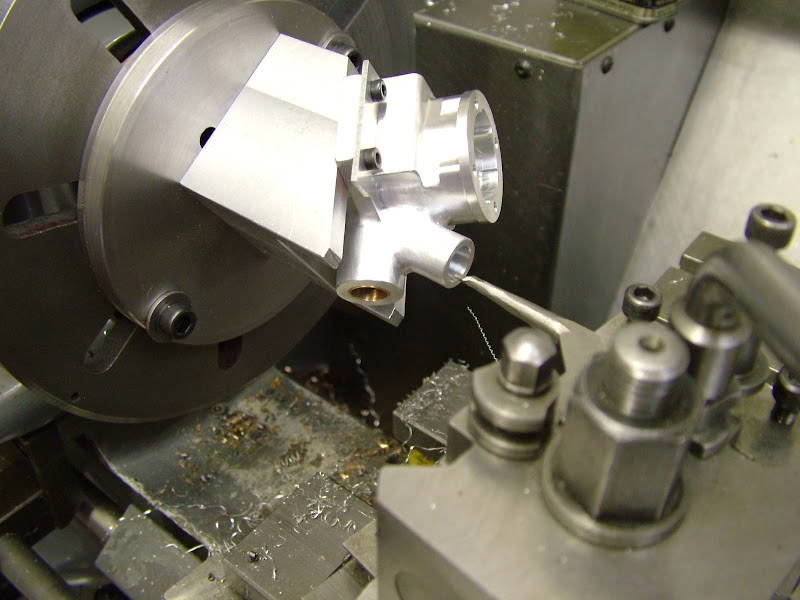
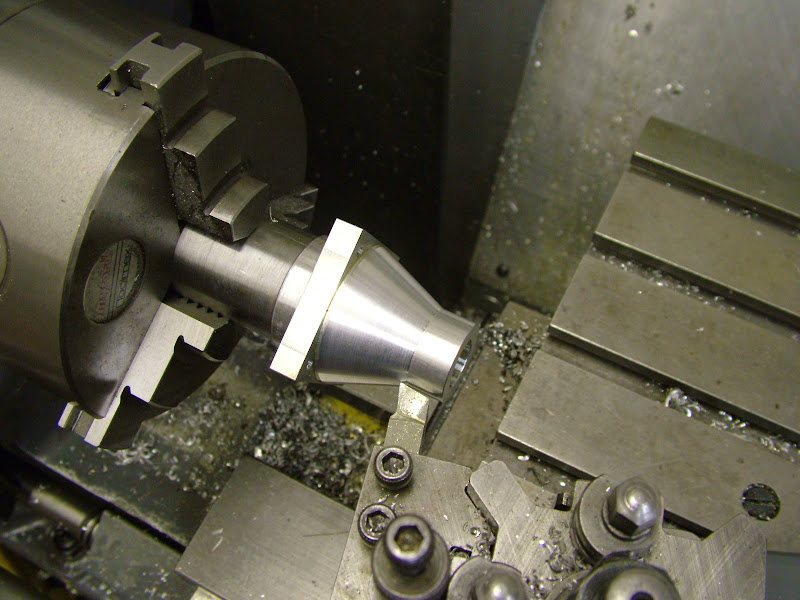
.. the venturi taper turned....
DSCF0156.JPG


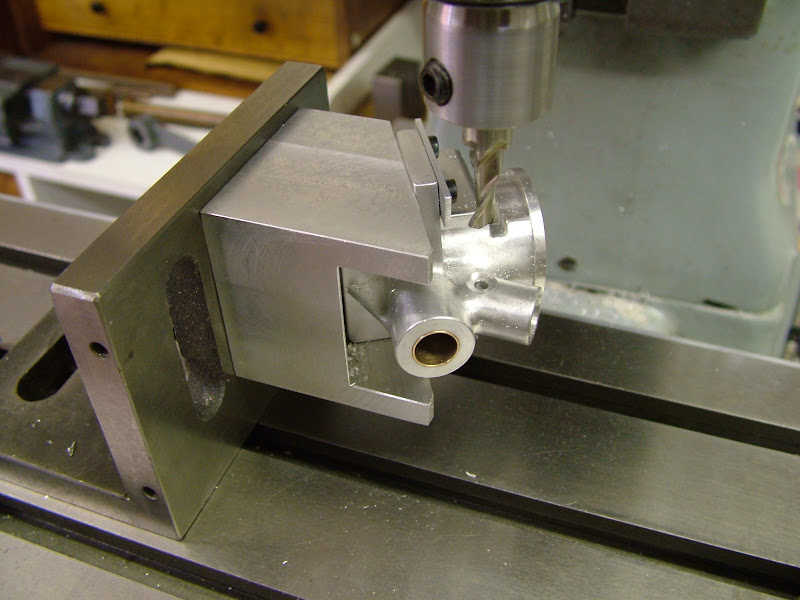
...then transfered to the mill for the last but one op drilling and spotfacing for the spray bar
DSCF0163.JPG


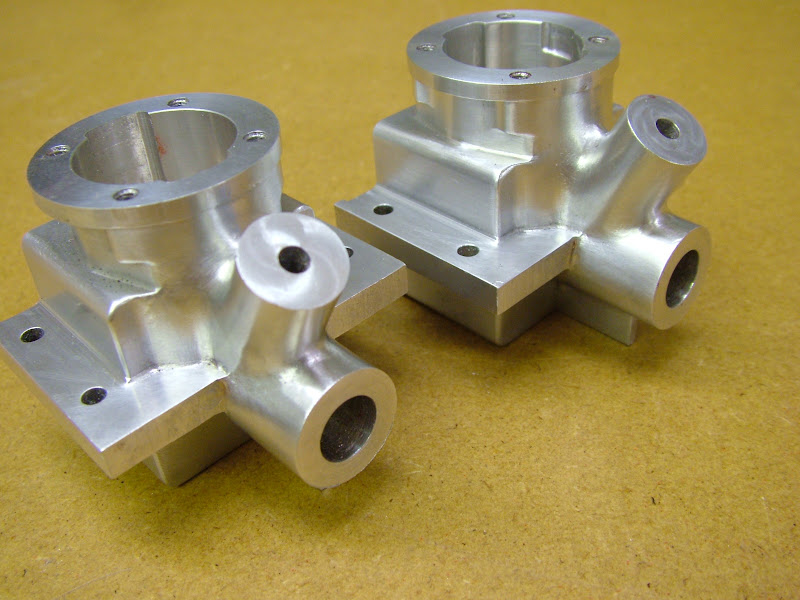
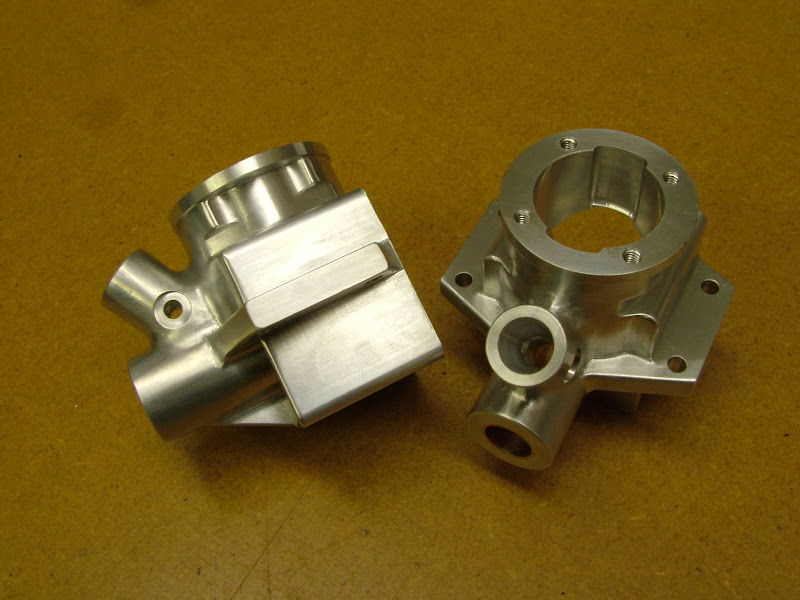
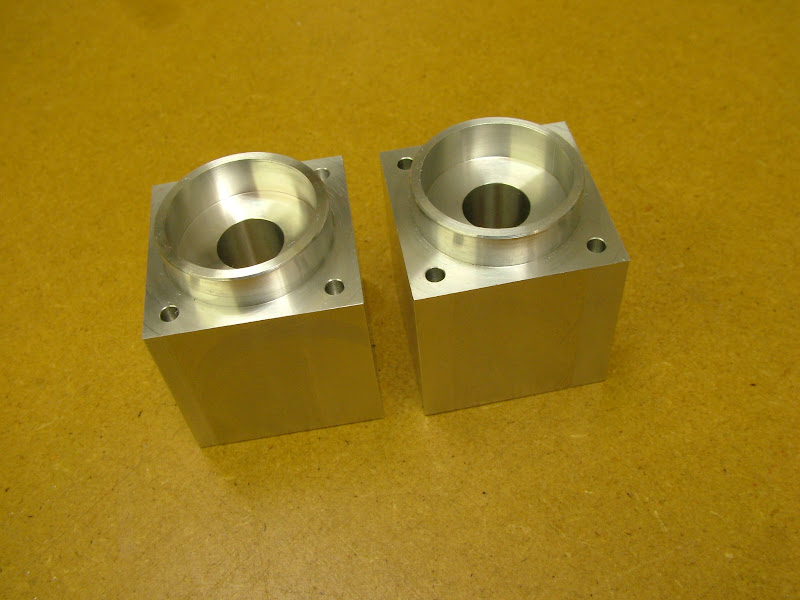
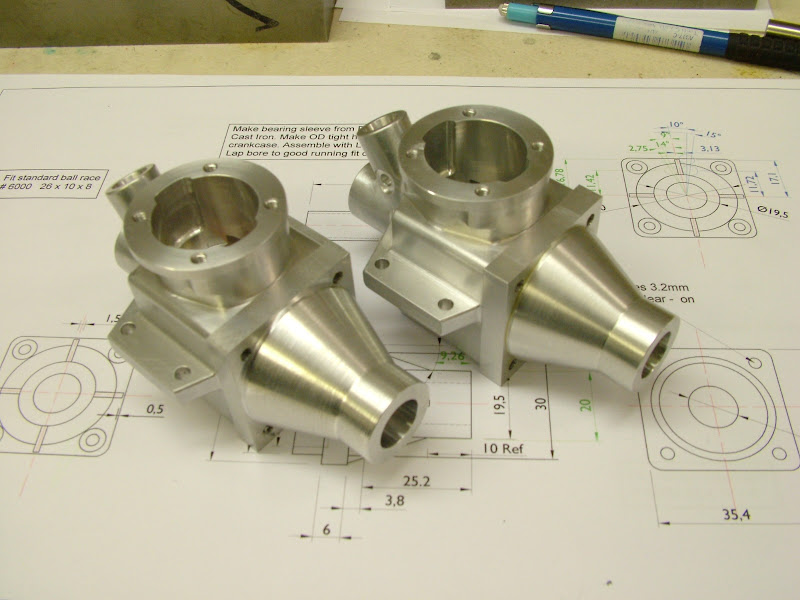
With another couple of hours spent with an assortment of needle files and rifflers, various grades of wet and dry paper stuck to differing shaped hard wood sticks, Garryflex blocks and 000 wire wool they are ready at last for bead blasting. The last op, to put the groove in on the end of the valve housing will get done after blasting.
DSCF0171.JPG


Well I guess a big sigh of relief is called for as it's all been a bit long winded but seeing them there on the bench makes it worth it. I hope however I haven't stretched your attention span too much, my apologies if so :-[


At last however the next part (the front housing) can be tackled and one which should be much quicker though still requiring some fixture work.
These few pics are of the ops carried out today...

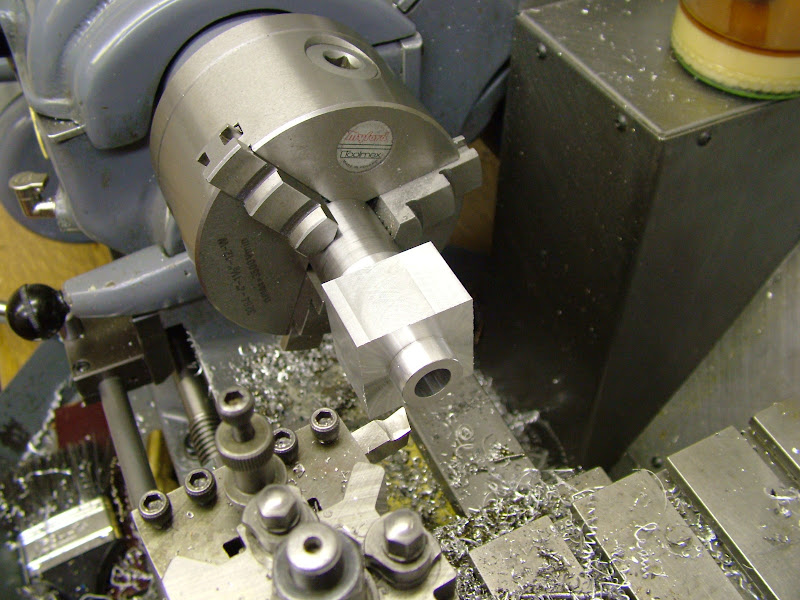
Began by setting up the same as the case and drilling, boring and reaming for the front sleeve as well as boring the ballrace housing and front register
DSCF0184.JPG


After the turning the holes were drilled on the mill using coordinates .
DSCF0186.JPG


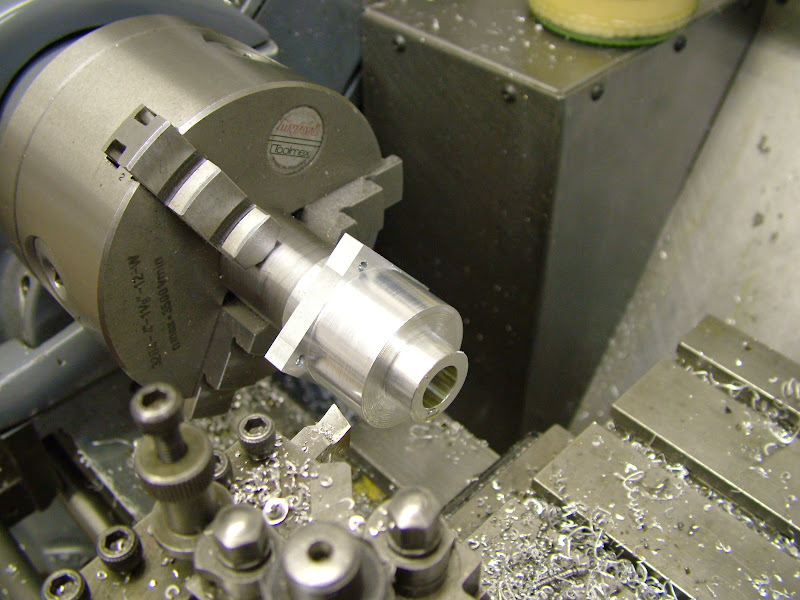
Held on another expanding mandrel the front portion could be tackled....
DSCF0190.JPG


DSCF0191.JPG


DSCF0196.JPG


Now theres a fair session on the rotary table ahead but I couldn't resist this early look ;)
DSCF0199.JPG


That's a lot of pic's - hope that's not 'overload' ::)

Regards - Ramon


Hi Ramon
they are looking so good Mate :bow:
Pete
 
Not fed up with the case pictures at all, it's been an education. Making a machined part look like a casting is fascinating and watching all the steps unfold makes it easier to understand how this can be achieved. Ramon, your Table Engine redefined my view of what a model should look like and this one continues to push the boundaries so thanks for the effort.

Jan
 

Latest posts

Back
Top