- Joined
- Jan 30, 2011
- Messages
- 365
- Reaction score
- 72
Hi guys, pleased to tell - it's been a good day  for that old cliche that you can learn something most days is not to be dismissed lightly and today was certainly a good one for it to ring true.
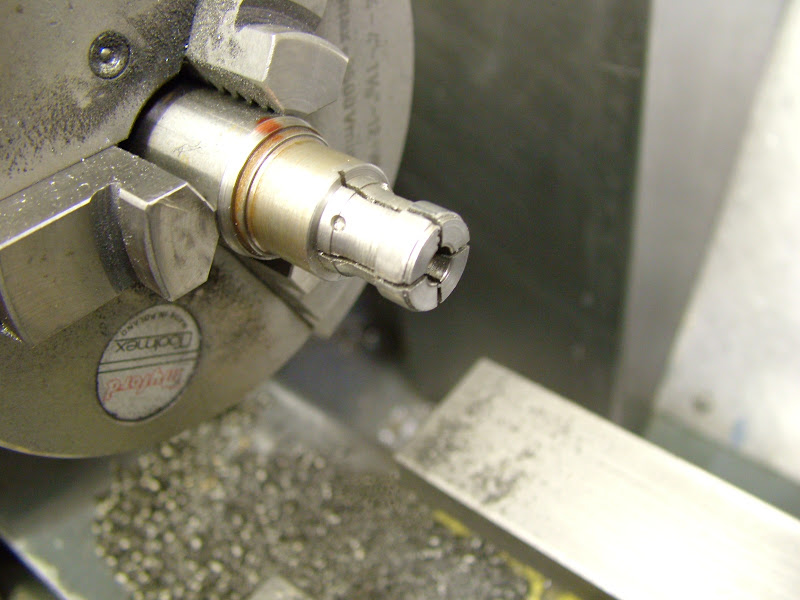
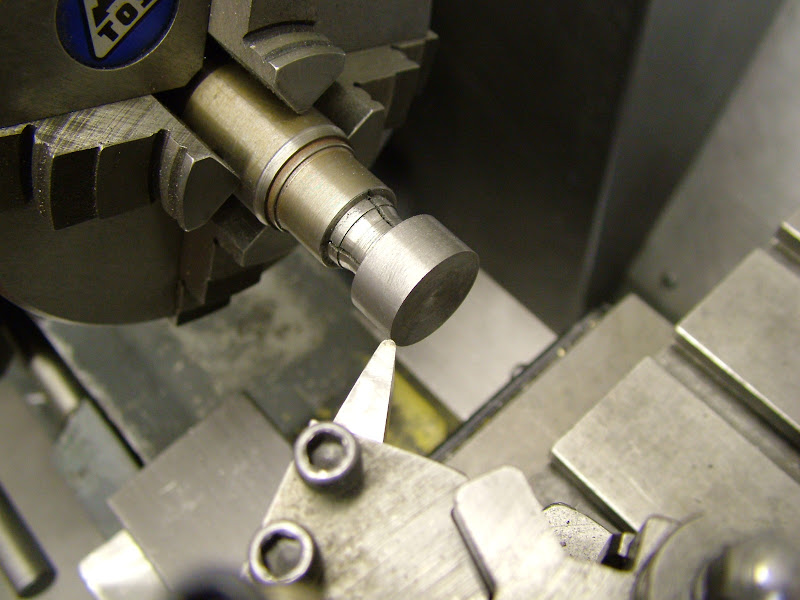
Began by making those contra pistons. These can be tricky little things to make not just in getting the right fit but in holding them to do so. Several methods of holding them, most fairly inadequate, have been tried in the past but when I did the 'Racers' though it might have been the Etas I think it dawned that maybe using an expanding mandrel 'in reverse' - removing the screw and allowing it's natural spring to grip the cavity in the top of the CP - might work. On trying it quickly became apparent that as long as there was a good .05mm interference with a slight tapered lead in the grip was sufficient to turn the outer faces and subsequently hone it to fit. It occurred today that if one mandrel was kept purposefully for this and all rear recceses were initally turned to fit they could be opened out later if desired.
This old mandrel was pressed into service, I think it's what I used previously - 12.7mm OD. The CP was bored 12.65 and was then turned and the concave face cut without any slipping problems
It was felt that the new honing tool was much too wide to be able to use effeciently so I reverted to the old method of using two flat fine india stones - using lots of paraffin and oil as a lubricant this actually works extremely well but control of size is difficult as it's entirely down to feel, judgement of time and constant stopping to clean and check. The first one went fine, three 'goes' and checks and the CP fitted just right - a nice push fit using the drill as a press.
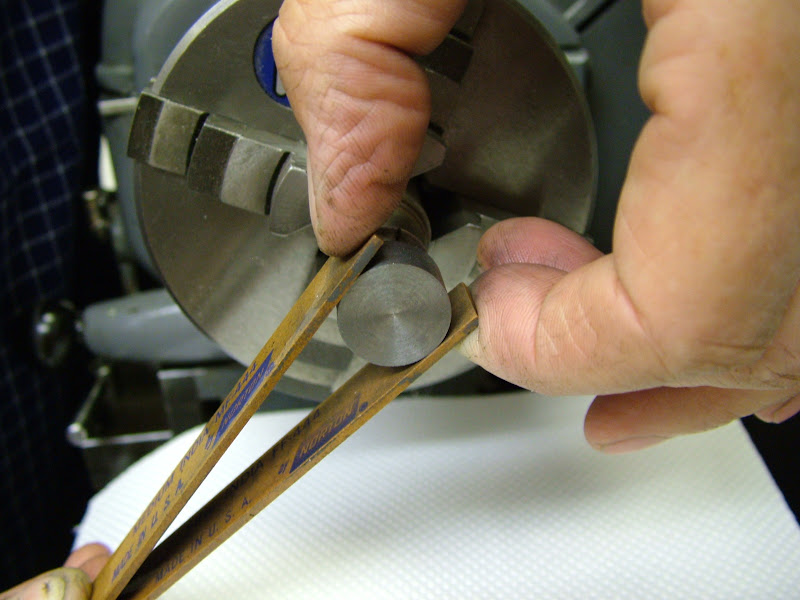
The second however pushed easilly straight through the bore
This is not neccessarilly the 'make it again' set back it might at first seem as it is possible to 'grow' cast iron with the application of some heat. Forgive me for refering to him again but good old George in one of his many articles in a US magazine - Model Airplane News I think - described heating a worn cast piston to red heat and - I always thought it said - allowing it to cool. This does indeed work, the average 2.5cc piston growing perhaps 0.02- 0.03mm sufficient for re lapping. Several old diesels and one or two glows have certainly been given a new life using this method over the years. So the CP was duly heated and before I realised what I was doing had picked it up with the tongs and dropped it in the oil instead of letting it cool. Surprise of the day was finding upon measuring that it had grown a whole .06mm - 18.30 initially to 18.36mm. Up the loft and a rummage through the old control line folders and there it was - heat to cherry red and quench in oil - after all this time in letting it cool :
 06 is a big difference to .02/3 and a much bigger help if the need is there
The CP, now hard took much more stoning but this time the fit was there and finally there was a set of parts .....
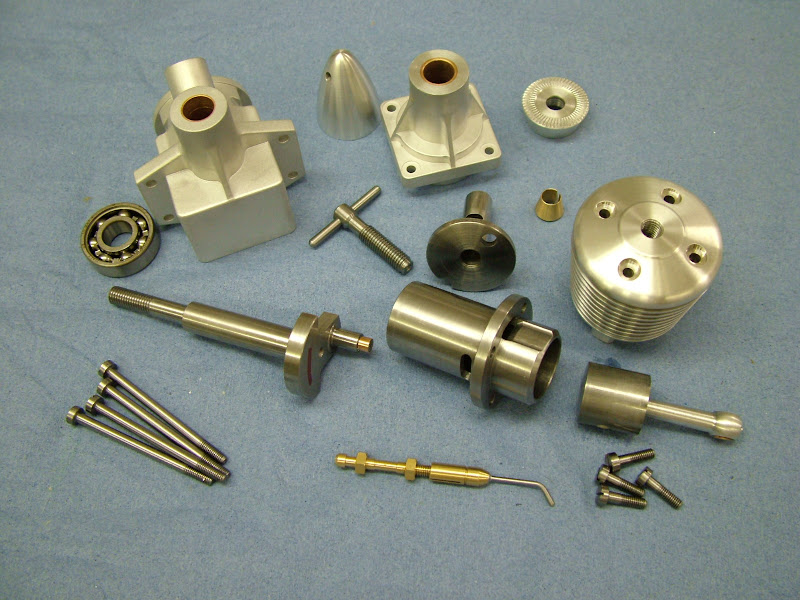
..well two actually but one set now looks like this ;D
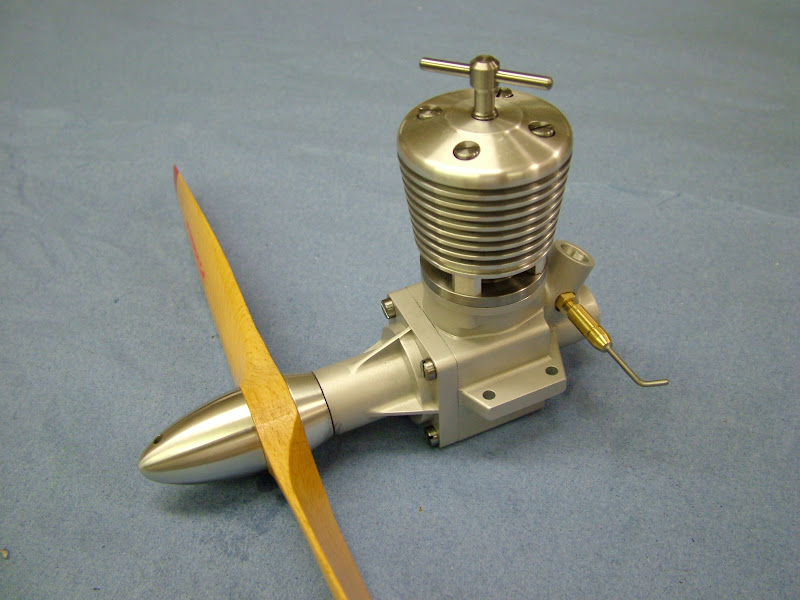
Having previously got the drum valve to nice running fit quite some time was spent getting the drum valve to run freely as it had distorted slightly in the heat treatment. Having given the case a thorough clean in cellulose the shaft showed constant signs of abrasion. Stoning the distortion gradually improved the fit but it still seemed gritty. Then the penny dropped. The bead blasted surface was still retaining grit - just enough to come off on the hands and find its way to effect the fit of the drum valve. A quick blitz in the Ultra Sonic sorted this out and the shaft fitted without further problems. The rest of the engine went together okay, the only slight bit of fettling was on the outer diameter of the conrod which was just touching the inner surface but, it has to be acknowledged, the compression seal did not seem great, certainly not what was hoped for
Finally though, apart from the needle valve it was together at 6pm when with fuel can in my hand ready to try it Sue put her head round the door - "I'm just about to dish up" - ahh perfect timing :
So a little later it was strapped in the stand still minus needle valve and some fuel squirted through the ports, the compression screw had to be screwed in a surprising amount when suddenly it fired on the prime needle valve immediately fitted and it was off on it's first run ;D ;D
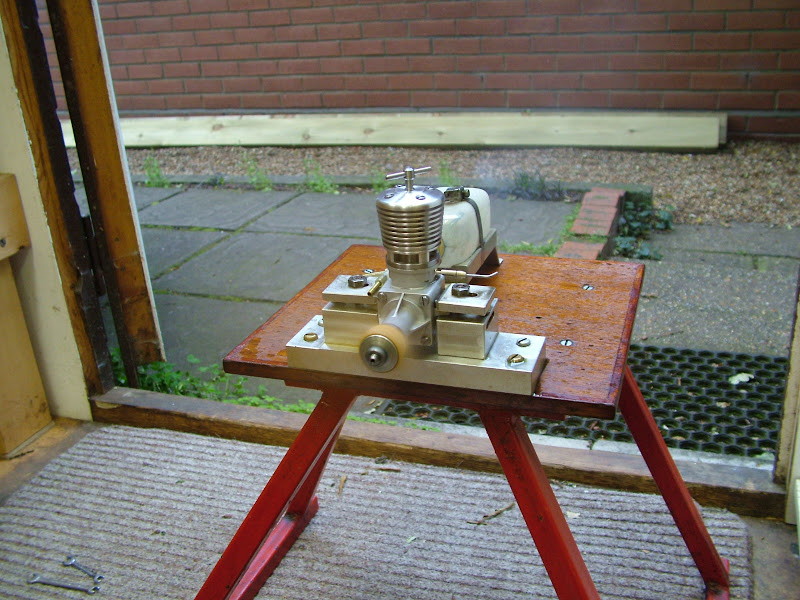
The revs were kept well down but it has a gorgeous, deep, throaty, 'diesel pop' to it. It is assembled without gaskets but I think that there should be at least a paper one between liner and crankcase. It vibrates a little, that may be down to the low rpm or the mass of material in piston and crankshaft - scaling effect I'm afraid but it's early days that might diminish on a change of prop.
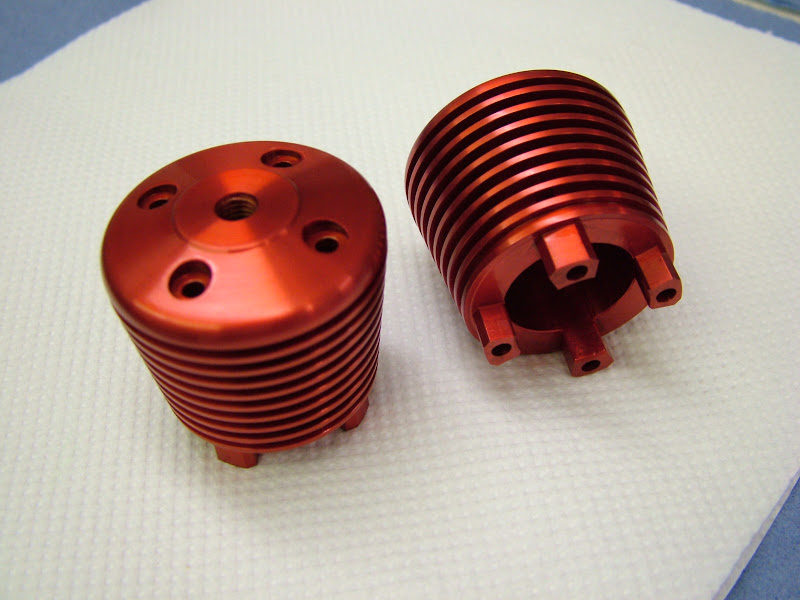
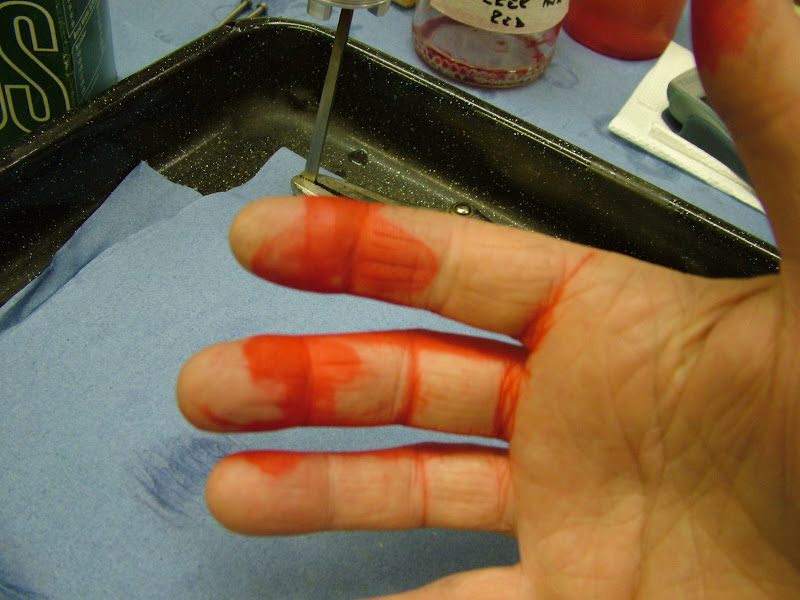
I shall now get the anodising done before assembling the second one so I guess for a 'Work in Progress' that's the end of the line. I confess I'm a mite tired
I'll come back with some more pics when they're finished completely.
Thanks for your comments along the way - all of them much appreciated
Regards for now - Ramon
Began by making those contra pistons. These can be tricky little things to make not just in getting the right fit but in holding them to do so. Several methods of holding them, most fairly inadequate, have been tried in the past but when I did the 'Racers' though it might have been the Etas I think it dawned that maybe using an expanding mandrel 'in reverse' - removing the screw and allowing it's natural spring to grip the cavity in the top of the CP - might work. On trying it quickly became apparent that as long as there was a good .05mm interference with a slight tapered lead in the grip was sufficient to turn the outer faces and subsequently hone it to fit. It occurred today that if one mandrel was kept purposefully for this and all rear recceses were initally turned to fit they could be opened out later if desired.
This old mandrel was pressed into service, I think it's what I used previously - 12.7mm OD. The CP was bored 12.65 and was then turned and the concave face cut without any slipping problems


It was felt that the new honing tool was much too wide to be able to use effeciently so I reverted to the old method of using two flat fine india stones - using lots of paraffin and oil as a lubricant this actually works extremely well but control of size is difficult as it's entirely down to feel, judgement of time and constant stopping to clean and check. The first one went fine, three 'goes' and checks and the CP fitted just right - a nice push fit using the drill as a press.

The second however pushed easilly straight through the bore
This is not neccessarilly the 'make it again' set back it might at first seem as it is possible to 'grow' cast iron with the application of some heat. Forgive me for refering to him again but good old George in one of his many articles in a US magazine - Model Airplane News I think - described heating a worn cast piston to red heat and - I always thought it said - allowing it to cool. This does indeed work, the average 2.5cc piston growing perhaps 0.02- 0.03mm sufficient for re lapping. Several old diesels and one or two glows have certainly been given a new life using this method over the years. So the CP was duly heated and before I realised what I was doing had picked it up with the tongs and dropped it in the oil instead of letting it cool. Surprise of the day was finding upon measuring that it had grown a whole .06mm - 18.30 initially to 18.36mm. Up the loft and a rummage through the old control line folders and there it was - heat to cherry red and quench in oil
The CP, now hard took much more stoning but this time the fit was there and finally there was a set of parts .....

..well two actually but one set now looks like this ;D

Having previously got the drum valve to nice running fit quite some time was spent getting the drum valve to run freely as it had distorted slightly in the heat treatment. Having given the case a thorough clean in cellulose the shaft showed constant signs of abrasion. Stoning the distortion gradually improved the fit but it still seemed gritty. Then the penny dropped. The bead blasted surface was still retaining grit - just enough to come off on the hands and find its way to effect the fit of the drum valve. A quick blitz in the Ultra Sonic sorted this out and the shaft fitted without further problems. The rest of the engine went together okay, the only slight bit of fettling was on the outer diameter of the conrod which was just touching the inner surface but, it has to be acknowledged, the compression seal did not seem great, certainly not what was hoped for
Finally though, apart from the needle valve it was together at 6pm when with fuel can in my hand ready to try it Sue put her head round the door - "I'm just about to dish up" - ahh perfect timing :
So a little later it was strapped in the stand still minus needle valve and some fuel squirted through the ports, the compression screw had to be screwed in a surprising amount when suddenly it fired on the prime

The revs were kept well down but it has a gorgeous, deep, throaty, 'diesel pop' to it. It is assembled without gaskets but I think that there should be at least a paper one between liner and crankcase. It vibrates a little, that may be down to the low rpm or the mass of material in piston and crankshaft - scaling effect I'm afraid but it's early days that might diminish on a change of prop.
I shall now get the anodising done before assembling the second one so I guess for a 'Work in Progress' that's the end of the line. I confess I'm a mite tired
I'll come back with some more pics when they're finished completely.
Thanks for your comments along the way - all of them much appreciated
Regards for now - Ramon


![DreamPlan Home Design and Landscaping Software Free for Windows [PC Download]](https://m.media-amazon.com/images/I/51kvZH2dVLL._SL500_.jpg)


