Geared horizontal twin engine

Home Model Engine Machinist Forum

Help Support Home Model Engine Machinist Forum:

This site may earn a commission from merchant affiliate links, including eBay, Amazon, and others.

Brian Rupnow

Design Engineer
Project of the Month Winner
Joined
May 23, 2008
Messages
15,259
Reaction score
8,544
Location
Barrie, Ontario, Canada
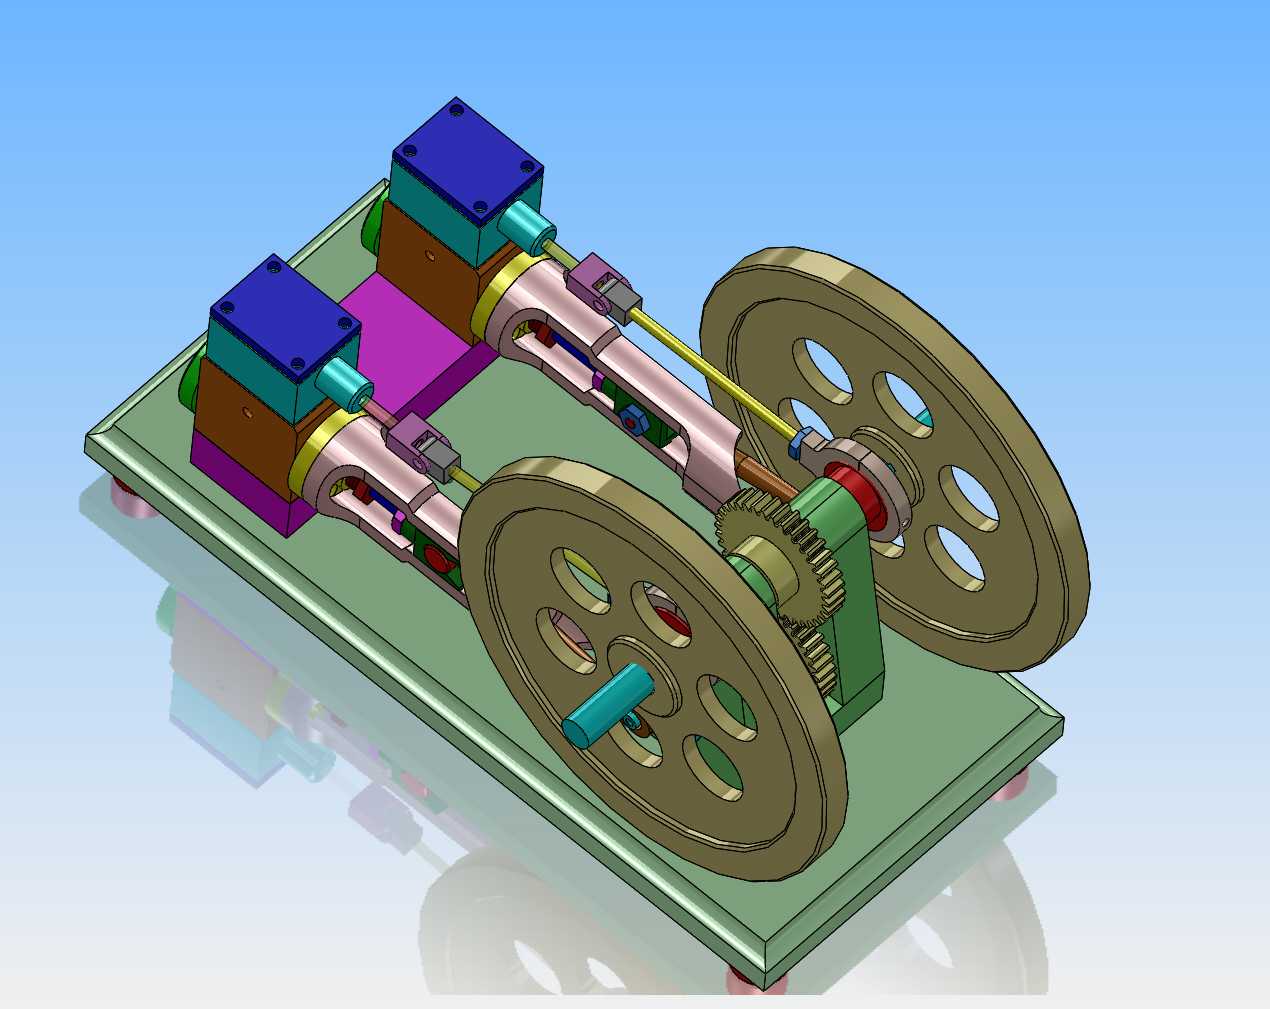
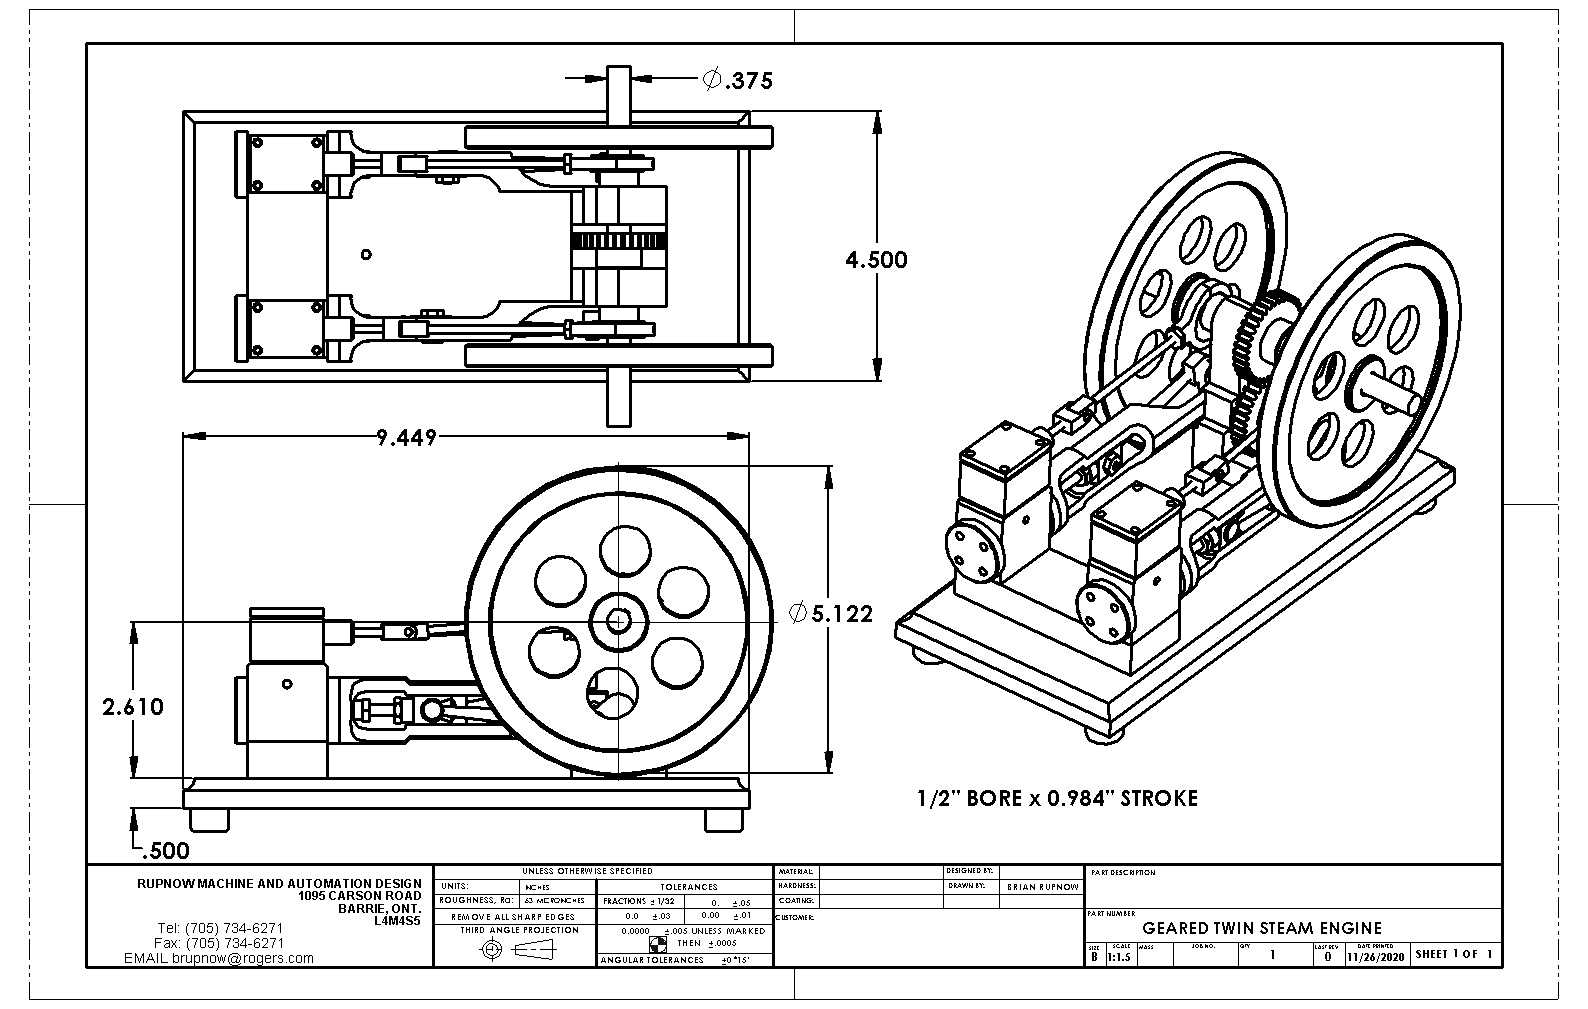
I have always thought that the most elegant cross head guides I've ever seen were on the Popcorn engine, as designed a few years ago by Stu Hart of the U.K. Stu done the original in metric, then I took his drawings and basically redrew them in imperial inch size. I changed very little, and it has always been one of my favourite engines. A week or so has gone by since I finished my version of the Trevithick locomotive engine. I'm setting here this morning on my computer dicking around with the idea of a twin horizontal engine that incorporates the Popcorn cross head guides and operates the cylinder slide valves thru a set of gears similar to what I did on the Trevithick engine.
31DfHN.jpg
 
Brian, I thought you were going to take it easy after the Treveithick engine and humping your lathe hither and thither - your work rate is inspirational - slow down man - you make me feel such a slacker !

Regards, Ken
 
Brian, That's a interesting design, but flywheels on the eccentric shaft and not the crankshaft that intrigues me, could it effect the smooth running of the engine ?
I'll be watching with great interest.
Mike1
 
Brian, Excellent choice in the 'Popcorn' style crossheads - a very nice design.
I would echo Mike1's comments about the gears. Each pulse of torque wil reverse the load through the gears, possibly causing noise and rough running. If the gears were transmitting only the power required for the eccentrics, they could also be much thinner and lighter.
Looking forward to seeing your design develop.

One of the projects I am currently working on is a twin engined motorcycle, with the engines coupled through gears. Other similar arrangements have shown that it is very important to time the two engines so as to minimise load reversals in the gear train.
Clearly the issue is much reduced in a small steam engine, but it is still a factor.

Pete.
 
Other people have used this gear driven design on single acting hit and miss engines, and it doesn't work well on them. The main reason it doesn't work well on hit and miss engines is that there is such great reversal of torque between when the engines hit to drive the crankshaft and then the torque reversal when the engine coasts, depending on the inertia of the flywheels to carry the engine thru a number of miss cycles. This plays Hell with the gear teeth. On a double acting two cylinder engine, you really don't even need much of a flywheel for them to run.
 
Brian, That's a interesting design, but flywheels on the eccentric shaft and not the crankshaft that intrigues me, could it effect the smooth running of the engine ?
I'll be watching with great interest.
Mike1
Usual practice is to have flywheels on crankshafts - because they are the most substantial for hanging a massive flywheel upon. The largest (stiffest) shaft will have bearings most able to cope with the non-running condition, where all the mass of the flywheel is pressing (usually) on only 1 or 2 bearings. But if another shaft is used, then it often needs to be beefed-up to take a flywheel. Also, the fastest shaft is better for flywheels, as they can be made smaller if running faster. Valve layshafts in whatever form may be running at half crank speed and therefore balance of crank and con-rods is a different set of calculations... - and I think (can't remember - but someone will) you cannot resolve the primary balance with a half-speed shaft. But if the eccentric shaft is separate form the crank and is at crank speed (lie Brian's design), then you may be able to balance the main crank primary mass, providing the linkage between the 2 shafts can cope with the torsional vibration forces.... (=BIG Gears!). So it isn't common practice for many reasons.
With the loads on a model - Like Brian's design - I reckon the gears - if nicely meshed - will do fine. They look big.
Personally, I would have arranged the cylinder above the valve chest - so pistons drive a crankshaft with the flywheels directly mounted, and the eccentrics on the layshaft (below) can then drive the valves directly. Or if the eccentrics remained on the crank (as many engines exist) a simple and light lever could transmit the motion to the valve rods. - But that would be a different design to Brian's.
With Brian's arangement, I think the balancing can be arranged so the primary crank imbalance can be resolved by counterweights on the crankshaft, then some secondary (or are they tertiary?) imbalances from side oscillations of con-rods be compensated by balance weights on the eccentric shaft. How about it Brian?
Can you post your balance configuration and calcs? I'm sure I'm not the only one who wants to learn more about this interesting design. Keep up the good work. - Will plans be available (prints/pdf will do?) when completed, so we can make something unique to display at our local club shows?
Sorry if my posts are a bit long winded. "new" configurations of engines - like Brian has drawn - really interest me from a design perspective. I can't see any new Machining challenges here?
Thanks Brian.
K2
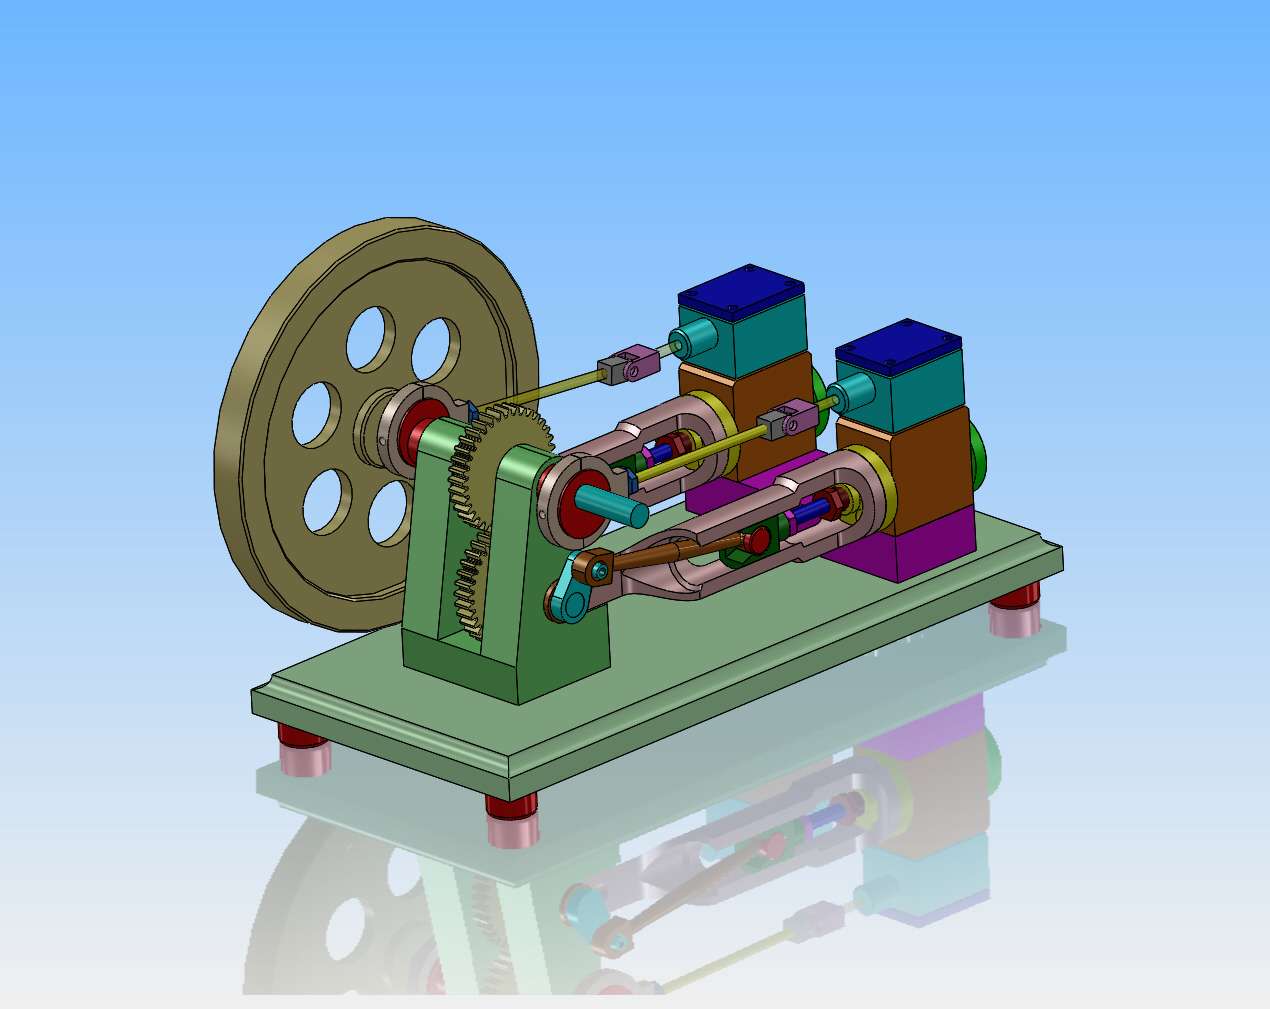
 
Brina, thanks for the start of something new and different, if you got it in your head and you have seen it running in the minds eye it shall come to pass and we shall learn, that is a neat Idea that I guess you call it three D, really looks good, anxious to see the build and hear it come to life, thanks for sharing with us, Joe
 
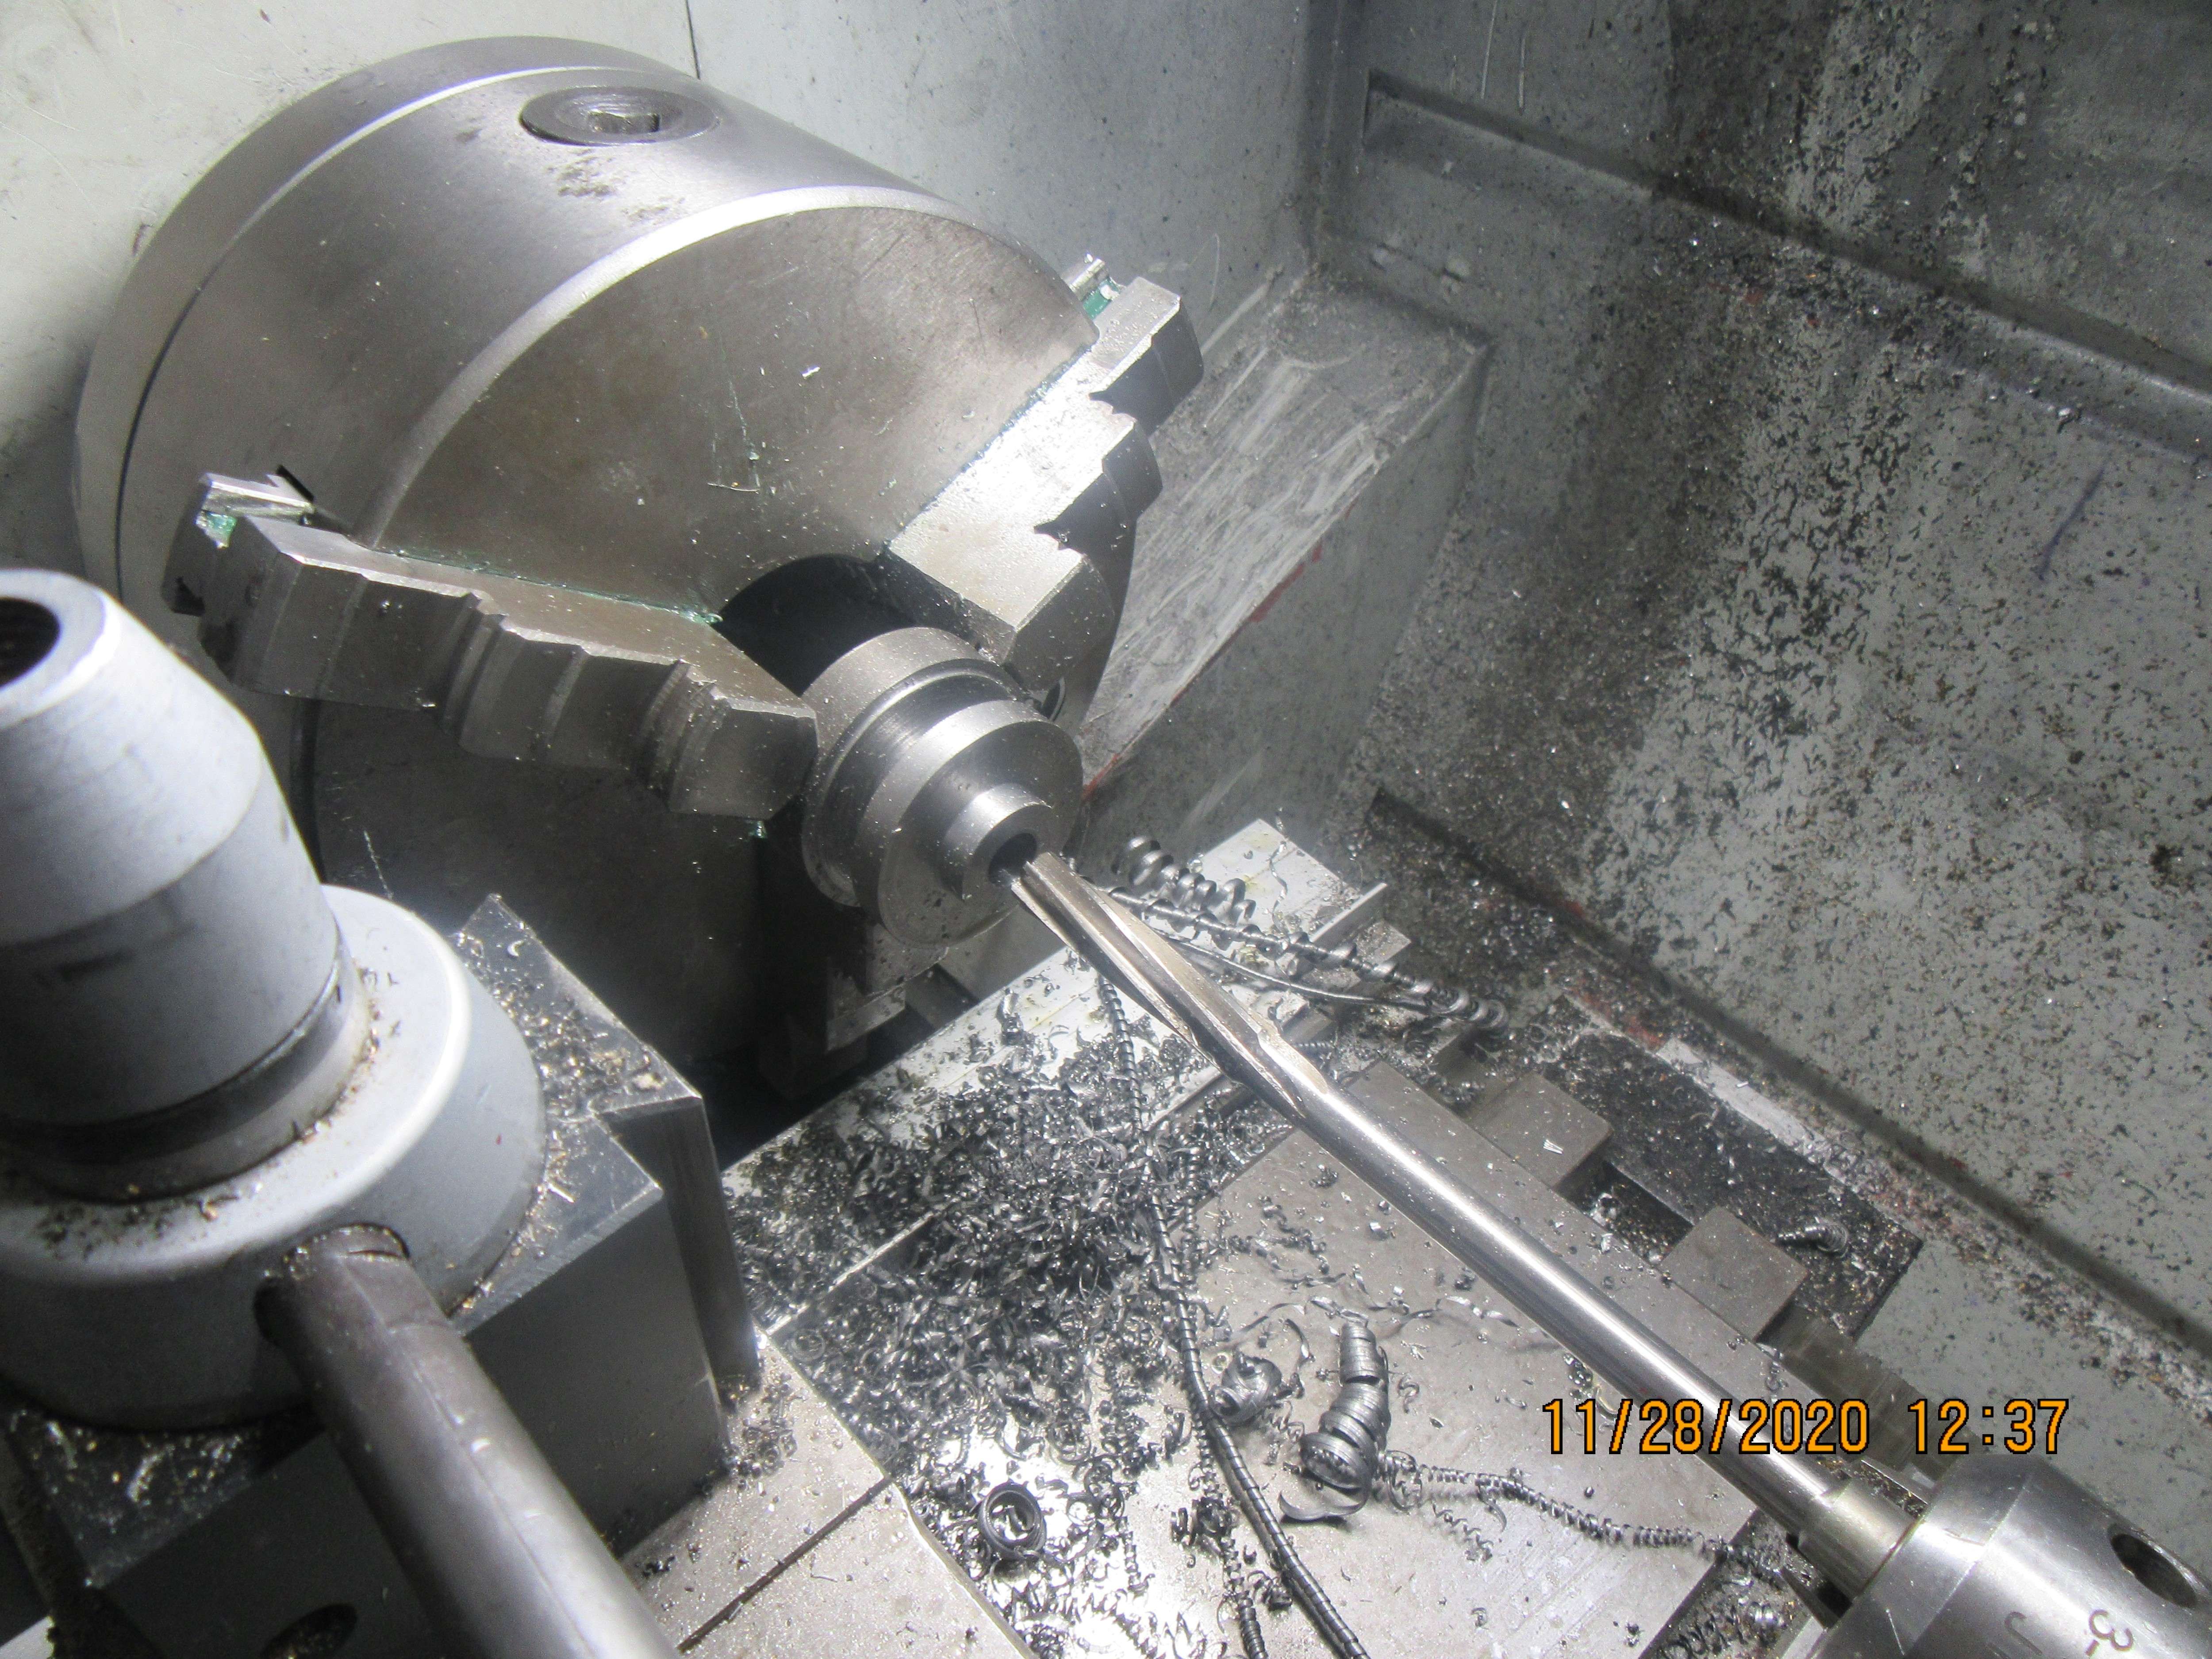
This morning I'm making gear blanks from steel. Whenever I buy a length of steel, I always buy it 2" or 3" longer than I actually need. All of the left over pieces are saved for jobs exactly like this. A lot of left over short pieces of shafting end up becoming gears for different projects. I'm not down to "zero scrap", but I try to use up every possible bit of steel that I buy. The o.d. of the gear, the o.d. of the hubs, and the bore are all put in in this set-up. Then I will flip the part around in the jaws and turn down the remaining bit to the outer diameter of the hub. This gives me a portion of steel to hold in my 3 jaw vice mounted on my rotary table when I cut the teeth into the blank. Then the extra long hub will be shortened to size.
YQi2yX.jpg
 
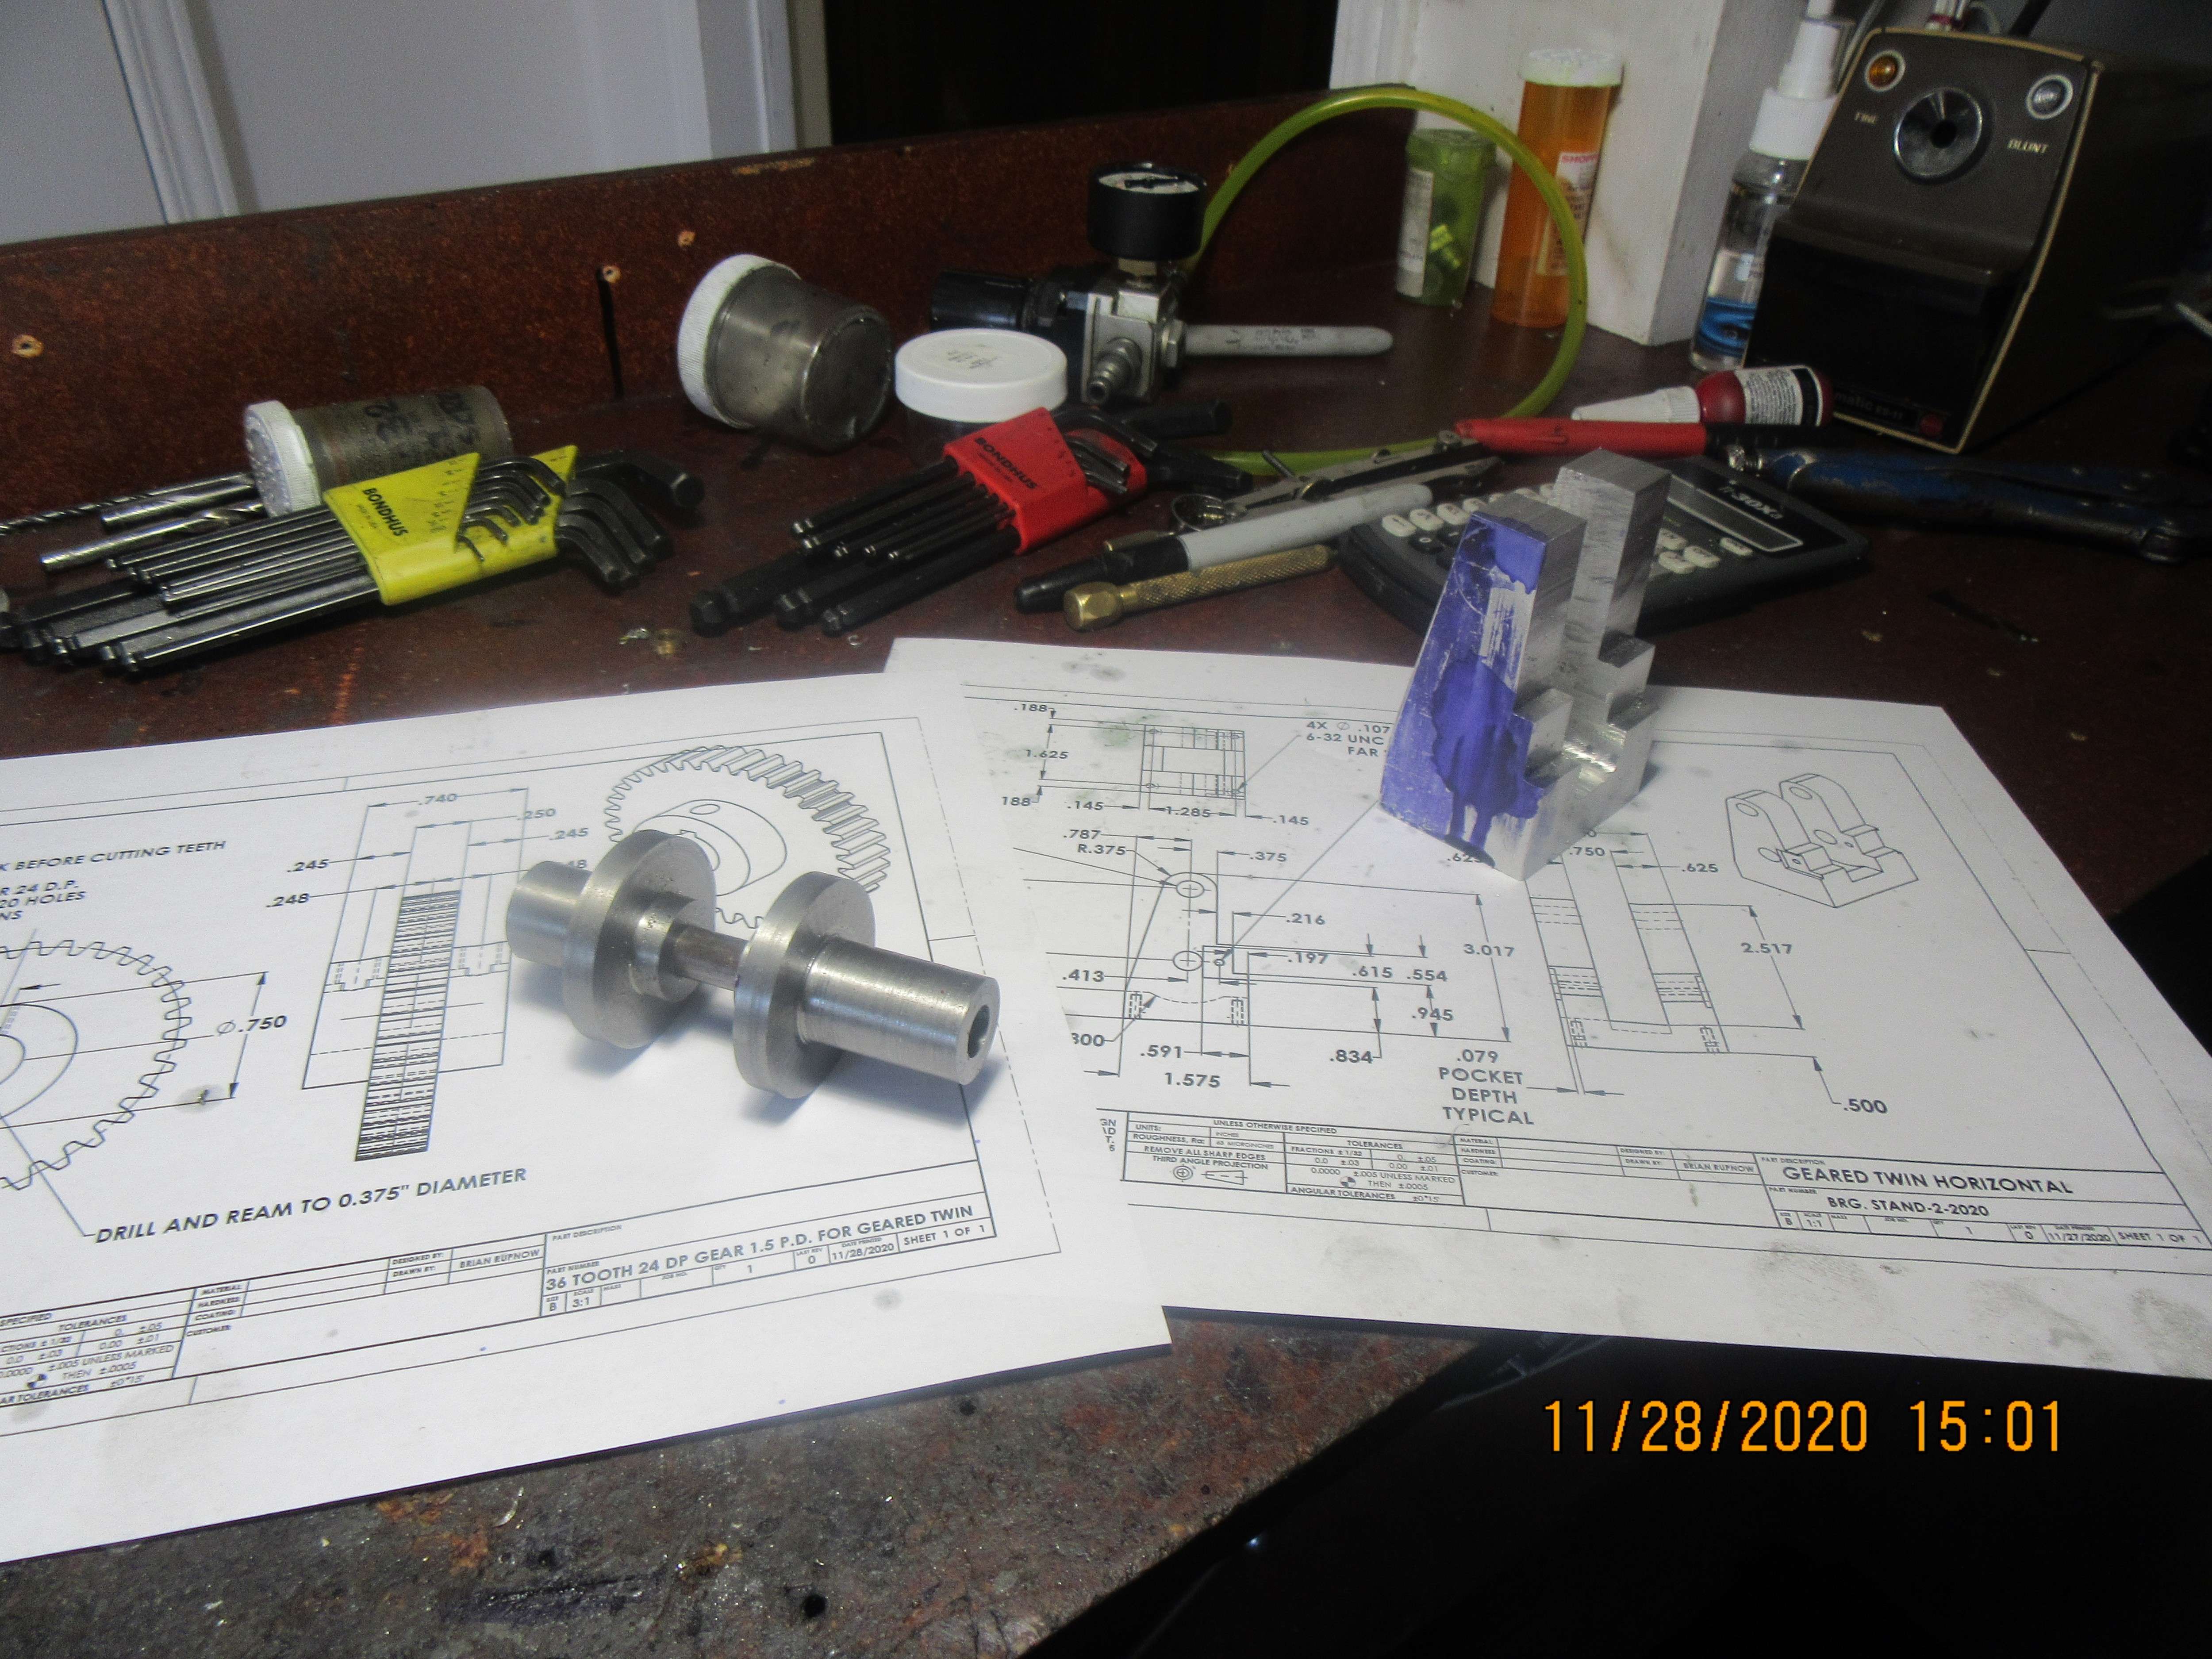
That's enough work for today. Both gear blanks are turned to size, and the main crankshaft support is roughed out. I have had a clever idea about cutting teeth in the gear blanks, but I will share that with you tomorrow.
Tr8KSK.jpg
 
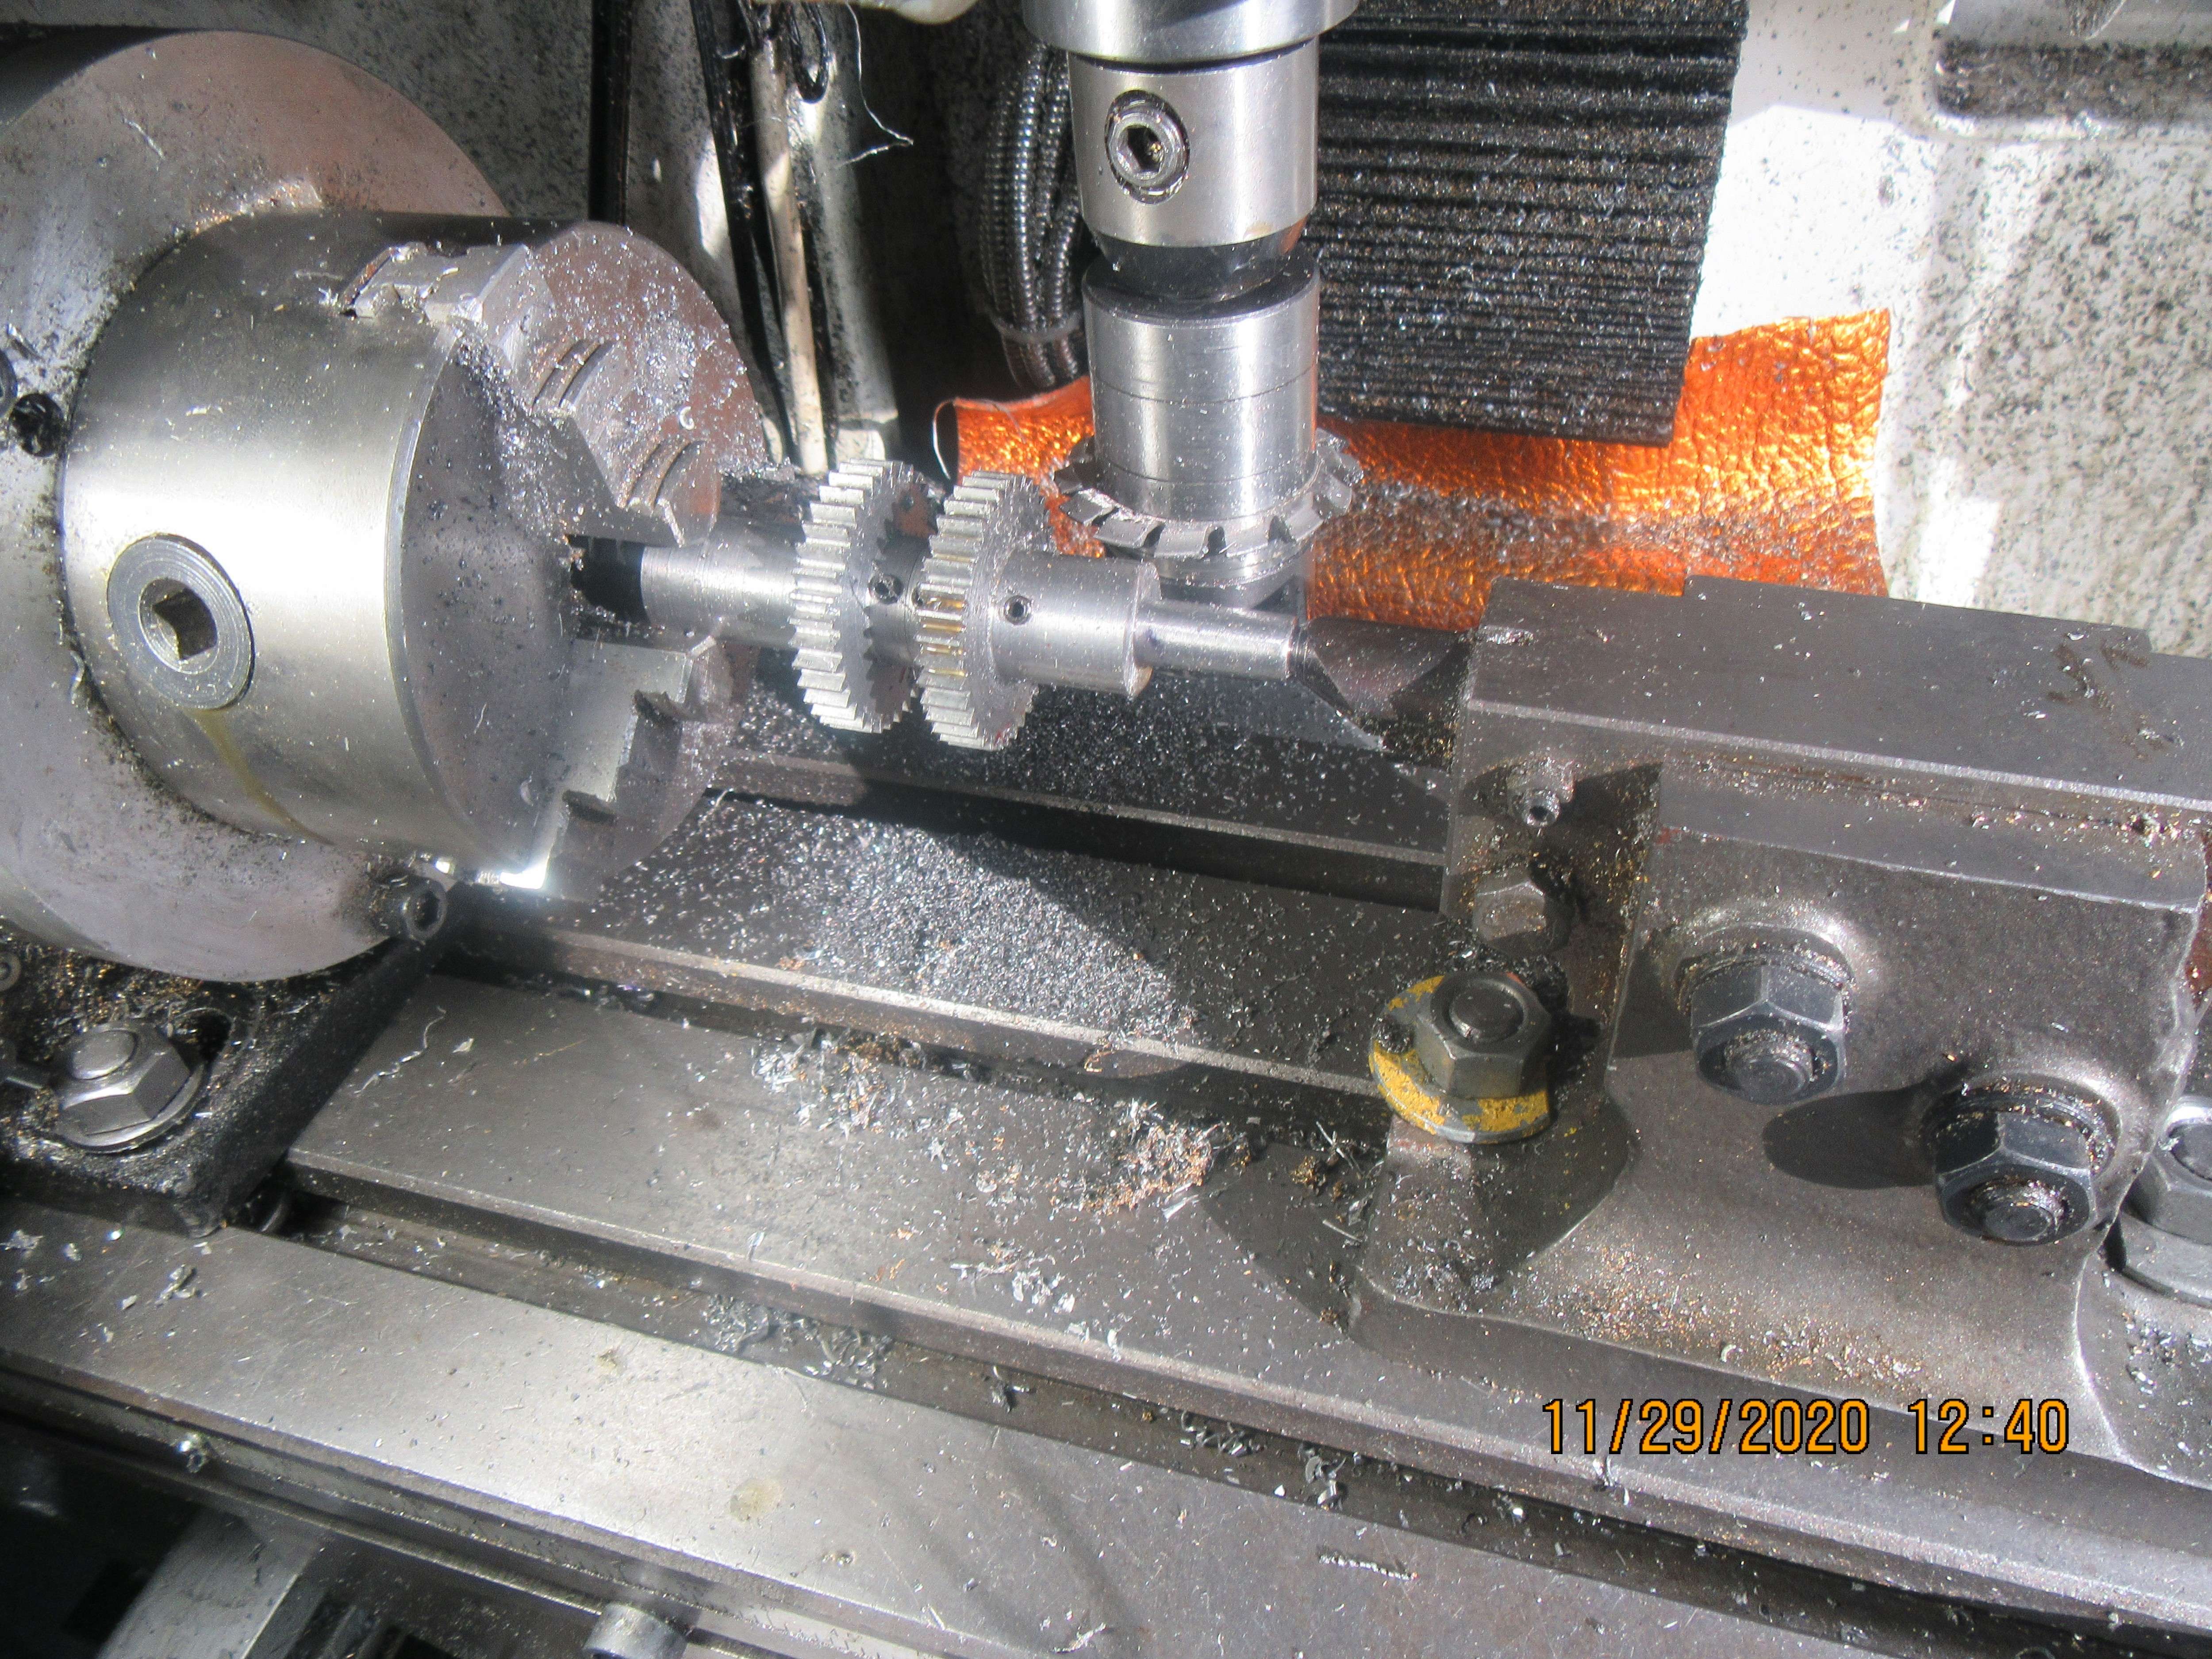
This morning I cut the 36 tooth gears. Yesterday, as you seen, the gear blanks were made from two different pieces of steel. I wanted to cut these gear one time only. The gear in the chuck has an extended hub on one side which is held in the chuck jaws. Both gears have been drilled and tapped for set screws and will eventually get keyways cut directly below the set screws. I inserted a piece of 3/8" cold rolled steel into the gear in the chuck, and that same piece of cold rolled extends thru the second gear, and on out to the tailstock chuck. Set screws are firmly cinched up on both gears, and this lets me cut both gears in one pass. This only works if both gears have the same number of teeth. Now I will trim the hubs on both gears to the finished dimension and add the keyways.
FoZzYV.jpg
 
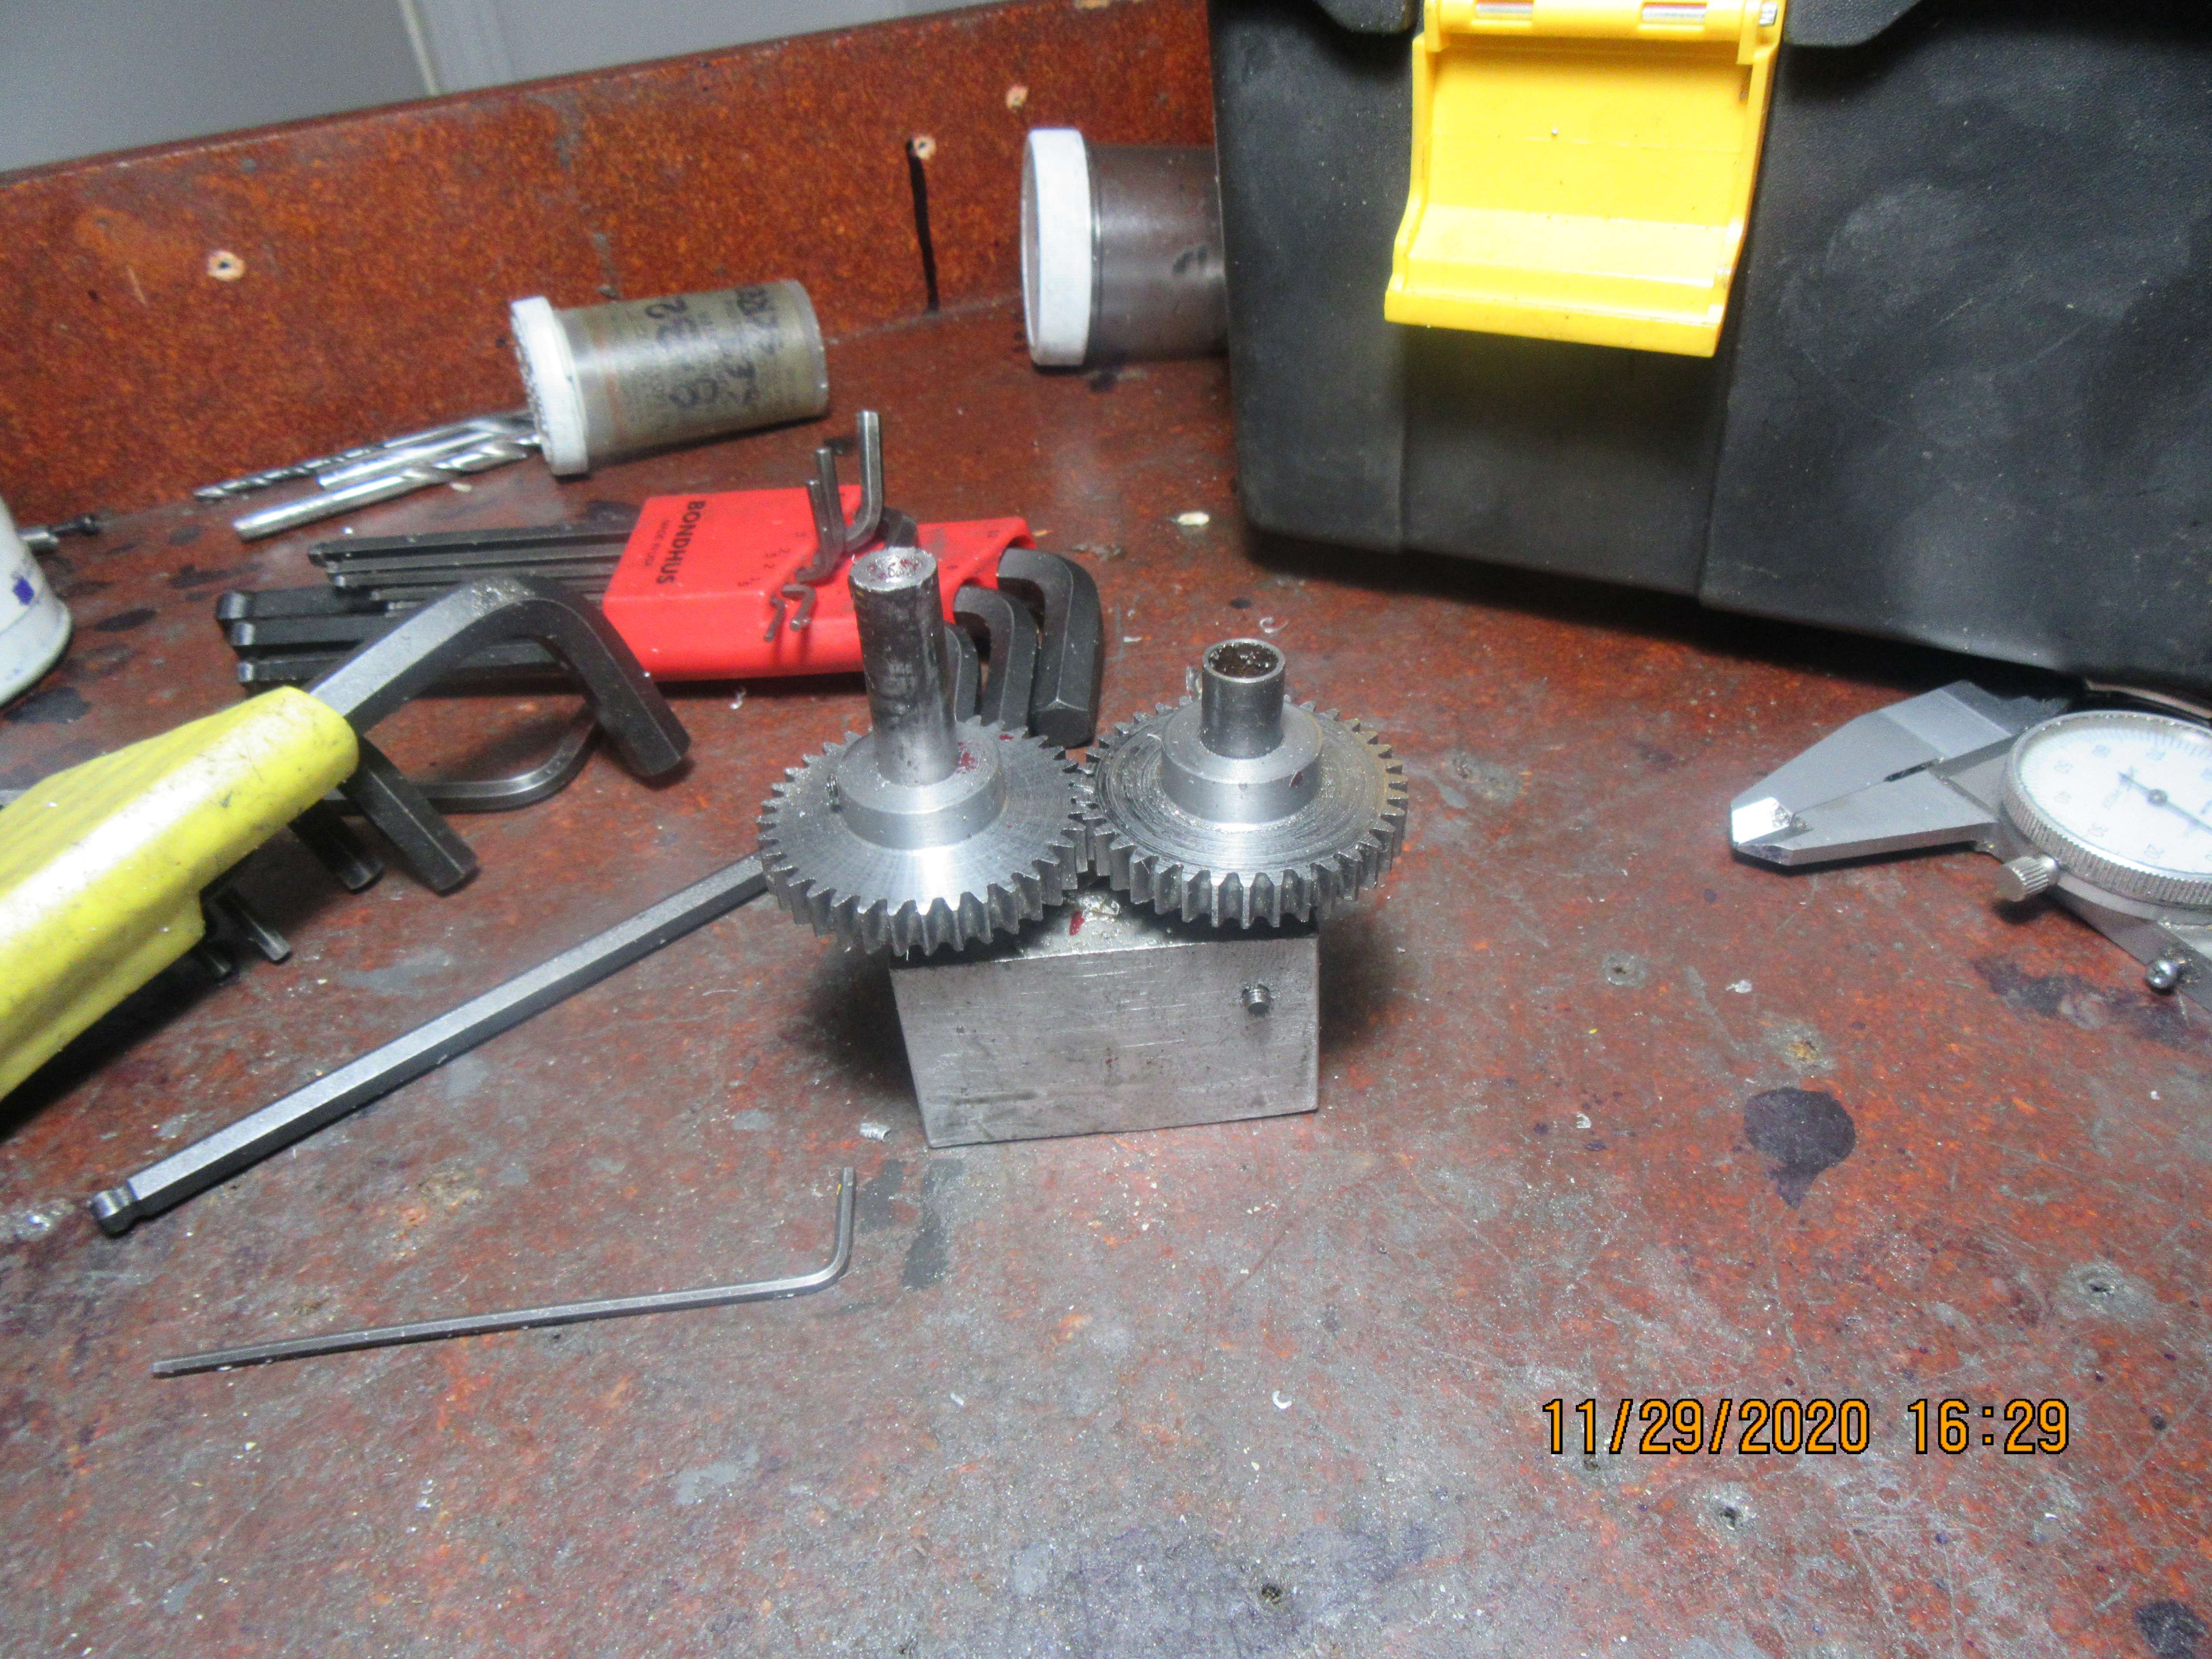
In this picture the gears have been cleaned up, and two test holes have been drilled and reamed in a piece of scrap aluminum at the correct center distance. Two scraps of 3/8" cold rolled rod are inserted thru the gears and into these holes. This way I can check that the gears mesh properly. If they are a bit too tight or a bit too loose, then I can adjust the hole centers in the finished piece to compensate for that.---It makes me absolutely crazy if I just put the holes into the finished piece first and then find out that the gears don't mesh properly. There isn't any good way to fix that!!!
35FO0V.jpg
 
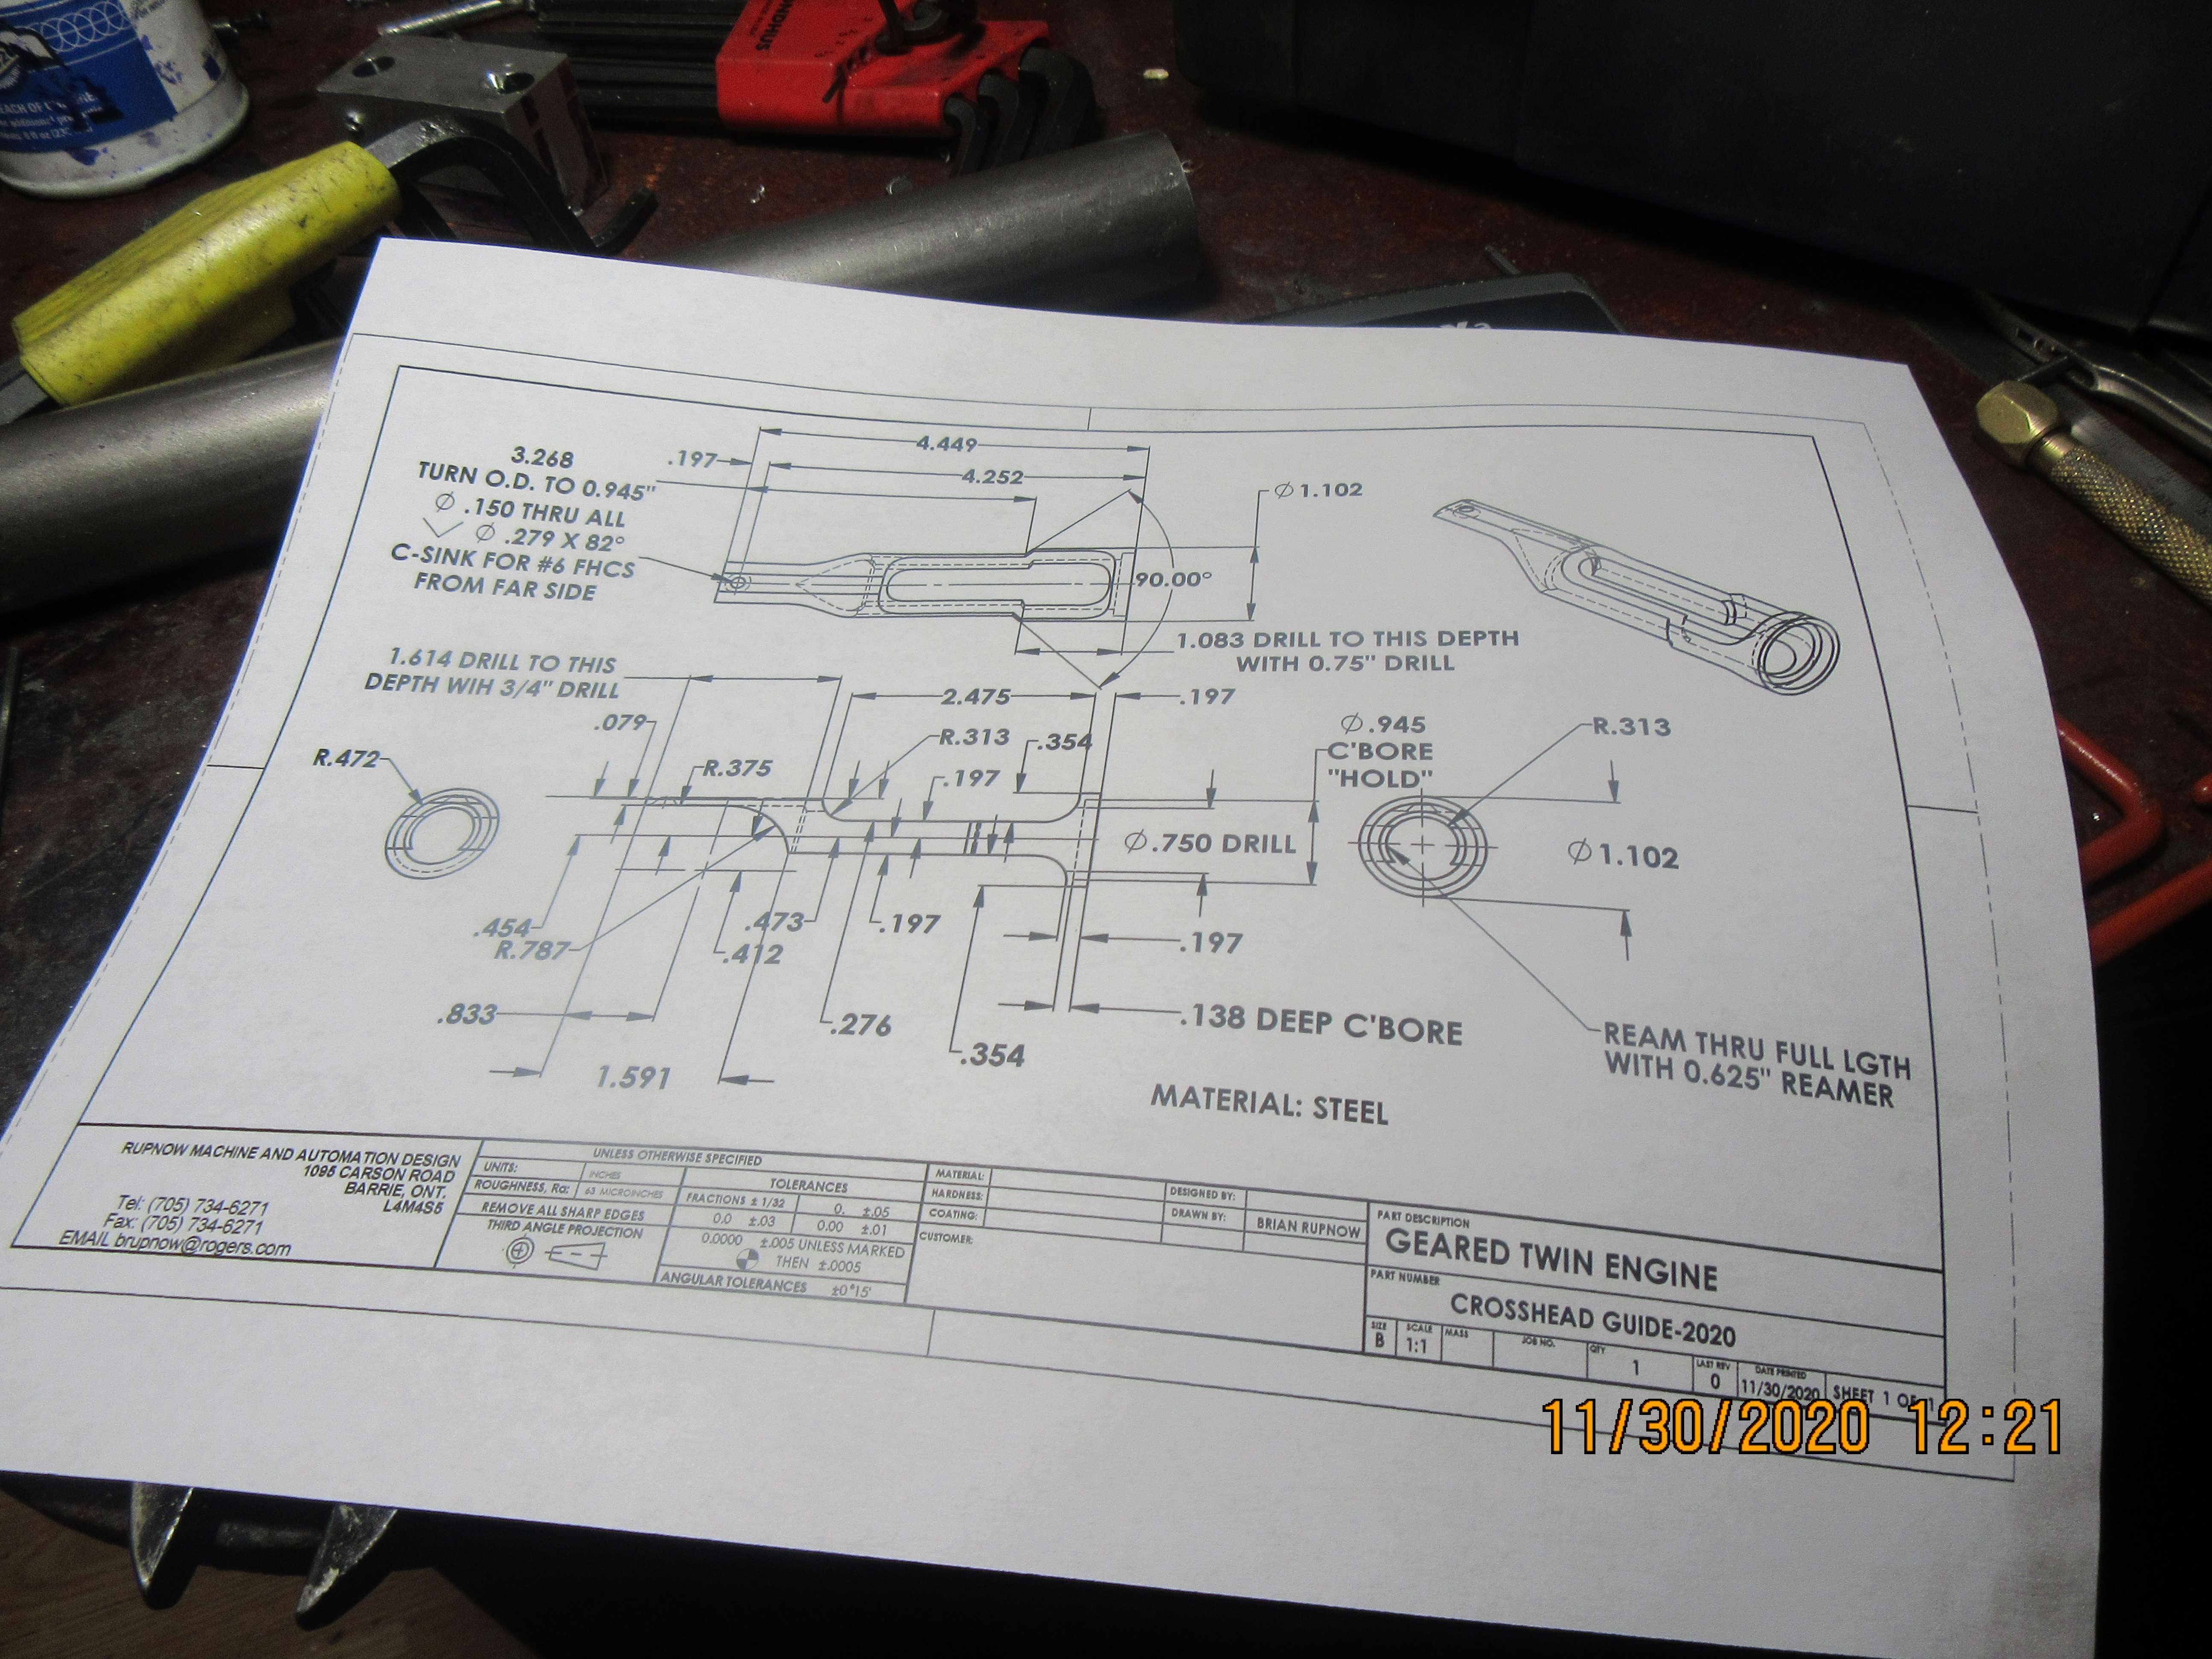
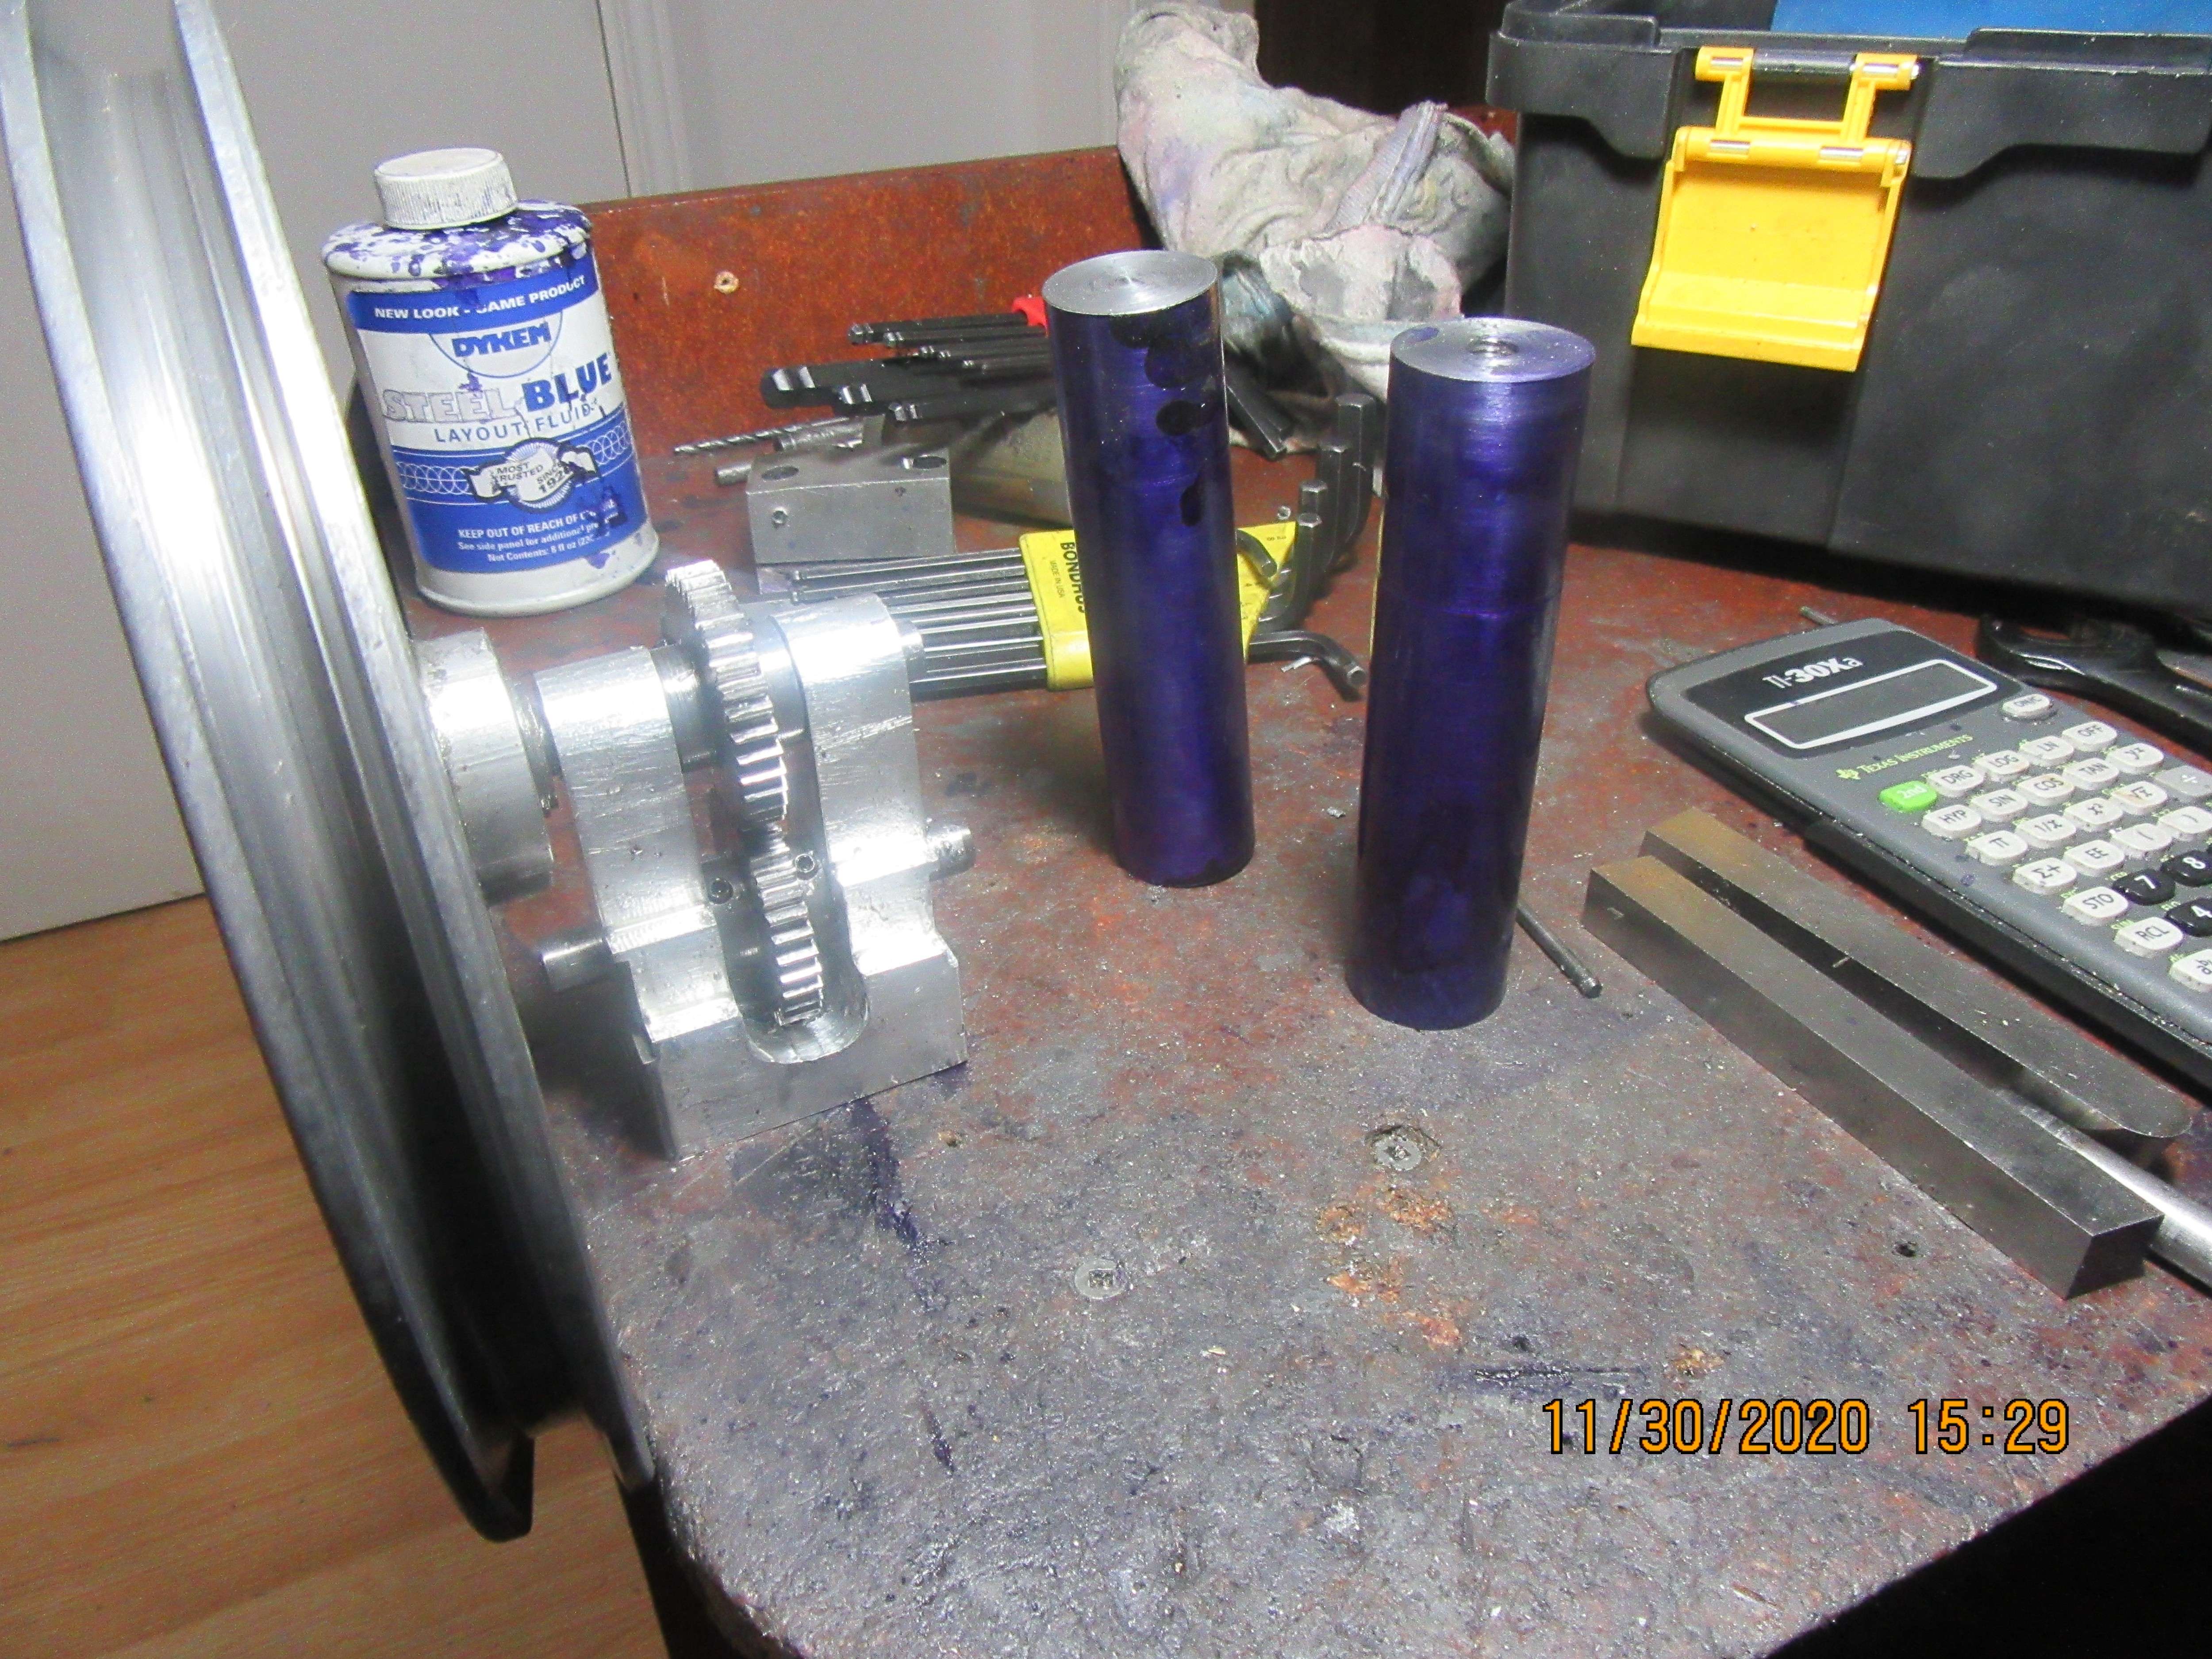
The bearing stand and gears are finished, and now I think I'll go after the cross-head guides. I happen to have stock of the correct size left over from some other project, and I'm trying to build this engine "on the cheap" which means using as much stock that I can from stuff just setting around here collecting dust.
vusRTK.jpg
 
I feel like it's too late for this comment since you're already commencing work -- but if you put the valves on the bottom and the power cylinders on the top, you'll be driving the flywheels with the crankshaft without any major changes to the rest of the engine.

(Well, aside from making it impossible to access the valves -- but I'm an engineer! I have a reputation to maintain with the guys on the factory floor, and service).
 
Tim--I know a little secret about slide valve engines. The slide valve is held tight against the side of the cylinder (where the ports are) by steam (or air) pressure in the steam-chest. However, there is something called gravity that you have to contend with. If the valve slider is on the underside of the cylinder and you try and start the engine from zero pressure, then gravity holds the valve slider away from the ports and the engine will just set there and pee any pressure out the exhaust ports until you give the engine a shake to get that slider up against the port faces. Some early steam engines got around that by placing a spring on the side of the slider farthest away from the ports, which held the slider against the port faces so as not to leak all the air pressure away.
 
If I were the same guy who came up with all the bitty parts in the Citroen DS suspension, or whoever it was at Bristol that decided that a 9-cylinder radial engine should all the complication of sleeve valves (all those gears!) instead of a couple of bump rings, roller lifters and tappets, I'd advocate more parts.

I mean -- what's one little spring per cylinder? That's only two. Plus cover plates, and sliders, and ...

(I'm going to stop being a smartass now. At least for the moment.)
 
Hi Tim, Seems you are learning the lesson ("stop being a smartass ") I failed to learn - being an engineer myself.... - and Old Grumpy Engineers DON'T learn new tricks.... - So what's this "stop being a smartass" stuff? I enjoy learning about things like gravity affecting slide valve sealing, which would not happen if you didn't ask? (Thanks Brian!) - And having worked in Automotive for a Japanese manufacturer.... I learned that "in the West" we re-design to overcome problems, but "in the East" they design a countermeasure bit and add it on... and add it on... and add it on... - E.g. The philosophy of "Complexity makes "Hondas" reliable", compared to "simple Western engines" that are less so? (But much better in other ways?) - That's why they won the war of "usability" in the 1960s. But the world has turned a lot since then... perhaps nowadays the universal attitude is one of "never mind how rubbish the design actually is, just fiddle it to work and we'll make money anyway"? - Or do I have a jaundiced view of Manufacturing Management?
Maybe as Engineers we choose what to learn? - like making the piece that exactly fits the jigsaw, not just accepting the piece that didn't really fit well?
Keep up the good work ALL! - Sorry for my grouse!
K2
 

Latest posts

Back
Top