You are using an out of date browser. It may not display this or other websites correctly.
You should upgrade or use an alternative browser.
You should upgrade or use an alternative browser.
Briggs & Stratton 6S - A Beginnig
- Thread starter b.lindsey
- Start date

Help Support Home Model Engine Machinist Forum:
This site may earn a commission from merchant affiliate
links, including eBay, Amazon, and others.
- Joined
- Dec 14, 2007
- Messages
- 1,181
- Reaction score
- 31
Those springs turned out real pro Bill.
How much spring back did you get when comparing the ID to the mandrel size? Did you have washers on the capscrew for tensioning the wire or just use it to deflect against?
- Joined
- Jan 3, 2008
- Messages
- 2,085
- Reaction score
- 17
Thanks Nick and Kustom. The calculated mandrel sizes were .264" and .270" so i compromised and made one mandres of.267" dia. I was shooting for an ID of .312" and the results came out at .310 and .315" close enough i think. According to Dean they may shrink a little after stress relieving them so one should be dead on and the other slightly small, but I can adjust the diameter of the spring retainer to account for that. As for the music wire guide, I just screwed a 10-24 SHCS into a piece of 3/8 square aluminum and used it as a deflector...tensioning was done by holding on to the wire tightly with my hand and it seemed to work out ok. Might be a different matter with heavier wire though. I have them in the oven now so we'll see what happens in a couple of hours. If one or both dont measure up I have plenty more wire to try again. So far there isn't much smell from the oven which is good since the wife is sitting nearby at the kitchen table.
They look great, Bill! Your diameters came out really close, too. I have Marv's program downloaded, but haven't got around to using it yet. From your post it sounds like it's just the ticket for calculating this.
When I do my heat treating, the smell I mentioned comes from the steel wool the springs are wrapped with. It has a trace of oil on it to keep it from rusting. Could be one of those good smells to a man, but not so nice to a lady.
Dean
When I do my heat treating, the smell I mentioned comes from the steel wool the springs are wrapped with. It has a trace of oil on it to keep it from rusting. Could be one of those good smells to a man, but not so nice to a lady.
Dean
- Joined
- Jan 3, 2008
- Messages
- 2,085
- Reaction score
- 17
After baking the springs for an hour at 450 degrees F and allowing rhem to cool slowly, the ID shrunk by about .003"-.005" and the length by about .010" With a few minor adjustments to one of the spring keepers the final dimensions should still be fine. Figuring that the springs will be compressed somewhere around .100" once installed and that the cam lift will be .125 (less valve clearance), the final compressed length will be .400" give or take a few thousandths. Both springs will fully compress to between .300 to .332 so neither will "bottom out" but i want to recheck all this on the drawings tomorrow morning. In unwraping the springs inside the steel wool inside the outer foil wrap, the steel wool appeared more brownish, and given the lack of any smell, maybe there wasn't any residual oil on the steel wool. The springs darkened slightly but the ends of both appeared slightly blueish. Don't know if that is normal or not but I have fully compressed both numerous times and they spring back to the post baked length consistently, so I am hoping they are good to go.


$519.19
$699.00
FoxAlien Masuter Pro CNC Router Machine, Upgraded 3-Axis Engraving All-Metal Milling Machine for Wood Acrylic MDF Nylon Carving Cutting
FoxAlien Official
![DreamPlan Home Design and Landscaping Software Free for Windows [PC Download]](https://m.media-amazon.com/images/I/51kvZH2dVLL._SL500_.jpg)
$0.00
DreamPlan Home Design and Landscaping Software Free for Windows [PC Download]
Amazon.com Services LLC

$443.98
TM NEXDYNAMI AT29618 Water Pump Compatible With/Replacement For John Deere 1020 1520 2020 300 301 400 401 440 440A 480 AT29618
VIVID MARKET CORPORATION

$39.99
$49.99
Sunnytech Low Temperature Stirling Engine Motor Steam Heat Education Model Toy Kit For mechanical skills (LT001)
stirlingtechonline

$38.26
$49.99
Becker CAD 12 3D - professional CAD software for 2D + 3D design and modelling - for 3 PCs - 100% compatible with AutoCAD
momox Shop

$99.90
$109.90
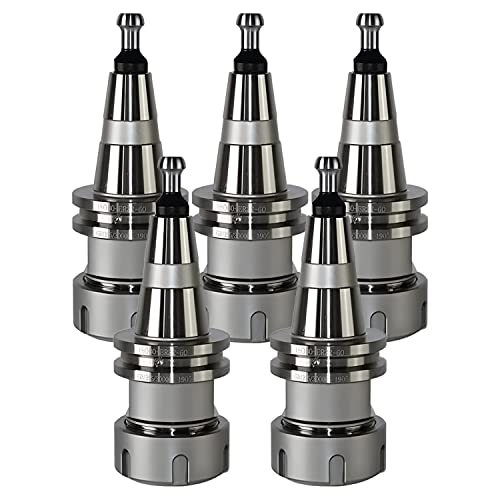
5PCS/Lot ISO30 ER32-60 Balance Collet Chuck G2.5 30000rpm CNC Tool Holder Stainless Steel Nickel plated With Pull Stud Woodworking Machine
david PA system

$54.46
Amana Tool - 46280 CNC 2D & 3D Carving 6.2 Deg Tapered Angle Ball Tip x 1/32 Dia x 1/64
Express Tool Supply
- Joined
- Jan 3, 2008
- Messages
- 2,085
- Reaction score
- 17
Today I did a little more machining to one end of the crankcase. This is the end where the carb, muffler, etc, will eventually attach. There was a good bit of aluminum to remove and I took it slow not wanting to make an error at this point (or hopefully any point for that matter). The first two pictures just show some of the metal removal. Pictures 3 and 4 show the roughed out end of the crankcase. The last picture also shows the cylinder head in its approximate position.


- Joined
- Jan 3, 2008
- Messages
- 2,085
- Reaction score
- 17
The next two pictures show the crankcase next to the prototype. The protrusion will be machined later to form the rounded outer housing for the camgear. This can be seen in the prototype. Some of the width of the protrusion will go away when the various profiles of the back side of the crankcase are done.


- Joined
- Jan 3, 2008
- Messages
- 2,085
- Reaction score
- 17
The crankcase work needed to be done on the full size mill at work, but since it went pretty well I was feeling brave enough to try and finish up the camgear on the Sherline at home this evening. This meant cutting the lobes, and rounding the rest of each lobe's profile and drilling the two oil holes. Starting with the RT set on zero, the four angles for the flats of each lobe had already been figured so it was just as matter of setting the RT to the correct angle and milling the flats to the proper depth. This is shown in picture 1. That being done the rest of each lobe aside from the flats and the high point needed to be rounded. This was also done on the mill with the same set-up by rotatung the lobes 5 degrees at a time to remove the remaining excess material. This is shown in photos 2 and 3 and worked well with minimal filing needed to finish rounding things out.


- Joined
- Jan 3, 2008
- Messages
- 2,085
- Reaction score
- 17
In the last two pictures the oil holes are drilled to lubricate the camgear as it runs on its fixed axle and the finished camgear shown next to the prototype. I still need to file the transition from the flats to the peak points of each lobe, but this shouldn't take much. That's it for the moment...thanks for looking. More machining will be done on the crankcase tomorrow. Now that final exams are over, the machine shop is quiet enough to allow for some concentration.


- Joined
- Jan 3, 2008
- Messages
- 2,085
- Reaction score
- 17
For whatever its worth, the attached .pdf file shows the angles for the flats and how they were derived as well as the various positions of the RT.
View attachment Camshaft.pdf
View attachment Camshaft.pdf
- Joined
- Jan 3, 2008
- Messages
- 2,085
- Reaction score
- 17
Thanks for checking in Arnold. Here is a little more progress on the crankcase...mostly just outting the angles on the base to match the oilpan and drilling the holes where the crankcase attaches to the oilpan. More and more metal is turning into chips...theres gotta be a crankcase in there somewhere ;D


Quite a lot of work done in these last posts, Bill. A lot of swarf to make from the crankcase yet, but it's getting there. Springs look good, and sounds like things worked out just fine.
Thanks for the new pics and words!
Dean
Thanks for the new pics and words!
Dean
- Joined
- Jan 3, 2008
- Messages
- 2,085
- Reaction score
- 17
Thanks Dean...and you're right...a lot more swarf to go on the crankcase both inside and out, and that will have to wait till Monday. Meanwhile, at home the Sherlines saw some more duty tonight with some work on the two ends of what will be the built up crankshaft. Picture 1 shows the flywheel end. The 1/4-28 left hand threads had already been cut and in this picture the taper is being turned which will mate to the same taper in the flywheel. Photo 2 shows the business end being turned down as in the prototype where a pulley would be added. In photo 3 the shaft was moved to the mill to cut a 3/32 wide by 3/64 deep keyseat. The last photo shows the two shafts separated by a space where the webs and crank will go. Also shown is the 7/16" hex nut (also with LH threads) which will hold the flywheel and starter hub onto this end of the crankshaft. That's it for today. This weekend I will be woriking on the valves, tappets, and spring retainers, which are all of a size perfect for the Sherline.


zeeprogrammer
Well-Known Member
- Joined
- Mar 14, 2009
- Messages
- 3,362
- Reaction score
- 13
Those gears are awesome. The springs too.
Very nice work Bill.
Very nice work Bill.
- Joined
- Jan 3, 2008
- Messages
- 2,085
- Reaction score
- 17
Thanks Steve and Zee. Yep...no more grading homework or tests or setting up labs for the next month but it will all start again in early January and with many of the senior design project teams needing shop time to make their prototypes, it will be super busy...but its also one of the best parts of the job!!
Zee, nice to see you checking in from time to time. I miss your posts, your humor, and seeing your projects too. How's the shop coming?? Can you see all your tools yet? :big:
Bill
Zee, nice to see you checking in from time to time. I miss your posts, your humor, and seeing your projects too. How's the shop coming?? Can you see all your tools yet? :big:
Bill
- Joined
- Jan 3, 2008
- Messages
- 2,085
- Reaction score
- 17
This morning was spent in my little corner of the garage with the space heater keeping things more or less tolerable. Started out making a bushing for one end of the crankcase as it was easier to do this than try to machine it into the crankcase base directly. A gasket, washer, and 10-32 hex cap screw will cover the hole and secure this end to the oil pan (Photo's 1 & 2). Then one of the two tappets was turned from O2 drill rod as shown in photo 3. Another one of these will have to be made and both will need to be hardened.


Similar threads
- Replies
- 86
- Views
- 26K
- Replies
- 77
- Views
- 29K
- Replies
- 117
- Views
- 41K
- Replies
- 9
- Views
- 3K
Latest posts
-
-
-
-
A New Method (?) to Dynamically Change Cam Timing when Engine is Running
- Latest: Niels Abildgaard
-
-
-
-
-
-


![TurboCAD 2020 Designer [PC Download]](https://m.media-amazon.com/images/I/51UKfAHH1LL._SL500_.jpg)


![MeshMagic 3D Free 3D Modeling Software [Download]](https://m.media-amazon.com/images/I/B1U+p8ewjGS._SL500_.png)

