Offenhauser Inline 4 cylinder, Might Midget Model Engine Build

Home Model Engine Machinist Forum

Help Support Home Model Engine Machinist Forum:

This site may earn a commission from merchant affiliate links, including eBay, Amazon, and others.
This is very impressive work and I really appreciate the level of detail you show. I never think about using the 3D printer to make fixtures for machining. Also, the cylinder liner info will help when I get to that on my Little Demon engine.

It gives me a work quality to aim for.

Rick
 
Cambox and Camshaft Bearings

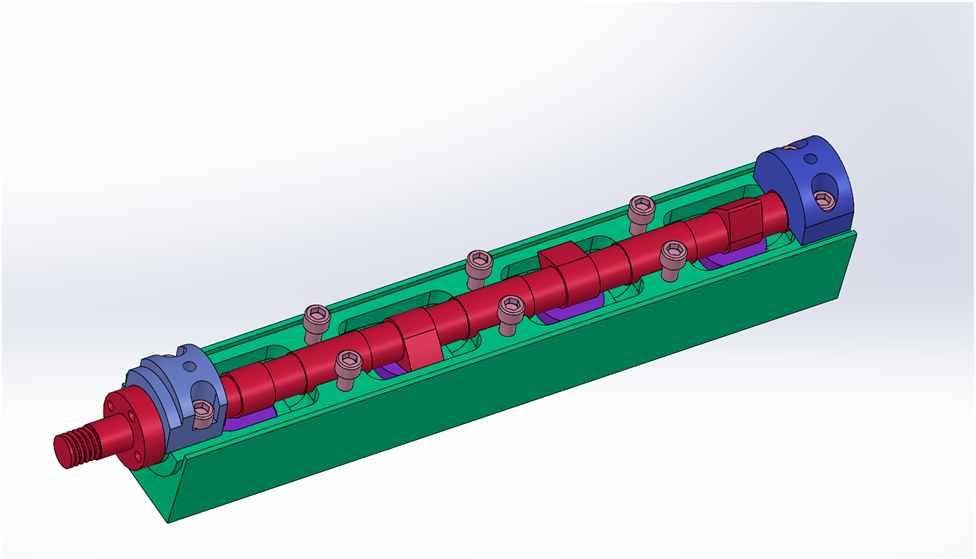
The Cambox houses the overhead camshaft, its bearings and the cam followers. Since I have completed my first camshaft, I will move on to the first Cambox.

image-33.png

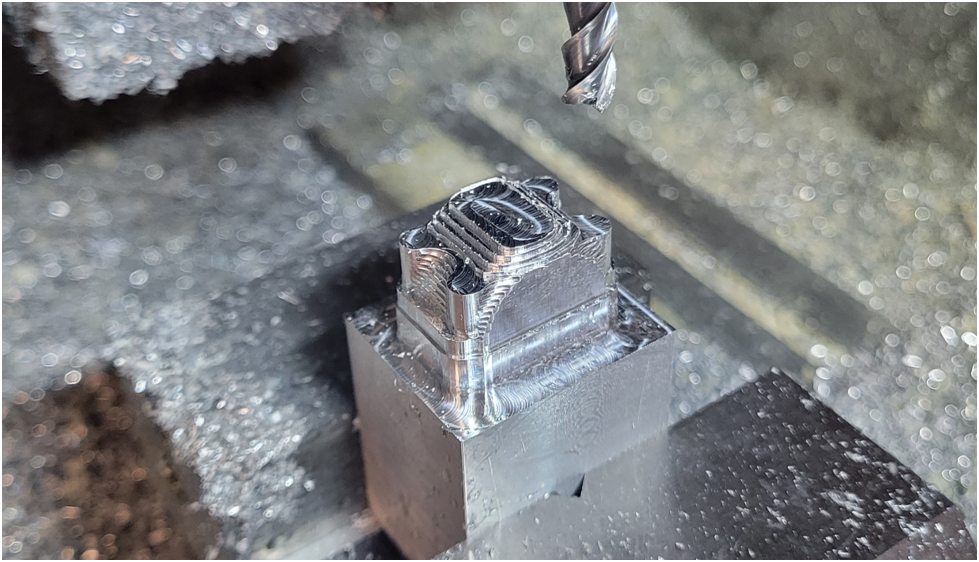
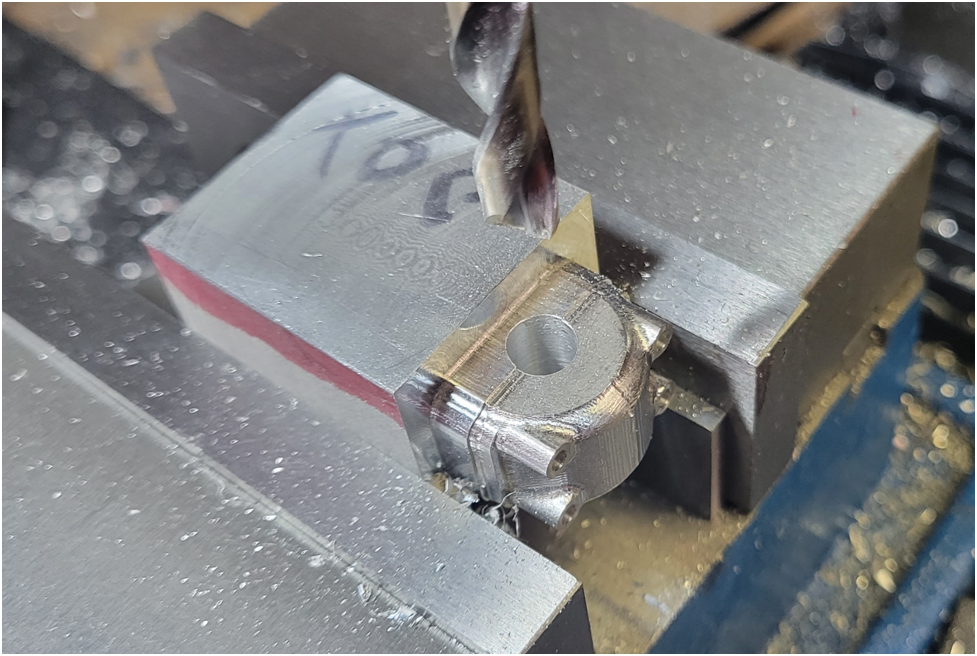
I start with an oversized work piece, fly cut the top and square off the front end. On the second cambox I will not bother fly cutting the top surface as it gets machined away. I drill the four holes for the cam followers undersized so the 1/4" end mill does not need to plunge cut. These will be milled out further so a 3/8" reamer can finish the cam follower guide holes.
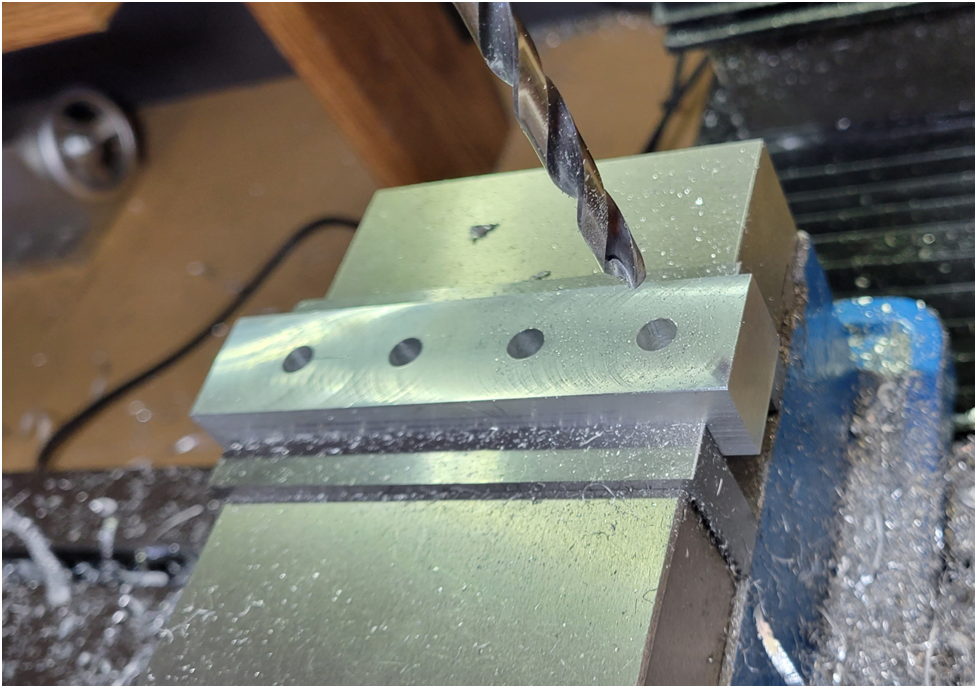
image-34.png


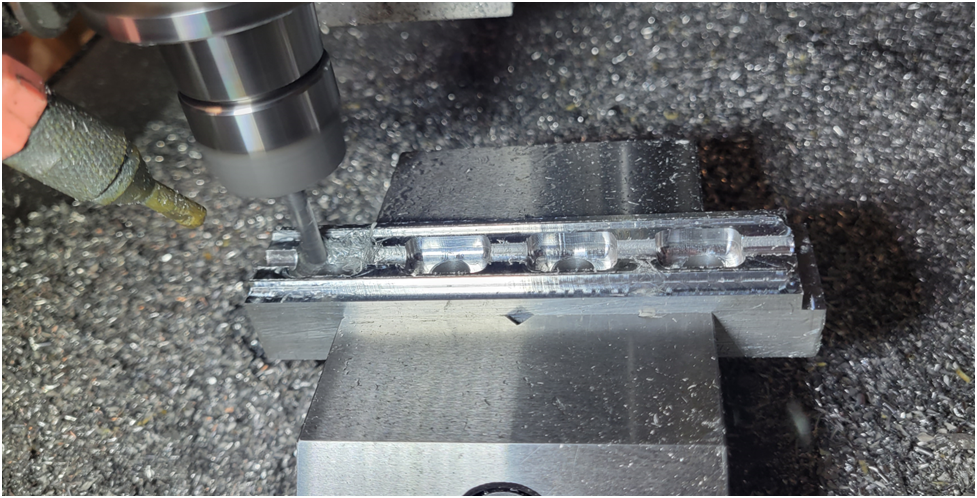
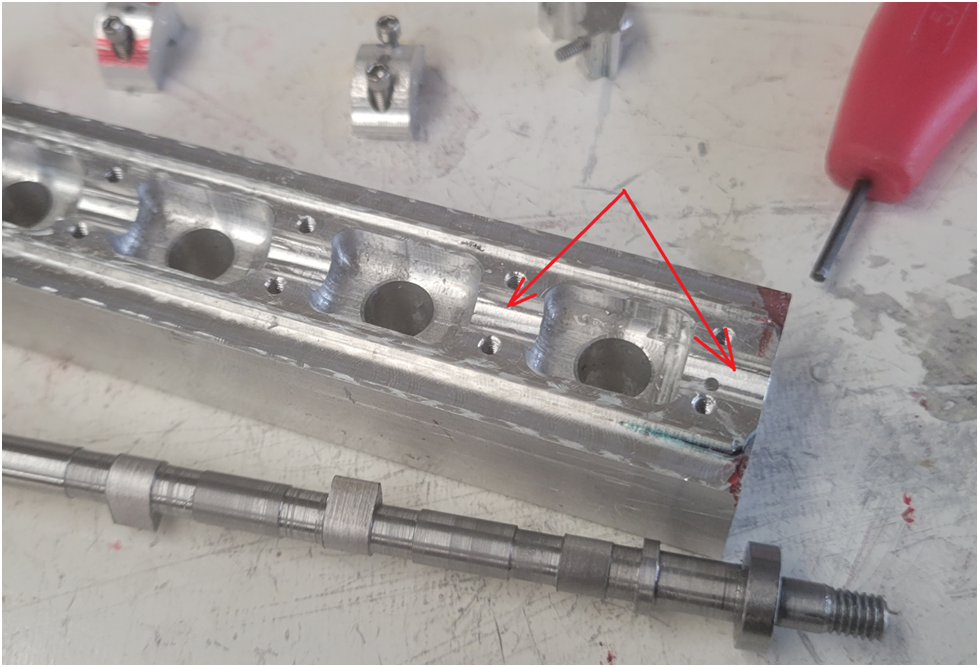
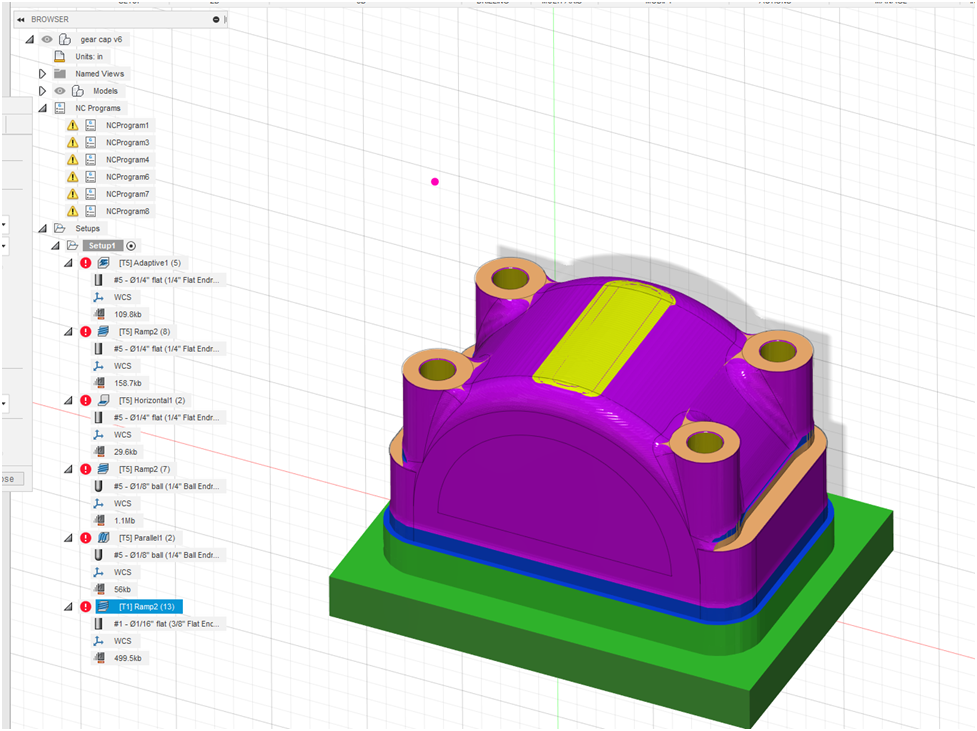
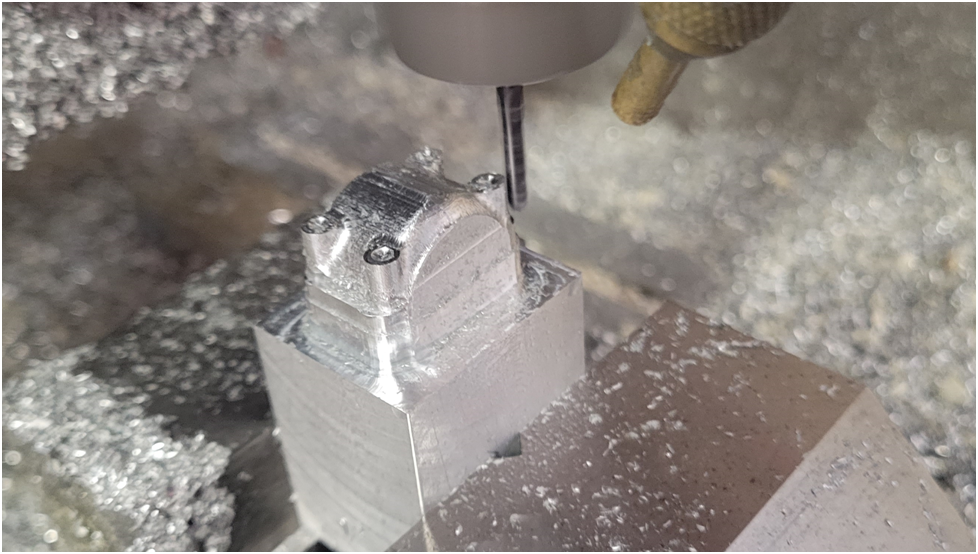
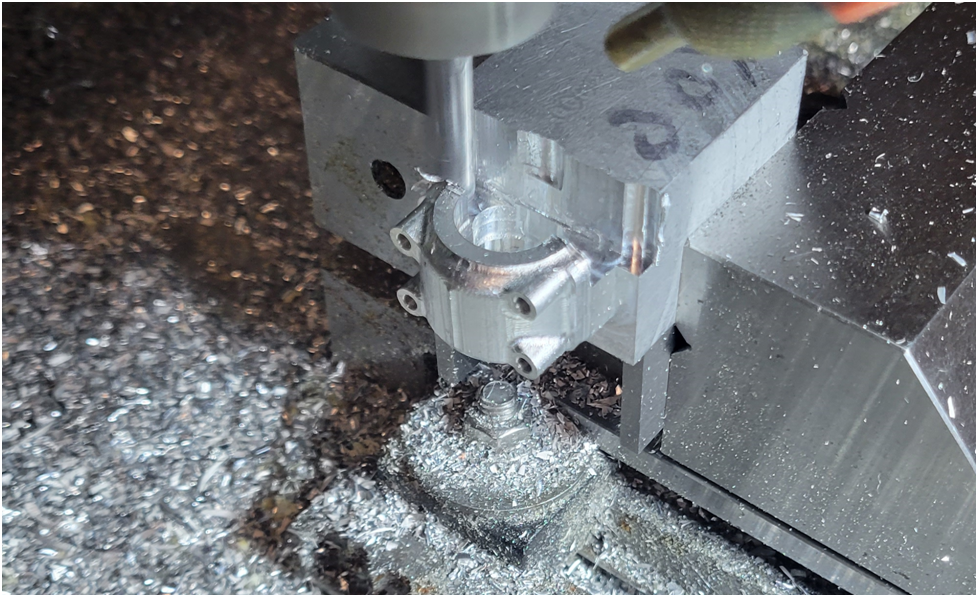
I use a 1/4" end mill to rough and finish the cam follower holes, horizontal and vertical surfaces; a 3/32 flat end mill to rough out the trough for camshaft lower bearing surfaces; a 3/16 ball end mill to "finish" the lower bearing surfaces; and finally a 1/16" flat end mill to create the holes for the camshaft bearing hold down screws. I put "finish" in quotes as the bearing surfaces will be reamed later. The bearing hold down screws will eventually pass through the cambox through clearance holes and screw into the cylinder head. But I will drill undersize and tap the holes first so I can clamp the upper cam shaft bearing clamps in place to ream the camshaft bearing surfaces.

image-35.png

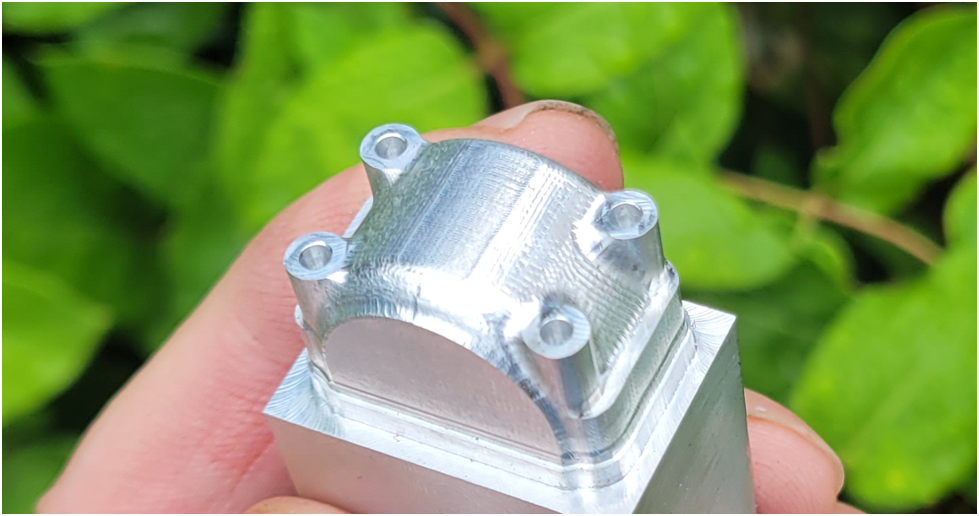
Above is the final milling operation with the ball end mill. And below the machining has been completed on the top surface of the Cambox.


The bottom surface will be machined once the gears have been depthened and then the side surfaces will be machined last as they are cosmetic.

image-36.png

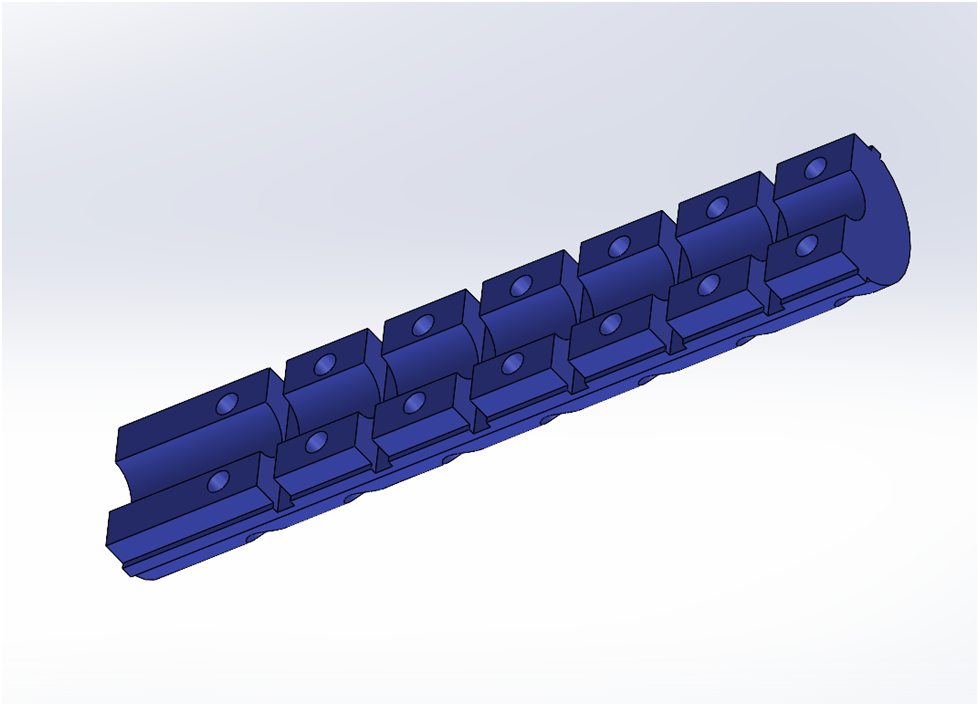
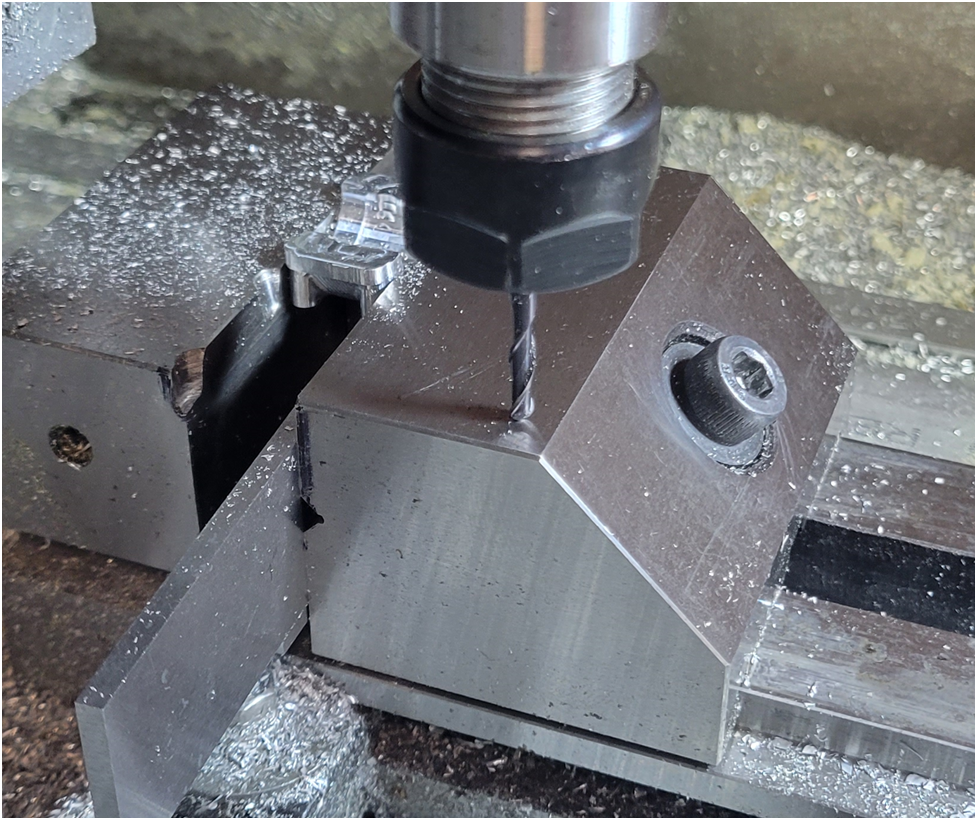
Now on to machining the camshaft top bearing caps. they will be machined as a group, then separated on the band saw, and their ends finished on the mill.

image-37.png

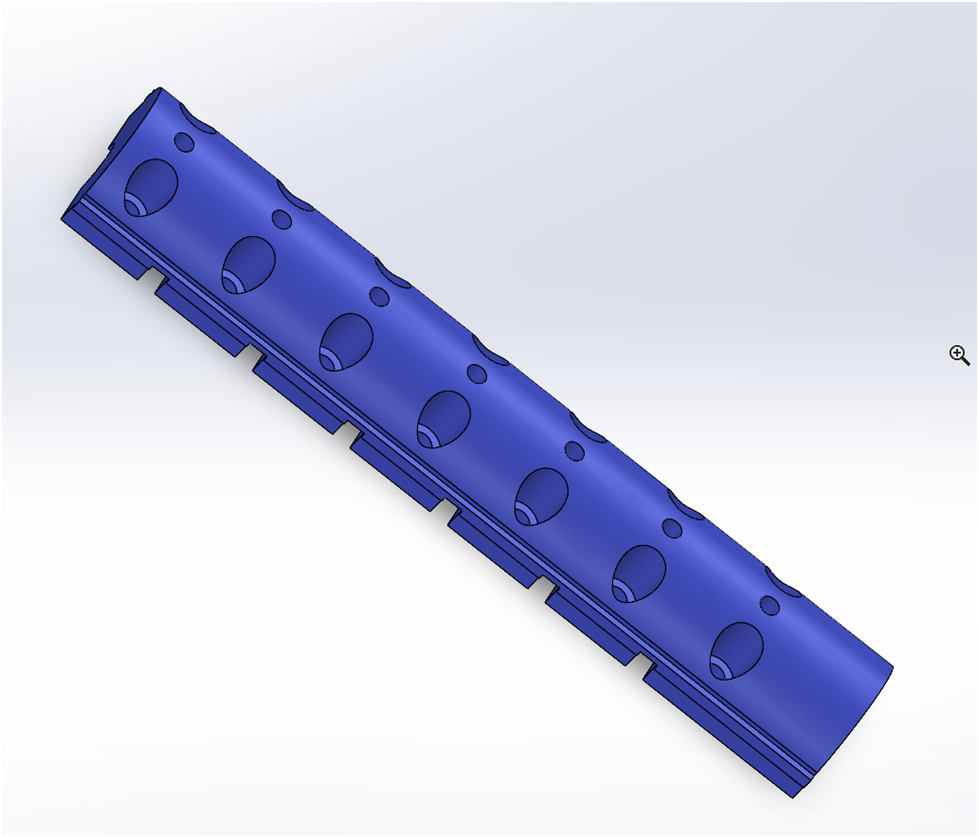
3D model of the bank of camshaft bearing clamps. The ears on the sides will be machined off later, they are vise stops and will be used instead of parallels in the vise. They provide the required space for the milling tools to clear the vise.

image-38.png

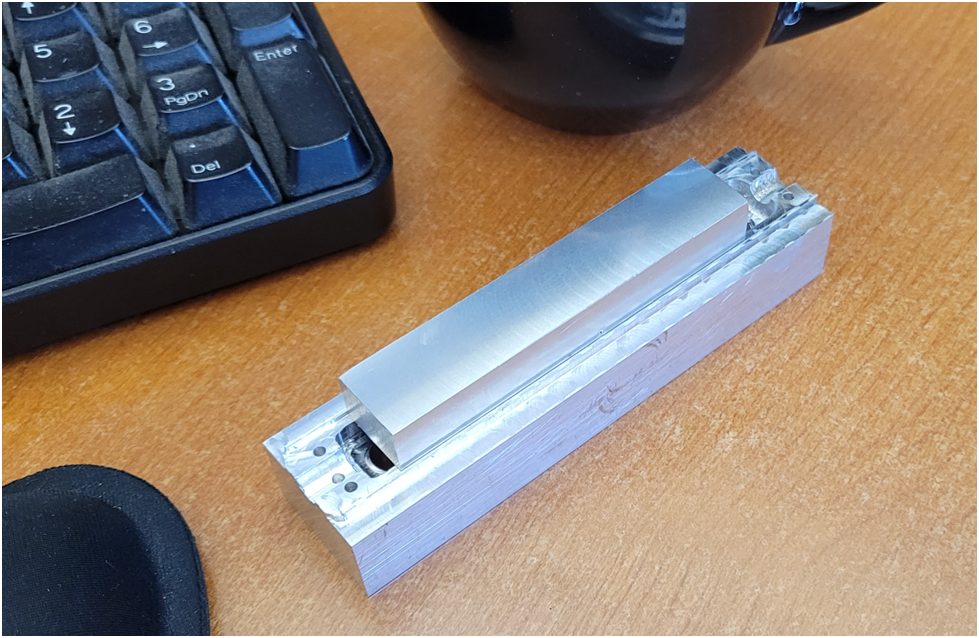
Below the work piece has been finished to size.

image-39.png

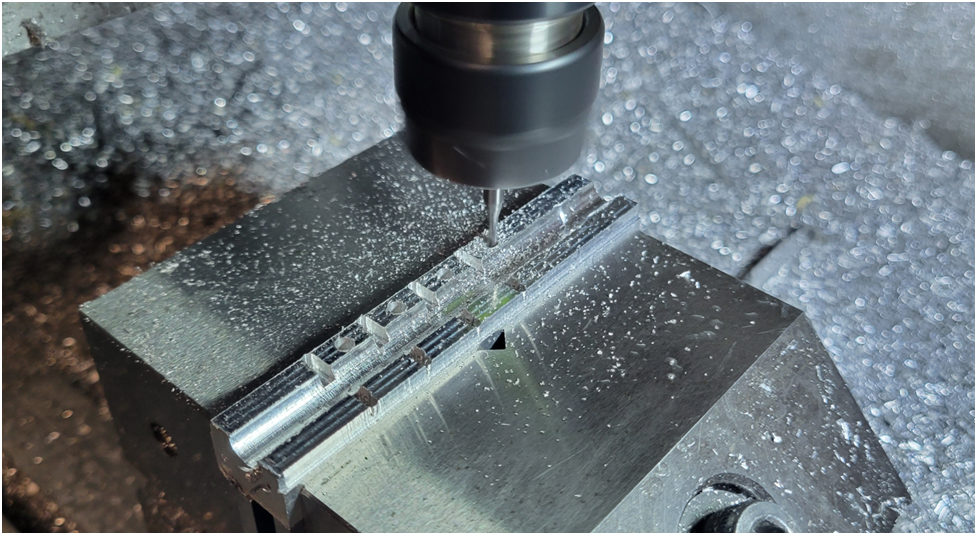
Then the bottom is machined....

image-40.png

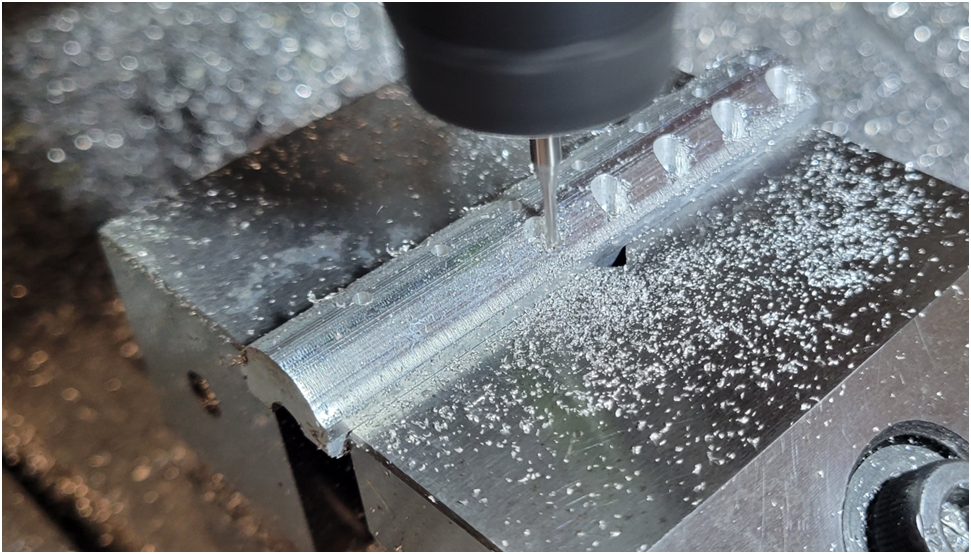
The top is machined....

image-41.png

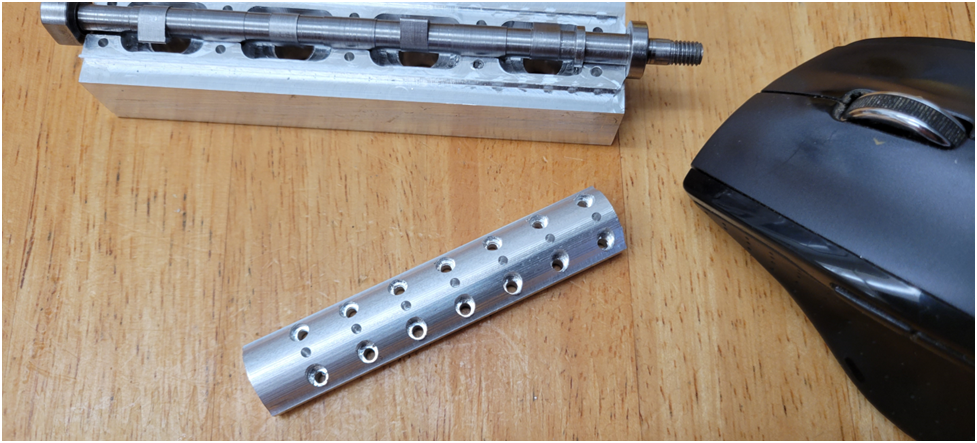
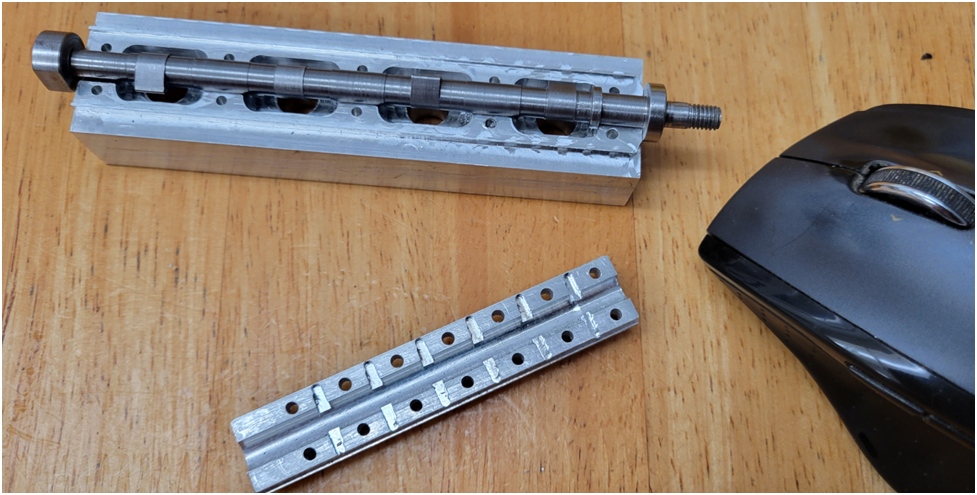
And the finished group of top camshaft bearing caps are shown below:

image-42.png

I am pleased with the registration of the top machining to the bottom machining. This can be seen in how well the top machined countersinks match the screw holes machined from the bottom.

image-43.png

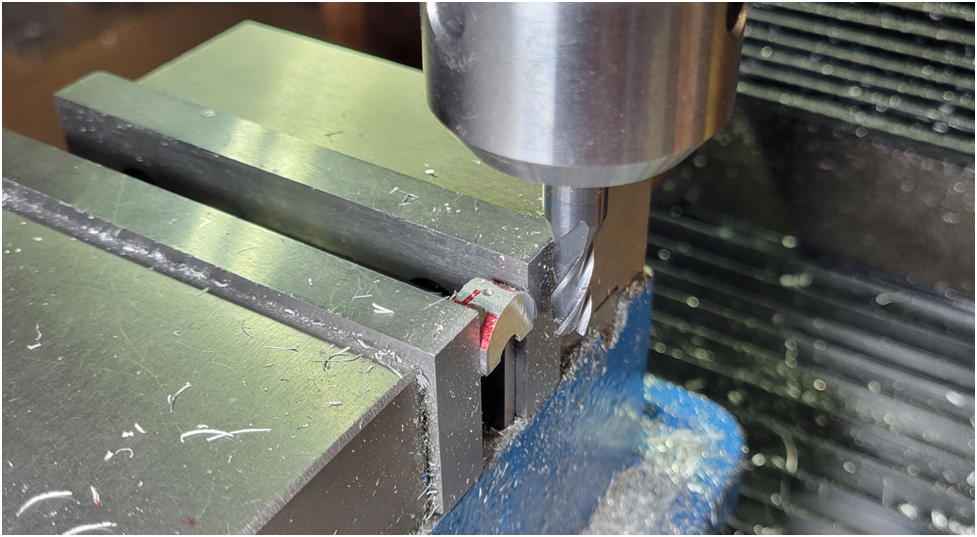
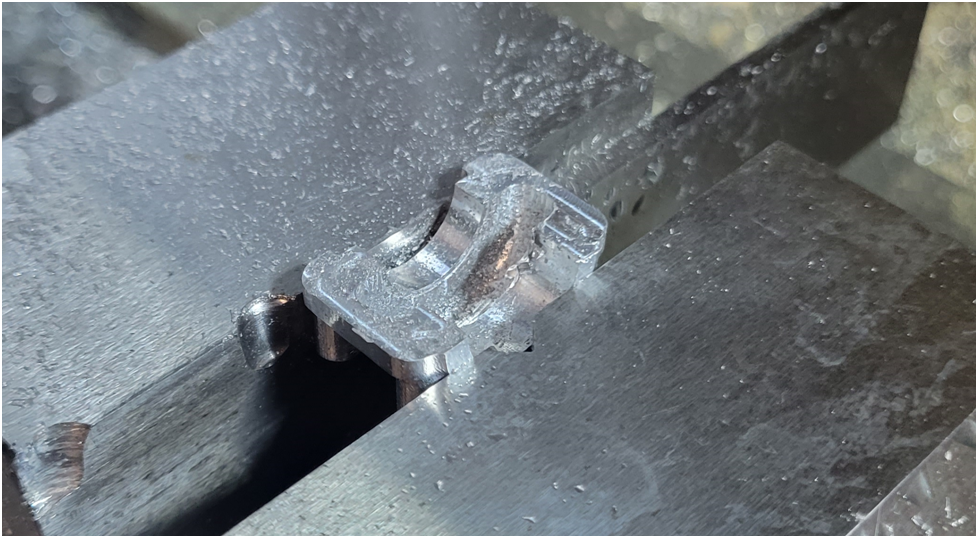
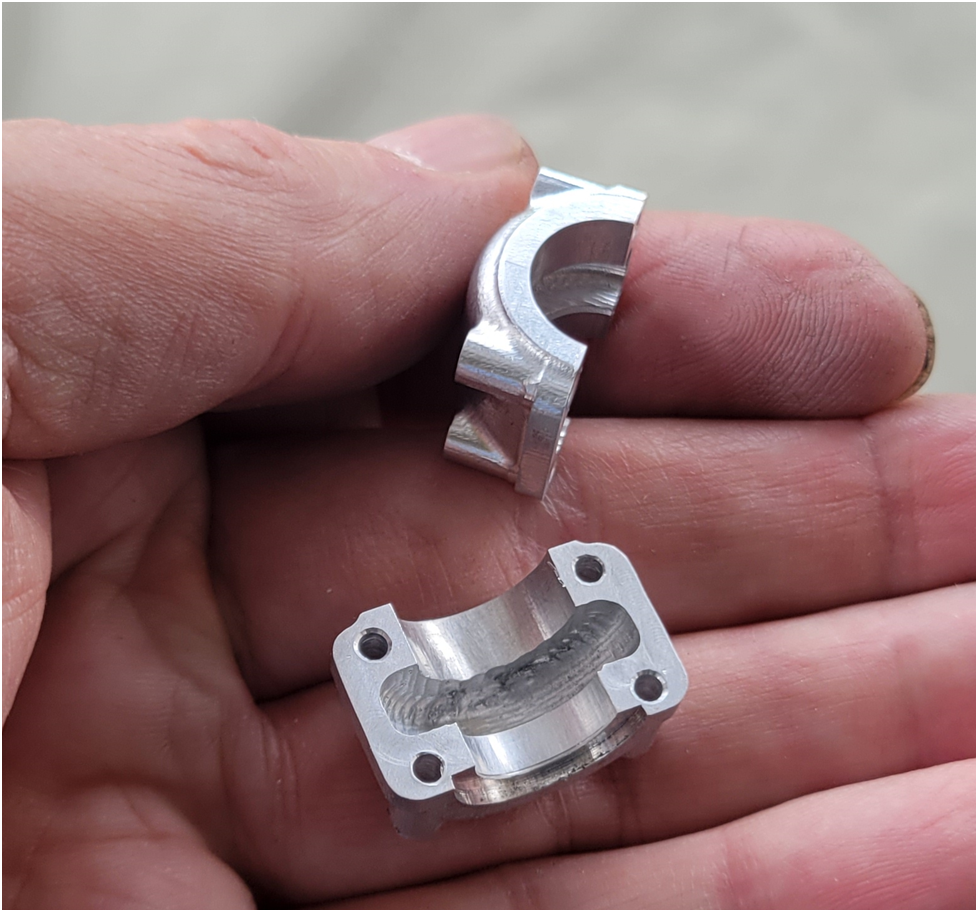
The individual caps are seperated on the band saw and then finished to final length on the mill.

image-44.png

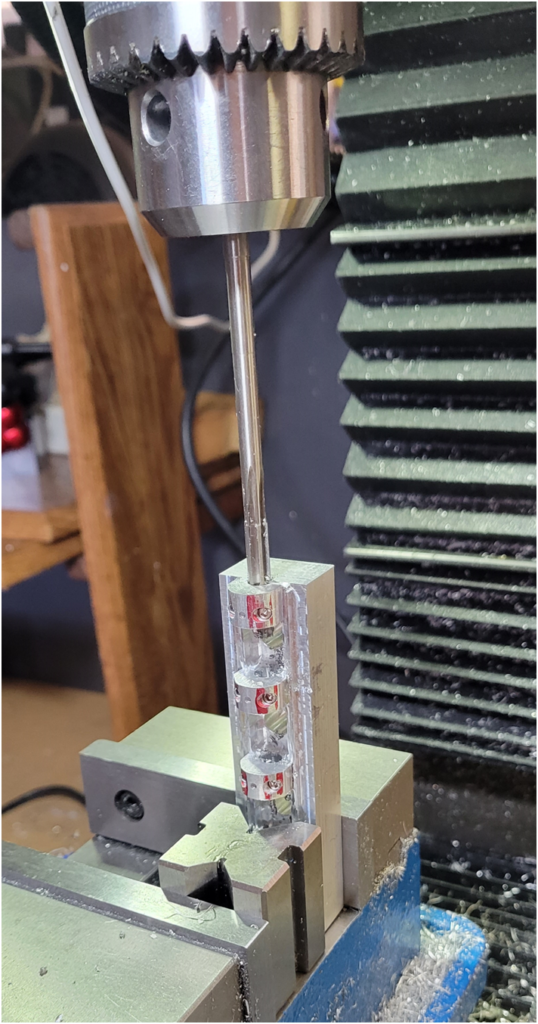
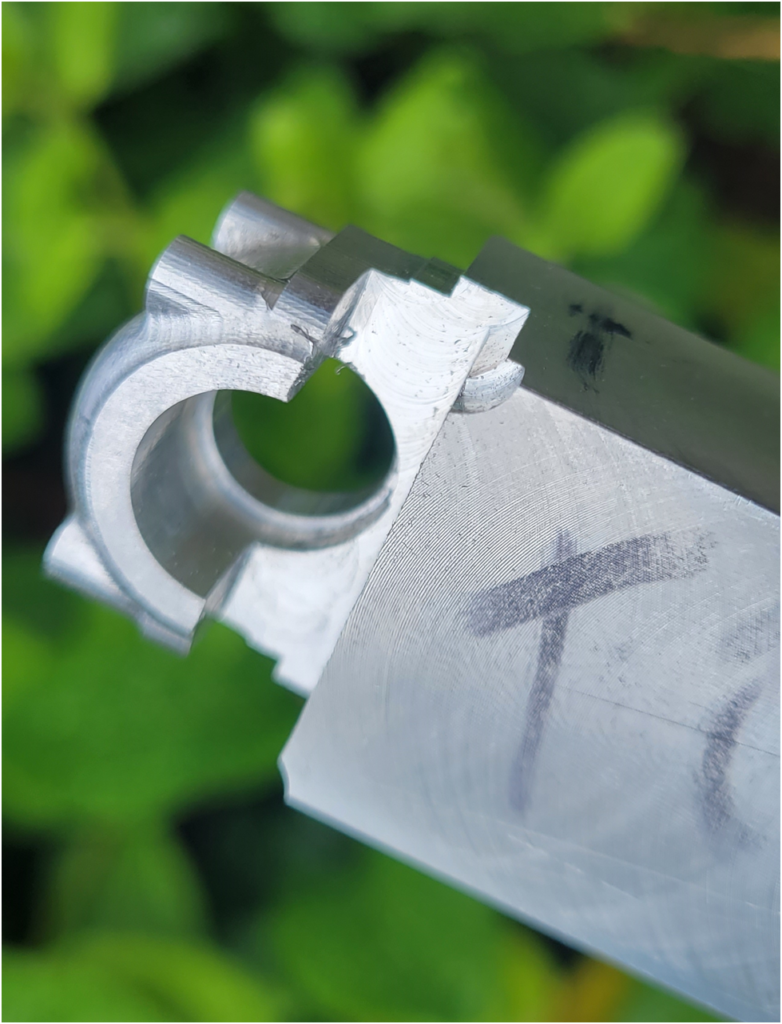
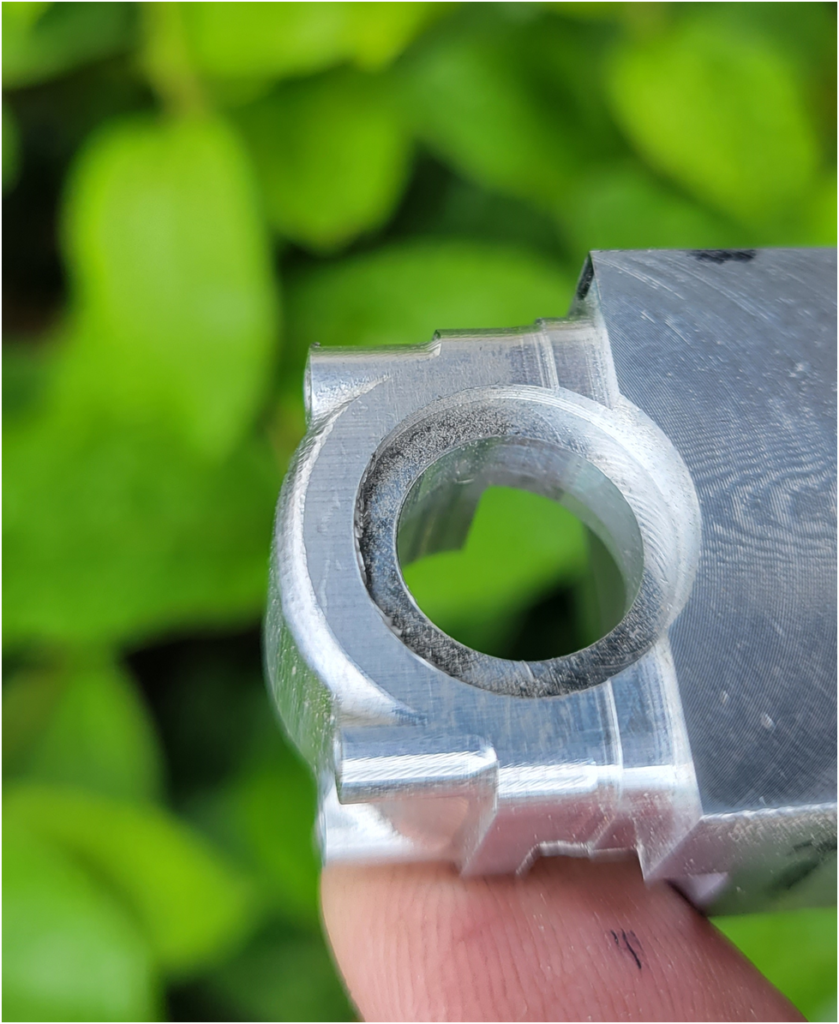
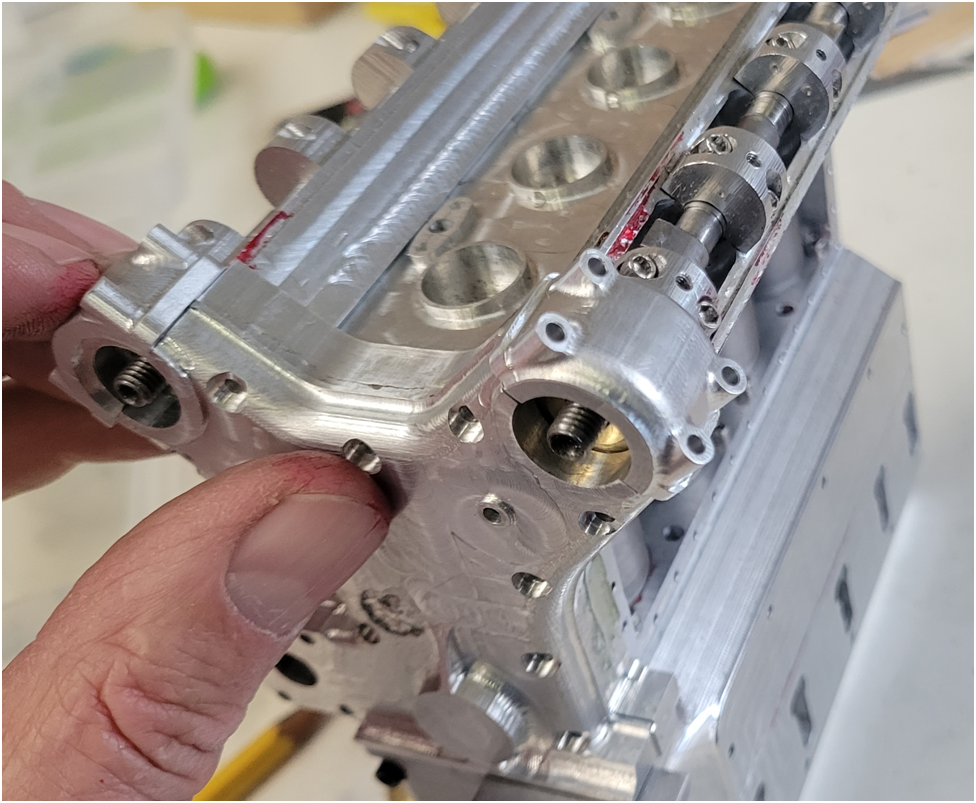
The bearing caps are clamped into place using a properly sized rod to align them, and then the camshaft bearing surfaces are reamed to size. I used a 6mm reamer because my imperial reamer set is in 1/16 increments--a .250" reamer was too big and interfered with the 2-56 hold down screws and I felt the .1875" reamer was too small for the camshaft bearing surface. So I used a .2362" reamer, known by some as a 6mm.

image-45-538x1024.png

Then I move on to the second camshaft....

image-46.png

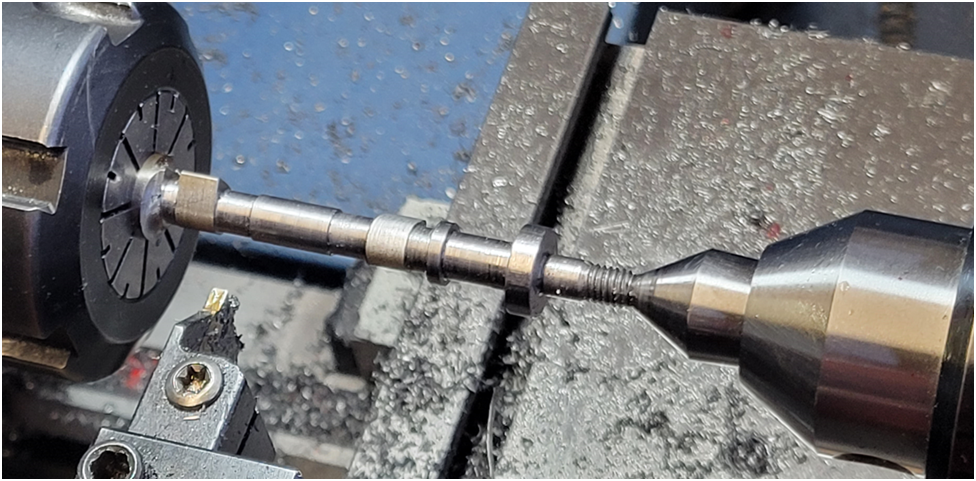
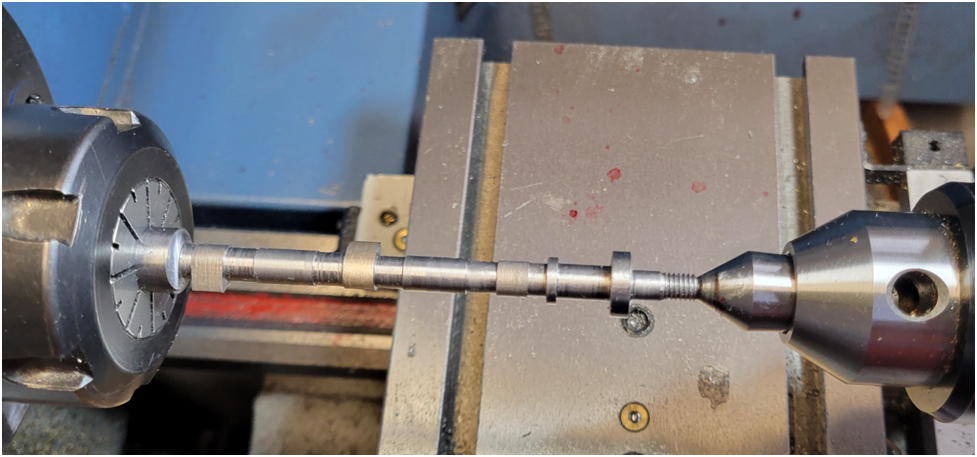
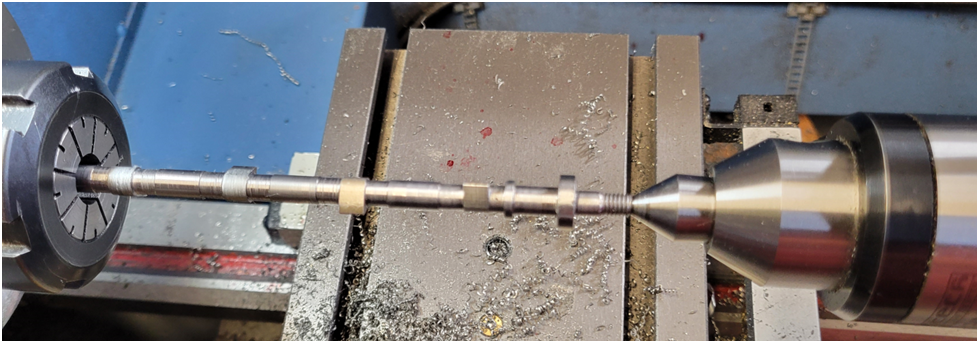
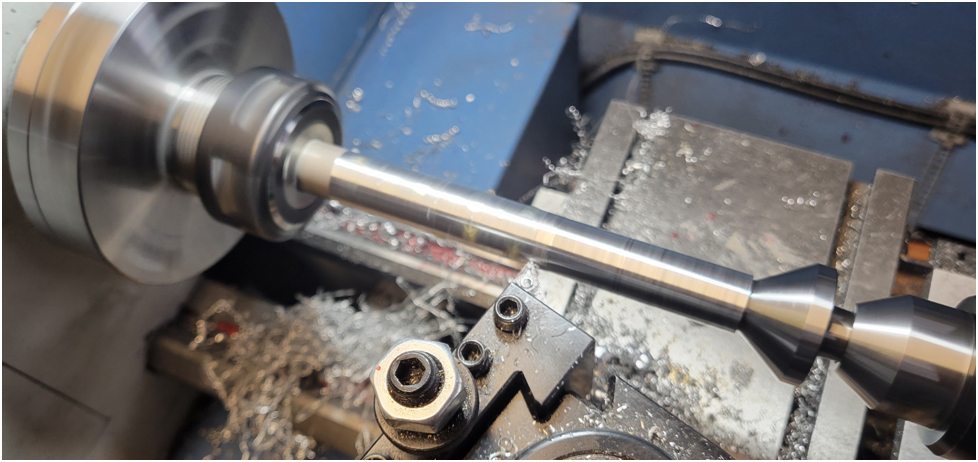
I turn on centers and machine as close to the collet as possible, extending the camshaft out section by section as shown below:

image-47.png

I take small cuts, advancing the cross slide .0025" at the most each cut.

image-48.png

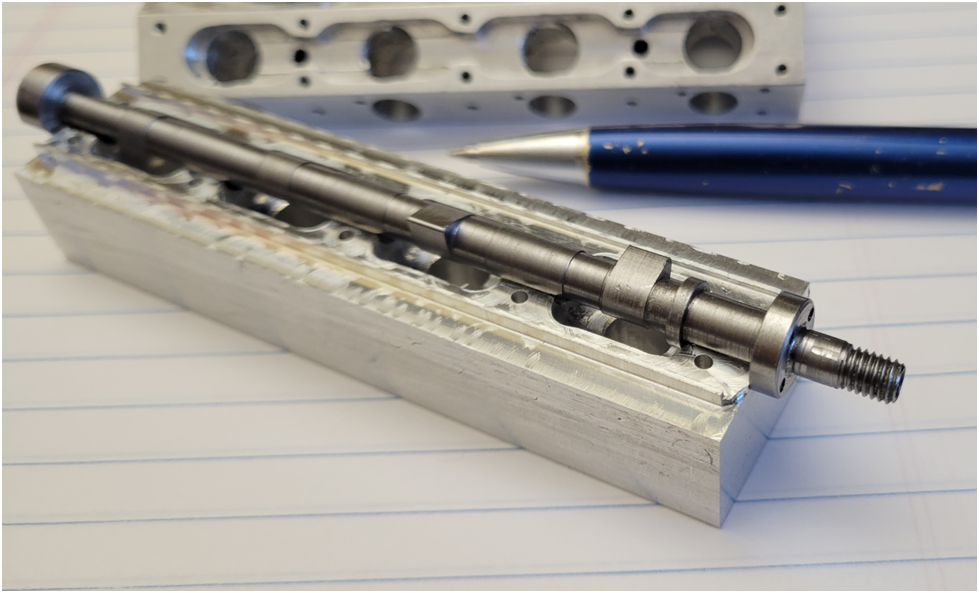
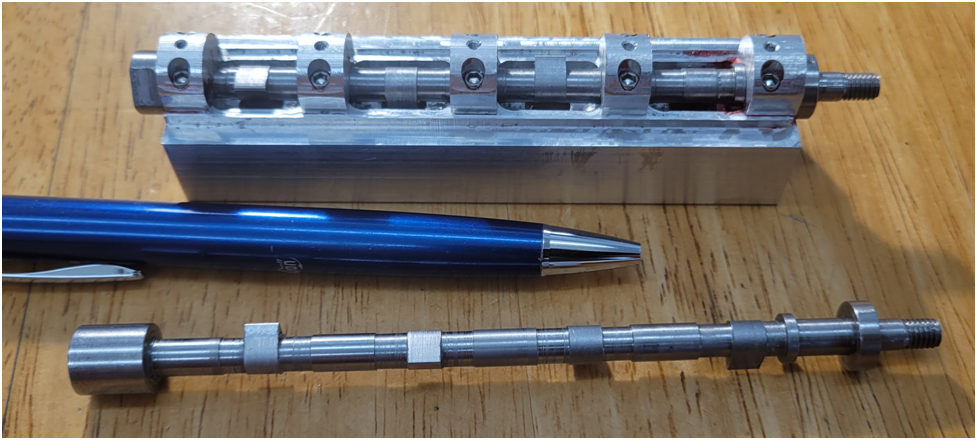
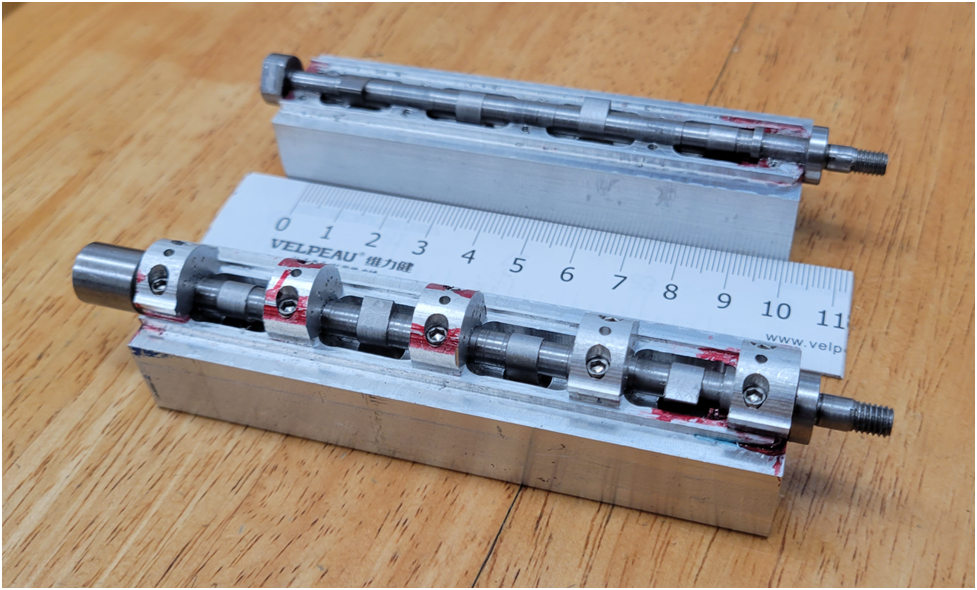
Below the first camshaft is installed in the cam box and the second camshaft is in the same state as the first.

image-49.png

Then the second cambox, below the camshaft bearing surfaces are indicated after reaming.

image-50.png
image-51.png

Second Cambox top machining complete.


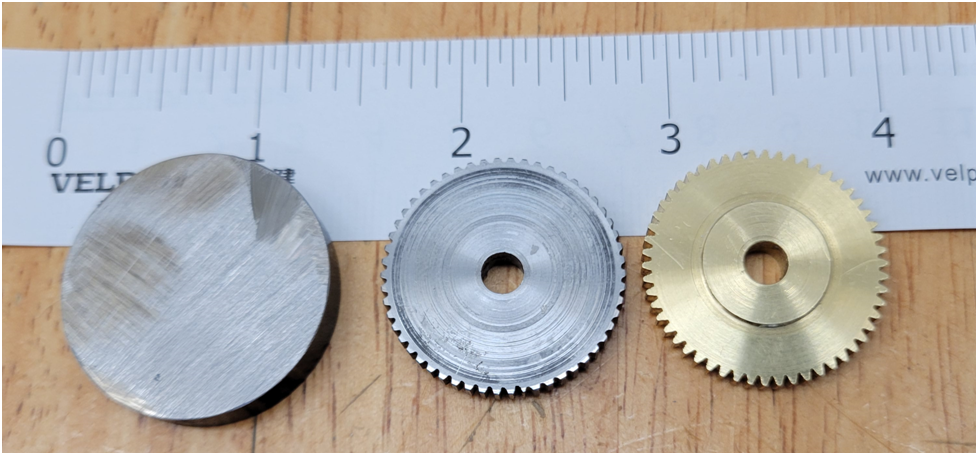
I am now going to turn my attention back to the gears. I have decided to attempt making my gears out of 1144 stressproof steel, but so far I have not had good luck. I ruined my cutter on the first attempt. I am sure I ran the cutter spindle speed too high. I took 4 cuts per tooth working up to .045" depth. If you look at the bottom of the steel gear you can see where the teeth start out OK, but as the cuts work their way around clockwise the cutter wears out.

Below is a 1144 steel gear blank on the left, a failed 1144 steel gear in the middle and a brass gear that meets print. I have bought another gear cutter and I will try slowing the spindle speed way down on the cutter, take small bites and lots of oil. We will see.....

image-52.png
 
Offy – Cambox Covers
Cambox Covers
The cambox covers mount to the top of the camboxes and enclose the camshafts. They are often polished aluminum and are a distinctive feature of the Offenhauser engines.
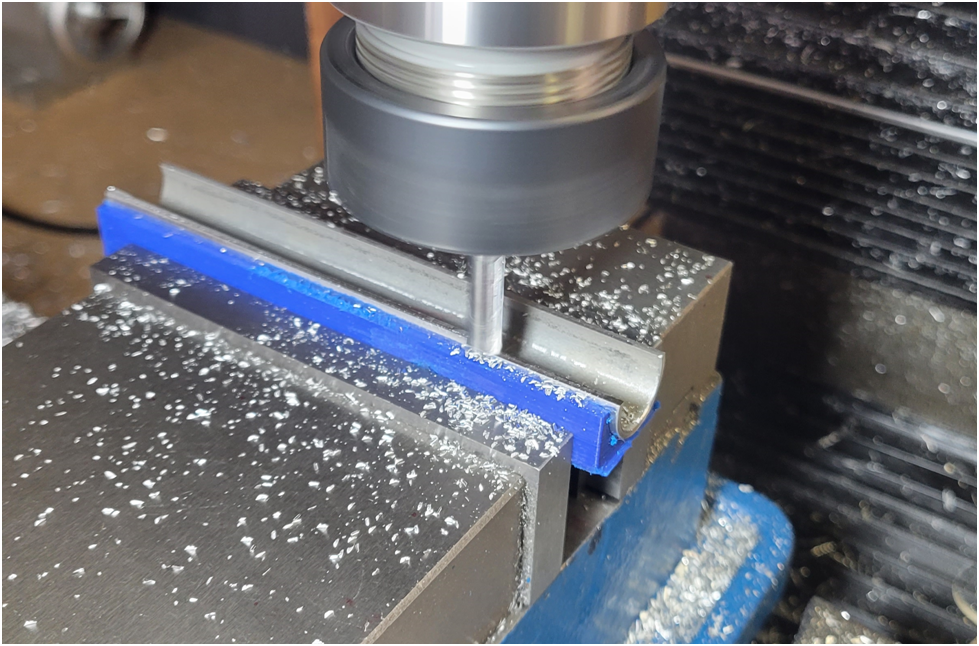
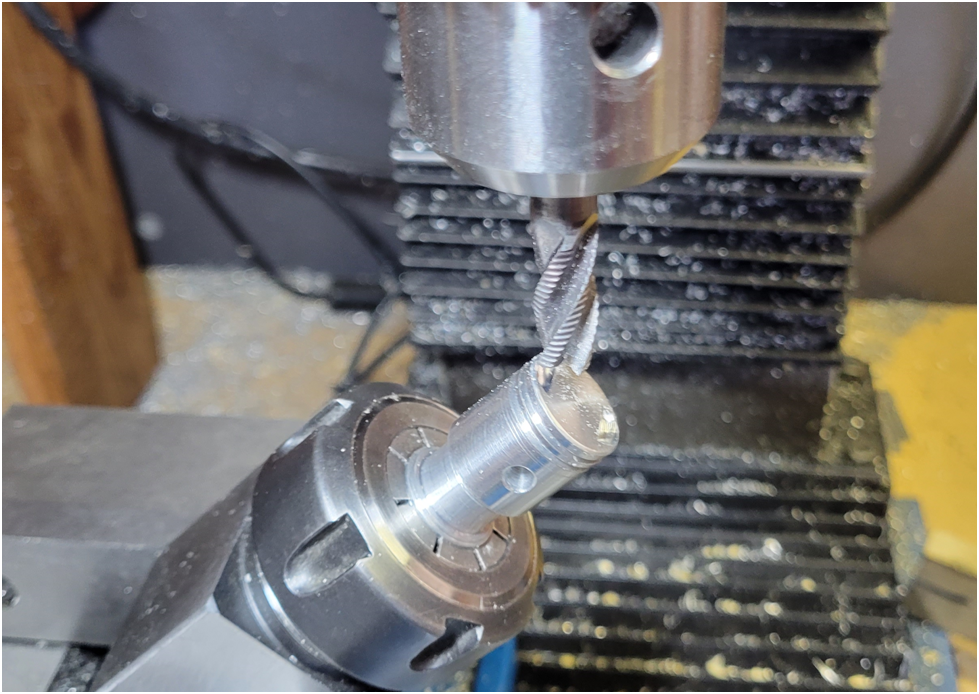
1651526846910.png


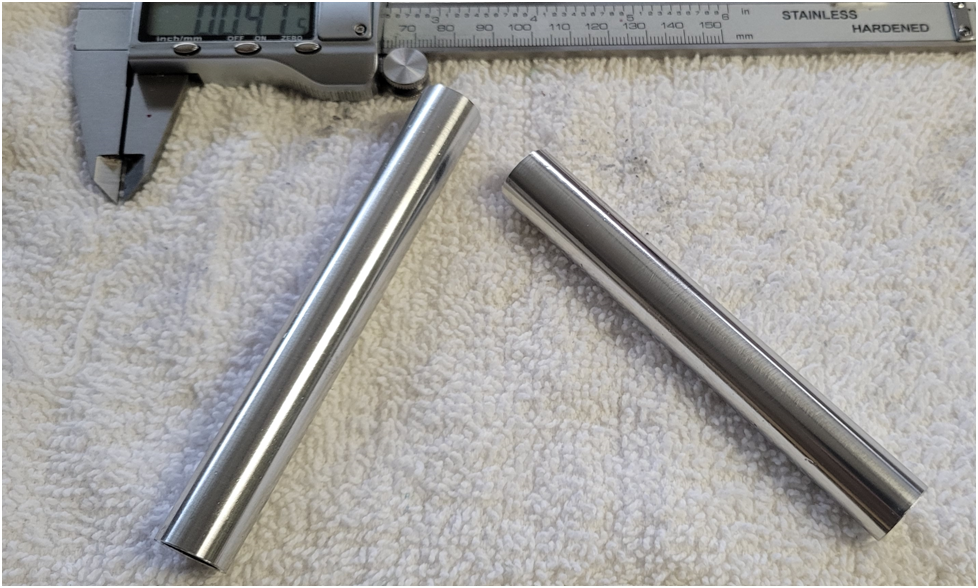
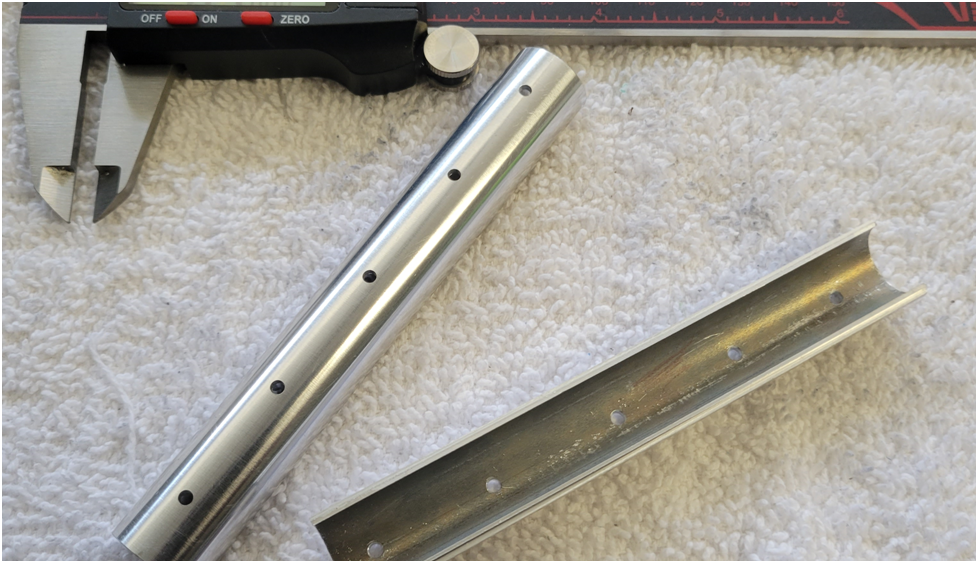
In my scale they are sections of a .67″ tube–a non standard dimension. I thought of several approaches to their fabrication and settled on using .625″ OD tubing (.065″ wall) and stretch it to size using a form tool.
First I turn the outside of the tubing on the lathe and polish it, first with scotch brite, then fine steel wool and finally polishing compound on a rag.
image-2.png


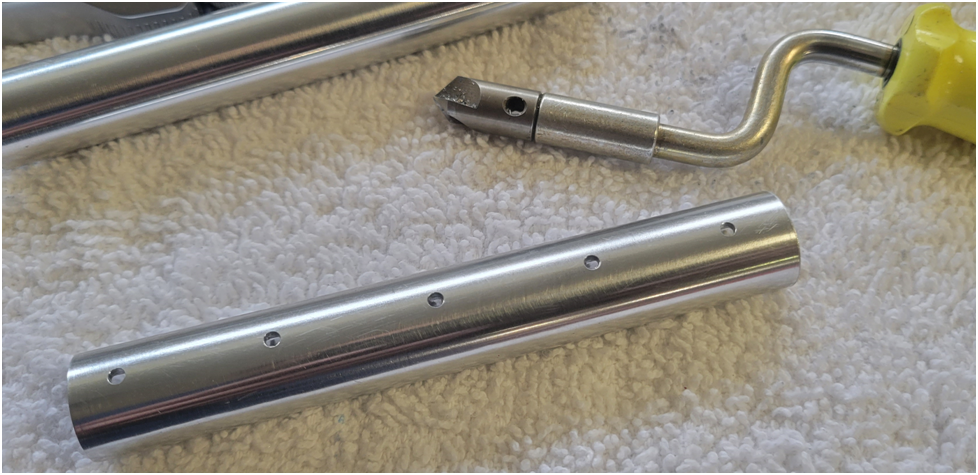
Below are the polished aluminum tubing work pieces. One I turned using a carbide insert and the other a HSS rounded tool. The HSS tool had the better finish.
image-3.png


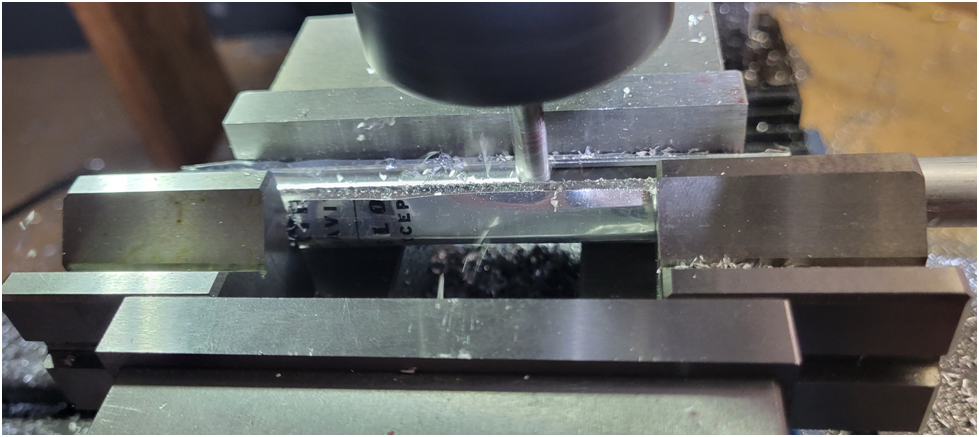
Next I machine a .35″ slot in the tubing, leaving extra material.
image-4.png


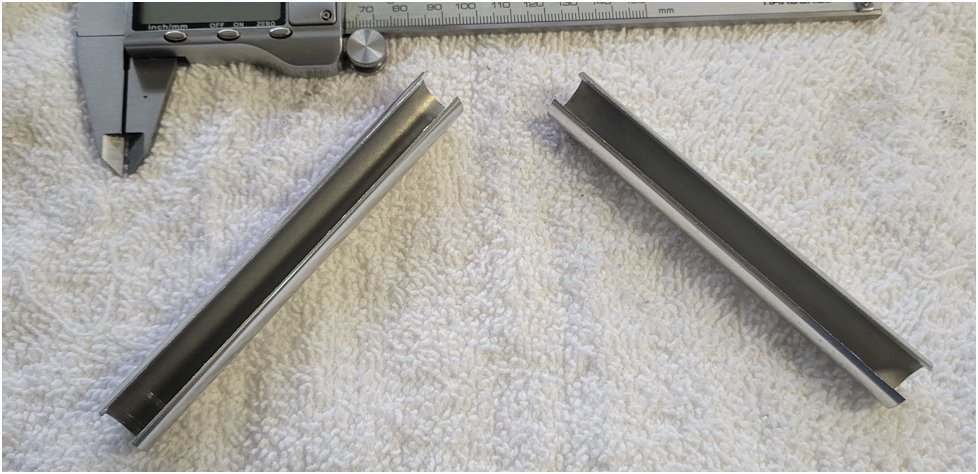
Below are the tube sections with the slot cut.
image-5.png


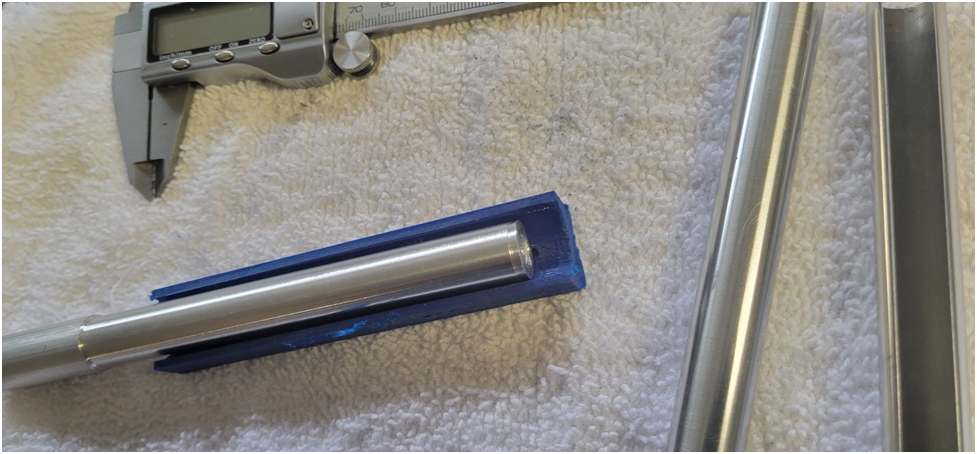
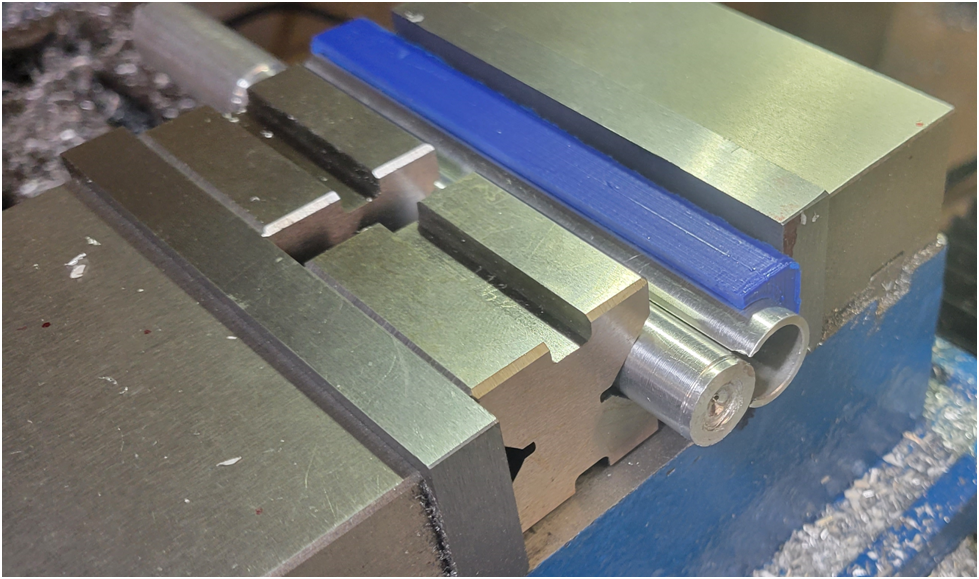
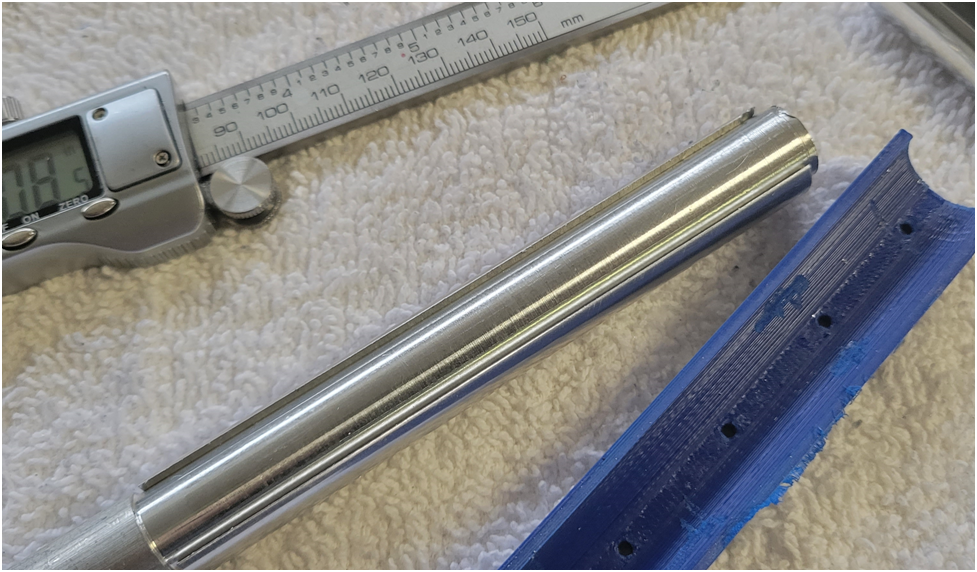
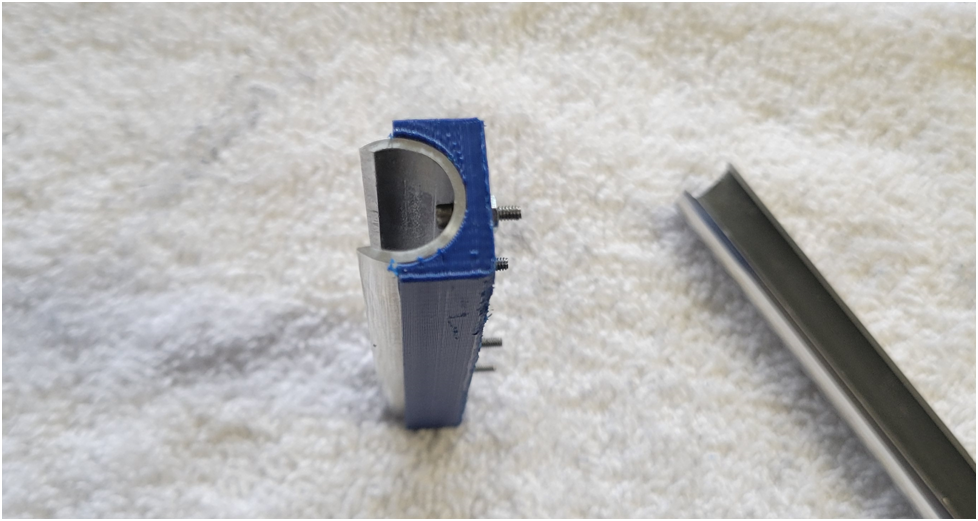
As mentioned above a form tool is used to stretch the tubing to the proper diameter. The female part of the form is 3D printed and the male part of the form is an aluminum rod turned to size. The form tool is shown below.
image-6.png


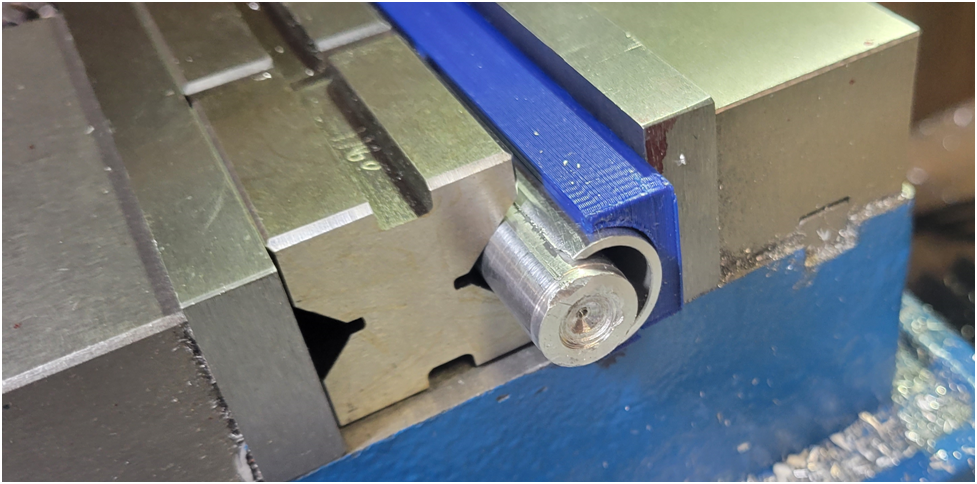
Then, using the mill vise, I press the male form tool into the split tubing.
image-7.png


The tubing section is more than a 1/2 section, so the male form tool pops into place.
image-8.png


Below is the split tubing now sprung to the male form tool.
image-9.png


I press the male form tool free of the tubing section and now have my .67″ diameter tube section.
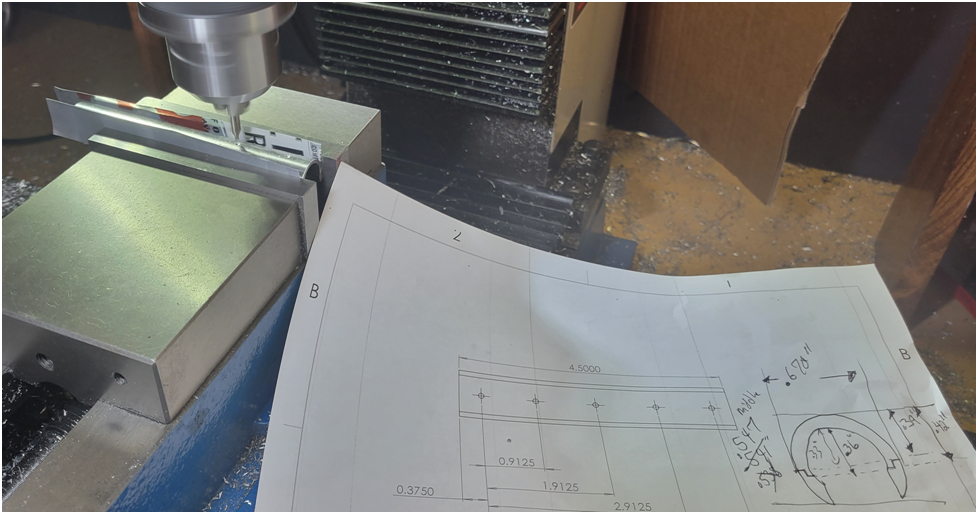
Next I drill the 5 holes that will be used to mount the cambox cover to the cambox.
image-10.png


Below the holes are cleaned up.
image-11.png


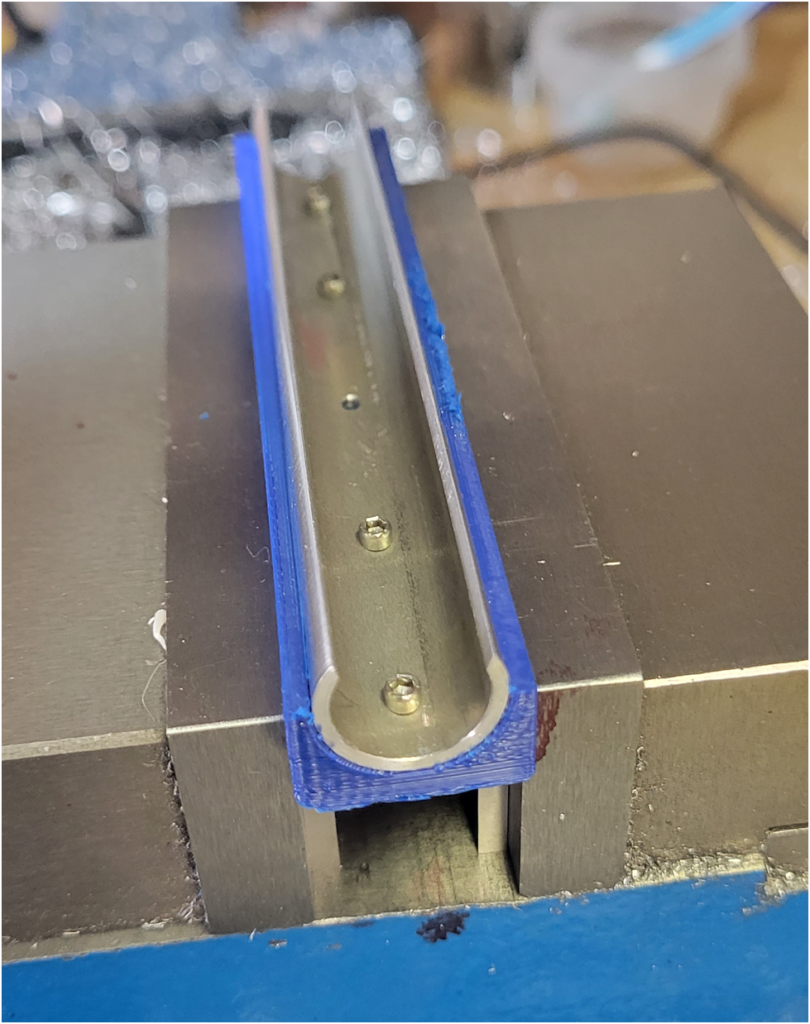
Then the tube sections are screwed to the female form tool which will be used as a holding fixture.
image-12.png


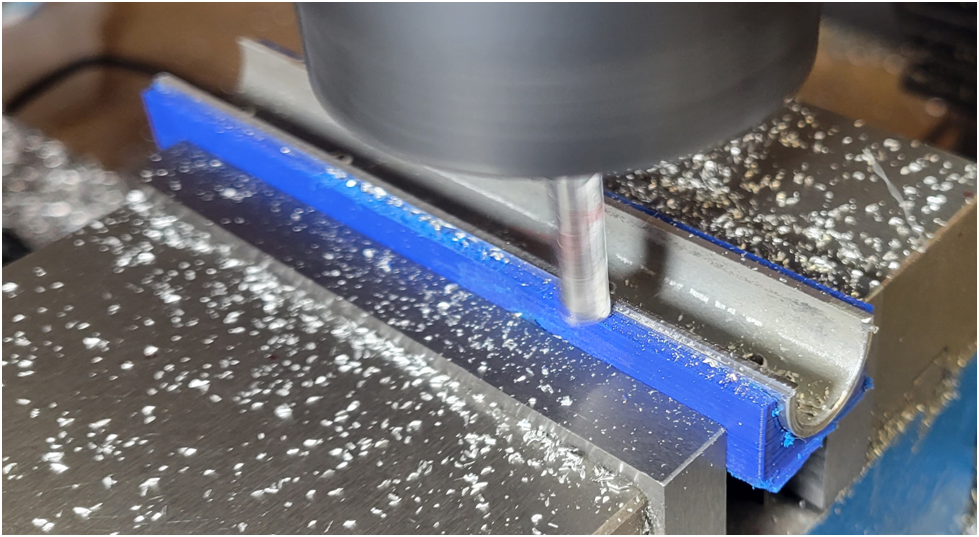
This is clamped in the mill vise on parallels. The fixture will orient the work piece so the holes will be in the top center of the finished cambox cover.
image-13-810x1024.png


The bottom of the cambox cover is machined to set the total height of the cover.
image-14.png


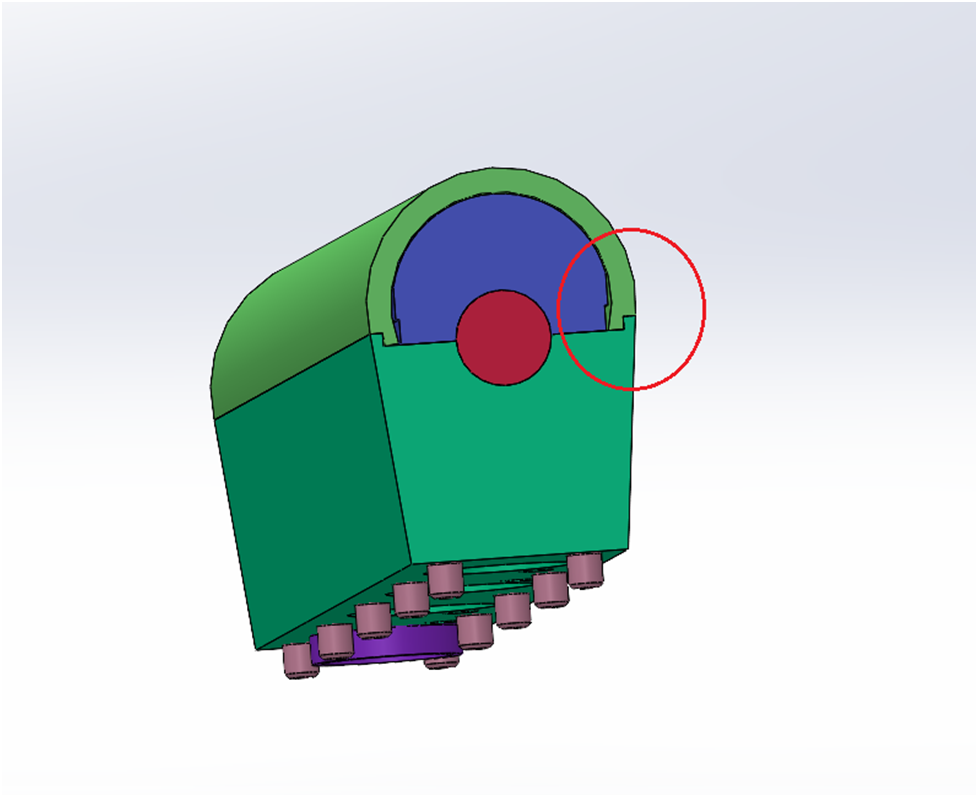
Then a notch is machined into the bottom of the cambox cover so it fits tightly to the cambox.
image-15.png


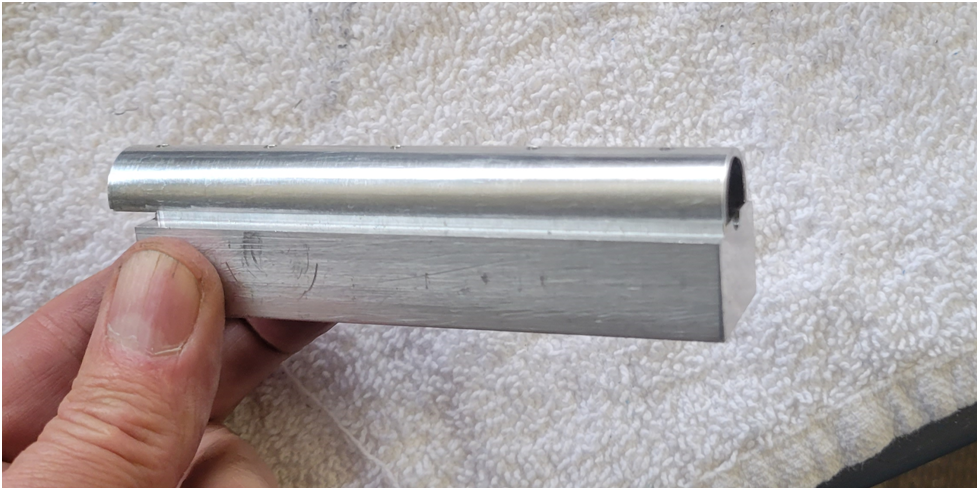
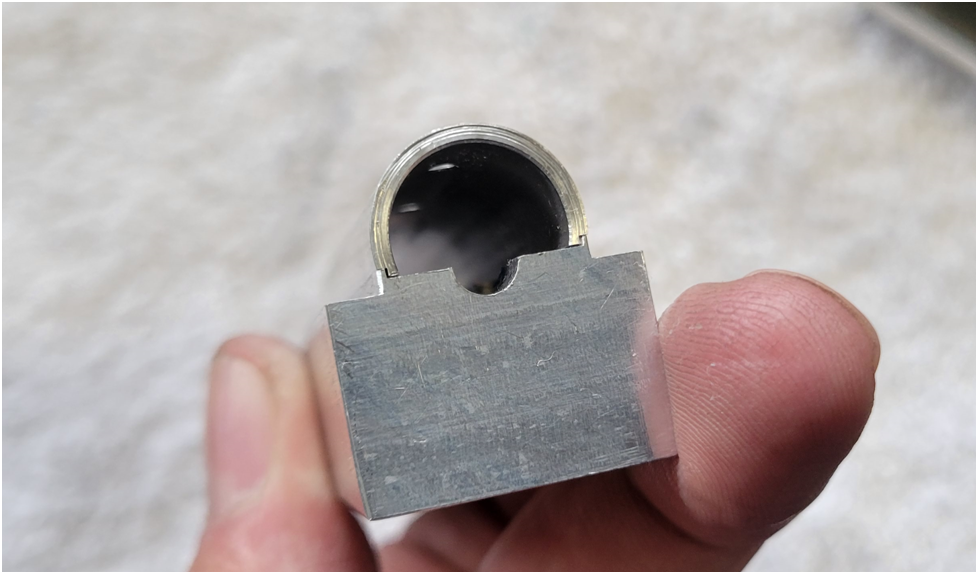
Below is a finished cambox cover snapped in place on top of a cambox.
image-16.png


The 3D model showing the notch feature of the cambox cover:
image-17.png


And a closeup of the finished cambox cover mounted on top of the cambox. Note that only the top machining has been competed on the cambox.
image-18.png


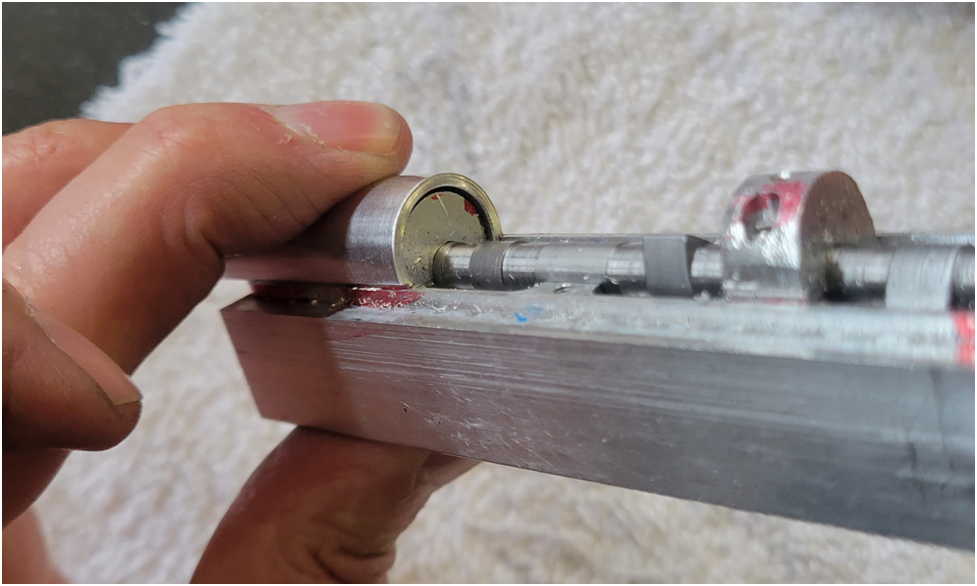
Below the cambox cover is in place and shows the clearance between itself and the camshaft bearings which double as attachment points for the cam cover screws.
image-19.png


And finally the finished cambox covers.
image-20.png
 
Offy - Gaskets Part 1


Gail (@GailInNM) was kind enough to cut gaskets for me on my last engine. This time around I decided to develop the capability myself. It is something I want to be able to do going forward.

My first task was to procure PTFE film in .005", .010" and .020" thicknesses. Fortunately, a plastic supply house is located within reasonable driving distance. Unfortunately, they do not like to deal with the little guy. I wanted a couple of square feet of each. They brought out the quote- 25$ per thickness, $75 total. They wanted to charge me a minimum of 1 pound of each size at $25 a pound. Who ever heard of such a thing, who buys rolls of PTFE film by the pound? Well I found another outfit that sold the film by the foot at pretty reasonable prices, but the shipping was $20. I bit the bullet and spent a total of $55 for the PTFE film I needed and have enough for several engines.

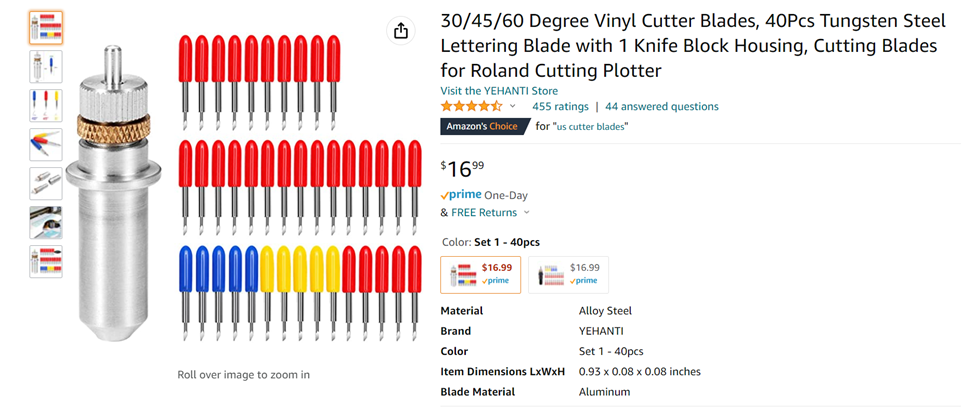
My second task was to obtain a cutter, after some research I settled on this from amazon:

This image has an empty alt attribute; its file name is image-21.png


I decided to use the 3D printer to do the cutting. The reason I decided to go this route was that the 3D printer has an auto bed leveling feature. The cutter needs to be held at a very consistent distance over the material being cut.

I used Fusion 360 to create the tool path. I could not make Fusion 360 create a Gcode file the 3D printer was happy with, the formats were too different and I could not find a post processor to do what I wanted. So I wrote a Python script to convert from "milling" Gcode to "3D printer" Gcode. This of course took some trial and error to get right.
This image has an empty alt attribute; its file name is image-22.png


I then made a bracket for the cutter for my 3D printer.

Well, after about a week of developing and improving the adapter to allow the cutter to be mounted to the 3D printer carriage, and getting good Gcode, I began making test cuts. But like so many other things in our racket, the 3D printer carriage was not rigid enough; all of my circles came out as ovals. A 3D printer print head is not designed to take much side load. Instead of continuing any further I decided to switch to the CNC router.

I made an adapter for the cutter so I could mount it in an ER25 collet in the CNC router. The Gcode from fusion 360 could be used directly on the CNC Router.

This image has an empty alt attribute; its file name is image-23.png


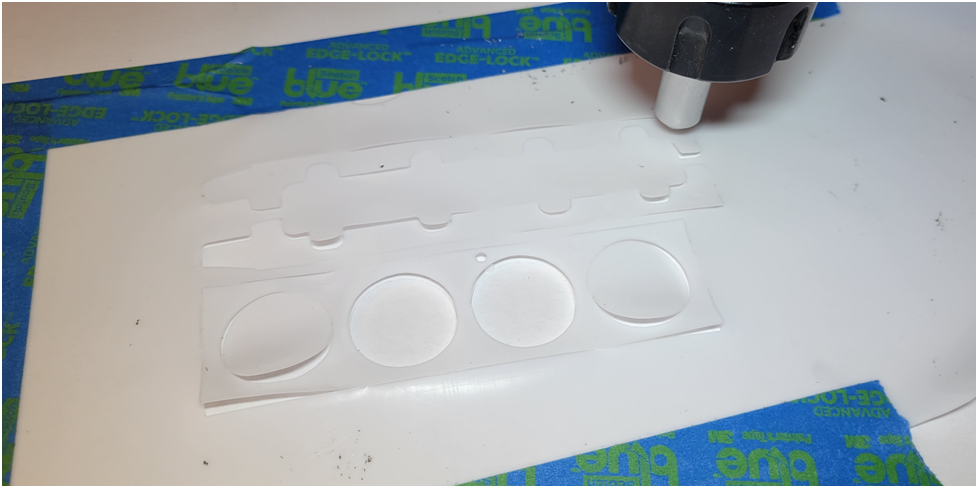
This worked much better. Below is a picture of the results of my first attempt at making gaskets on the CNC router.
This image has an empty alt attribute; its file name is image-24.png


Next time I will cut all of the holes first and the outlines last. Once the outlines are cut, the gaskets can move around a little, and the holes do not come out perfectly round.

Now I need to design the rest of the Gaskets.
 
Fantastic Gasket.
Some questions please. Does Fusion calculate drag
cutting offset to the cutter? Does the blade stay in contact with the material
between locations of separate cuts? How did you hold the ptfe to the
cutting surface . Did you make your own rotating bearing cutter holder?
If so how much offset did you use?
This interests me, and all details would be appreciated.
Thanks and sorry for all the questions.
 
Gaskets - Part 2

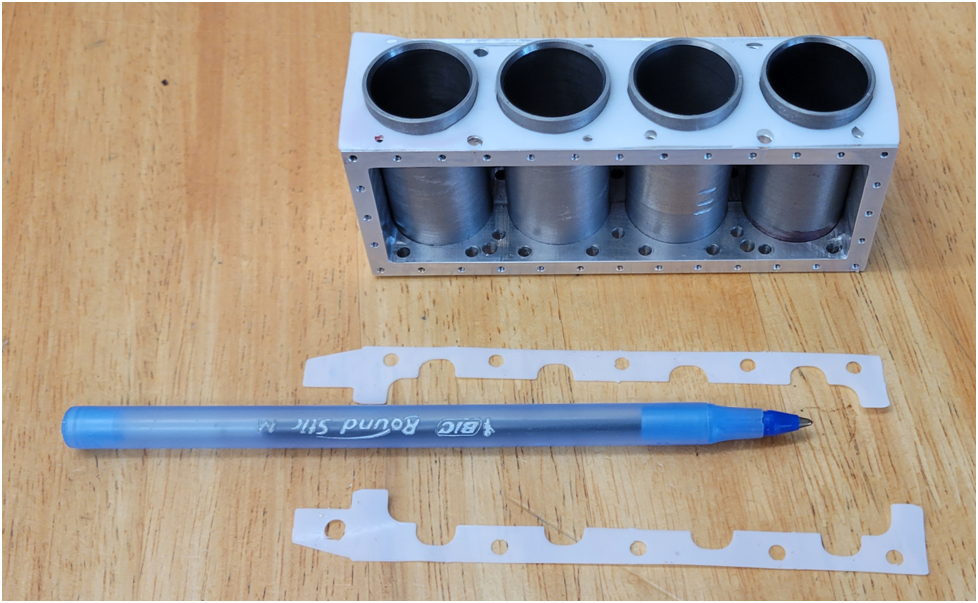
Below is a complete set of Gaskets for the Offy.

1652298229778.png


To get a hard flat surface I started with a block of wood clamped in the vise. A wood router bit was used to level the surface of the block.

1652298243823.png


A slab of Corian was screwed to the wooden block to provide a hard flat work surface.

1652298253668.png


I simply taped a piece of cardboard to the Corian to give me a backup cutting surface, and then taped the PTFE (teflon) sheet to it.
1652298263288.png

As mentioned in the last post I purchased a vinyl cutter from Amazon. It is a pretty neat little deal, the height of the cutter can be adjusted and locked into place. A magnet pulls the cutter in and holds it. I turned a simple adapter ring so I could mount the whole thing in an ER25 Collet

1652298274666.png


Below is the cutter assembled:

1652298285578.png


And mounted in the 1/2" collet:

1652298292417.png


The spindle is off during the cutting operation and the little cutter can rotate in its housing to act as a "drag knife". No special code is required, simply trace the outline of the gasket with the cutter.

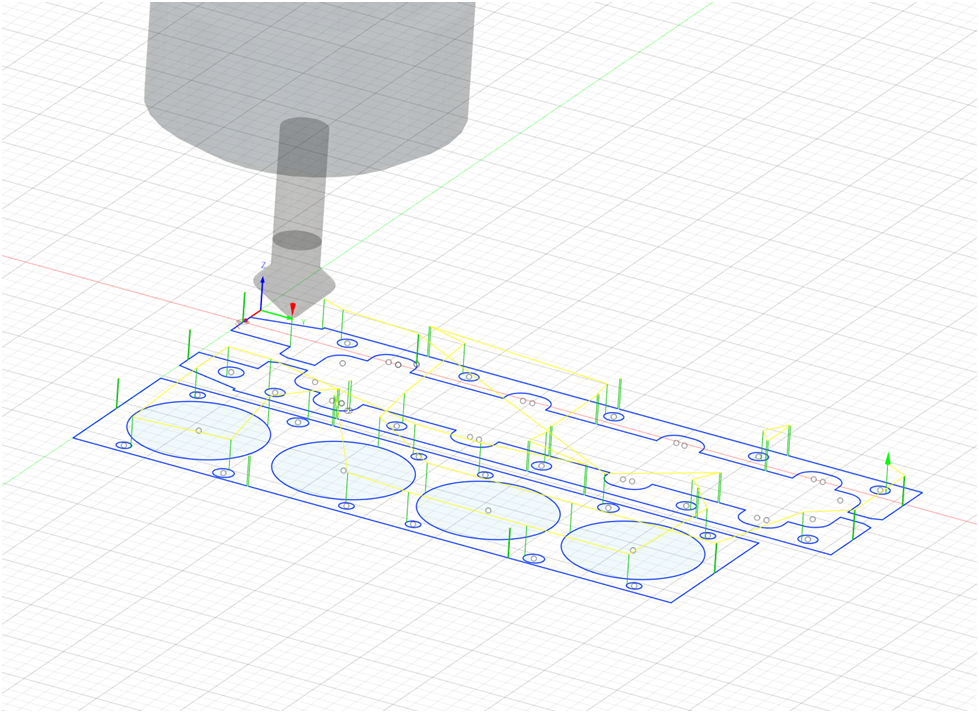
Creating the Gode was done in Fusion 360 using a DXF file of the desired outline, then a trace operation was used.
1652298303975.png


I organized the file so the small holes where cut first, then the large holes and finally the outline. I placed small .010" gaps in the outline of the gasket so it remains intact during the cut. Above you can see the green lines where the cutter is lifted and the yellow lines that represent rapid moves to the next cutting location. The cut lines are blue.

@propclock , To answer your specific questions:
Does Fusion calculate drag cutting offset to the cutter? - this is not required as the little cutter is so small and acts like a drag knife.

Does the blade stay in contact with the material between locations of separate cuts? - The cutter is only in contact with the material when it is cutting, it is lifted to move to the next cut. See cut profile above

How did you hold the ptfe to the cutting surface . - Painter's tape

Did you make your own rotating bearing cutter holder? - No, just the adapter to the ER25 collet.

If so how much offset did you use? - Again, no offset is required.

I hope this helps.
 
Nice work on the gaskets. I do something similar on my Tormach. For a work table I used a piece of two inch thick formica covered table top. A heavy metal bracket bolted to its bottom allows me to mount the table in my vise and most the top is surprisingly normal to the spindle axis. For a compliant cutting surface I purchased a cutting mat from a sewing notions store and taped it down to the top surface. The whole thing works great, but over time a few crashes have limited the areas I can still work on. - Terry
 
Thank you very much for the details . I ordered the cutters,& holder yesterday and they arrived today.!
I spent a lot of time looking at cambam drag cutting but I guess I don't need any Yea!
Time to play. Again thanks for the details.
 
Offy – Camshaft Gear Caps
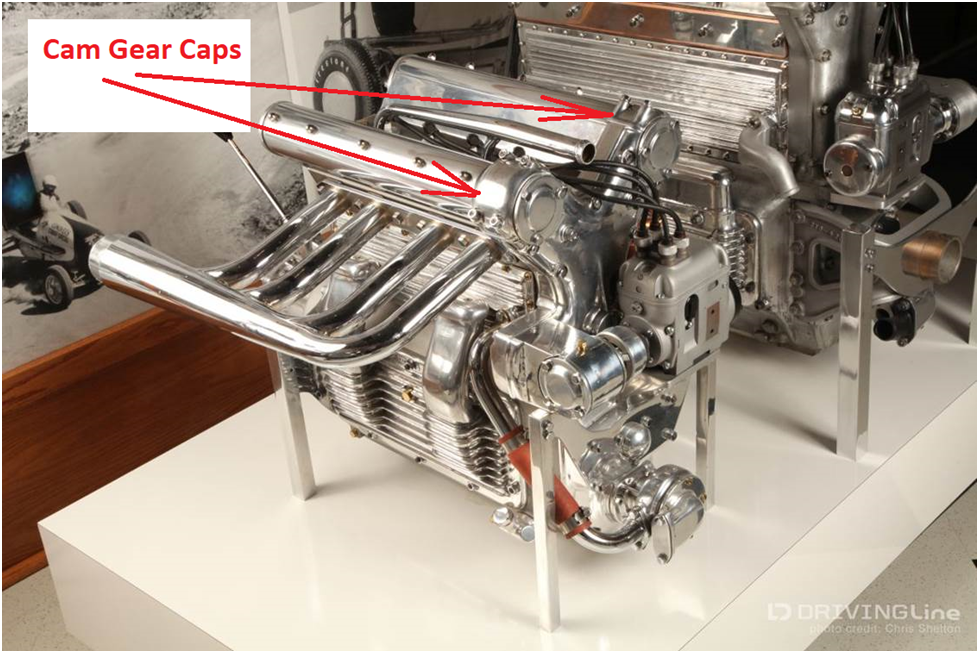
The Caps that cover the Camshaft Gears are small parts, but pretty complicated to fabricate because of all the small features on all sides. It is challenging to maintain registration of the features on the four sides needing machining.

The caps are shown on an engine below:
image-25.png


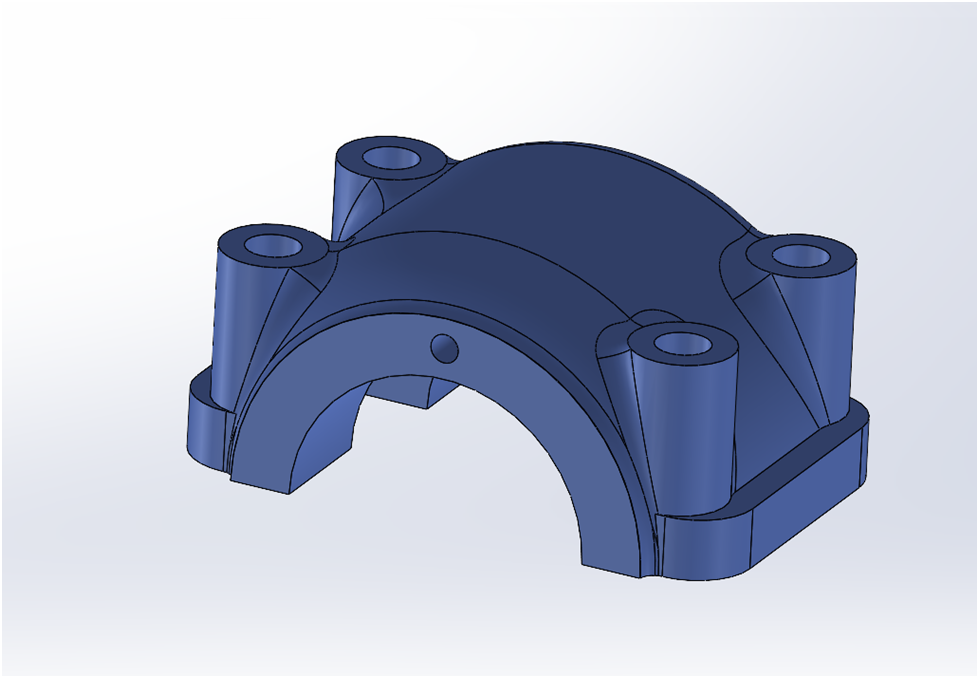
The 3D model:
image-26.png


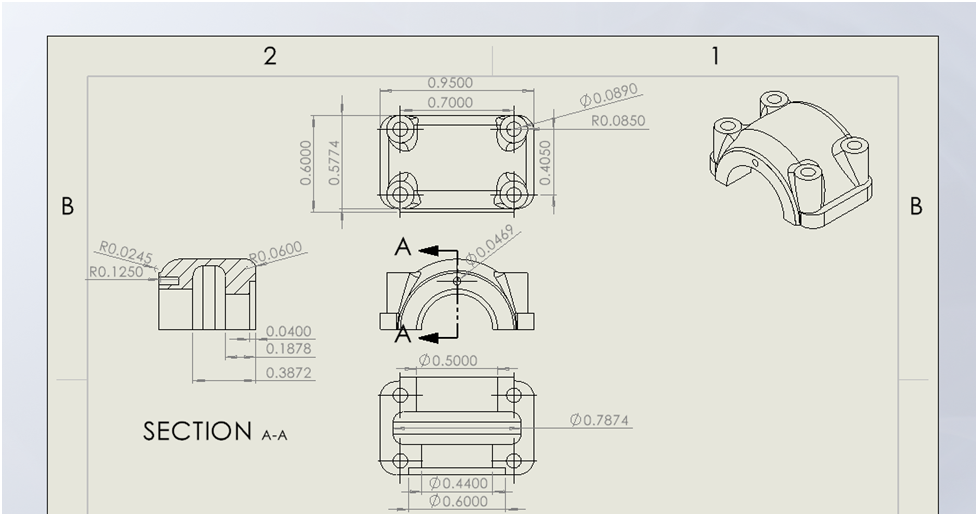
The dimensioned print:
image-27.png


Fusion 360 was used to create the tool paths for the CNC router. There is a roughing pass with a 1/4″ flat end mill, and a finishing pass with a 1/8″ ball end mill. The four holes are spot drilled with a 1/16″ mill, with a follow up on the manual mill to drill them to size.
image-28.png


Below is the roughing pass:
image-29.png


Then the finishing pass from the top.
image-30.png


The finished machining of the top of the cap.
image-31.png


The manual mill is used to drill a 1/4″ pilot hole before machining the sides.
image-32.png


The top and sides of the cap stand offs were used to touch off the CNC router before machining the front side.
image-33.png


Below is the result of the front side machining. .010″ material was left on the bottom to be machined off when the bottom is machined.
image-34-782x1024.png


then the back side machining is done:
image-35-839x1024.png


And finally the bottom machining is performed, first with a 5/32″ flat end mill, then a 1/8″ ball end mill. Sinde the bottom of the part was machined off and the Z-axos zero was lost, the two end mills used the top of the vise to zero the Z-axis.
image-36.png


finish machining of the cap bottom:
image-37.png


The caps ready for bead blasting:
image-38.png


And a cursory test fit on the engine:
image-39.png


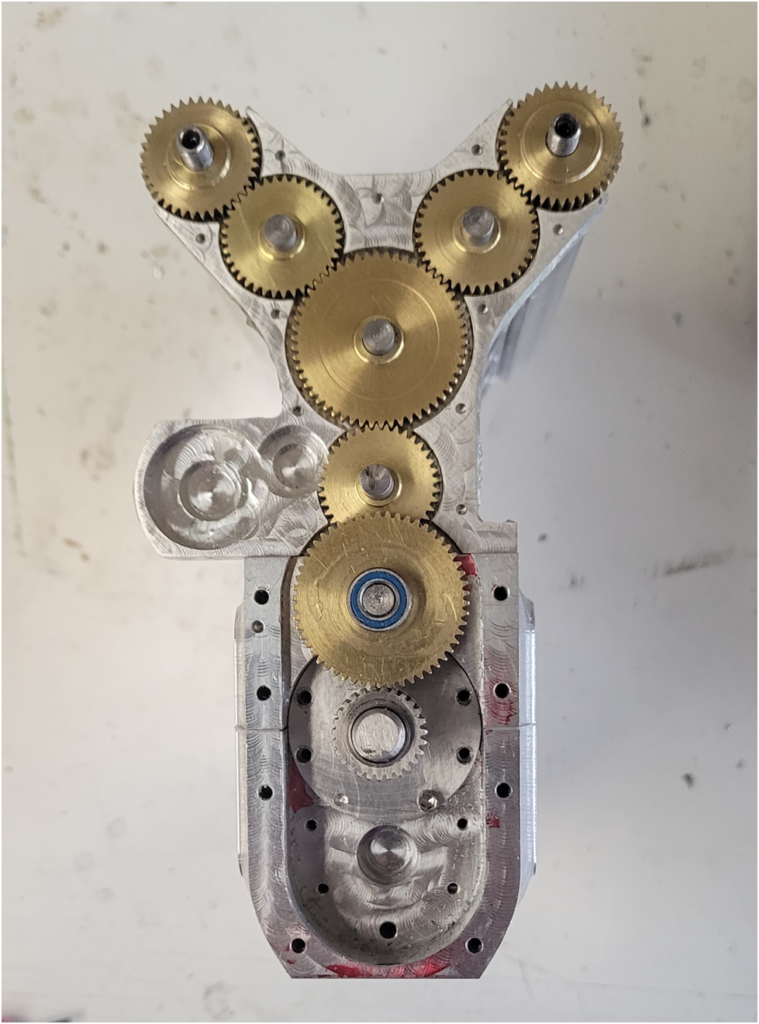
Below is a fun picture of the gears installed in the gear tower. I have made two attempts to cut steel gears, but they both failed. I am not giving up on cutting a full set of steel gears, gotta try again.
image-40-759x1024.png
 
Terry,

Thanks, that is a lot of help. My spindle speed is too fast and my first attempt was WAY too fast. I will give your speeds and feeds a try. The cutter has a lot of cutting edges per revolution so 250 RPM for a gear cutter is not the same as say a 3 flute end mill. I have been using the CNC router to cut the gears, but the spindle will only go down to 600 RPM (10Hz * 60 seconds/minute). I will set up on the manual mill where I can slow the spindle down, but will have to feed manually.
 
My numbers are probably way conservative, but for CNC I can walk away and mow the lawn while the gear is being cut. If you do it manually you might want to be more aggressive on the depth of cut so you don't fall asleep at the wheel. It sounds like you were just running too much rpm for a 1-3/4" diameter HSS cutter in steel. Stressproof really does machine nicely. For a large number of identical gears I also cut a single thick blank and part off the individual gears later since I only have one yard to mow. - Terry
 
Offy – Ring Stress Relief Fixture

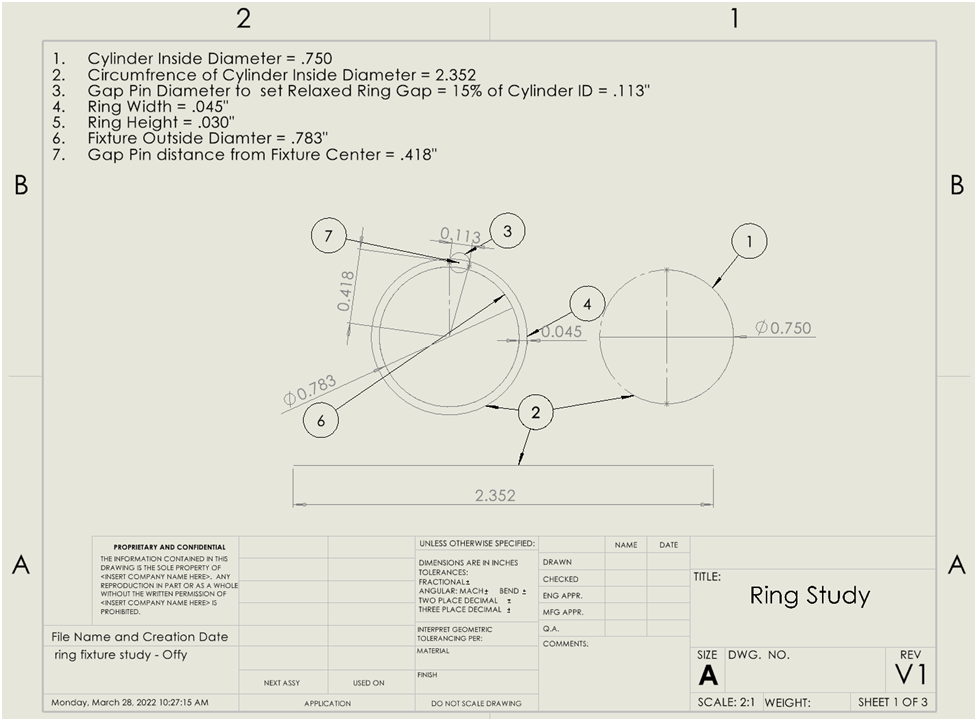
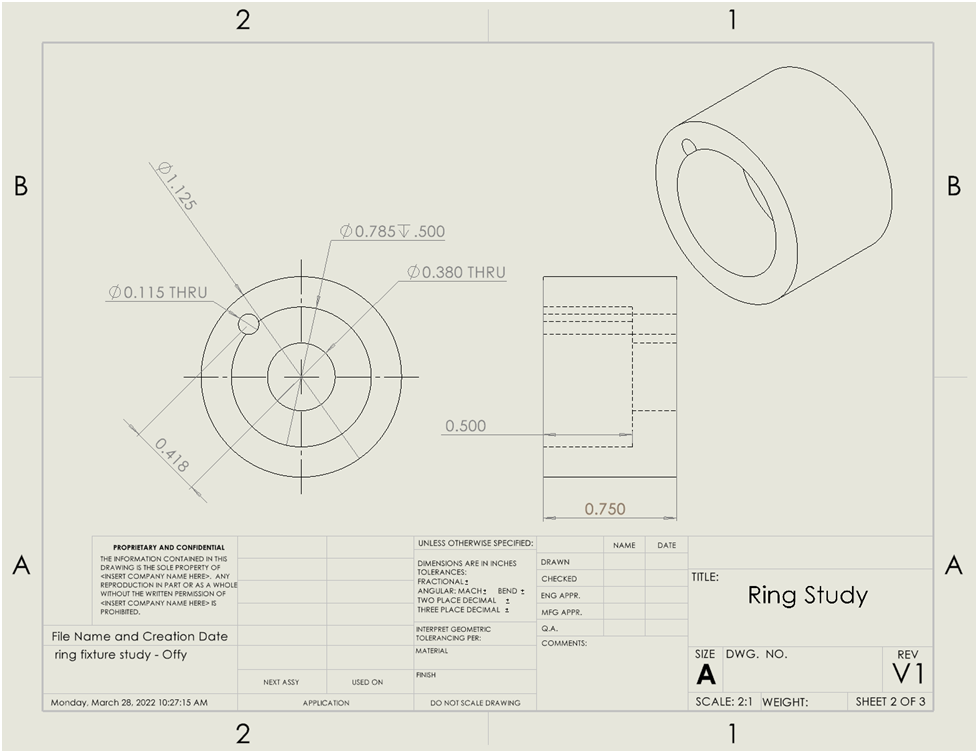
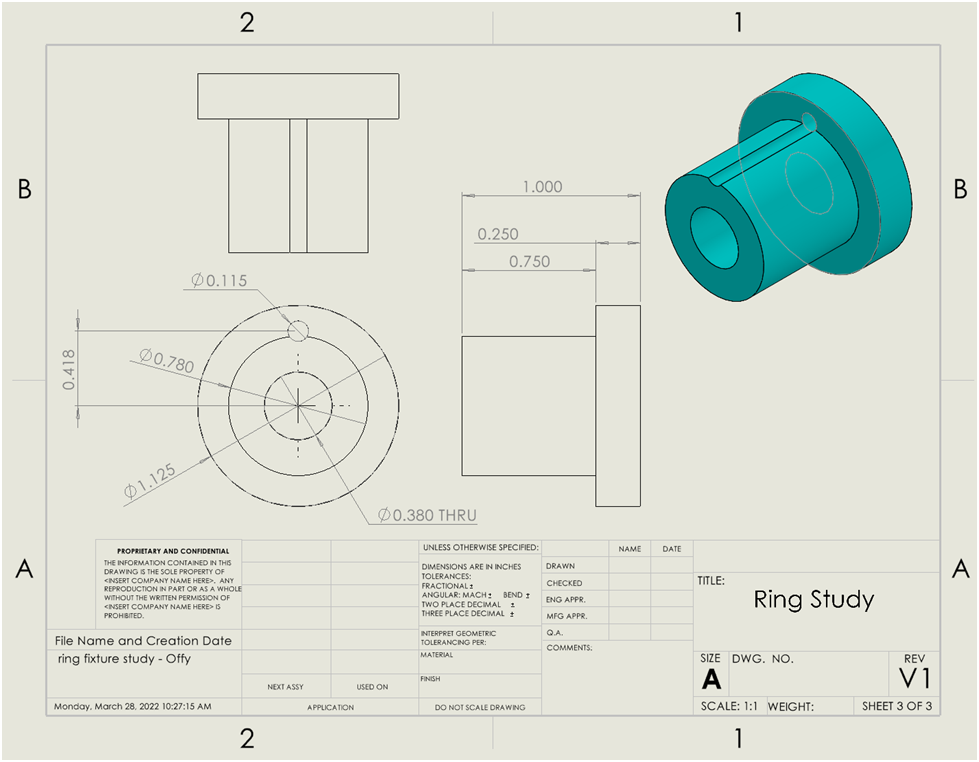
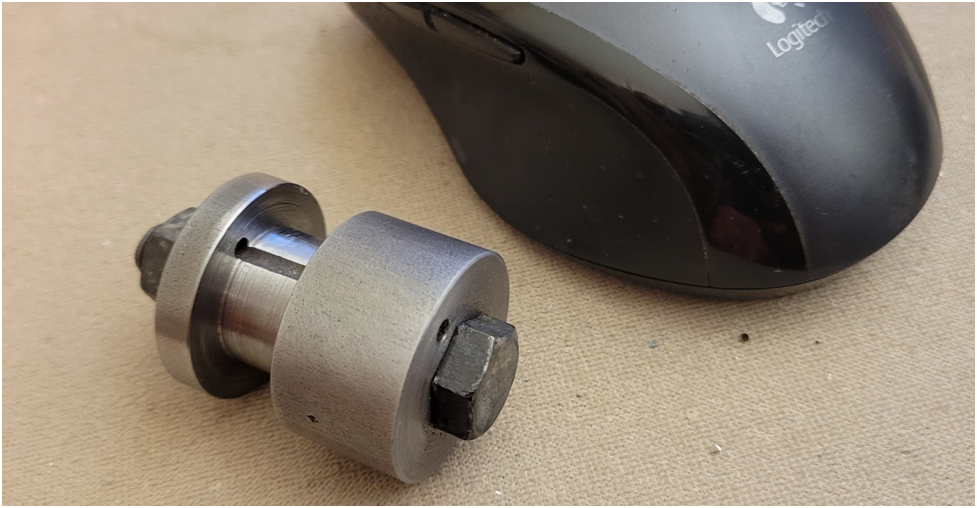
I use George Trimble’s formulas for the dimensions of my rings and the stress relief fixture. I have a print for this fixture that is parametric, that is I update the dimension of my cylinder bore and the rings and the CAD program does the rest of the calculations for me.
image-40.png
image-39.png
image-41.png


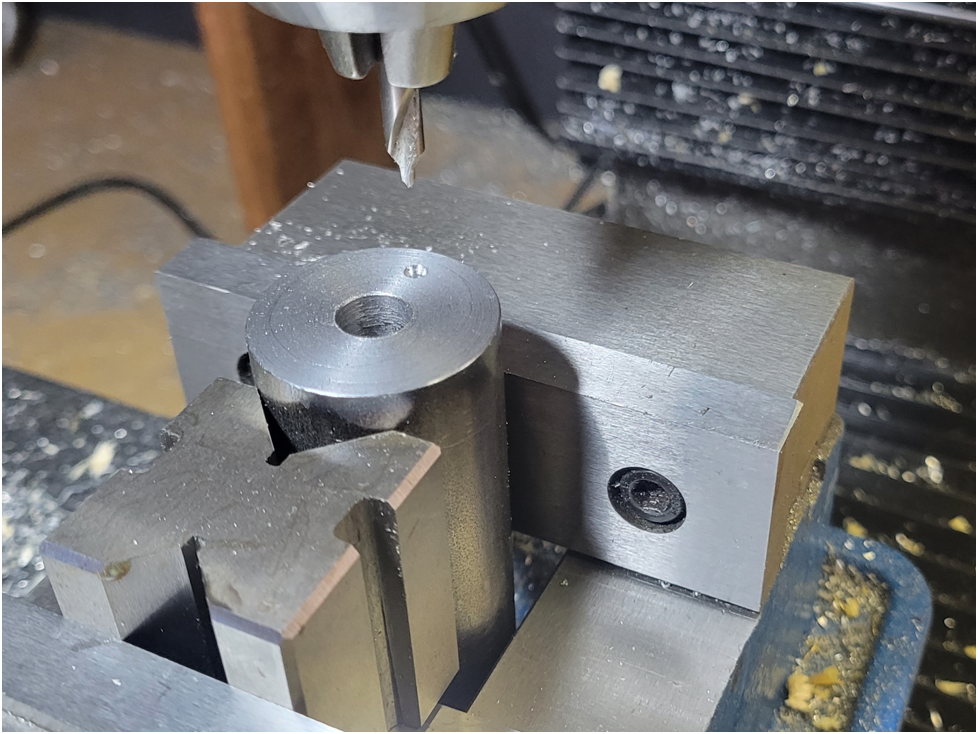
The only tricky part about machining the fixture is the requirement to drill the hole for the ring gap pin before the machining of the finished diameters on the lathe. I start in the lathe with round steel stock, face it and drill the center 3/8″ hole for the clamping bolt. Then I pull the work piece out of the lathe and set it up in the mill.
image-42.png


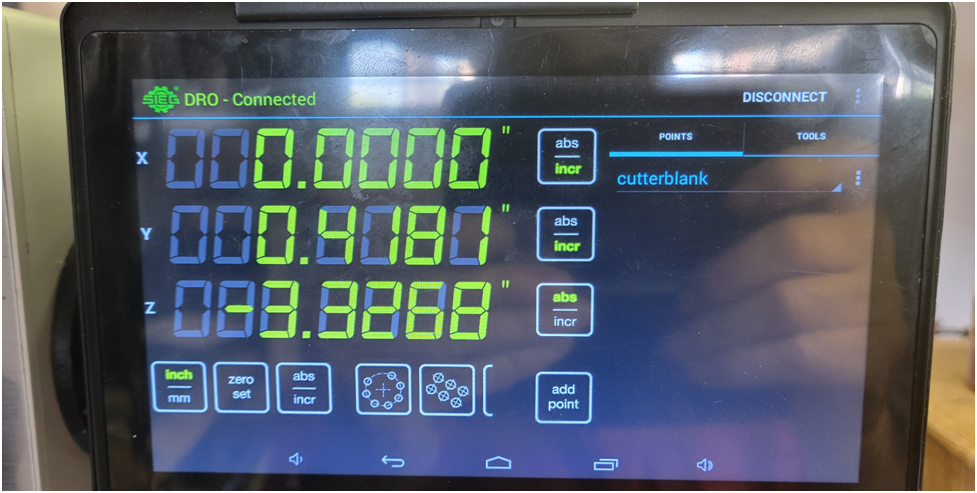
I use a wiggler to find the center of the large hole, then use the DRO to offset to the position of the ring gap pin.
image-43.png


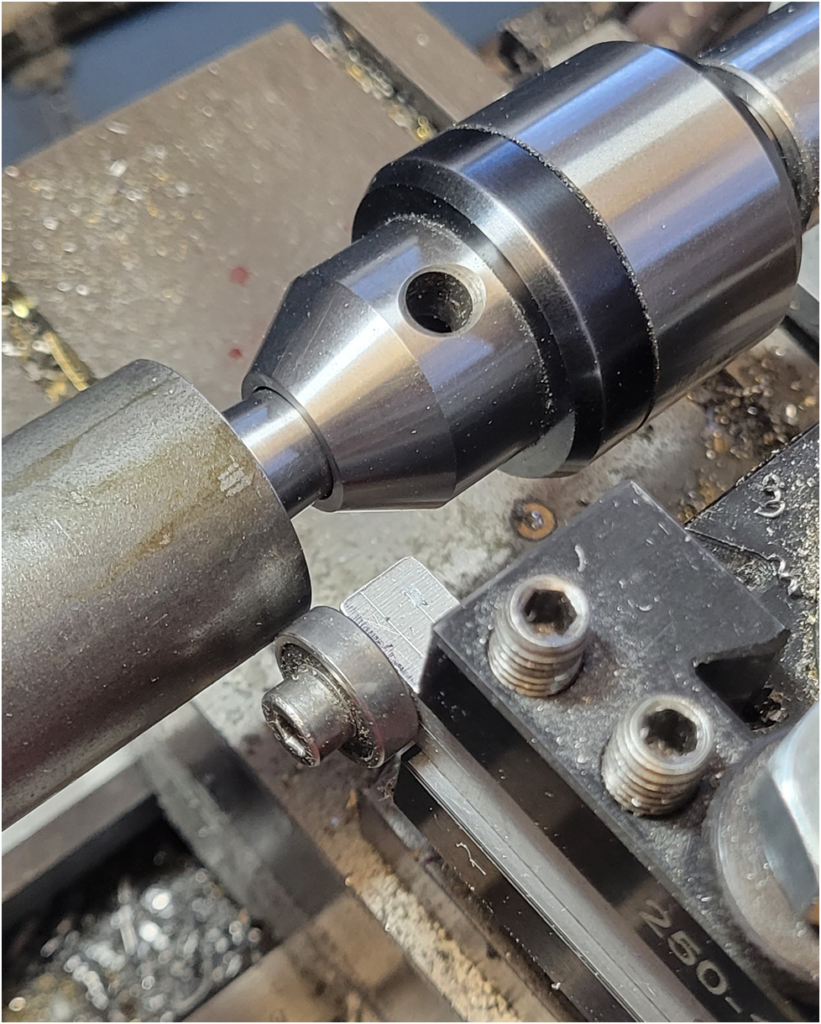
When I return the drilled work piece to the lathe I use a centering bearing in the tool holder and a live center to insure I am reasonably back on center.
image-44-821x1024.png


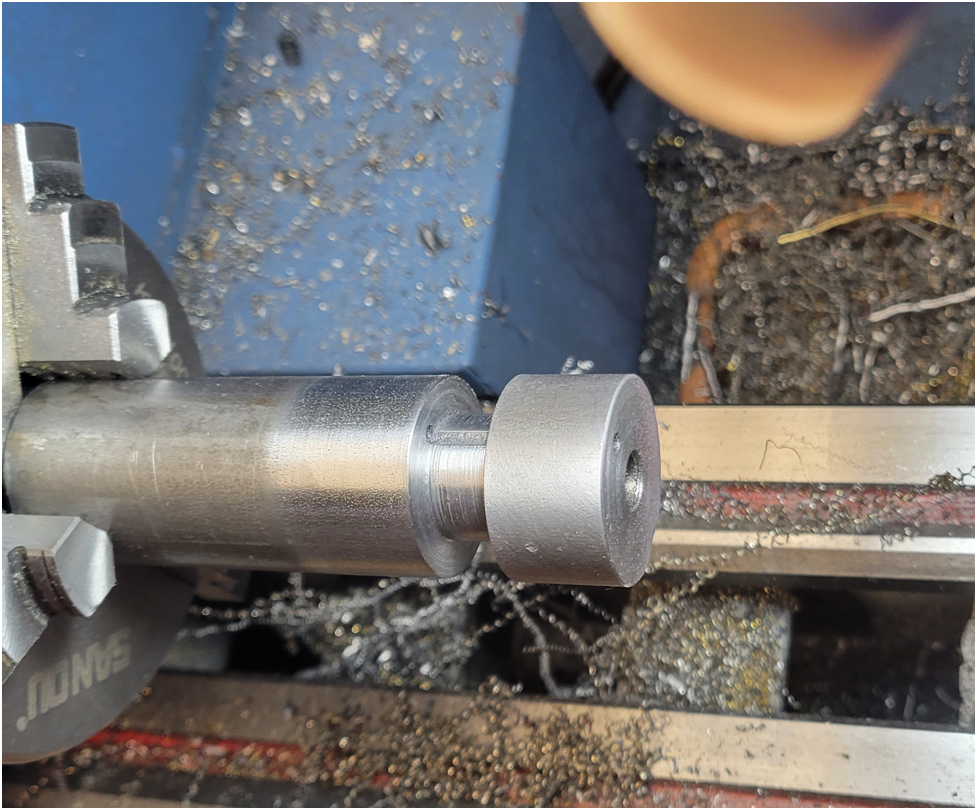
I turn the two parts of the ring to dimension. Below I am using the end cap to properly size the OD of the ring holding fixture. This OD is the critical dimension for the fixture along with the position and diameter of the gap setting pin.
image-45.png


Below is picture of the finished fixture. Care must be taken to remove any radius at the bottom of the fixture so the first ring seats flat. I usually use a sacrificial ring at the bottom with a filed internal chamfer to insure the rings sit flat.
image-46.png
 
Last edited:
Offy – Rings and Pistons


I like to make my cylinder sleeves first, then my rings to match, then finally my pistons. I do this so each matches its predecessor if there are any discrepancies. This time around I did a good job of making the cylinder sleeves match, only one was different and it was only by .001″. I made 13 rings, needing only 8, with all spot on the ID and OD. But I did not do a great job repeating the height of the rings, this is due to my skill at repeatable setting the zero point on the lathe carriage or the positioning of the cut off tool. I use the razor blade zeroing method, but any way I had a variation of .0299″ to .0342″. I made my pistons match the cylinders and the piston grooves match the ring’s height.

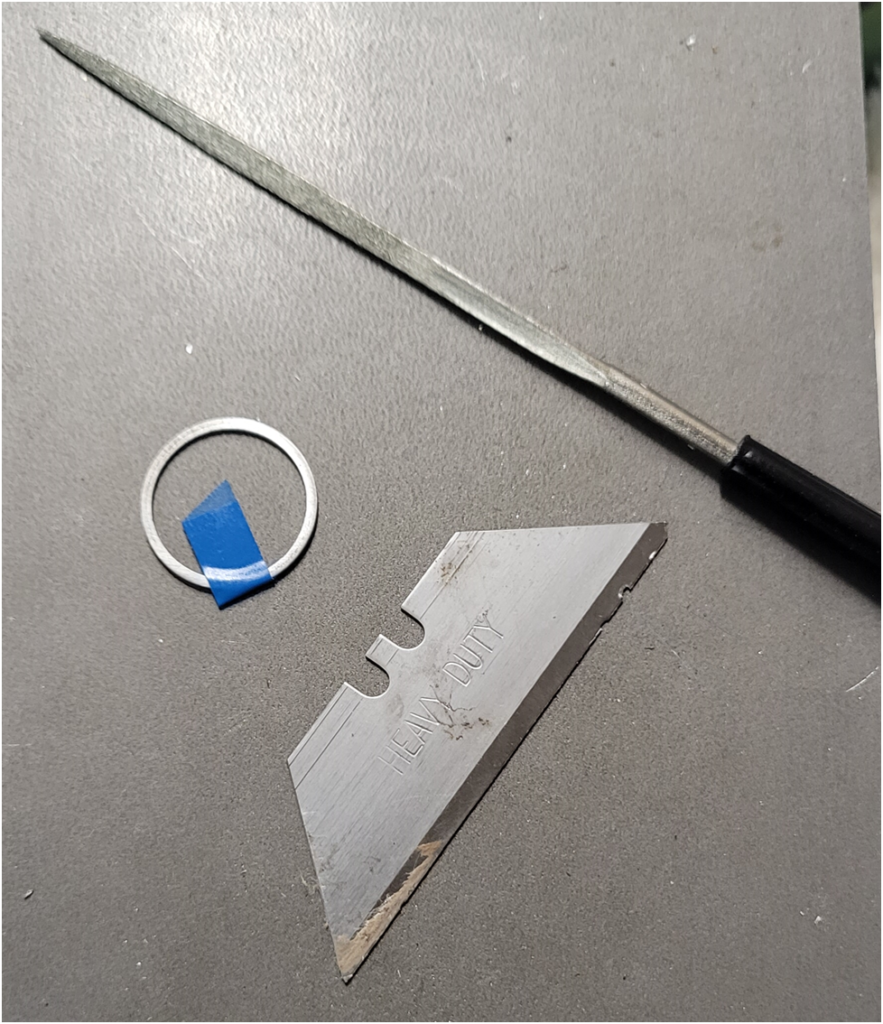
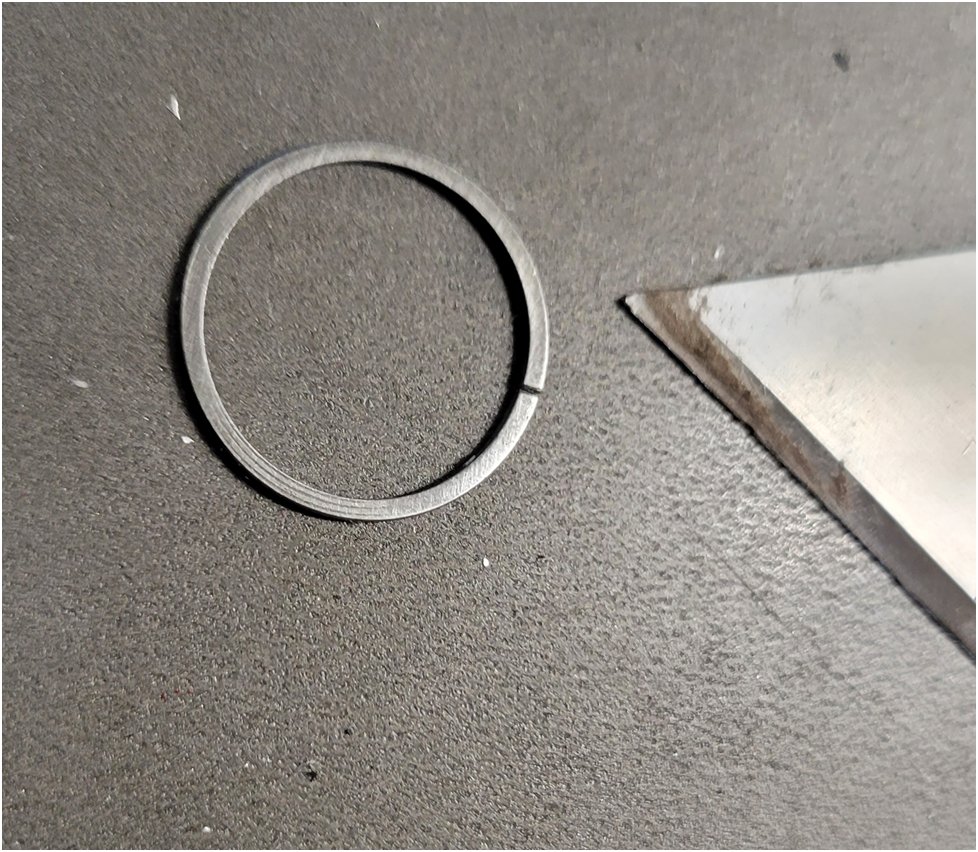
To cleave the rings, I put a piece of tape as shown below and score the top and bottom with the fine edge of a diamond file. The tape helps align the scoring on the top and bottom, I rest the file against the edge of the tape and drag the file.
image-51-883x1024.png


I use a razor blade and a slight tap with a hammer to cleave the rings at the score mark.
image-52.png


I then measure and sort the rings, light test them, and assigning them to cylinders. I turn the pistons matching the ring grooves to the rings.
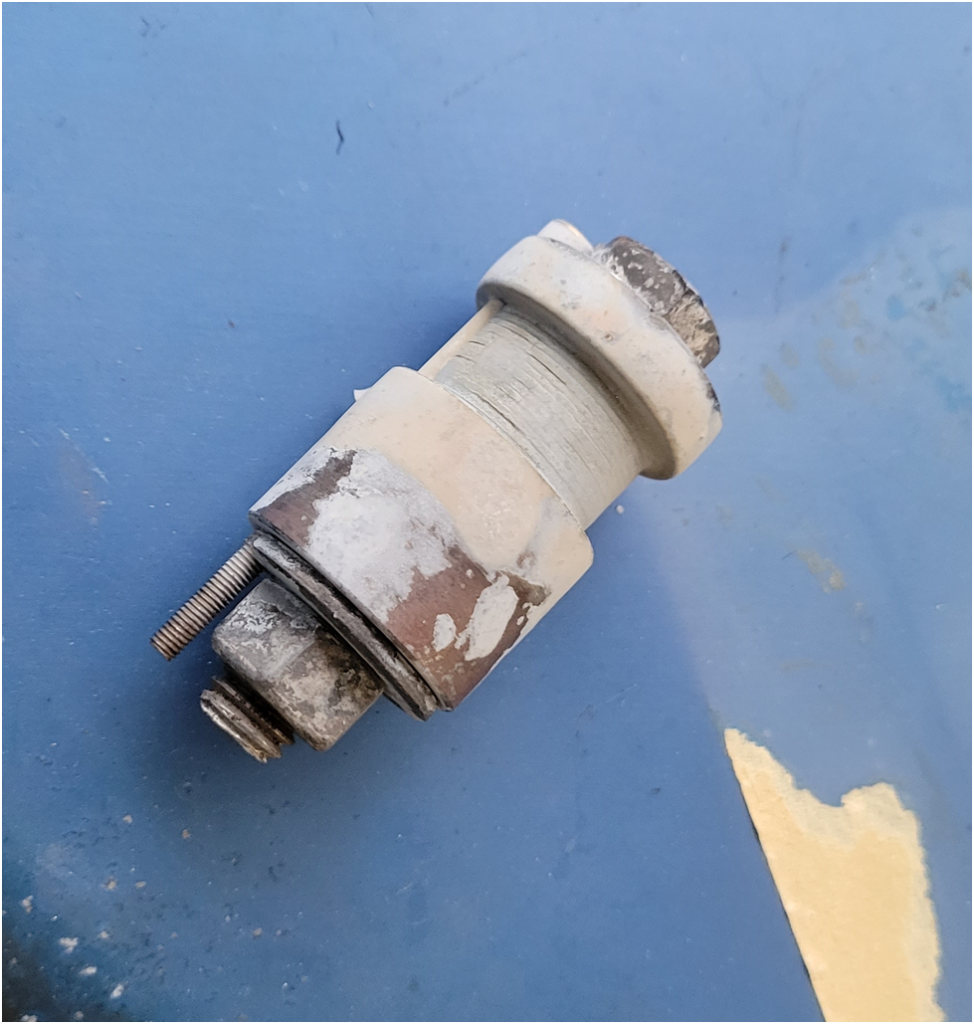
When I heat treat the rings I first heat them to about 400 degrees F, pull them out and coat them with a slurry of Boric Acid and Isopropyl Alcohol. The alcohol boils off and leaves a nice crust of the Boric Acid. the picture below shows the rings in the stress relief fixture after heat treat. The rings are protected from oxidation.
image-53-974x1024.png


Below is another picture after the fixture and rings have been soaked for a minute in boiling water. the Boric Acid dissolves revealing the finish on the rings.
image-54.png


Then to making the pistons

image-55.png


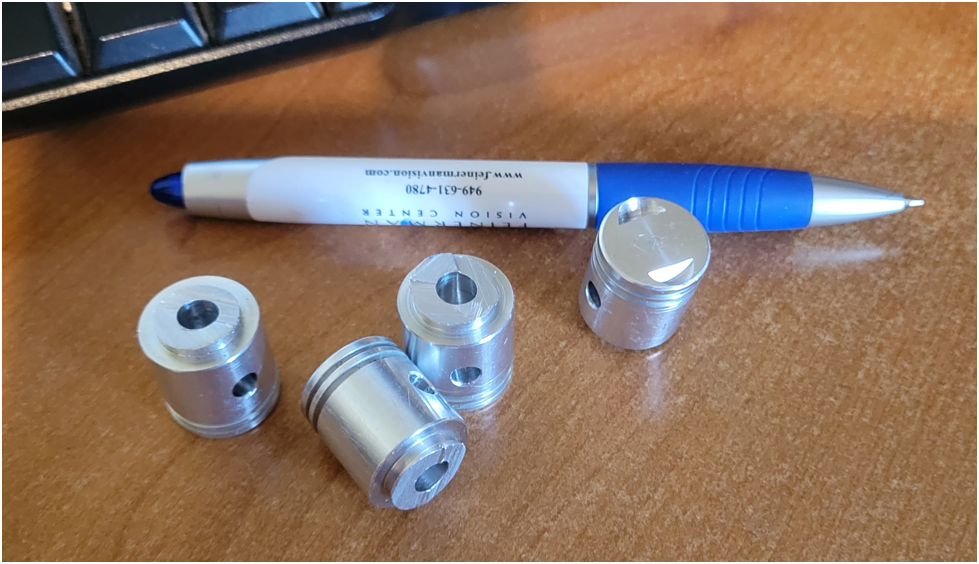
Below the sorted rings and pistons still attached to the work piece. the rings are stored in bags with labels and some oil to prevent rust.
image-56.png


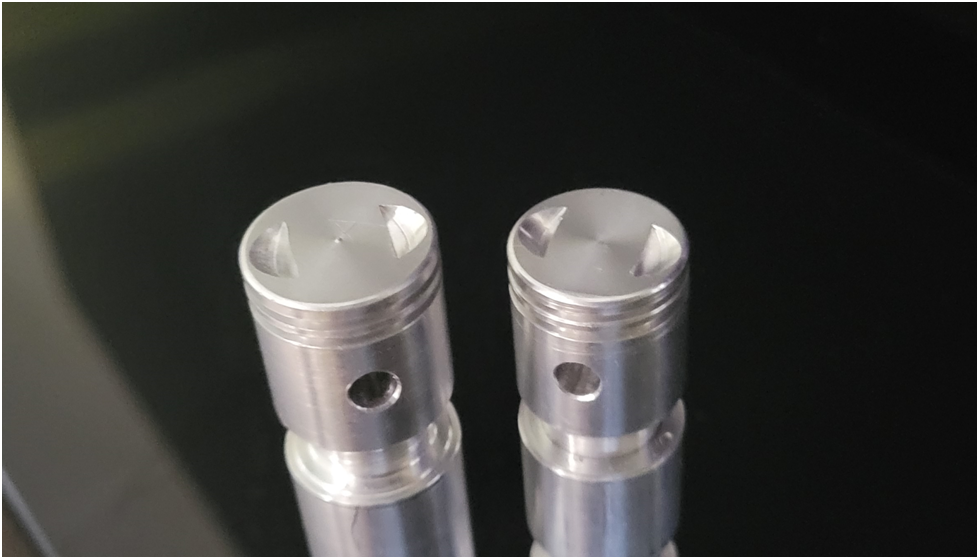
Below I am using the mill to drill the gudgeon pin hole.
image-57.png


And below I am removing some material from the top of the pistons to clear the valves in an excess of caution.
image-58.png


image-59.png


then I remove the pistons from the work piece and drill 1/4″ holes down in the bottom of the pistons to ease the machining that will be performed on the CNC.
image-60.png


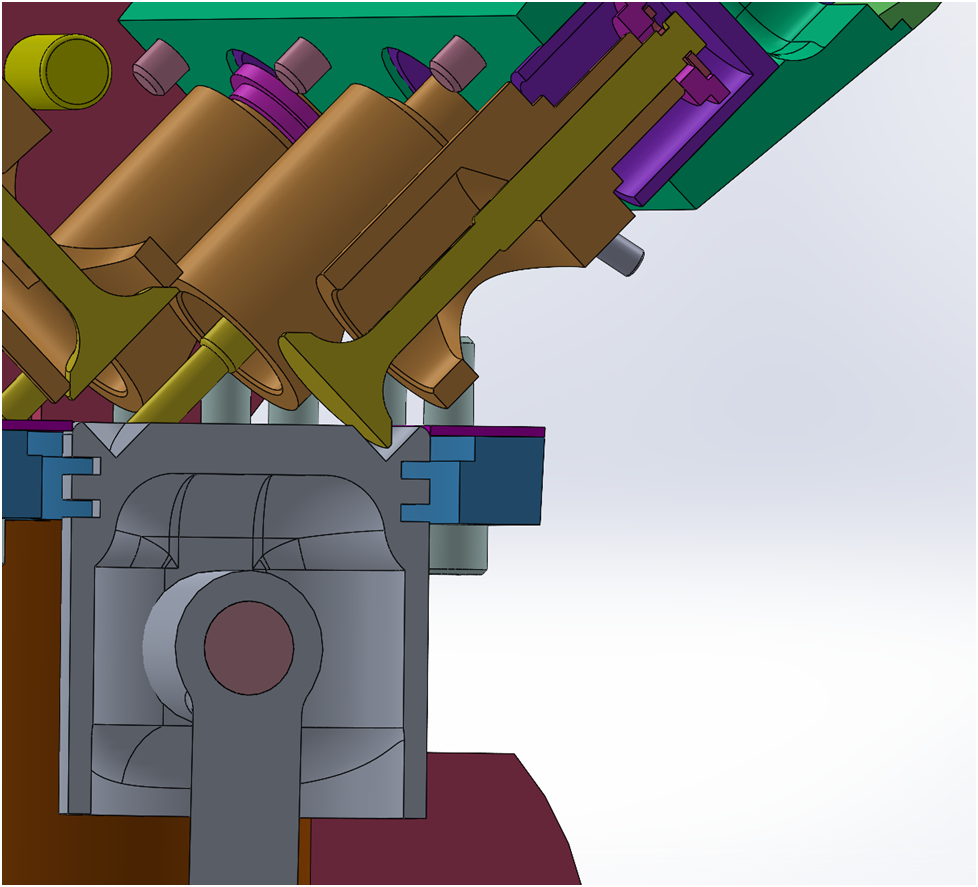
Below is a cutaway of the piston showing the internal cut out required to leave enough material for the rings. Also is shown the worst case valve piston clearance.
image-61.png


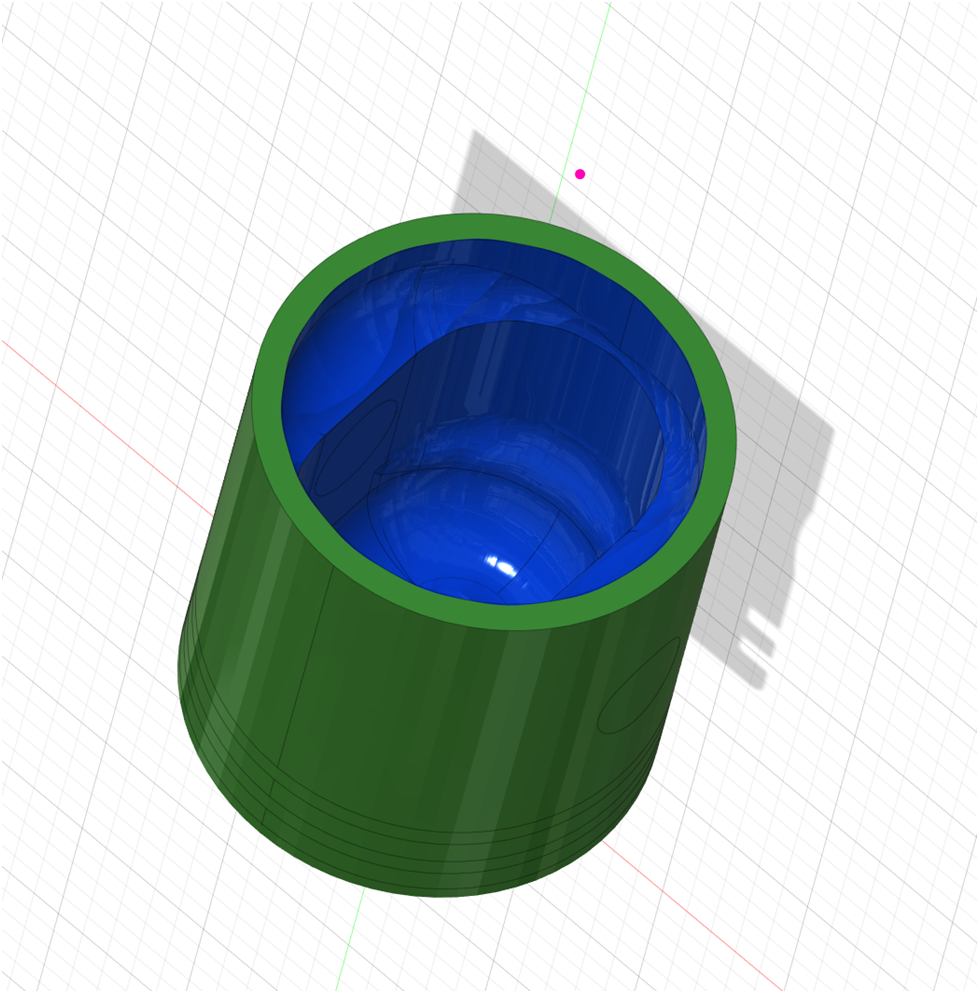
Then the tool paths are created and simulated:
image-62.png


Next I will finish the inside of the pistons on the CNC router.
——————————————————————————————————–
Below is a summary of the steps I use to make piston rings:
  • I put the cast iron slug in a 4 jaw chuck for the max gripping power and rigidity.
  • I turn the ring blank down, leaving 300% material, so instead of .050″ thick, I turn down to .150. So, for a 1″ internal cylinder bore, the ID of the blank would be about .9″ and the OD would be about 1.05″
  • Pull the blank out of the lathe and Stress Relieve in the heat treat oven – 1000 to 1050 degrees F for an hour and a half.
  • Furnace cool to less than 200 degrees F before air cooling the rest of the way down. Usually I just leave it in the oven over night.
  • Put back in the 4 jaw chuck centering as well as possible. Turn the ID on the ring blank to final dimension, then turn the OD to final dimension. Finish the OD with emery paper.
  • Part the rings off.
  • Wet sand (with light oil) on a piece of glass with 400 then 800 grit paper to clean up edges and get to proper height.
  • Cleave the ring gap. I lightly score the top and bottom of the ring with a fine file, then use a razor blade to cleave the ring. I hold the razor blade so its cutting edge is in the filed groove, then tap the back of the razor blade to cleave the ring.
  • Use a fine diamond file to clean up the gap and get it to .004″ in the cylinder sleeve using feeler gauges.
  • Use an Arkansas sharpener’s ceramic rod to clean up inside edges.
  • Clean the rings and the heat treat fixture with acetone.
  • Clamp rings into the heat treat fixture. Clamp means finger tight, everything will expand with the heat.
  • Set the heat treat oven to 1050 degrees F and place the loaded ring fixture into the oven.
  • When the oven reaches a temp of about 300 to 400 degrees, pull the fixture out of the oven and rub a slurry of boric acid and isopropyl all over the exterior of the rings. This does a good job of preventing scale, it is easy to see where you miss a spot after treating.
  • Stress Relieve the rings in the heat treat oven – 1000 to 1050 degrees F for an hour and a half. (my reference is the study performed by the Naval Research Laboratory on stress relieving cast iron dated 1948)
  • Furnace cool (over night) to less than 200 degrees F before opening the furnace.
  • Remove the fixture and drop into a tin can of boiling water to remove the boric acid.
  • Lightly scotch brite the rings exterior, then remove them from the fixture. Clean the rings as necessary.
  • Perform Terry’ light test to determine the quality of the seal of the rings against their cylinder sleeve.
  • Measure each ring, note in the log, coat each with light oil, and place into labeled zip lock bags.

1656620209767.png
 
Last edited:
Offy – Conrods Part 1

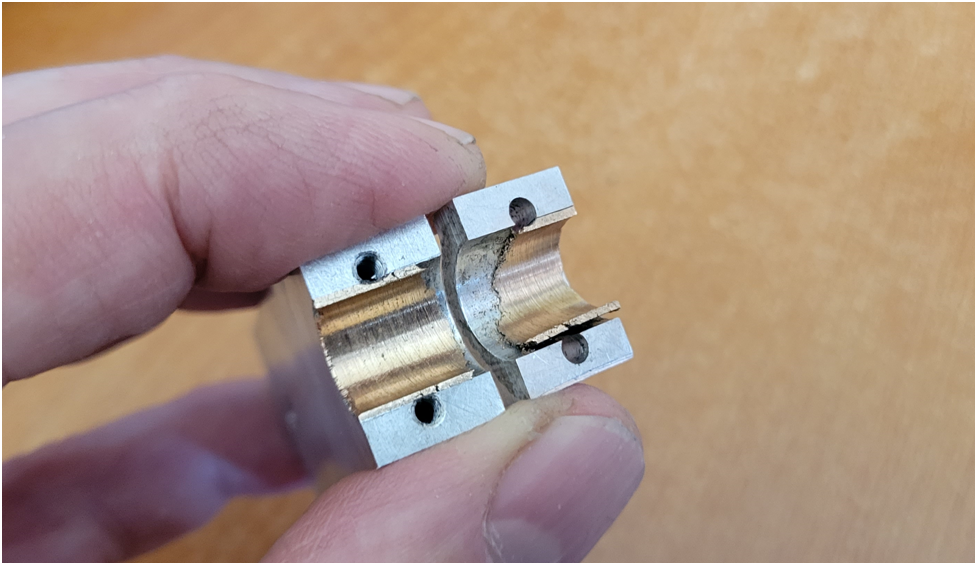
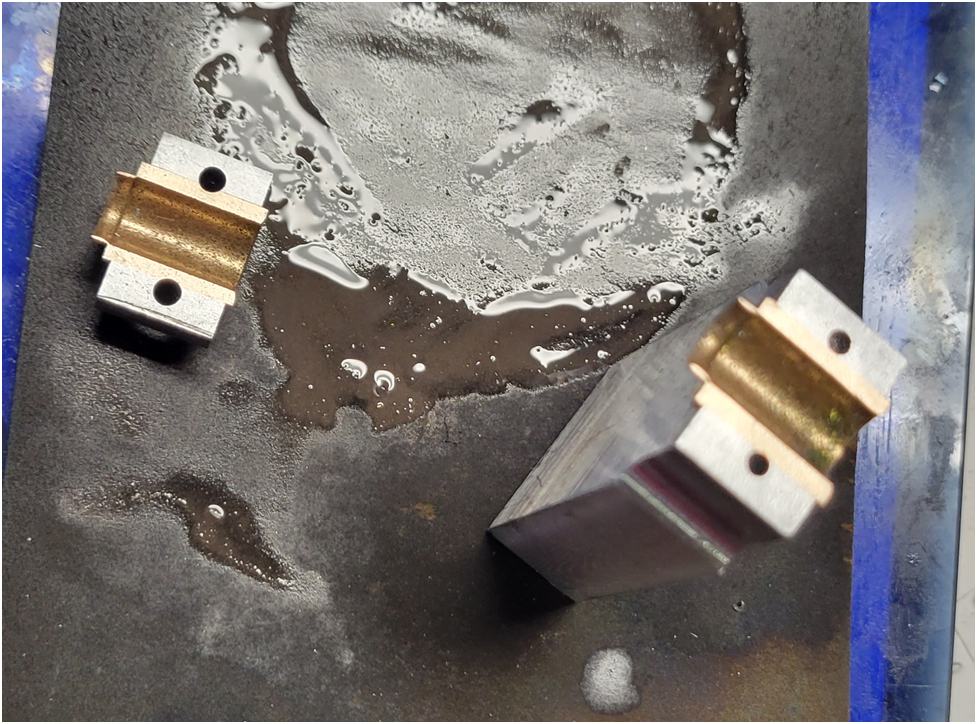
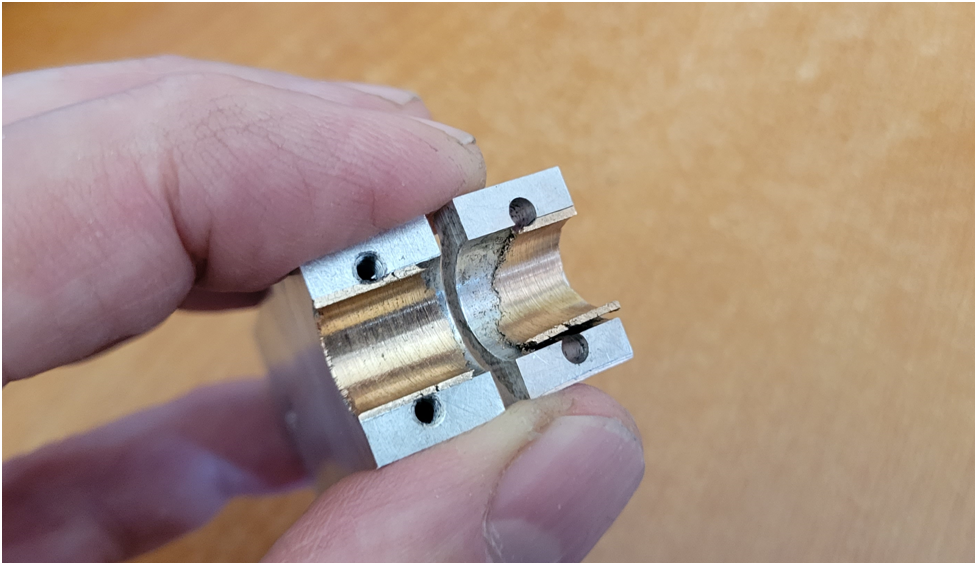
I am going to try something different with the connecting rods. I want to install a bronze split bushing in the big end. It will be secured with Loctite and brass taper pins. As a warning, my first attempt was a failure as can see below:
image-63.png

The bushing is too thin and the material is very brittle and hard to machine. I want the cap screw holes to clear the bushing, but the distances are really tight and the resulting bushing is too thin.

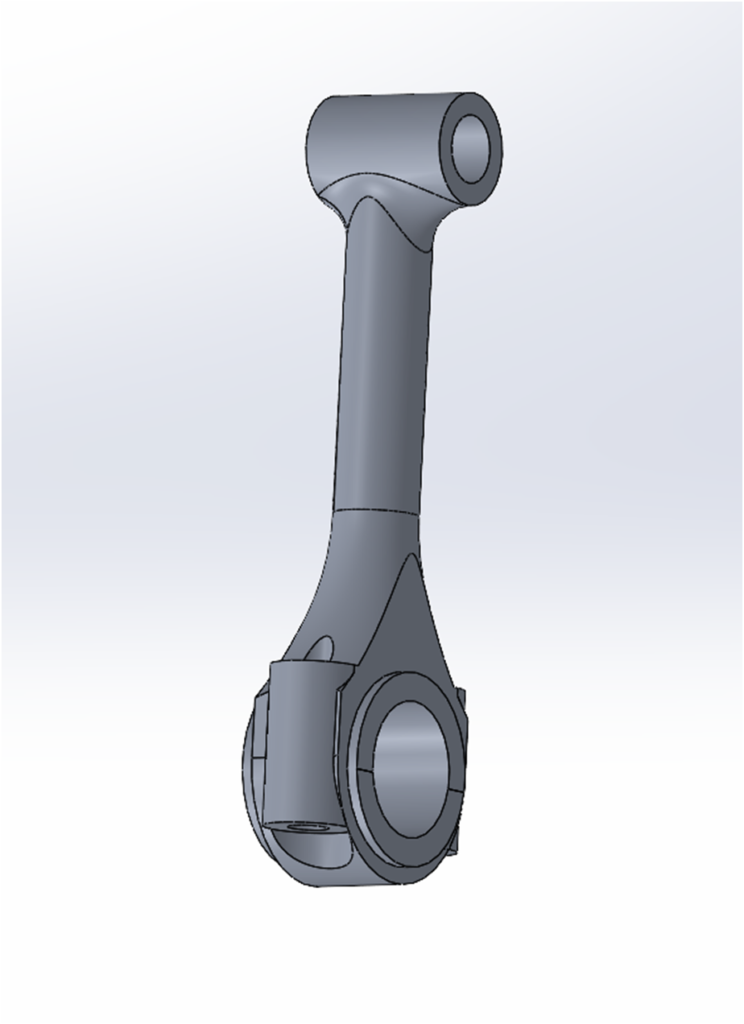
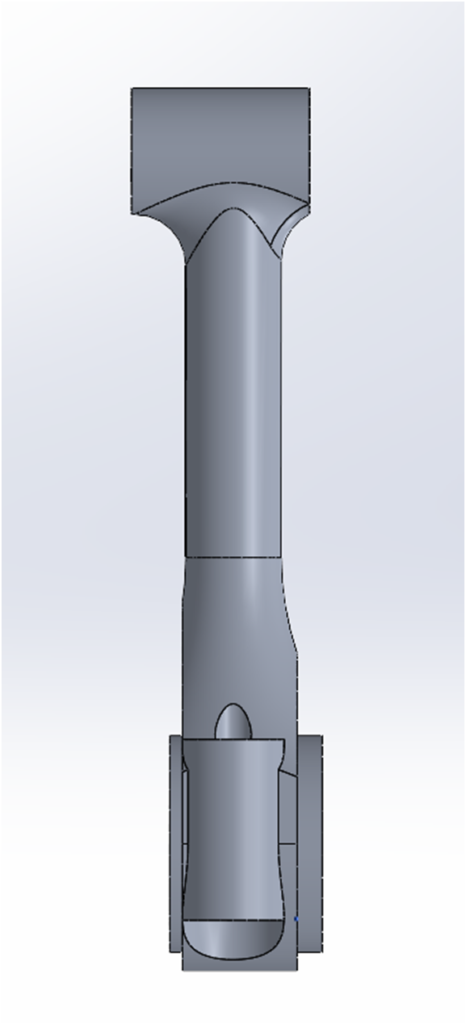
To back up a bit, the following images are of the desired connecting rod. It is not symmetrical as can seen in the side view due to the geometry of the crankshaft with respect to the pistons–the big end is offset from the piston center.
image-66-744x1024.png
image-65-466x1024.png

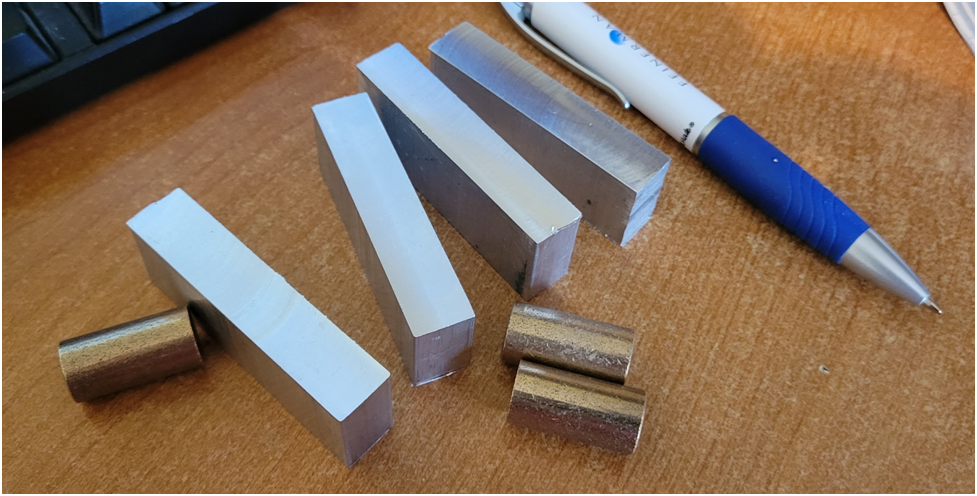
Below is the material squared up and ready to go, fortunately I only make one to start with.
image-67.png

I drill a clearance hole in the work piece to facilitate CNC machining.
image-68.png

Then I turn the bronze bushing to size.
image-69.png

The big end profile is machined:
image-70.png

The hole is reamed and the bronze bushing is installed with Loctite.
image-71.png
image-72.png

The end cap has the cap screws holes drilled/tapped and countersunk.
image-73.png

A slitting saw is used to separate the cap. I use a 1/32″ thick saw blade.
image-74.png

so far, so good.
image-75.png

The surfaces are wet sanded and then the cap is screwed into place.
image-76.png

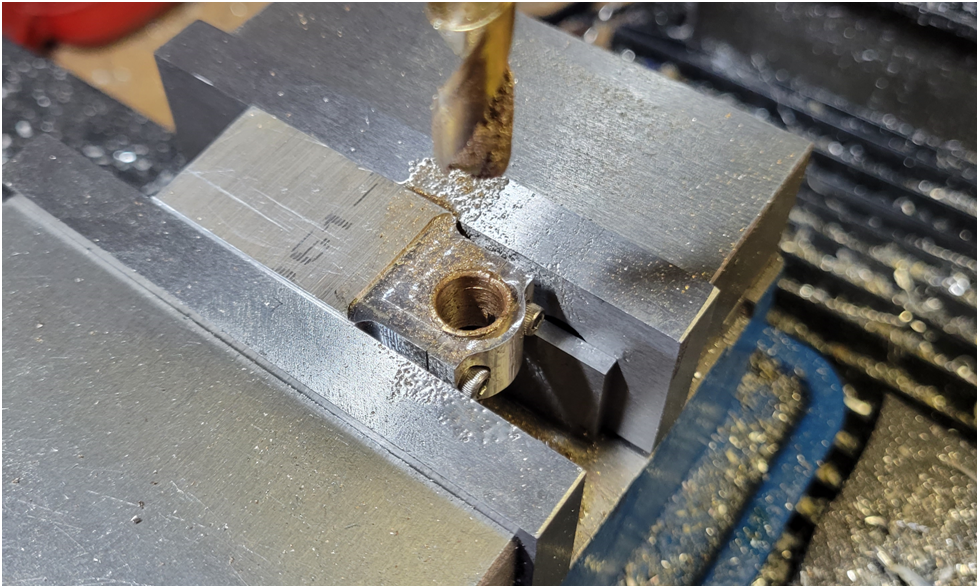
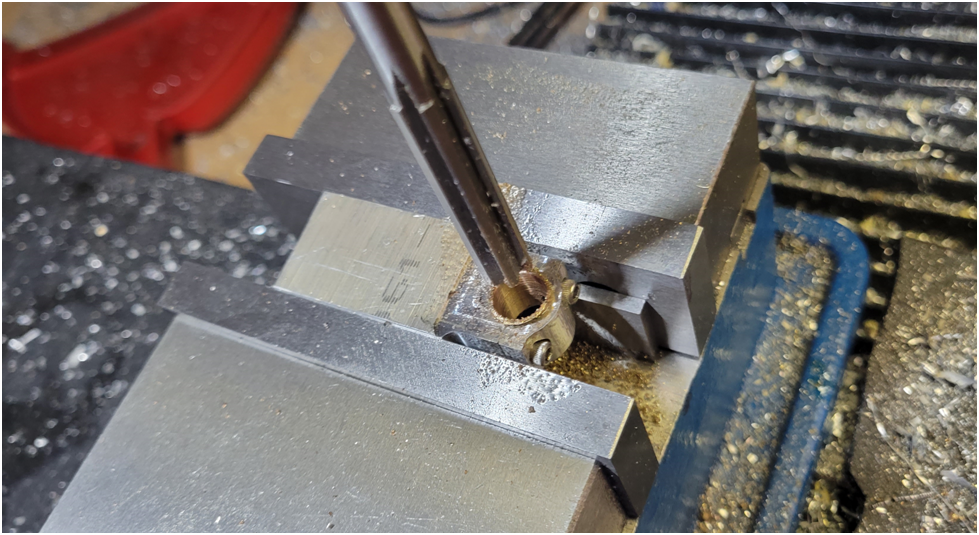
I then drill and ream out the big end hole. This is where things went awry. Perhaps the drill was not sharp enough, I got too aggressive, or the design was simply poor not allowing enough bearing material.
image-77.png
image-78.png

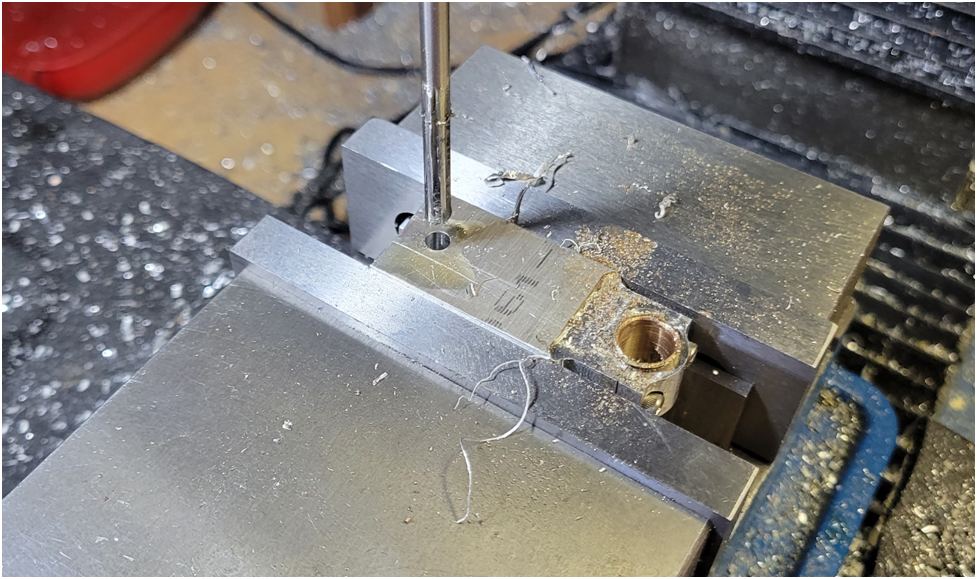
The gudgeon pin hole was drilled and reamed.
image-79.png

And again the end result:
image-80.png

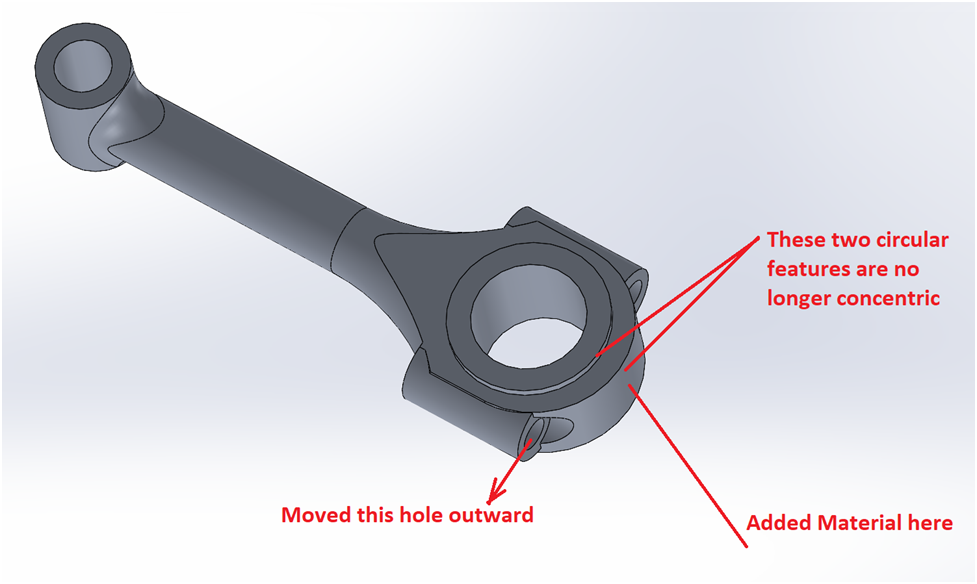
So I redesigned the Conrod. I moved the cap screws outward to allow for a thicker bearing and I added some material to the con rod cap.
image-81.png

Below is the beginnings of a second try. Here I have completed all of the above steps to the point where I am letting the Locktite cure–that will be over night. The bronze bushing diameter the first time around was .4385″, the second attempt is .499″. The ID will be .375″, so I will have more meat in the bushing, but less in the cap.
image-82.png

So, I am now waiting for the Loctite to cure. I will report back after the rest of the conrod machining is complete.
 
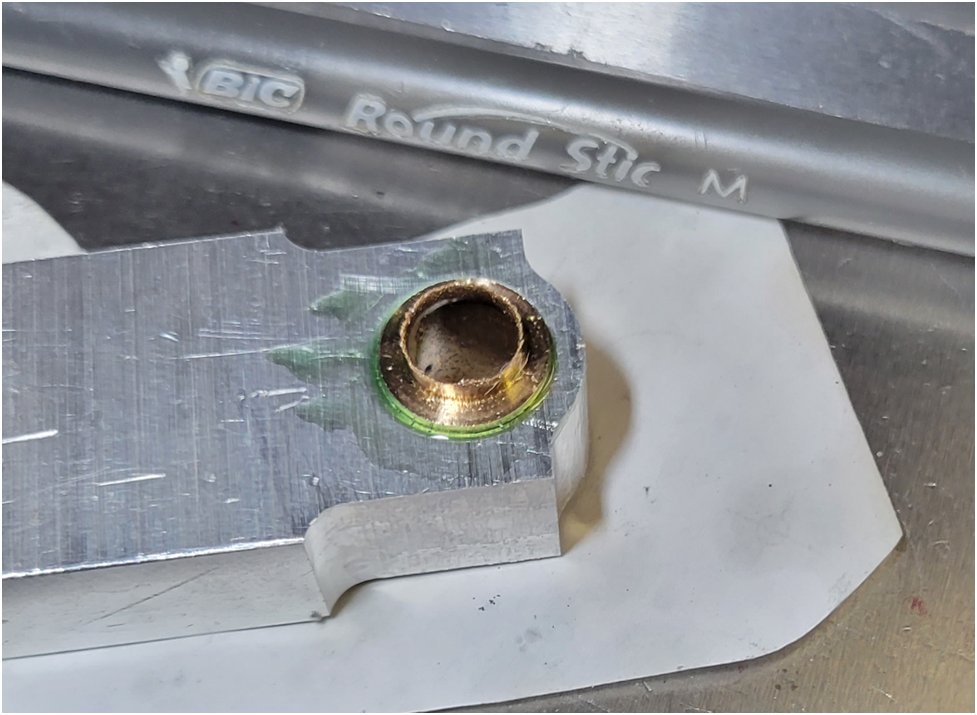
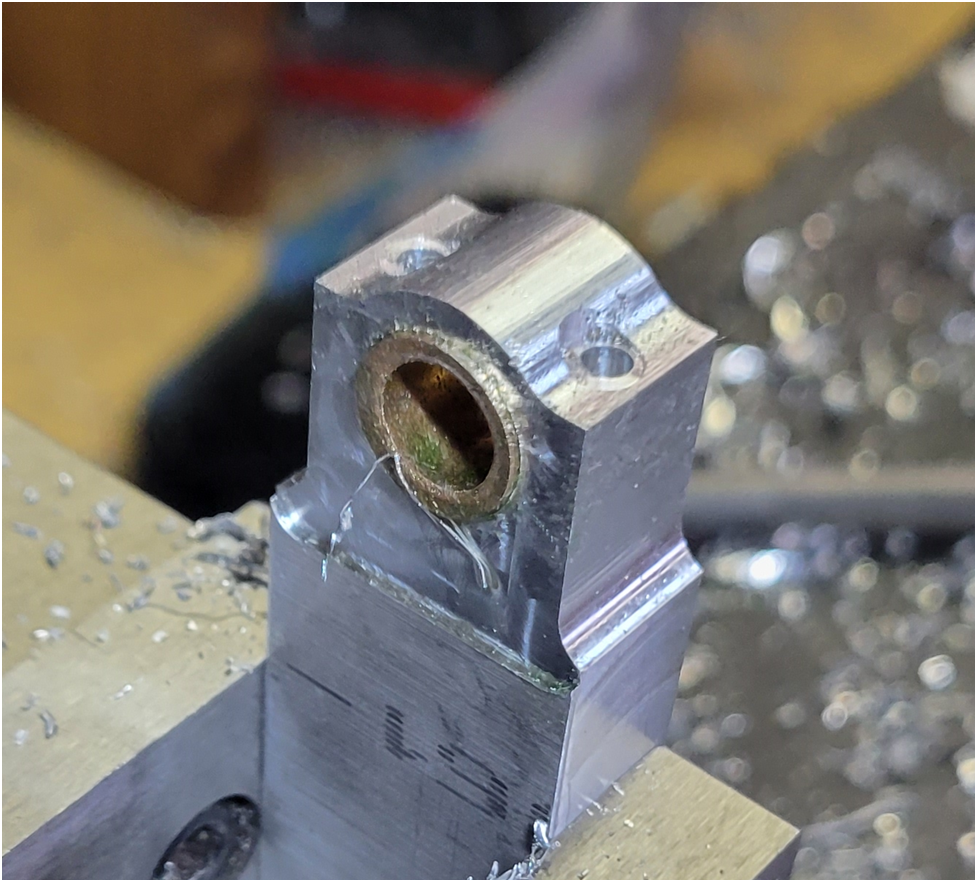
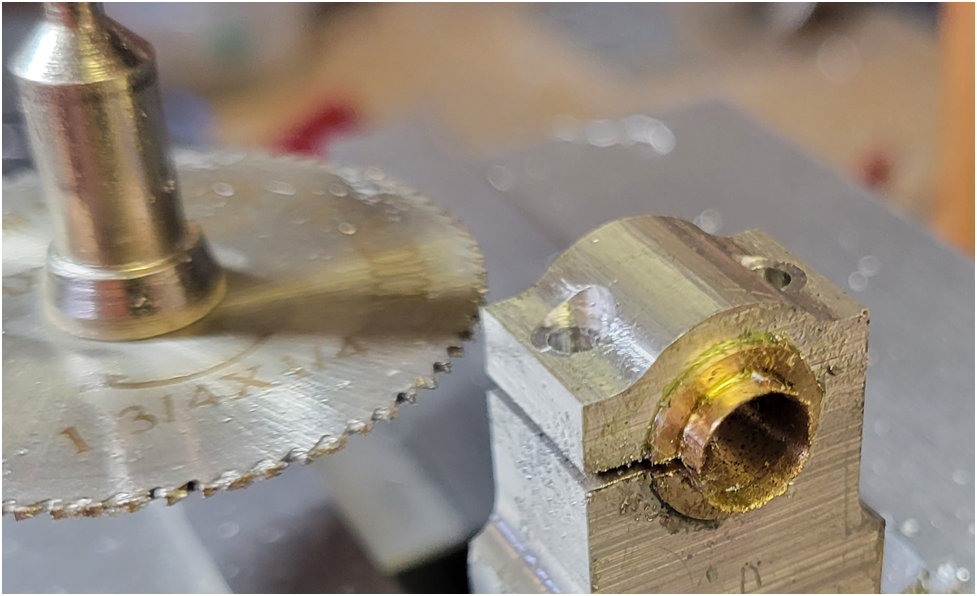
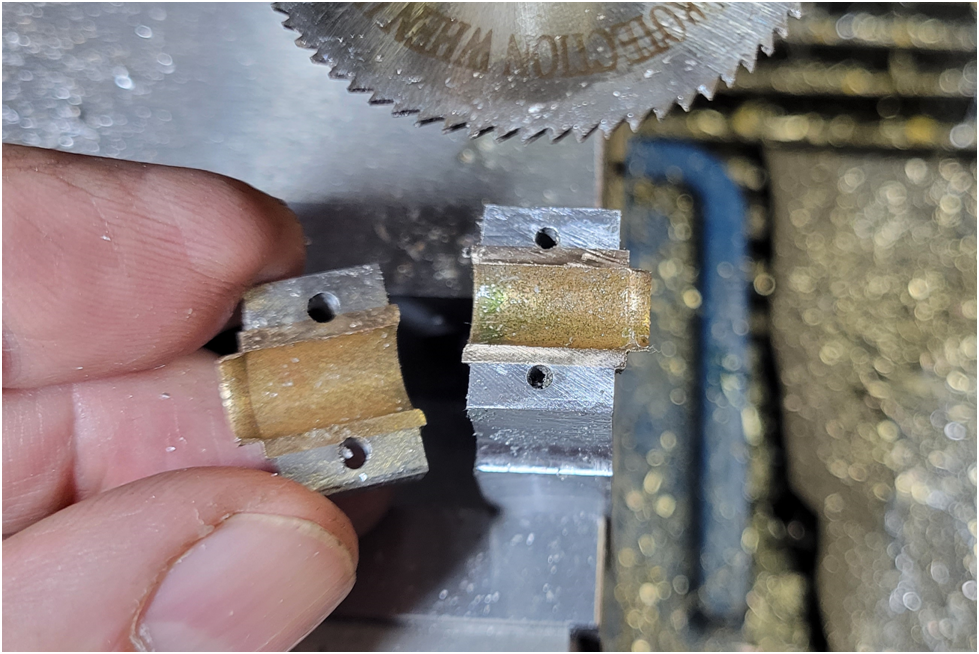
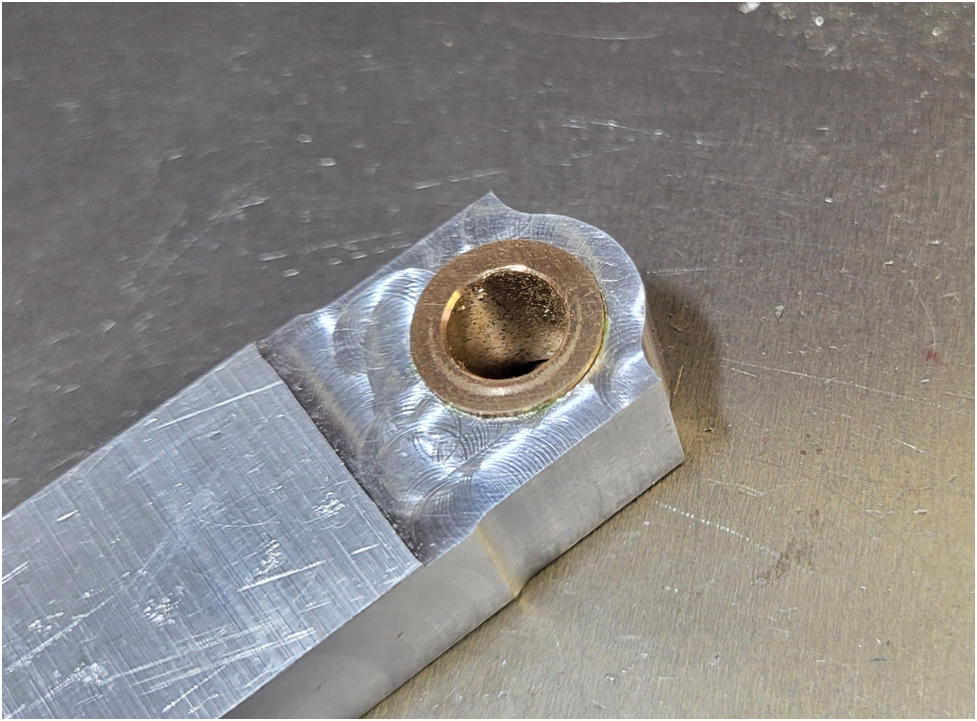
Using a softer bronze is a good suggestion, I do have some softer Bronze that I have designated for use in making the valve guides. I had some bronze bushings laying around and thought I would give them a try. It requires some special attention when machining. Below are a couple of snaps of my second attempt.

1656693979797.png


1656693990383.png

I am please with the design changes to the connecting rod. The bronze bush is thicker and the cap looks substantial enough. I also was very careful when machining the bronze. I used lots of oil and stepped up one drill size at a time.

This conrod blank is ready for the outside "cosmetic" machining.
 
Back
Top