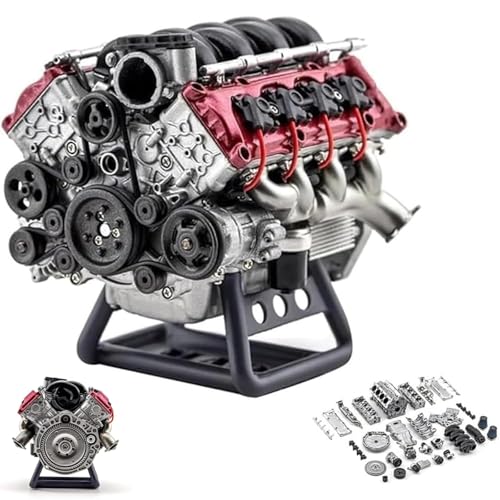
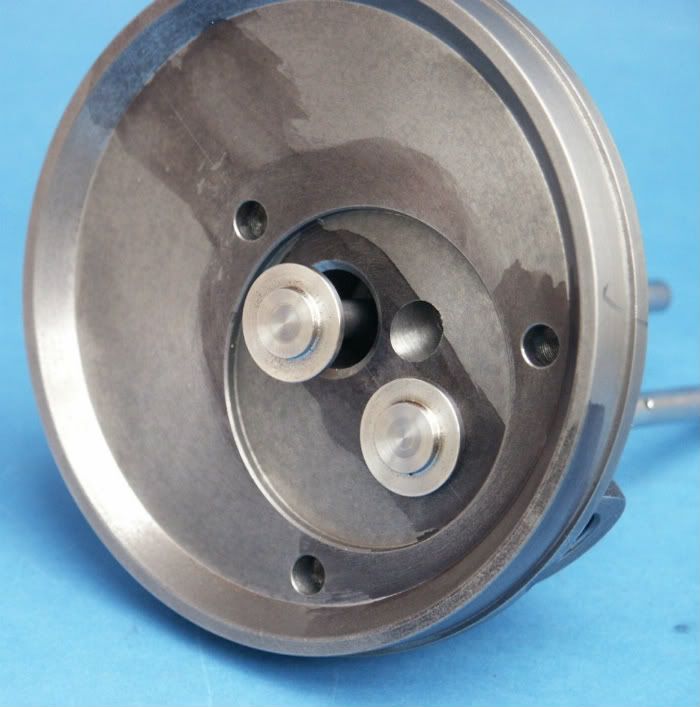
30cc Inline Twin 4-stroke Engine based on Westbury's Wallaby

Home Model Engine Machinist Forum

Help Support Home Model Engine Machinist Forum:

This site may earn a commission from merchant affiliate links, including eBay, Amazon, and others.
A quick update on the completion of the manual machining for the connecting rods.

1627234358693.png

Here I am machining off the conrod end cap. As Paul suggests, it is better to tap the holes before cutting off the end cap. A slitting saw could also be used. I am using an 1/8" end mill and I am offsetting each pass .005" so that each face, both the conrod and the end cap, are climb milled for a nicer finish.

1627234568462.png

The final manual machining is pretty straight forward: using the edge finder to locate the two holes, center drill, drill and ream.

1627235071884.png


Here are the two conrod blanks ready for the CNC router. Behind them is the beginning of a fixture to locate the conrods during the CNC routing operations. The conrods will need to be flipped so we can machine both sides and we need to maintain proper orientation with as much precision as we can.


Next installment I will detail some more CNC tool path generation in Fusion360.
 
The first step to CNC machining the conrods is to make the fixture to hold them in a manner that allows them to be machined on both sides. I like to machine the fixture and the conrods all in one setup so the conrods and the fixture have the axis touched off at the same time. It is OK to make the fixture and use it later, but there will probably be a couple of thou zeroing error when the fixture is setup in the vise a second time. So I machine the fixture and tap the 6-32 threaded holes in the vise, install the alignment pins, then machine the conrods without re-zeroing the work piece.
1627411963835.png

Here is the conrod blank mounted on the fixture. Note that the hold down screws only provided a downward locking force and do not locate the blank, this is done by precision machinied pins. There are matching machined pockets machined into the fixture to locate the pins.


The conrods will have the following machining operations:

  • Removing the majority of the material then finishing the flat surfaces - 1/4" end mill
  • Machining the flat sides - only needs to be done once - 1/4" end mill.
  • Machining the curved surfaces - 3/16 ball end mill
  • Machining the cut out in the middle of the conrod web- 3/32" flat end mill.
  • Flip and repeat
I made three different 3D models to ease the generation of the tool paths. Below is the first one, note that the side cutouts and the middle web cutout are missing from the model.


Below is the simulation of the first machining operation. the blue represents the material left by the roughing pass and the green is the finishing pass for the flat surfaces. Note that the very top flat surfaces are not machined as this is where the tooling hold downs are. The machining parameters are: 1/4" flat end mill, 8000 RPM, 15 IPM, 050" step down, .020" material left on roughing pass.


1627418079234.png


1627418094339.png

After the 1/4" flat end roughing, but the sides have not been finish machined.

Next, with the 1/4" flat end mill still mounted, the sides are machined:

1627418113008.png


Below is a simulation of the finishing pass with the ball end mill. The parameters are as follows: 8000 RPN, 10 inches per minute, .005" step down and only the curved surfaces were selected for machining. While the other machining operations took about 10 minutes, this one takes 25.
1627418131977.png


The fine blue lines show the tool's path, the yellow lines are moves where the tool is not in contact with the work piece.


1627418152760.png

After the side milling, contour milling and the web cutout milling. Read to flip it over and do the other side.


1627418167531.png

The above simulation shows the expected result after machining the curved surfaces using the 3/16" ball end mill. I have circled two areas that were not properly machined during the horizontal finishing pass, I did not notice these artifacts until after machining the conrods. I will have to finish these areas by hand.

Finally the conrod web cutout is machined with a 3/32" end mill, this will give nice radii in the corners.

1627418191625.png


While I was machining the second conrod my compressor gave up the ghost. My spindle is water cooled and requires compressed air to seal the bearings. The compressor's electric motor made a horrendous screech and then blew a fuse. I ordered a replacement 5 hp motor from Amazon and it will be here tomorrow. So I will have to re-establish the CNC axis zero points and restart the milling operation. I will touch off the precision pins in the fixture.


Below is the first conrod mounted on the crankshaft, I am very pleased with the fit.
1627418205807.png


Notice the reliefs I had to add to the sump to clear the conrod cap attachment screws. I did not include these screws in the CAD model, so did not notice the interference. The CAD model should include ALL the parts including hardware, live and learn.
 

Attachments

  • 1627410982442.png
    1627410982442.png
    498.2 KB
I received a new electric motor for my compressor and was able to continue machining this morning. I finished up the second conrod.

1627590281074.png

I will bead blast these before I install them.


I also worked on the main crankshaft center bearing. Fairly straight forward lathe work. I started with a couple of bronze bushes and machined a bit more than 1/2 off of each, then soldered them together.

1627592110345.png


I chucked them up in the lathe and drilled and reamed the inside diameter to .501", then turned down the outside diameter to .625". I made a little sideways notch tool and machined a small groove in the middle of the bronze bearing for oil. Then cut it off.

For the bearing caps, I grabbed a couple of pieces of scrap aluminum, fly cut a smooth surface on each. Then clamped them together in the vise. One was a tiny smaller so I used a few pieces of paper between it and the vise jaws to lock them both down. then I machined a couple of countersinks, drilled and tapped, then screwed them together.

1627592130026.png


then back to the lathe:

1627592143354.png


I turned the outside to 1.250" and drilled and bored the inside diameter to .625 using the bronze bushing (still soldered together) as a check. Faced the outside, cleaned up the edges and parted it off.

I then heated up the bronze bushing and separated the two halves.


Below is the bearing cap and the bronze bush installed in the upper crankcase.

1627592160341.png


I oiled up the bushing and tightened everything down. there is an area of about 10 degrees where the crank is a bit tight. I'll inspect it and see if anything stands out, otherwise I think this will wear in. I still need to drill the oil hole in the cap and bronze bushing and I will also drill a small hole and inset a brass taper pin to insure the bronze bushing does not spin.
 
Cylinder Sleeves


I have made both of my cylinder sleeves, and of course the second one came out better than the first. I was targeting an ID of 1.000" and I had to take the first one out to 1.005" to get the ID consistent all the way through and to remove a scratch by honing. The technique I used to get the second near perfect included the following strategies:

  • Used a four jaw chuck to give max clamping support on the blank cast iron work piece.
  • Cut the ID before the OD to provide more material to stabilize the blank while cutting the ID.
  • I used an oiled paint stick and applied constant, but slight, pressure on the outside of the sleeve, sort of a poor man's following rest to counter act the pressure of the boring tool. without this I was getting about .002" spring in the part from the start of the boring pass to the finish.
  • When close to my final dimension, I used a bunch of spring passes where I did not advance the cross slide, just ran again and again
  • I ran the lathe really slow so there was no chatter, I had to go down to 280 RPM, but got really clean cuts.
  • I used the finest power feed setting. A single pass took about 6 minutes
All of this required extreme patience, but I got two sleeves that I am happy with. But more important I think I have a solid technique for future builds.

1627845410663.png


Wow did I learn a few things preparing my cylinder sleeve blanks. I attempted to cut the cast iron rod into two using a standard cut off wheel like I use to cut mild steel. That did not work. I cut and cut and cut and cut and all I ended up with was a chunk of really hot cast iron. Finally I stopped and did some research. I then switched to a diamond masonry blade and that made all the difference. It cut right through the cast iron. On the first blank I drilled the internal ID out to .5" using the largest drill bit I own, then bored it out to close to the final 1". That took forever. So I bought a set of drills sized 9/16 to 1" and drilled the blank close to final dimension before I started boring. Much quicker.

1627845428790.png

Set up on the table saw for cutting cast iron blanks. Out of the frame is another large C clamp (G clamp) holding the wood to the miter slide.


1627845443621.png

Test fitting the first blank in the cylinder block. I turned the OD first on this one.


1627845457872.png

My drill bit set from Amazon, saved a bunch of time boring.


1627845474843.png


1627845503250.png

Second cylinder sleeve - nice finish on the ID, right on the numbers, no chatter at 280 RPM.

Honing went pretty quick on the second sleeve and I took off just under .001" of material. the first sleeve took longer as I had a step of .002" at the top end that I could feel with my finger. After taking this out and removing a scratch toward the bottom I ended up .005" over my target internal diameter. This will complicate the manufacture of the rings as I will have to make two batches of differing sizes. The pistons will be different too, but in the big scheme of things pistons are nothing compared to making rings.


1627845517205.png

Sleeves test fit in the block. One cylinder I gave a cross hatch hone, the other I did not. I do not know if this matters. The sleeves are sitting slightly proud of the top of the block, these will be fly cut flat after the sleeves are secured in the block with loctite.
 
I have never cross hatch honed a model engine cylinder before and I don't recall seeing it done. I did my first cyliner as I usually do, no cross hatch. But all of the full sized engines I've ever rebuilt, I always put a cross hatch pattern in the hone, so I did it on the second cylinder. I think that the finish on the model engines should be so fine that you don't really see the hone pattern, but I don't think you want the finish so fine it is "polished".
 
In full sized engines, the idea of cross hatching is to “hold lubricant”on the bore as well as assisting in “bedding in” the rings! However, as you say model engines don’t usually have it at all. It makes me wonder why. Thank you for your response.
 
Piston rings

First off I want to say that I have seen that the fabrication of rings can be a charged subject on this forum and I am no expert so take what I do with a large grain of salt. I was amazed that Brian's recent discussion of making rings garnered over 30 thousand views over a period of a few months. Wow!

I try to machine to print, but there are so many hours in the fabrication of the sleeves and rings that I want to be able to use a part that might not be perfect. So I make my cylinder sleeves first, then make my rings to match them, then I make my pistons to match the rings.

A recent revelation was Terry's light inspection technique. I machined an aluminum plug (don't have any Delrin), painted it black and use a super bright flash light to backlight the rings in the sleeve.

I use George Trimble's formulas for the dimensions of my rings and the stress relief fixture. Given a 1" bore, the thickness of the ring should be between .040" and .045". I go a little bigger, say .050" This is rather critical! Too thin and there is not enough wall pressure, too thick and you have too much installation stress (broken ring). The relaxed gap should be .15" ( I use 4mm - .154"), compressed gap should be .004". The height of the ring is not too important. Smaller is less friction, say .03125"

I use my CAD program to do my math for me. Below is my calculation for the fixture:
1628033769508.png


First I take the internal diameter of the split and gapped ring in the cylinder sleeve. That is represented by the circle on the right, the internal diameter of the ring in my case is .900" Using a half circle allows me to measure the arc length. I determine that the arc length of the internal of the split ring is 2.8234". This is twice the displayed ring half arc length of 1.4137 minus the gap of .004. These dimensions are placed on the left diagram which represents the heat treat fixture. This gives me a diameter for the fixture of .9455", a spacing pin diameter of .154" (I use a 4mm threaded rod) and the position of the gap spacing pin from the center of the fixture of .5038" (I round to .50")

Summary of my piston ring fabrication process:
  • I put the cast iron slug in a 4 jaw chuck for the max gripping power and rigidity.
  • I turn the ring blank down, leaving 300% material, so instead of .050" thick, I turn down to .150. So, for a 1" internal cylinder bore, the ID of the blank would be about .9" and the OD would be about 1.05"
  • Pull the blank out of the lathe and Stress Relieve in the heat treat oven - 1000 to 1050 degrees F for an hour and a half.
  • Furnace cool to less than 200 degrees F before air cooling the rest of the way down. Usually I just leave it in the oven over night.
  • Put back in the 4 jaw chuck centering as well as possible. Turn the ID on the ring blank to final dimension, then turn the OD to final dimension. Finish the OD with emery paper.
  • Part the rings off.
  • Wet sand (with light oil) on a piece of glass with 800 grit paper to clean up edges and get to proper height.
  • Cleave the ring gap. I lightly score the top and bottom of the ring with a fine file, then use a razor blade to cleave the ring. I hold the razor blade so its cutting edge is in the filed groove, then tap the back of the razor blade to cleave the ring.
  • Use a fine diamond file to clean up the gap and get it to .004" in the cylinder sleeve using feeler gauges.
  • Use an Arkansas sharpener's ceramic rod to clean up inside edges.
  • Clean the rings and the heat treat fixture with acetone.
  • Clamp rings into the heat treat fixture. Clamp means finger tight, everything will expand with the heat.
  • Set the heat treat oven to 1050 degrees F and place the loaded ring fixture into the oven.
  • When the oven reaches a temp of about 300 to 400 degrees, pull the fixture out of the oven and rub borax all over the exterior of the rings. This does a good job of preventing scale, it is easy to see where you miss a spot after treating.
  • Stress Relieve the rings in the heat treat oven - 1000 to 1050 degrees F for an hour and a half. (my reference is the study performed by the Naval Research Laboratory on stress relieving cast iron dated 1948)
  • Furnace cool to less than 200 degrees F before opening the furnace.
  • Remove the fixture and drop into a tin can of boiling water to remove the borax.
  • Lightly scotch brite the rings exterior, then remove them from the fixture. Clean the rings as necessary.
  • Perform Terry' light test to determine the quality of the seal of the rings against their cylinder sleeve.
  • Measure each ring, note in the log, coat each with light oil, and place into labeled zip lock bags.

1628033787950.png

Heat Treat oven in use for cast iron stress relief


1628033806997.png

Heat Treat fixture just out of the Oven. I use a single sacrificial ring to insure the stack is flat against the fixture.


1628033826852.png

Finished ring installed in its cylinder sleeve with computer screen back light. Ring Gap can be seen at the top of the ring and is .004".


1628033849581.png

Light Testing Essentials


1628033866744.png

Good light test, only the ring gap lets the light through. In a dark closet here, I needed a little ambient light for the photo. You need to twist the cylinder and look straight down the walls to see if there are any light leaks.

What was my biggest lesson learned? Make all of your cylinder sleeves with exactly the same internal diameter! I made one 1.000" and another 1.006". I just finished making a set of rings for one cylinder, now I need to repeat the process for the other. It would have been better to make hone both cylinders1.006" and all the rings the same.
 
I am thinking I want to tackle the riskiest parts next. The rings are definitely one-this is behind me, the valves and their ability to seal against their valve cages are another. the cam is also one. I am not too worried about the timing gears. OK, It is decided. I am going to tackle a couple of valves and their valve cages and build a test fixture to verify their ability to seal. I really like what Terry M. did in this regard. I have 303 stainless for the valves and some bronze rod for the valve cages. I'll use the 3D printer to make the test fixture out of ABS and some O-rings.
1628182152977.png
 
Last edited:
That image shows far too great a width of the valve seating.

Usual practice is to machine the seating square edged, and if necessary (it usually is) cut a very fine chamfer with a home-made seating cutter used by hand, then gently lap the valve in with a fine, soft paste. Brass polish may be enough.
 
I'm not a fan of seating cutters I prefer to turn a chamfer with the topslide set over to 45deg at the same setting that the valve guide is reamed at so all stays concentric. This can require some complex setups when there is no separate insert and the seat is machined directly into the head, one below was about the most out of balance I have done.

Width of seat varies from one design to another but I've yet to see one shown with a square edge, most seem to range from 1/16" to 1/8" wide.

PICT0345.jpg


That image shows far too great a width of the valve seating.

Usual practice is to machine the seating square edged, and if necessary (it usually is) cut a very fine chamfer with a home-made seating cutter used by hand, then gently lap the valve in with a fine, soft paste. Brass polish may be enough.
Thanks for the information on the size of the valve seat. I really appreciate it. A seemingly insignificant detail such as this can result in a valve does does not seat and an engine that does not run and endless furstration. thanks again.
I'm not a fan of seating cutters I prefer to turn a chamfer with the topslide set over to 45deg at the same setting that the valve guide is reamed at so all stays concentric. This can require some complex setups when there is no separate insert and the seat is machined directly into the head, one below was about the most out of balance I have done.

Width of seat varies from one design to another but I've yet to see one shown with a square edge, most seem to range from 1/16" to 1/8" wide.

PICT0345.jpg


That is an incredible setup. Bravo.
 
Interesting! I've been wondering how to approach the valve seat angle cutting and how wide to make it. I build many small Honda engines and they make this tool which works well for final seat finishing. I plan to fashion something similar in miniature. For reference OS engines use quite a narrow seat width (pictured in head) while Saito use a wide seat. The little OS 20 valves are very nice!
 

Attachments

  • IMG_5448.jpg
    IMG_5448.jpg
    130.8 KB
  • IMG_5452.jpg
    IMG_5452.jpg
    87.9 KB
  • Saito seat.jpg
    Saito seat.jpg
    58.6 KB
  • OS Valve.jpg
    OS Valve.jpg
    81.5 KB
  • IMG_5449 (1).jpg
    IMG_5449 (1).jpg
    97.4 KB
Last edited:
Interesting! I've been wondering how to approach the valve seat angle cutting and how wide to make it. I build many small Honda engines and they make this tool which works well for final seat finishing. I plan to fashion something similar in miniature. For reference OS engines use quite a narrow seat width (pictured in head) while Saito use a wide seat. The little OS 20 valves are very nice!

This is a great turn in Eccentric's build thread for us newbies, and I don't want to de-rail it, but what I like about this is the Honda tool.

Most of us don't mind special setups like the cylinder head in the four jaw chuck, but for a factory, having to do special setups all the time can be a big expense. So custom tools are analyzed to see if they can save money. If the tools can save money over different setups, they'll do it.
 
My only real experience of valve and seat size and design is from the 1960s, when I was "part-time apprentice" at a friend's engine overhaul workshop. I was tasked with re-grinding valves on the Delapina Valve grinder... and fitting new seat inserts and grinding seats in old worn cylinder heads... mostly where the original seats had been directly cut in the head castings. Seats at near enough 1/8" were standard, form Mini 850cc engines to truck engines that had valves 2" diameter. The seal-line was about 1/16" wide after lapping. (Same width as a pencil lead was ideal). But MODEL engines have such tiny valves, I imagine that starting with a square edge of the valve port and lapping to a full line on the valve AND SEAT will be OK.... Spring pressure, hammer when closing etc. are all affected by "scale" factors, (squares and cubes particularly) and the usage is not thousands of hours but hundreds of minutes. If the valve is 10mm across, then 1mm of seat seems sensible. As a maximum...
But I am really only guessing...
K2
 
Interesting! I've been wondering how to approach the valve seat angle cutting and how wide to make it. I build many small Honda engines and they make this tool which works well for final seat finishing. I plan to fashion something similar in miniature. For reference OS engines use quite a narrow seat width (pictured in head) while Saito use a wide seat. The little OS 20 valves are very nice!
I had to make a similar tool for the sealion
Paul
 

Attachments

  • valve seat cutter.PDF
    40.9 KB
Paul,
You are a better man than me putting eight valve seats in a head without valve cages. I can imagine the sweat on your brow as you cut each one hoping not to ruin your head with its innumerable hours already invested.

I remember reading one of Westbury's articles where he suggests installing the valve and then giving it a wack to form the valve seat.
I used a 3 step D cutter as per ETW's recommendation so you cut the hole for the valve guide / then for the porting / and the chamber all in one operation so that everything is in line then you link the round chamber parts together to for the full chamber size.
Yes it was a heart stopping moment on each one considering the amount of machining which would have been wasted by just one slip up.
The valve seats were cut after installing the guides and I used a DTI on the end of the pilot pin to measure the depth ( all cut by hand power )

Paul
 
My only real experience of valve and seat size and design is from the 1960s, when I was "part-time apprentice" at a friend's engine overhaul workshop. I was tasked with re-grinding valves on the Delapina Valve grinder... and fitting new seat inserts and grinding seats in old worn cylinder heads... mostly where the original seats had been directly cut in the head castings. Seats at near enough 1/8" were standard, form Mini 850cc engines to truck engines that had valves 2" diameter. The seal-line was about 1/16" wide after lapping. (Same width as a pencil lead was ideal). But MODEL engines have such tiny valves, I imagine that starting with a square edge of the valve port and lapping to a full line on the valve AND SEAT will be OK.... Spring pressure, hammer when closing etc. are all affected by "scale" factors, (squares and cubes particularly) and the usage is not thousands of hours but hundreds of minutes. If the valve is 10mm across, then 1mm of seat seems sensible. As a maximum...
But I am really only guessing...
K2
On my Webster I machined the valve seats square. Lapping with the valve established sufficient seat width. Would probably cut a small seat on larger valves.
 

Latest posts

Back
Top