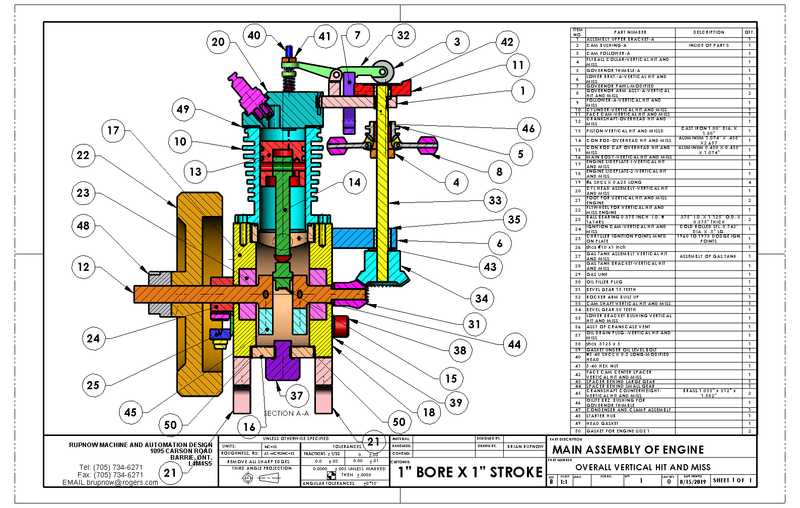
Verical hit and miss engine

Home Model Engine Machinist Forum

Help Support Home Model Engine Machinist Forum:

This site may earn a commission from merchant affiliate links, including eBay, Amazon, and others.
So, here it is guys.--First run. I tried to get it to start for about half an hour. It would fire and run if I put a few drops of gasoline down the sparkplug hole, but then die off once those few drops were burned. This lead me to believe that the spring on the atmospheric intake valve was too strong. I removed the spring and cut two coils off, then reinstalled it. The engine started right up, as you see in the video. My next trick will be to get the engine running properly with the hit and miss lever in place.---Brian
.

Great running engine
 
Hi Brian .I back into the fold but I have cold feet. Now embarking on the lasy DIY Amplifier. Been messing with Stereo Amp Building and winding tranformers.
 
Hello Gus--I'm so glad to hear from you. I thought maybe you had gone to that big engineworks in the sky. I am still fooling with these little engines and loving it. I'm happy that you are well and still finding creative things to do.--Brian
 
We're finished. The engine hits and misses and runs excellently. Keep in mind that there are variables which can be tweaked to give even better hits and misses. The strength of the spring directly below the face cam, the height of the fixed collar below the ring supporting the counterweights. The ignition timing, and the needle valve on the carburetor. Even the size of the brass counterweights. I sell the complete drawing package as .pdf files for $25 Canadian funds, payed into my Paypal account to [email protected] The solid models can be included as .step files or x_t Parasolid files, or even as native Solidworks 2015 files. This has been a fun build, and a relatively fast build. ---Brian Rupnow
 
What is my final opinion of the purchased cast iron rings? They work great. They are a damned snug fit into a piston groove cut with a 0.094" cut off tool, so I had to lay them on a flat sheet of glass with some 600 grit aluminum oxide lapping paste and lap then on both sides to get a proper fit into my piston grooves. They do go onto the piston with much breath holding and much 10W30 oil. I was really afraid that I was going to break them, but didn't. Before being installed on the piston I tried them for fit inside the cylinder. One ring had a gap of 0.004" so was fine. one has an end gap of about 0.002". so I worked the gap a little bit with a points file to widen the gap to 0.004". I couldn't get them to compress enough to go into the cylinder after they were installed on the piston, so I put the cylinder up on the lathe and cut a 20 or 25 degree lead in chamfer on the end closest to the crankshaft. That, along with more 10W30 oil made it possible to install the pistons. This engine rotates very freely with the sparkplug out. Considerably easier than an engine using Viton rings. would I buy these rings again?--Most definitely
 
oNDdpz.jpg
 
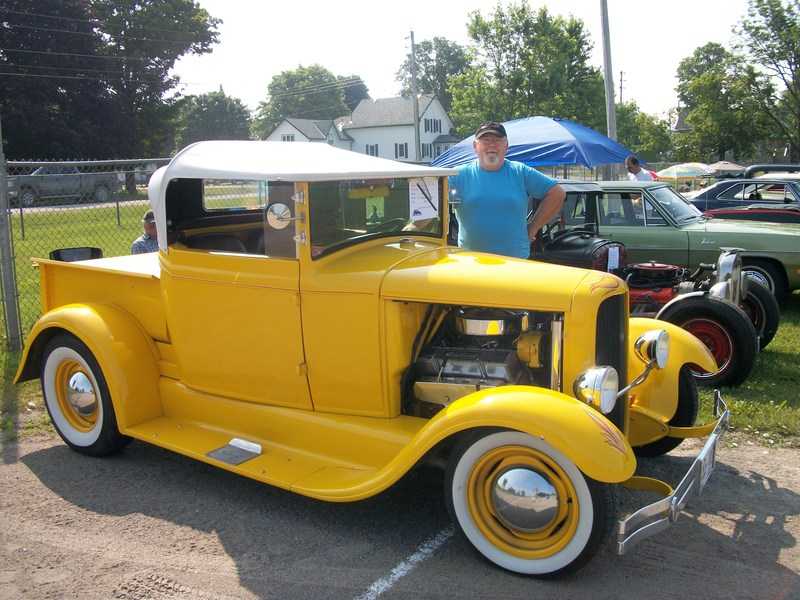
Hello Brian Rupnow. I was pleasantly surprised to see your name attached to this little engine. You probably don't remember me but You used to frequent another site regarding Hot Rods. I first "met" you there.
Do you still have the canary yellow rod? Excellent work on this piece, I am about to go to the beginning and have a good read I'm certain. Congrats on the project and maybe I'll see you in the funny papers?!?! :cool:
 
34-40--Hot Rodding was my lifetime hobby up until about 10 years ago. I got arthritis so bad that I couldn't lay on the cement floor and roll around doing all the things required to keep a hot rod in fighting trim. I sold the little yellow roadster pickup and bought a lathe and a mill and started designing and building small engines.--A hobby that can be done standing up at a machine or setting at my computer. Fifty years as a design engineer designing special purpose machinery and automation is a good background to have for doing this.---Brian
5hK2FO.jpg
 
Last edited:
Well done Brian ! A beautiful little engine and runs nicely . Given some time will you have plans for sale ?
Cheers
John
 
Hooray!
Another great write-up and video of the end result. As usual well worth the reading time over the build.
Thank you Brian for your efforts in building and posting progress or lack thereof as sometimes happens.
The few things I make never get a write-up as I get too involved in the process. (Usually fixing my newbie mistakes that I seem rather good at making in the first place.)
Thanks again for posting.
John B
 
Here is a video of the engine driving the ball lifting machine. Engine is working fine, but ball lifting machine doesn't appreciate being run so fast. It is dropping balls out one side, but my grandson Bren wanted to see it running, and I figured I might as well make a video at the same time.
 
I have an idea for a varying load machine which basically is turning a shaft supported in bearings with a weight offset to one side, driven by a gear reduction and pulley system. Engine under load will have to fight gravity when the weight is being lifted on one side. When weight goes "over the top" and begins to descend, engine will go into "miss" mode. I have sold the plans for this engine and have spent all day updating and correcting all of the 70 drawings involved. Tomorrow I will save them as .pdf files and send them off to the people who purchased them.
 
Thanks for the update Brian, glad to see you're still having fun.

I did let the fella's "over there" know you're doing fine.
 
Last edited:
Yes thank you Brian . Sorry for the delay, I work and sleep pretty strange hours.
These plans are excellent ,very easy for me to follow. I may have to change some of it slightly reaming and tapping to metric because that is all i have.
Thank you Brian for your for your work on this forum and making plans like these available.
I probably won't get a start on this project for a couple of months and I am slow when I do get going.
  • :)
Cheers
John
 
Back
Top