Today was major assembly and gasket day. Everything was calculated to have the outside to outside measurement of the crankshaft hubs to match the inside dimensions of the side-plates and bearings, with the cylinder being exactly in the center. It was close---really close, but no cigar. However, I knew that by the time I put a 0.030" gasket between the side-plates and center section, that it would free up a bit of room. It did, everything cleared and went round and round. I was afraid that I was going to break the cast iron rings when trying to put them on the piston. 10w30 oil saved the day, and I got them on VERY carefully. Then came the question of how in heck do I compress the rings so I can get the piston into the cylinder. This lead to dismounting the cylinder, putting it up in the lathe, and turning a 30 degree internal chamfer on the end which sets closest to the engine. That worked, as with a good deal of butt-clenching I tapped the piston with rings mounted on it into the cylinder (again with lots of 10w30 oil. So--Engine is assembled and everything clears when I turn it over by hand. All I have left to do on the engine is to make the counterweights which mount on the crankshaft.
You are using an out of date browser. It may not display this or other websites correctly.
You should upgrade or use an alternative browser.
You should upgrade or use an alternative browser.
Verical hit and miss engine
- Thread starter Brian Rupnow
- Start date

Help Support Home Model Engine Machinist Forum:
This site may earn a commission from merchant affiliate
links, including eBay, Amazon, and others.
- Joined
- Sep 19, 2015
- Messages
- 274
- Reaction score
- 80
Almost there Brian and looking good. How are your eyes going?
Johno--My eyes are doing great. I have never had any pain thru this entire eye thing, and my vision is much clearer now. I go in to see my optometrist at the end of august to get prescription glasses for "close up" work. I don't need any glasses for distance vision. The only aggravation I have had is trying to remember to put all the different eye drops into each eye for a month following the surgeries.
Yesterday evening I filled the crank-case with oil, made certain that the crankshaft would rotate a full 360 degrees, then took the engine out to my run-in bench. With a 2.5" pulley on my electric motor and a 6" pulley on the engine shaft, I connected the two with a v-belt and let things "run in" for 20 minutes. The engine is turning at about 800 rpm. Some people agree with this "run in" period, some disagree. I always run my engines in for a period of time to free everything up before trying to start the engine. This run in time MAY help the rings to seat. It will certainly take the high spots down.
Yesterday evening I filled the crank-case with oil, made certain that the crankshaft would rotate a full 360 degrees, then took the engine out to my run-in bench. With a 2.5" pulley on my electric motor and a 6" pulley on the engine shaft, I connected the two with a v-belt and let things "run in" for 20 minutes. The engine is turning at about 800 rpm. Some people agree with this "run in" period, some disagree. I always run my engines in for a period of time to free everything up before trying to start the engine. This run in time MAY help the rings to seat. It will certainly take the high spots down.
After a successful half hour run in, the engine was completely torn down this morning so I can mount the counterweights to the crankshaft. If you wanted a look inside, here it is.
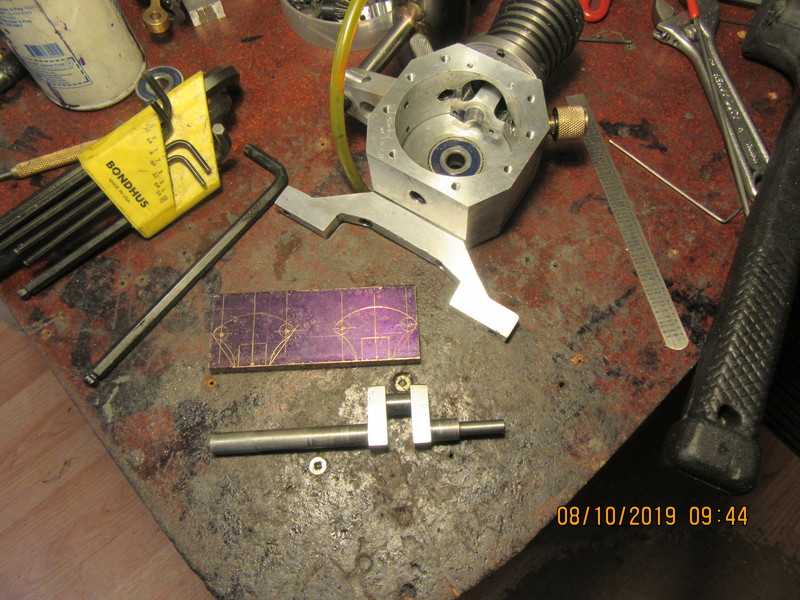

Minh Thanh---Yes.

$19.15
$29.95
Competition Engine Building: Advanced Engine Design and Assembly Techniques (Pro Series)
MBC Inc.
![DreamPlan Home Design and Landscaping Software Free for Windows [PC Download]](https://m.media-amazon.com/images/I/51kvZH2dVLL._SL500_.jpg)
$0.00
DreamPlan Home Design and Landscaping Software Free for Windows [PC Download]
Amazon.com Services LLC

$99.99
AHS Outdoor Wood Boiler Yearly Maintenance Kit with Water Treatment - ProTech 300 & Test Kit
Alternative Heating & Supplies

$45.99
Sunnytech Mini Hot Air Stirling Engine Motor Model Educational Toy Kits Electricity HA001
stirlingtechonline

$49.95
$55.99
DjuiinoStar Hot Air Stirling Engine Assembly Kit: Spend 30 Minutes to Build Your Own Stirling Engine
djuiinostar

$26.89
$34.99
Peachtree Woodworking Supply Bowl Sander Tool Kit w/Dual Bearing Head & Hardwood Handle, 42 Pieces Wood Sander Set, 2 Hook & Loop Sanding Disc Sandpaper Assortment, 1/4 Mandrel Bowl Sander
Peachtree Woodworking Supply Inc

$38.70
$49.99
Becker CAD 12 3D - professional CAD software for 2D + 3D design and modelling - for 3 PCs - 100% compatible with AutoCAD
momox Shop

$9.99 ($1.00 / Count)
$13.99 ($1.40 / Count)
10 Pcs Carbide Burr Set Bits 1/8" Shank Compatible with Dremel Milwaukee Rotary Grinder Tool Kit Accessories Drill Rasp File Attachment Wood Metal Stone Carve Grind Cut Sand Engrave Polish Porting
SworkerDirect

$171.00
$190.00
Genmitsu CNC 3018-PRO Router Kit GRBL Control 3 Axis Plastic Acrylic PCB PVC Wood Carving Milling Engraving Machine, XYZ Working Area 300x180x45mm
SainSmart Official

$599.00
$649.00
FoxAlien Masuter Pro CNC Router Machine, Upgraded 3-Axis Engraving All-Metal Milling Machine for Wood Acrylic MDF Nylon Carving Cutting
FoxAlien Official
Took one of my grandkids and went to the steampunk fair in Coldwater today. A great day, ice cream was eaten, soft drinks were drank. Very few steam engines (I seen one) but lots of weird and wonderful creations and many people both young and old dressed in what they considered "period costumes" . Steampunk is far more about fantasy that any reality that ever existed, but I love it. Bren's day was made when I bought him a fancy hat. I tried to buy one for myself in black, but the guy didn't have anything big enough to fit my fat old head, so I custom ordered one "to be built". I gave the guy $10 and a business card. I may never hear from him again, but probably will. It was a great, fun day.


Okay, I admit it. I had to do a little work today. I made these brass crankshaft counterweights this morning before I picked Bren up to go to the fair.
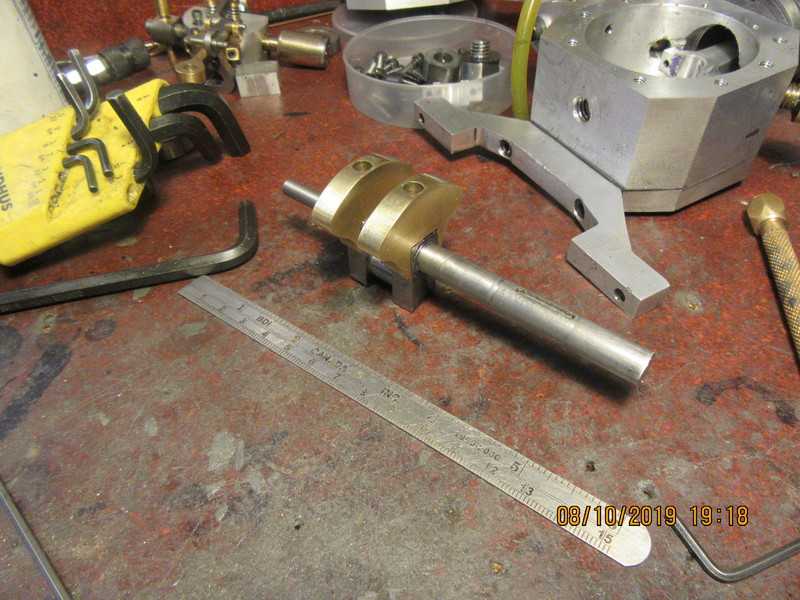

The engine has been completely reassembled, with gaskets between the side-plates and the main body, between the cylinder and the main body, and a head gasket. All clearances have been checked. I will let the engine "run in" with all its components in place for about 20 minutes before setting the valve and ignition timing. I have to buy a set of points and a condenser tomorrow, and after they are installed, we should be ready to go.
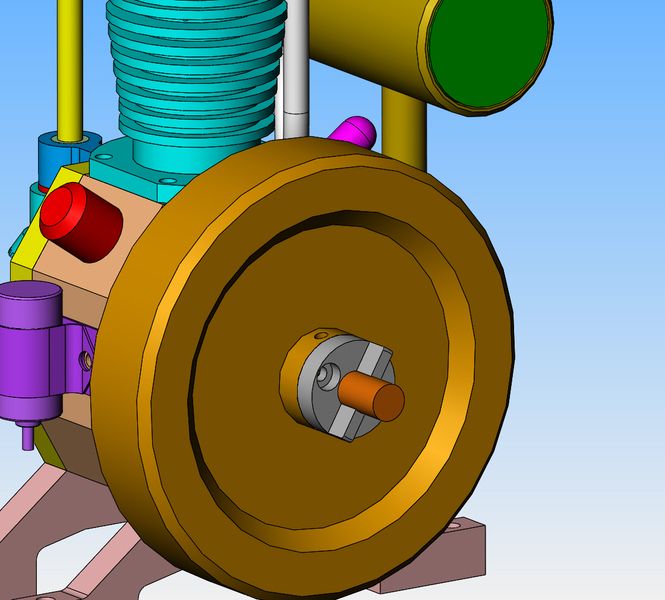
Laying in bed last night, going over the starting procedures for this new engine, I suddenly thought "Oh my God-I may have created a monster!!" I thought I was being very clever by hiding the points and ignition cam in behind the flywheel. Bingo!! How do I adjust the position of the ignition cam to time this thing. This morning I opened the 3D cad model, and breathed a sigh of relief.--One of the grub screws in the ignition cam is accessible from the side, even with the flywheel in place. That means I can set the ignition timing, and when the engine runs satisfactorily, I can loosen the flywheel grubscrew, slide the flywheel back a bit on the shaft, tighten the second ignition cam grubscrew, then slide the flywheel back into place.
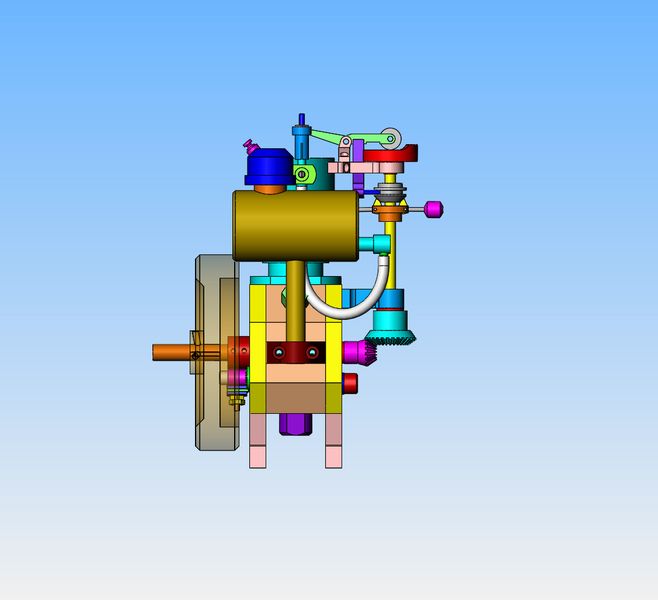

I didn't feel like "builder bear" today, so I went to Part Source and picked up my ignition points and condenser. I have never taken the time before to model a condenser, so when I built the engines I just mounted the condenser wherever I could find room for it. I took half an hour and modelled it, so I can put it into my engine models from now on. I have had the Dodge ignition points and the NGK CM6 sparkplug modelled for years now.
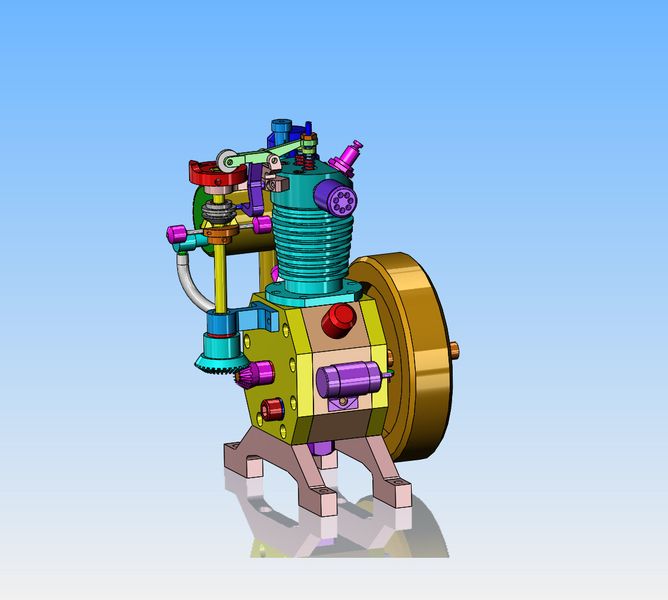

Forgot my starter hub. This one will be a little different. I made the part this afternoon from steel. You will also notice that I changed the orientation of the condenser.--This way makes the wire lead lay flatter so it isn't rubbed by the flywheel.

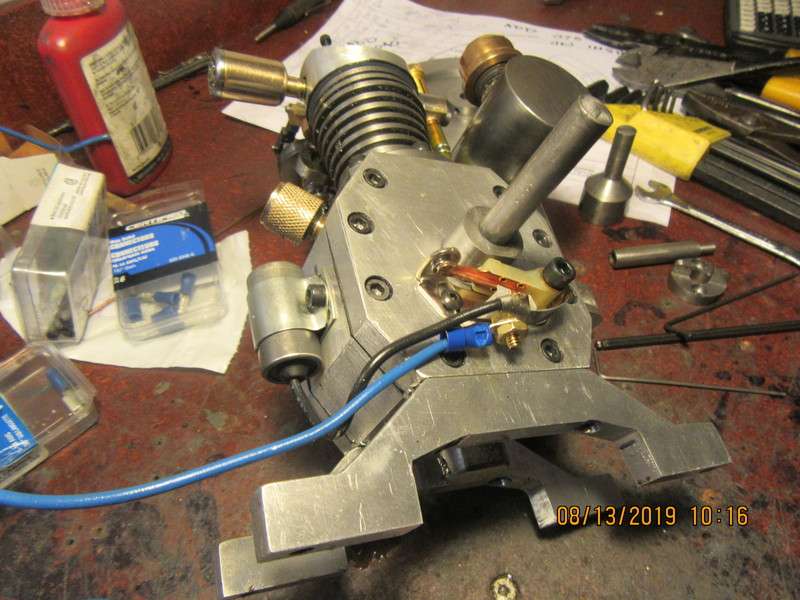
If any of you "Newbees" ever wondered--This is the electrical wiring required for one of these engines. The condenser wire attaches to the only terminal on the ignition points. So does the blue wire, which runs out to one side of the coil which is not shown, Another wire runs from the other coil terminal back to a 12 volt battery. From the battery a wire runs thru a switch and then back to a ground anywhere on the engine. When the points open, it breakes the circuit, and this induces a spark in the sparkplug wire. If the engine runs away on you and starts to over rev, you shut the switch off.

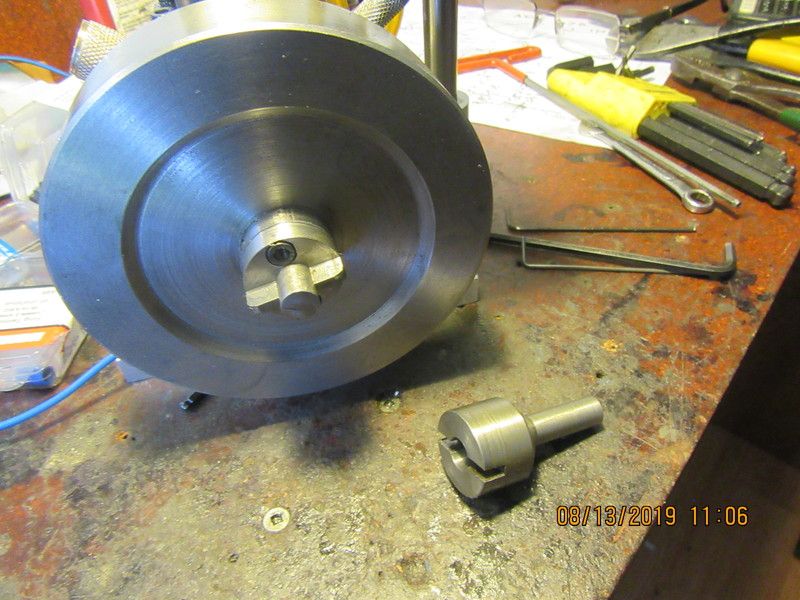
Like I said--Something a little different. The starter hub bolts to the flywheel. The starter spud fits into my 3/8" variable speed drill.

So, here it is guys.--First run. I tried to get it to start for about half an hour. It would fire and run if I put a few drops of gasoline down the sparkplug hole, but then die off once those few drops were burned. This lead me to believe that the spring on the atmospheric intake valve was too strong. I removed the spring and cut two coils off, then reinstalled it. The engine started right up, as you see in the video. My next trick will be to get the engine running properly with the hit and miss lever in place.---Brian
.
.
Congratulations! That seems like it went just about as well as it could have gone.
Bob--The angels were with me on this one.---Brian
- Joined
- Sep 19, 2015
- Messages
- 274
- Reaction score
- 80
Nice Brian congratulations. Is this the first ringed engine you have made ?
Cheers
John
Cheers
John
This is the first engine I have successfully built with metal rings. The compression is phenomenal, and the ability of the engine to coast is much improved over a similar engine using Viton rings.
Similar threads
- Replies
- 1
- Views
- 679
- Replies
- 11
- Views
- 1K
- Replies
- 0
- Views
- 340


![MeshMagic 3D Free 3D Modeling Software [Download]](https://m.media-amazon.com/images/I/B1U+p8ewjGS._SL500_.png)


