You are using an out of date browser. It may not display this or other websites correctly.
You should upgrade or use an alternative browser.
You should upgrade or use an alternative browser.
Tiny Inline 4 Cylinder IC
- Thread starter kcmillin
- Start date

Help Support Home Model Engine Machinist Forum:
This site may earn a commission from merchant affiliate
links, including eBay, Amazon, and others.
- Joined
- Jan 19, 2010
- Messages
- 1,193
- Reaction score
- 41
Thanks Jeff, Hobs, and Nick.
Well, what good are valves without keepers.
These little guys were surprisingly easy to make, so I made a few extra because they are so tiny (I will probably loose one)
Basic Lathe work. I turned to OD to .166" and drilled a 1/16" hole about an inch deep.
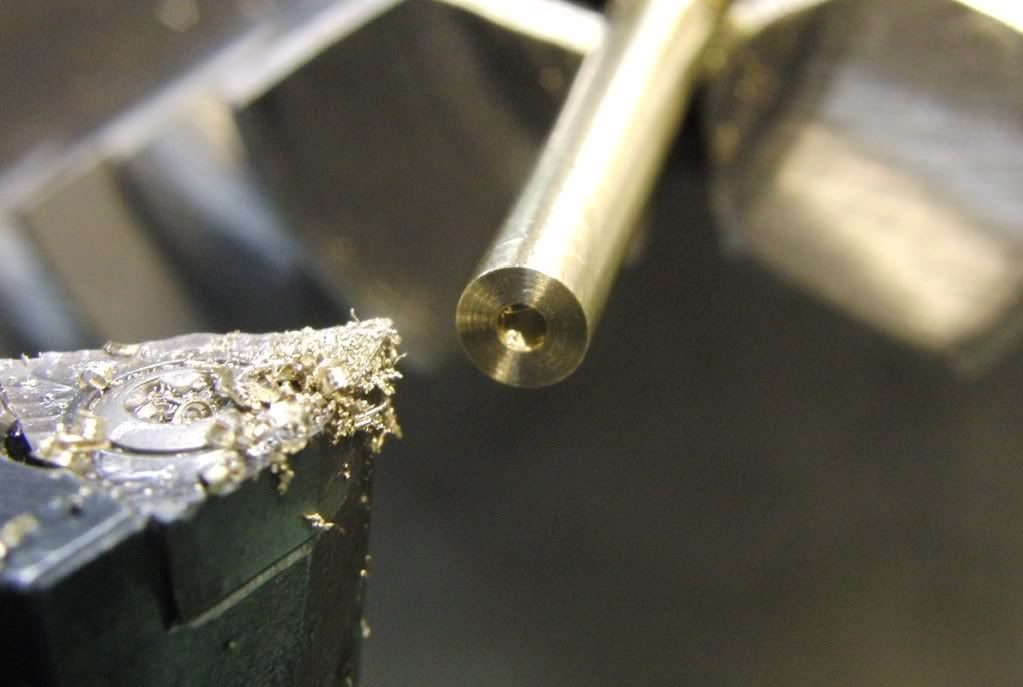
Then I moved it to the mill. A 1/16" end mill was used to make the slot.
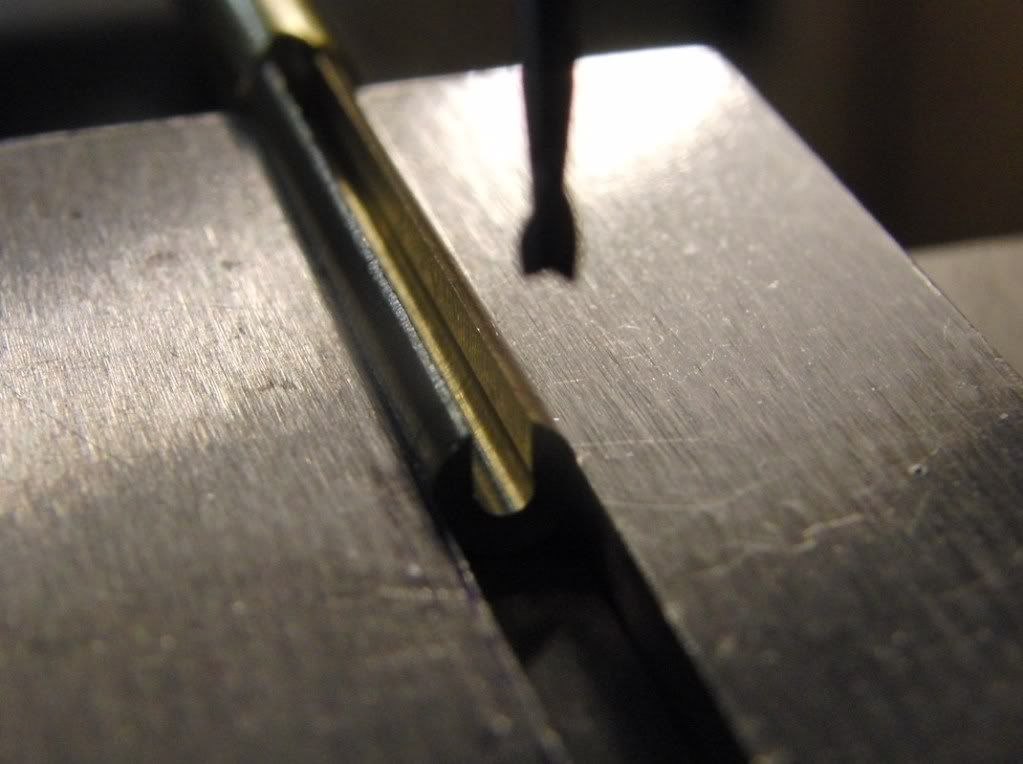
Back over to the lathe and with a 3/32" end mill I countersunk the end for the valve. This will "Keep" the keeper in place.
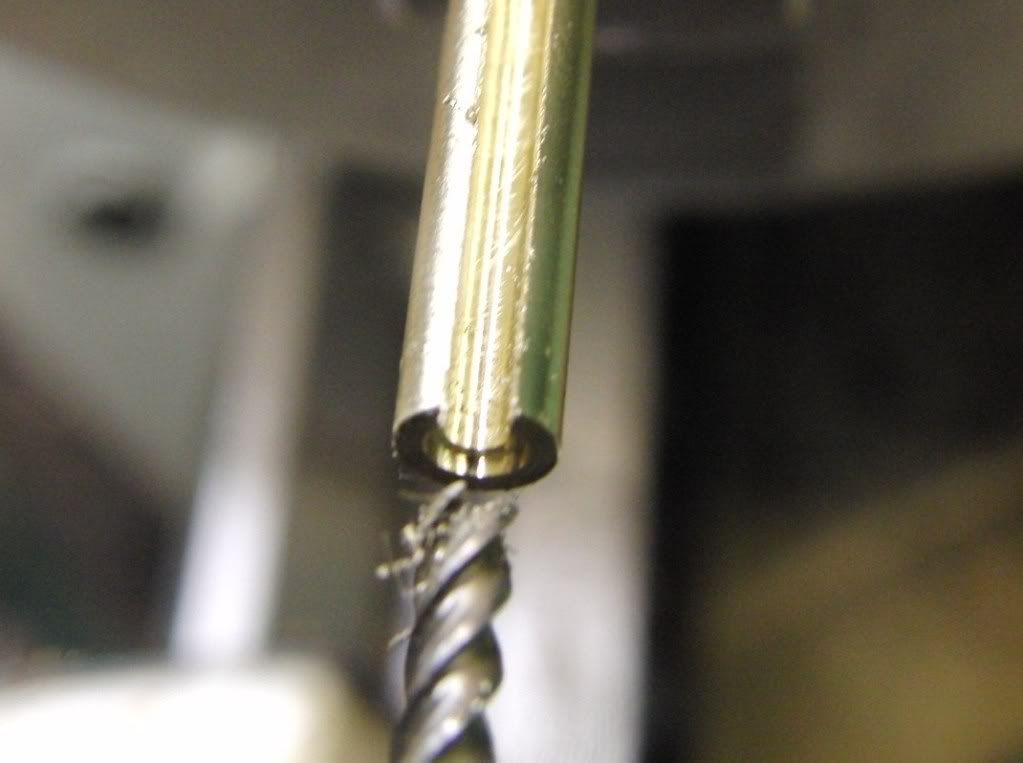
Then part the peice off, it is about .040 long.
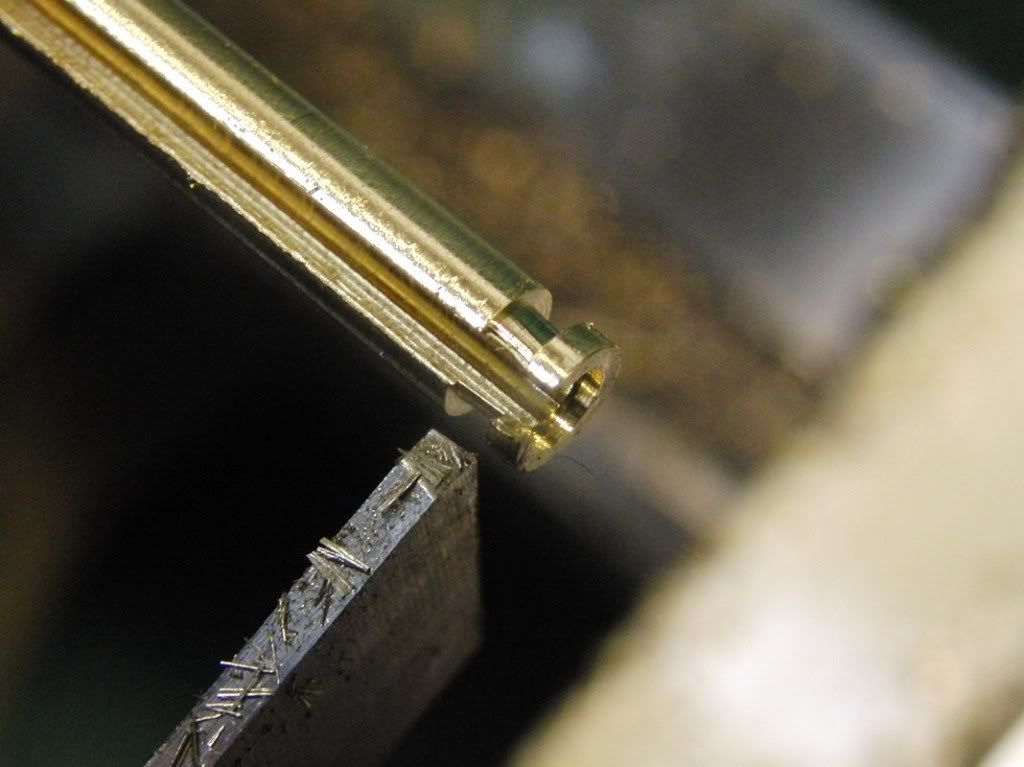
And here they are.
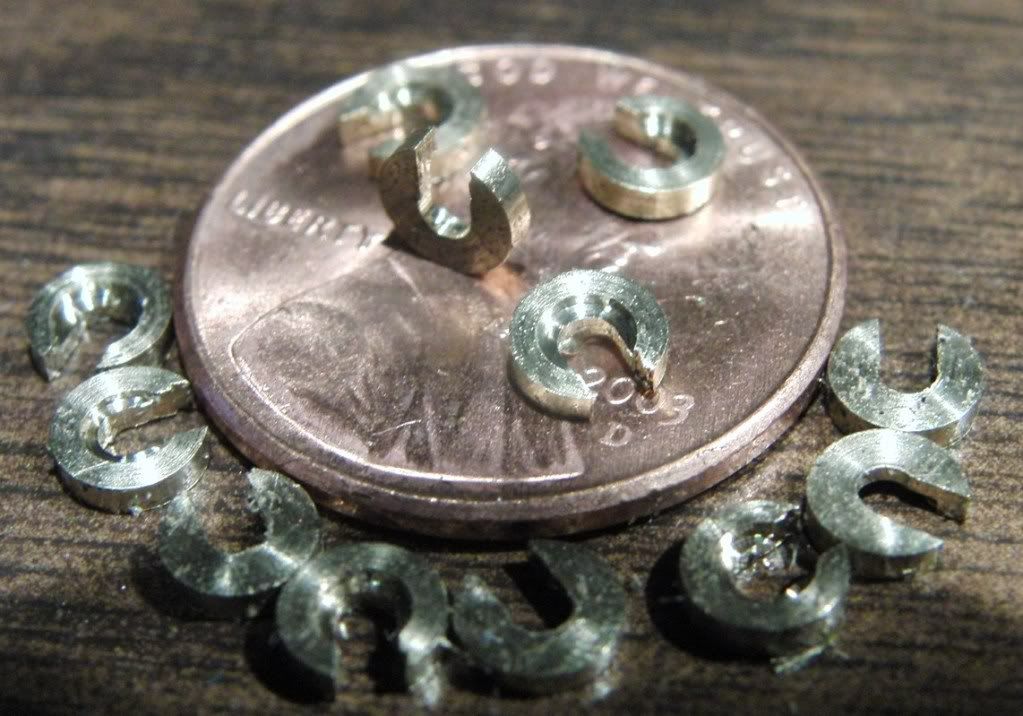
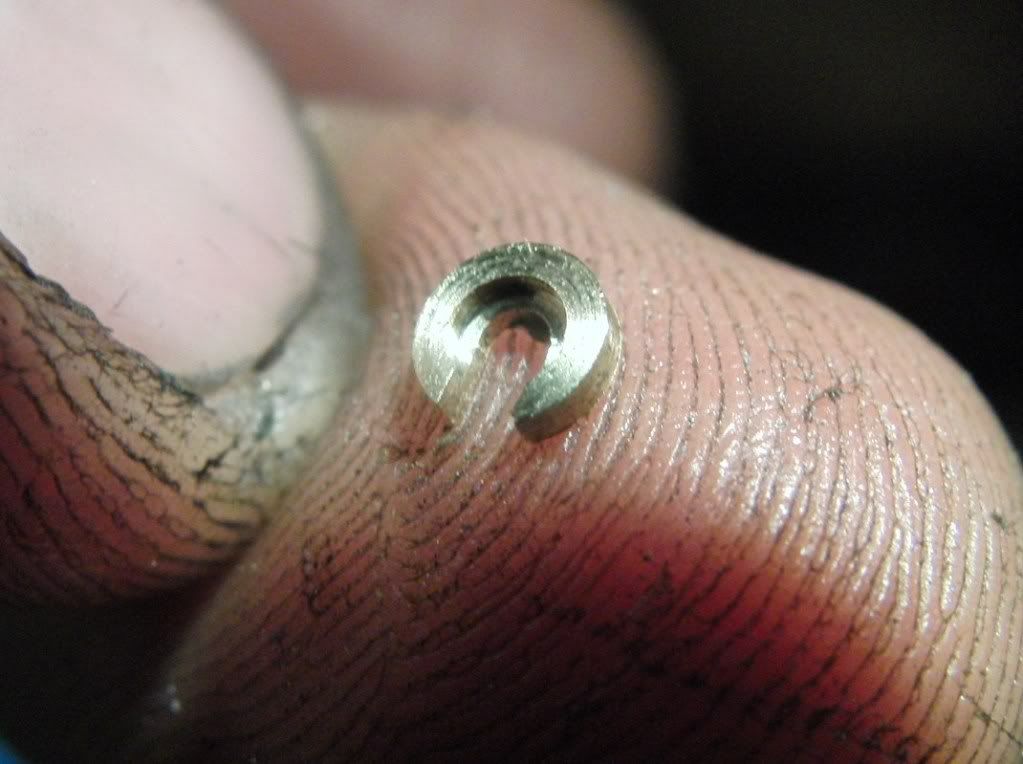
I think these are the smallest parts I have made so far, I was apprehensive at first, but it was so easy I made 27 of them.
Kel
Well, what good are valves without keepers.
These little guys were surprisingly easy to make, so I made a few extra because they are so tiny (I will probably loose one)
Basic Lathe work. I turned to OD to .166" and drilled a 1/16" hole about an inch deep.

Then I moved it to the mill. A 1/16" end mill was used to make the slot.

Back over to the lathe and with a 3/32" end mill I countersunk the end for the valve. This will "Keep" the keeper in place.

Then part the peice off, it is about .040 long.

And here they are.


I think these are the smallest parts I have made so far, I was apprehensive at first, but it was so easy I made 27 of them.
Kel
deere_x475guy
Well-Known Member
Kel, nice job on the keepers and construction description. For a guy that has only been in this a short time you are amazing me. I have to get over my mind block with small parts....

$99.99
AHS Outdoor Wood Boiler Yearly Maintenance Kit with Water Treatment - ProTech 300 & Test Kit
Alternative Heating & Supplies

$24.99
$27.99
HOZLY 5PCS/Lot ISO30 Tool Holder Clamp Flame Proof Rubber Claw CNC Machines Automatic Tool Changer
HOZLY

$39.99
$49.99
Sunnytech Low Temperature Stirling Engine Motor Steam Heat Education Model Toy Kit For mechanical skills (LT001)
stirlingtechonline

$37.82
$49.99
Becker CAD 12 3D - professional CAD software for 2D + 3D design and modelling - for 3 PCs - 100% compatible with AutoCAD
momox Shop

$89.99
Outdoor Wood Boiler Water Treatment Rust Inhibitor- AmTech 300 & Test Kit
Alternative Heating & Supplies
![DreamPlan Home Design and Landscaping Software Free for Windows [PC Download]](https://m.media-amazon.com/images/I/51kvZH2dVLL._SL500_.jpg)
$0.00
DreamPlan Home Design and Landscaping Software Free for Windows [PC Download]
Amazon.com Services LLC

$94.99
$109.99
AHS Woodmaster 4400 Maintenance Kit for Outdoor Wood Boiler Treatment
Alternative Heating & Supplies

$17.65
$18.99
Product-Led SEO: The Why Behind Building Your Organic Growth Strategy
The Quality Books
- Joined
- Jan 19, 2010
- Messages
- 1,193
- Reaction score
- 41
Thanks Everyone for your kind words.
Bob, I owe it all to HMEM (and my machines)
Chuck, Thanks! I was not sure how els to make them efficiently. It got a little hairy parting them off so far out from the chuck, If I did it again, I would only go 5/8" max instead of 1.
Don, I am going out to purchase one of those Lights with the magnifying glasses on them. Oh ya, a clean shop is a pretty good idea, I have already lost a valve and 2 keepers to the "Swarf Pile"
Kel
deere_x475guy said:For a guy that has only been in this a short time you are amazing me. ..
Bob, I owe it all to HMEM (and my machines)
Chuck, Thanks! I was not sure how els to make them efficiently. It got a little hairy parting them off so far out from the chuck, If I did it again, I would only go 5/8" max instead of 1.
Don, I am going out to purchase one of those Lights with the magnifying glasses on them. Oh ya, a clean shop is a pretty good idea, I have already lost a valve and 2 keepers to the "Swarf Pile"
Kel
- Joined
- Jan 19, 2010
- Messages
- 1,193
- Reaction score
- 41
Some more work done this morning.
I am trying to come up with some ways of making multiple parts efficiently and accurately. These rocker arms are another example.
I started with a 1/4" thick by 5/8" wide brass barn and milled it down to .156" thick.
I Drilled the necessary holes for the pivots and rollers.
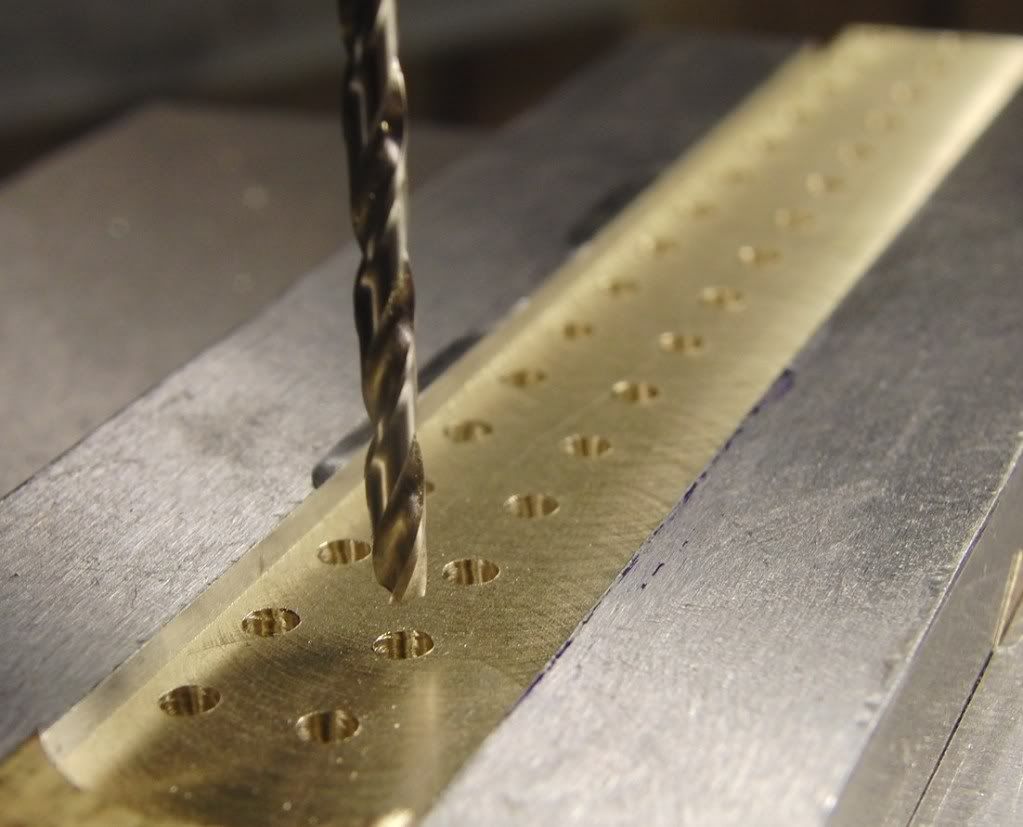
Then I flipped it and milled the profile. I used a 1/4" ball end mill to "Kiss" the edges to get a final thickness of 1/8".
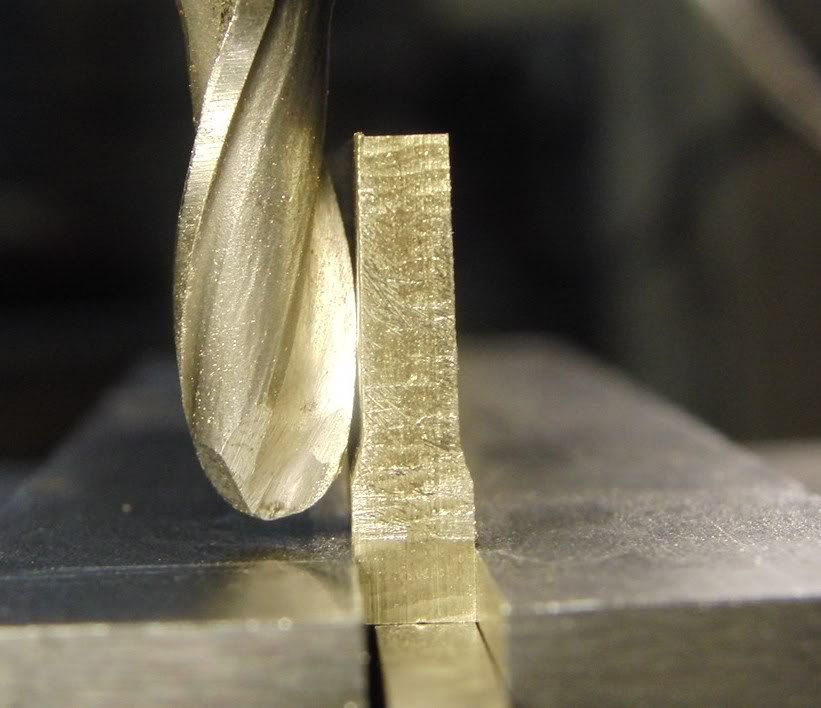
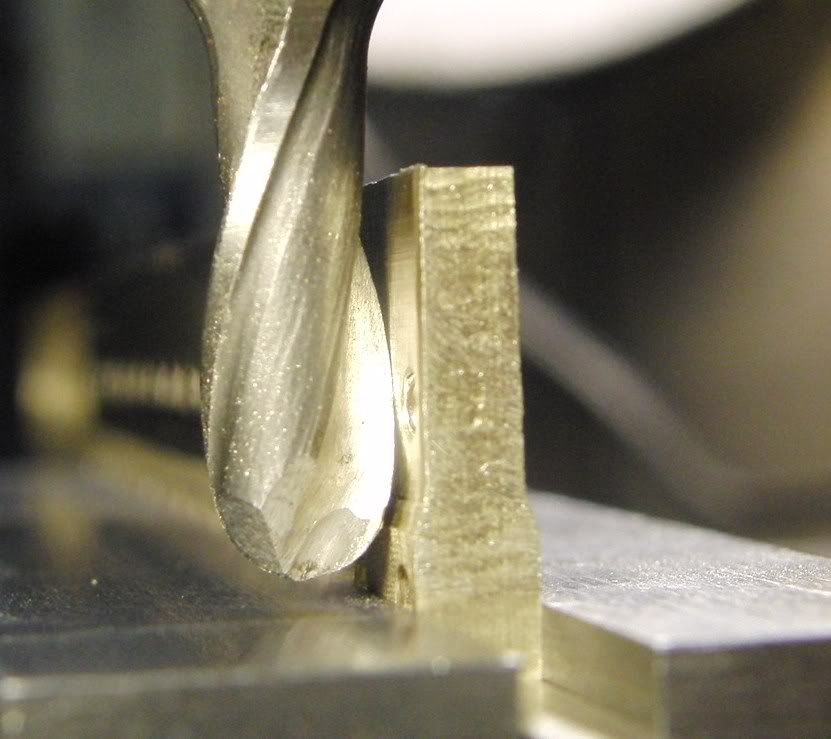
Then I flipped it once more and milled the 1/16" slot for the rollers.
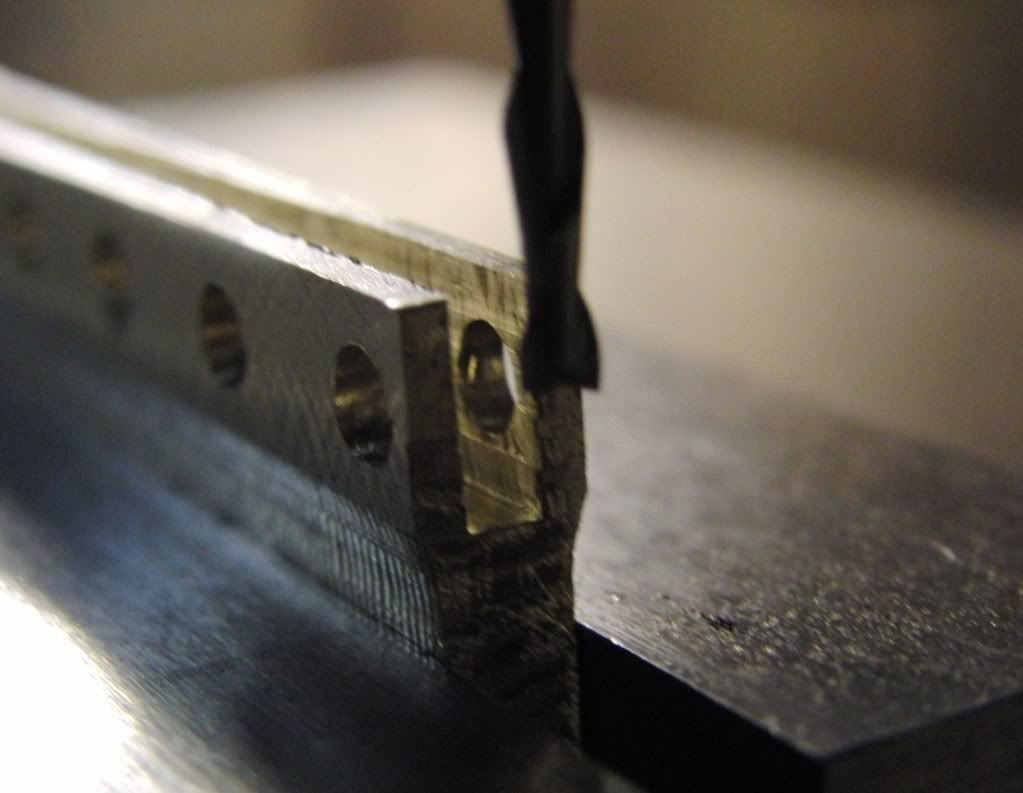
Now it is time to "Part" them off.
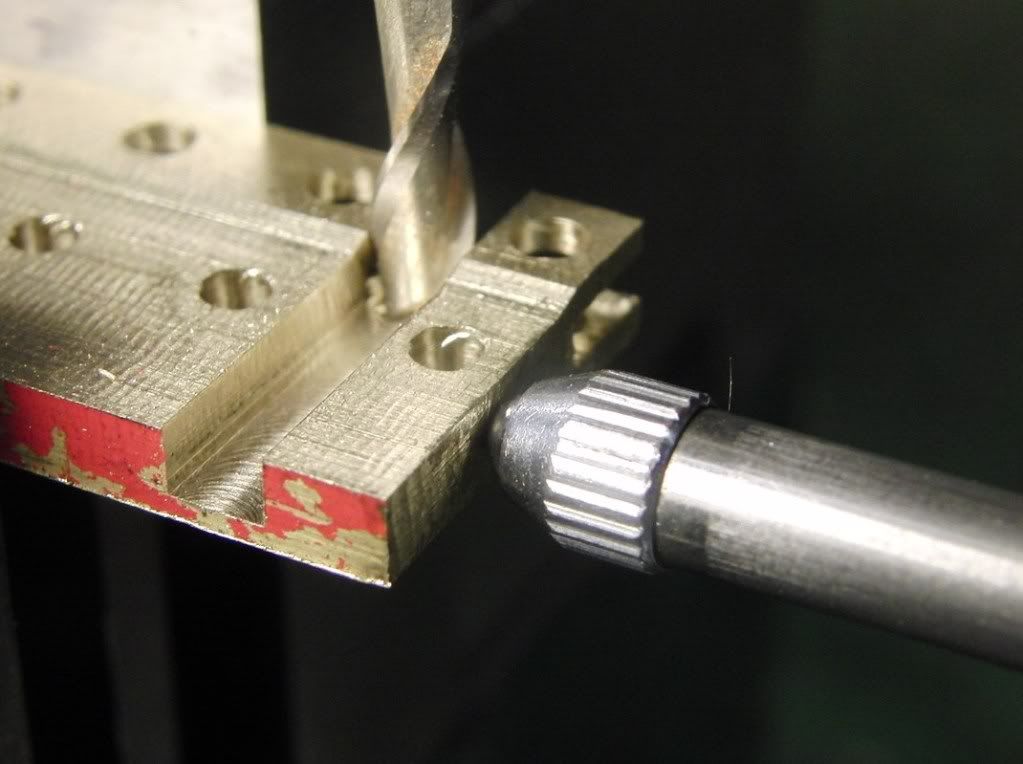
Once again using a dial indicator to locate the part, I used a 1/8" end mill to cut them off.
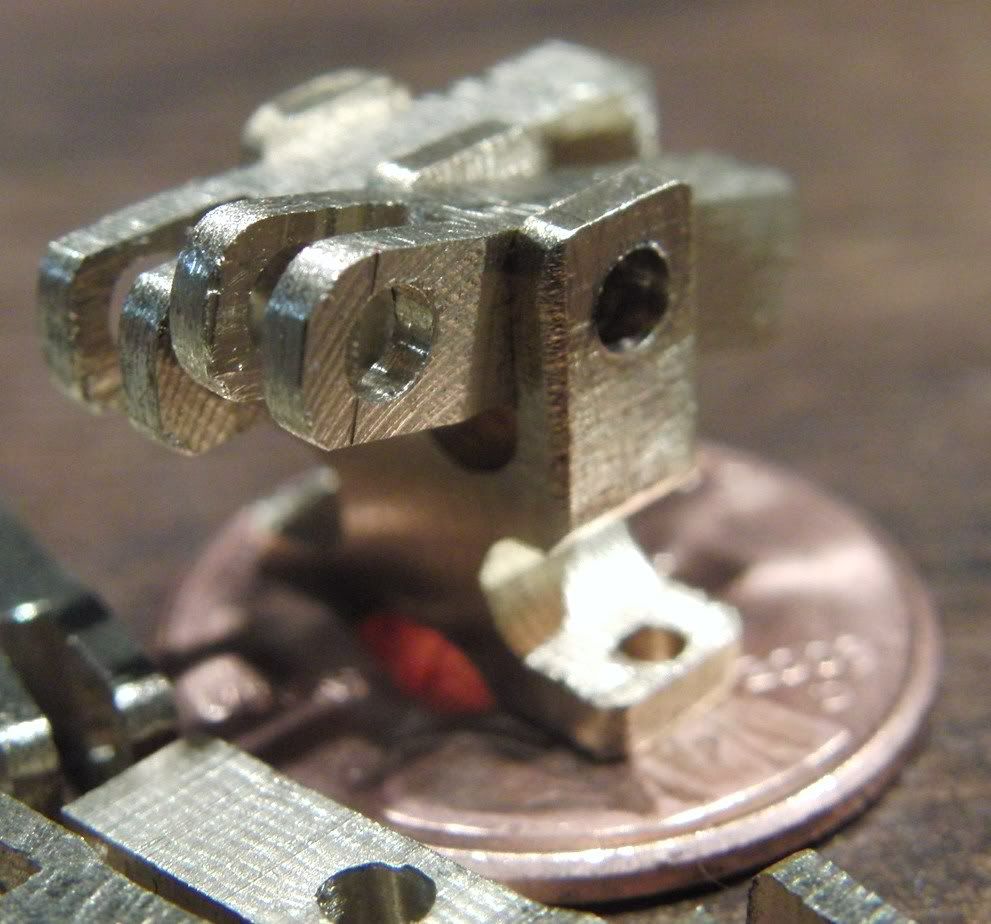
Here is the "Almost Finished" rocker arms. I still have to make to half holes for the pushrods.
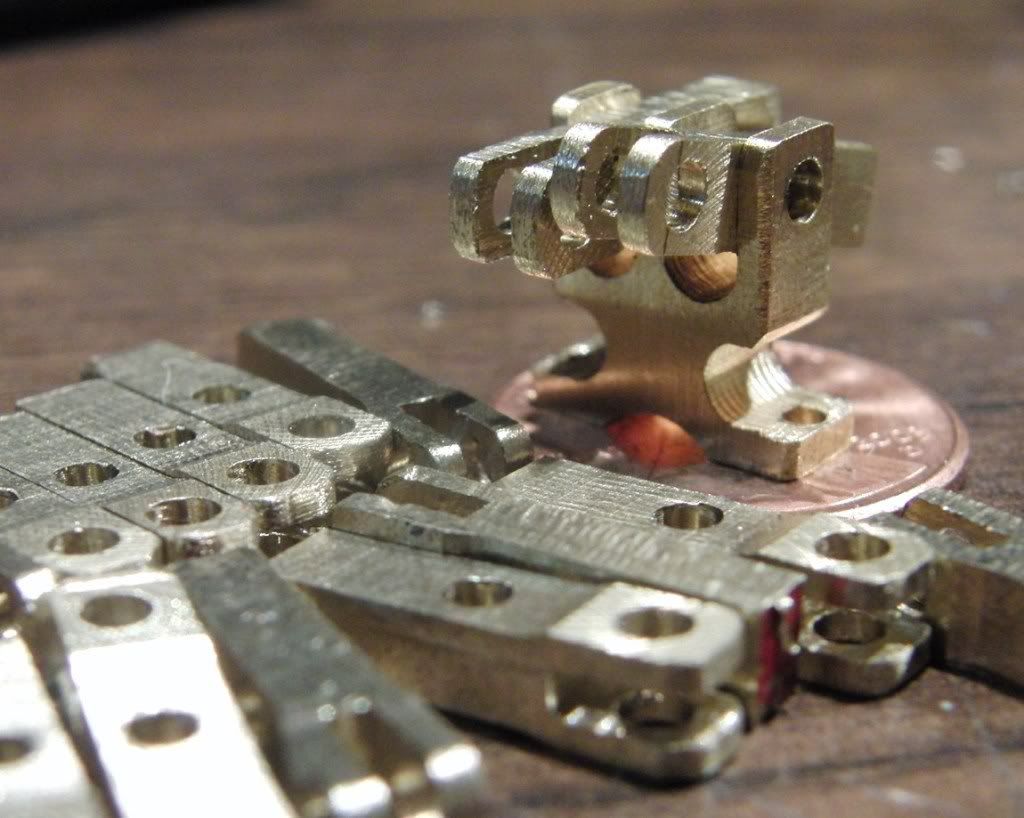
Now on to the rollers and finishing them off.
I am thinking about making a tumbler to polish the parts, or at least take down the sharp edges. What type of medium should I use? Anything common and cheap would be great.
Kel
I am trying to come up with some ways of making multiple parts efficiently and accurately. These rocker arms are another example.
I started with a 1/4" thick by 5/8" wide brass barn and milled it down to .156" thick.
I Drilled the necessary holes for the pivots and rollers.

Then I flipped it and milled the profile. I used a 1/4" ball end mill to "Kiss" the edges to get a final thickness of 1/8".


Then I flipped it once more and milled the 1/16" slot for the rollers.

Now it is time to "Part" them off.
Once again using a dial indicator to locate the part, I used a 1/8" end mill to cut them off.

Here is the "Almost Finished" rocker arms. I still have to make to half holes for the pushrods.


Now on to the rollers and finishing them off.
I am thinking about making a tumbler to polish the parts, or at least take down the sharp edges. What type of medium should I use? Anything common and cheap would be great.
Kel
- Joined
- Feb 17, 2008
- Messages
- 2,330
- Reaction score
- 445
Really like your keeper method, Kel.
I am going to have some keepers coming up in a few weeks and will do them your way, or at least similar. It looks much easier than the way I made my last ones. It's a winner. Thm: Thm:
I think that I may try using a 1/16 ball end mill and put a slot in 5/32 brass stock with it so I won't have to drill the stock.
You are making great progress on an impressive build.
Gail in NM
deere_x475guy
Well-Known Member
Kel, check Mcmaster carr and do a search of finishing media. The ceramic will probably work well to remove the machining marks and deburr....you will need something like walnut shells for polishing afterward.
- Joined
- Jan 19, 2010
- Messages
- 1,193
- Reaction score
- 41
Thanks Gail and Bob.
I am going to check the gun shop for some tumbling media.
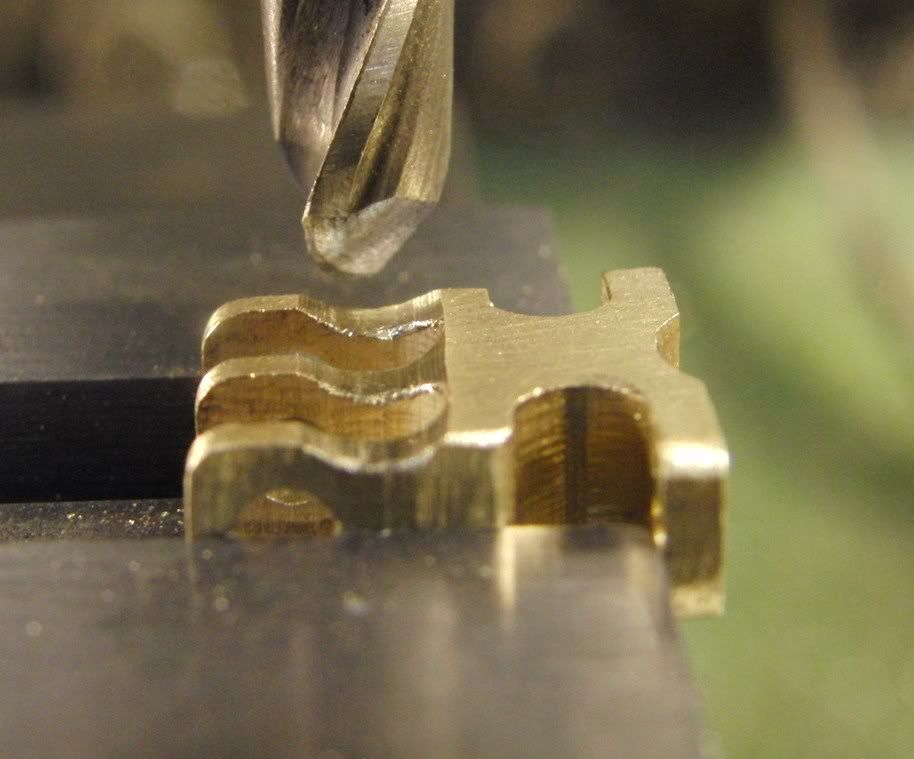
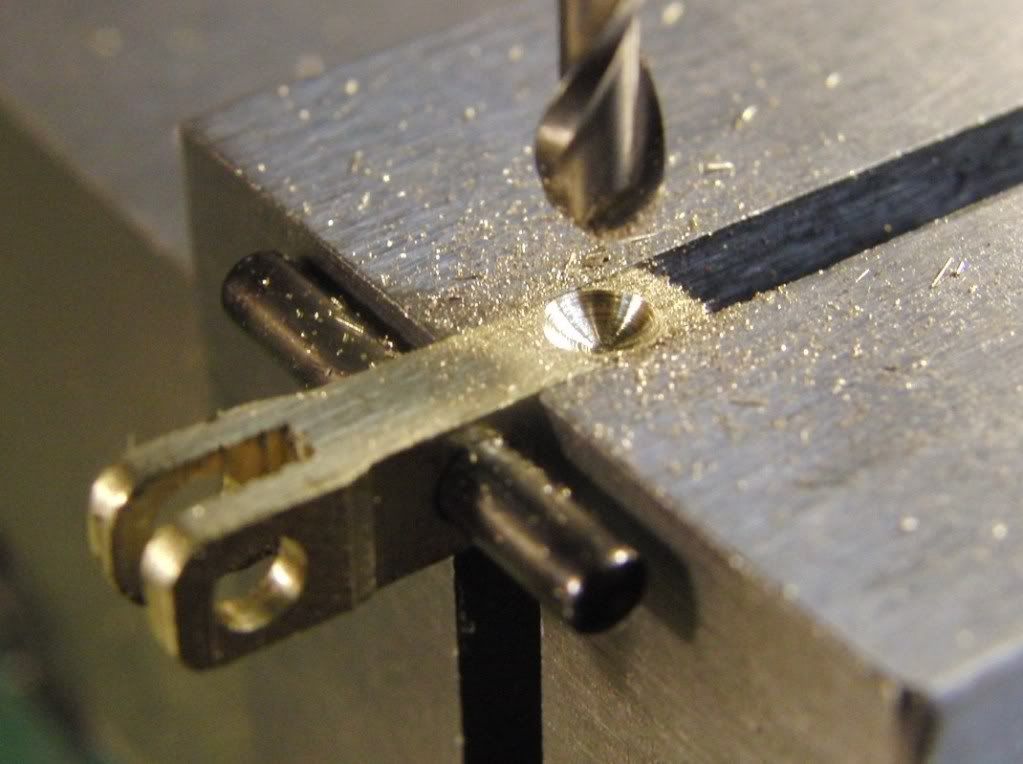
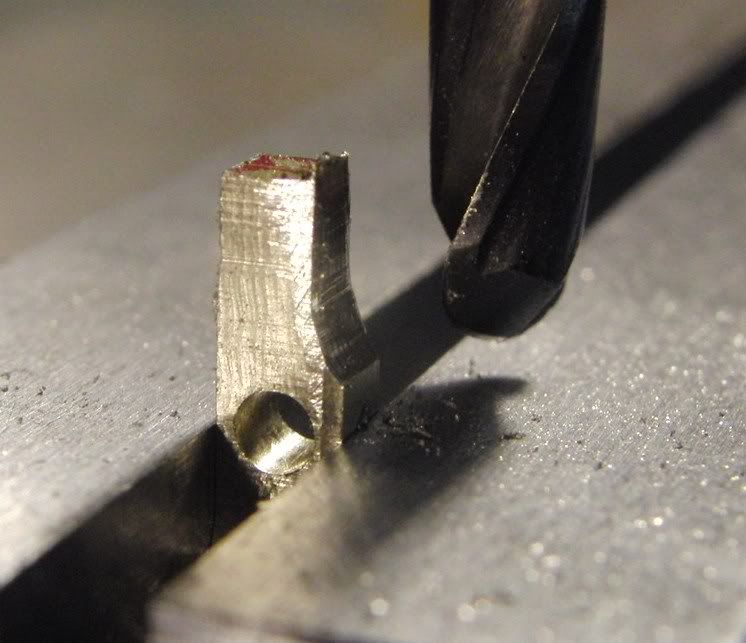
Here are some follow up pics. I had to remove a little material from the rocker arm holders to provide clearance for the rockers.
I also milled a little material away from the top side of the rocker arm to make it a little less blocky.
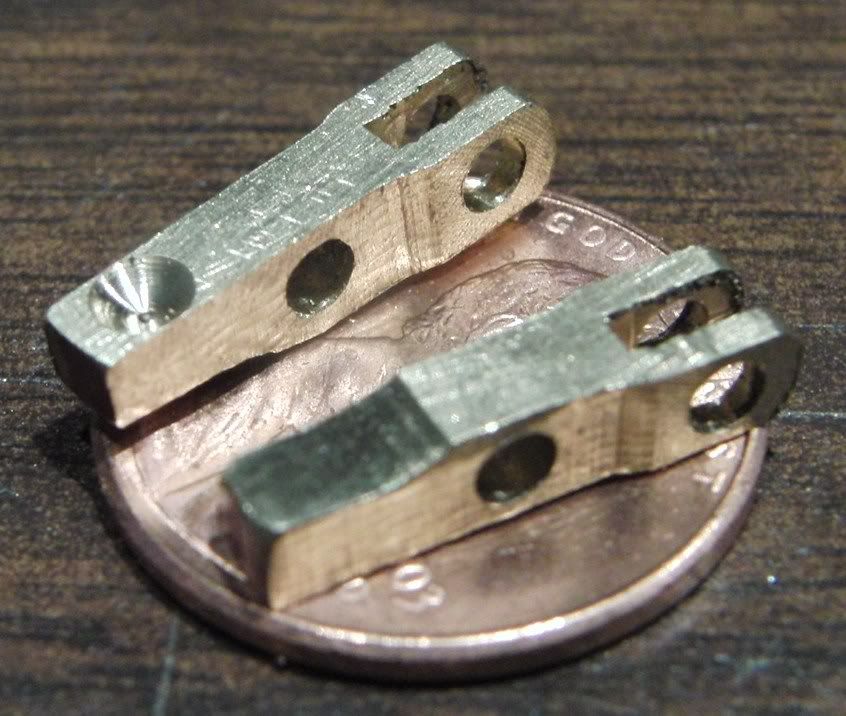
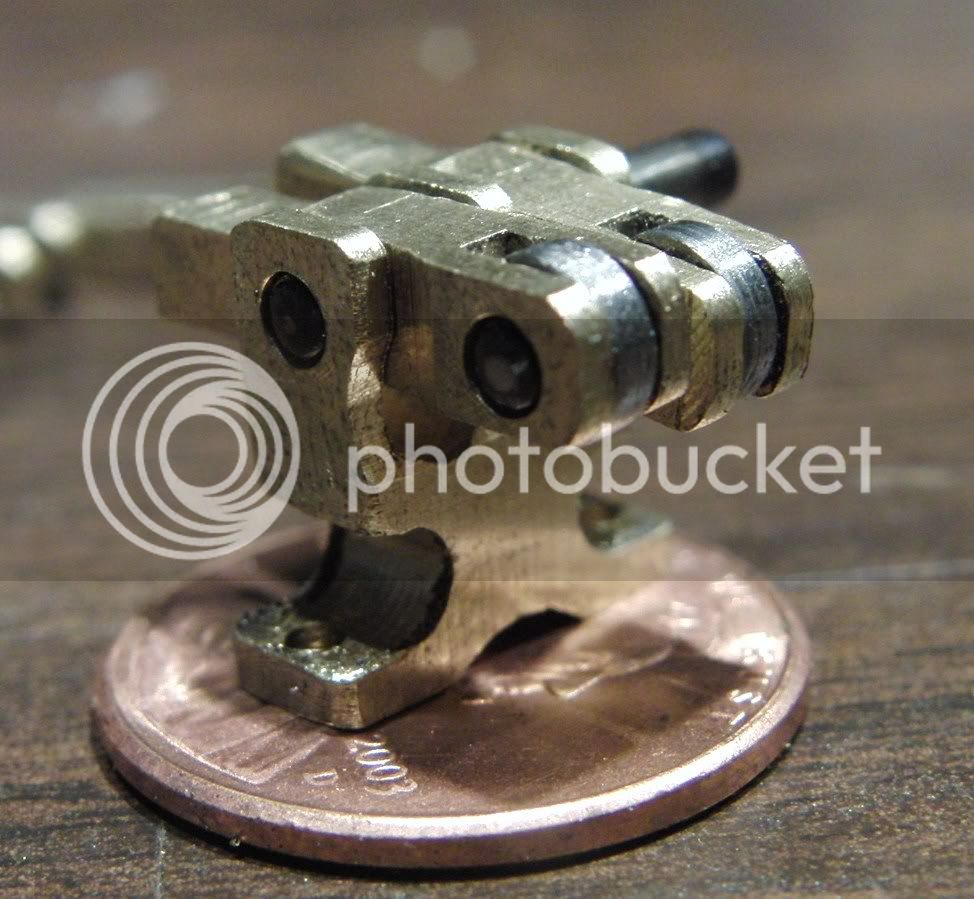
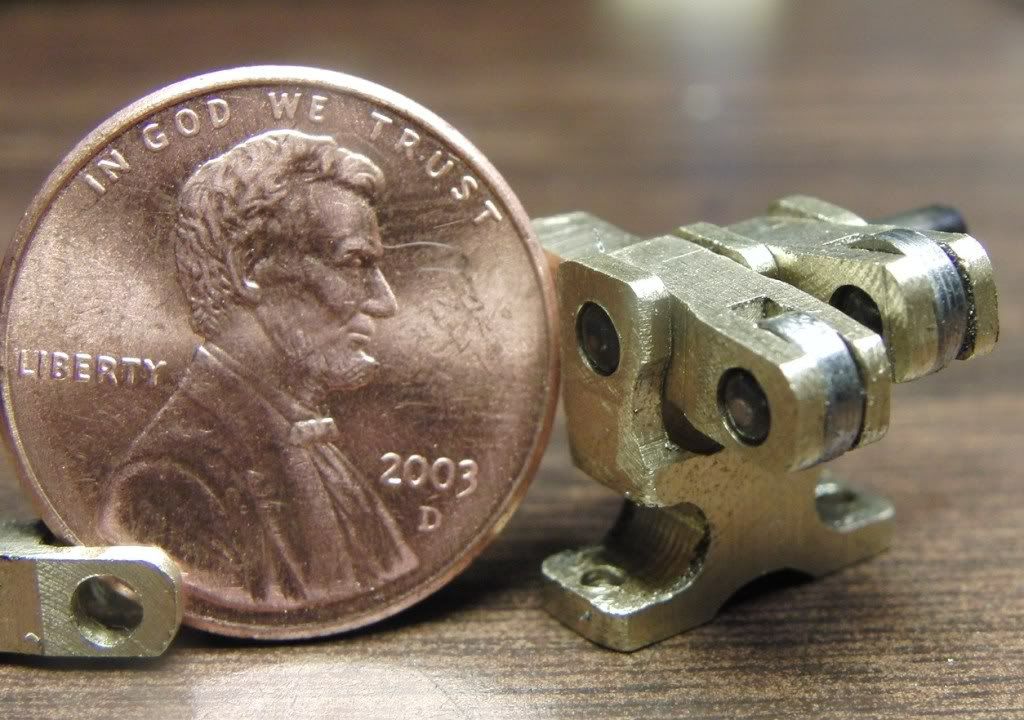
Thanks for lookin!
Kel
I am going to check the gun shop for some tumbling media.
Here are some follow up pics. I had to remove a little material from the rocker arm holders to provide clearance for the rockers.
I also milled a little material away from the top side of the rocker arm to make it a little less blocky.


Thanks for lookin!
Kel
Go to the pet store... lizard bedding is ground walnut shells and corncob is also available there. Much cheaper than the gun store and works just the same.kcmillin said:Thanks Gail and Bob.
I am going to check the gun shop for some tumbling media.
If you need mass quantities, then hit up a sandblasting supply place.
- Joined
- Jan 19, 2010
- Messages
- 1,193
- Reaction score
- 41
Thanks Shred. To the pet store I shall go.
I have completed a very crude tumbler and am currently "Tumbling" the tine rocker arms and holders. They still have machine marks on them so I am starting out with glass beads from my blast cabinet.
-
I also added some small steel washers to aid in the de-buring. I will check every few hours to make sure it is not over doing it.
More updates later.
Kel
- Joined
- Jan 19, 2010
- Messages
- 1,193
- Reaction score
- 41
Arv, I cant show you the parts yet, they are not done yet. (This tumbling sure takes awhile)
I do got some vids of it running.
I am using a mixture of glass beads, aluminum oxide, sleel washers, and a couple big bits to break up the parts when they get stuck together.
<object width="480" height="385"><param name="movie" value="http://www.youtube.com/v/7EKQkVrV3EI?fs=1&hl=en_US"></param><param name="allowFullScreen" value="true"></param><param name="allowscriptaccess" value="always"></param><embed src="http://www.youtube.com/v/7EKQkVrV3EI?fs=1&hl=en_US" type="application/x-shockwave-flash" allowscriptaccess="always" allowfullscreen="true" width="480" height="385"></embed></object>
And what would it be without an action shot.
<object width="480" height="385"><param name="movie" value="http://www.youtube.com/v/y54PPcXfRuM?fs=1&hl=en_US"></param><param name="allowFullScreen" value="true"></param><param name="allowscriptaccess" value="always"></param><embed src="http://www.youtube.com/v/y54PPcXfRuM?fs=1&hl=en_US" type="application/x-shockwave-flash" allowscriptaccess="always" allowfullscreen="true" width="480" height="385"></embed></object>
Kel
zeeprogrammer
Well-Known Member
- Joined
- Mar 14, 2009
- Messages
- 3,362
- Reaction score
- 13
Very neat Kel.
What's the purpose of that 'screw'? in the side? I see it poking in but was wondering if it could cause unwanted marks.
What's the purpose of that 'screw'? in the side? I see it poking in but was wondering if it could cause unwanted marks.
- Joined
- Jan 19, 2010
- Messages
- 1,193
- Reaction score
- 41
Zee, that screw was there to stop the barrel from moving forward in the fixture and detaching itself from the motor shaft.
This tumbler was a complete failure,(No surprise there, it only took me 15 minutes to make) although it did tumble, it did not do it reliably.
I have since made a new tumbler. I used a coffee can this time, it was places in a "Cradle" of roller blade wheels, with a motor turning one of the wheels to rotate the can.
I have not had good luck with my mix of glass beads, aluminum oxide, washers, and bits of ceramic tile. The tool marks were not even changing after 24 hours of tumbeling. They are very light marks too. I think the sandblasting agents were a bad Idea.
So I decided to try the walnut shells. I mixed in some shavings from a stick of polishing rouge and let her go for two days.
The parts were polished but the tool marks remain. I am thinking about crushing up some more ceramic tiles and not using the glass beads and aluminum oxide.
Am I wasting my time with the ceramic tiles? Should I get some "Real" tumbling media. (For removing tool marks)
Your thoughts are appreciated.
Kel
- Joined
- Jul 8, 2009
- Messages
- 774
- Reaction score
- 250
I think you're trying to do at least two steps at the same time which is probably why your results are less that satisfactory. Try removing the tool marks using an aggressive media. If you know anyone that does sandblasting see if you can talk them out of a cup or two of their blasting media, the coarser the better. Then after the tool marks have been removed and you have a matte finish you can polish the parts with the glass beads or walnut shells.
Long time lurker.
Don
Long time lurker.
Don
- Joined
- Jan 19, 2010
- Messages
- 1,193
- Reaction score
- 41
Pat, I have had one of those sanders on the wish list for quite some time, I really need to get me one.
It has been awhile since my last post, but nI have been working. I made the 8 spark plugs I need, and then I received the 74 pieces of white corian pen blanks from e-bay, so I will make 8 more the way that Gail did for the "Tiny"
I also made the cylinder liners. I have yet to hone the little guys, it is going to be quite difficult to hold onto when honing so I might need to make a clamp style holder for them. Not sure yet though, I bored them undersized then used a .374" reamer to make the final bore, then I will hone it (Somehow)
Kel
Maryak
Well-Known Member
- Joined
- Sep 12, 2008
- Messages
- 4,990
- Reaction score
- 77
kcmillin said:I also made the cylinder liners. I have yet to hone the little guys, it is going to be quite difficult to hold onto when honing so I might need to make a clamp style holder for them. Not sure yet though, I bored them undersized then used a .374" reamer to make the final bore, then I will hone it (Somehow)
Kel
Wooden clothes peg ???
Best Regards
Bob
Similar threads
- Replies
- 95
- Views
- 12K


