'Poppin' Flame Licker Engine

Home Model Engine Machinist Forum

Help Support Home Model Engine Machinist Forum:

This site may earn a commission from merchant affiliate links, including eBay, Amazon, and others.
I throw pieces out of my lathe at home on a regular basis.
I tend to be a bit more aggressive than my small hobby machines
capable of handling.

I have done that at work as well on several occasions.
My last incident there involved a 800 pound spider coming loose
and taking flight. No damage to the part or the machine.
I not only had to change trousers, but socks as well! :D

Rick


Nick, sounds like you had a bad day. I have done that many times. Although I have used a parting tool far out from the chuck with sucess, but only on 1 1/2 inch steel. I use a verry liberal amount of tapping oil to complete the job. It makes a verry nice spirial chip. I just recently discovered doing it at a slow rpm is the best. (I have a mini lath and its really easy to get the right speed)

I think you will have no problem using 2 inch steel. Mine runs fine with one 2 1/2 inch flywheel, so you should have no problem with the two inch.(I think?)

kel
 
Thanks for the advice and encouragement guys. Yes brown trousers were the order of the day, infact when I went in and got changed I wondered what had happened then remembered I had brown long jons on :big:

Wow Kel, didn't realise you had got yours running, hadn't got that far up the unread ones - will have a look now - congratulations :bow: ;)

Nick
 
Just a note on making a flywheel for the poppin that is undersize. I made my flywheels out of 2" material, but I had to make the rim thinner on one side as the cam lever sits in this recess.


IronHorse
 
Good point IronHorse.

I had to turn down the spokes on the cam flywheel so the bearing would not hit. There is verry little room for everything in there.

Also when it comes time to getting it running, the valve is CRITICAL, I used a .002 feeler guage, and it has to sit perfectly flat. It the plans It states you may have to bend it to get it to seat. I tried this at first and it was either not seating on the top or not seating on the bottom. I decided to use the last bit of my feeler guage to make a new valve. I bent the valve rod so that when the valve is closed the rod is perpendicular to the head face. Then I set the valve to just rest up against the head. (too much and the top curls up) Also I did not bend the valve, and I have had good luck with this. The engine will run with a bic lighter.

Unlike the Jan Ridders internal valve, the flame position does not seem to be to critical, it will run in many different places, This is how you can adjust the RPM. And Like the plan says the timing is verry forgiving as well. You can play with it to find a sweet spot though.

Also I made the cam duration longer. (about 120-130 degrees) I figure the pressure in the cylinder will force the valve open with verry little resistance. Who knows, I will have to make different cams and tinker with it a bit.

Anyway, I hope this helps when it comes to starting them up for the first time.

Kel

 
Yeah good point iron horse, I noticed that last night.

Excellent work Kel, thanks for your notes on the fine tuning.

Nick
 
NicK,
You mentioned earlier that you planned on selling one of these. How are you going to find a buyer? or do you have one lined up? Also what is a fair price? And is it legal to sell something made from someone els's plans?
I am interested in possibly doing the same. Ya know, to offset the cost of our expensive hobby.

kel
 
Kel,

I was thinking of ebay, or in the for sale section on another forum. I wouldn't have thought there is any reason you can't sell it, seen plenty of stuart turner engines and the like on ebay all the time. Also, ours won't be 100% to the plans anyway.

As for price, I know LTD stirling engines can be had for around £80 on ebay but these are becoming, not mass produced but quite easliy available. I think these should be at least £75 to £100. Although this is enough to easily recoup material costs, it nowhere near pays for your time so I think people would be happy to pay this. You very rarely see these for sale and I think they are desirable due to their good looks and nice running characteristics.

Do you reckon it'd be possible to run one from a tea light? Doubt if the flame would be hot enough?

Nick
 
Nick,
I do think you can run it on a tea light. Mine will run off a butane lighter, although I think butane burns hotter, but these engines are verry forgiveable when it comes to the flame.

I will try a candle flame tonight and see if it works. Ill lel ya know if I get er running. (so far, about 3 hours of running time with an alchohol flame)

Kel
 
Nick,
I got the engine to run using a candle flame, however I coulkd not get a tea light to fit. Are we talking about those little 1 1/2 inch candles about 3/4 inch tall, with an aluminum cup? There is no room with the valve there, I had to tilt a birthday candle into position.

Ya know, I would be pretty tired of the shop If the last thing I did was hacksaw 4 flywheels out of 2 inch bar. OUCH. One of those cheap chinese bandsaws 64 1/2 inch blade, works verry well. I got mine for about $230. And I got to say, it was the best money I ever spent. It cuts through my 2 1/2 inch steel in about 4 minutes. They sell these under many different brand names. All for a resonably good price.

kel
 
Kel,

Oh yeah, forgot about there being no room for one of those! Very impressive running from a candle though, very impressive.

I've been looking at those and power hacksaws for ages to be honest just never got around to it! I think I will soon though. I was planning to sell my centec 2a horizontal miller to fund the hacksaw and a few other bits like rotary table but again, never got around to it!

Might get back in there tonight.

Cheers,

Nick
 
I’ve finally got my self back into the garage for a couple of hours and made a little progress. Things seem to keep getting in the way of this project.

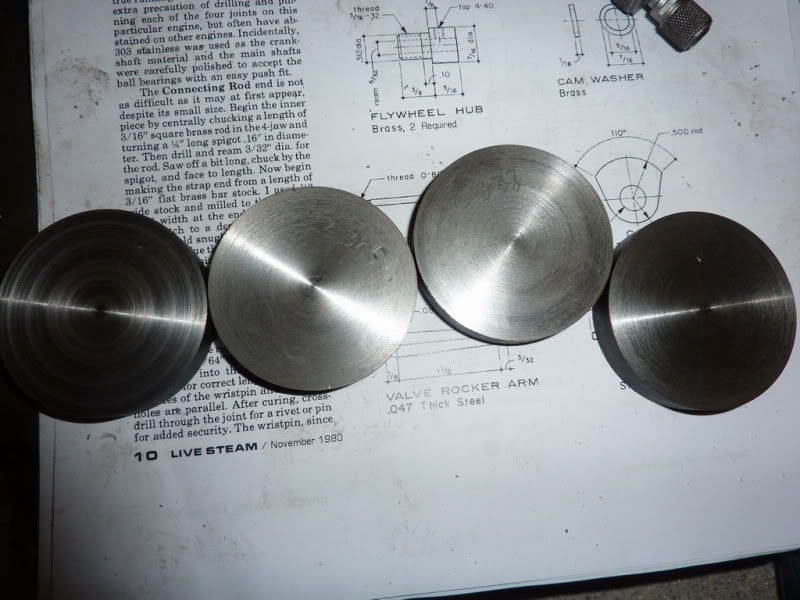
I started by facing all the flywheel blanks to about 10 thou over thickness to leave a little to skim at the end.
Seeing as though I have a few of each part to do I am trying to do a sort of mini production line on this job, completing operations rather than the part. So I left the lathe saddle where it was and faced across each blank. They came out within a few thou of each other so I scribbled the sizes on so I knew how much to take off on the next operations.
2010-02-1921-15-35_0001.jpg


I then centre drilled one of the blanks and drilled out to 5/16” hole ready to turn the recess. I thought I’d be able to do this with my standard carbide tool that I now seem to be able to use for most jobs! After struggling on for about 10 mins I got a 20 thou deep recess that my 1 year old son could have chewed out better with his few teeth! The tool just didn’t have the right clearances, I don’t know why I thought I’d get away with it, it was just rubbing far too much everywhere.

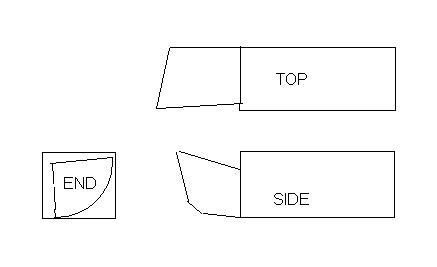
So I decided to take a step back and think about it for a few seconds, then grind an HSS tool just for the job. This sketch shows the angles I ground it to:
FlywheelTool.jpg


This now worked an absolute tread, was very pleased with myself! Don’t know why but it was satisfying to watch it cut, I could cut 30 thou at a time with no chatter or anything. So I quickly turned the recesses on a couple of the flywheels, then got a bit tired and bored and came in. It took little time to do though so not worried about that now.
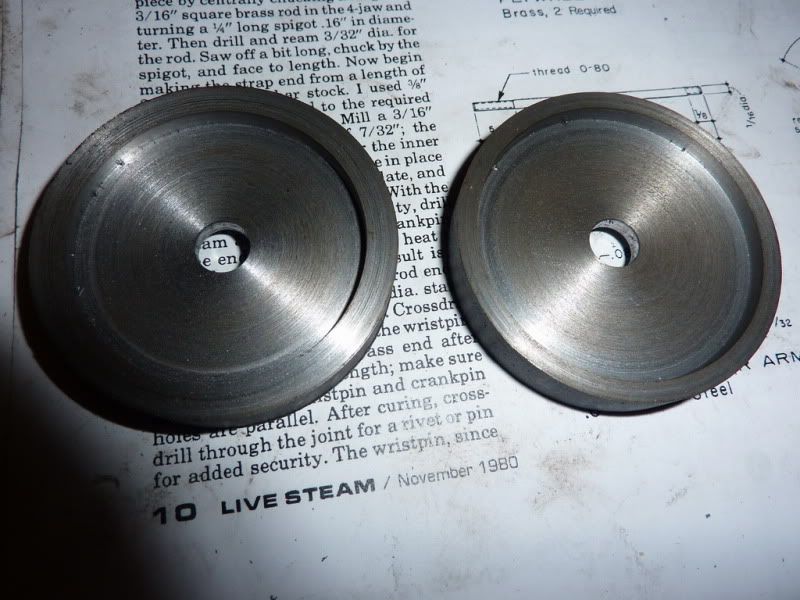
Here is a pic showing 2 flywheels, 1 has a larger recess in 1 side to clear the cam and roller as Iron Horse pointed out earlier.
2010-02-1922-54-18_0002.jpg


It is only now that I realise how light these flywheels are and probably one of the reasons poppin runs so fast. There are 4 9/16” lightening holes called for on the drawings but I’m going to go for 6 smaller holes as I can use the 3 jaws of the chuck to divide those. I will probably turn up a mandrel to mount on in the milling machine and drill in the same way I did the cylinder holes. Should be really quick to spot them all with centre drill then open up that way.

I won’t be getting much more done on this in the coming days – family do tomorrow, might get a bit done sun night but then away with work until thurs night when I should hopefully pick it back up.
Might go for the crankshafts for a change after these flywheels are sorted.

Nick
 
Good job making the new cutter, Nick. Back to progress, then!
Flywheels look good.

Dean
 
Nick,
Good job on the HSS bit. Ive been too cheap to get the indexable tool, so making my own HSS tool bits is the only thing I have to cut with on the lathe. I use an 8 inch grinder with really bad runout on the stone. It really hacks up the HSS, but I get suprisingly good results with it. the angles are just eyeballed. Although I cant cut 30 thou off a steel face cut with my mini lathe. That is mighty impressive Nick.

Your choice to cut six holes in the flywheel will look a whole lot better than the four they show in the plans.

kel

ps. Forget what I said about not bending the valve. This is pretty much necessary to keep the valve flat on the head through the entire stroke.
 
Looking good. I agree, I reckon 6 holes in the flywheels will look much better than 4.

Vic.
 
Nice job with the flywheels Nick.

Stew
 
Hi guys,

John, yes I did realise that after I had done it. I will have to see if I can modify that tool for future use as a double edged one, if not make one that cuts on the other side. I considered making these flywheels in 1 piece with built in hubs as I usually do but decided against it as the nut / hub is the method of clamping the cam disc to flywheel and adjusting it so it would need a redesign.

Well I've had a couple of short sessions in the workshop since my last post. For some reason I just can't get motivated / finding it hard to find the time, then when I do I'm in by 22:00 where as before sometimes I was in the shop until 2am - that's probably not good I know, but still got more done that way!

Anyway, onto the build:

The first job was to get all of the flywheels to the same stage with the recesses turned out, remembering to do 2 flywheels with the larger dia. recess on one side to clear the cam disc.

I then blued the flywheels and marked them up for the lightening holes by using the jaws of the 3 jaw chuck to index the 6 holes.

The idea then was to set about making an arbor to hold the flywheel on – this way I could set the milling machine to the right place then simply fasten each flywheel to the arbor in turn and index around lining up by eye with the markings, tighten nut, then drill. There would still be a bit of manual adjustment but only 1 adjustment for each hole.

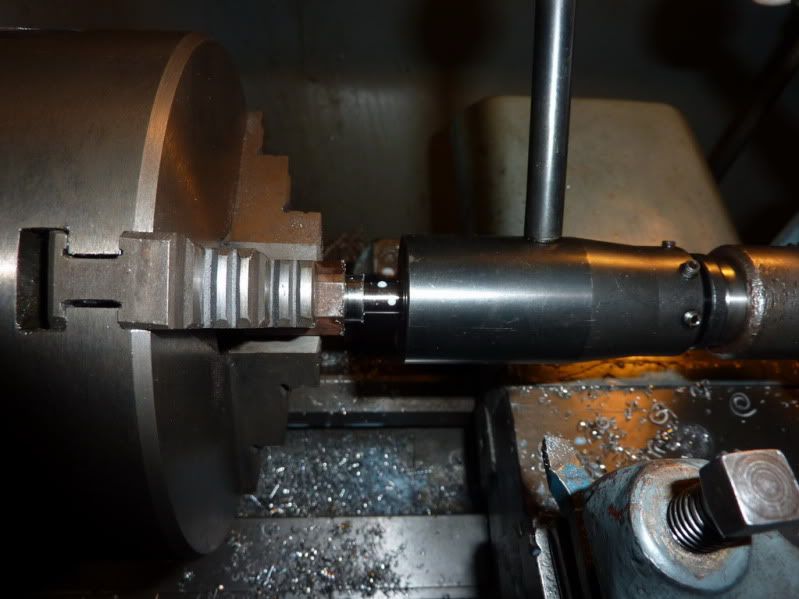
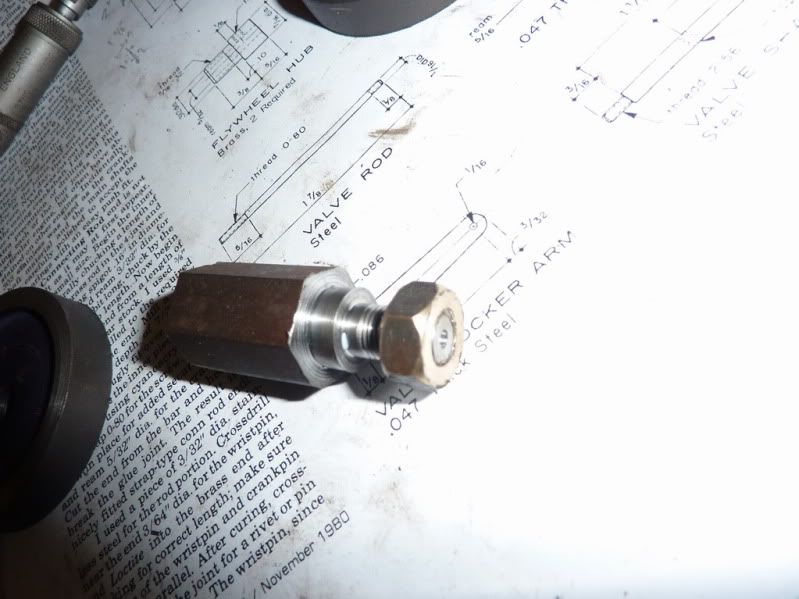
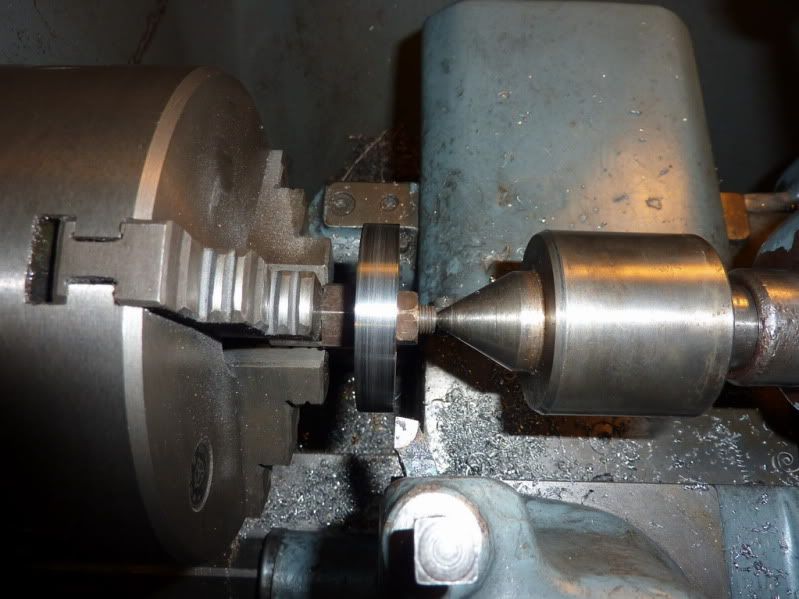
Threading arbour in lathe with tailstock die holder:
2010-02-2521-54-49_0001.jpg


Here is the arbour:
2010-02-2522-19-56_0002.jpg


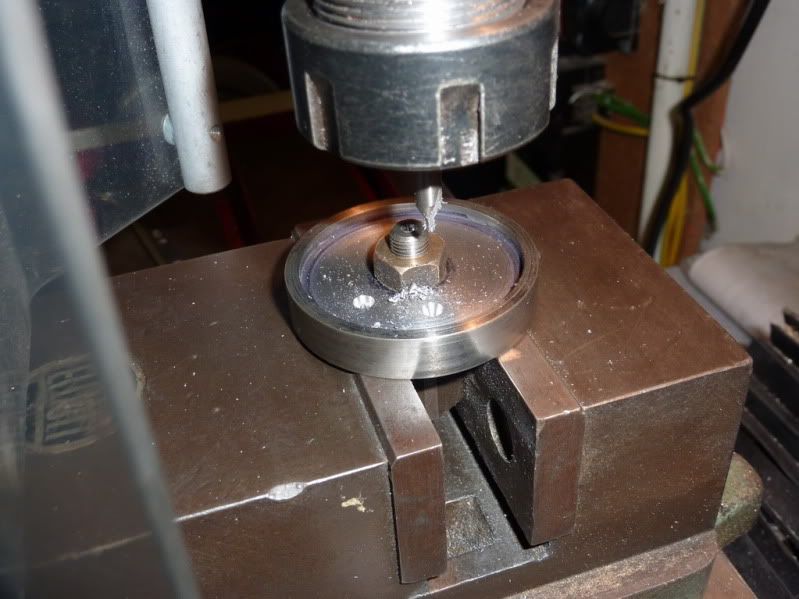
So I plonked it in the milling vice, centred the quill and wound it out to the rad that the lightening holes lie on and started drilling:
2010-02-2522-55-13_0004.jpg


I soon realized that this method was still taking a while – I had to drill 24 holes, 6 on each of 4 flywheels but opened up gradually too. As soon as I started opening the holes up it became less easy to find the centre of the hole by eye.

Luckily, I had a brainwave – I say luckily because by chance I had made the arbor from hexaganol bar – my indexing method was sat there looking me right in the face and I couldn’t see it!

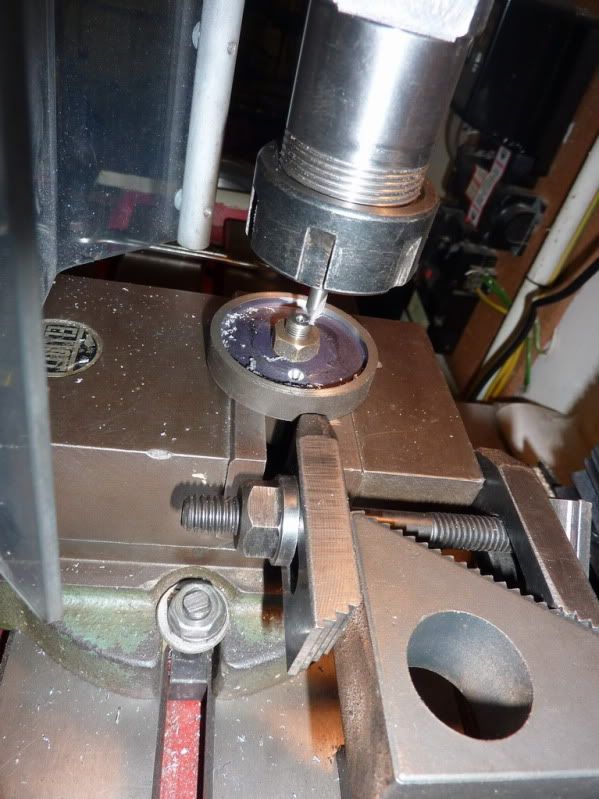
So with a vice depth stop in place (thanks Tim!), all I had to do was clamp the flywheel onto the arbor, slacken the vice and index around onto the 6 flats of the hex bar! This made if very quick to do.
2010-02-2523-22-37_0001.jpg


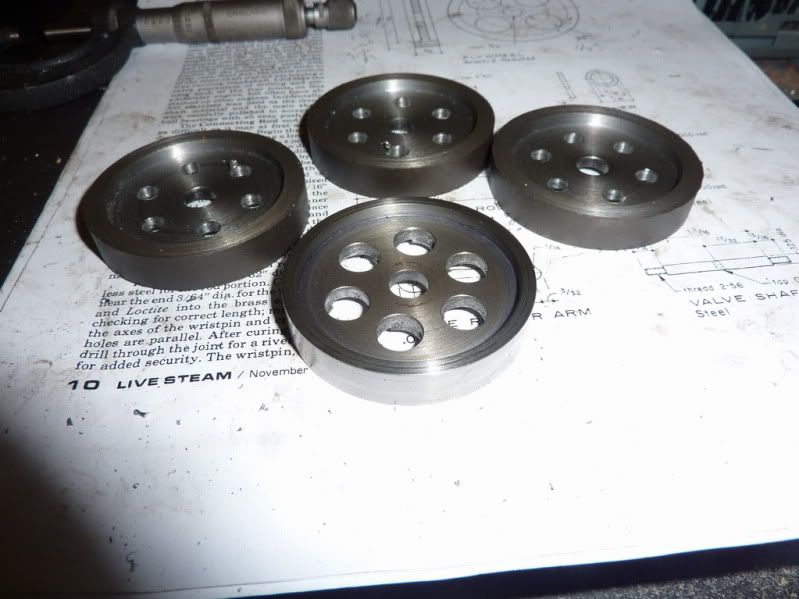
Here are the flywheel s at similar stages:
2010-02-2600-41-52_0005.jpg


Once I got to the larger size I was having massive problems with getting the drill to cut – It did a little then just refused, with or without cutting oil, tried regrinding etc but it was making a right mess chewing through the steel on the first flywheel I did. So I used a slot drill instead, this worked much better, quicker and cleaner.

Once all the holes were drilled I put the arbor back in the lathe and turned a parallel register on the other end. Turned it around and turned a new location diameter for the flywheels (see last pic) I then left the arbor in the chuck and clamped each flywheel on in turn to true up the OD. This should make them run true.
2010-03-0323-00-01_0006.jpg


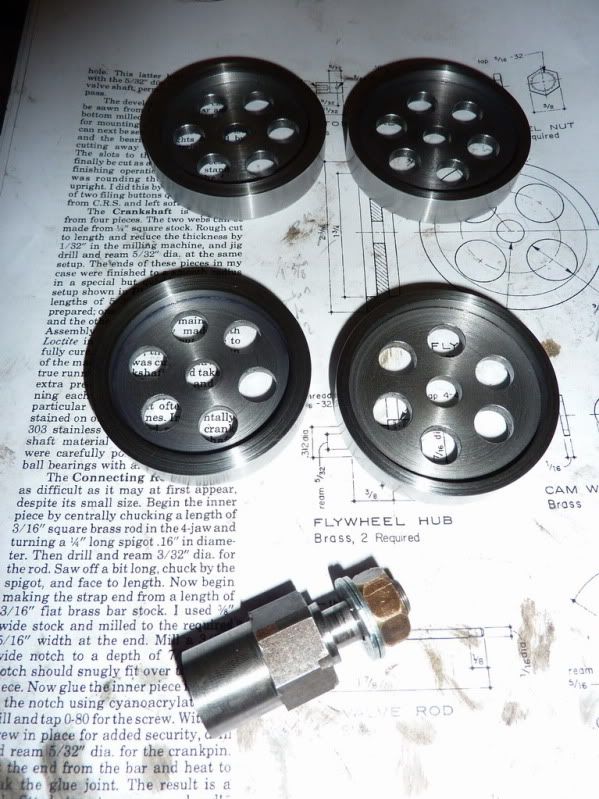
Here are the two pairs of flywheels, I’ve left the centres as they came from the lathe so I can paint.
2010-03-0323-10-17_0007.jpg


Lovin the flywheels Nick.

Your thought of indexing the holes using the hex arbor was an absolute moment of genius. I have a rotary table, and I will definatly use this method whenever I need six, or three equally spaced holes (or anything). Much easier than seting up the rotary table.

Here is a little motivation, You got to think of the awesomely awsome, incredibly cool, fantastic, one of a kind, engine, that runs in a verry unique way, wich you WILL end up with. Remember the great, unexplainable feeling you got when your other flame eater was running for the first time, the incredable sense of pride you felt? I do, and.........well, multiply that ten fold and that is how you will feel after you get these little beauties running.

kel

ps. I really should not talk though, I have not been millin' in about a week and a half. But I got something pretty cool brewing in the old noggin.
 
They look just dandy, Nick.
The hex bar indexing thing is good for making cutters and things like that, too. I have a set of four of them made up for holding different sized work pieces. Very handy. You made good use of it, plus, you showed another use for them!

I hope you don't mind me saying, but don't worry about the motivation thing. We all have little spells of that. Me too, at the moment, and for the last few weeks. After working on someone else's stuff all day, sometimes you just feel like relaxing in the evenings. Just saying, you're not the only one.
(I've been pecking at the same little Jerry Howell burner for nearly three weeks, while John has got eight or nine of them nearly done in that time.)

You're doing fine, and it's coming along well.

Dean
 

Latest posts

Back
Top