Old School Barstock 2 Stroke

Home Model Engine Machinist Forum

Help Support Home Model Engine Machinist Forum:

This site may earn a commission from merchant affiliate links, including eBay, Amazon, and others.
For all of those who wondered why I didn't do the crankcase bore on my mill rather than the lathe, as I explained, on a standard, conventional boring head, you can not advance the boring tool inside a bored cavity. Here is a video of an "automatic" boring head similar to the Waulhopter, that can be advanced while the tool is running.
[ame]https://www.youtube.com/watch?v=I4vbBqV6vsU[/ame]
 
ENCO sells / has sold Wohlhaupter style "automatic" boring heads for about $ 250.- when I purchased mine quite a while ago. Works like a charm for planing and internal recess making provided you have the right tool for creating the recess. Has two feed settings: 0.0005 and 0.001 per revolution - you count the clicks for determining the advance / diameter until you reach the desired diameter / clicks counted. Used it for O-Ring grove making and similar.

Peter J.
 
ENCO sells / has sold Wohlhaupter style "automatic" boring heads for about $ 250.- when I purchased mine quite a while ago. Works like a charm for planing and internal recess making provided you have the right tool for creating the recess. Used it for O-Ring grove making and similar.

Peter J.
Yes, and our Canadian dollar is worth about 37 cents American right now---
 
Yes, Brian that is a very unfortunate fact right now. It puts a damper on the best intentions.

Peter J.
 
ENCO sells / has sold Wohlhaupter style "automatic" boring heads for about $ 250.- when I purchased mine quite a while ago. Peter J.

Hmm.. I was not aware of this. That's about 1/4 the cost of a decent used Wohlhaupter on ebay...which rarely comes with R8 & I'm still not clear if/how they can be converted. Does this look the same as yours Peter? I never know what to make of the clones anymore - is this a bad copy of a semi decent Taiwanese copy of a ... :)
http://www.use-enco.com/CGI/INLMPI?PMPANO=0307692&PMKBNO=1123&PMPAGE=56

Sorry for the auto boring head side-bar inquiry.
 
Peter,
The automatic boring head I purchased quite a while ago is found in the ENCO online catalog page 483, model number 222 - 1100 with two feeds. Its currently listed in the online ENCO catalog for $ 384.89. The boring head I received is of a good quality / finish and works flawlessly although it came without instructions. The advertising at the time stated that it would come without instructions / manual.

Anybody considering a purchase of this item just missed the chance to buy at a 30 percent discount, sorry to bring that up.

Peter J.
 
I have a similar boring head, it is a Kuroda brand made in Japan. It's an excellent boring head, mine has an R8 shank on it, but it is able to have any type shank fitted to it. I have mainly used the facing facility on it to face the bottom of large counterbores in plates. One difference to the one in the video is that mine only uses the large ring to advance the tool bit, the graduations are marked on the ring, and I can easily split the divisions to take off 0.0127mm (0.0005") off a diameter.

Paul.
 
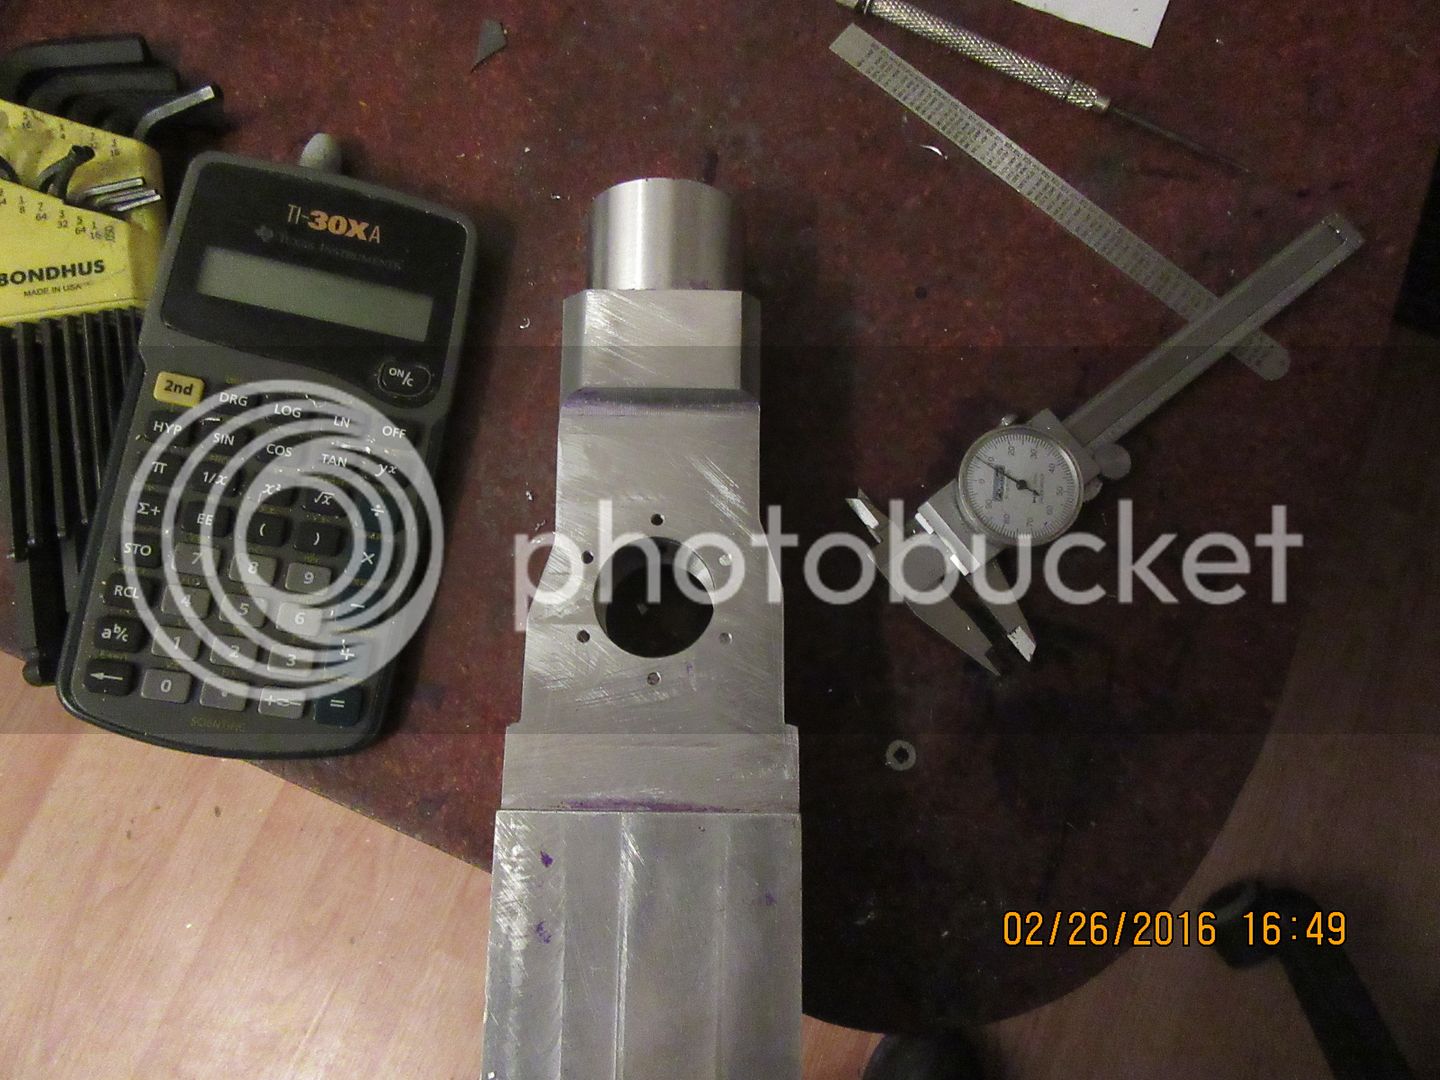
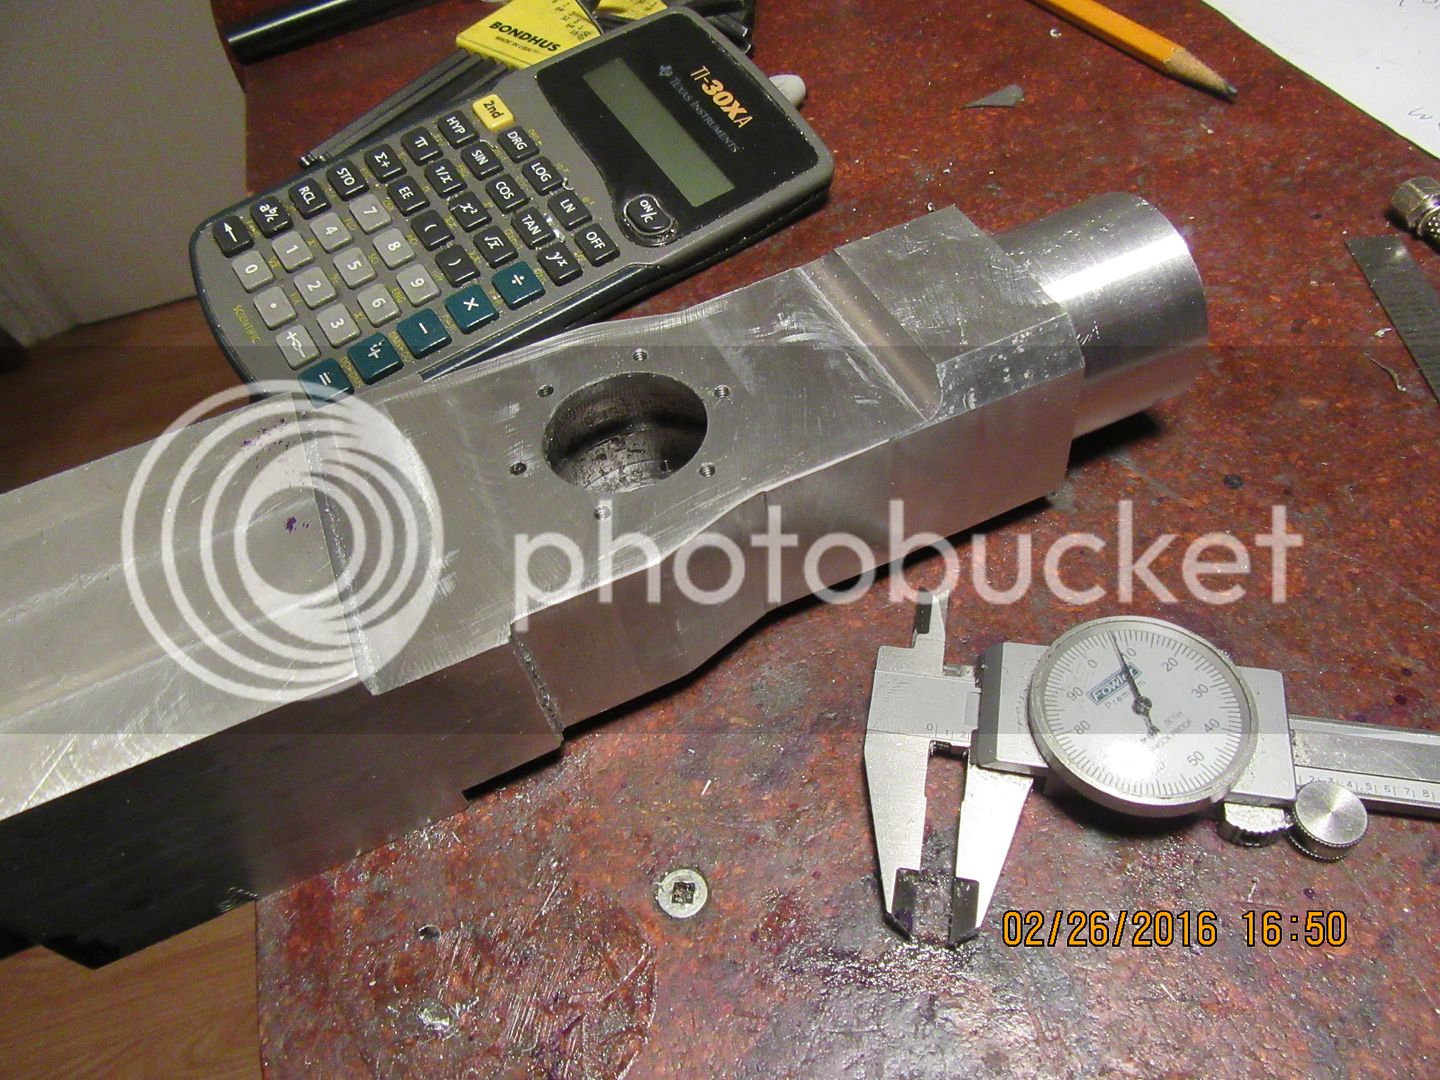
Well, you can tell it didn't start life as a casting, but it's pretty good for "home grown". Now if I don't mess anything up, the main body is getting close to being finished.

 
Hooray!!!---Just got a new contract. A bakery is having problems adding blueberries to their muffin mix. If they add the blueberries to the mix too soon, they stain the white dough. There are auto feeds commercially available to feed the berries into the mix at a later stage of the process, but they clump up and either don't add any berries to the mix, or add too many in a "glob". Customer wants me to design a machine to add the right amount of blueberries at the right time in the process. This is the kind of thing I love to do.---and part of the proceeds from this will buy me a set of micro deburring tools and pay for my new lap and diamond lapping paste!!!
 
Sounds like a cool job. My mind immediately went to an air powered blow-gun type system, completely unrealistic but imagine the fun it would be to play with!
 
Brian,
That blueberry job sounds very intriguing and I wouldn't underestimate the complexity and problem of adding whole blueberries to the muffin dough and keeping them whole in the dough.

Have been engineering food ingredient handling systems myself in the past including, for example, automated continuous flake ice making with electronic batch weighing and distribution of the flake ice without melting via pneumatic conveying to its dough making destination. Managed to re-grow my hair after pulling it out on that job.

Peter J.
 
One of my favorite jobs was the CNC controlled brownie cutter. A shop called Simply Divine Brownies wanted to make them in various shape- hearts, pumpkins, cats, etc mostly for holiday sales. I made 20 cutters for it from stainless steel strips. Nice part was they often paid off in brownies. See it at
watch
[ame]https://www.youtube.com/watch?v=kPNQI-_AUIA[/ame]
 
Just add them frozen that way they don't start to thaw until well mixed in so no risk of staining the mix, well thats the way mu Mum does them:)
 
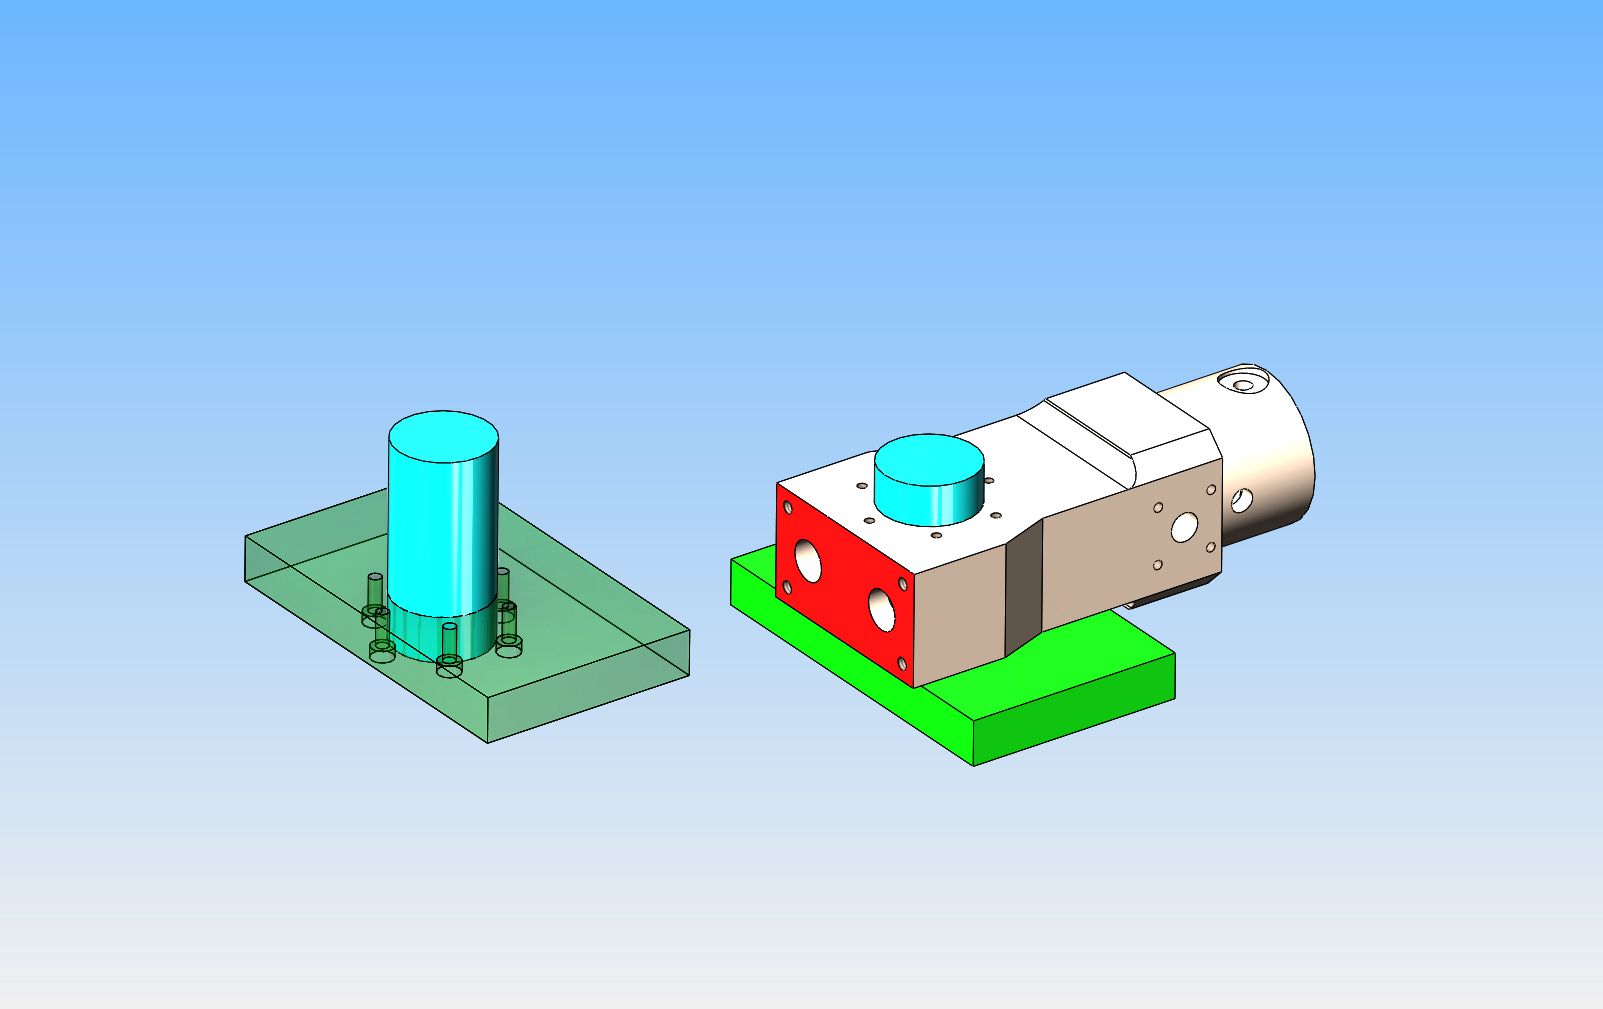
My next step is going to be cutting off the excess material and milling the bottom (shown in red) perfectly parallel and square to the center of the hole bored through the crankcase. The reason that it is a critical operation, is that the bore for the cylinder sleeve must be perfectly square to the centerline of the crankcase hole. I intend to bolt the engine baseplate to the underside of the "main body", and then clamp it to the faceplate when I bore the cylinder sleeve hole. :eek::eek: It only has to be perfectly "square" in one plain, so that the piston doesn't bind in the sleeve when the crankshaft is rotated. The other plain is not suite so important. To do this milling of the area shown in red, I will make the fixture shown in green and blue. (I have also shown a copy of the fixture with part of it made transparent for clarity.) The blue shaft will be turned to be "on size" with the crankcase bore. The green plate will have a hole bored "on size" with the shaft. The shaft will be Loctited into the green plate. The green plate will also have counterbored holes for the six bolts that fit into the threaded holes in that side of the crankcase. The green plate will be clamped to the bed of my mill, the "main body" aligned with the bed in the X axis. Then I will mill the red colored area with the side of an endmill, taking successive passes and lowering the spindle 0.100" on each pass until the red area is totally milled.
 
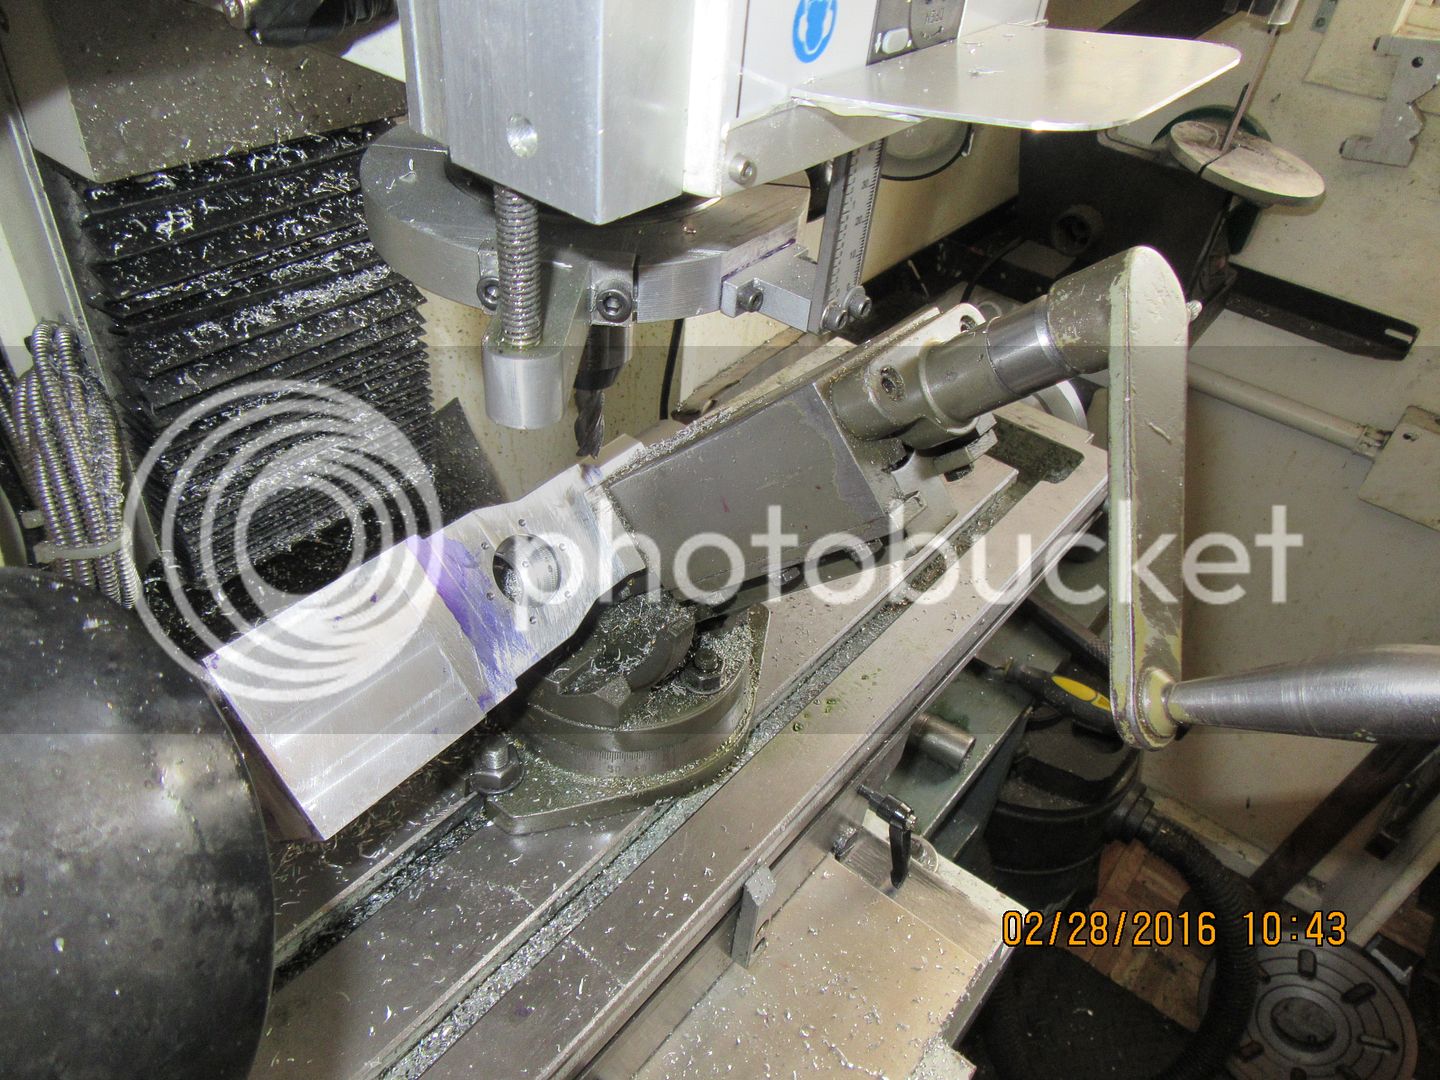
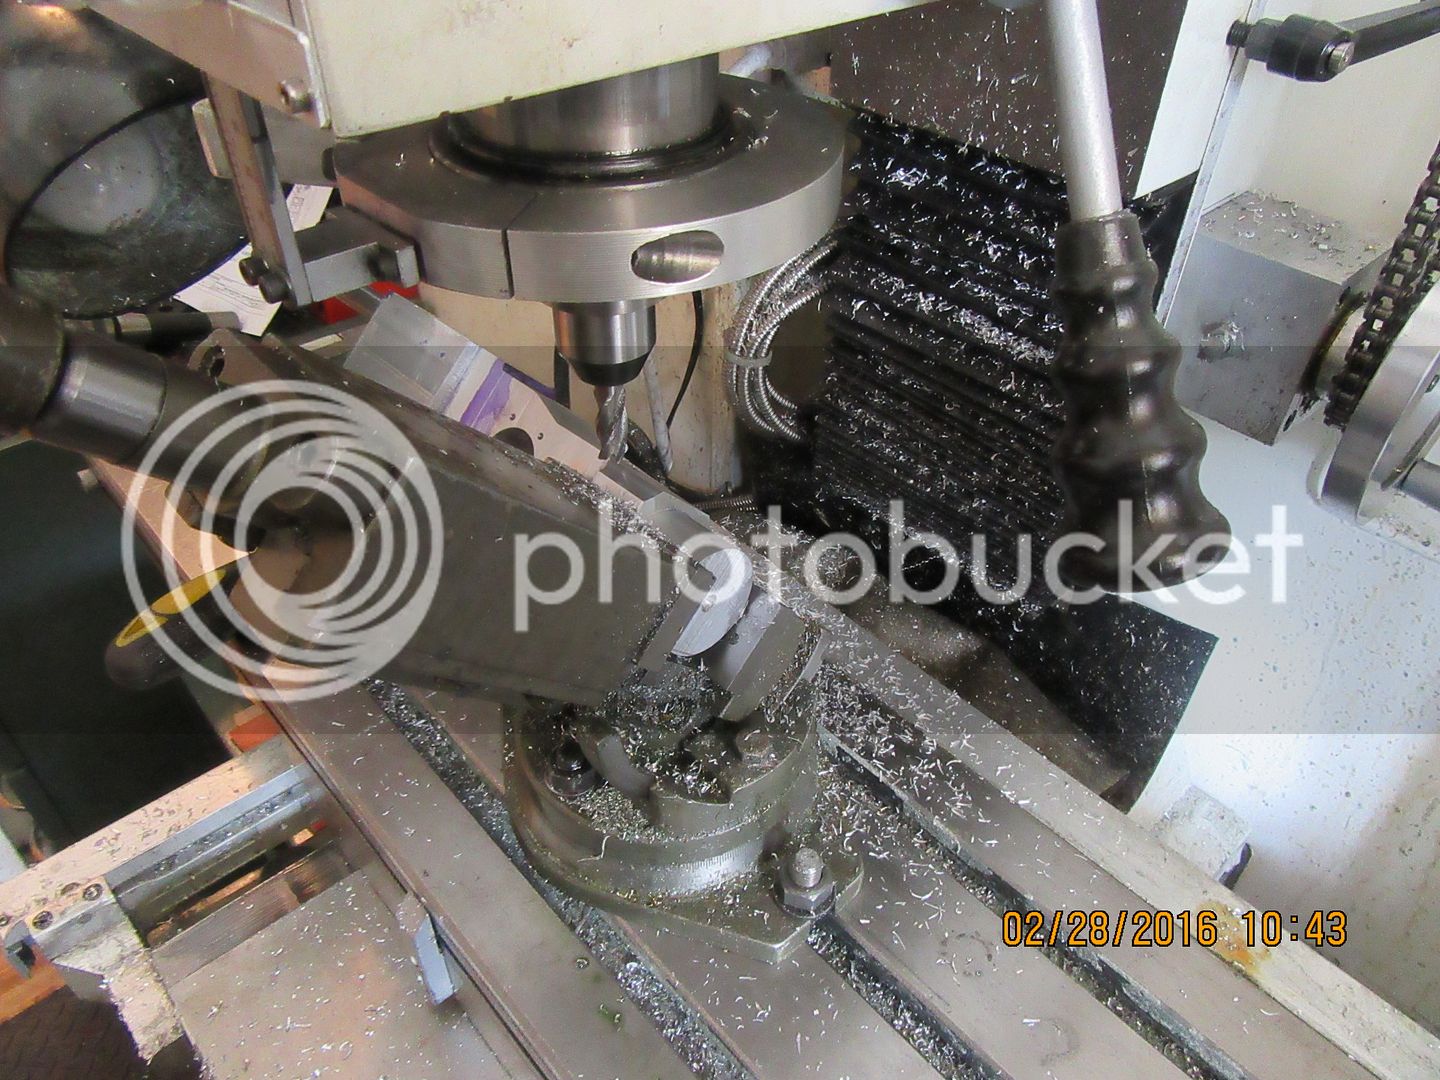
For those of you who enjoy the different set-up shots of the machining, here are a couple of shots of machining the 45 degree chamfers on the four corners of the main body. I call this my "tilt-a-whirl" vice, because it swivels and can be set up to any desired angle. It's really not a very good vice, as the moveable jaw kicks up too much to do any precision work, but for jobs like cutting chamfers on rectangular parts, it works just great.----Brian


Latest posts

Back
Top