Horizontal Mill Engine From Kit

Home Model Engine Machinist Forum

Help Support Home Model Engine Machinist Forum:

This site may earn a commission from merchant affiliate links, including eBay, Amazon, and others.
The Lever

Made one that didnt snap so figured a second try was in order to verify the results.

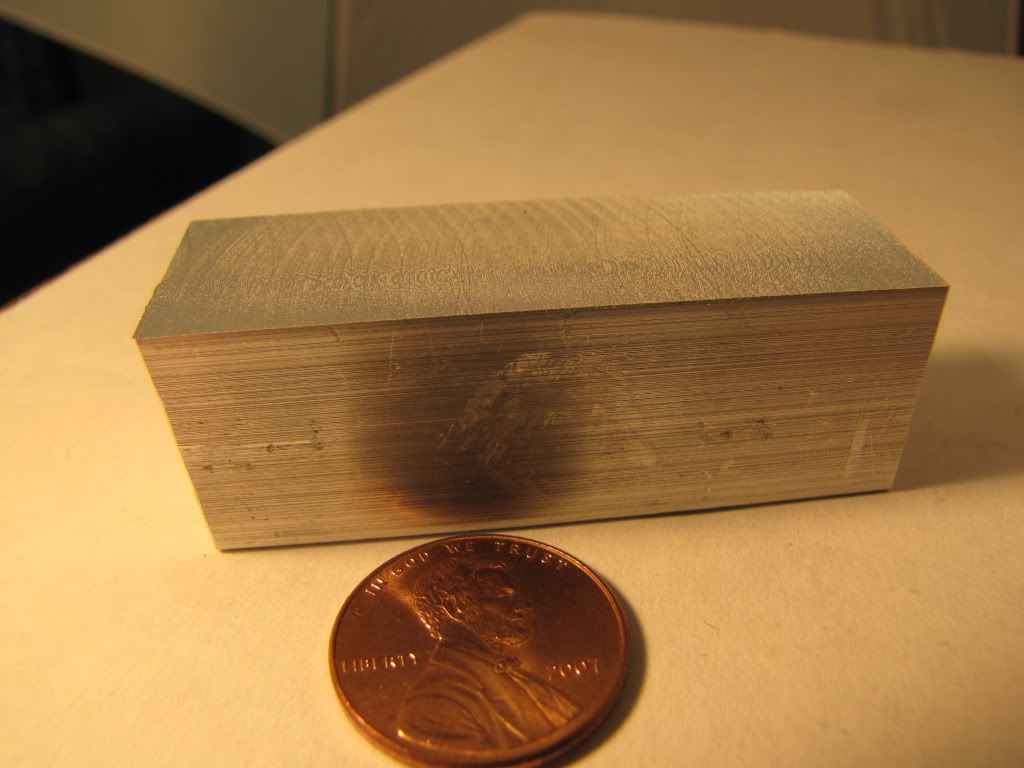
First up was to shape the piece. Did same as first, similar to Zee's sketch with the addition of a 0.200 by 0.080 neck.

Image1.jpg


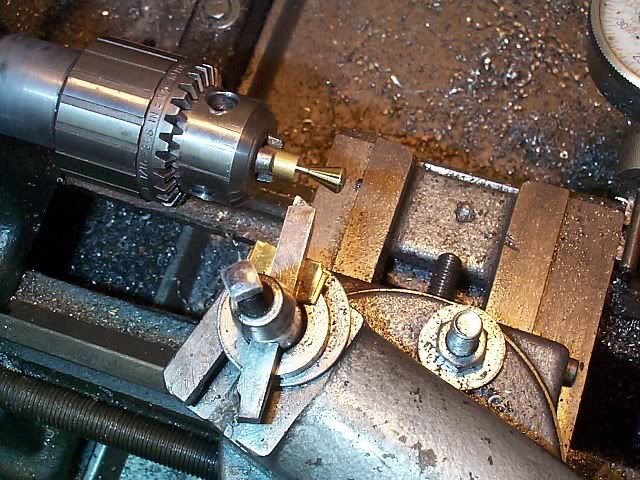
Used a 0.125 drill bit shank ground down at an angle to form a radius between the neck and shoulder. It does chatter but did the job

Image2.jpg


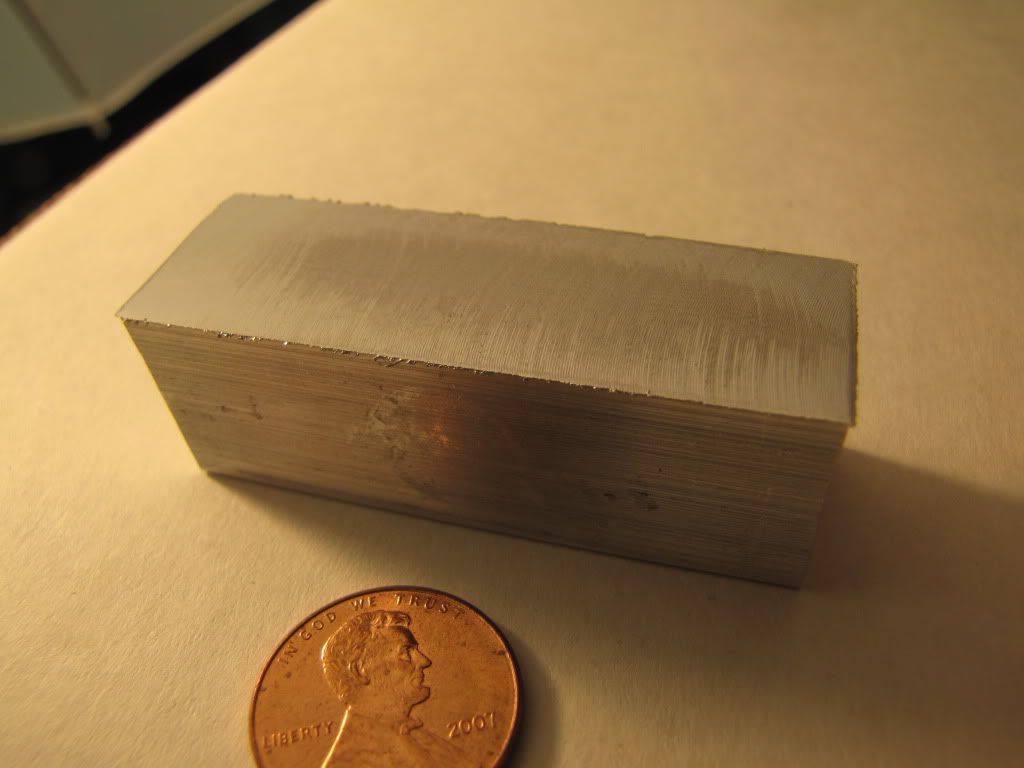
Used 220 and 400 paper to smooth the piece out, with a quick brush against a buffing wheel to remove any chatter, scratches. Piece ready for heat.

Image3.jpg


Held the long end with a pair of vise grips (they have a hole ground into the jaws to grip better with less force. Heated the piece with a regular propane torch. Sorta a dull red color that turns silvery, at this point with piece still in flame used some flat nosed needle nose to grap the lever end and with even pressure bent the piece just a bit. Slow and even bending, as soon as the needle nose touch the piece the heat gets drawn away, youi can see the color change so keep the piece in the flame and work slow

First bend just a few degrees To take the photos I had to dunk the piece in water after each bend and restart the heat process. As the end product was sucessuful I be sticking with this approach

Image4.jpg


Second Bend Few more degrees

Image5.jpg


Third Bend Few more

Image6.jpg


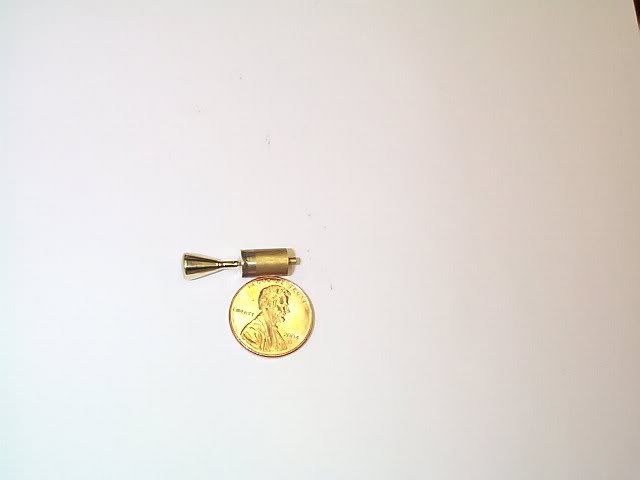
Final Bend Looking good Top piece is one I did a few days ago, bottom one is the result of this adventure.

As close a shot as my camera will allow, but the bend is clean and contained within the neck portion

Image7.jpg


It can be done, just allow the material to bend on its own good time while applying the encouragement. To much force or try to bend it too fast and, well, as ZEE puts it, much colorful words will be heard :)

Robert
 
Robert...good progress and good success. Can't say the same for me.

kvom...thanks...I'll need that tidbit in future.

Well today is pretty lousy. Didn't start that way...but it got bad fast.

1/2" square by 1" piece of brass in a 4-jaw chuck.
From what I can tell...I got it trued.
Drilled through .159 and tapped 10-32.
Turned it around...got it trued again.
Drilled 0.36 near to depth.
Used a 3/8 end mill and milled to depth.

Looked pretty good. I was pleased.

Some of you may recognize the part from that bit of description.
Doesn't matter though.

Squared up the vise in the mill.

Couple of parallels...laid the piece down.
Started using a 1/8 end mill.

Milled down to 1/16 of bottom then towards other end.
Looked fine.
Moved back to first end and over to edge.
Turned off machine and took a look see.
Little voice said 'hm'.
Started going to other end again.
Parallel came shooting out...heard a clunk.
Big voice said 'poop' (in so many words).

Investigated why little voice said 'hm'...

Two possibilities (so far)...

1) Downward pressure on the end caused the end of the parallels to push down...raising other end. Whole thing tilts. Next cut comes in at a relative angle. I thought I'd had things tightened down pretty well. Maybe not.

2) Mill is not in tram. I recently trammed the mill. Was I wrong about that? Could trying to cut the cast iron on the Spindex taken it out? Looking at the part...the angle seems severe enough that it would have been obvious the mill was out.

Going to check the tram. Wondering if I should remove the (supposedly square vise) and check...or stick a piece of sheet aluminum in and try flycutting.

I think I'll try the flycutting. Need to learn that anyway.

That, or go to bed and curl up.
 
Thought I'd explained what happened...then I WILL go to bed and curl up.

Started to remove the end mill so I can investigate further.

Little voice said "That seemed a little loose".
Big voice said "Poop (or something to that affect)...I didn't tighten the end mill!?"

So I'm thinking the end mill simply worked itself out a little at a time.

:wall: :wall: :wall: :wall:
I'll continue investigating to make double double sure that nothing else was done stupidly incorrectly.

In the meantime...nighty.

*club*
 
Ha! Don't feel bad, I'm becoming convinced the mystery part is impossible! :(

Attempt #1 - Part flopped over in the bandsaw at the end of the cut, saw proceeded to keep cutting halfway down the length.

Attempt #2 - Cut it off twice and still too short!

Attempt #3 - Used 3/8 milling cutter to bottom hole, wallowed it out to .4??. Remembered why I hate fb holes.

Design change - drill/ream through and use a cap.

Attempt #4 - Milling out corner, milled in fine switch to across. Hmm.. that looks funny. The part is now sitting at about a 20deg angle. ??? Not enough to hold on to I guess.

Attempt #5 - Left it on the bar. The hole is a little off center and the millwork looks like c**p but I'm calling it good for now. :-\

I hope it gets easier from here :D

Cheers
Jeff
 
Groomengineering said:
I hope it gets easier from here :D

Oh it will. What people need to remember is that it's not a smooth slope. Starting out it's fraught with dips and valleys (aka learnings).

Then fewer dips and valleys. But they're still there. Which is good. Otherwise there's no more learnings...and no more fun.

Thanks Jeff.
 
Attempt #4 - Milling out corner, milled in fine switch to across. Hmm.. that looks funny. The part is now sitting at about a 20deg angle. Huh? Not enough to hold on to I guess.

Attempt #5 - Left it on the bar. The hole is a little off center and the millwork looks like c**p but I'm calling it good for now.


There's some smart a$$ on this forum who keeps chanting the mantra...

NEVER REMOVE A PART FROM ITS PARENT STOCK UNTIL IT'S ABSOLUTELY NECESSARY TO DO SO.

I generally ignore him but maybe he's really on to something.
 
Oh it will. What people need to remember is that it's not a smooth slope. Starting out it's fraught with dips and valleys (aka learnings).

Then fewer dips and valleys. But they're still there. Which is good. Otherwise there's no more learnings...and no more fun.

You said it spot-on there Zee. And yes, sometimes things happen which you are not happy about. People might laugh at you. Turn that "laugh _at_ you" into a "laugh _with_ you" and life becomes more fun ;) - I've had that, welding a bolt-mounting to a steel pole for a car shade-net for a friend of mine. I welded the heck out of it, so with big fan-fare I removed the Vice-Grip from the part, and it fell to the ground. All the welding was on the pole, and none on the bit I wanted to weld to the pole. I'm still getting teased about that, but have since welded a lot of things for that friend, as well as helped him to learn to weld himself. We still have a laugh over it; money cannot buy experience, and humility comes for free.

As to the dips and valleys - those are between mountains. The higher the mountain you climb, the further the valley is below. If you are at the mountain top, and want to reach the next higher mountain top, you either have to take a journey back down through the valleys and then up again (i.e. more learning ;) ), unless someone with a helicopter is prepared to just take you over to the next one - no learning, no experience, and nothing to tell the grandkids - except "it was cool to have a ride in a helicopter".
The helicopter would be nice, but think of the lost experience - and fun. Sometimes learning/doing things the "hard" way, has hidden benefits, which in due curse provides a reward of it's own.

Apologies if this is OT, too philosophical and just a plain nuisance - just some personal learning that might be usable...

Regards, Arnold

Hmm, while I was writing up this lot a much respected person also posted a reply - stick to the mantra!
 
mklotz said:
There's some smart a$$ on this forum who keeps chanting the mantra...
NEVER REMOVE A PART FROM ITS PARENT STOCK UNTIL IT'S ABSOLUTELY NECESSARY TO DO SO.

Don't be bothered by him Jeff...but you can get a lot of good information and help from that smart a$$....an occasional laugh too. Really. Very helpful smart a$$ guy. ;D

Arnold...check out my most recent abyss valley here...

http://www.homemodelenginemachinist.com/index.php?topic=5855.0

Some people might give up here...but I won't...I might change my name though.
 
(Let's see if I can hit 3 for 3 tonight.)

Did some flycutting tonight. I did it once before...just playing around...this time it was serious. Is my mill in tram?

Well I think so. Here's a pic...

IMG_0472.jpg


Hatch marks!

However...if I move in the other X direction...the hatch marks are barely visible, if at all. Trammed or nearly trammed?

And what kind of surface finish can I expect? Brand new (pre-sharpened) cutter. But the surface was a little rough.

Feed rate seems to make a big difference. Slower rate gave better results.

...course I seem to live in a world where .87 - .40 is .37...so what do I know?

I think I'm good on the tram. Let me know if you disagree.
 
Looks good Zee!

The finish could be better, but I think its feedrate not tram

I would say you tram is pretty good!....slow your feedrate way down and try it.

It could be different going one way or the other, as you need to remember...everything is made out of rubber. Everything will move and if off ever so slightly one way, it will show up when you put some cutter force on her and she flexes a little. That would explain why it's changes with direction.....bet you can't even measure it....but you can see it.

Dave
 
Wow, I missed a lot on here today. Like Steamer says, your mill appears to be trammed. Try a slower feedrate, or sharpen your flycutter tool with a small tool nose radius.
 
Thanks Dave and Vernon.

I did notice that slowing down made the finish better.
But the last run seemed pretty slow.
Raises the question...how slow is slow without going backwards?

The tool is very very sharp (I bought a pre-sharpened one) but I don't think there's any radius on the tip. That may explain a lot.

I'll play some more.
 
The flycut surface looks good although a very small radius on the tool tip will, no doubt, improve the finish. I prefer a small diamond sharpening stone for doing such radiusing. The real experts can do it on a powered grinder but I haven't developed that level of manual finesse yet.

Why is that piece of stock so short? Has it been cut from the parent stock already? Tsk-tsk.
 
mklotz said:
The flycut surface looks good although a very small radius on the tool tip will, no doubt, improve the finish. I prefer a small diamond sharpening stone for doing such radiusing.

I have the 300 and 800 grit from Grizzly. Here's the 300.

http://www.grizzly.com/products/H7608/images/

No idea if this is good...will work...or whatever. Can only try unless someone suggests otherwise. I think I'm correct to say that I want to stroke the tool sharp edge first (i.e. sharp edge leads) to avoid creating a burr. What I'm unsure about is size of radius, how to know what the size is, how to make it round. (I heard that...practice practice practice.)

mklotz said:
Why is that piece of stock so short? Has it been cut from the parent stock already? Tsk-tsk.

Now just hold onto that 'tsk-tsk' until you get the answer young man. ;D
The piece is from my box of play pieces that I 'made' when I first got the lathe and mill...just to try the equipment and make my first ever cuts in metal.
When required or useful...my box of 'learnings' can also serve as practice pieces (as the one did the other day for the 'handle').
 
That stone looks great. Use a rolling motion of the tool on the stone to develop the radius. Only a very slight radius is needed. I don't want to try to suggest a numerical size for the radius since I do it "by eye". My suggestion is to develop the smallest radius you can and then mount the tool and test it. You should get a smoother surface on the cut. If not, make the radius larger and try again. I doubt that you'll need more than that one iteration to converge on something that works well.

Thanks muchly for the "young man". I needed that. Last night I had some young buck in his thirties address me as "sir" when he asked me for directions. The "golden years" do indeed suck.

I'll shut up about stock length now. Nevertheless, keep the mantra in mind.

When I was first starting out, I would write out a process sheet for each non-trivial part I was going to make. On it I would describe such things as:

how the part was to be held for each operation
how referencing to previously machined features would be accomplished
what tooling would be used
what clearances needed to be checked
etc.

It was amazing how often I'd back myself into a workholding corner. Then I'd have to go back and erase the first step - part off stock .xx oversize - and readjust the operation order so I could keep a handle on the stock until late in the sequence.
 
Ah good. Thanks for the tip on the tool. ;D Yes...I'll do the iteration...I have plenty of 'play' pieces.

The 'sir' was the quickest way to get me on the wrong side when the boys came round for the daughters. A close second was "Mr. Phillips" (that's my Dad!) but they had little choice. First name basis was deadly.

I do need to start my workshop manual. Right now I'm relying on memory. Not a good idea...especially considering the 0.1 fiasco the other day.
 
Had a chance in the shop...

Rounded off the tool tip and took a couple of runs at flycutting.
How do I know it's any good? What's small? There's 3 dimensions to this. Too many!

On one pass the chips that flew off were hot...and the finish was...well it reminded me of pills on a sweater.
Second pass...other direction...not as deep...almost mirror finish but no hatch marks.
Third pass...not as deep...hatch marks...but not the mirror finish.
(Each pass being the opposite direction.)

Here it is...hard to see I think...I tried putting the light at an angle to highlight it.
You might also notice the edges are pretty rough. I don't know what that means.

Feed rate was 'slow' (a relative term). Spindle rate was...well I didn't check.

IMG_0473.jpg


I need to find a local mentor so I can offer up my prize and see what they say. Sort of like the cat that drops the bird at the doorstep. "Well? What do you think? Great right?"

PS. Be kind in responses. A fellow member suggested I post this. I wasn't going to. If you hurt me...I'll have to hurt him (twice as bad). ;D
 
Aluminum? Use coolant. WD-40 or such will help a bunch.
No hatch marks in the opposite direction? Your leading edge was a bit lower than the trailing edge. Part flat enough for you like that? leave it alone and skim in that direction when finish matters. I do it at work on 20hp Haas machines, you can too.
1000 rpm ok for your machine, no vibration? 400-500 is as slow as I'd try if 1000-1200 is too much. 3-5 IPM and whatever depth-of-cut works on your mill, a single-point flycutter has a tendancy to chatter a bit more than a facemill... .005" finish pass?
A lot of the numbers depend on the rigidity of your mill. A 3" flycutter at 1000 rpm is too much surface speed for a cut with no coolant.

There, that didn't hurt, eh? Don't go hurting your fellow members. ;D

You need one of those nifty sliding feed-n-speed charts.
 
Thanks Vernon. Lots of good help there.
This is only 3rd time flycutting. So learning a lot. Will be practicing more too.
Guess that 'fellow member' doesn't have to worry so much. ;D
 

Latest posts

Back
Top