Horizontal Mill Engine From Kit

Home Model Engine Machinist Forum

Help Support Home Model Engine Machinist Forum:

This site may earn a commission from merchant affiliate links, including eBay, Amazon, and others.
zeeprogrammer said:
And now a song...

To the tune of 'Found a Peanut'...

I read this post this morning before heading into the shop. Hadn't heard that song since I was a kid.
Heard it all--day--long today, though...
 
Rof}

Zee do you have any idea how hard it is to dial in a finish cut with
eyes fogged from laughing?

Sometimes I think I'm getting too old for this stuff, but loving
every minute of it!

Thanks again for a much needed smile Zee!

Rick
 
rleete: Darn. There go my dreams of being the next Tom Jones.
Dean: Same here. The song is still rattling around the noggin.
Rick: Thanks!

So here's attempt #2. Using round stock this time. Here are the ends. I should have turned the body down to make sure it was true. I also should have used a different turning tool and put more of a radius on.

IMG_4422.jpg


IMG_4423.jpg


I then went to drill the little bugger. It was at this point where I became inspired to write a song.

So with my 3rd attempt, I did turn the body down before doing the ends. (But still have a sharp corner.) And went to drill with my 'newly purchased over lunch time' drill bit.

Lesson...I ran the chuck at highest speed...I used cutting fluid throughtout...I used smaller pecks (like I was afraid it might be a bug), I brushed the bit often. It went a whole lot easier.

So on to milling the sides. Almost ruined it. Got mixed up on the measurements and luckily realized before I'd gone to far.

IMG_4424.jpg


And here it (they) are so far...

IMG_4425-1.jpg


Left: Opportunity for the knowledgeable ones to smack my forehead.
Middle: I don't know how to describe it other than more opportunity for the knowledgeable ones to smack my forehead.
Right: So far so good.

Next shop time I get will be drilling the corner holes, milling the center, and drilling the side hole.

Well...that or another song.
 
Nice work Zee. Thm: Keep it going!

Cheers,
Phil
 
Zee....
I'm not sure if you are driving Marv or me crazier. In places, this thread has been almost agonizing as we've watched you drive head long into places most of us avoid like a hot Ebola zone. I've managed to hold my opinions to myself as long as you are managing to retain all your digits and the large bruise on your mid forehead hasn't erupted into a puddle of pulp.

In a distant former life, I suspect you were possibly a devoutly zealous monk of some self flagellant monastic order. .....LOL. It's the only thing I can come up with that explains the pleasure you've gotten from forcing such a difficult learning experience.

I think I get it.... the "TWCBY" thing... but it sure seems like a terribly stressful choice for getting to where you're trying to go. Nice work so far and fascinating to watch, this build, even when I'm flinching.....(grin)

Marv....
Hang in there. I'm feeling your pain, friend..... LOL

Steve
 
The finished piece looks good, Zee. Actually, from what I see in the pic, really good.

I can't tell how big it is. That furrin coin could be anywhere from 1/2" to 6" in diameter. (g)


I understand you had troubles drilling that deep hole... Once little drill bits get in more than about four or five diameters, you can save on the breakage by cleaning the hole every diameter's worth of depth, (as it seems you've found out). It involves a lot of cranking on the tail stock ram, but it saves on bits. You have to crank it all the way out to clean the flutes each time.
If you are making pretty small holes that go fairly deep, one way to make the job a little quicker is to use a pin vise to hold your drill bit. Drill the hole initially, for about the first five diameters as you normally would with the tail stock. Then, put your drill bit in a pin vise that will fit into the drill chuck in the tail stock. Leave the drill chuck loose on the pin vise. You just use the drill chuck to guide the pin vise, not grip it. Run the tail stock up to where the drill bit tip almost enters the hole, and feed the pin vise/drill bit into the hole by hand pressure, held between your fingers. You can push it in and out pretty quickly this way to clean out the hole and drill flutes. If the bit should stick in the hole, the pin vise will just spin in the drill chuck, and you can turn off the lathe and back it out. Again, that only works for small holes, but it may come in handy sometime.
Someday, you can get a sensitive drill attachment to fit your tail stock and it will do the same thing even easier.

Again, nice looking part!

Dean
 
Thanks Phil.

Steve...c'mon! You're just watching someone learn. It's like sending the kid out to the backyard. He's going to do stupid things and come back with scratches and cuts. 'pleasure?' Believe me, I've had my moments of frustration, anger, and doubt. (It's the doubt that worries me.)

I'm that kid. I may 'think' something doesn't seem right but when in doubt I'm going to side with the purported experts. I don't have the knowledge or experience yet to 'know' there's a better way. (But if I even think safety is at risk...I'll ask more questions.)

I have to admit I have the same problem at work with inexperienced associates. I sometimes want to say "what in the world are you thinking?". I always try to remember "it's very difficult to remember what you didn't know".

I'd like to think I'm not doing anything any different from any one else who's starting out and teaching themselves this craft. Let me know if I am. (But try to be kind...the doubt level is at risk and exponentially proportional.)

Thanks for the support and I hope to cause less pain as I go along. Actually, my goal is to convert the pain from one of "I can't believe he did something that stupid" to a pain of "I can't believe he did something that awesome". Might be a while though. ;D

Thanks Dean. Yeah, as I was posting the pics I thought I should have included my 0.75" penny. The body of the part is 1.0 x 0.625 x 0.31 (give or take ;D). I'm always surprised by how small the parts are. The part looks decent enough but the surface of the milled areas isn't as smooth as I'd hoped.

Thanks for the tips on drilling. I hope to avoid Herman's "2nd verse...same as the 1st".
 
Zee....
No offense intended and no condemnation coming from this front.... trust me. I've already had the pleasure of climbing the steep side of the learning curve. The annoying frustration and those doubts are still fresh in memory. I had the "advantage" of taking on a number of non engine projects where my own ideas were the only guide, so the idea of strictly following the paths of others never took root. Those projects all had to be adapted as I went along. The frustration levels were probably higher but the results were often higher than I expected too.

Not having the benefit of experienced hands sharing advice slowed things considerably and cost me a bit more in broken tooling and a couple of un-needed machine failures, but it didn't stop me. Once I found this forum and the likes of the Bogster, George Seal and Marv, to name only a couple of many very important contributors, their sage counsel accelerated my climb until I gained the confidence to trust my own instincts.

I'm actually admiring your aggressive attack on the learning curve. More so because I so recently traveled the path you're now battling your way down. Having a strong sense of humor certainly helps....LOL.

Steve
 
:bow: Great work Zeep. You're not just climbing the "Learning Curve", you're carving steps into it. ;D
 
Thanks Steve and Vernon.

I should know better than to try and write anything at 1:30 in the morning after a full evening of liquid refreshment and a tear-jerker of a movie. Sorry if my response came across as if I were offended.

No offense was taken. None. And a big reason I joined this forum is the obvious support provided to the beginner without judgment. Again...thank you all.

The learning is fun and I'm having fun with it.
 
You're getting there Zee ;D - the third valve chest part looks good - some minimal work with emery & oil on a flat surface will make it shine.

And you have definitely started to get the "feel" - even the "gut feel" is coming through. That one can be important - I can't explain why - it just is; it's worth listening to.

Thanks for all the smiles :) - have to search for that "peanut" song; If I can learn to whistle it, it would be fun to teach to Shrek ;)

Kind regards, Arnold
 
zeeprogrammer said:
The learning is fun and I'm having fun with it.

When the "Fun" disappears that's the time to quit ........... keep up the good work Zee I'm certainly enjoying the ride 8)

CC
 
Well done Zee.. its nice to listen (read?) the thoughts of a guy who not only can learn but also listens and goes out of his way to assist.... nice Aussie 50c piece there mate :big:

Incidentally..Aussies have absolutely NO idea about coins sizes..... our $2 coin is smaller than our $1 coin and that 50c piece is bigger again.... go figure..im Aussie and I have no idea..... nice work mate, enjoying watching your progress...
 
Artie said:
Incidentally..Aussies have absolutely NO idea about coins sizes..... our $2 coin is smaller than our $1 coin and that 50c piece is bigger again.... go figure..im Aussie and I have no idea..... nice work mate, enjoying watching your progress...

Similar goofiness here in the USA, Artie. Our 10 cent piece is smaller than both our 5 cent and 1 cent piece. The last couple of one dollar coins issued have both been almost the same size as our 25 cent piece and both smaller than the 50 cent.
The people here do seem to know what they want in our coinage though, even if the gubment completely ignores them. The last two dollar coins introduced have been well rejected by the citizens and see almost no use.

Maybe we should all use something that is common to all of us. I understand that M&M's sell in every country..
 
Thanks Arnold. Happy when I keep seeing progress. Careful with the 'peanut' song...it can get stuck. :)

Thanks CC. You're very right.

Thanks for the support Artie.

Dean...try a Minstrel...bigger and better.

 
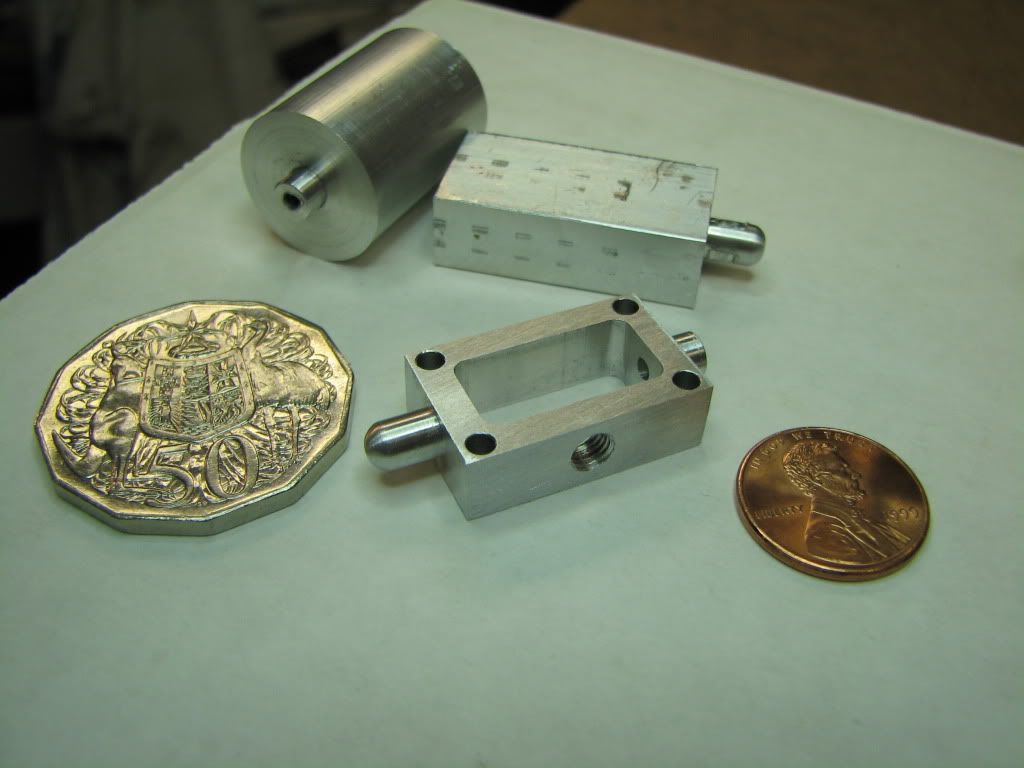
3rd attempt at Steam Chest. But I won't keep you in suspense. It was successful and I'm pretty pleased with it.

A few interesting problems that had to be worked out. The instructions weren't the clearest in this area...I'll point them out when I get to the pics. Many thanks to 'beerless' one for his help and answering my many questions.

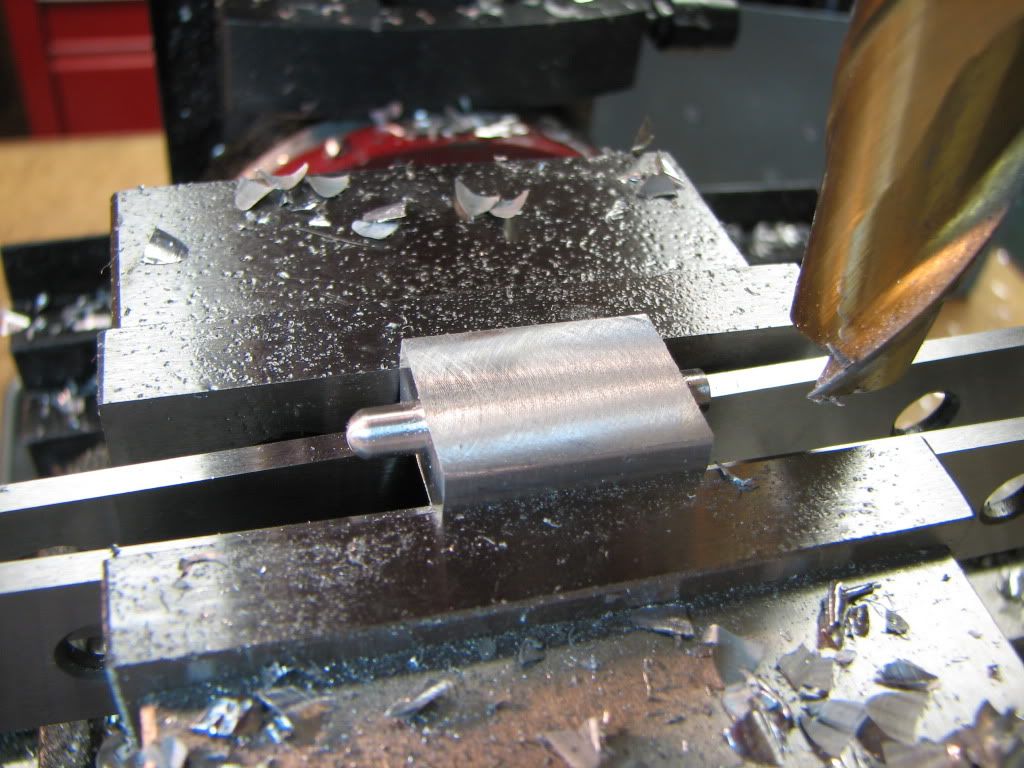
First issue was supporting the part while drilling the four corner clearance holes. Instructions showed parallels...but if they weren't thin enough...the drill would hit them. So I used two tall parallels in the center, a bit of foam, and a shorter parallel at each side. Then made sure I didn't drill too far.

IMG_4427.jpg


The instructions 'put aside' the steam chest at three different points in the process. I couldn't figure out why. They were doing the cover and porting plate. After I did the clearance holes I realized it would have made it easier to do the 3 parts in sequence and use a vise stop. All three parts have holes in the same place so it would have meant less edge finding and more accuracy.

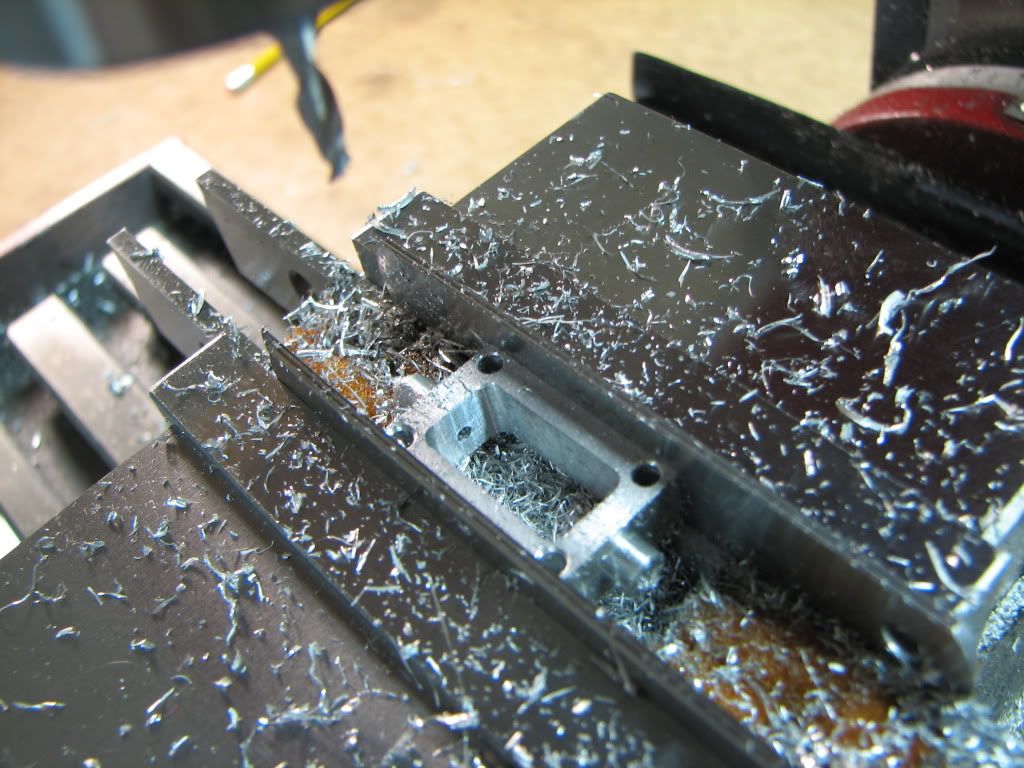
Next issue was the through pocket. Same problem as before with support. The parallels would be in the way. So I shimmed the sides by .063 (combination of shims gave me the same offset on both). 'Beerless' one is wanting me to mill a step in my vise or to make some soft jaws with a step in them. Sounds like a good idea. That would have solved this too.

IMG_4428.jpg


These are the corner holes for the pocket...

IMG_4429.jpg


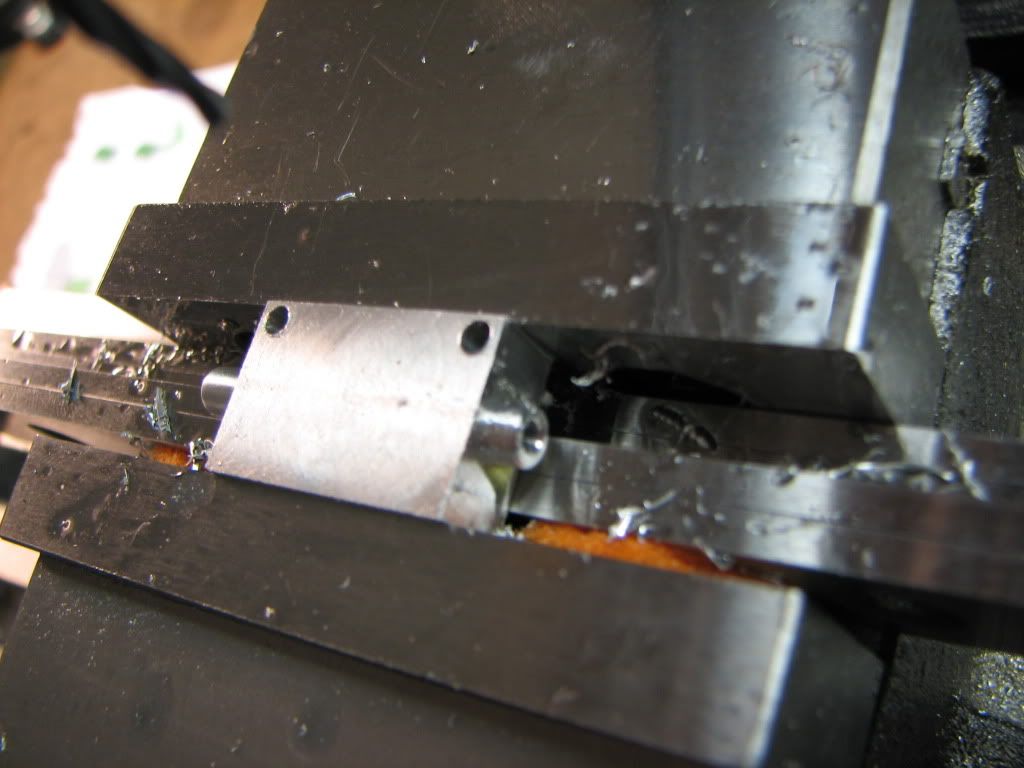
Milled the pocket. This caused a lack of oxygen due to my holding my breath a lot. I plunged cut around the pocket (slightly undersize) and then did a finish pass.

IMG_4430.jpg


No pic of the side hole and threading. Used a 1/4" collet to hold the tapping tool in the mill.

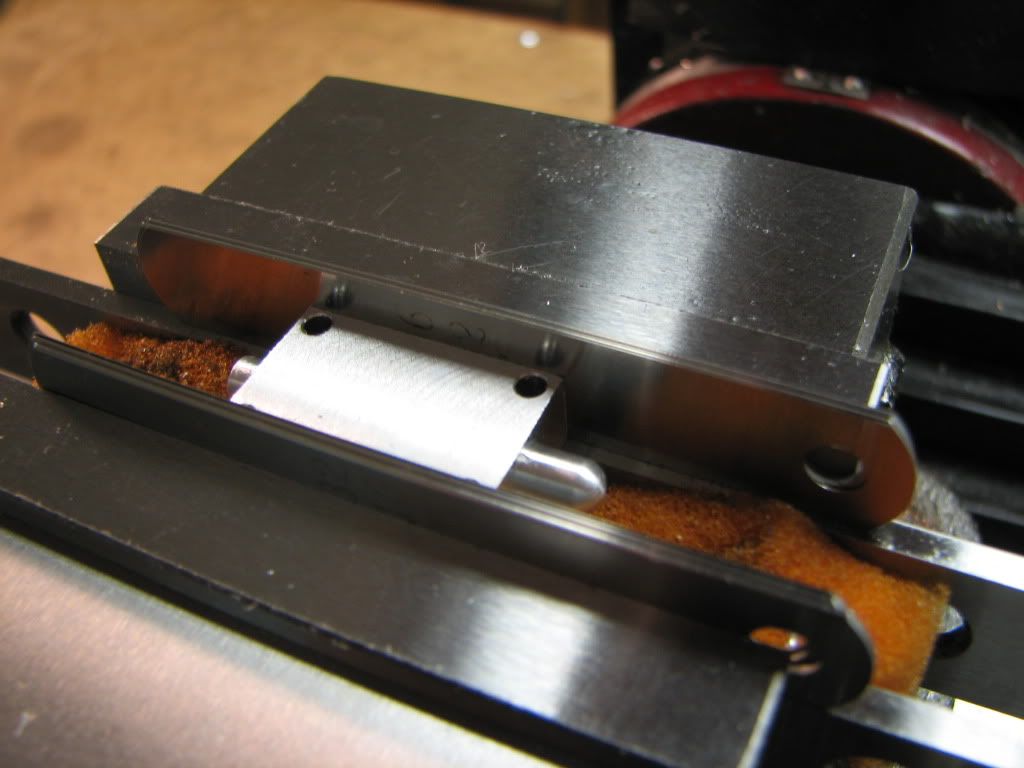
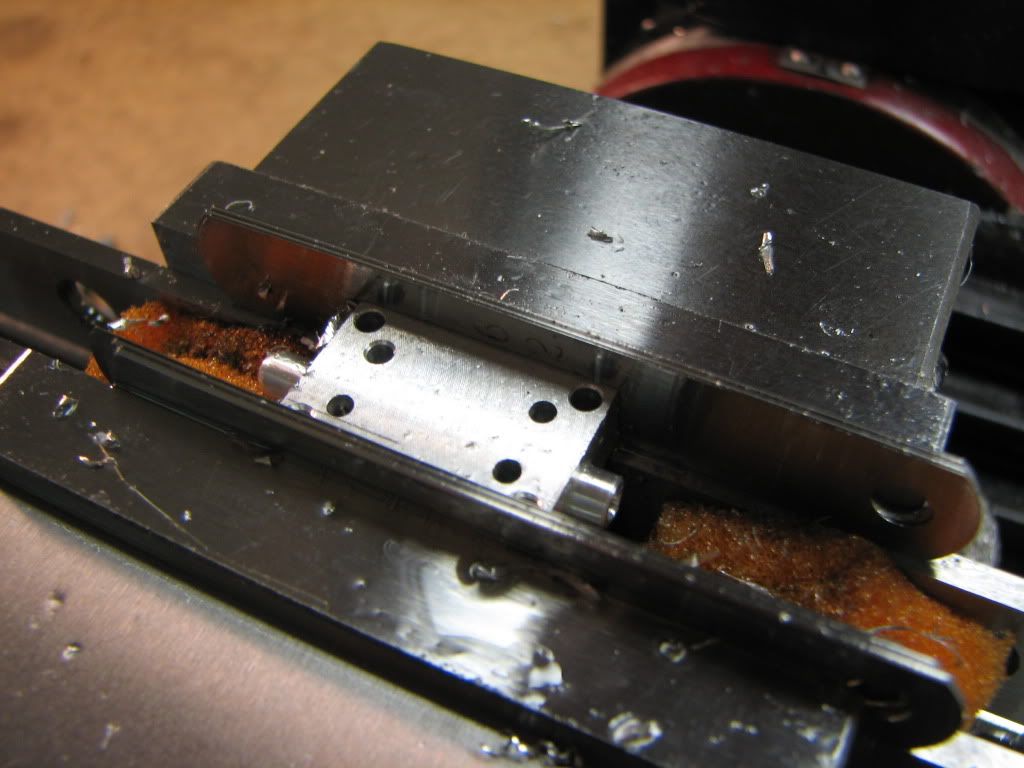
Then off to sanding. The result...

IMG_4431.jpg


The pocket came out 2 or 3 undersized in width and within a thou of length. Similarly for the outer dimensions. The only question I have is whether I got into the tenon far enough with the drill.

So...feeling good...no new song. I hope this didn't make anyone flinch too much. :big:

Folks are arriving today for a week's stay...I doubt I'll get anything done.
 
Another great-looking part! Nice post too, except for the bit about "Beerless". *beer*
 
Looking good Zee!


Don't pay Cedge no never mind....... ;D

Your doing fine..

Dave
 

Latest posts

Back
Top