Horizontal Mill Engine From Kit

Home Model Engine Machinist Forum

Help Support Home Model Engine Machinist Forum:

This site may earn a commission from merchant affiliate links, including eBay, Amazon, and others.
After having the CNC on my mill for some time now, I have noticed some wear in the screws.
If I am doing anything manual on it I try to lock any axis that is not being used. It cuts down on the chatter.
I rebuilt my lathe now its time for the mill.
-B-

p.s. don't forget to unlock the jibs when going back to CNC (don't ask how I know) you might hear something from the steppers like stepping on a cats tail, they don't like being bound up.
 
-B-...I have no CNC...but your tip for locking unused axes down is a good one. I've gotten better at that because it does make a world of difference.

However...I'm wondering if people think there was a lot of chatter in the cut. I've had another comment on this. But I think it's just the camera shot and not being clear about what I was doing. I didn't notice any chatter...they were plunge cuts...

The picture that I think might be causing the confusion (if any) is a picture after a series of plunge cuts taken (supposedly) .06 inches apart. Not that I followed that exactly. I found that the smaller the amount of metal to remove, the bigger the distance I could go without the end-mill being pulled down by the brass.

After that cut, another cut was made along the metal (no plunge). That cleaned up things pretty good. I had very little sanding to do on the edges except at the small end because I was off from center a little. What little dents are left are because I didn't go in far enough for the final cut...and didn't sand it away well enough.

Right now I'm wondering how much I can get done in the upcoming days/weeks/months. Wife comes home tomorrow...then folks are visiting...then off to visit folks and in-laws...darn it...why can't they be into machining model engines too?!
 
Zee,
I just added the chatter part (thats what I suffer from).
I was refering to an earlier post about the brass grabbing and bringing down the spindle.
-B-
 
Didn't get a lot done...not that I do anyway...but thought I'd show something...

I'm working on the reversing lever. I have to use the RT with the sliding block.

I wasn't too happy with the instructions. 3/8" thick, 1" by 1.5". Set it in a 4-jaw with center about .16 from the end. Turn a .312 boss .19 high. Steel. That seemed like a lot of interrupted unbalanced cutting.

After a little consultation...I decided to mill most of it off and then turn it.

Here it is after milling about .2 depth for the boss...leaving 1.75...
IMG_4405.jpg


When I milled it, I put a dot where the center of the boss is. Here I've mounted it on the 4-jaw. Disaster almost visited me. I had to make a spacer and while tightening things up, the spacer fell out. Well I didn't want that flying out so I left it out. But then I realized I was going to drill and ream and that would put a lot of pressure on the part. I needed the spacer. So redid it and this time taped the spacer. They should have mentioned that in the instructions. Every time I tighten something down, something else can come loose.

IMG_4406.jpg


Drilled and reamed...

IMG_4407.jpg


Turned. I put the spindle speed as high as I could before the unbalanced part would cause some vibration.

IMG_4408.jpg


You can see a little corner that the turning didn't get to. But that's okay. When profiled, the corners are gone.

Then I went back to the mill and vise and milled the thickness and flycut to 0.06. Rats....no...0.05. Oh well.

Here it is sitting on the jig I made. I haven't mounted it yet. The screw is a 10-32 and fits snugly in the hole. Profiling is not critical. So it should center nicely. I'll also put a clamp at the other end..just a piece of metal and a screw through it.

IMG_4409.jpg


This was a little nerve wracking...I still haven't 'relaxed'.
 
Hmm, I'm trying to remember how I did it. I made mine of brass.

Small piece of 1/16" brass plate. Mark out profile, handle and curved opening for lock screw. Cut to rough shape with jeweler's saw, file to final shape. Chain drill opening, lop cusps off with midget chisel and then file to shape. Drill for pivot bushing.

Make (brass) pivot bushing. Drop in hole in plate and (soft) solder. Buff all shiny. (This was back when I thought engines should be shiny - I've gotten over that now.)

Now, what was my point? Ah, I remember...

Whenever a part consists of a thin plate with one extended feature perpendicular to the plate plane, consider fabrication as an alternative to milling a lot of material away.
 
Great work Zee. Something I do that you might want to think about, when I need a spacer or something along that line in behind, I use super glue, the really thin stuff like water. It holds the spacer in nicely and most times a rap with a plastic hammer takes it off, if not a quick soak in acetone does or a touch of heat from a heat gun.
 
You got it done, Zee, which is what counts. There are a few other ways, (for your next project);

Reverse it in the four jaw after you had the boss turned, pack it up and face off the bottom side. Same can be done in the three jaw if the boss is big enough to grab with the jaws.
or
Use a large arbor with a hole drilled in it for the boss to fit into, super glue the piece to the arbor and chuck the whole affair in the three jaw and face off the back side.
or
Pack it up in the mill vise using parallels, boss side down, and flycut it to finish thickness.

Dean
 
Thanks Marv. Yes...fabrication actually crossed my mind this time. It just seemed odd to have a little cylinder and a hunk of metal flying off of it. If I were doing another engine...I would certainly do it differently.

Thanks JimN. My 'consultant' mentioned superglue too. The tape did fine...but I've seen/heard superglue used a lot...so it's a technique I'll eventually learn.

Thanks Dean. Actually, the instructions called for flipping the part around into a 3-jaw and thinning to size. I should've mentioned that. But I didn't like the idea of gripping a .312 diameter by less than .2 high cylinder and turning it. Just seemed like I was asking for trouble and seeing the part take off on me. I had the vise out already...so I used that...milled close to size (apparently too close) and flycut it.

But overall yeah...just like in programming there seems to be more than one way to solve a problem. I like to hear about them.
 
Reversing Lever...done...could have been better...and if I ever make another one...it will be. In the mean time...this will have to do...

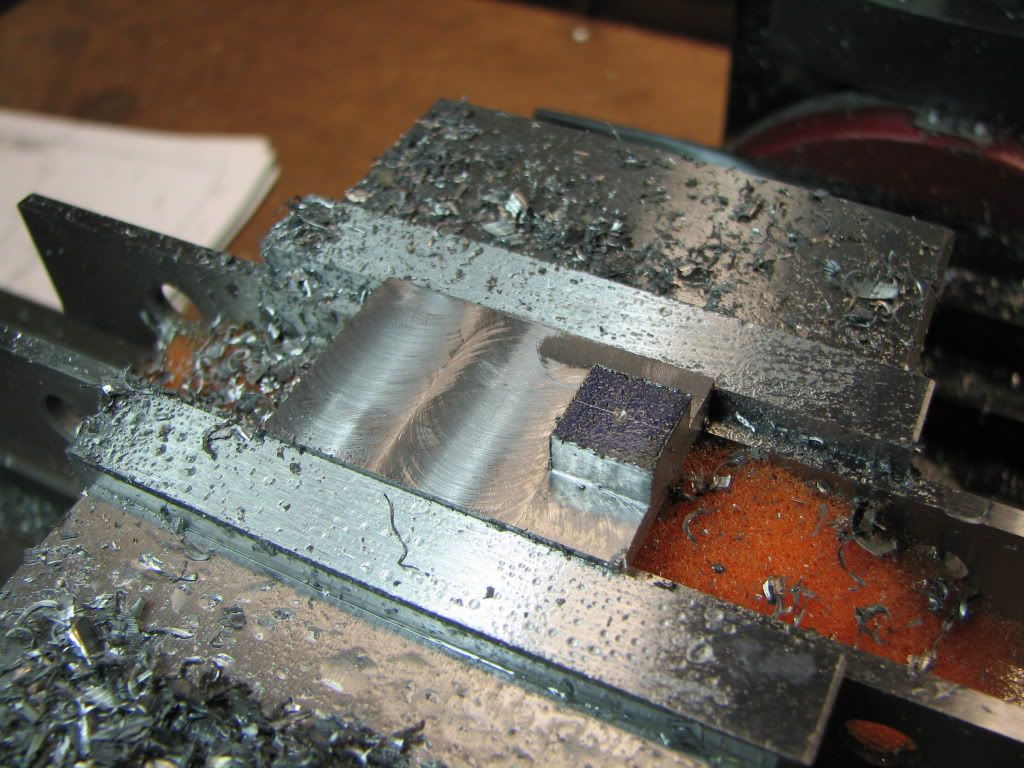
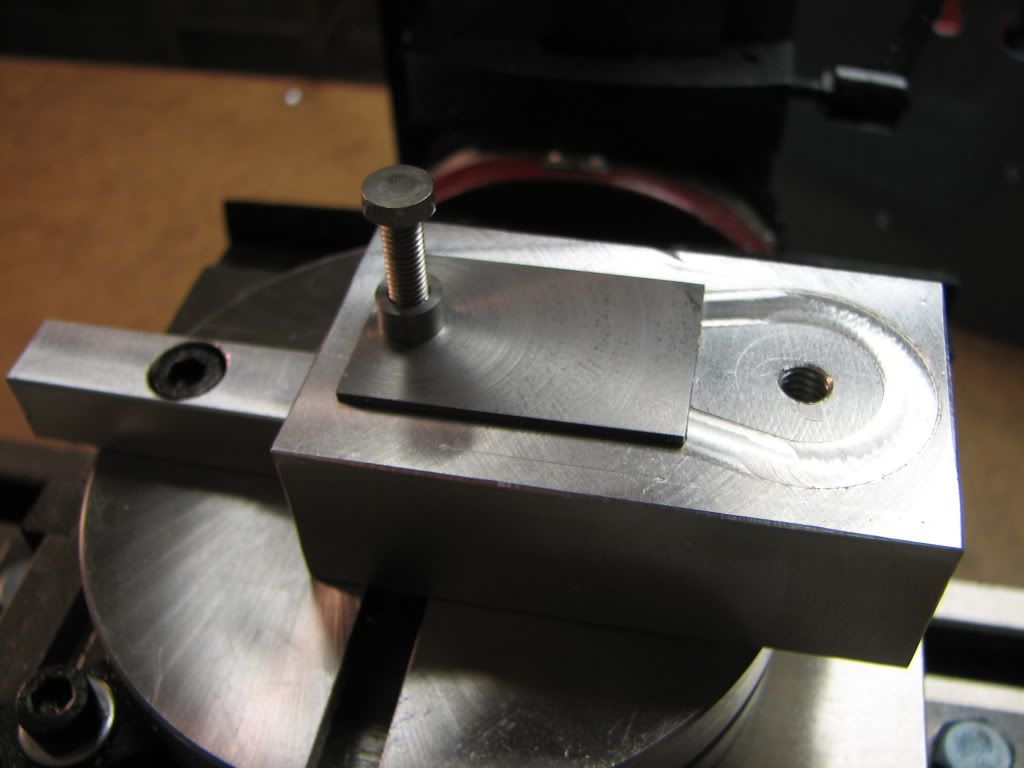
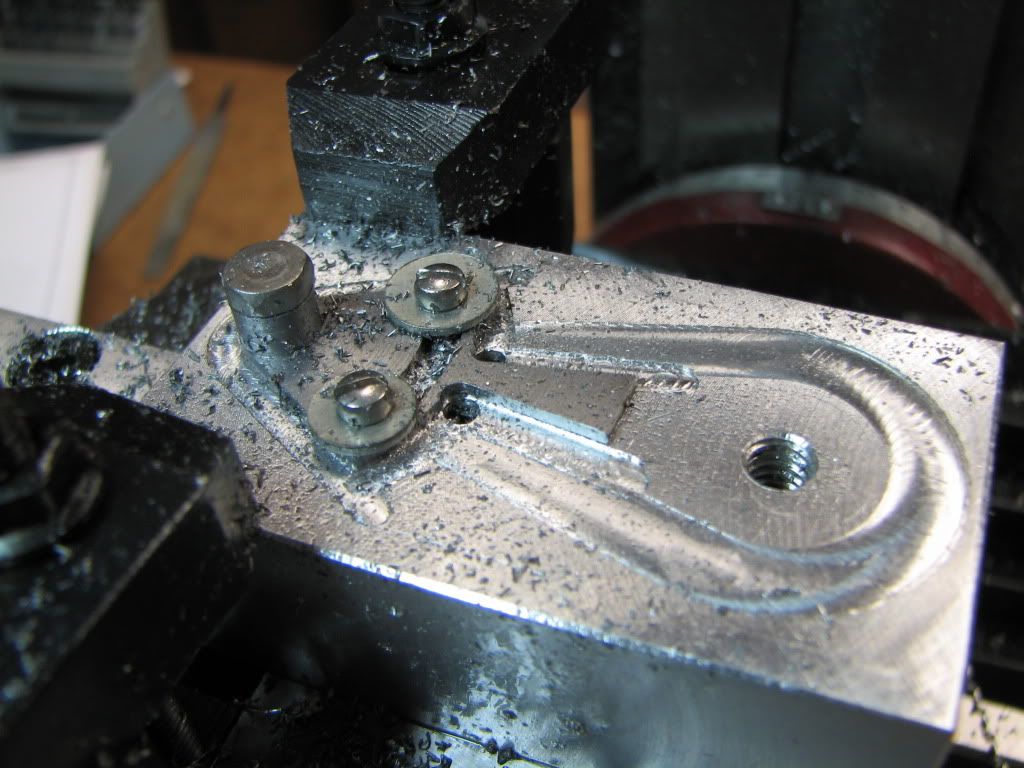
Here it is clamped down with a 10-32 and the block clamped down with RT clamps. (Remember the RT clamps.) 4 holes. 2 are at the end of travel for the arc that will have that fantastic brass handle! They'll be tapped for 5-40 that will be used as clamps. (Not my idea..is instructions.) The other two are are the corners of the handle. (Another infamous handle as it turns out.)
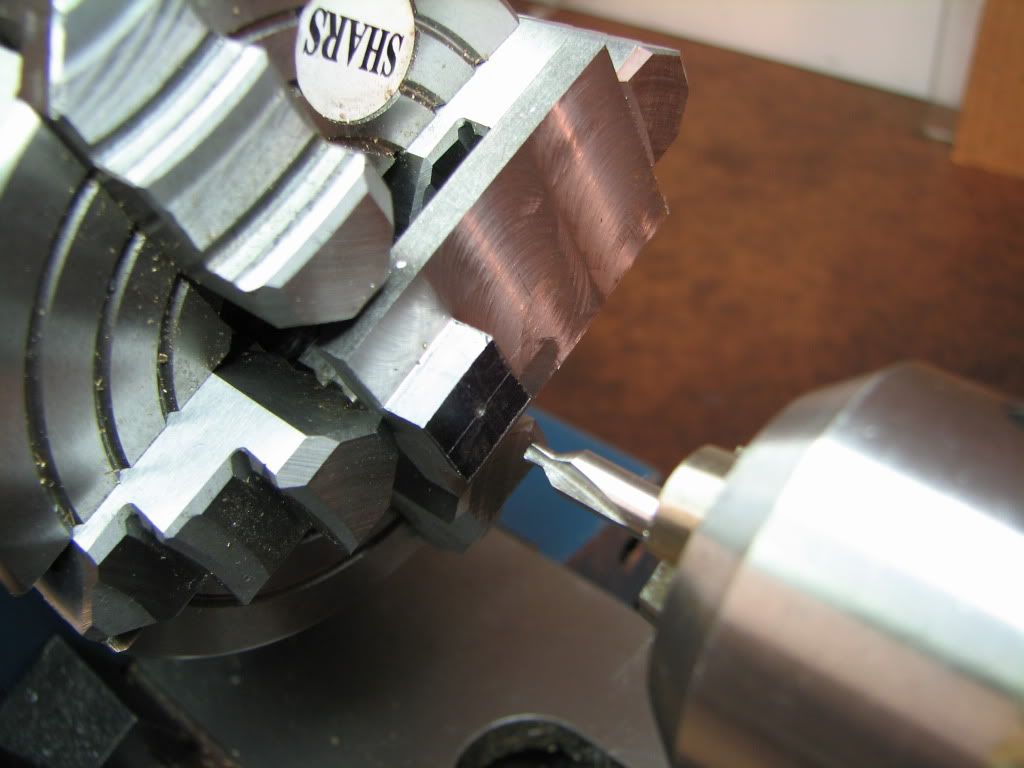
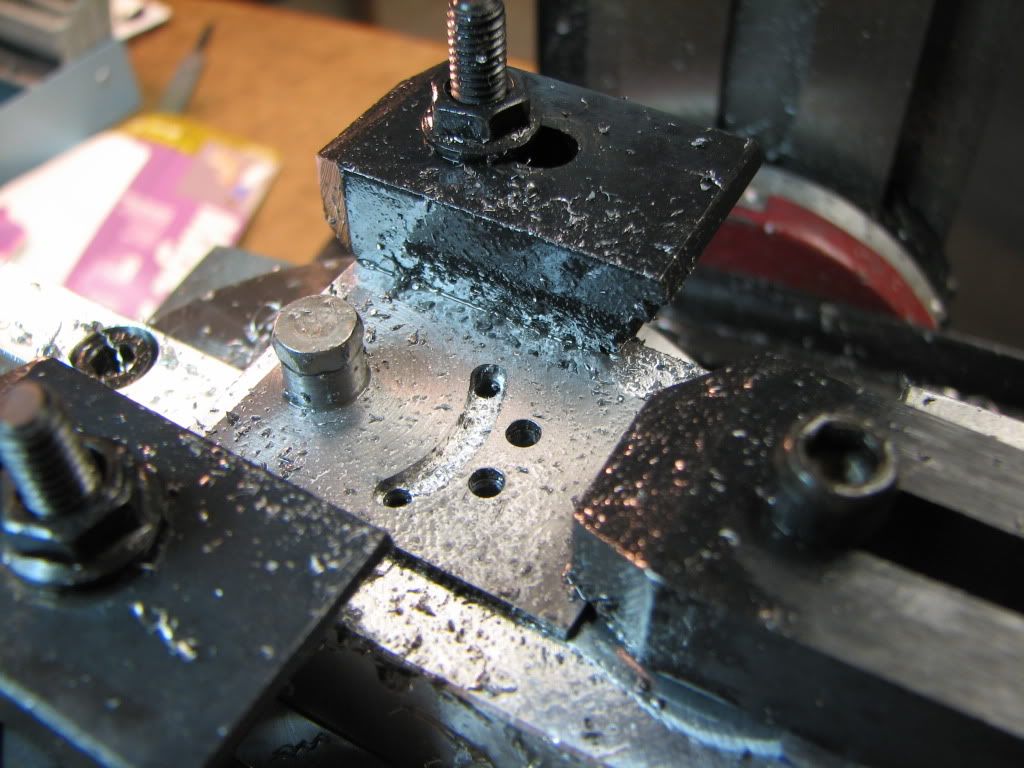
IMG_4410.jpg


First arc made...

IMG_4411.jpg


I don't know what I did wrong...the result is what was wanted...but the part didn't rotate in the way the instruction said. Oh...maybe not wrong then...just different. The eagle eye (or those paying attention) will have espied that the RT clamps are now in a different orientation. That is what happens when you take a dry run with the X axis and see that you're going to bang the spindle into the bolt of the clamp.

IMG_4413.jpg


On the plus side...the biggest thing I wanted to succeed at was to rotate around the boss...right next to it without marring it. One half was spot on...the other half was just a tiny tad away. Which is better than a tiny tad in. So I was happy.

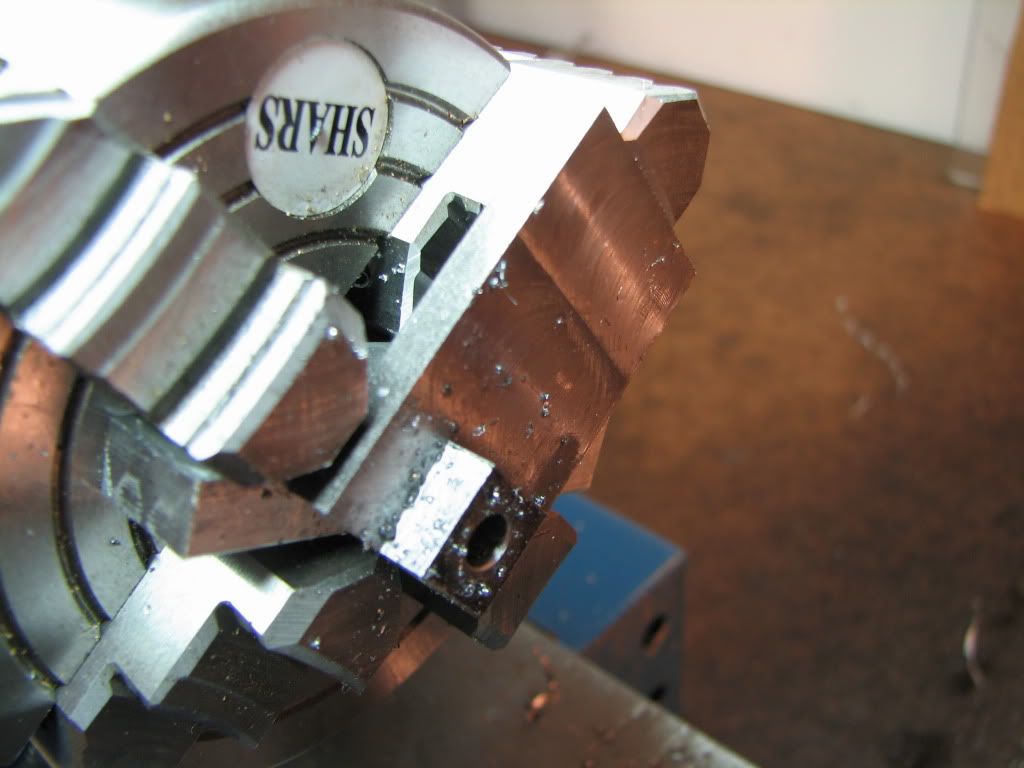
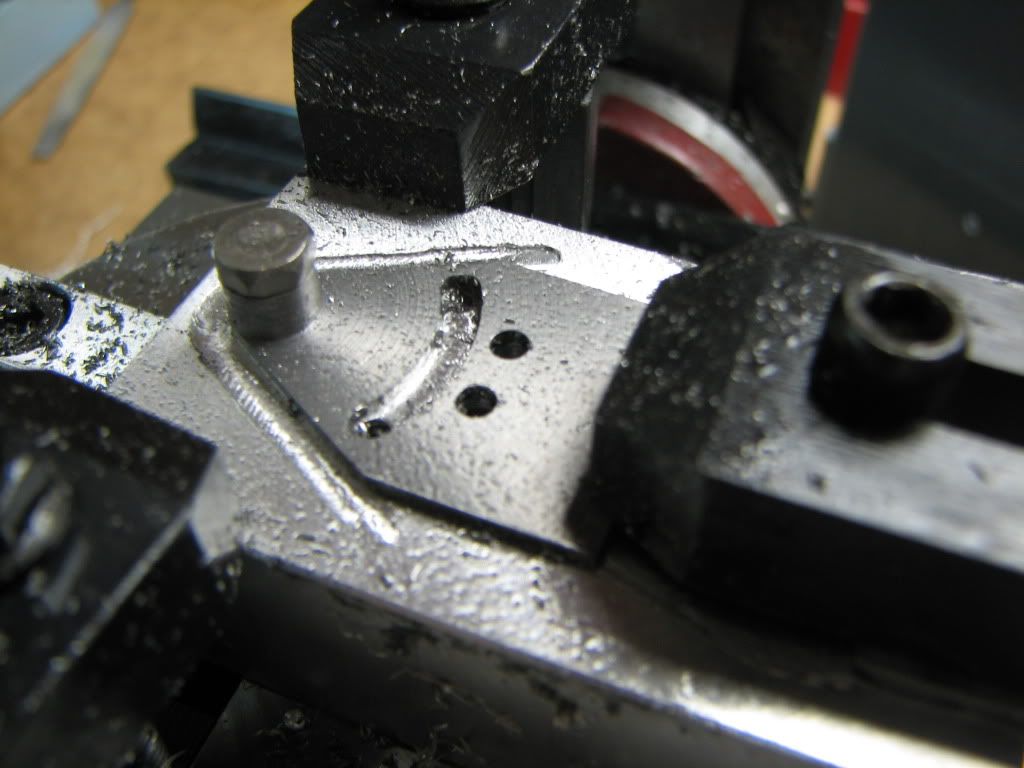
With the 5-40s in place...

IMG_4414.jpg


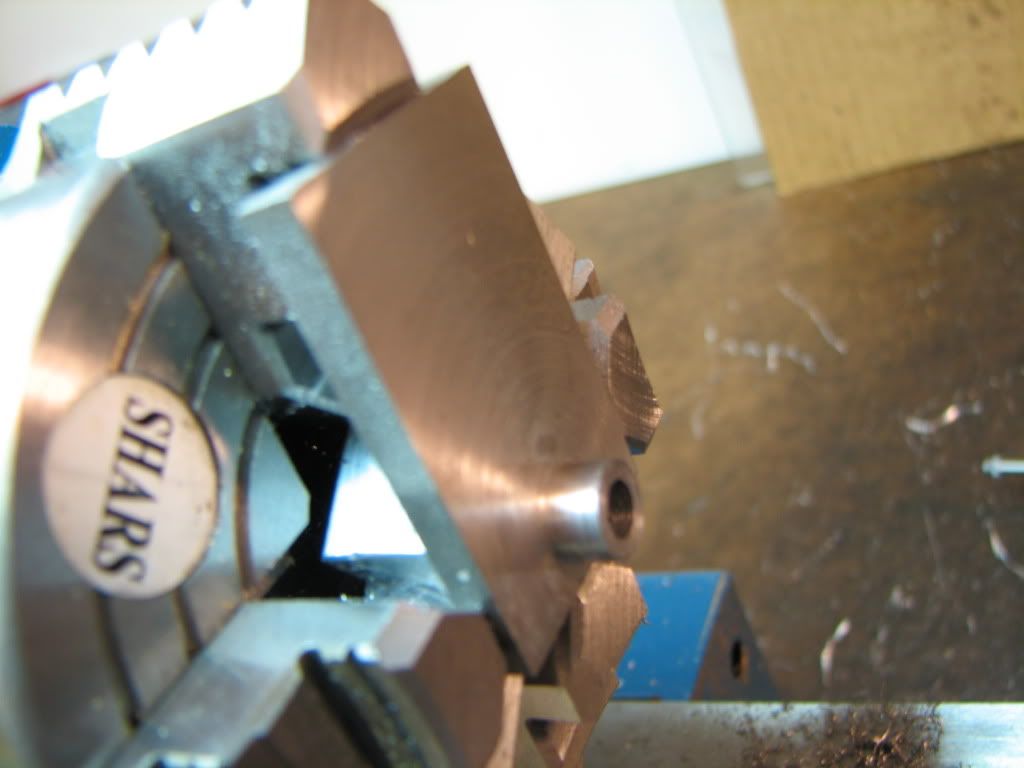
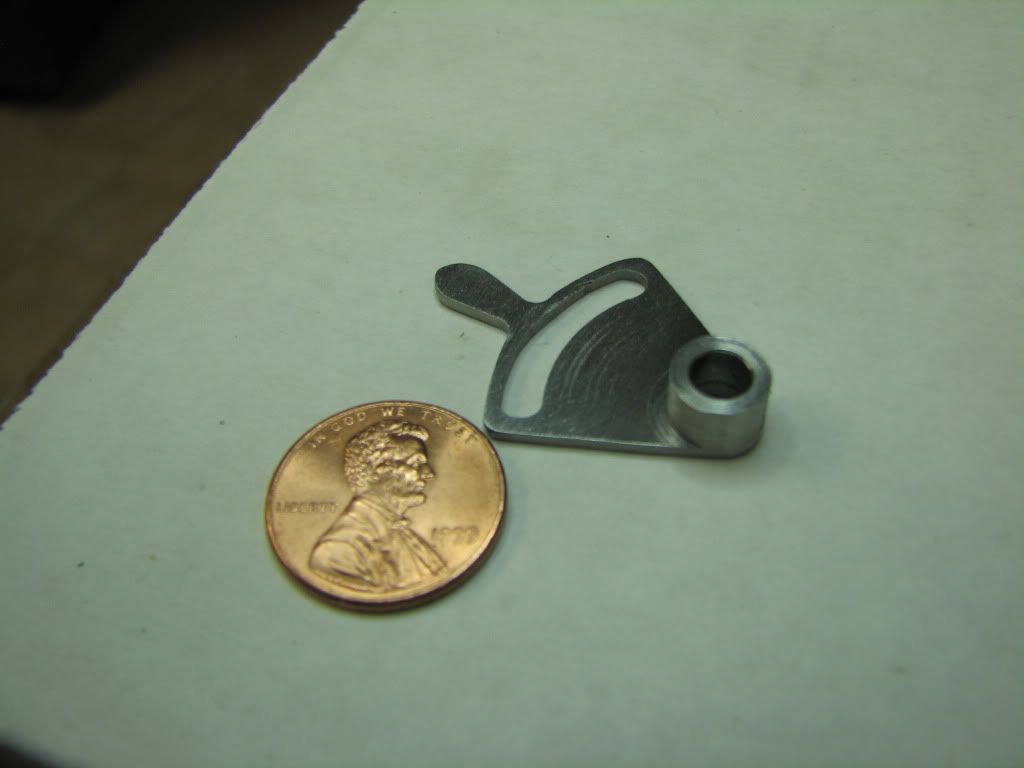
Now the handle. A little voice (not mine by the way) said something like..."If it were me...I'd file the end round."...but another voice (mine this time) said "Noooo. I want to do it like the instructions.". So I have a short handle now. Darn it...I was thinking..."Okay...this is the last operation...what am I doing wrong. It has to be something...it's the last operation. No? Okay. Let's do it."

Well the something was forgetting to move by half the diameter of the cutter.

IMG_4415.jpg


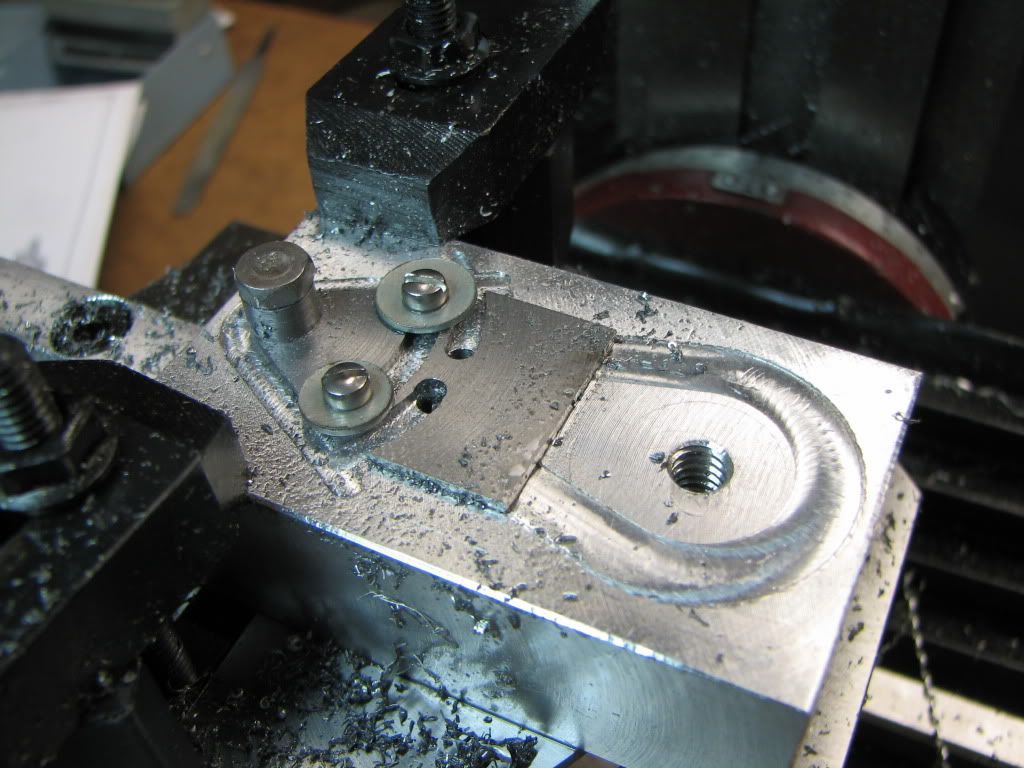
The 'finished' result. Well...'finished'? I could have spent more time cleaning up and sanding. I also see that 1018 seems to tear pretty good..you can see a spot or two on the inner arc. Could probably clean that up with dremel. Also, the old eye does see the ittiest detail...I don't think I took care of backlash as well as I should have.

IMG_4417.jpg


Couple of other things...

In doing the reversing lever and eccentric arm...the instructions suggested using a grease pencil to mark the location of the mill in X and Y. That was a great tip. Made things much easier. So long as you put your cranks on 0 and don't adjust them then it's easy to get back to where you were. A single turn of crank is visibly off the grease mark. (I used a sharpie as my grease pencils went out the door in the clean up in preparation for this hobby. Drat.)

Also...the 3rd clamp you saw...the instructions said to drill a 10-32 and make an L-shaped clamp. (I forgot to do that and didn't want to tear down the RT). As it turned out, I still had the 10-24 from the eccentric arm...and it was in position to use another RT clamp. That left a shim...well...it helps to keep the scraps and boo-boos...used a bit of metal from the machinist clamp I made when I first started.

 
Looks pretty good to me, Zee.

Could you have visualized yourself making a part like this back in February (?) when you started? Pat yourself on the back and crack a bottle of Lafite-Rothschild.
 
Hi Marv. No...actually...I couldn't say what I visualized. I wanted to build an engine...do some machining. I had no idea what it entailed except a lathe, a mill, and some tools. This is great fun. And a lot of that fun and learning has been due to this forum and its members. So thanks Marv...and thanks to everyone.
 
Just had to jump on and give my personal thanks to not only Zee but to all you guys who post regularly or irregularly. And this is for posts past, present and those to come. Great stuff!

Ive had the mill for about a year now and have amazed myself at what can be done with her. Ive now increased my abilitys hugely just by watching your builds. Ive picked up so much info on technique and 'how to' that I simply want to race out and build things (like Zees rev lever!).

Same goes for the lathe, shes been a family member for over 20 years and I thought I had her options down pat. I see her in a new light and want to try a few techniques on her as well.

Until now all my skills have been self taught....stooooopid me, how much time and material have I wasted? Maybe I should have signed up for a shop class years ago....

Great stuff from all, I hope I can add something back to the site as time goes on....

Cheers

Rob
 
Hi Rob. Very nice post. Thank you.

Even though I'm not in it for a job...I've thought about a class too.

But don't feel bad about thinking what you could have done! I'm sitting here wondering what I could have done had I started this 30 years ago. That road leads to depression. No thanks.

Lastly, I think you just contributed...thanks! It's not always about machining...just support is invaluable.
 
Thanks -B-.

I took another look at the picture. My! This is one case where the picture looks better than the real thing. But I'm pretty happy...lots of interesting learnings in that exercise.

Just have to toot my own little horn here...as much as it might be ill-founded...but I think some of you have experienced the same...

I was cleaning up after the last part...putting things away...ya.de.ya.de.ya.da...and I picked up a part that I didn't recognize...hm...what the heck does this go to?...where did it come from?...and then it hit me! I'd made it! It was one of the blackened nuts I'd made for the indicator holders. It looked like a 'real' part! Man that felt good! Well...other than realizing I'm losing it. ;D
 
Zee,
That's a fine looking part you made. You made some complex machining moves there and the end result looks great. :bow:

Rob - nothing wrong with being self taught...as long as you pay attention to the instructor ;D

Cheers,
Phil

 
I did take a class in the local Vo-tech. But what we learned there was just fundamentals and safety. The really cool stuff like what you are doing comes later and is learned from experience and from others who can share tips with you. That is what is so great here. Those of us who do not work in a machine shop with the old timers to learn from can gather a lot of shop wisdom from those with a lot of experience right here. So thanks to you guys who share your skills and to Zee for asking the questions.
 
Philjoe5 said:
Zee,
That's a fine looking part you made. You made some complex machining moves there and the end result looks great. :bow:

Rob - nothing wrong with being self taught...as long as you pay attention to the instructor ;D

Cheers,
Phil

Hi Phil, I agree with your sentiment..cept I havent had an instructor.. my view on self taught is no instructor, so I meant I could have been at another level had I had an instructor earlier..(you guys are now my 'instructors'. thanks for putting your hands up). :bow:
 
zeeprogrammer said:
Hi Rob, I think you just contributed...thanks! ..... support is invaluable.

Got to agree ........... teamwork is what this site is all about 8)

Nice going Zee ;)

CC
 
Very good going Zee - your machining skills are definitely improving Thm:

Kind regards, Arnold
 
Back
Top