Horizontal Mill Engine From Kit

Home Model Engine Machinist Forum

Help Support Home Model Engine Machinist Forum:

This site may earn a commission from merchant affiliate links, including eBay, Amazon, and others.
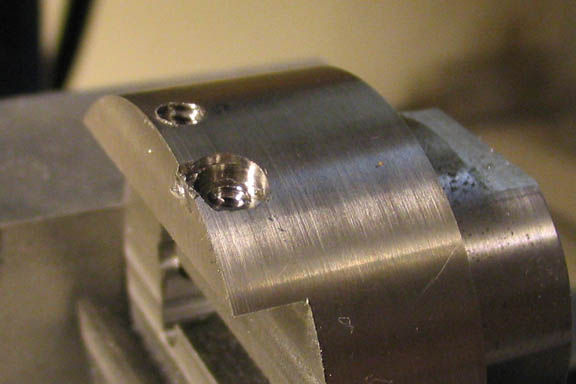
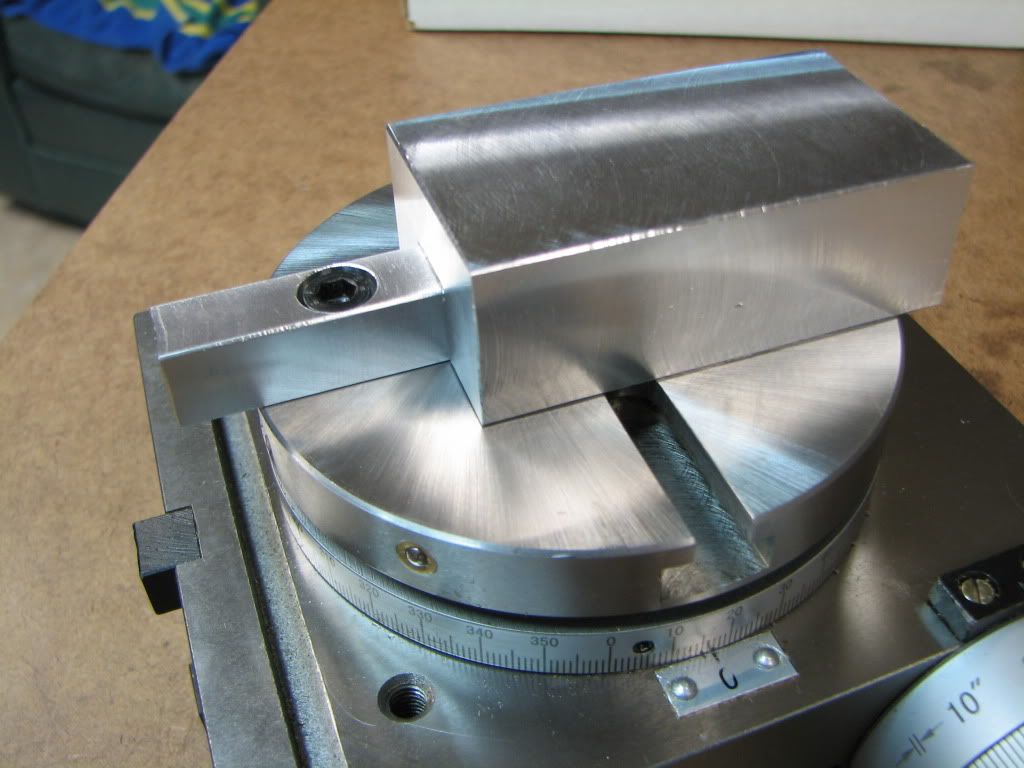
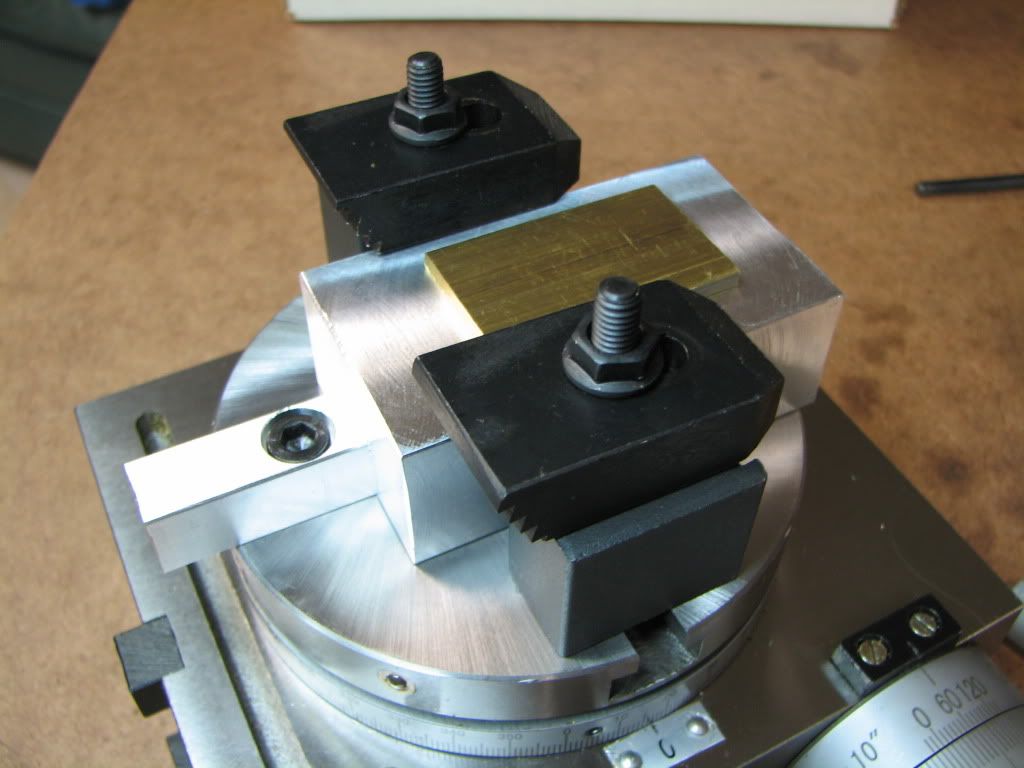
Well, I think the people that suggested I cut my reamers down have misled me.
If I shorten this one anymore...there won't be any reamer left!!!
What are you people thinking?!

IMG_4387a.jpg


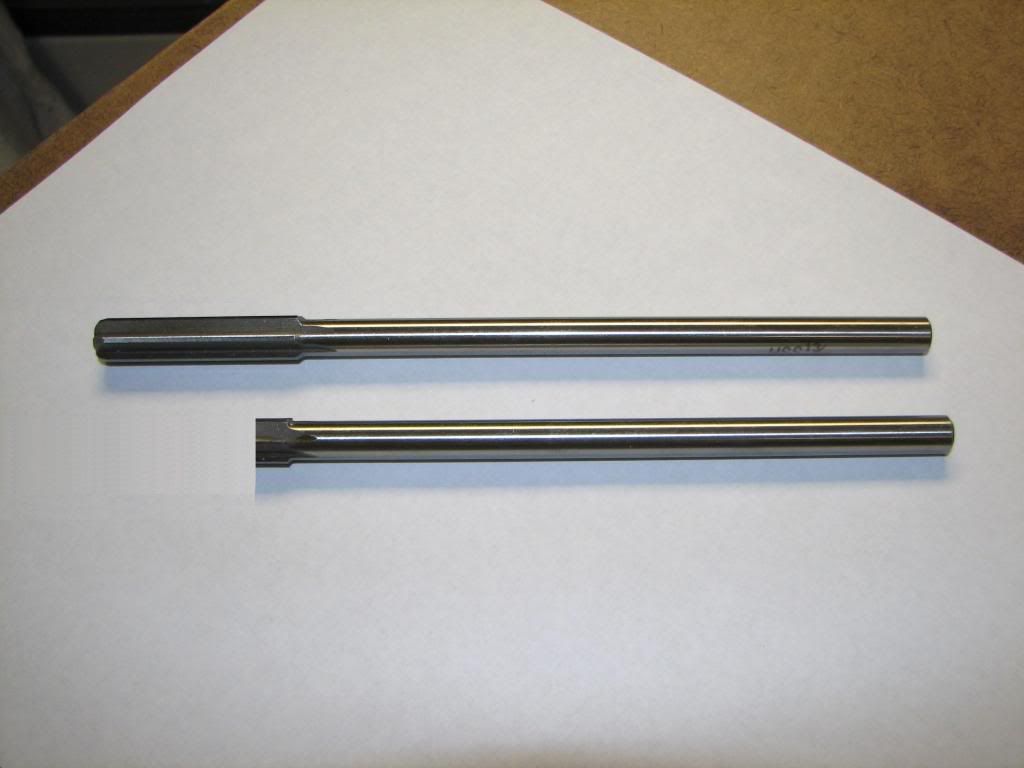
I think it's the other end that...oh...is that what you meant? Darn.

(Is a fake picture. Just couldn't resist. Actually meant to have a real one but when I went to do it...I realized that I don't have the required reamer! Nothing to cut! For the other hole, I think the reamer is short enough already. If not...I'll cut it when I need it...not when I'm not sure.)
 
Nice One ZEE,
When I first looked I went th_wtf1.
Rof} Rof} Rof}
Tony
 
Oooooh, yas' got me as well there Zee. My first thought when I saw that pic come up was "No, he couldn't have been that stupid could he ??? :eek:" The world may never know, tune in tomorrow for answers to these and many more questions. :big:

BC1
Jim
 
I think my heart skipped a beat when I saw that picture.
Good one Zee, I think you got all of us. Thm:
-B-
 
Thanks...it was fun.
No...not 'that' stupid. But stick around...I have other stupids I can do. :big:
 
Ya had me for a second there, Zee. I looked close thinking "NO HE DID NOT just cut the sharp end off his reamer!" Then I saw the telltale P'shop shadow and breathed a sigh of relief, remembering I was one of those who suggested that you cut them off. Thought we had a real life Homer Simpson here for a minute.. Doh!
;)

Dean
 
Dean...stay tuned. Homer may show up yet. (Although difficult as doughnuts have been banned from this house. Not my choice mind you.)

 
So I've been looking at the next step for the mill engine from the instructions. And I just have to say it again...this kit...or rather the instructions for it...are a poor excuse for someone's idea of a beginner's kit.

Sure...one should read the entire instructions before beginning...but no manual should have the words..."But first,...". If it should be first...well then...make it first!

Instructions say going to use the rotary table.
So I set it up.
"But first"...use the vise to do some operations.
Okay...back to the vise...then, per instructions, back to the RT.
And then it says "Now machine up a Milling Fixture similar to"....
Uh...right...and I need the vise for that right?
And then...
"The rotary table shown is six inches in diameter..."
Well darn. Mine is 4". Any mention of whether I NEED a 6" table? Will 4" do?

deja vu. I've had this conversation somewhere before...
Hmmm...not the wife...she doesn't care about machining...

Anyway...I've tried to follow this instruction manual for the benefit of the poor souls that follow me...but now that I realize there can be no one poorer than me...

Forget the manual...drawings are okay..but you don't need to spend the extra money for the parts...unless you think it's convenient...but if you screw up one part...you'll be buying anyway.

Ah well...wife goes another trip this weekend...I should have a bit more time to figure this out...or rant some more.
 
zeeprogrammer said:
Dean...stay tuned. Homer may show up yet. (Although difficult as doughnuts have been banned from this house. Not my choice mind you.)

That Homer guy shows up in my shop too, Zee. I could have made a counter bore in about an hour to do this piece right, but instead took the "easy" way out and used an
end mill. Had about eight hours work in this piece when this happened.

21.jpg


I was able to salvage this piece, but I was unhappy when it happened! Doughnuts help in a case like this. I keep a box of 'em next to the first aid kit.

Dean
 
Dean...Sorry to hear that. Glad you were able to salvage the part.

What was wrong about using the end mill? What caused it?

As for Homer...since you are lucky enough to have some doughnuts...toss some over the fence...he might leave the shop for them. Unless...you're going to follow them and fight over them. :big:

Phil...thanks. Without humor (or even humour) I'd be one pretty sad guy. ;D
 
That project was done a few months back. I'm over it, but the doughnut supply dwindled that day.

An end mill will work for this most times, actually. It can be iffy, though. On this piece, the counter bore was right next to the edge of the hole, and it just vibrated a bit and broke out of the hole, yanking the piece out of the vise. A counter bore is made similar to an end mill but it has a pilot that keeps it straight in the hole, preventing problems like this.

Dean
 
Turns out the instructions assume I have a 6" RT. Silly people. I only have 4"
hm....deja vu...this keeps happening.

And like other things...you can't use the 4" in the way the instructions have you do the eccentric arm and reversing lever. So did a little talking with the guy who owes me beer. (He was some help...but he still owes me beer.)

The original plans call for putting a block of aluminum on the RT and putting the part on top of that. Two bolts go through the ends of the block into the T-nuts of the table. That in itself makes the block too long for the 4". You also have to put a stop block near the edge of the table with a spacer between it and the block. During the operation, you move the block over to the stop. The spacer and stop block is used as a way of sliding the block over so the mill can work on a properly spaced hole.

So...instead...I made two thick washers whose diameter is the same as the width of the slot (i.e. keying pins). I'm going to put those on the bottom of the block so the block can slide along the slots. Then I'm going to use the clamping kit for the RT to clamp the block down. I'll use a magnetic indicator mounted on the mill table to move the block when I unclamp it.

Here's the block and washer. Although it wasn't necessary, I went ahead and faced and squared the block. Good practice for me.

IMG_4388.jpg


Here's the 'pins' just sitting on top of the block.

IMG_4389.jpg


The block is 1" high, 3" long, and 1.5" wide.

I'll proabably make several tapped holes along the center line so I could the pin in different places.

Since profiling the eccentric arm and reversing arm will result in the top of the block getting milled (and I have to drill into it too) I've thought about using a 2nd sacrificial plate. (Just picture the current block being sliced into two with the bottom, thinner part being the carrier and the top, thicker part being the sacrificial.)

For now...I can use the block and mill it down as I use it and once it gets thin enough...then start make a new plate to put on top.

I'm not looking that far into the future...at some point I'm going to have this ready to go and find out something bad. Like the mill is too short...or the reamer is too...nah.
 
Not so sure about this. I didn't take into account the lengths of the slots and the central area where the hole is.

For the eccentric arm, the part has to slide .96" but for the reversing lever the part has to slide 1.188".
Central area is about 1.42".
Each slot is then (4 - 1.42) / 2 = 1.29".
The pin is .31. Half that is .15 so...
the effective length of a slot is 1.29 - .15 = 1.14 which is 'shorter' than 1.188.

So at best...it's right on the money close enough.

I suppose one possibility is a longer block and put in sliding pins. ( came up with that myself ;D) It only needs to keep the part along the center line when sliding it. For that matter...the pins can be stationary...if that's possible...and just slot a 5/16 in the block...hm...yep...gotta do some more thinking.

Or...bar (key) on the RT on each slot...then if bar goes off one slot as it slides...it still has enough on the other to stay centered.

Okay...feeling a little better...and haven't lost any work...just a hole I already drilled. Oh...and two thick washers. Some drawings...ah...not much...gained experience. We won't discuss what kind of experience. Thank you.
 
zeeprogrammer said:
.....So...instead...I made two thick washers whose diameter is the same as the width of the slot (i.e. keying pins). I'm going to put those on the bottom of the block so the block can slide along the slots. Then I'm going to use the clamping kit for the RT to clamp the block down. I'll use a magnetic indicator mounted on the mill table to move the block when I unclamp it.....

I found it feels really good making something just so you can 'make something else' easier, or better and knowing it is your own creation doesn't it?

Maybe all this just means I'm easily entertained. :big:

Keep on Truckin' my friend, I'm enjoying the ride.
Kermit
 
You're getting along Zee; I presume nothing of this is in the original instructions ? :)

As to facing the block, besides getting practice from that, it is a good idea to face raw stock; don't ever trust raw stock to be square as-supplied!

Regards, Arnold
 
Thanks Kermit. Very much. Yes...I'm having fun with this tool.

Arnold...thanks. The concept is in the instructions (and I'm sure there are other ways to do this) but the mounting details are different. While I don't think squaring the block in the original concept was absolutely necessary (given the thinness of the part to make)...I wanted the experience. And yes, I was surprised by the lack of squareness.

I hope to use the tools, or some of them, again some day.

So here is the block and the key on which it rides. The key is bolted down with the T-nuts. I made it one piece as I don't need the center hole of the RT once it is mounted. But you can see how easy it would be to chop it into two and use a couple more T-nuts. The slot in the block is deep enough so that it actually sits on the RT...not the key.

IMG_4390.jpg


Here is the key bolted in and the block riding on top.

IMG_4391.jpg


Here's the block clamped down and a blank part sitting on top...later the part will be clamped to the block using a bolt (and possibly washers and shims).

IMG_4392.jpg


So that was fun. Thanks again to the guy who owes beers. Someday he'll start asking what's in it for him when I ask questions. Which is fine...but it won't be beer. :big:

I do wonder why the mill table couldn't have been used to move the whole thing back and forth. I'm thinking it could and I've done all this for...for nothing? :hDe: No matter. Good exercise.

Now...let's see what new trouble this troublemaker can make for some of our troubled members. ;D
 
It's reassuring to see, Zee, that you've finally accepted the fact that making jigs and fixtures is a good thing, even if it distracts you temporarily from the primary project. Preserve this attitude; it will serve you well in the future.

I still can't figure out how this is going to be used to make the eccentric arm and the reversing handle but I'm sure that will become apparent in the next set of pictures or so.
 
Your 1500th post directed at me Marv. Thanks!

But just to clarify...I've always known, and have said as much, that making jigs and fixtures is a good thing. I've only differed on when. I guess it's time now. ;D

As for your question about how I'm going to use this to make the eccentric...well...I suspect part of your question is a preliminary to when you're going to tell me that I didn't have to go through all this. (After all, you've made this engine. ;D)

No doubt there are other ways. Anyway...

The eccentric arm has two arcs some distance apart. If the RT is used to cut the arcs, then the spindle has to be centered on the RT and just as importantly, the RT has to be centered on the hole (arc). Which means the part has to move the holes to the center of the RT. Hence, the block. Certainly can move the part without the block (but I expect it would be more difficult and less accurate - especially if one has to do that more than once).

Then...rotate and use mill table to connect the arcs.

The profile of the eccentric is not critical. Just the size and distance of the two holes. So a round-over would be convenient too.

So...yes...maybe I've made a tool...a tool I didn't need...that some experience might have told me I didn't need...had I waited a little longer. :big: Sorry.

Seriously though...I've gotten to the point where I'm going to do more of this. I was just talking to the beerless friend of mine a few days ago and he was pressing me too. Well...I do have a few things lined up...

A holder for grinding my tool bits (Yes! I'll be grinding too! ;D)
I want to mount some digital calipers on the lathe and mill.
hm...there's a couple of others I can't think of off the top of my head...
Also have the Z mod to do.

Thanks again Marv.


Latest posts

Back
Top