Henry Ford Engine

Home Model Engine Machinist Forum

Help Support Home Model Engine Machinist Forum:

This site may earn a commission from merchant affiliate links, including eBay, Amazon, and others.
That's guaranteed to happen at least twice a project for me, dont feel bad. :)
A little heat will help with the threadlocker.
 
O.K.

I flipped the exhaust valve around so that it's facing the right direction. That was fun.

Tried to start it again and NOTHING. It puffed a couple of times but I had to manually rotate the flywheel in order to do so. When it did "poof" it barely moved the flywheel.

It seems like it doesn't have enough power to do what it's supposed to do. Should I take the combustion chamber apart (again) and fill every nook and cranny with lead? Will this really help?

I can't wait to finish this and move on to an air engine that I CAN get running....very frustrating........
 
Vascon---Where do you live? This is driving me crazy!!! I may have to hitchhike to your place and help you to get that thing running!! When they are that close, and you have enough compression to make the piston "bounce" back when you flip the flywheel by hand, it shouldn't take nearly that much agravation to make them run.---Brian
 
Hello Chris, I've been following along in the shadows watching your progress and am sorry to see that you are having so muck difficulty getting you H. Ford to light up. I've reviewed the past several pages and I do not see any reference to valve sealing but I did see that you had the valve backackwards :-X s**t happens. I wonder, could your compression ratio be too low? How much 'kickback' in the flywheel exists when you give it a quick flip?

Following with increased interest

BC1
Jim
 
I appreciate the feedback guys....I love the passion in this forum. There is nobody more frustrated than me. I will try and take a short video at some point today along with some pictures of the whole operation. Brian...thank you, I'm getting there. It must be painful for some of you to read all of this.

I used lapping compound for the valve seat. I don't think it's a "perfect" seal but now that I have the valve facing the correct direction it doesn't combust out the exhaust port.

Thanks again...you guys are great!

Chris
 
No, it's not running yet. :mad:

Do you think it's because of the exhaust valve not sealing correctly?

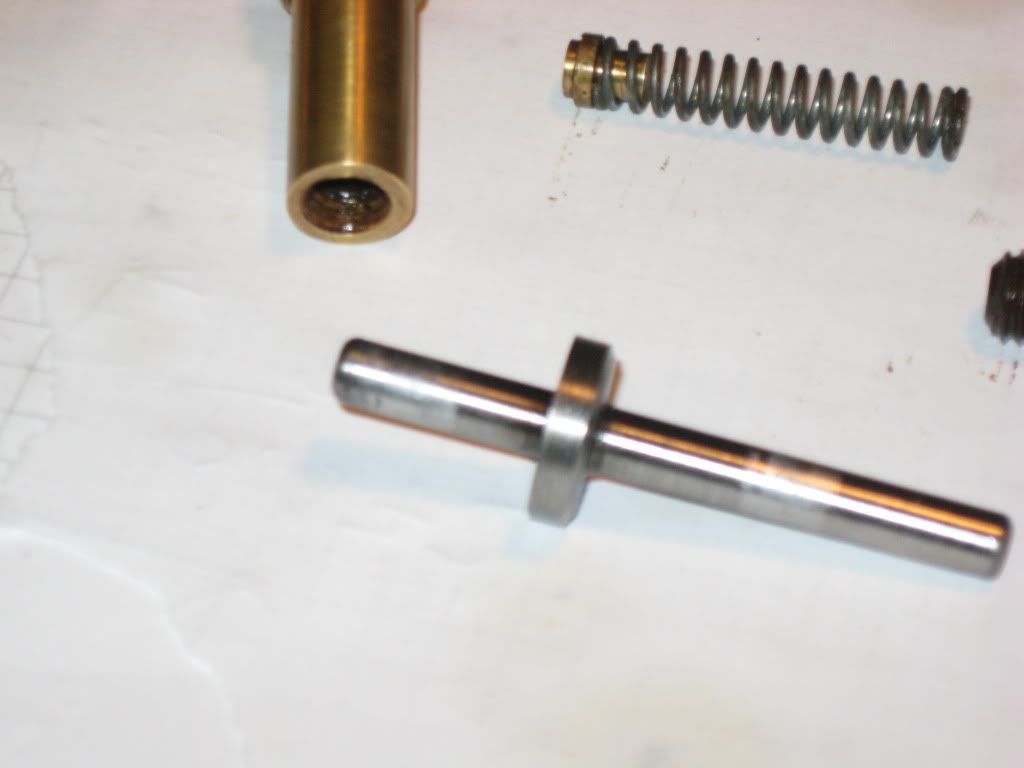
FordEngine005.jpg


If you notice in the picture, I added a small 45-degree chamfer. Should there be a larger lead-in chamfer...30-degrees? I heard air weezing out of the exhaust valve when it was closed. I got it to POP a couple of times but it did not move the flywheel.

:mad: :mad: :mad:
 
Brian Rupnow said:
Vascon---Where do you live? This is driving me crazy!!! I may have to hitchhike to your place and help you to get that thing running!! When they are that close, and you have enough compression to make the piston "bounce" back when you flip the flywheel by hand, it shouldn't take nearly that much agravation to make them run.---Brian

Brian...I'm about ready to take you up on your offer.

Chris
 
Vascon---I don't know if you followed my Kerzel build or not, but I had one Hell of a time getting the valves to seal. I redid the head, I redid the valves, I built valve cages---it went on and on. And there simply was no way it was going to run untill I got those valves to seal as tight as a ducks butt!!! Eventually, with guidance from a couple of other senior members on this forum, I built a "valve seat cutting" tool, and thru using it and progresively finer grades of grinding past, I got the valves to seal---tightly and completely. Then, and only then, the engine ran fine. If you can hear anything leaking, or if, when you come up on compression by hand turning the crankshaft you gradually feel the compression leak away---then its not going to run. These small i.c. engines are not forgiving at all in respect to compression loss. I got lucky on my webster build--It ran "right out of the chute", but the Kerzel drove me nuts. Those valves have to seal PERFECTLY!!!
 
Thank you Brian. I know now it's not a perfect seal. I am going to try and fix my existing valve by making the angle on the valve and try lapping it in again. I do remember your build....I will look through it again to see how you fixed the valve seating issue.

Chris
 
If this engine was my first engine build...I would have never gotten into this hobby.

I simply cannot get this engine to run. I added a much steeper chamfer to the valve today...bought valve grinding compound...and "thought" I had fixed the valve seating issue. Air STILL leaks by the valve when it's supposed to be compressing. I tried to run it anyway and it just "poofs", mostly out of the exhaust.

I don't want to go out and make another exhaust valve...it took me forever to make the one I have now! I'm only going to make it the same way again...just like the flipping instructions tell me to. I left a sharp knife edge on the valve seat. Chamfered the valve and lapped it in. That didn't work last time why should it work a second?

I am ready to smash this engine with a hammer.
 
How wide is the valve seat surface? The surface of the seat that contacts the valve should be .010 - .015 wide. Is it wider than that?

Dont use normal lapping compound. It is too course and will do more damage than good. Try to find some lapping compound with about 400 grit.
 
Chris,
I started this hobby trying to make a Stirling engine. Build #1 - a failure, #2 - a failure. Got plans for a larger one, build #3 - a failure, build #4 - a failure, build #5 - not a complete failure, but a really poor runner. This represented a year of effort. I desperately needed a success. So I switched gears, and built a fairly simple steam engine. I liked the basic design of that engine so I spent the next year making all kinds of variations of it.

Meanwhile I'd glance over at the Stirlings gathering dust thinking I'd have another go at trying to get them to run. At this point I've found much more interesting things in steam engine design and doubt I'll ever go back to the Stirlings. Do I feel like a quitter? No, I'm just having one heck of a lot more fun that I did in that first year. But I learned a lot from trying the Stirlings and there's no doubt they gave me some valuable experience.

My advice - given your present level of frustration, put this engine aside. Start another project. Anything that will likely lead to success. You can always come back to the Ford engine. When taking a hammer to your handwork seems like a solution, it's time to consider other options.

Just rambling on a subject I'm familiar with - FRUSTRATION

Cheers,
Phil
 
stevehuckss396 said:
How wide is the valve seat surface? The surface of the seat that contacts the valve should be .010 - .015 wide. Is it wider than that?

Dont use normal lapping compound. It is too course and will do more damage than good. Try to find some lapping compound with about 400 grit.

I'm not sure how wide the surface is. I will check this weekend. Is wider better? I bought regular compound but can buy some 400 grit from McMaster or something. I will try that.

Thanks,

Chris
 
Philjoe5 said:
Chris,
I started this hobby trying to make a Stirling engine. Build #1 - a failure, #2 - a failure. Got plans for a larger one, build #3 - a failure, build #4 - a failure, build #5 - not a complete failure, but a really poor runner. This represented a year of effort. I desperately needed a success. So I switched gears, and built a fairly simple steam engine. I liked the basic design of that engine so I spent the next year making all kinds of variations of it.

Meanwhile I'd glance over at the Stirlings gathering dust thinking I'd have another go at trying to get them to run. At this point I've found much more interesting things in steam engine design and doubt I'll ever go back to the Stirlings. Do I feel like a quitter? No, I'm just having one heck of a lot more fun that I did in that first year. But I learned a lot from trying the Stirlings and there's no doubt they gave me some valuable experience.

My advice - given your present level of frustration, put this engine aside. Start another project. Anything that will likely lead to success. You can always come back to the Ford engine. When taking a hammer to your handwork seems like a solution, it's time to consider other options.

Just rambling on a subject I'm familiar with - FRUSTRATION

Cheers,
Phil

Thanks Phil...I do have an Elmer Verburg engine in mind...
 
Chris, I was having a heck of a time getting my valves to seal on the Tiny I4. What I ended up doing was re-cutting the valve to 46 degrees, and leaving the valve seat 45 degrees.(This should give you the tiny valve sealing surface .010 or so) Then I mixed up a homebrew batch of valve lapping compound. I started by scraping off some fine powder from a stick of jewlers rouge (regular hardware store stuff), toothpaste (I am not sure which is the best to use) , a dab of grease and a drop of oil. I then spent about ten minutes with each valve, turning and lifting. This is a labor intensive process and probably not the best way, but for the most part it worked for me....... except for that pesky #2 exhaust valve :Doh: :big:

Kel


Kel
 
Just a thought, I wonder if using a stronger spring on the exhaust valve might encourage it to seat?

Chuck
 
stevehuckss396 said:
No, the wider they get the harder it is to get sealed.

Good to know...I was thinking otherwise. Whew....

I just bought two stop & waste valves and am going to try the whole process again.
 
kcmillin said:
Chris, I was having a heck of a time getting my valves to seal on the Tiny I4. What I ended up doing was re-cutting the valve to 46 degrees, and leaving the valve seat 45 degrees.(This should give you the tiny valve sealing surface .010 or so) Then I mixed up a homebrew batch of valve lapping compound. I started by scraping off some fine powder from a stick of jewlers rouge (regular hardware store stuff), toothpaste (I am not sure which is the best to use) , a dab of grease and a drop of oil. I then spent about ten minutes with each valve, turning and lifting. This is a labor intensive process and probably not the best way, but for the most part it worked for me....... except for that pesky #2 exhaust valve :Doh: :big:

Kel


Kel

Thank you Kel....I purchased some 400-grit Clover lapping compound. I'm going to take my time this go around.

Chris
 
cfellows said:
Just a thought, I wonder if using a stronger spring on the exhaust valve might encourage it to seat?

Chuck

Chuck,

This is what some of my students have been saying....it's definately the easiest way to go at this point. I'll check the local hardware store this weekend.

Thanks...

Chris
 

Latest posts

Back
Top