Double acting Double Oscillator

Home Model Engine Machinist Forum

Help Support Home Model Engine Machinist Forum:

This site may earn a commission from merchant affiliate links, including eBay, Amazon, and others.
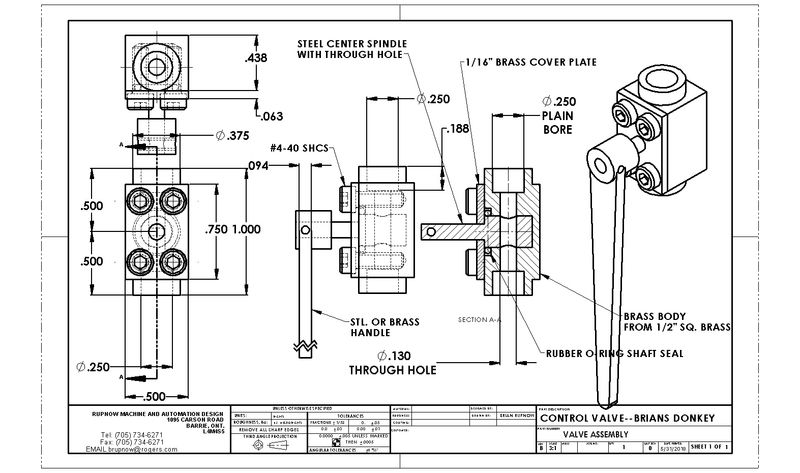
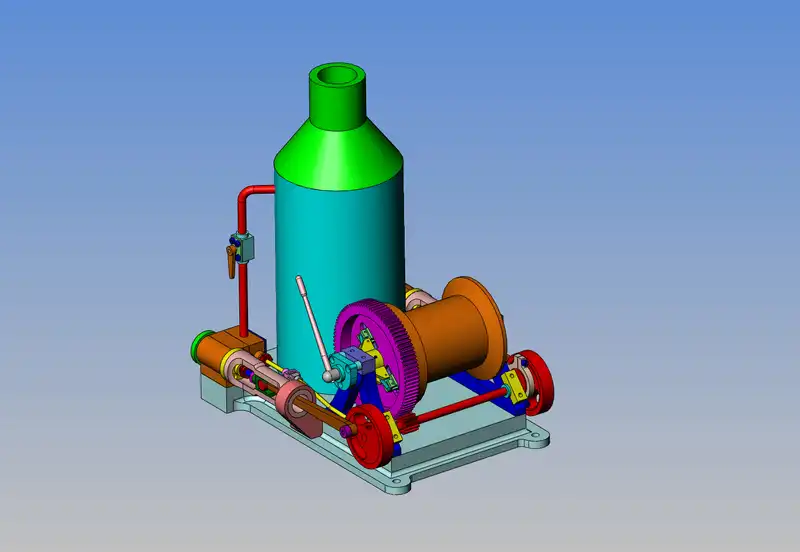
Amvolk--a number of years ago I designed and built a " Steam Donkey Winch" I wanted a valve which would control the speed of the twin "steam engines" so I designed one that worked very well. If you follow the red line coming out of the boiler you will see the valve in place on the line. It worked very well, and gave great control over the engine speed. (And if those twin engines look a bit like a Cretors popcorn Engine" there is a very good reason for that.)
ejsAgr.jpg

img}


ER9LTN.jpg
 
Today I was bored, so I decided to go back and address the subject of "running something" with my oscillating engine. I took 20 minutes to machine a pulley and added it to the crank arm on one side, then set up my "Crazy Joint" for a demo video.
 
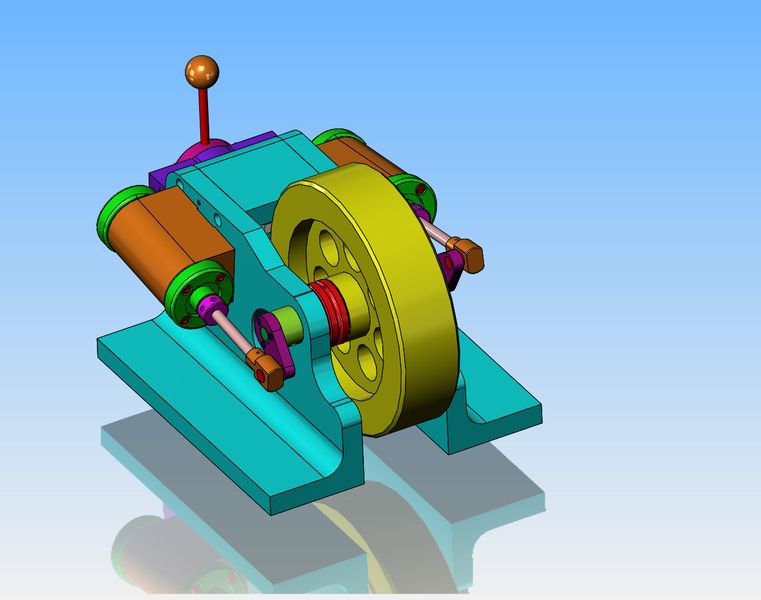
And if you were wondering---this is the engine with the power take-off modification. Basically, what it means is that the two angles which make up the main frame of the engine are 1/2" farther apart. This gives room for the red, 1/2" wide power take off pulley.
9UGSPH.jpg

This is a quick general question about PTO solution. In the old days, they used big flat belts. Why wouldn't/couldn't you cut a V in the flywheel for a V belt? Is is just matter of gearing? Or aesthetics :)
 
O rings are cheap and easy to access. They don't need any fussy groove in the pulleys they run on, and they transmit power very well, and will also bend in many different planes if they are required to. They are stretchy, so you don't need any specially calculated centers between pulleys. Flat belts are not easy to access and require a certain amount of "fiddling" with to be sure that they track well and don't run off the pulleys. V belts are difficult to access in the size required for these small engines, and require a great deal more precision when machining the grooves in the pulleys.
 
I've had a few questions about the "crazy joint". I modelled it in 3D, then animated it. It's kind of hard to get your head around it even when you see it in operation. And--whatever camera effect makes the stage coach wheels revolve backwards is still in play. I would have thought that would be overcome by now, but apparently it hasn't.----Brian
 
It's a neat mechanism, but someone originally invented it and produced the mechanism. Which leads to a pertinent question:

What's the advantages / disadvantages of this mechanism over bevel spur gears? The gears must have been better in some way since they are still used and this mechanism is part of the kinematic design scrap heap.

...Ved.
 
From what I discovered, there is a very small "dead spot" at two places on the rotation. That is why the flywheels have to be moderately heavy to get the mechanism over that flat spot and keep it turning smoothly.
 
It's a neat mechanism, but someone originally invented it and produced the mechanism. Which leads to a pertinent question:

What's the advantages / disadvantages of this mechanism over bevel spur gears? The gears must have been better in some way since they are still used and this mechanism is part of the kinematic design scrap heap.

...Ved.
Looking at the video the input and output rotate in the same direction, gears would rotate in the reverse from in to out.

Cheers
Andrew
 
What's the advantages / disadvantages of this mechanism over bevel spur gears? The gears must have been better in some way since they are still used and this mechanism is part of the kinematic design scrap heap.

From what I discovered, there is a very small "dead spot" at two places on the rotation. That is why the flywheels have to be moderately heavy to get the mechanism over that flat spot and keep it turning smoothly.

The mechanism might be easier to make if you have no way of milling gear teeth. It is likely to be quieter than straight-cut gears. On the other hand, it will be less efficient because of all the sliding bits. On the basis of judgment rather than analysis, I think it would be possible to balance the mechanism at least moderately well, but in most instances that will not have been done, so there would be vibration when running at much of a speed.

I don't see any kinematic reason for a dead spot, but to avoid binding at some point I think it would need to be either exceptionally accurately made,
or to incorporate enough slop to compensate.
 
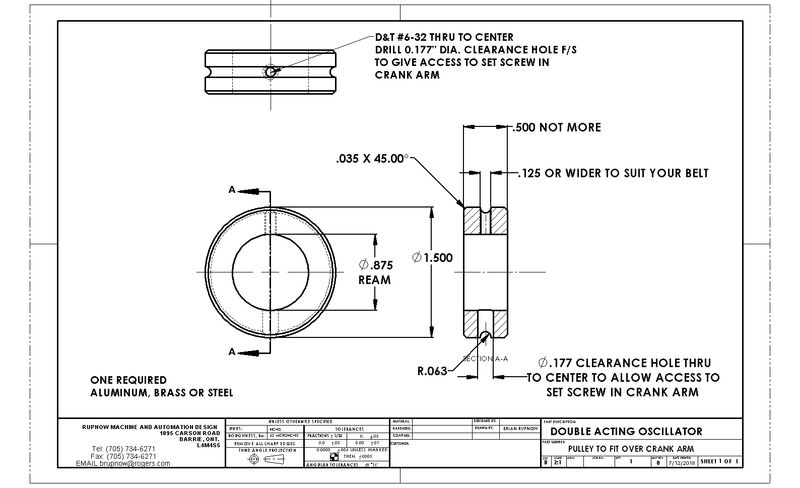
A heads up to all of you who are currently building this engine from my plans. When I designed the pulley which fits over the crank arm, I put a set screw in it, but failed to realize that with the pulley in place there was no way to access the set screw in the crank arm. So, a clearance hole has been added to the pulley to allow access to the crank arm set screw.---Brian
huaFw5.jpg
 
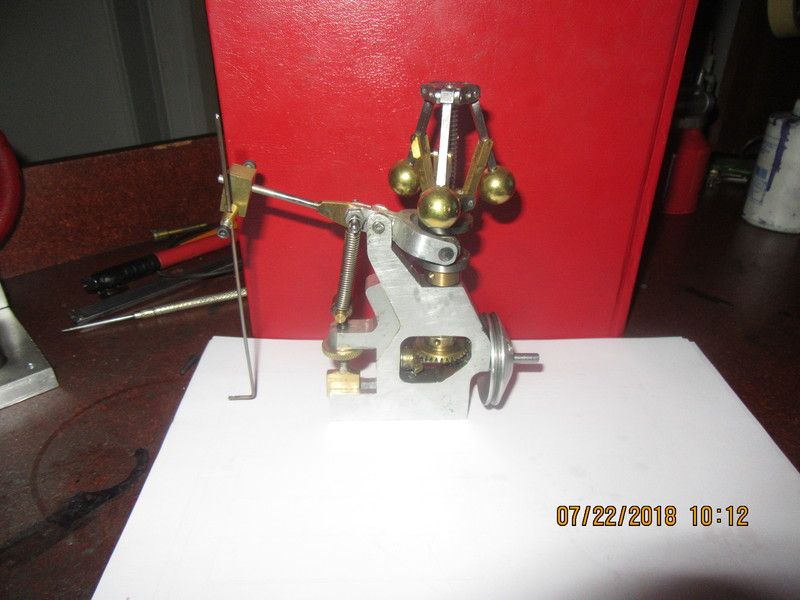
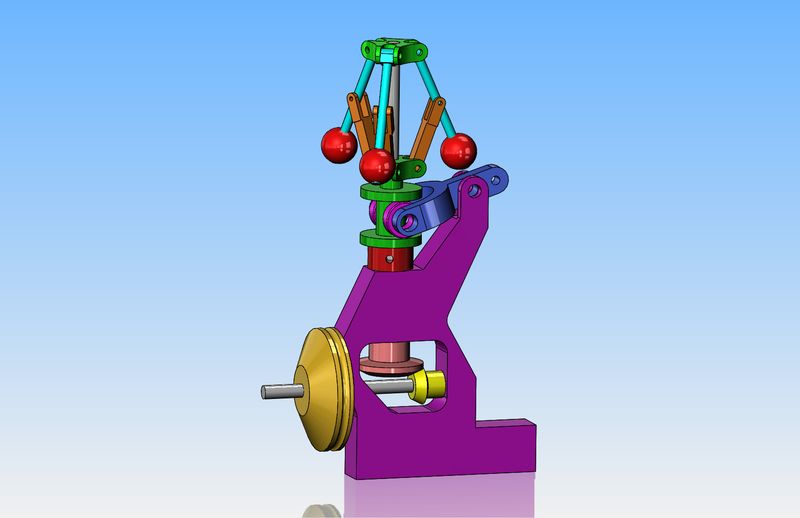
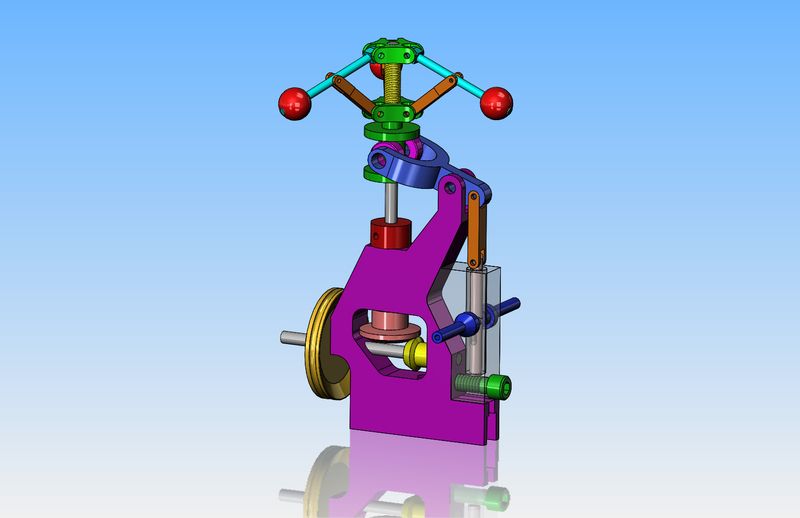
I have a three ball governor that I designed about three years ago. At the time I designed it, I was looking for a way that I could change the rpm setting while the governor was working, not setting still. I was successful in doing that, by adding a pair of tension springs to the output lever to counteract the compression spring on the main post. Since this type of governor will work in either direction, I may try marrying it to the double oscillator engine.
JvdAFt.jpg
 
I'm not sure how I managed to do it, but I seem to have lost all of my Solidworks files on this 3 ball governor. I know I had a long post about it on this forum around 2010 but the search mechanism on the forum won't let me find it. If any of you have the link to my post about the 3 ball governor, could you paste it in this thread so I can find it.
 
Thanks Brian, read the entire series on this lovely
engine. It made for a very enjoyable morning.
I have never seen a crazy joint before. Thanks.
I need to add one to one of my steam engines just for fun.
Again thanks. Paul Denham BAEM member.
 
I have just spent much of the morning remaking a 3d model of the three ball governor. I don't know how it happened, but I had completely lost my original SolidWorks files on this governor. So---It was a matter of chasing down existing .pdf files, printing out some old drawings I had posted about 8 years ago on the forum, and measuring my existing governor. I'm not totally finished yet, as I have to add in the steam control valve, but I'm a lot closer now than I was early this morning.
CFvXot.jpg
 
Here we go. A few compromises here, as I am working with an existing governor. The governor in it's current state as shown in the earlier photograph is not set up for a steam valve. I have to remove the adjusting counter-springs and add on the steam valve components.
Kez8xM.jpg
 
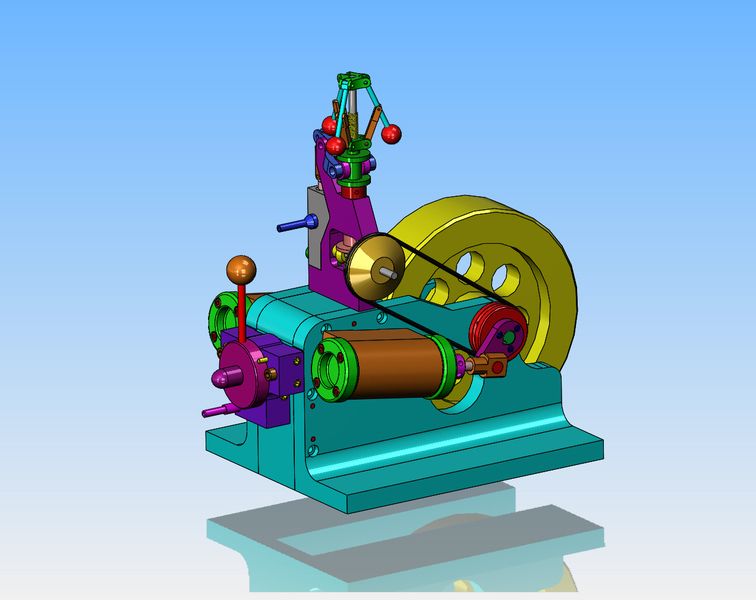
Okay--Going to look sorta/kinda like this. I'm a bit surprised--the scale doesn't look all that bad, considering the oscillator and the governor were built a few years apart. If I go ahead and do this I may have to move the dark blue steam inlet/outlets around a bit on the governor.
lyrF7t.jpg
 
Back
Top