Okay Guys and Girls---A bit of a change in the game plan. I was going to build the Upshore "Farm Boy" engine, but I want this engine to be water cooled, and I found a set of free plans with what I think is a nicer cylinder design at http://www.floridaame.org/GalleryPages/g1h0106.htm This is not going to be a fast build, but I will build it one peice at a time and document it here as I go along. This will not be to my own design (unless I see an area that I think needs improvement.) If anyone has built this engine, please post and let me know if the plans are mostly correct, and how well your engine ran. If you choose to follow along, or even to build your own version, then welcome aboard---Lets have fun!!!----Brian
You are using an out of date browser. It may not display this or other websites correctly.
You should upgrade or use an alternative browser.
You should upgrade or use an alternative browser.
Brian Builds the Kerzel Hit and Miss I.C.
- Thread starter Brian Rupnow
- Start date

Help Support Home Model Engine Machinist Forum:
This site may earn a commission from merchant affiliate
links, including eBay, Amazon, and others.
So here we go--The very first peice I go to model, and I have to change it!!! The original plan calls for a 0.625" radius cut full length on the top side of the base (3 3/4" long), and explains that Kerzel set it up using a boring bar between centers to do so. I have opted instead to mill a shallow slot full length with an endmill instead.
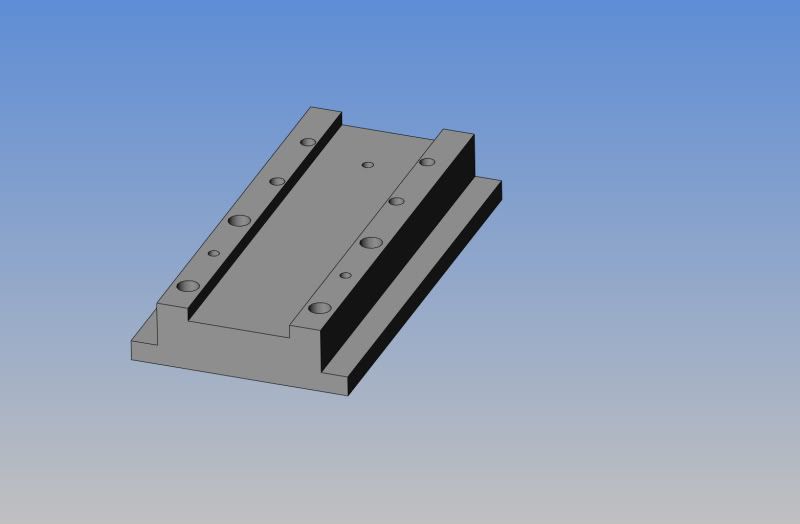

Just make sure the con rod does not touch the base!
J
J
- Joined
- Dec 28, 2008
- Messages
- 1,731
- Reaction score
- 9
Brian, You could use a 1/2" ball nose end mill (on the out side and inside milled out areas) to maintain the rounded casting look that the designer intended.
I I'm not critiquing your idea, I just mean to provide another equally aesthetic approach that would simplify the base's construction.
-MB
I I'm not critiquing your idea, I just mean to provide another equally aesthetic approach that would simplify the base's construction.
-MB
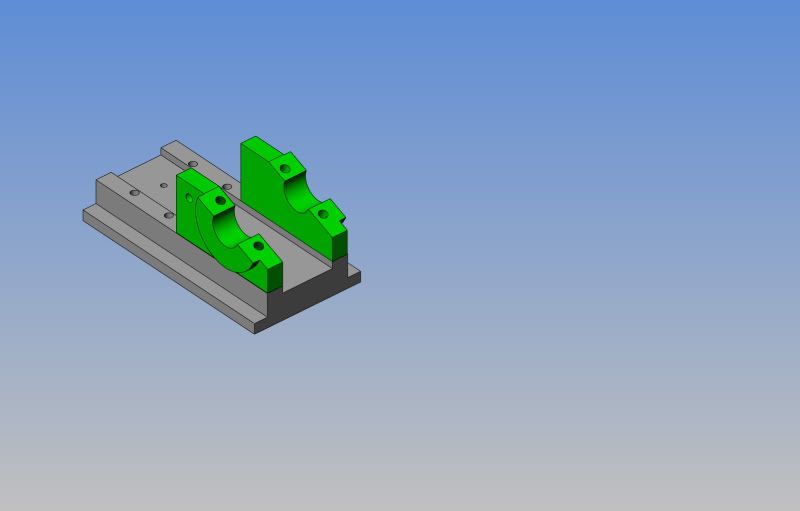
We get the two frame sides (which are opposite hand) whittled out, and attach them to the base---


$104.99
Sunnytech Hot Air Stirling Engine Motor Steam Heat Education Model Toy Kit M16-CF
stirlingtechonline

$649.00
$699.00
FoxAlien Masuter Pro CNC Router Machine, Upgraded 3-Axis Engraving All-Metal Milling Machine for Wood Acrylic MDF Nylon Carving Cutting
FoxAlien Official

$94.99
$109.99
AHS Woodmaster 4400 Maintenance Kit for Outdoor Wood Boiler Treatment
Alternative Heating & Supplies

$59.99
Sunnytech Hot Air Stirling Engine Motor Model Educational Toy Electricity Generator Colorful LED (SC001)
stirlingtechonline

$15.99 ($0.05 / Count)
$18.99 ($0.06 / Count)
HongWay 300pcs 2 Inches Sanding Discs Pad Kit for Drill Sanding Grinder Rotary Tools with Backer Plate Shank and Soft Foam Buffering Pad, Sandpapers Includes 60-3000 Grit
HongWay US

$99.99
$109.99
AmTech300 - Boiler Treatment Professional Strength (Rust Inhibitor For Outdoor Wood Boilers)
Alternative Heating & Supplies

$156.90 ($1.40 / oz)
Replacement Combustion Chamber Kit, Burnham V8 and V8H, 1-6 Sec, 108136-01, 1129
Lynn Manufacturing

$403.09
DM14 Engine Build Kit, Metal Engine Build Model Great Metal Material for Engineer for Factory
Easoger Official

$28.51
$45.00
Key Contemporary Buildings: Plans, Sections and Elevations (Key Architecture Series)
Lions Den Books321

$188.98
TM NEXDYNAMI RE41157 Water Pump Compatible With/Replacement For/John Deere 6200 7400 6300 6600 6500 6400 7220 7600 7200 RE41157
VIVID MARKET CORPORATION

$45.99
Sunnytech Mini Hot Air Stirling Engine Motor Model Educational Toy Kits Electricity HA001
stirlingtechonline

$190.00
$254.99
Genmitsu CNC 3018-PRO Router Kit GRBL Control 3 Axis Plastic Acrylic PCB PVC Wood Carving Milling Engraving Machine, XYZ Working Area 300x180x45mm
SainSmart Official

$39.99
$49.99
Sunnytech Low Temperature Stirling Engine Motor Steam Heat Education Model Toy Kit For mechanical skills (LT001)
stirlingtechonline
Metal Butcher said:Brian, You could use a 1/2" ball nose end mill (on the out side and inside milled out areas) to maintain the rounded casting look that the designer intended.
I I'm not critiquing your idea, I just mean to provide another equally aesthetic approach that would simplify the base's construction.
-MB
Good point, Metal Butcher---I've got a brand new 1/2" ball nose end mill I've never used yet!!!
Oh---and by the way---I will be changing all fasteners (where-ever I can) to #5-40 and #10-24.
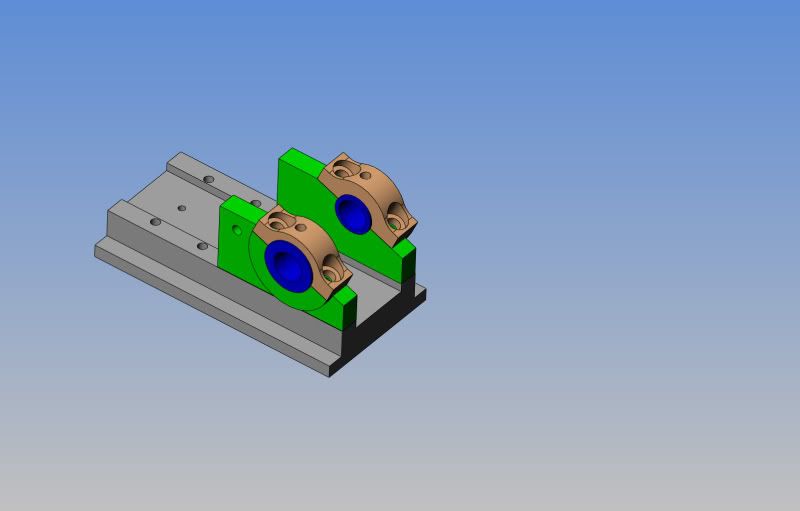
By adding the two bearing caps and the bronze crankshaft bushings, we now have a home for our crankshaft. By creating the solid models of the individual peices as I go along and thn assembling them, it lets me check to see how things line up and for clearances, etc.

Things start to get real interesting when the cylinder body gets added. This is just the water jacket actually---The cylinder liner bolts inside it.
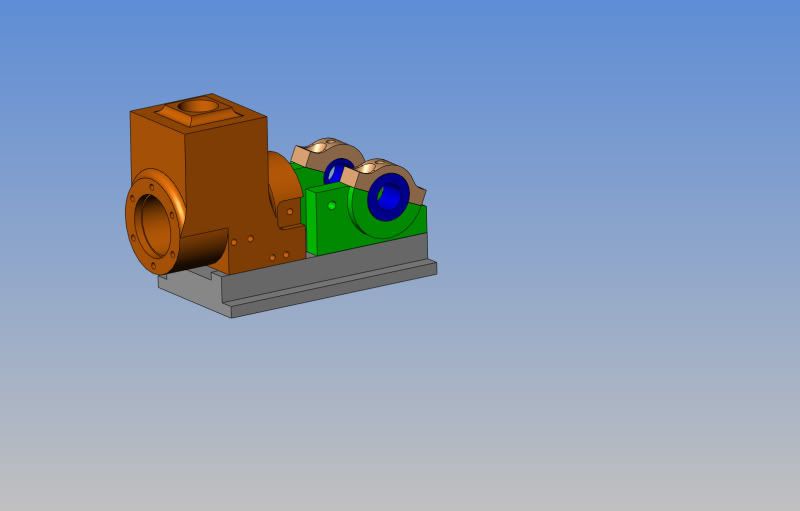

Chuck---From what I can see of the plans, the entire length of the cylinder liner (2.3") is a slight interferance fit into the aluminum water jacket. The water jacket doesn't let water come in contact with the liner anywhere. When I worked for Volkswagen of Canada, we used to have a copper based heat transfer paste we would use on inserts in the H13 permanent molds for casting aluminum wheels. I may try and find a small quantity of that in a tube, as it would make such a long interferance fit slide together easier, and could help with the heat conductance to the cooling water. I know these small engines, particularly the hit and miss style don't create a lot of heat anyways.
- Joined
- Aug 25, 2007
- Messages
- 3,890
- Reaction score
- 715
Interesting thought. I'm wrestling with the water jacket on my hot bulb engine. Hadn't thought of a completely sealed water jacket that just fits over the cylinder liner. Maybe make it out of brass so I could solder it together...
Chuck
Chuck
Now add in a crankshaft---This is a healthy little bugger, 3/8" dia. with 7/16" diameter at the bearings.---I haven't got a 7/16" reamer---This'll give me an excuse to buy one.
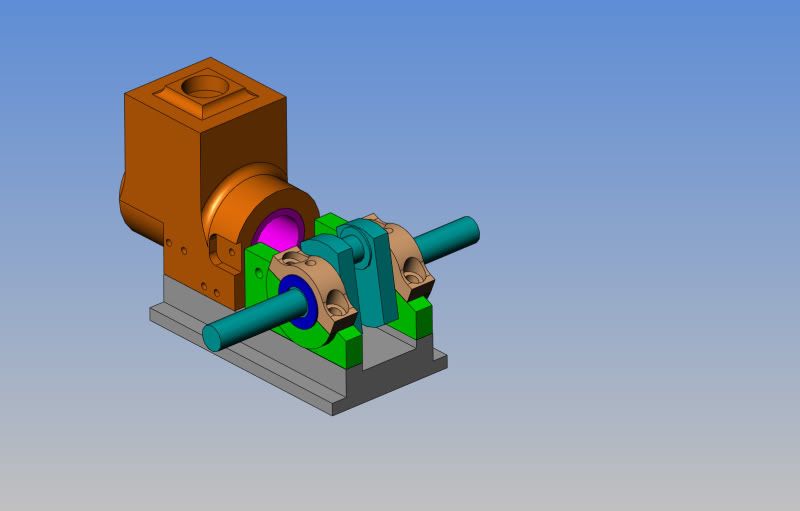

And finally, to end off the day, a cylinder head.--And Oh Yeah---The dimensions for it are on the drawing, but by God, you've sure got to hunt for them, and calculate, and guess a little bit.
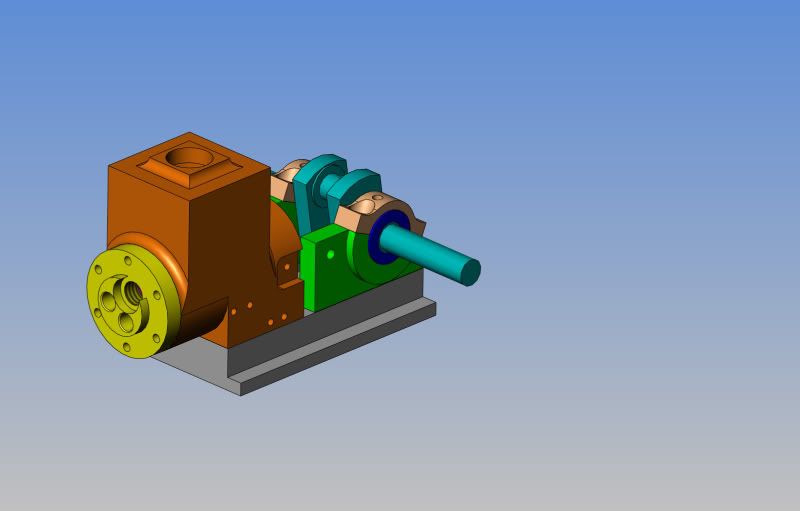

I think I hearing it running already, how neat to be able to do that kind of design, Your good I mean great, Lathe Nut
Dave Sohlstrom
Member
- Joined
- Oct 4, 2008
- Messages
- 195
- Reaction score
- 27
Brian
I've been watching your conversion of the 2D drawings to 3D. I had downloaded the drawings myself and was playing with 3D to better understand them. In drawing the Cylinder Body I believe that we are looking at a wet sleeve engine vers dry sleeve. find enclosed my drawing of the Cyl Body.
Dave
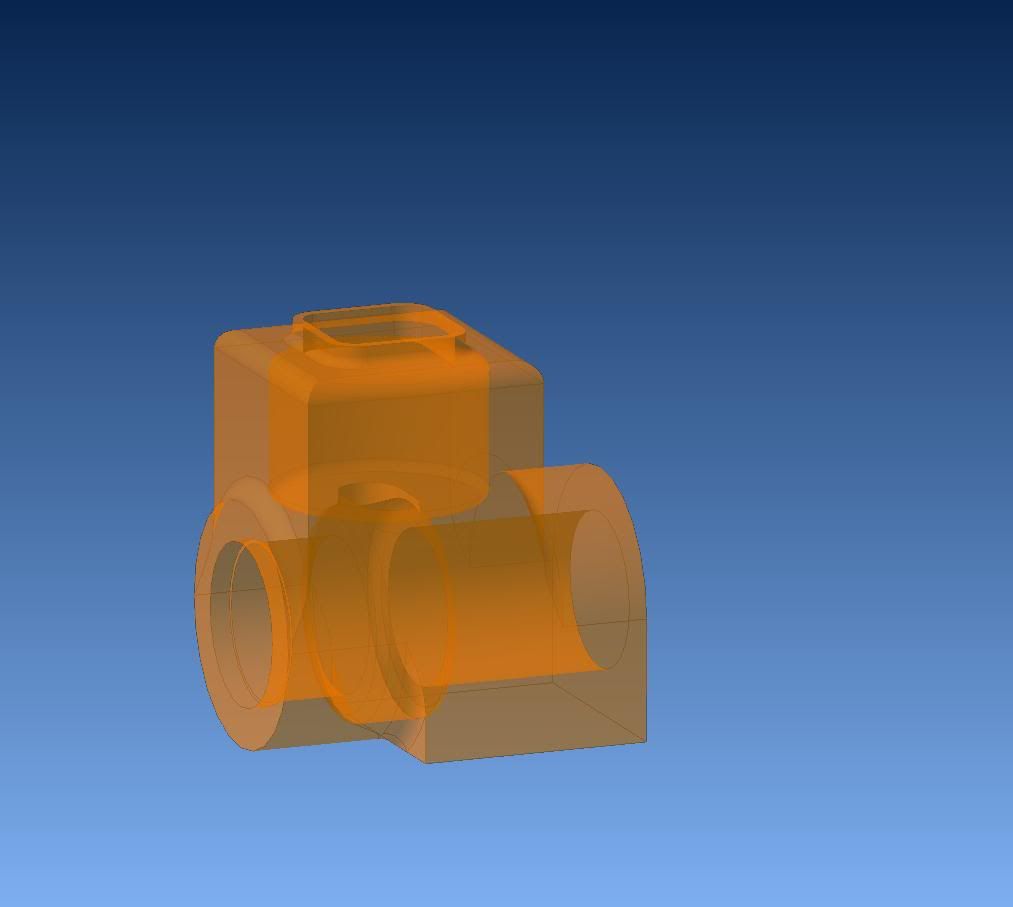
I've been watching your conversion of the 2D drawings to 3D. I had downloaded the drawings myself and was playing with 3D to better understand them. In drawing the Cylinder Body I believe that we are looking at a wet sleeve engine vers dry sleeve. find enclosed my drawing of the Cyl Body.
Dave

As I get deeper into this, I'm beginning to find errors in the drawings. There is definitly a mistake in the hole position in the "Cam Slide Bearing" on page HHM1-04 The drawing of the piston has a note attached to it refering to a 3/8" diameter bore, while its actually a slot that is shown. The connecting rod drawing is missing a number of dimensions---I have used what seem to be logical dimensions to model it. If anyone else is planning on building this engine, let me know and I will put corrected/complete drawings up in this thread. Even with a few small errors, this is still looking like a well designed engine. I didn't want to build my own sparkplug, so I modelled the NGK sparkplug #CM-6 that I used in my Webster engine, but there was simply no way it was going to fit, so I guess I will be building my own sparkplug. I plan on using Viton o-rings on the piston, so when I get the correct dimensions and part number, I will put up a new detail drawing of the piston.
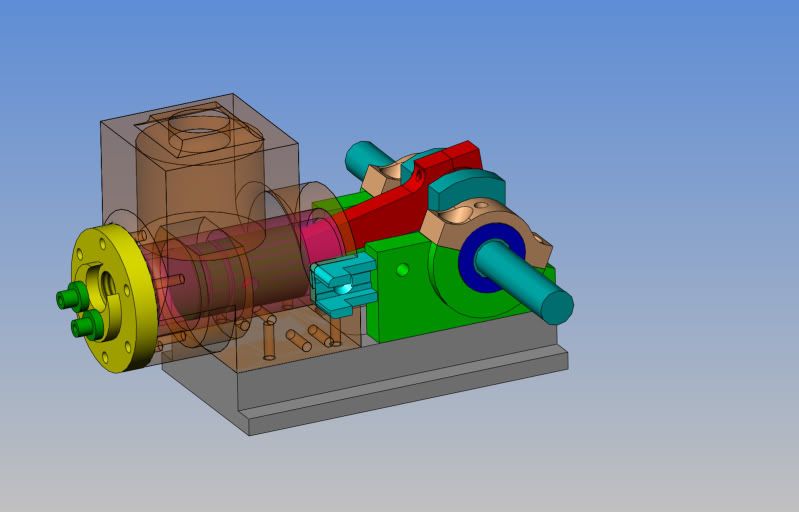

Brian if you can't fit a CM-6 plug and don't want to make something then you could probably get away with one of the 1/4 x 32 plugs such as Rimfire, they are quite a bit smaller than the 10mm ones
Jason
Jason
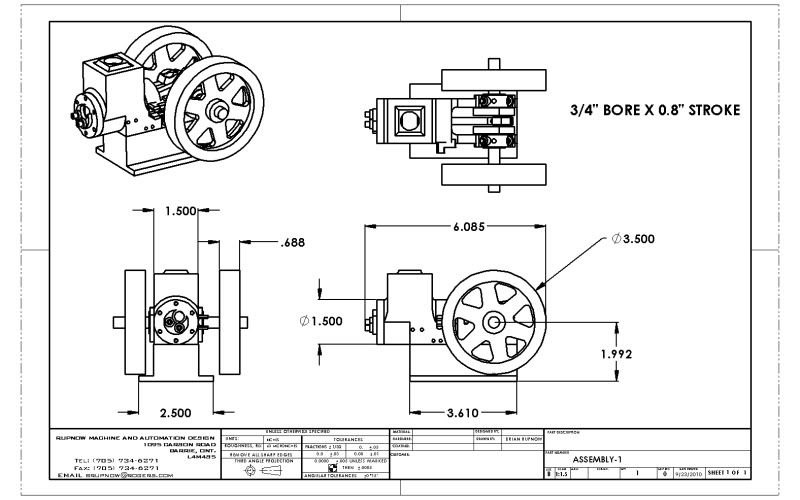
Just to give some idea of relative sizes, here is an assembly drawing. One thing you will note is that I increased the thickness of the base by 0.9", so that it extends below the flywheels. The original builder had it setting up on a block of wood.

Similar threads
- Replies
- 413
- Views
- 56K
- Replies
- 356
- Views
- 62K


