Thumper--a 1 3/8" bore i.c. engine

Home Model Engine Machinist Forum

Help Support Home Model Engine Machinist Forum:

This site may earn a commission from merchant affiliate links, including eBay, Amazon, and others.
I'm not so sure that loads on those blades are as small as might be imagined.
The purpose of the flywheels is to keep the engine turning between power strokes. At each power stroke, there is a large torque pulse accelerating the flywheel. If the blades are not a tight fit in the slots in the hub, the welds will be stressed and will fatigue.
 
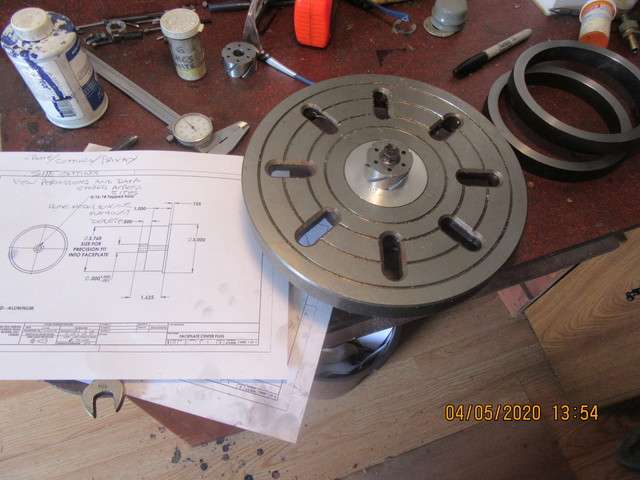
In my effort to "avoid the virus" I'm trying to not to go out anywhere to buy more material. I had one big cube of aluminum 3" square, so today I set it up in my lathes 4 jaw and turned three diameters on it, all in one set-up. One diameter is a "precision fit" into the faceplate mounting hole, one is a precision fit into the 1/2" bore inner flywheel hub, and the third diameter is slightly larger than the hole in the faceplate to keep the plug from "pulling through" the faceplate. The small diameter is drilled and tapped on center for a 5/16" bolt, which holds the inner flywheel hub tight against the faceplate. I'm not a huge fan of setting things up in my 4 jaw, but I can do it when I need to.
DY2HZ5.jpg
 
I'm thinking forward to the next steps in this flywheel fabrication exercise. In a perfect world, I can hold the outside rim (6" tube parted off to 3/4" wide) in my lathe 3 jaw chuck. I can slide the hub (with slots) over a piece of 1/2" cold rolled steel and hold it in my tailstock chuck. This will guarantee absolute concentricity. I could then cut the flatbar "fan blades" to a perfect precision fit between the hub and the outer rim. Then tackweld both ends of the flatbar to the hub and the outer rim.---This sounds good, but their are some fairly sophisticated controls in the electrics of my lathe, and I think that any kind of electric welding would probably damage my lathes circuitry.----Or---I can counterbore a 1 1/2" hole into a large piece of 6" wide aluminum flatbar and in the same set-up counterbore a 6" diameter recess to center the outer flywheel rim. Have to think some more on that, because the blades are the full 3/4" depth of the hub and outer rim. I don't have a piece of 6" wide aluminum anyways, and I am not going to venture out into "virus country" again. I do have a 10" faceplate which I might be able to do something with. Any good suggestions will be entertained---
I would make the fan blades a little over size, weld them into the hubs, then turn the outside diameter to a snug fit for the outer rim. I've had a little experience with fan blades, they need to be curved like the top of an airplane wing to work really efficiently but that may not be needed in this case, would complicate assembly a little.
 
teeleeves--That works if the "blades" are strong enough not to deflect when you try to machine the tips. These blades, when attached to the hubs, will stick out 2" unsupported. I don't think they would machine cleanly because they are only 1" x 1/8" material and will deflect rather than be clearly cut. It did cross my mind that I could do what you are saying if I used a toolpost grinder, but I don't have one.
 
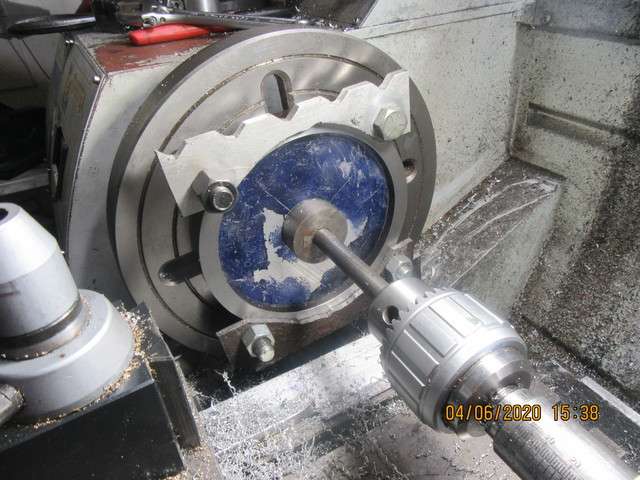
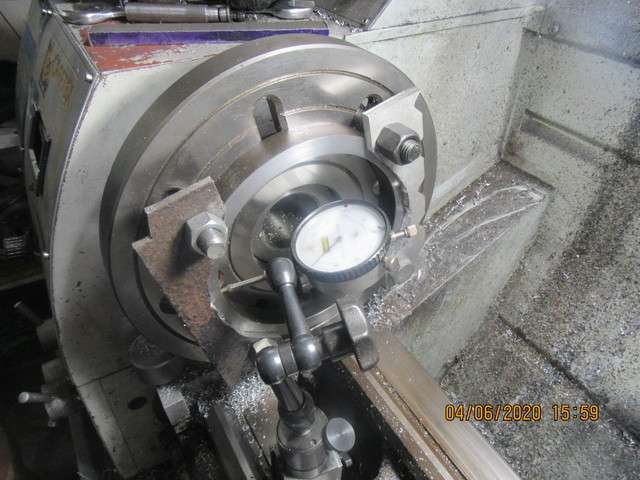
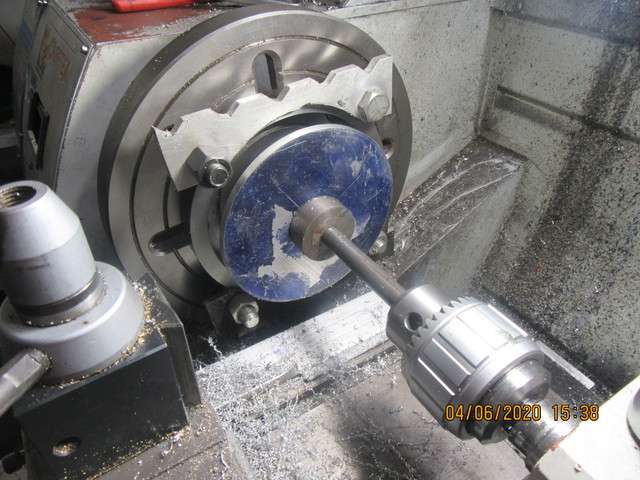
This didn't go quite as I had planned, but it was very close. I was having trouble getting the rim centered, so I made up a disc with a reamed 1/2" center hole and an outer diameter that was a precision fit into the flywheel outer rim. I put a piece of cold rolled 1/2" diameter in the tailstock chuck, mounted my centering plate on that, set the flywheel rim over the centering plate, then cranked it in flush against the faceplate. I had to make up a couple of "grip plates" to hold the outer rim in place. After I was done, I backed the tailstock and centering plate away and checked the inner diameter with a dial indicator. It had a total indicated run-out of about 0.040" so I spent a half hour tappy tappy tapping on the rim until the best reading I could get was about .015" total indicated runout. The outside and inside of this piece of tube has never been machined so I'm not certain how concentric the inner and outer diameters are. The next step will be to dismount the faceplate from the lathe with the outer flywheel rim still in place, then use the fixture I machined yesterday to hold the flywheel hub perfectly centered. Then I start cutting the "vanes" to length. In a perfect world, the vanes would all be exactly the same length, but it seldom works out that simple.
gtr6wA.jpg

f8VqKX.jpg

y6qpF5.jpg
 
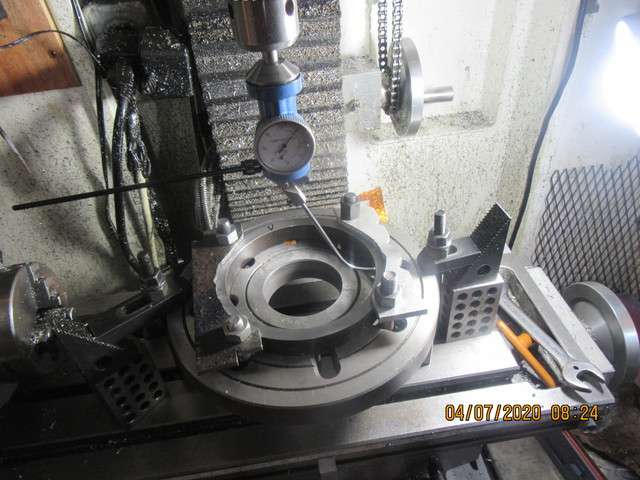
One last and final concentricity test before I start cutting "blades". I have this "sweep indicator" that I seldom use, but this is a set-up that best suits it. First sweep the hole in the center of the faceplate and move the mill bed until I get a zero reading all the way 360 degrees around the faceplate hole. Then move the "finger" up to the inside diameter of the tube and sweep again, tapping the tube a little bit this way, a little bit that way, until I get a zero reading on a full 360 degree sweep. Good to go now, today I will cut blades to suit. Unfortunately, the 1" blade width, as purchased is just a bit wide. I have to take about .035" off one side to get the exact width so that the blade will not extend out beyond the edges of the hub. I will probably put all 6 blades in the mill vice and mill them all at the same time. I have been doing everything I can in the machine shop, where it is warm, but I can't put the welding chore of any longer. So--later this afternoon or maybe tomorrow morning, I will move my act out into the garage. I am going to make up about 10 different "practice weldments " until I get some experience with my new TIG, and then I will tackle the flywheel.
U1p8kl.jpg
 
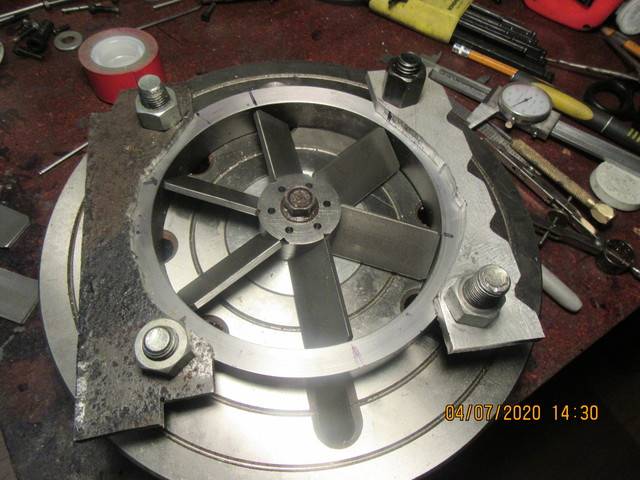
So, after almost a full day dicking around and getting things as perfect as I can, we have number 1 flywheel ready to weld. I have tried to space things out so that the warmer weather got here before the need to weld. It was 58 degrees F here today, which is not exactly as warm as I would have liked, but you work with what you've got. You will notice that the corners of the fan blades have all been chamfered about 3/32" x 45 degrees. That gives me room for a little bit of filler rod, without any of it sticking out past the edge of the flywheel. So---Tomorrow morning I practice my tig welding, tomorrow afternoon I weld the first flywheel. Wish me luck!!---Brian
BAuszE.jpg
 
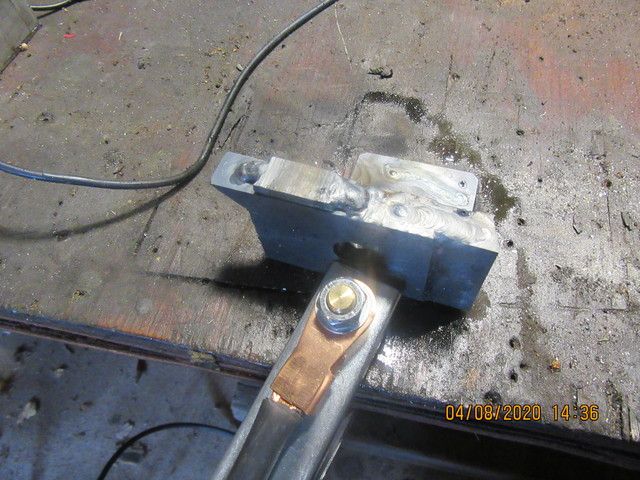
YOWZAHH!!!--I tig welded something!! Okay, I know it isn't impressive, but it is my first weld with my new tig welder. The documentation and instructions that come with this unit are worse than horrible. It's not Chinglish, but whoever wrote it, English was certainly not their mother language. The two actual "welds" are fusion welds at 125 Amps, with a 3/32" 2% thoriated tungsten. No filler rod was used. I have already figured out that I don't care for the foot pedal control. My machine has a "high tension start" function, with a push button on the actual torch head to start the arc going. I am amazed at how hot the arc gets, so quickly. I have been watching "How to tig weld" videos from Weld.com, and they are very informative and well done. I have also started a binder in which I write down everything I learn or discover about the tig welding process. I think I need more than half a days practice before welding anything that is going to be visible, like the flywheel/fan blades. I had hoped to get more practice in tomorrow, but the high temperature for the day is going to be only 2 degrees Celsius. I don't want to freeze to death learning to tig weld.
P7hefJ.jpg
 
This morning was the first time I actually installed all of the required hoses and lines to the welder. The damned thing is like an octopus. I spent the rest of the morning fabricating even more brackets on the welding cart to hold all the various wires and hoses. Then I went for my walk, then I actually dared a practice session with the welder. The weld you see was done at 125 amps and bypassing the foot pedal, which would have been fine with my old Lincoln buzz box stick welder, but seemed unreasonably hot with the tig. At a full 125 amps, everything gets so hot so quickly that it is scary. I realize that if I had the foot pedal hooked up I could ease up on it and cut the amps down to a more controllable level. Learning--learning--
 
Repeat after me, the foot pedal is your friend.... Now go write it on the chalkboard 100 times! :p

But seriously, infinite heat control right at the tip of your, er, foot. Wait’ll you start on aluminum, and that heat runs away faster than the population of Tokyo staying out of the reach of Godzilla!

Stay warm,
John W
 
This morning I made a run for it---Put on my mask, Purelled my hands, and drove to the wine store.---Wine store was closed. Decided to get points and condenser for the new engine, went to PartSource, and it was closed. I have conflicting information about tig welding. One YouTube spot has a man saying how very important it is to wear gloves to protect your hands from harmful rays. Another YouTube site has guys with bare arms covered in tatoos giving instruction on how to tig weld. Having suffered some bad ray burns from arc welding in a tee shirt, in my youth, I decided to stop at my welding store and buy some tig gloves. Gasoline is cheaper right now than it has been in 20 years, so I filled up my truck with gas.---$53 to fill the tank.--It usually costs about $88. I don't feel a lot like working today, so other than a bit of tig practice I'm going to have a lazy day. Good wife has decided to accompany me on my "Fat mans walk" now that all the glaciers have retreated from my wood trails across the road. She took this picture of me yesterday on our walk.
YDpDut.jpg
 
I'm with John - you want to start using the foot pedal right away. I thought it would be a lengthy learning curve, but I found that it somehow seems absolutely natural, almost instinctive ... up to a point. On my previous machine, the foot pedal was always 0 - 200 amps; on my new machine, the pedal is 0 - 100% of the amperage dialed in on the front panel. The latter is way, way, WAY better. I had long thought about adding a potentiometer to my old foot pedal to let me achieve a similar result - now I wish I had done so.
 
Brian, it’s good to get out of the house, and as my Mom used to say, “get the stink blown off of you!” I too live in a rural setting and enjoy getting outside, riding my trials motorcycle around my property, and doing some chores. Unlike you, my weather is almost always tenable. My part of Arizona has about 330 days of sunshine per year.

Awake, I went to TIG welding school in the Navy (Air Rework Facility, North Island NAS, San Diego) many, many years ago. We used Lincoln IdealArc 300 amp welders with fixed high frequency (60 hz) and you’re right, the pedal and capabilities were NOTHING like my new machine with its incredible range of features. BTW, my unofficial final exam for graduation from the Navy training program? Butt weld two sheets of aluminum foil. Even with my NEW machine, with my old eyes I don’t think I can pull that one off anymore!

John W
 
I can't even blame my eyes - though they are definitely getting old - I'm pretty sure I will never achieve an aluminum foil weld!! I was really proud of myself when I finally managed, with the help of the new machine, to weld a bandsaw blade without blowing out holes.
 
Brian:
Get over it and use the pedal. With TIG (unlike MIG) you need some variability in the current. It's key to controlling the weld pool. As the metal heats up on a long weld you WILL have to throttle back or the weld will get out of control.
It's also useful to throttle back when you get to the edge of a piece (like the edges of your fins) so they don't melt away.
Also you need to throttle back and fill at the end of a weld so you don't leave a crater. Which can result in a crack.
You'll find this out most when you start welding aluminum.

Yes fully cover up exposed skin. I once got a burned upper chest (below the neck) from welding in a T-shirt. Nasty. And your hands are tough but will get "sun burned". The gloves are also useful when you have to push parts around while they're hot.
Good TIG gloves are very thin and supple to give you fine control of the filler.
Lots and lots of practice required.
 

Latest posts

Back
Top