You are using an out of date browser. It may not display this or other websites correctly.
You should upgrade or use an alternative browser.
You should upgrade or use an alternative browser.
Small V8
- Thread starter stevehuckss396
- Start date

Help Support Home Model Engine Machinist Forum:
This site may earn a commission from merchant affiliate
links, including eBay, Amazon, and others.
Thanks everybody!
Taking the night off, waiting for metal to come in the mail.
Taking the night off, waiting for metal to come in the mail.
Hello All!
Decided to do something easy tonight. I made the rollers for the rockers and the pins to pin the rollers. The rollers were a case of drilling the center and then parting them off a piece of 1/8 inch droll rod. The pins were just parted off a piece of 1/16 drill rod.
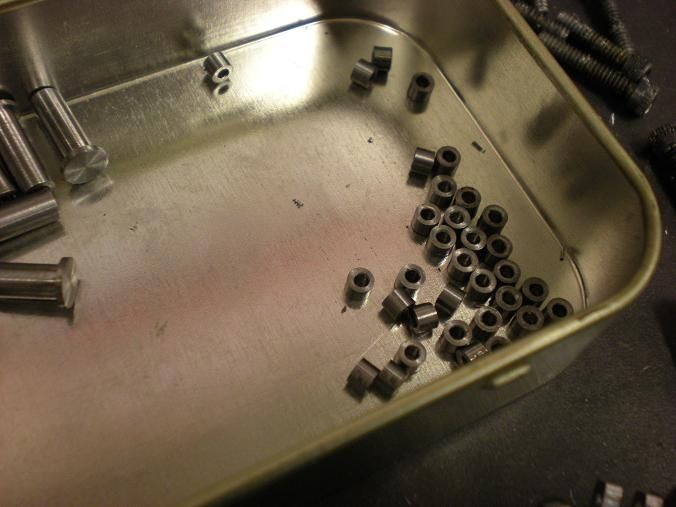
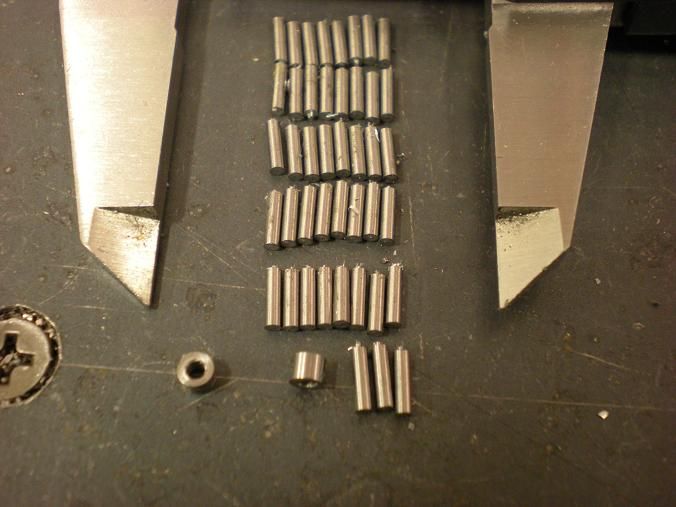
Decided to do something easy tonight. I made the rollers for the rockers and the pins to pin the rollers. The rollers were a case of drilling the center and then parting them off a piece of 1/8 inch droll rod. The pins were just parted off a piece of 1/16 drill rod.


$49.95
$55.99
DjuiinoStar Hot Air Stirling Engine Assembly Kit: Spend 30 Minutes to Build Your Own Stirling Engine
djuiinostar

$19.15
$29.95
Competition Engine Building: Advanced Engine Design and Assembly Techniques (Pro Series)
MBC Inc.

$99.99
AHS Outdoor Wood Boiler Yearly Maintenance Kit with Water Treatment - ProTech 300 & Test Kit
Alternative Heating & Supplies

$26.89
$34.99
Peachtree Woodworking Supply Bowl Sander Tool Kit w/Dual Bearing Head & Hardwood Handle, 42 Pieces Wood Sander Set, 2 Hook & Loop Sanding Disc Sandpaper Assortment, 1/4 Mandrel Bowl Sander
Peachtree Woodworking Supply Inc

$45.99
Sunnytech Mini Hot Air Stirling Engine Motor Model Educational Toy Kits Electricity HA001
stirlingtechonline
![DreamPlan Home Design and Landscaping Software Free for Windows [PC Download]](https://m.media-amazon.com/images/I/51kvZH2dVLL._SL500_.jpg)
$0.00
DreamPlan Home Design and Landscaping Software Free for Windows [PC Download]
Amazon.com Services LLC

$9.99 ($1.00 / Count)
$13.99 ($1.40 / Count)
10 Pcs Carbide Burr Set Bits 1/8" Shank Compatible with Dremel Milwaukee Rotary Grinder Tool Kit Accessories Drill Rasp File Attachment Wood Metal Stone Carve Grind Cut Sand Engrave Polish Porting
SworkerDirect

$599.00
$649.00
FoxAlien Masuter Pro CNC Router Machine, Upgraded 3-Axis Engraving All-Metal Milling Machine for Wood Acrylic MDF Nylon Carving Cutting
FoxAlien Official

$37.82
$49.99
Becker CAD 12 3D - professional CAD software for 2D + 3D design and modelling - for 3 PCs - 100% compatible with AutoCAD
momox Shop

$171.00
$190.00
Genmitsu CNC 3018-PRO Router Kit GRBL Control 3 Axis Plastic Acrylic PCB PVC Wood Carving Milling Engraving Machine, XYZ Working Area 300x180x45mm
SainSmart Official
Lakc said:Thats some seriously small stuff. I always have a problem measuring such things on my lathe, I doubt I would get them all the same size.
You wont have trouble if you get that DRO for Christmas!!
The DRO is for the Millport. I wouldnt waste a good dro on the lathe just to watch all the numbers jump around when I started a cut.stevehuckss396 said:You wont have trouble if you get that DRO for Christmas!!
Hello All!
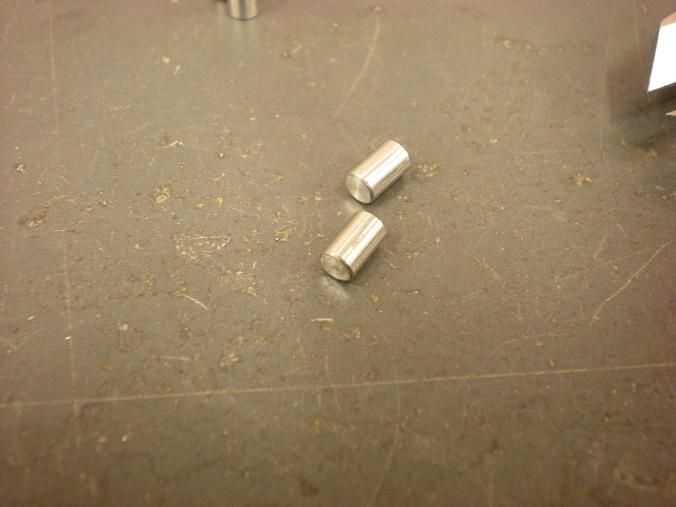
Made some progress in the way of the rocker pivots. They were a little trickier than i thought they would be. These things are only .156 round and .250 long. Made all the barrels first. Just used .156 drill rod and parted off the pieces and used a file to break the corners.
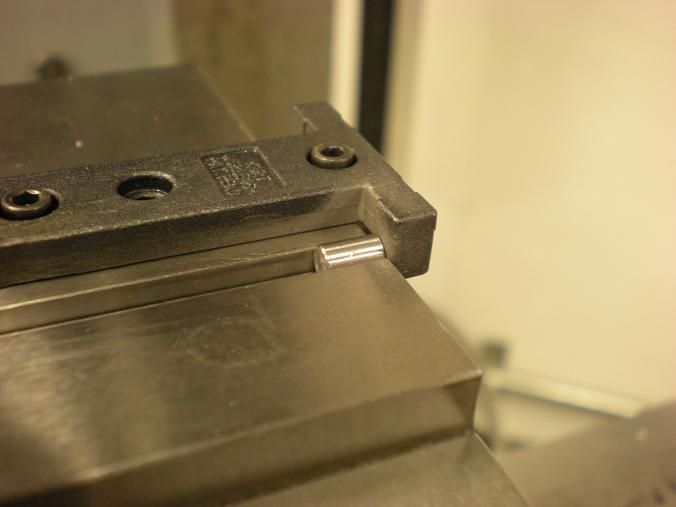
I was able to set the barrel down on a parallel. I had one that is just smaller than the height of the vise jaw.
I started using a center drill to spot the hole but the drill kept wandering anyway. I did'nt know this but found that if i used the center drill to drill as deep as it took to make a starter hole that was just smaller than the drill, It would follow the spotted area and worked much better.
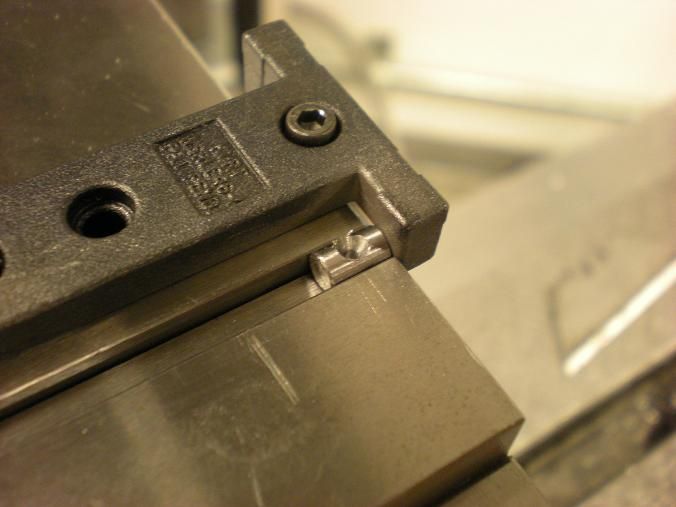
Then Just a drill bit to get the hole in it.
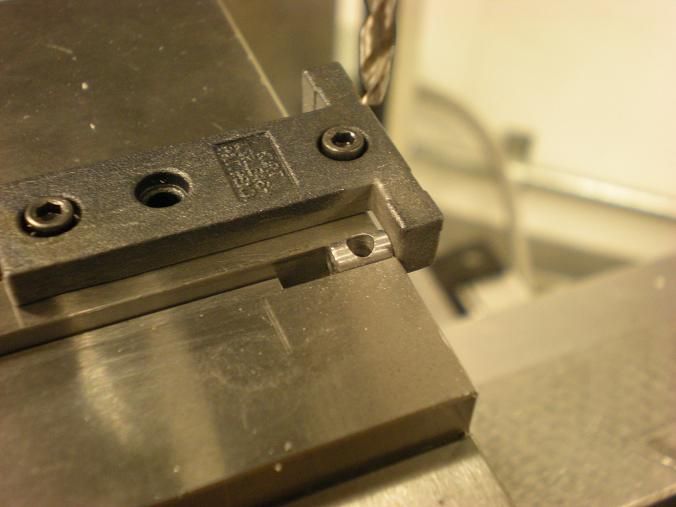
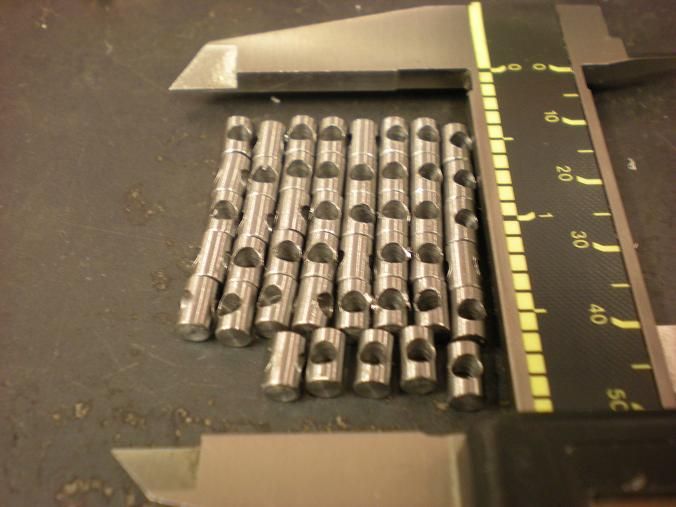
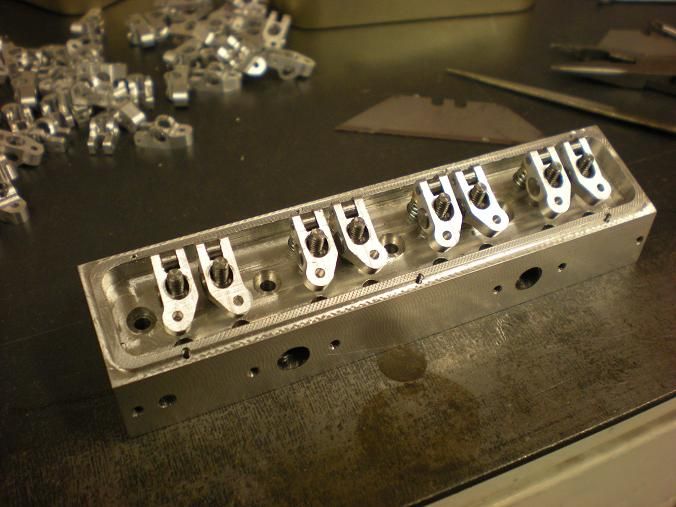
I don't have the nuts done yet but I could not resist putting 8 rockers together just to see what it looks like. Of course the valves would need to be put in also. Everything looks ok so far. I have also used some JB weld to patch up the water jacket fiasco and hope to complete the heads by the end of next week?
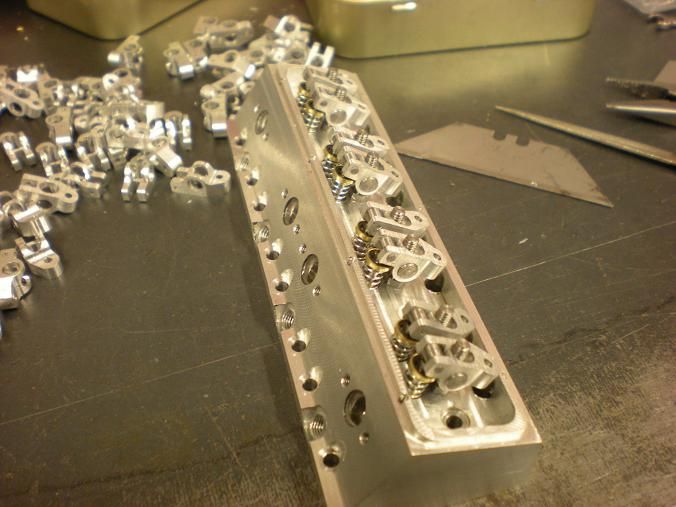
Made some progress in the way of the rocker pivots. They were a little trickier than i thought they would be. These things are only .156 round and .250 long. Made all the barrels first. Just used .156 drill rod and parted off the pieces and used a file to break the corners.

I was able to set the barrel down on a parallel. I had one that is just smaller than the height of the vise jaw.

I started using a center drill to spot the hole but the drill kept wandering anyway. I did'nt know this but found that if i used the center drill to drill as deep as it took to make a starter hole that was just smaller than the drill, It would follow the spotted area and worked much better.

Then Just a drill bit to get the hole in it.


I don't have the nuts done yet but I could not resist putting 8 rockers together just to see what it looks like. Of course the valves would need to be put in also. Everything looks ok so far. I have also used some JB weld to patch up the water jacket fiasco and hope to complete the heads by the end of next week?


agmachado
Well-Known Member
- Joined
- Nov 6, 2010
- Messages
- 289
- Reaction score
- 16
Hi Steve,
Very cool your engine!
The position of the spark plug... Can do this affect the running of the engine ?
In your drawing, you put the spark plug on the side of the cylinder... it helps a lot for engines with small diameters, is that idea ?
Are you creating this engine or drawings are third-party ?
Best regards,
Alexandre
Alexandre Machado said:The position of the spark plug... Can do this affect the running of the engine ?
In your drawing, you put the spark plug on the side of the cylinder... it helps a lot for engines with small diameters, is that idea ?
Are you creating this engine or drawings are third-party ?
I doubt the location of the plug will affect it running at this size. They are there simply to keep them looking like the american V8. Most American V8 engines (work horses)are off to the side like that. As long as the plugs are in there somewhere, It should run.
The design is my own. I did take some ideas and general measurements from other engines.
I finally did it!!
I finally had some time to get the rocker arms done. I put a few together and tested the amount of actual rocking motion and of course, Not enough. I started the day re-cutting the slot by just a few thou. I might have gotten away with what I had but the pushrod length would have had to be exact so why fight it.
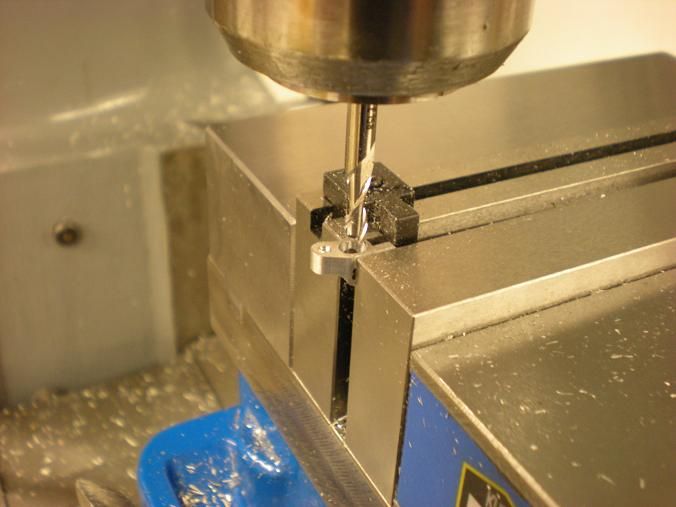
Then the counterbore was done. I had a club member regrind a #2 counter bore bit so the pilot was a few thou smaller than the tap drill instead of the clearance hole. I was able to then counter bore the bottom for a caphead screw.
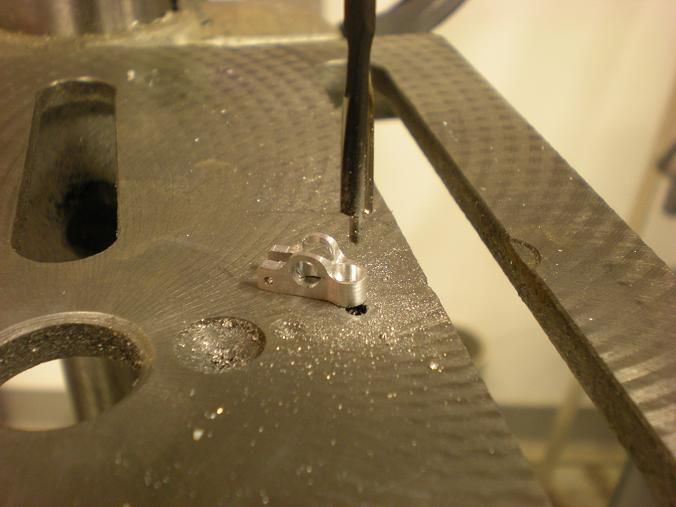
Then all that was left was the tapping of the holes in the tail. Thru hole with 1/16 of material, what the heck. I used the "speed tap wrench" to get the job done.
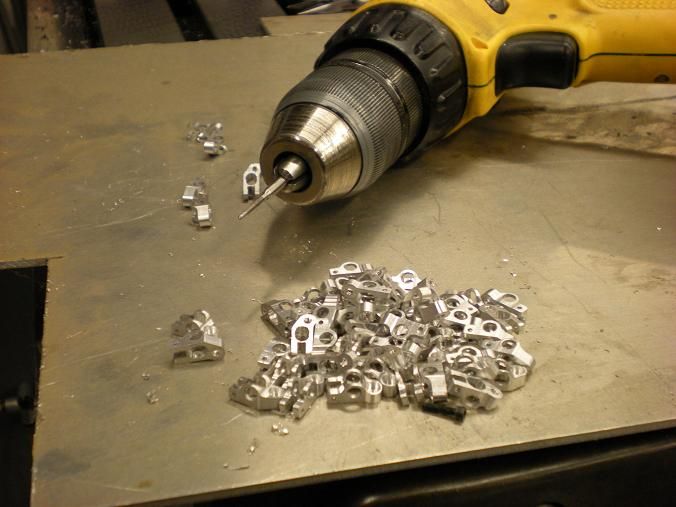
After that I started to make the adjusting nuts but after 2 I didn't feel like doing them. I wanted to have some fun instead of the production line stuff that has been going on lately. I decided to make the air cleaner lid after looking at JPeter's V8. He has a cool air cleaner on his and I was thinking "I want one of those". So I spent the rest of the session watching the mill make me one.
Sorry about the crappy picture.
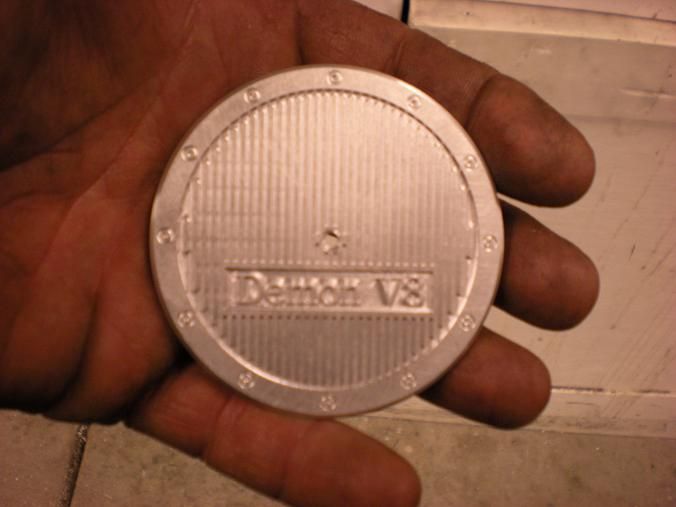
I finally had some time to get the rocker arms done. I put a few together and tested the amount of actual rocking motion and of course, Not enough. I started the day re-cutting the slot by just a few thou. I might have gotten away with what I had but the pushrod length would have had to be exact so why fight it.

Then the counterbore was done. I had a club member regrind a #2 counter bore bit so the pilot was a few thou smaller than the tap drill instead of the clearance hole. I was able to then counter bore the bottom for a caphead screw.

Then all that was left was the tapping of the holes in the tail. Thru hole with 1/16 of material, what the heck. I used the "speed tap wrench" to get the job done.

After that I started to make the adjusting nuts but after 2 I didn't feel like doing them. I wanted to have some fun instead of the production line stuff that has been going on lately. I decided to make the air cleaner lid after looking at JPeter's V8. He has a cool air cleaner on his and I was thinking "I want one of those". So I spent the rest of the session watching the mill make me one.
Sorry about the crappy picture.

- Joined
- Jan 19, 2010
- Messages
- 1,193
- Reaction score
- 41
Steve, the air cleaner looks great!!
Them rockers are incredibly complex little parts. :bow: :bow:
How did you hold them when counter boring? It looks like they are on a drill press with no fixture or vice. Is this just an "After" picture?
Kel
Them rockers are incredibly complex little parts. :bow: :bow:
How did you hold them when counter boring? It looks like they are on a drill press with no fixture or vice. Is this just an "After" picture?
Kel
Similar threads
- Replies
- 33
- Views
- 3K


![MeshMagic 3D Free 3D Modeling Software [Download]](https://m.media-amazon.com/images/I/B1U+p8ewjGS._SL500_.png)


