If it runs---Then it is beautiful. If it runs in hit and miss mode, it won't need a cooling fan, because during the miss cycles it pumps ambient temperature air thru the cylinder which will cool it adequately. If it doesn't run, then it is simply a beautiful piece of art.
You are using an out of date browser. It may not display this or other websites correctly.
You should upgrade or use an alternative browser.
You should upgrade or use an alternative browser.
Parksy's single cylinder four stroke
- Thread starter Parksy
- Start date

Help Support Home Model Engine Machinist Forum:
This site may earn a commission from merchant affiliate
links, including eBay, Amazon, and others.
- Joined
- Dec 9, 2015
- Messages
- 327
- Reaction score
- 350
Thanks all. These comments mean a lot to me as I haven't been machining for very long at all. But my interest and motivation is very high.
Anyway, I lapped the valves into their respective seats today and Brian, your comments about having issues with sealing were on my mind the entire time. But I got them sealing well. Because I have used a nut on the end of the stem it is easy to spin the valve with a socket in the milling machine using only Spring pressure. A drop of oil on the stem and fine valve lapping paste onto the seat, then cleaned up thoroughly then repeat with metal polish, then cleaned thoroughly again and then done with wd40. Strangely enough, the wd40 at the end just makes thing work better. Maybe it cleans the contact surface at a micro level, I'm not sure, but I find this step crucial and recommend it to everyone who has trouble sealing valves. When the wd40 doesn't turn black anymore, it's a good indication that it's nice and clean.
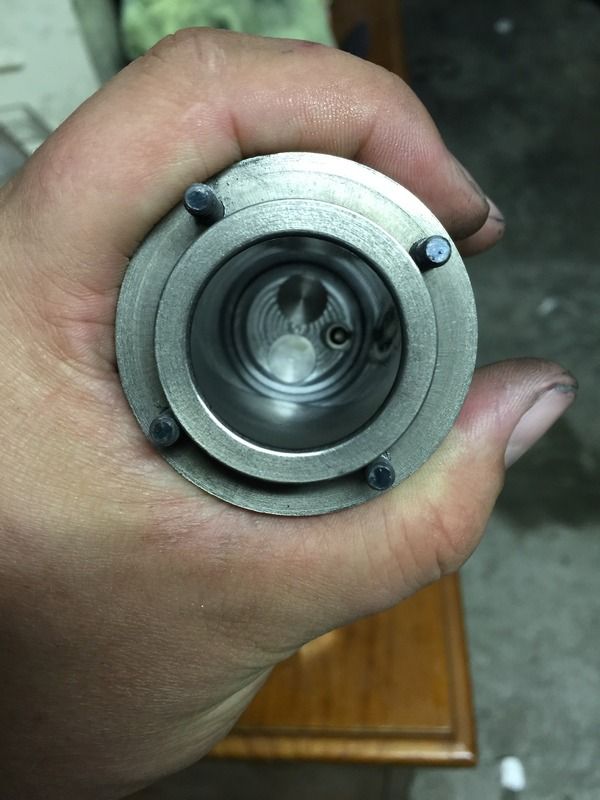
Anyway, I lapped the valves into their respective seats today and Brian, your comments about having issues with sealing were on my mind the entire time. But I got them sealing well. Because I have used a nut on the end of the stem it is easy to spin the valve with a socket in the milling machine using only Spring pressure. A drop of oil on the stem and fine valve lapping paste onto the seat, then cleaned up thoroughly then repeat with metal polish, then cleaned thoroughly again and then done with wd40. Strangely enough, the wd40 at the end just makes thing work better. Maybe it cleans the contact surface at a micro level, I'm not sure, but I find this step crucial and recommend it to everyone who has trouble sealing valves. When the wd40 doesn't turn black anymore, it's a good indication that it's nice and clean.

- Joined
- Jun 24, 2010
- Messages
- 2,457
- Reaction score
- 974
Good luck, look forward to the run. The WD-40 comment is interesting. When I was mucking about with lapping compound I found WD-40 to be one of the better things to wash the lapping compound off for some reason. Acetone or methanol or alcohol dilutes the greasy carrier goop but WD40 seemed to make it shiny & clean with very little effort. I'm starting to think WD40 is good for mosquito bites & arthritis  Anyway your 'black' might either be highly diluted micro polish left over, or no polish & simply metal on metal lapping?
I wrote about this in some other post but when I was testing valve seal against my vac gauge I think the best results came from polishing the valve face, but maybe for the wrong reasons in my case. I feel like yes my 1200 paper was indeed making it super shiny, but maybe putting an ever so slight radius to what is supposed to be a linear 45-deg face. And the nice seal was occurring because it was finding a tangent contact point as a result of this arc. Just a hunch, could be off base.
I wrote about this in some other post but when I was testing valve seal against my vac gauge I think the best results came from polishing the valve face, but maybe for the wrong reasons in my case. I feel like yes my 1200 paper was indeed making it super shiny, but maybe putting an ever so slight radius to what is supposed to be a linear 45-deg face. And the nice seal was occurring because it was finding a tangent contact point as a result of this arc. Just a hunch, could be off base.
- Joined
- Dec 9, 2015
- Messages
- 327
- Reaction score
- 350
Cheers Petertha. Not far from attempting a start. Ignition is set up and working nicely, the valve train is completed and linked together with bronze pins. Gave the flywheels a spray with paint. And the carby is about half way there.
I have a question about Spring pressure with compression springs. I need the intake valve to open with less pressure than the exhaust. If I use the same Spring, but have the exhaust under more tension than the intake, then should this setup be ok? I hope this question makes sense. It seems obvious, but I could be overlooking something.
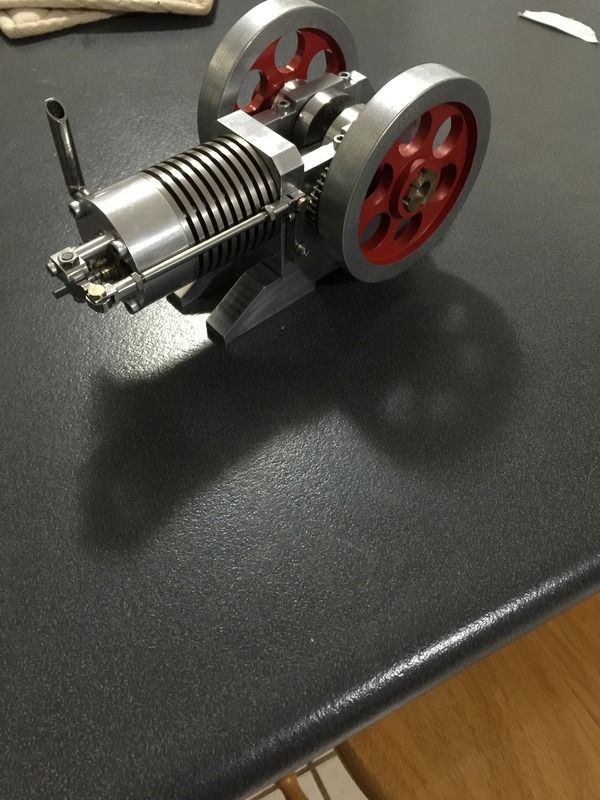
I have a question about Spring pressure with compression springs. I need the intake valve to open with less pressure than the exhaust. If I use the same Spring, but have the exhaust under more tension than the intake, then should this setup be ok? I hope this question makes sense. It seems obvious, but I could be overlooking something.

The atmospheric intake spring needs to be the lightest possible spring you can get that will still pull the valve closed once you have opened it by pressure on the end of the stem with your finger. Something with .010" to .013" wire size. The Exhaust spring can be much more robust, as it not only has to be capable of pulling the valve tightly shut, but must also ensure that it rocks the rocker arm and holds the end of the push-rod firmly in place against the cam at all times (except when the cam is not influencing the push-rod bearing at all--then it needs about .005 to .009" clearance between cam and bearing to allow the valve to seat tightly) . The exhaust spring also has the mechanical cam to compress it. It can be .022" to .025" wire size. The intake valve is depending on "ambient" air pressure only to open the intake valve against the spring pressure, it so must be very light.
Last edited:
- Joined
- Dec 9, 2015
- Messages
- 327
- Reaction score
- 350
Well today has been a very exciting day. I finished off the carburettor. I've never made one before and I only went off a few pictures I quickly googled to get a basic idea. I remember seeing a picture of a sewing needle used as a metering valve so I used this method.
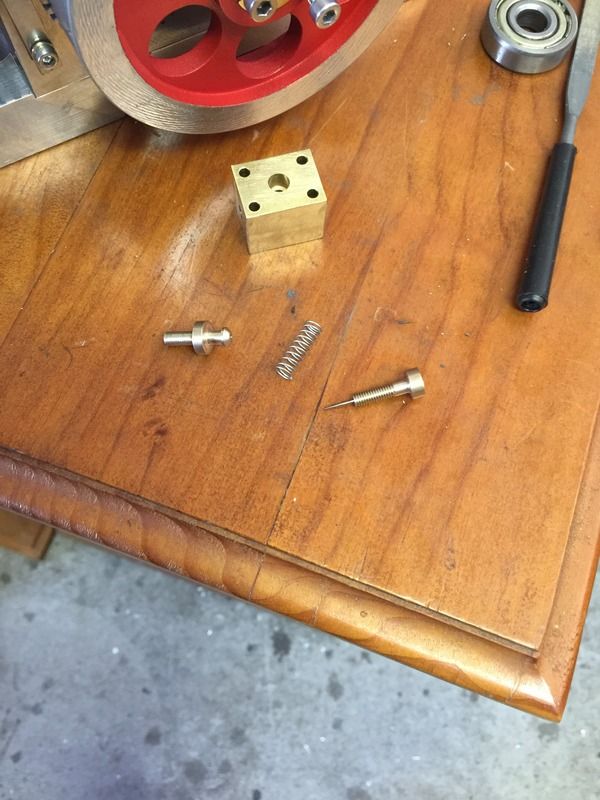
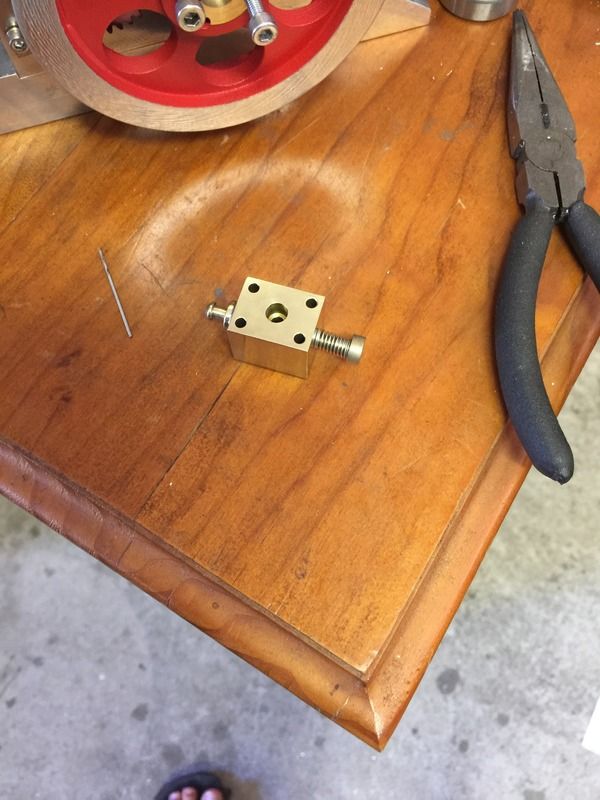
Installed the carby then realised that the engine could possibly run. So I hooked up the ignition components and gave it a spin. No luck by hand. Tried a Dremel with a rubber wheel and this worked well. Except that it ruined the paint job on the flywheels. Never mind, easily fixed. Got lots of pops and smoke and a bit of frustration. But then an hour or two later of tinkering and I found the sweet spot!! It runs!! I remember reading about the satisfaction that is felt when an engine first roars into life by other members and now I know the feeling. Truly satisfying!
https://youtu.be/TFNfYNB3k7k
[ame]http://www.youtube.com/watch?v=TFNfYNB3k7k[/ame]
I will make a wooden base to house the electronics and make a nice looking fuel tank to rest on top somewhere.
Cheers all!
Congratulaions--If you send your "real" email address to brupnow @rogers.com, I will send you plans for a carburetor with a throttle and for a carburetor without a throttle which is suitable for hit and miss operation.---Brian rupnow
- Joined
- Dec 9, 2015
- Messages
- 327
- Reaction score
- 350
Thank you Brian, I appreciate this a lot. I tried that email (without the space of course) but it doesn't seem to work for me.
My email address is apthegreatis at hotmail.com. Don't judge me on the email, I've had it since I was 15 years old.
My email address is apthegreatis at hotmail.com. Don't judge me on the email, I've had it since I was 15 years old.
Did you get the emails I sent you?---Brian
Your workmanship and attention to detail is top notch. It's a really good looking model. Congratulations! - Terry
- Joined
- Dec 9, 2015
- Messages
- 327
- Reaction score
- 350
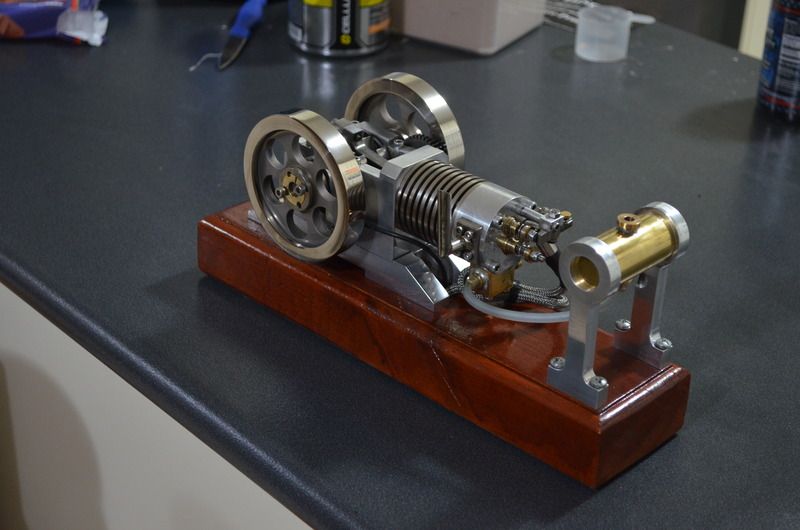
I didn't like the painted flywheels so i sandblasted them back to bare metal and polished the outer rim. I then nickel plated them and i'm happy with how they turned out. The inside part of the flywheel also has plating on it, but because of the rough surface, it doesn't appear the same as the outer rim.


- Joined
- Jan 24, 2009
- Messages
- 554
- Reaction score
- 124
Looks great Andy! But then I'm a big fan of satin nickle.
Pete
Pete
el gringo
Well-Known Member
- Joined
- Aug 30, 2010
- Messages
- 333
- Reaction score
- 175
Hi Parksey;
I haven't participated in this forum in a while, but as I got ready to start a thread on a build I started in 2014 and have since completed, your current build caught my attention.
My build is amazingly similar to yours although the quality of my work pales in comparison. I built mine as a hit and miss and I can show detail pics of the governor I devised for it if you are interested...I will post the relative build thread soon.

- Joined
- Dec 9, 2015
- Messages
- 327
- Reaction score
- 350
Thank you all.
El gringo, that is strangely familiar. I like it. Usually I'll see something and build something similar based on what I've seen, but this one I just plucked from thin air. I'm thinking about a separate governor that won't use the crankshaft, but I'll have to think about it.
El gringo, that is strangely familiar. I like it. Usually I'll see something and build something similar based on what I've seen, but this one I just plucked from thin air. I'm thinking about a separate governor that won't use the crankshaft, but I'll have to think about it.
- Joined
- Dec 9, 2015
- Messages
- 327
- Reaction score
- 350
Here's another quick video. I haven't tuned it and it's not running at its best but the flywheels look good. I still can't hand start it. It has good compression and this may be the cause.
https://youtu.be/npNY9Xn30us
[ame]http://www.youtube.com/watch?v=npNY9Xn30us[/ame]
https://youtu.be/npNY9Xn30us
[ame]http://www.youtube.com/watch?v=npNY9Xn30us[/ame]
Similar threads
- Replies
- 11
- Views
- 798
- Replies
- 12
- Views
- 2K


