You are using an out of date browser. It may not display this or other websites correctly.
You should upgrade or use an alternative browser.
You should upgrade or use an alternative browser.
Kozo A3 in 1.5" scale
- Thread starter kvom
- Start date

Help Support Home Model Engine Machinist Forum:
This site may earn a commission from merchant affiliate
links, including eBay, Amazon, and others.
- Joined
- Jun 4, 2008
- Messages
- 3,294
- Reaction score
- 636
Thanks for looking in, Ron.
No pics today. I finished facing the drivers down to a thickness of .751, then decided to make an axle to fit the holes created yesterday. I cut a piece of 1.25" steel rod and faced/center drilled each end for a length of 8.8", leaving room to remove the center holes later if desired. I turned one end to .875 using the 6-jaw chuck (seemed a good fit when tried with a wheel), then turned the rest of the axle with the turned end held in a collet. At the finish, using the same insert and DRO setting, the collet end measured .873 and the end held by the live center .871. Since I will be fixing the wheels to the axle with Loctite 620, which is good up to gap of .015, it should work.
The rear axle needs to accept two eccentrics for the water pump and lubricator, so I'll use today's axle as the rear. For the front I think I'll just turn down each end for a length of 2" or so near the spindle, and leave the center thicker.
- Joined
- Jun 4, 2008
- Messages
- 3,294
- Reaction score
- 636
After spending the morning with my truck leaking fuel all over the driveway and street (hopefully just frozen o-rings in the fuel bowl), I did some more work on the axle boxes. The goal is to mill slots along the sides that fit the pockets milled into the frame.
Although the frame mic out at .515, the slots cut with a .500 endmill fit very well. So my guess is that there is at least that much runout on the mill spindle or the collet. In any case, I "whittled" the first one down until I had a very tight fit, and then added .006 as per the tolerances Kozo implies in the book. This allows a little front to back flex on the axles.
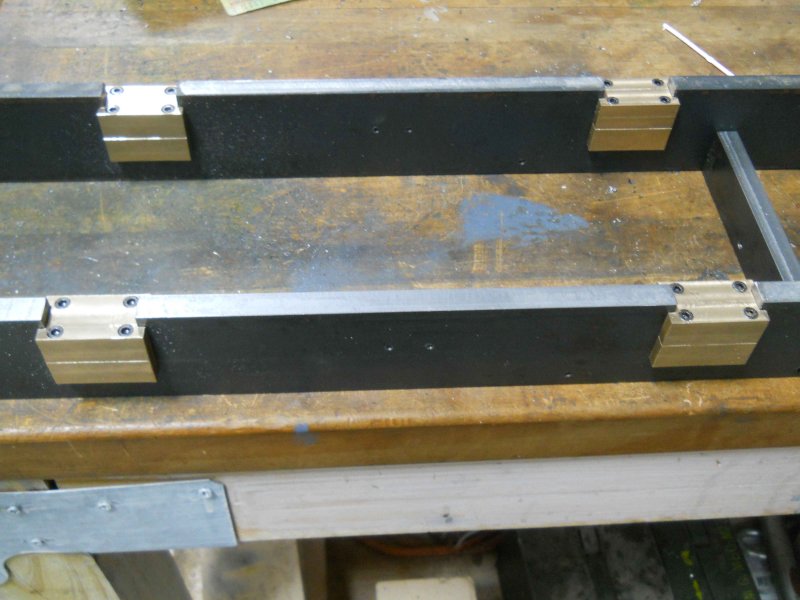
I then made a start on milling stock to size for the retaining bars that attach to the frame under the axle boxes.
Although the frame mic out at .515, the slots cut with a .500 endmill fit very well. So my guess is that there is at least that much runout on the mill spindle or the collet. In any case, I "whittled" the first one down until I had a very tight fit, and then added .006 as per the tolerances Kozo implies in the book. This allows a little front to back flex on the axles.

I then made a start on milling stock to size for the retaining bars that attach to the frame under the axle boxes.
- Joined
- Jun 4, 2008
- Messages
- 3,294
- Reaction score
- 636
Today's work started with finishing the axle box retaining bars and fitting them to the frames. Here's my setup for spotting the mounting holes:
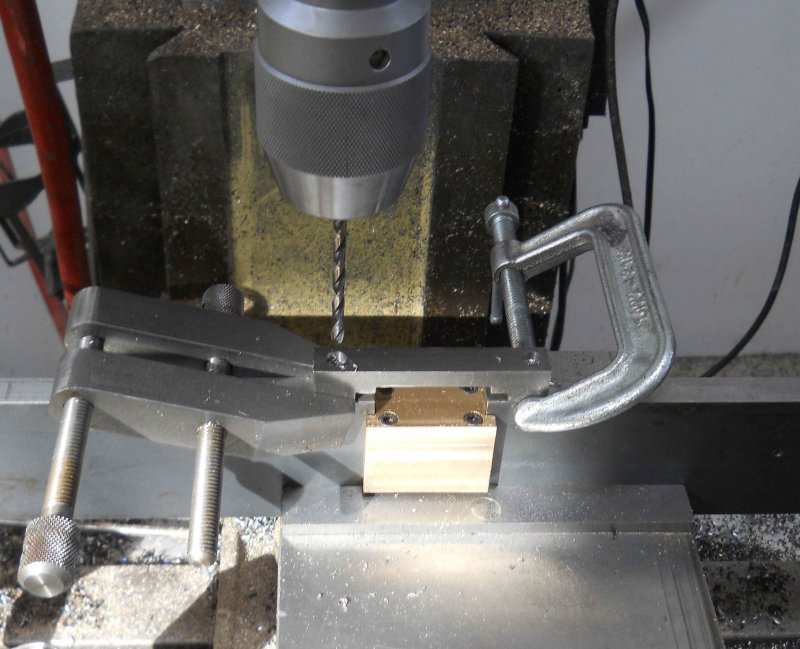
Next, I wanted to mill the two slots on the top sides of the axle boxes where the spring stirrups ride. As there are 8 slots, and I would be using two endmills (1/4, 1/8), I just developed a simple CNC program to mill them repetitively:


Next, I wanted to mill the two slots on the top sides of the axle boxes where the spring stirrups ride. As there are 8 slots, and I would be using two endmills (1/4, 1/8), I just developed a simple CNC program to mill them repetitively:

- Joined
- Jun 4, 2008
- Messages
- 3,294
- Reaction score
- 636
I'll probably blow my mind first ;DJeff02 said:Man at this pace youre going to be blowing your safety before spring!
Today's work was to finish the bores in the axle boxes. I decided to use a CNC technique I hadn't tried yet, which is milling a hole rather than drilling it. The method is to have the endmill make circles around the center while steadily lowering the Z-axis. For me the advantage was being able to mill a 27/32" hole while not having a drill that size. Additionally the hole is rounder and straighter in theory than a drilled hole.
I first center-drilled each box, and then a .5" hole to allow the milling swarf to fall through rather than accumulating in the hole as it deepens:
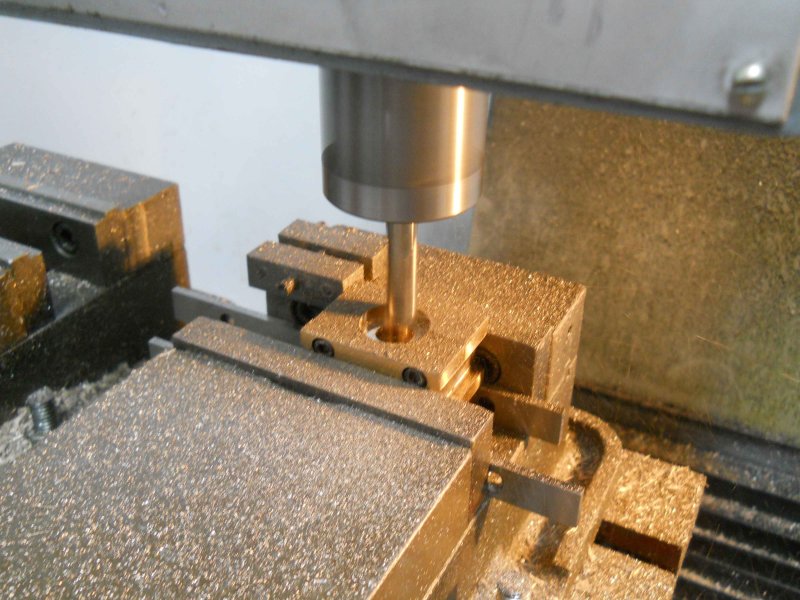
The program used a 2-flute 7/16" endmill at 3000rpm and 20 ipm. Each 360-degree turn around was .010" deeper.
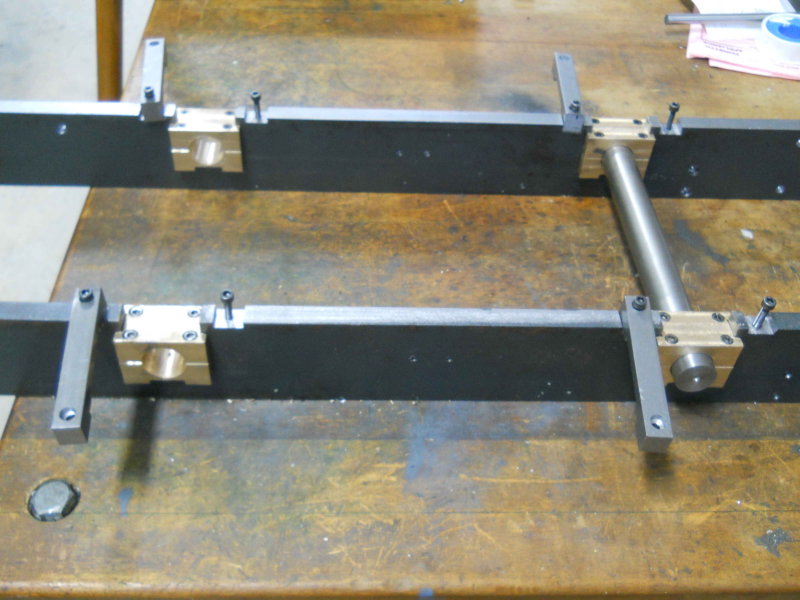
Next I used the .875 reamer on each bore. This reamer is over 7" long with a 3/4" shank, so not suitable for a mini-mill. It's not really necessary to ream the bore, but since I used the reamer on the drivers the diameters ought to match closely.

$99.99
AHS Outdoor Wood Boiler Yearly Maintenance Kit with Water Treatment - ProTech 300 & Test Kit
Alternative Heating & Supplies

$599.00
$649.00
FoxAlien Masuter Pro CNC Router Machine, Upgraded 3-Axis Engraving All-Metal Milling Machine for Wood Acrylic MDF Nylon Carving Cutting
FoxAlien Official

$49.95
$55.99
DjuiinoStar Hot Air Stirling Engine Assembly Kit: Spend 30 Minutes to Build Your Own Stirling Engine
djuiinostar

$171.00
$190.00
Genmitsu CNC 3018-PRO Router Kit GRBL Control 3 Axis Plastic Acrylic PCB PVC Wood Carving Milling Engraving Machine, XYZ Working Area 300x180x45mm
SainSmart Official

$26.89
$34.99
Peachtree Woodworking Supply Bowl Sander Tool Kit w/Dual Bearing Head & Hardwood Handle, 42 Pieces Wood Sander Set, 2 Hook & Loop Sanding Disc Sandpaper Assortment, 1/4 Mandrel Bowl Sander
Peachtree Woodworking Supply Inc

$9.99 ($1.00 / Count)
$13.99 ($1.40 / Count)
10 Pcs Carbide Burr Set Bits 1/8" Shank Compatible with Dremel Milwaukee Rotary Grinder Tool Kit Accessories Drill Rasp File Attachment Wood Metal Stone Carve Grind Cut Sand Engrave Polish Porting
SworkerDirect

$45.99
Sunnytech Mini Hot Air Stirling Engine Motor Model Educational Toy Kits Electricity HA001
stirlingtechonline
I like the design of the retaining bars in that their shape (and the shape of the frame) should function to keep the frame from flexing - while not depending on the force supplied by the screws.
And as the others said: Oh my, what a progress...
And as the others said: Oh my, what a progress...
- Joined
- Jun 4, 2008
- Messages
- 3,294
- Reaction score
- 636
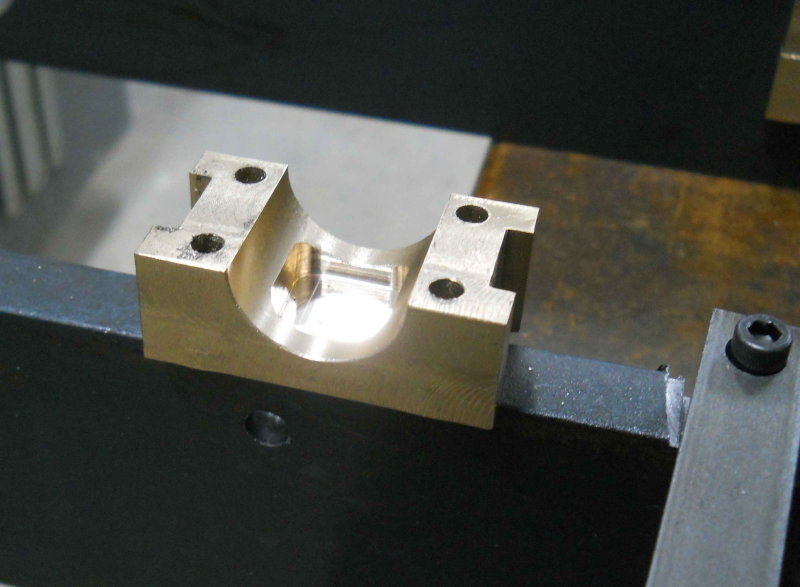
It seems to me that the main function of the retainers plus the two piece boxes is the ability to remove the bar and the lower bearing half to re-lubricate the stuffing for each bearing. Today I needed to mill the pocket where the lubricated cotton is placed in the axle box lower half. I did these on the CNC mill after first verifying the program on a piece of aluminum scrap.
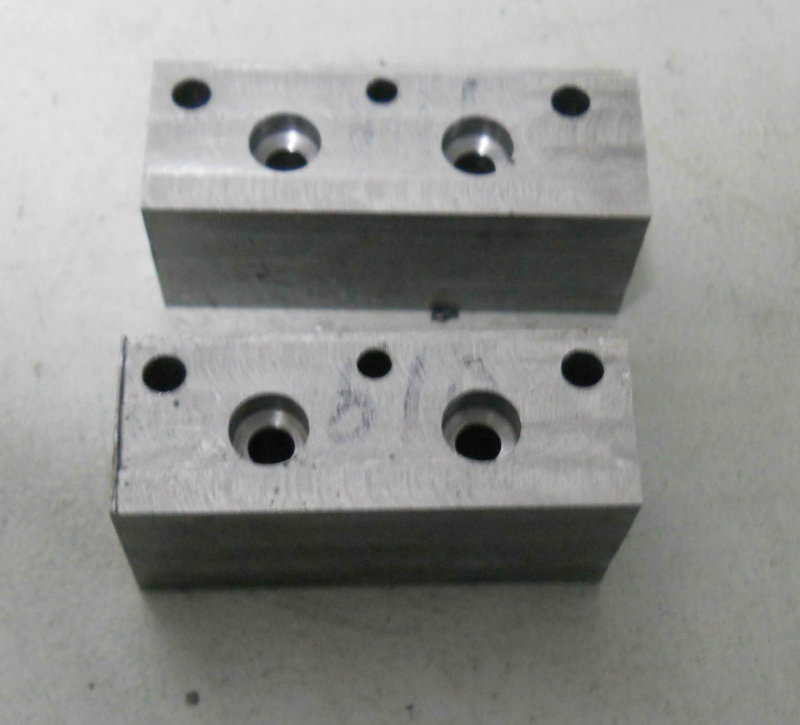
Then I decided to make a start on the brake lever bracket (drawing 6 on p213). The first step was to mill some 1x1x2" bar to nominal piece dimensions, and then drill the 5 through holes in each. Then two two mounting holes (8-32) were counterbored. Again, all done on the CNC mill.
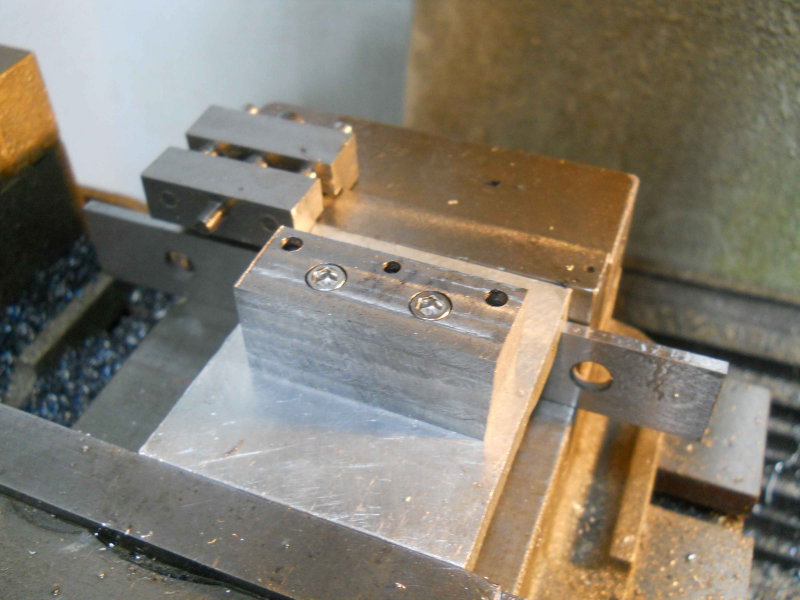
Then I mounted a piece of aluminum in the vise, and drilled/tapped two 8-32 holes to match the holes drilled in the parts. I then attached the brackets to this fixture with 8-32 SHCS.
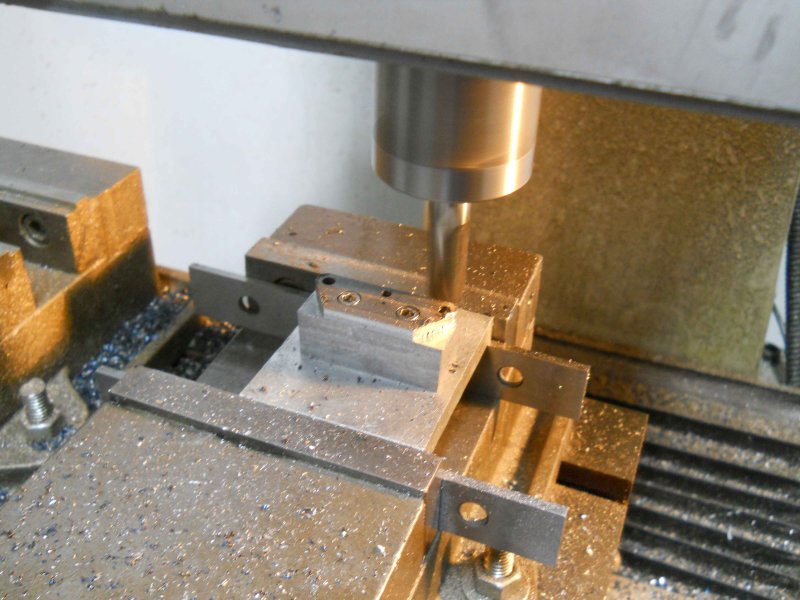
The outer profile of the bracket could now be milled using a 1/2" 4-flute endmill @ 1200 RPM. I kept the feedrate down to less than 10 ipm, although I suspect it could have been done faster.
The result of a couple of hours shop time:
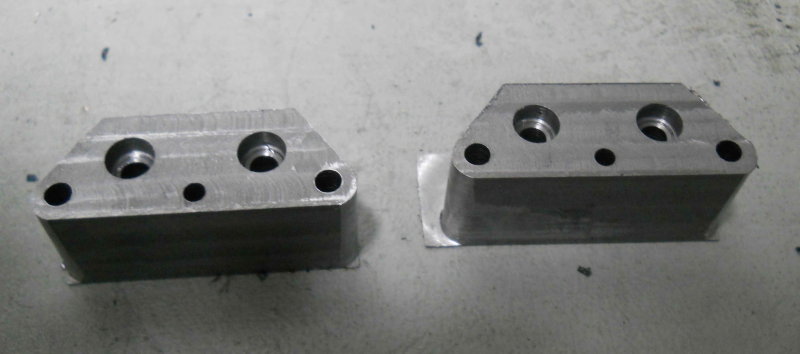
The rest of the work on these parts will be done manually on the Bridgeport. No further progress foreseen here until after Christmas.

Then I decided to make a start on the brake lever bracket (drawing 6 on p213). The first step was to mill some 1x1x2" bar to nominal piece dimensions, and then drill the 5 through holes in each. Then two two mounting holes (8-32) were counterbored. Again, all done on the CNC mill.

Then I mounted a piece of aluminum in the vise, and drilled/tapped two 8-32 holes to match the holes drilled in the parts. I then attached the brackets to this fixture with 8-32 SHCS.

The outer profile of the bracket could now be milled using a 1/2" 4-flute endmill @ 1200 RPM. I kept the feedrate down to less than 10 ipm, although I suspect it could have been done faster.

The result of a couple of hours shop time:

The rest of the work on these parts will be done manually on the Bridgeport. No further progress foreseen here until after Christmas.
zeeprogrammer
Well-Known Member
- Joined
- Mar 14, 2009
- Messages
- 3,362
- Reaction score
- 13
kvom said:No further progress foreseen here until after Christmas.
Noooooooo! Say it ain't so!
- Joined
- Jun 4, 2008
- Messages
- 3,294
- Reaction score
- 636
Back from Florida, suffering a head cold, so not much time in the shop this afternoon. I finished up the brake lever bracket, which involved primarily milling slots. With a 1/8" endmill in steel, you can't push it; so the narrow slot was .025 DOC at 2ipm. I'm glad the BP has a table drive, else that's a lot of cranking.
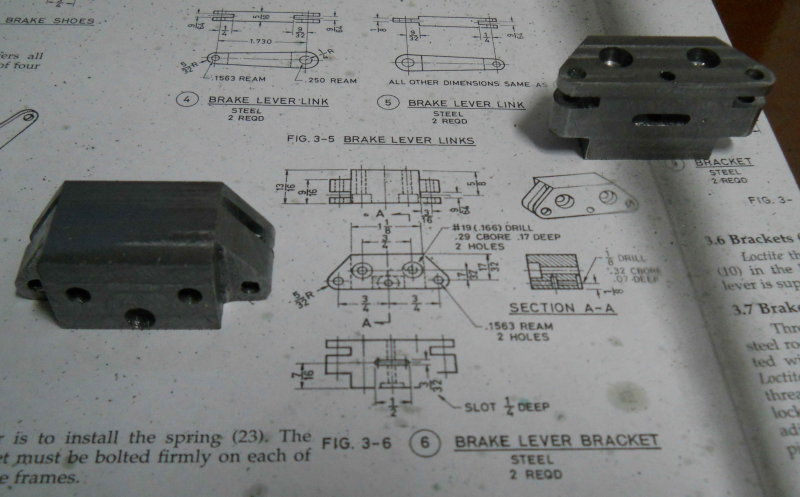
I did manage to do some CAD/CAM on some other brake parts to be done later this week.

I did manage to do some CAD/CAM on some other brake parts to be done later this week.
- Joined
- Jun 4, 2008
- Messages
- 3,294
- Reaction score
- 636
I got 1-1/3 part done today. The 1/3 part is the center section of the brake lever beam. Making this was a bit of a PITA, but it came out OK in the end. I used the same 304 stainless bar as for the fire grate:
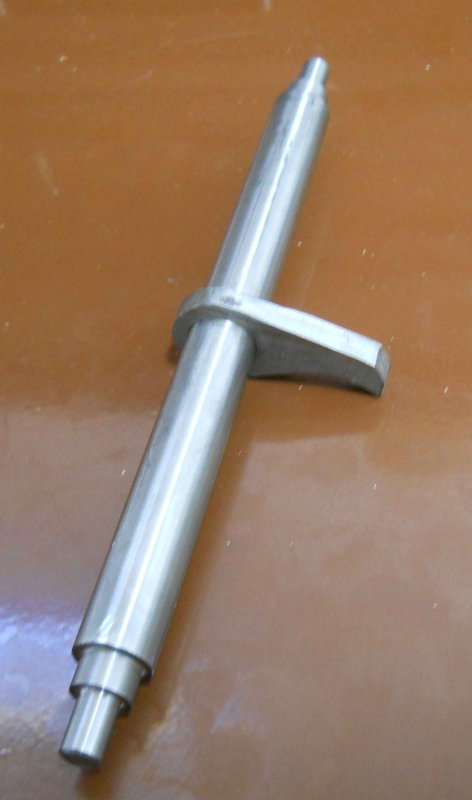
It's a tight sliding fit onto the beam that I made previously. I will eventually fasten it permanently with green loctite and possibly a roll pin as well.
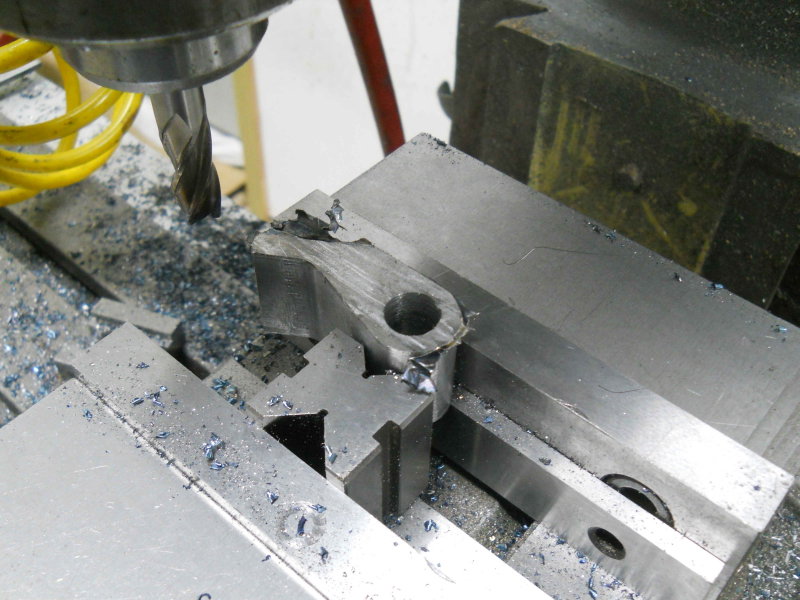
The other part is the brake pedal bracket (fig. 3-12 on p. 215). The first operations are on the CNC mill on a piece of CRS 2.5x1.4x1.3.
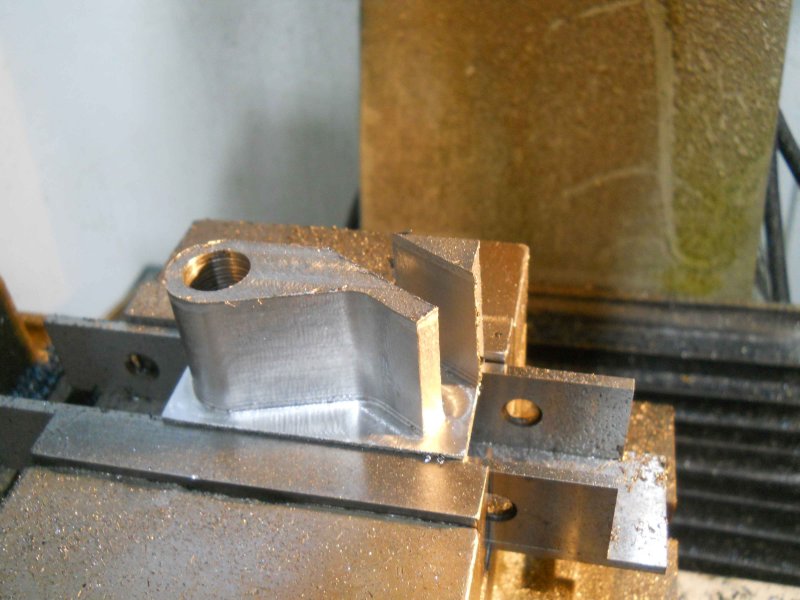
Then after removing the remaining "corner" remnant with a hacksaw, the bottom section could be machined off on the Bridgeport:
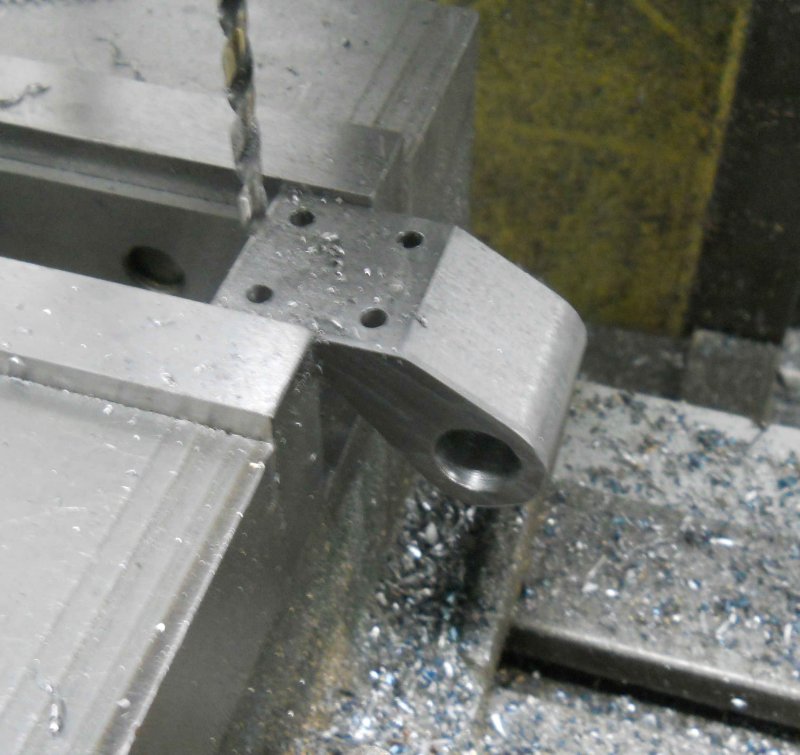
After a bit of filing to cleanup the edges, I drilled the 4 through holes for 8-32 screws:
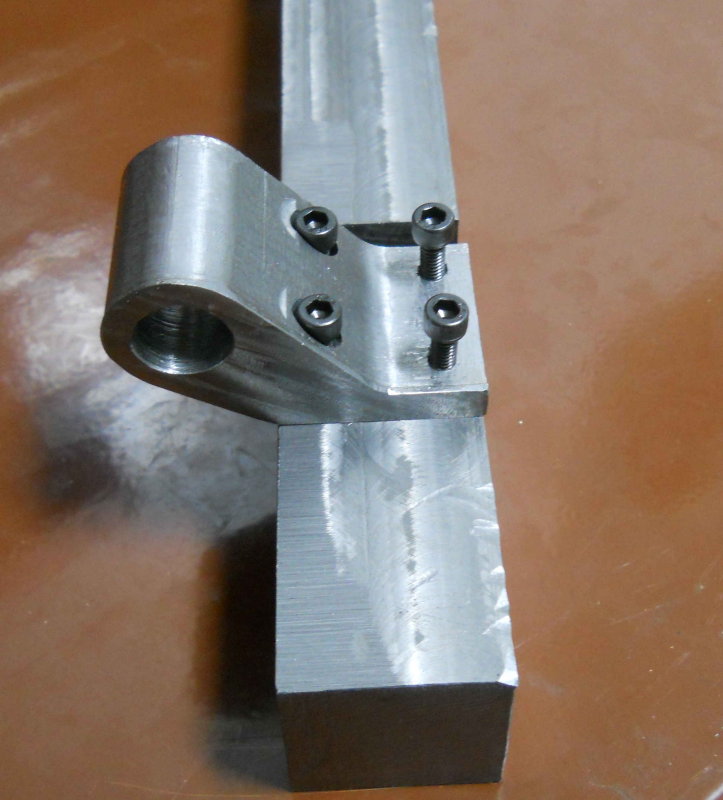
Then after countersinking two of the holes on the bottom, a test fit onto the frame footplate:
It seems to me that some of these parts are drawn for elegance of form, as they are not easy to machine as drawn, and a simpler, more oblong profile would work just as well.

It's a tight sliding fit onto the beam that I made previously. I will eventually fasten it permanently with green loctite and possibly a roll pin as well.
The other part is the brake pedal bracket (fig. 3-12 on p. 215). The first operations are on the CNC mill on a piece of CRS 2.5x1.4x1.3.

Then after removing the remaining "corner" remnant with a hacksaw, the bottom section could be machined off on the Bridgeport:

After a bit of filing to cleanup the edges, I drilled the 4 through holes for 8-32 screws:

Then after countersinking two of the holes on the bottom, a test fit onto the frame footplate:

It seems to me that some of these parts are drawn for elegance of form, as they are not easy to machine as drawn, and a simpler, more oblong profile would work just as well.
- Joined
- Jun 4, 2008
- Messages
- 3,294
- Reaction score
- 636
After an off day yesterday, I had almost an entire workday in the shop today while all the women were out of the house. Seems there should be more to show somehow. The productions were 4 parts of the brake pedal as drawn on p. 215, plus the bushing for the brackets. I just used a 1-piece bushing with a press fit rather than the 2 pieces loctited to the bracket.
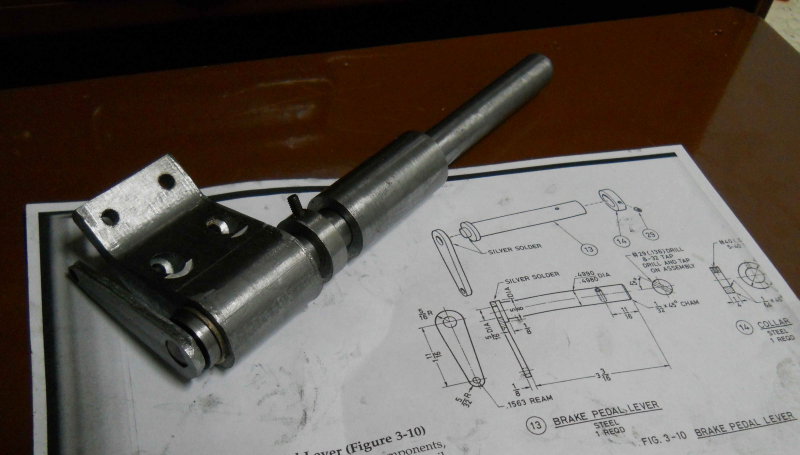
It still packs the actual pedal piece, as I don't have proper size material. I'm also unsure if a Mapp gas torch will heat the steel bar enough to bend 90 degrees as stated in the book. The design also defers connecting the two sliding parts of the lever bar until final install, so as to orient the pedal at the proper angle for comfort.

It still packs the actual pedal piece, as I don't have proper size material. I'm also unsure if a Mapp gas torch will heat the steel bar enough to bend 90 degrees as stated in the book. The design also defers connecting the two sliding parts of the lever bar until final install, so as to orient the pedal at the proper angle for comfort.
- Joined
- Jun 4, 2008
- Messages
- 3,294
- Reaction score
- 636
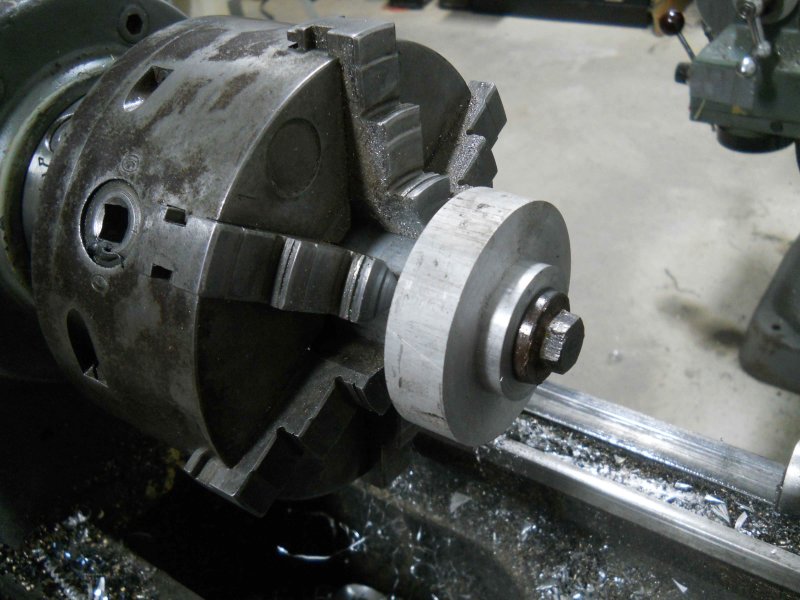
I purchased a lathe tool for cutting the profile for 7.5" gauge train wheels from a builder on the Home Machinist board, so I am now in a position to cut the flange and tread on the iron driver wheel castings. To ensure concentricity with the 7/8" center bore, it's necessary to turn a mandrel that's a good sliding fit for the bore. The first task was to turn an aluminum washer for clamping on the mandrel, and I made this from a piece of 1-1/8" aluminum, drilled for a 1/2" screw and parted off .3" thick. I then turned the mandrel from a length of 1-5/8" aluminum, taking the last cuts .001 at a time until the fit was achieved. As I had reamed the drivers, I found that all had the same good fit as the first. I then drilled the center of the mandrel for the 1/2-20 screw I found in my bolt bin (1/2-13 seemed too hard to thread as my tap is a crappy carbon steel one).
Not wanting to experiment with a $75 casting that has a lot of work in it already, I had previously made a blank "wheel" from some 3" aluminum round, drilled and reamed to the same bore as the castings, and hence a good fit for the mandrel. Here's the trial wheel mounted:
Rather than a full cut with the profile tool, I turned the blank to 3 separate diameters:
1) Flange diameter fully across
2) intermediate diameter .25" less and .156 from inner edge of the wheel
3) tread diameter .375" less than the flange and .234 from the inner edge
I then used the compound set a 3 degrees to turn the tread, stopping at the edge of the intermediate cut
Now the profile tool is aligned with the inner edge:
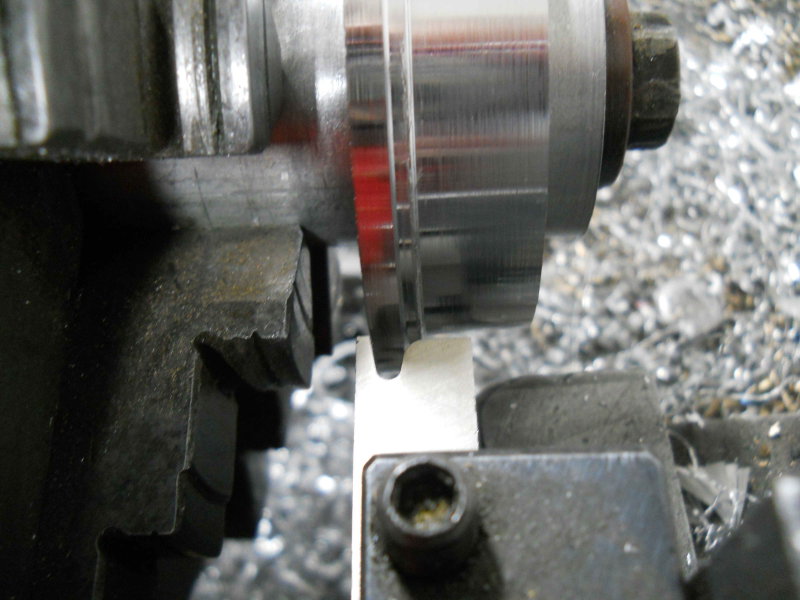
Finally I advance the cross feed slowly until the outer radius meets the tread. Even being aluminum there was a fair amount of chatter. It looks as if I needed to go in a couple of thou more, although I doubt it's critical.
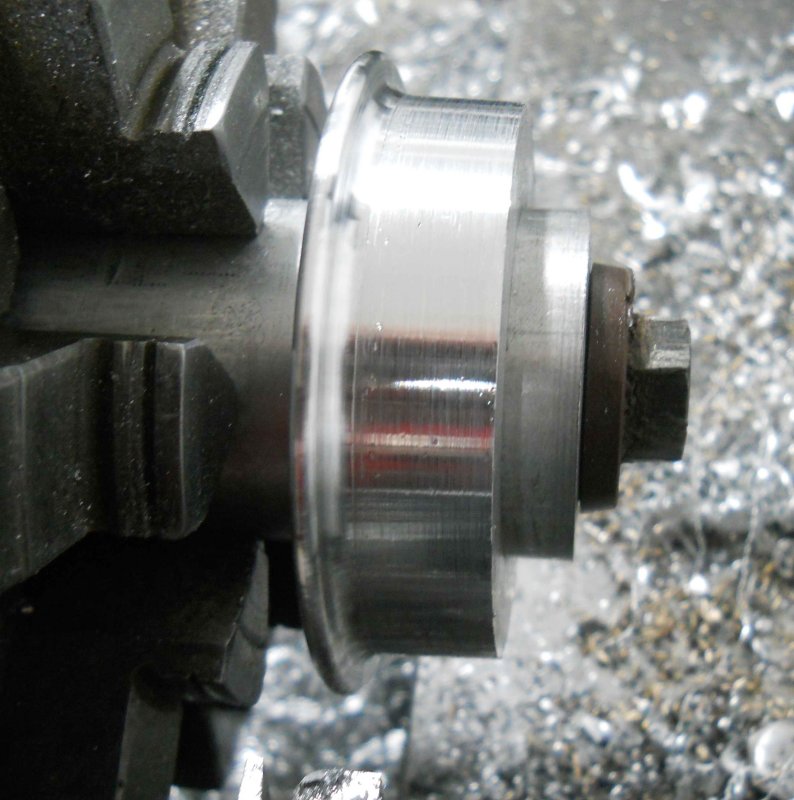
After a little polish, I can take this to the club's new years day party to get feedback from the other members.
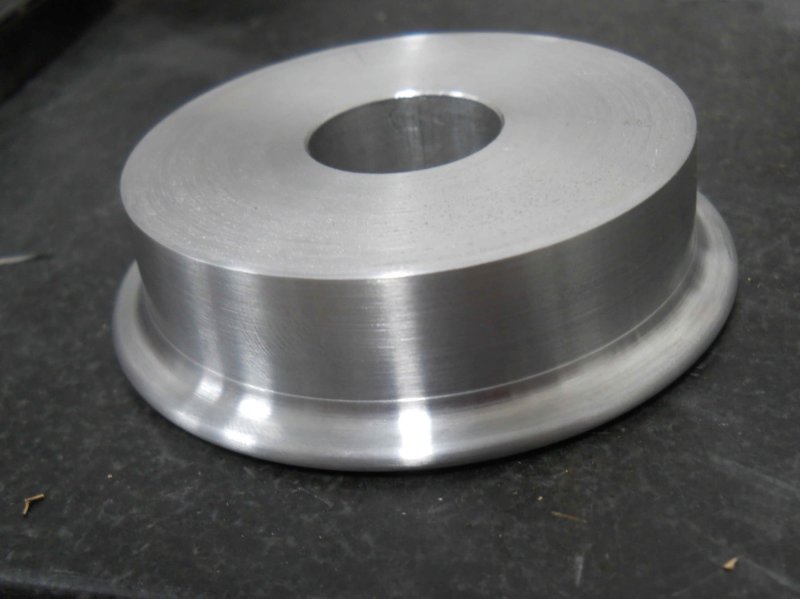
Of course, the mandel will remain chucked on the lathe until the drivers are finished. The edge opposite the flange will also be rounded off.
Not wanting to experiment with a $75 casting that has a lot of work in it already, I had previously made a blank "wheel" from some 3" aluminum round, drilled and reamed to the same bore as the castings, and hence a good fit for the mandrel. Here's the trial wheel mounted:

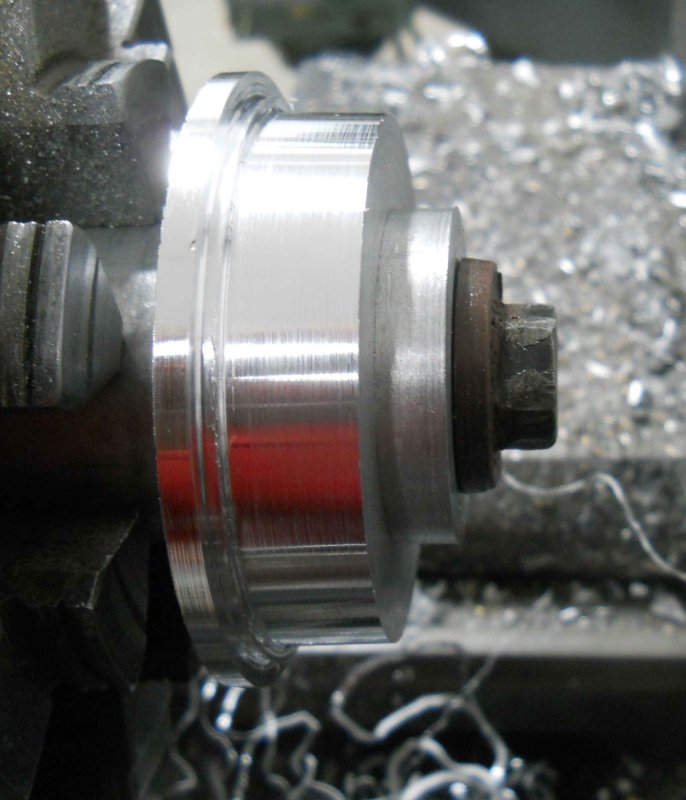
Rather than a full cut with the profile tool, I turned the blank to 3 separate diameters:
1) Flange diameter fully across
2) intermediate diameter .25" less and .156 from inner edge of the wheel
3) tread diameter .375" less than the flange and .234 from the inner edge
I then used the compound set a 3 degrees to turn the tread, stopping at the edge of the intermediate cut

Now the profile tool is aligned with the inner edge:

Finally I advance the cross feed slowly until the outer radius meets the tread. Even being aluminum there was a fair amount of chatter. It looks as if I needed to go in a couple of thou more, although I doubt it's critical.

After a little polish, I can take this to the club's new years day party to get feedback from the other members.

Of course, the mandel will remain chucked on the lathe until the drivers are finished. The edge opposite the flange will also be rounded off.
- Joined
- Jun 4, 2008
- Messages
- 3,294
- Reaction score
- 636
Doing that profile by hand coding would be easy, and probably good practice in learning the g-code. At our school we do all the lathe work by hand coding as you get better (and readable) code as opposed to what mastercam outputs.
- Joined
- Jun 4, 2008
- Messages
- 3,294
- Reaction score
- 636
This evening I started turning the flange and tread for the drivers. All went well until the flange profile tool grabbed and twisted the aluminum mandrel in the chuck jaws when finishing the 2nd wheel. :-[ So now it's all out of square, and I'll have to make a new one to finish the last 2 wheels. That can wait until tomorrow.
kvom said:Not wanting to experiment with a $75 casting that has a lot of work in it already
Just out of curiosity : is that $75 for a single wheel, or for the set of four?
- Joined
- Mar 1, 2010
- Messages
- 866
- Reaction score
- 82
This one is definitely on my watch list.
As others have commented you are going through this at a good pace. Are you doing all your own CAD/CAM for this from the drawings or has somebody already done the programming for each of the parts? If you are doing it yourself where is the most time being spent. Processing the drawings or machining the parts?
Pete
- Joined
- Jun 4, 2008
- Messages
- 3,294
- Reaction score
- 636
The 4 drivers were $300 ($75 each) plus $20 shipping.
I am doing my own CAD-CAM for the CNC parts. The CAD is done in DraftSight, and generally is pretty fast to do one part. Note that a drawing will cover only the operations on one side of the part, so several may be needed. Then I load the DXF file into CAMBAM to generate the g-code. While this can be fairly simple, you also have to imagine the fixturing that will be needed to hold the part. For odd shaped parts you may need to use the drawing to generate a separate pocket for the vise soft jaws. I also use a feed&speed calculator to determine feed rates to plug into the CAM.
I'd guess that overall I spend about the same amount of time with the software as the shop time. I'm dealing with odd-shaped bits of steel gleaned from a scrap bin in a lot of cases, so manually machining to a stock size can take as much time as the CNC machining. Without a tool changer, parts that need multiple tools can take a lot of time, as after changing the toll I need to set the Z height above the stock surface. For this reason, I try to use the same tool for all copies of a part (using a vise stop for positioning).
CNC is most useful for the parts with rounded profiles and odd angles. Rectilinear parts are often faster and easier to make manually. I also like to drill on the Bridgeport where the CNC setup would be time-consuming, or the holes are deep.
zeeprogrammer
Well-Known Member
- Joined
- Mar 14, 2009
- Messages
- 3,362
- Reaction score
- 13
kvom said:This evening I started turning the flange and tread for the drivers. All went well until the flange profile tool grabbed and twisted the aluminum mandrel in the chuck jaws when finishing the 2nd wheel. :-[ So now it's all out of square, and I'll have to make a new one to finish the last 2 wheels. That can wait until tomorrow.
As in the the $75 drivers? Is the driver okay?
The shot of the brake pedal in the vise brought the scale home for me. It's not small!
Similar threads
- Replies
- 111
- Views
- 31K


