Lew Hartwick just emailed me and asked if I owned stock in the layout dye company, and made me laugh.---Reminds me of a very funny story. The year I was 17 an older fellow in my small town asked me if I would paint his mothers house white for $100 if he supplied the paint. It was a small house, and I really needed the money so I said yes. The son lived out of town a few miles, but he had to drive in and out of town twice a day, and his mothers house was right on the main corner in town, so every time he came in or out of town he would see me there painting. Now I have to admit, I had never painted a house before, but it was an old previously unpainted clapboard house, and it sucked up paint like a sponge. I think I painted that damn house about 4 times before it quit soaking up paint. I didn't want to waste any good clothes, so I just wore the same old clothes for a week straight through, and by the time I was done, everything I was wearing was painted white, including my old work shoes and my hair. Finally I was finished, and Rene' came to inspect the job. He walked all around, looked up, down, and in all the crooks and crannies, pulled out a $100 bill (The first one I had ever seen), and pronounced it a job well done.--Then he asked me--"By the way, how did that paint taste?" somewhat taken aback, I asked what he meant. He said---The first dozen times I drove by the house, I thought you were using a brush, but the last dozen times I drove by, it looked like maybe you were drinking the paint and p1ssing it on!!!! ;D ;D ;D
You are using an out of date browser. It may not display this or other websites correctly.
You should upgrade or use an alternative browser.
You should upgrade or use an alternative browser.
Jacobs Ladder---
- Thread starter Brian Rupnow
- Start date

Help Support Home Model Engine Machinist Forum:
This site may earn a commission from merchant affiliate
links, including eBay, Amazon, and others.
2 drawings to finish off the weekend. I have all my platework finished except for these two pieces.
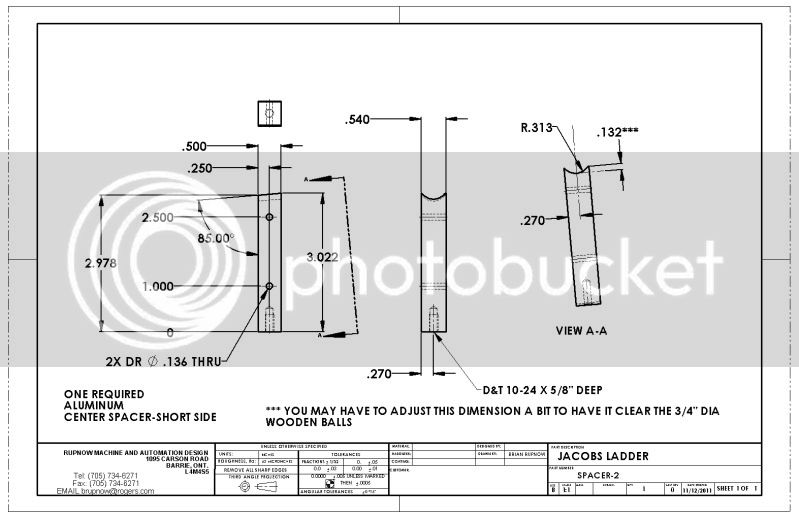
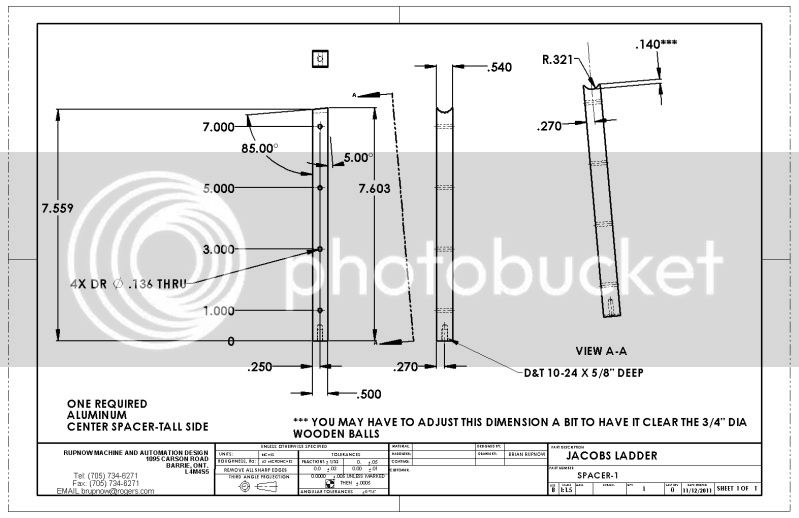


As in all the things I design, there is a bit of"design evolution" happening here. Basically, I decided to put the 2" dia holes in both outer staircases, and the counterbored holes will be in the "near side" outer staircase only, with clearance holes in the spacers and threaded #5-40 holes in the far side staircase only. This is because I had to thread them anyway to bolt the two sections of outer stairs together while sawing them out and shaping them. I will update the outer staircase drawing later this week.
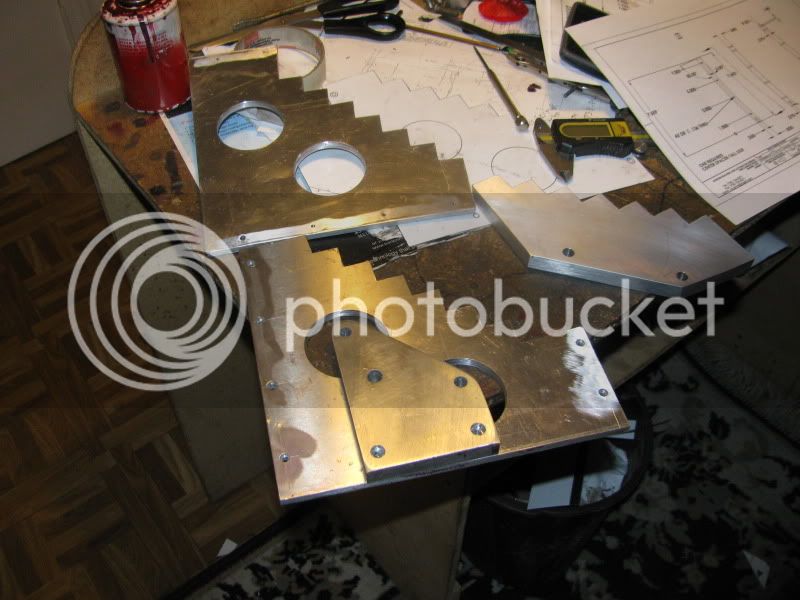

Gotta make a note to myself---Maybe paste it on my forehead!!! Don't push so damn hard on the scriber. I like my scribed lines to show up really good, so I push really hard on the scriber to make the lines really visible against the Dykem layout dye background. Then after all the layout dye is washed off with methyl alcohol, I have these big deep grooves to sand/polish out, and it takes forever. Maybe if I post about it, I'll remember for next time-----
I know what you mean Brian, there's nothing more satisfiying busting walnuts with a sledge hammer. :big: I too soon learned that a gentle touch is all that's required doing lay out work using dye, just enough to make the mark visible. 'Cept where there is to be a hole drilled, then I get a bit ham fisted at the line intersects, but that is only because I still manually find and drill holes the old fashioned way. ;D
Duffy's lift is coming along quite nicely BTW
BC1
Jim
Duffy's lift is coming along quite nicely BTW
BC1
Jim

$89.99
Outdoor Wood Boiler Water Treatment Rust Inhibitor- AmTech 300 & Test Kit
Alternative Heating & Supplies

$94.99
$109.99
AHS Woodmaster 4400 Maintenance Kit for Outdoor Wood Boiler Treatment
Alternative Heating & Supplies

$45.99
Sunnytech Mini Hot Air Stirling Engine Motor Model Educational Toy Kits Electricity HA001
stirlingtechonline

$519.19
$699.00
FoxAlien Masuter Pro CNC Router Machine, Upgraded 3-Axis Engraving All-Metal Milling Machine for Wood Acrylic MDF Nylon Carving Cutting
FoxAlien Official
![DreamPlan Home Design and Landscaping Software Free for Windows [PC Download]](https://m.media-amazon.com/images/I/51kvZH2dVLL._SL500_.jpg)
$0.00
DreamPlan Home Design and Landscaping Software Free for Windows [PC Download]
Amazon.com Services LLC

$99.99
AHS Outdoor Wood Boiler Yearly Maintenance Kit with Water Treatment - ProTech 300 & Test Kit
Alternative Heating & Supplies

$24.99
$34.99
Bowl Sander Tool Kit w/Dual Bearing Head & Hardwood Handle | 42PC Wood Sander Set | 2" Hook & Loop Sanding Disc Sandpaper Assortment | 1/4" Mandrel Bowl Sander for Woodturning | Wood Lathe Tools
Peachtree Woodworking Supply Inc

$39.58
$49.99
Becker CAD 12 3D - professional CAD software for 2D + 3D design and modelling - for 3 PCs - 100% compatible with AutoCAD
momox Shop

$39.99
$49.99
Sunnytech Low Temperature Stirling Engine Motor Steam Heat Education Model Toy Kit For mechanical skills (LT001)
stirlingtechonline
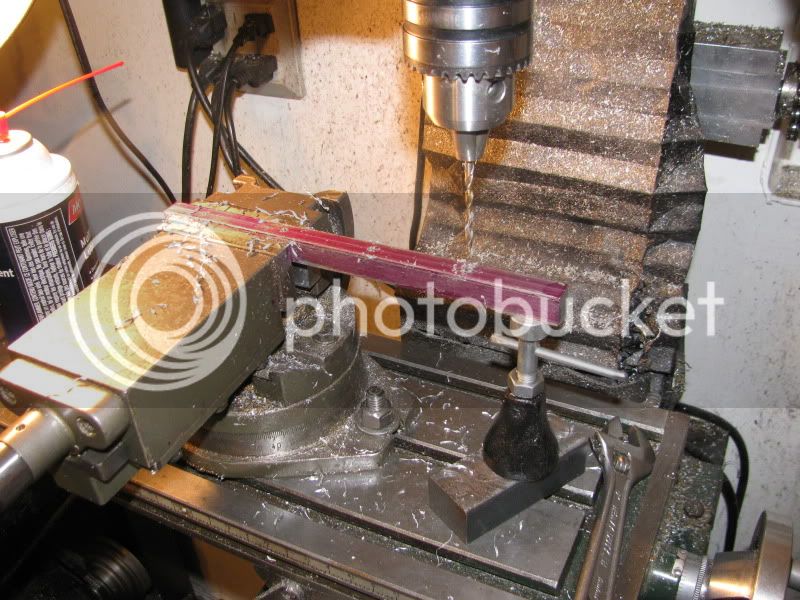
Drilling the spacers for between the outer staircases.---Ya gotta love those little machinists jacks. I didn't even know there was such things till heard about them on this forum.

Time for a teaser shot.---Its a trick. Those are 1" balls, not 3/4". but you get the idea. I didn't have any 5/8" plate to make the bearing stand with, so I used a piece of reclained 1/2" plate----thats why there is an extra hole in the plate. i will probably make up a 1/16" spacer to set between it and the staircase it is bolted to.
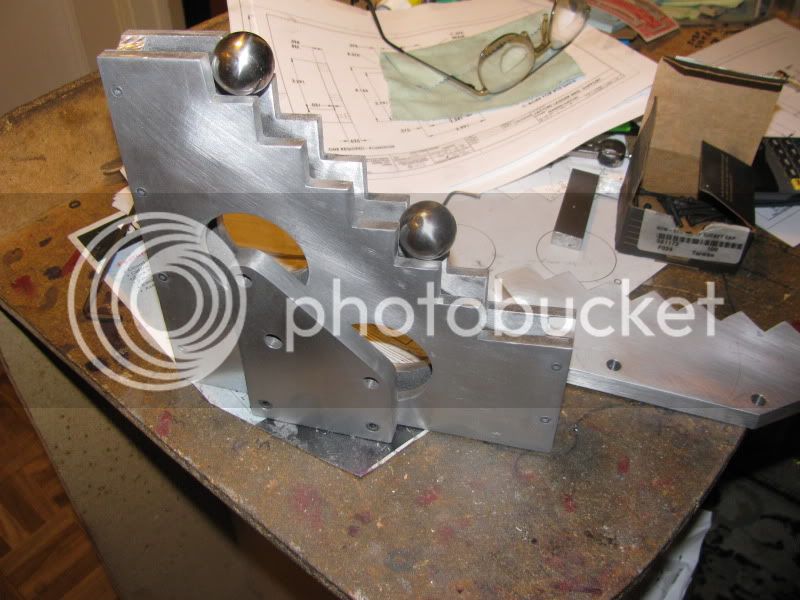

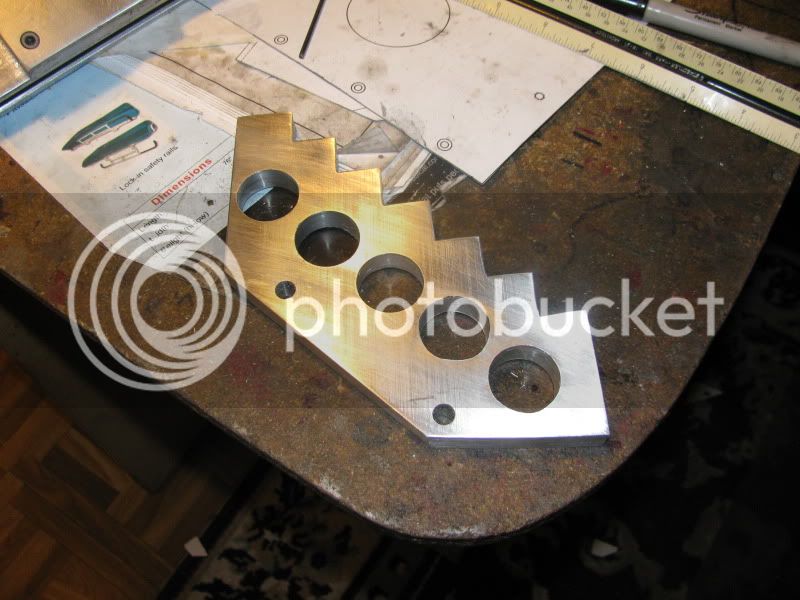
The center section of staircase was heavier than I felt comfortable with, so a series of 1" dia. holes took away some of the weight.

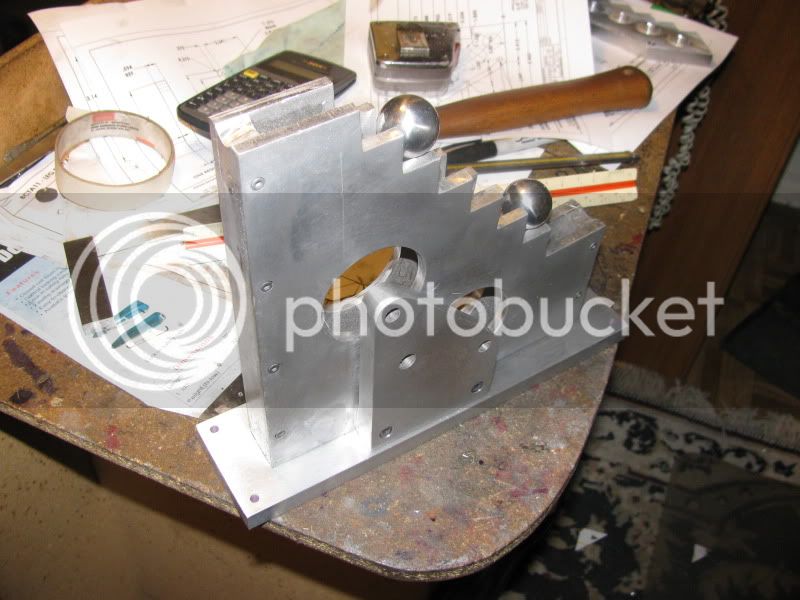
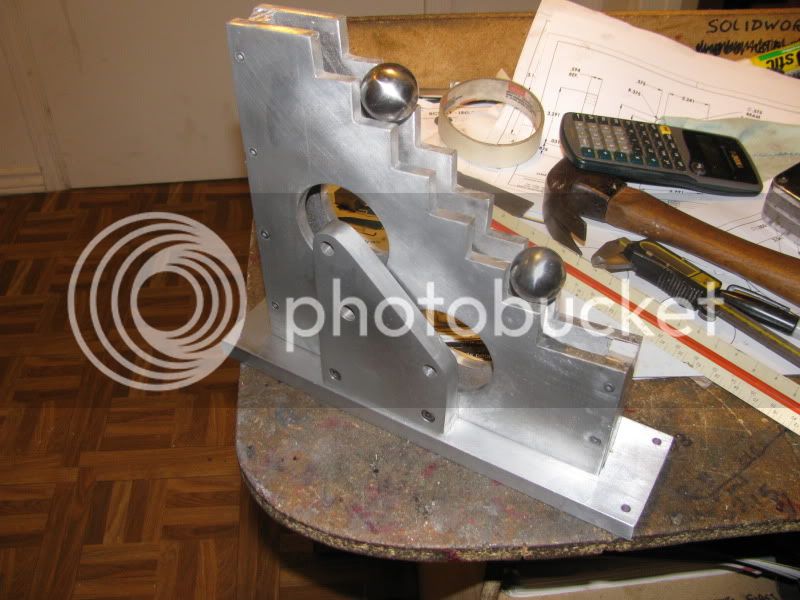
It makes me so happy when one of my projects gets mature enough to stand up all by itself!!! (Man, I've been around my latest grand kid too much!) Got the baseplate finished tonight and the spacer that fits in behind the bearing stand. Next thing to tackle will be the eliptical arms I guess, then I can't do much untill Duffys sprockets show up in my mailbox.


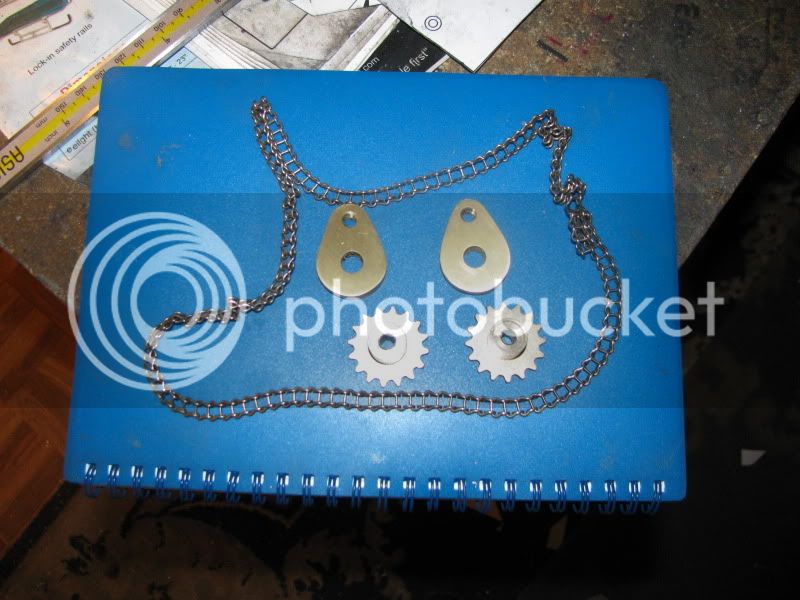
WOOHOO!!!!! Duffys sprockets arrived in the mail today. Thank you Duffy!!! Thank you, thank you, thank you!!! I made up the two eccentric arms tonight from brass and "posed" them with the sprockets and chain for tonights picture. I will model the sprockets and add them into my assembly, and figure out my shafts next. The sprocket bores were just slightly undersize from .1875, and I suspect that in their previous lives were press fitted onto 3/16" diameter shafts. Duffy said they are out of a 1950's era printer, so I doubt they were metric. I put them in my lathe and ran a 3/16" reamer thru the bores, and will add a #5-40 set screw to each hub. Since the original plan was to have 5/16" shafts, and thats what my eccentric arms and bearings are set up for, I may put a 5/16" bore in the 4 1/2" drive pulley and mount the sprockets outboard of the pulley.---I'll have to model it up and see what it looks like. I don't dare open the sprocket bores out to 5/16" as they are two piece construction and would fall apart if I took that much out of them.

Naw, It'd just look too goofy with the sprockets outside the pulley. I'll make the pulley with a 3/16" bore and set it up like this.
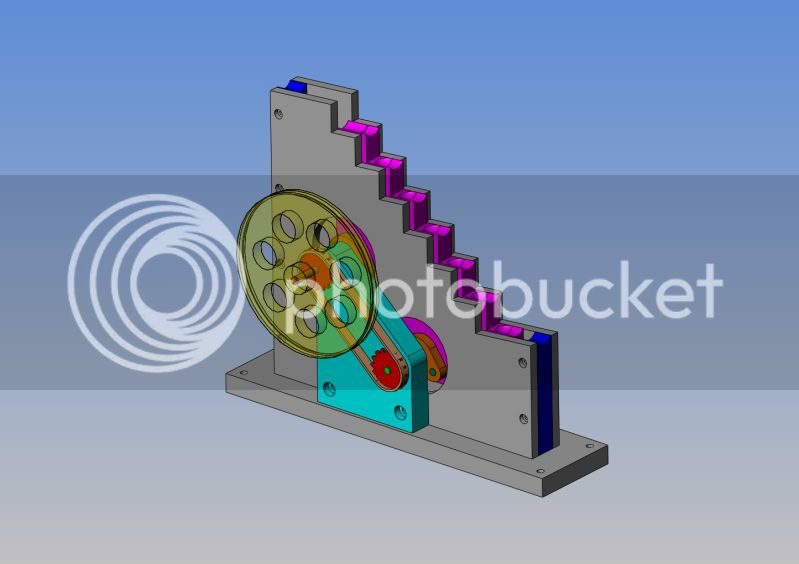

I was haunted by my old friend insomnia last night, so I popped out of bed at some ungodly hour this morning and bored one of the sprockets out to 1/4" with no consequent disasters. I'll use that one on the upper shaft so I can keep the pulley bore at 1/4". The one on the bottom shaft can stay at 3/16" bore, because there is not nearly so much overhung load on the shaft.
No post last night, as I had a "command appearance" at number 1 Grand daughters Christmas concert. I did however find a source for 3/4" diameter wooden hardwood balls in Guelph, Ontario, and was able to buy 12 balls for $12. I also ordered a pair of 5/16" dia. x 1/2" long shoulder bolts which will be used to hold the center (moving) staircase to the eccentric arms. Tomorrow morning I hope to finish the shafts, and may even get to test run this critter!!!----Brian
Cowabunga Roy!!! I think its going to work!!! I held the chain tight by hand and rotated it thru one complete revolution, and it seems to do exactly what I expected it to. I'm going to have to do some serious shortening of the chain, and I will probably have to but a 'take-up' idler on it to keep any slack out of the chain, but I think its going to be great. I couldn't wait 4 days for my shoulder bolts to come in, so I made up my own for "try-out' purposes. If I find time tomorrow. I'll make up a pulley and shorten up the chain, and MAYBE we'll get a first run video made up. I will only be able to use "pretend" balls, and like migrating lemmings, they will all jump off the cliff into the sea because I don't have my return ramp made up yet, but I'm feeling good about the progress.
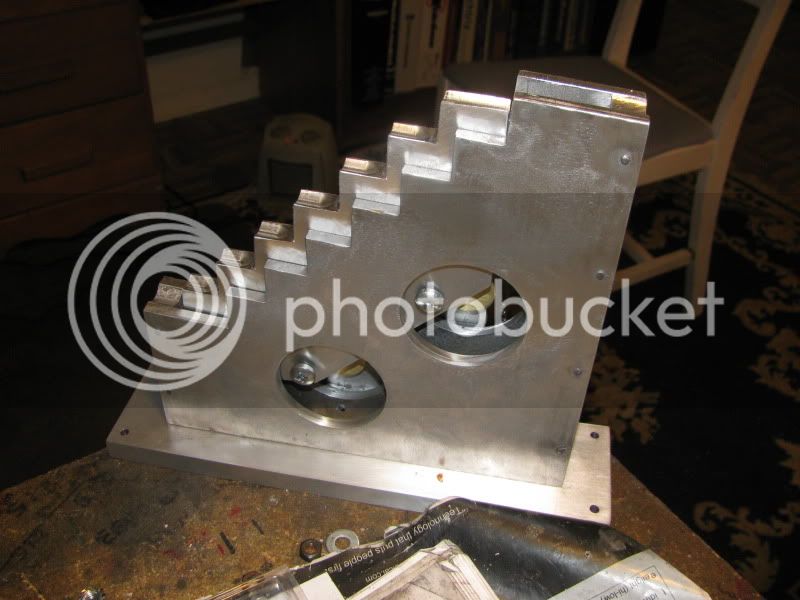
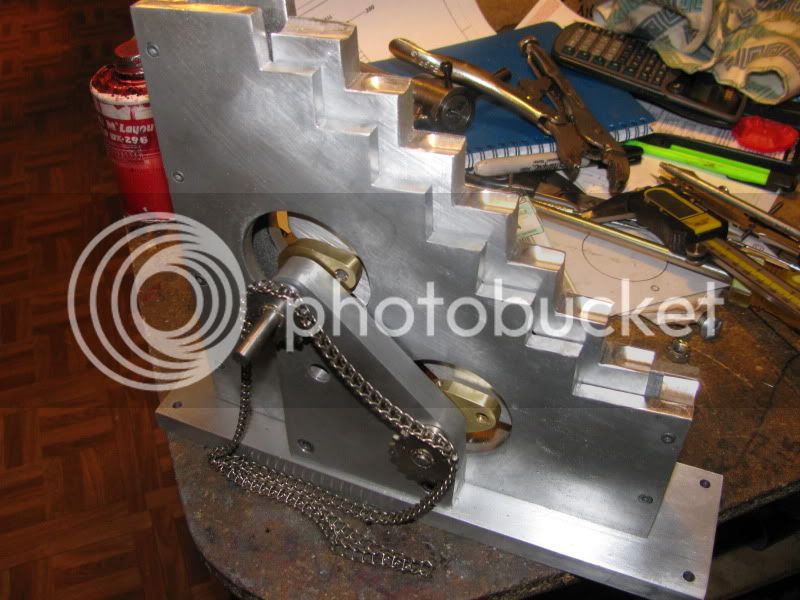


This morning I'm making a 4" dia. pulley, because thats the largest stock I have. However, I have found a real "caveat" in my design. Even with Duffys chain connecting the two shafts, unless it is pulled painfully tight, the non driven shaft still wants to turn and rotate the wrong direction when the driven shaft passes over "top dead center". I hadn't realy expected this. I think I see a way to add a second "link" between the two shafts, offset the same amount as my eccentric arms, but out of phase to them by 90 degrees, on the outside of the pulley. If that is the case, Duffys chain may become redundant. I'm learning as I go along here, so will keep you posted.----Brian
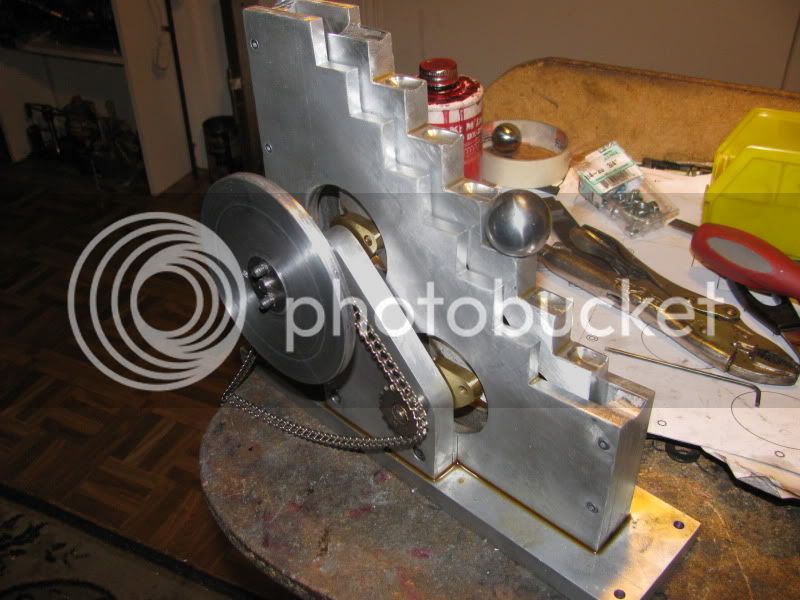
I built a pulley this morning, and here you can see that the center staircase had paused halfway thru its "lift" mode and lifted one of the 1" balls up, getting ready to carry it up to the next step. I'm still not 100% sure that this will work with only a chain and not a second link arm, but I bet I'll know before the weekend is over. Gotta go now and take a load of dry firewoood over to a friends house. I just got a gas fireplace in last week, and its wonderfull.--

Similar threads
- Replies
- 77
- Views
- 30K


