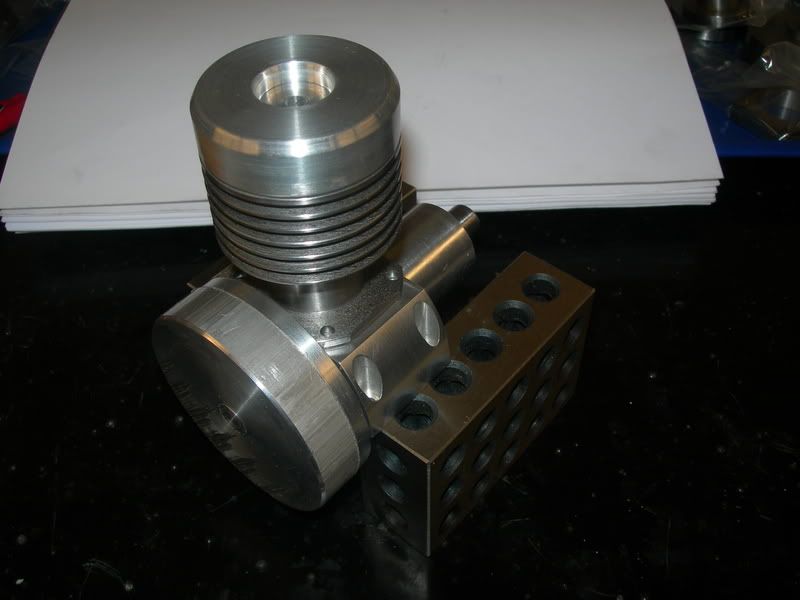
Crusader .60s (x2)

Home Model Engine Machinist Forum

Help Support Home Model Engine Machinist Forum:

This site may earn a commission from merchant affiliate links, including eBay, Amazon, and others.
WE,
I'm with Eric. Last time I saw this post it was a page long. You're making some great progress :bow: :bow:. You've documented some great techniques here, the photos are great. The co-ax indicator is one of those tools I often thought I'd like to get, now you've given me a good reason to make the move.

Keep us posted

Cheers,
Phil
 
Maryak said:
Mind - Hell it's just great that an idea I borrowed and tried has not only been successful for me but of use to a friend and colleague
icon_yippee.gif


I am tickled pink that you have one good looking crank there buddy
laugh2.gif

Bob, that fixture worked like a charm. I am glad that you had posted it in your thread because it sure saved me some time. And thank you for your kind comments.

The crank turned out pretty good. The biggest thing is it is well within tolerance and with some light oil spins easily in the bushing. We'll see just how good it is when the thing is fired up. If it holds together, than I call it a success... If not, then as you say, flight will commence shortly there after! ;D

dsquire said:
I knew that the third time would be the charm, no doubt in my mind at all. Now we will sit back and watch the rest of the crusader take shape.

Don, if it were any other time, I would say that a blind hog finds an acorn every once in a while. Not so this time. I found on this particular part I had to be on my game. That's obvious with having to give it three tries for one good part. ::)

Stick around, I've got some momentum going now! Still aways to go, but I'll get 'er done one piece at a time!

Philjoe5 said:
I'm with Eric. Last time I saw this post it was a page long. You're making some great progress :bow: :bow:. You've documented some great techniques here, the photos are great. The co-ax indicator is one of those tools I often thought I'd like to get, now you've given me a good reason to make the move.

Phil, this project has been like getting an overloaded truck up a hill, it goes s - l - o - w at first, but once you get to the top, things really start moving. My enthusiasm is building for completing this project, so that helps, too.

As far as techniques, I am not sure how great they are. They work for me, so I am happy to share. One thing about this hobby, there's a million different ways to drill a hole!

And the beloved co-ax indicator... There's a mysterious history behind this particular tool! If you haven't seen it, it is here. This is one of those "luxury" items that I personally always talked myself out of when spending the tooling budget. Now that I have one, I am throwing rocks at my old method of locating any circular object on the mill. It is one of those tools that won't get used all of the time, but it is sure handy to have in the bag of tricks!


Thank you one and all for the encouragement and support! :bow:
 
WE,

Yes mixing your own fuel will be very much cheaper, especially since you already have the required ingredients available.

I used to mix most of my own, however, it is now very difficult to get hold of METHANOL, and especially NITROMETHANE here in the UK thanks to government restrictions on the distribution of such chemicals (largely due to ILLEGAL DRUG FACTORIES with regards to METHANOL and, since NITROMETHANE is also classed as an explosive, TERRORIST THREAT).

CAN'T HAVE ANY FUN NOWADAYS... :( :( :( :big: ;D ;D

So what is required?

There are only three basic ingredients required, namely: -

OIL...... either pure CASTOR OIL, SYNTHETIC RACING OIL or better still a 50%+50% mix of the 2.

METHANOL (METHYL ALCOHOL).

NITROMETHANE.

A good general running mix would be: -

18% -20% oil (CASTOR, SYNTHETIC or a blend of both, as above).
5% - 10% NITROMETHANE.
remainder % METHANOL.
MIX BY VOLUME.

I would suggest for your first runs that you use the higher oil content and the lower NITRO content.
Once run in for an hour or so you can then increase the NITRO, and reduce the OIL.

Some commercial fuels use an additional CHEMICAL DYE additive, YELLOW, RED GREEN etc, mainly to identify the PARTICULAR MIX FORMULA, whilst others may also contain some anti-foaming agent (e.g. LIQUID POLYMER RESIN as used in CAR POLISH).
In either case only a few drops (per GALLON) are introduced.

Neither contribute anything to the running capability and some DYE materials, such a HY-VIZ red, can actually stain the engine metal. So best left out in my book.

A note on the OIL...... SYNTHETIC oil is much cleaner to use but breaks down more readily, especially if you get a LEAN mix, which will result in much higher running temperatures when it will break down completely and not protect your engine.
CASTOR oil does not break down (in fact it gets better with high temperatures and lean mixture), however, it is much dirtier to use and will coat your engine with a thin layer of brown gunge which can be difficult to remove.
By using a BLEND of both oils you get a cleaner running mix but with the added protection of the CASTOR at higher, LEANER, running temperatures.


On a slightly different note: -

Your coaxial indicator can also be used as a very accurate TRAMMING tool.
Place an accurate flat plate on your machine table and use one of the long,curved end, probes to sweep around the top surface, almost at the max dia. This will get over the problem of the table slots.

A good source of an accurate flat plate is a brand new DISC BRAKE rotor (disc) which are not very expensive to purchase from a motor factor.
These are machined (very often SURFACE GROUND) to very high tolerance with regard to being flat and with both sides parallel, certainly close enough for the purpose.
If necessary, gently clamp it to the table via it's centre hole using low profile clamps, but generally they are heavy enough not to need clamps (given the low forces being applied by the probe) and TRAM away.

Just another idea to let you play with your gift.

Best regards.

Sandy.
;D ;D ;D ;D ;)
 
Sandy, thanks for the reply! I have been messing with exotic fuels for more years than I can remember. Kind of goes with the racing stuff!! I looked today, and I have about 100 gallons of methanol, and about four of nitro. Two quarts of castor oil. I wonder how long that little engine would run on that amount of fuel?? :big: ;D

One nice benefit of mixing my own fuels is the ability to adjust the percentages as things break in. And yes, the cheap factor is certainly attractive! I guess I will need to get some synthetic racing oil to supplement the castor oil. Any one brand of synthetic you would recommend??


As far as the co-ax indicator, I hadn't thought of using it for a tramming tool. I guess it would be a great application for that as well. Mater of fact, it could be used in the lathe as well for centering work pieces in a four jaw, but an indicator on a magnetic stand works perfectly for that application.

I currently use a piece of 1" plate glass for tramming my head, but the more I use it, the less I am fond of it. Not due to inaccuracy, but if my hands are a slight bit oily (I don't know why they would be messing with machinery ::)), it tends to want to slip out of my hands. I have visions of that happening and then landing on my foot with the corner impaling or taking a toe or two off. The edges have been ground down, but that piece of glass is heavy, and I know it would do some damage if dropped onto a body part!! :eek:

Because of that, I very likely will go to a brake rotor or something similar for nothing more than being able to have a good hold on it. I can then use the glass for sanding flat surfaces and avoid handling it with oily hands.

Thanks again for the comments!!
 
I guess I will need to get some synthetic racing oil to supplement the Castor oil. Any one brand of synthetic you would recommend??

WE,

That is a very hot potato, a bit like asking what lathe is best?...ask 10 guy's and you get 10 different answers.

I think it will depend upon what is available in your particular part of the world but a few suggestions are: -

KLOTZ oils....... Techniplate R50 for synthetic (and BeNol for racing castor).
A lot of the commercial fuel manufacturers use these 2.

Others are: -

Silkolene 4T R40S is a very good synthetic, also Castorene.

The most important thing to establish is the miscibility with Castor oil.... some don't mix well and should be used on their own.

For Castor oils then: -

BeNol (see Klotz above)

Castorlube C from 'BIRCO'

Castrol M is one of the best castor oils around and can be used on it's own.... it is one of the cleanest available.

Hope this helps.

best regards.

Sandy. ;D ;)
 
SandyC said:
That is a very hot potato, a bit like asking what lathe is best?...ask 10 guy's and you get 10 different answers.

Oops!! You're right! What I should have asked is if there was on or two to stay away from (still a hot potato, but not quite as large ;D). At any rate, thanks for the advice. I do have some Castrol M on hand, 1/2 quart to be exact.

Now all I need is an engine to burn this stuff in. :p Guess I need to get busy!!
 
Glad to see your managing to progress W/E 8) ........... thanks for all the updates and for sharing all the up's and down's, including all the crankshaft options ??? ......... to be fair I think we all learn more from something like that than all the "it went right" threads ......... however ...... I hope you don't have any more for a while, leave that to someone else for now. :bow:

atb

CC
 
Well, after a very busy week I made it out to the shop this evening, and even made a little progress.

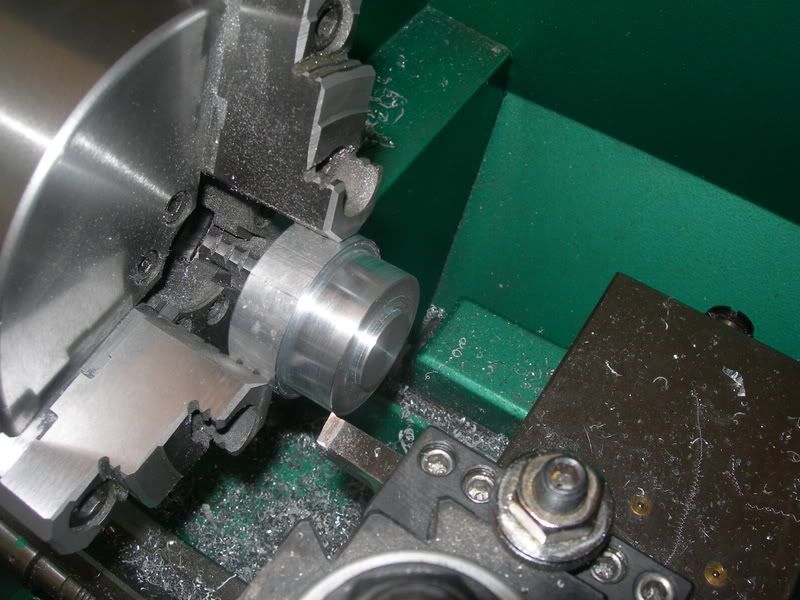
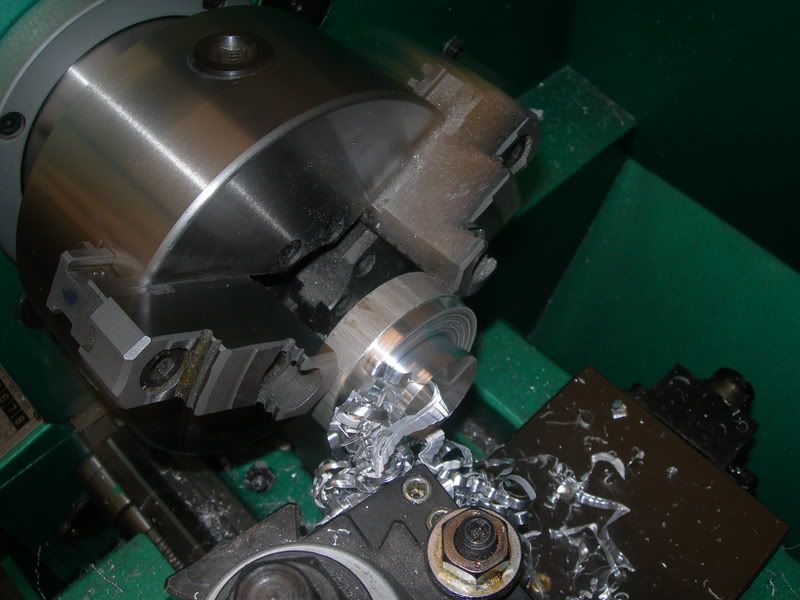
I started off by turning the head. That started from a piece of aluminum and was a straight forward face off, shoulder, and part off job. It was flipped over, and the other side was faced off to dimension and the counter bore for the glow plug was machined.

Here's the business side of the head being machined.
DSCN3384.jpg


The cylinder was test fitted to the head and was a tight fit.
DSCN3385.jpg


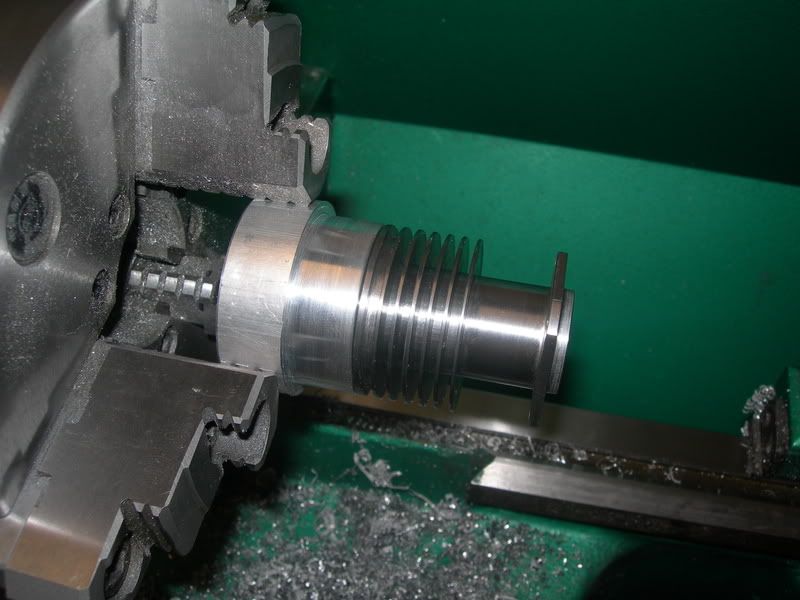
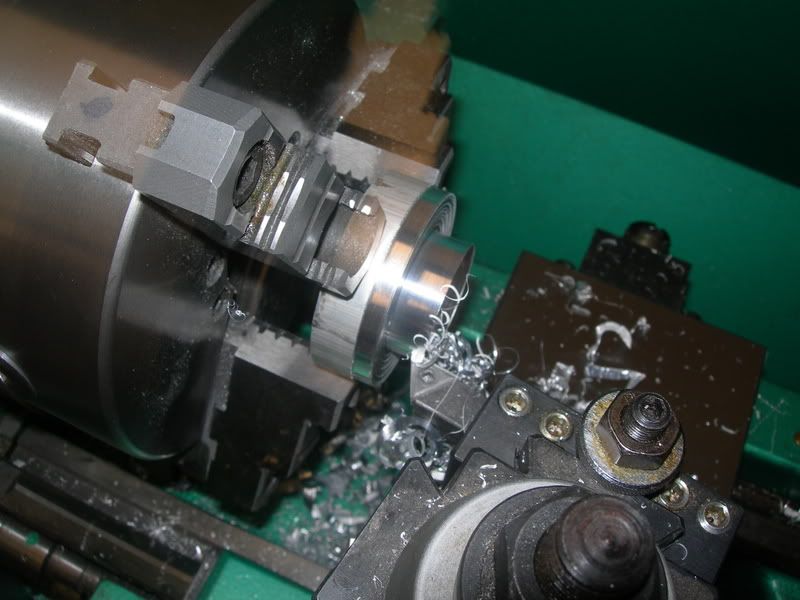
After the business side of the head was machined, the next thing I did was to machine the engine's backplate to the internal dimensions. This part is also aluminum and was a straight forward face of, shoulder, and a blind hole was drilled and reamed for a press fitted bushing to later be installed. The original drawings call for the crank case and backplate to be squared off, but on my engine I am leaving some meat on the crank case for aesthetic reasons. I machined the backplate to the same outside diameter as the crank case for now. I haven't decided what I am going to do on that little bit at this point, but the material is there when I decide.

Turning the backplate's internal shape.
DSCN3387.jpg


Almost there...
DSCN3388.jpg


And a test fit with the crank case and crankshaft in place.
DSCN3390.jpg


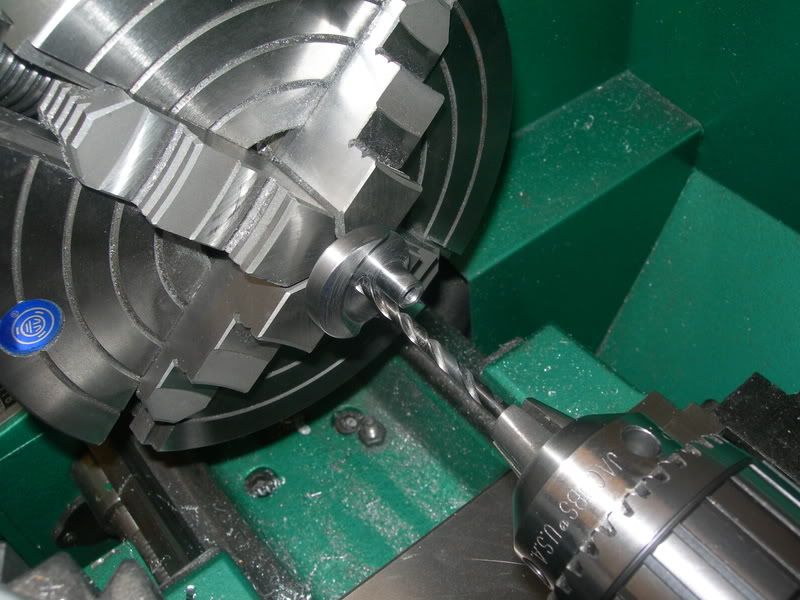
Once the internal stuff was done on the back plate, I drilled the center hole in the crank shaft. This was done in the four jaw as well, and the part was centered and drilled. Nothing really to write home about...

Drilling the crank shaft center hole.
DSCN3386.jpg


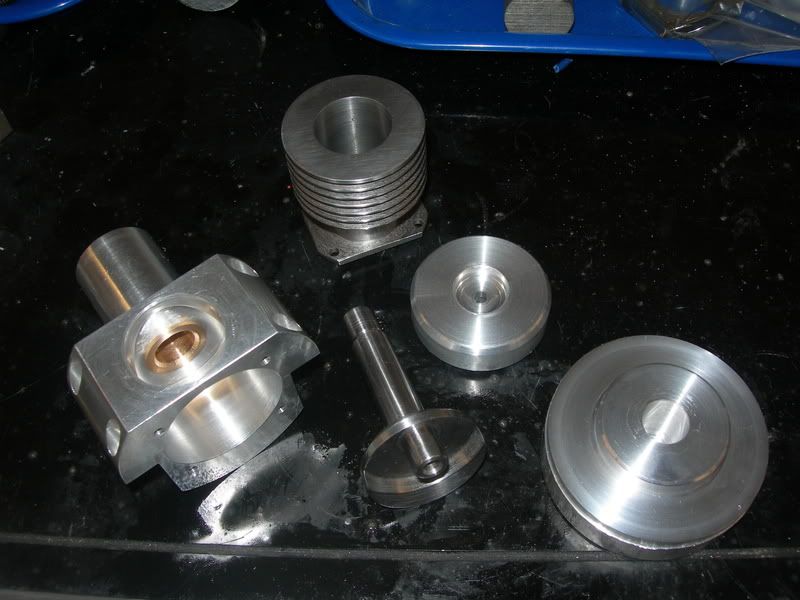
And this is where things left off for the night.

The parts laid out.
DSCN3389.jpg


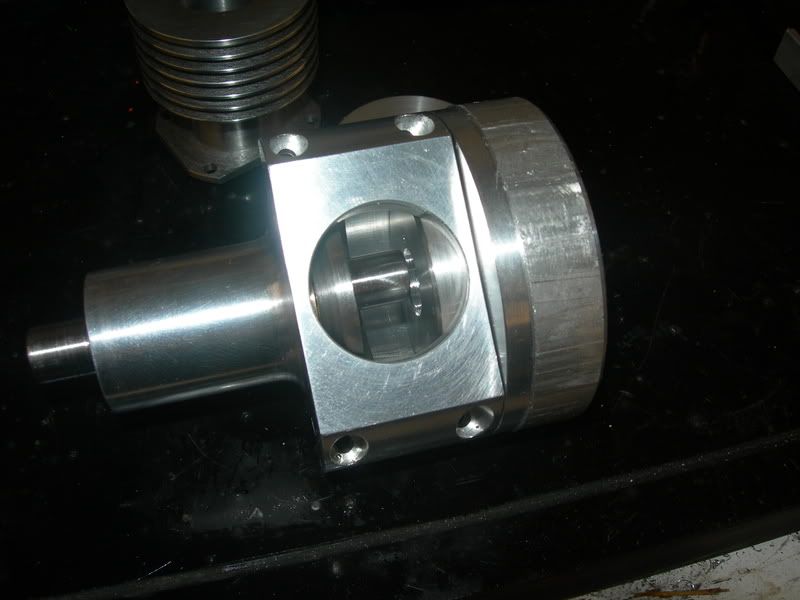
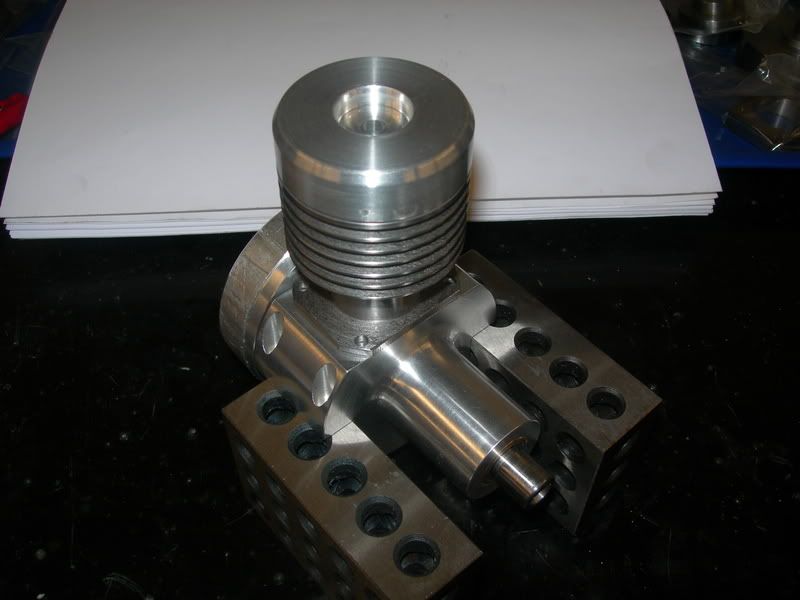
It's starting to look like an engine!
DSCN3391.jpg


DSCN3392.jpg


Next up will be finishing the crankshaft which involves drilling one hole about midway down the main journal for the fuel/oil to lubricate the bushing. The connecting rod and pistons (one for trial fit, one for real) are next up. And then the trail fitting of the rotating assembly will begin. There will be some relief cuts needed in the crankcase for the rod. Once everything looks good, I will then cut the ports in the cylinder and machine the bypass cover and exhaust manifold. Then comes the infamous drilling and tapping of the head, cylinder, and crankcase. A little solder job will finish the cylinder up.

The rotary valve and bushing will follow. The backplate has a bunch of material to be milled off, so that will take a bit of time to do. The final bits will be the prop flange and spinner, and the carburetor. Fining the head and bottom of the crankcase I am saving for after I get the engine running.

I feel like I have made it over the hill and now have a little bit of momentum going on this project. I hope that I can keep it and finish this thing out before too much longer! I am ready to see this thing sputter!!

 
Looking real good there, W/E.
With all the heartbreaks and hurrays along the way I'm anxious to see it running.

 
To add fuel to the fire in my younger days I raced go karts and model aircraft both using methenol and I ALWAYS used Castrol M. It is great.

Ian.
 
WarEagle :bow:

Looking pretty good. Its starting to look like the engines that I play with. Feels a lot better when you have a productive night like this. Keep up the good work, I'll be watching.

Cheers

Don
 
WarEagle, you passed some nice comments on my Mills build but I have to say the quality of your work is exceptional! :bow:

I don't know how you keep your chuck as clean as you do either.....super work. :bow:
 
W/E,

Its really starting to look like an engine.
1034522319.gif


Will there be fins on the head.
say_question.gif
say_question.gif


Best Regards
Bob
 
ksouers said:
Looking real good there, W/E.
With all the heartbreaks and hurrays along the way I'm anxious to see it running.

Thank you for the complements! As with any project (at least any that I undertake), Mr Murphy is right there along side me. It just takes a little persistence to keep him at bay!!

The excitement is really starting to mount as I am getting closer!

seagar said:
To add fuel to the fire in my younger days I raced go karts and model aircraft both using methenol and I ALWAYS used Castrol M. It is great.

No arguments there! And the younger days of racing.... Those were some great times!!!

dsquire said:
Looking pretty good. Its starting to look like the engines that I play with. Feels a lot better when you have a productive night like this. Keep up the good work, I'll be watching.

Don, it was a productive night indeed. Some nights you have it, and some nights you don't. Last night was on my side! ;) Thanks for the cud-dos and definitely stick around, the fun stuff is just beginning!!

Metal Mickey said:
WarEagle, you passed some nice comments on my Mills build but I have to say the quality of your work is exceptional! :bow:

I don't know how you keep your chuck as clean as you do either.....super work. :bow:

That makes my day, although I would tend to argue! :big: I am my own worst critic. ::) On the mills build, I really enjoy seeing these projects posted here and each one is an inspiration!

As far as keeping my chuck clean, I really work clean in my shop. After each process, I go after the chips with the shop vac and wipe down tools and machines pretty often. I guess it is being anal, but my time is limited and I like to be able to walk into an organized (well, loosely used term here!) and clean shop and go to work. The messes drive me nuts if they are left behind,

Maryak said:
Its really starting to look like an engine.
1034522319.gif


Will there be fins on the head.
say_question.gif
say_question.gif

Bob, thanks for the comments! It is starting to look pretty good. I have the majority of the bigger stuff at least semi-finished, so it is coming together on the exterior. The small stuff will take a bit to get through, but maybe not a large amount of time.

As for the head, I will cut fins in it but am waiting until I get the other parts made and check clearances. No need to go through all of the trouble doing the fining if the part will need to be remade. There is a method to my madness... If I don't totally finish a part, then it will be good to go. But if I finish a part, bling it and have it show quality, then there will be some little something that will turn it from masterpiece to scrap!! ;D :big: ;)


To all, thank you for watching this come together! It has been a lot of fun, and I have grand plans going forward. For all of those documenting builds, "Thank you for the inspiration!". As I say, stick around because things are starting to get fun!!!
 
You are always welcome to come to my work shop if you want to clean up :big:
 
Metal Mickey said:
You are always welcome to come to my work shop if you want to clean up :big:

Okay, I'm game. You cover my travel expenses, wages, feed me, and provide me a place to sleep (the shop would work) and I'll clean your shop... ;D :p :big:
 
Well, my goal of having this engine completed by the end of the year is now looking to be in jeopardy and the ability to pull it off is swiftly eroding away! I am hoping to have some time to spend on it this weekend and hope to have a few more pieces made. Having way too many irons in the fire here lately has made the shop pretty much inaccessible.
icon_thumbsdown.gif


The hardest thing for me will be fighting the urge to hurry it along to make the goal. I know that won't work, or it will be a sloppy finish to the project. Maybe the model engineering gods will smile on me over the next few weeks and I can see some progress.
 
W/E,
You have a great looking engine taking shape here. Keep at it man. We're all anxiously awaiting. Watching someone elses WIP is as exciting as working on my own + it's easier cleaning up afterward :big:

Cheers,
Phil
 

Latest posts

Back
Top