British 0-4-0 Toy Locomotive: he said

Home Model Engine Machinist Forum

Help Support Home Model Engine Machinist Forum:

This site may earn a commission from merchant affiliate links, including eBay, Amazon, and others.
Thanks very much Jim and tmuir.

tmuir...that's some high compliments. Thank you. I'll try and get better photographs ;D.

Some wick material came with the kit. I don't know what it is...but it looks like cotton braid...about 3/16" diameter, 15" long.
 
You really banged out some parts today, Zee. You get more done making mistakes and good
parts than I do just making mistakes. Tank and burners look really nice!

Dean
 
Zee,

Nice tank.

I enjoy reading about the journey that leads to your finished parts.

Good information and humorous to boot.

SAM
 
Thanks Dean and SAM.

I'm working on the safety valve today.

Print calls out a 1/4"-24 thread. Anyone know where I can get a die?
That's what I thought too. ;D

It cost me a little time looking for it in my die set until I remembered I'd done a couple of threads for the model already.
It's 1/4"-28. A typo that the vendor should have found had they built their own model from their own prints.

Also want to mention what a great idea it was to a get 5C collet set and some blocks so they can be used in the vise. This has saved me several times of switching out the vise for an indexer. Thanks guys.

The last operation on the valve is to drill to a depth and then modify a drill bill by grinding the tip at a 15 degree angle. The idea is to create a little hill that a ball bearing will sit on.

I did one part (well two...the burner tubes) using a modified drill bit as end mill. That didn't go so well. Any advice is appreciated.
 
Well all the parts are made.
Drilling the safety valve with the modified drill bit went well.

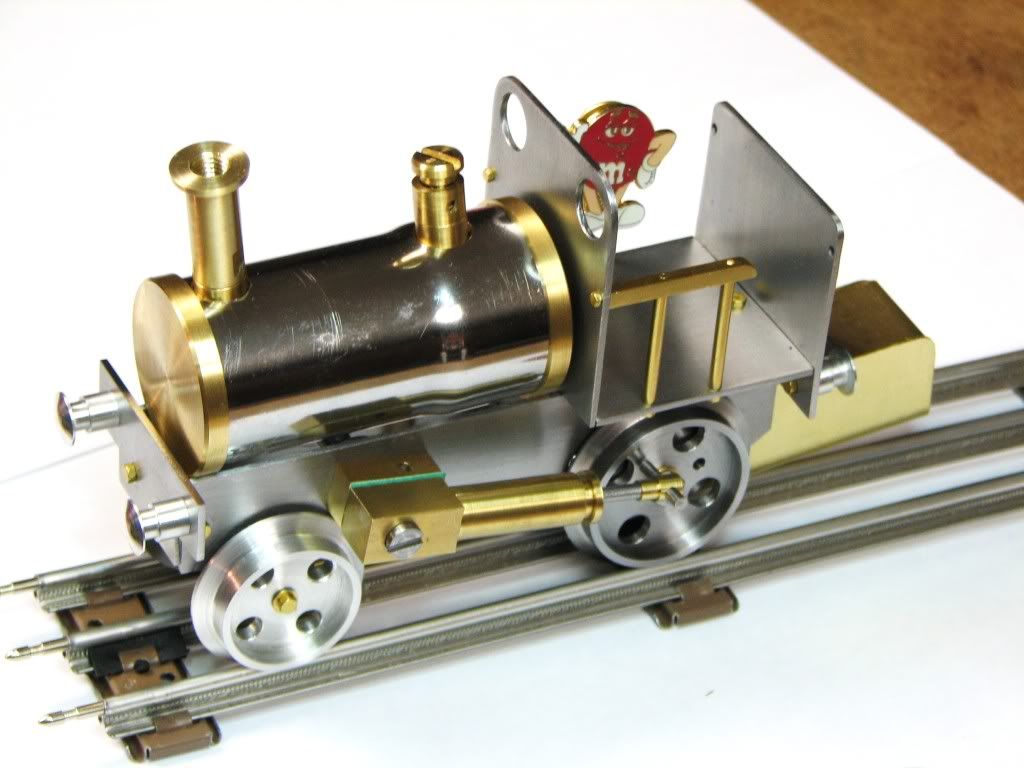
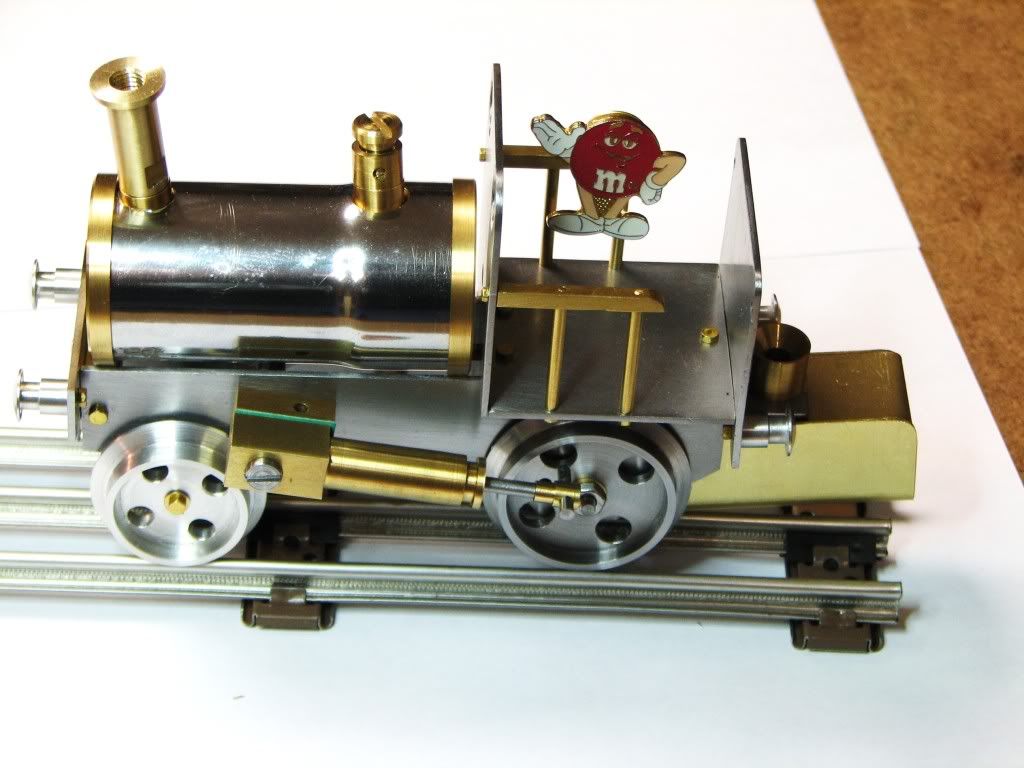
Here's some assembly pics. The safety valve and steam dome are held by poster tac...that's why they're at an angle.

99d08ee7.jpg


917cb1ba.jpg


Some areas need some cleaning up.

I discovered one of the port blocks doesn't perfectly line up with the cylinder. I don't know if that means a problem for the steam port...but I'll check that before soldering.

The pivot pins need to be shortened or the stretcher needs to be re-tapped.

Now I need to learn and practice silver soldering. Then make up some jigs. Then finish the model.

The instructions have you solder the steam pipe to the ports while the engine is assembled. I don't think I'll do that. I have to think I'll discolor the frame or other parts. That's one jig I have to make. Also a jig to solder the burner tubes. And another jig to solder the bushings for the safety valve and steam dome. I'm a little worried about the last...the bushings are pretty loose.

The other worry I have is that I can't imagine the boiler tube will survive the soldering. That's okay so long as it works.
 
Carl, that's looking as pretty as a picture :bow:

I don't know how the "chrome" plating on the boiler will stand up though. I'd be a bit cautious as well - don't know if silver solder will stick to it, so be safe and clean off any chrome where the end caps have to be soldered.

Jigs ;D - most useful things Thm: - now make them and get to soldering ;D - I'm keeping fingers and toes crossed for you!

Regards, Arnold
 
It's quite beautiful, Zee!
You and I have talked some about silver soldering, frame discoloration, etc. Hopefully, some of the other older hands at this will pipe up and advise you. I just don't know what to expect on the chrome tube.

On the bushings, you say "loose". How loose? (How many thousandths clearance between them.)

Dean
 
Thanks Arnold! I'll need them fingers and toes!

Thanks Dean. But I don't think I can accurately measure the looseness.

Instructions call for sanding the ends that the caps fit over. So I think that answers your question Arnold. As for the bushings...there's no sanding...I assume that the edge of the hole is sufficient.

Instructions have the end caps soldered first and then a jig used to hold the bushings while they are soldered one at a time. That's what concerns me...if the holes for the bushings are crap...then I may lose the end caps.

So...any thoughts about how loose is loose? I have a spare drain pipe...maybe I'll make that one up before I try soldering. At this early game (i.e. my limited experience) the 2nd attempt is almost always better than the 1st so I might have better holes for the bushings.

I figure the chrome is going to be toast. That's okay if the loco works...I mean gee...I've hardly started...if this works...well I can't express it.

Thanks again.
 
Great progress zeep! At this rate it won't be long before you have that little beauty steaming up. Do they give you any idea how long it should run on a filling or water?

Bill
 
I did a Google search on soldering to chrome pipe and the consensus seems to be that it can't be done.

So, now the question becomes, "How to get a neat band of chrome removed without farking up the rest of the pipe?"

Dipping it into a shallow pan of concentrated HCl might do it but that's not very homeowner friendly.

My suggestion is...

Make a wooden split collet to fit the pipe exterior. Cement emery paper into the collet. Mount the pipe in the lathe, lowest speed, and fix the collet to the pipe end. Clamp the collet so it can't revolve with the spinning pipe and so it can't move axially along the pipe. Turn on the lathe and grind away. Ensure that the ways are protected from the emery grit.

When done with this procedure, carefully remove the pipe from the lathe and throw it as far away as humanly possible. Get a proper piece of copper pipe and proceed with the construction of the boiler.

My biggest concern here is that, with the high heat required for silver soldering, you'll burn all the zinc out of the brass and be left with something too weak to withstand the steam pressure. At best you'll have a dribbler; at worst, a locomotive shaped grenade.

Are the commercial toy brass boilers (e.g. Wilesco) silver soldered? I'm betting they aren't. I'll bet they're put together with some form of soft solder.
 
Hi Bill, thanks for looking.

Instructions say it should take 4 to 6 minutes for the boiler to come up to steam. Then I'm supposed to wait for the timer to have 1 minute remaining (from what I don't know) and repeatedly lift the engine off the track (holding it level) and spin the rear wheels in the forward direction by hand and let it run for a moment.

If the engine runs too fast, then I'm supposed to make sure the wicks are not too high or lift the engine to bleed off pressure.

When the timer's alarm sounds (I'm not sure when it was set) then reset for 20 minutes of loco run time. And top off. After 20 minutes it's supposedly 50% of the water down.

Hm. I think I'll get my son-in-law to run this. Or the other daughter's new beau. Better yet...I'll get them both involved. Yeah.

Obviously the instructions are a bit hit-n-miss. There'll be a lot of learning going on.

I just saw Marv's post...I'll respond to that separately. He makes a good question.
 
mklotz said:
When done with this procedure, carefully remove the pipe from the lathe and throw it as far away as humanly possible. Get a proper piece of copper pipe and proceed with the construction of the boiler.

:big: Yeah. I do wonder. Mainly because I have yet to see an example on youtube or by anyone else using a chrome drain pipe.

See previous post about sanding the ends...still not convinced about the bushings though.

mklotz said:
Are the commercial toy brass boilers (e.g. Wilesco) silver soldered? I'm betting they aren't. I'll bet they're put together with some form of soft solder.

I've wondered that. It just seems that for this kind of model...(Wilesco etc.) that most people (students, schools, etc.) would have used soft solder.

So I'm interested in what people think too.

Now I'm thinking of giving it a go with a drain pipe but some other experimental pieces. If it doesn't go well...then maybe get some 1 1/4" copper pipe.

I'd almost put this aside as unworkable except that I've seen some good examples...some forum members have posted them in this thread.
 
Hi Zee,I think you will damage the chrome plate when silver soldering and as far as I know it will have to be removed from the areas you want to solder.In my humble opinion boilers should only be made from copper and bushes from bronze due to the fact copper has a greater strength and a lot better thermal conductivity and doesn't suffer from the zinc problem Ive experienced commercial brass fittings failing within 2 years use all be it heavy use.If you are not sure or worried about joints remelting on the second heat up why not use different grades of silver solder to assemble the boiler.Remember silver solder usually has a higher remelt temp not like soft solder.If you decide to purchase copper tube try to buy some of the same gauge as you already have as it will have a marked effect on the boilers performance if you go to far away from the designed gauge. Concerning Wilesco products I believe the gas fired toys are hard soldered and the others high melting point soft but correct me if wrong.Hope this makes some sense as I'm not a great communicator.At the end of the day why not have a go with what you have and should it not work out you've only lost a little bit of tube some solder and time and you will learn a good deal .I find silver soldering to be easier then soft.
regards Frazer
 
Zee, maybe write Dave Wimshurst and E. Chris, (pg 2-4, I think) and ask them what kind of solder they used on their brass boilers, and did the plans say what kind to use.

If you solder the ends on the boiler tube first, then do the bushings on top, it's very unlikely you will be able to heat the entire boiler enough while soldering the bushings to cause the ends to fall off. It takes a lot of heat to remelt the solder a second time, and you will only be heating the top of the piece when doing the bushings.

How much is too much clearance? I dunno. I know I've easily soldered brass parts with .010-.015" gaps with 56% silver.

Far as the zinc problem mentioned by Marv, I'm skeptical in this case. Zinc boils at over 1600°. Melts at about half that, but it's alloyed with copper, here. How will it get out? It is true that repeated high heating of brass weakens it by making it brittle, but you are not going to solder it every day. Normally, it's only going to be just above the boiling temp of water. 15 psi, right?

Dean


mklotz said:
Are the commercial toy brass boilers (e.g. Wilesco) silver soldered? I'm betting they aren't. I'll bet they're put together with some form of soft solder.

Most are soft soldered.
Mamod are mostly soft soldered although they have made a few with brass boilers that are silver soldered. As far as I know all Wilescos are soft soldered.
But all Jensens are silver soldered with the except of their really early stuff (1930s) which had rivetted then soft soldered boilers.
I would never recommend making a large hugh pressure boiler from brass but smaller toy ones are ok.
I have seen lots of old brass boilers that have suffered from dezinc that have pinholes in the end caps but never the boiler tube myself and most of these ruined boilers can be traced back to being stored away for years either in damp conditions or with water in the boiler.
I have an 85 year old Bing that I had to make a new endcap for due to someone stealing all the original fitting off it and when I opened up the boiler it was all good inside and since has been steamed several times.
I guess what I'm saying is for small 'toy' boilers running at low pressures that are only steamed occasionally and are emptied after use the brass boiler will last longer than us.
I look forward to seeing your loco running Zee.
 
Deanofid said:
Far as the zinc problem mentioned by Marv, I'm skeptical in this case. Zinc boils at over 1600°. Melts at about half that, but it's alloyed with copper, here. How will it get out? It is true that repeated high heating of brass weakens it by making it brittle, but you are not going to solder it every day. Normally, it's only going to be just above the boiling temp of water. 15 psi, right?

Dean

Dean,

Please don't be skeptical, it's a fact and it's caused by galvanic action as a result of temperature differences between various parts of the boiler as well as the fact that boiler water is seldom pure as it is usually treated with a compound to give a pH around 10.5.

Goodbye Zinc followed by goodbye boiler.

Hope this helps.

Best Regards
Bob
 
Thanks Frazer, Dean, tmuir, and Bob.

Dean...yep 15psi.

Bob...I think Marv (and Dean) was talking about burning the zinc out while you're talking about leaching the zinc. I could be wrong though. I can understand the zinc leaching out and I'm not concerned about that. The current plan is for the loco to run (he said) a few times and then be placed on display. Plans change though.

I reviewed the instructions...they don't specify the type of solder to use. Not soft or hard...just '1/32 solder wire' and used like I do in electronics...that is, heat the parts up and touch the wire to it. (I don't mean electronic rosin-core solder.)

Is the stuff at Home Depot soft solder?


Any solder that is around 1/3 or 1/2 lead is a soft solder. Lead and Tin both melt at very low temps. Tin lower than lead.

Adding silver up to 5 or 6 percent will raise the melt temp about 50 to 100 F, but it will still be a soft solder because of the amount of lead.

Kermit
 
Is the stuff at Home Depot soft solder?

HD sells hard solder via the web but in the store I've never seen anything other than soft solder. Some of the soft solder says "silver solder" on the packaging but, if you check the percentages, it's only 4% or so, thus soft.

This is California though; the situation may be different in Pennsylvania.
 
mklotz said:
HD sells hard solder via the web but in the store I've never seen anything other than soft solder. Some of the soft solder says "silver solder" on the packaging but, if you check the percentages, it's only 4% or so, thus soft.

This is California though; the situation may be different in Pennsylvania.
Same in Texas. Can't buy 'hard' or 'real' silver solder at HD or Lowes in-store. Deceptively-advertised soft solders are available.

 
Back
Top