Brian builds a Corliss

Home Model Engine Machinist Forum

Help Support Home Model Engine Machinist Forum:

This site may earn a commission from merchant affiliate links, including eBay, Amazon, and others.
Testing it like that will drive the piston right to the ends of the cylinder, you may be blocking the passage at one end, quite likely given how far in from the end they are

Or as the engine was tight and you loosened it up by" motoring" the piston would only have been moving by the stroke length and not right to the end where it will still be tight
 
Clever ideas Jason, but maybe that would explain the need to release it at one end, but not the reason for a slow stroke...? And if it was a tight piston or ring it would be slow both ways....
I think?
K2
 
Jason has good ideas. He's been playing this small engine game for quite a while. I think my problem has more to do with the operation of the valves than anything. Tomorrow I'm going to pull the cylinder apart and try a new/different way to seal around the piston rod. Chris Rueby over on Model Engine Maker has a way to seal the rod that I haven't tried before, and if I succeed using his method, then I will try to tweak the valve timing to give me better results.
 
Seal it with gland packing that is why it's made that way, detailed reply on MEM

Steamchick, Brian's engine was tight and has been motored for a few hours. The problem with this method is it only loosens things up in one position or only get bedded in for the distance they are moving, take the engine apart and things will move and quite likely go back to being tight. The motoring will also wear away metal where there is contact, again if things move you then could end up with more clearance. Better to get a good fit on each part as it is made so you know where there may be a tight spot then there is no need for motoring and engine should run straight away.

This engine has the steam passages about 1/4" in from the ends of the cylinder, 1/8" spigots on the end covers so piston being run up and down out of the engine will move the whole length of the cylinder and cover the passages and go beyond the bedded in area where it was motored which is 1/4" from the covers. Taper in the cylinder or non concentric piston rod hole in rear cover could mean piston is tighter at one end than the other
 
Thanks Jason. I wholeheartedly agree that correctly designed and made parts make an assembly that runs straight away. That was what we did in industry, all my working career. But my experience of many "model" plans (even companies like Stuart!) Have many "corners cut, or not well designed" so square pegs have to be "adjusted" to fit their matching round holes.
I am making a water pump and the plans leave a lot to "interpretation"! And everything is fully adjustable, without setting advice, so it needs a bit of nowce to make it work.
When I designed High Voltage Switchgear, the 2m long insulators had manufacturing tolerances of plus or minus 2.5mm. (Because they were ceramic, machined, but with cast iron machined flanges glued on with a bitumen mix.... bolt 3 of these together with 1/4 thick gasketing, and the accumulated tolerance is more than 1 inch variation.... so the mechanical linkage needed plenty of adjustment. I arranged this adjustment to be made and locked before the last joint was made, so performance was enhanced by 2 precisely set sub-assemblies being joined. I even designed the setting jigs. No further setting required! But you don't normally get that on "model" plans.
I sympathise with Brian, as he usually does his own design from scratch. So he works out how to set things within the design process. This time, it seems he is adapting another's design, so many gaps in "the knowledge". But that is half the fun, and why we like to chat about it.
Cheers
K2
 
Yes Charles, I did notice that as I watched the video. I corrected it after the video was made. Thank you.---Brian
 
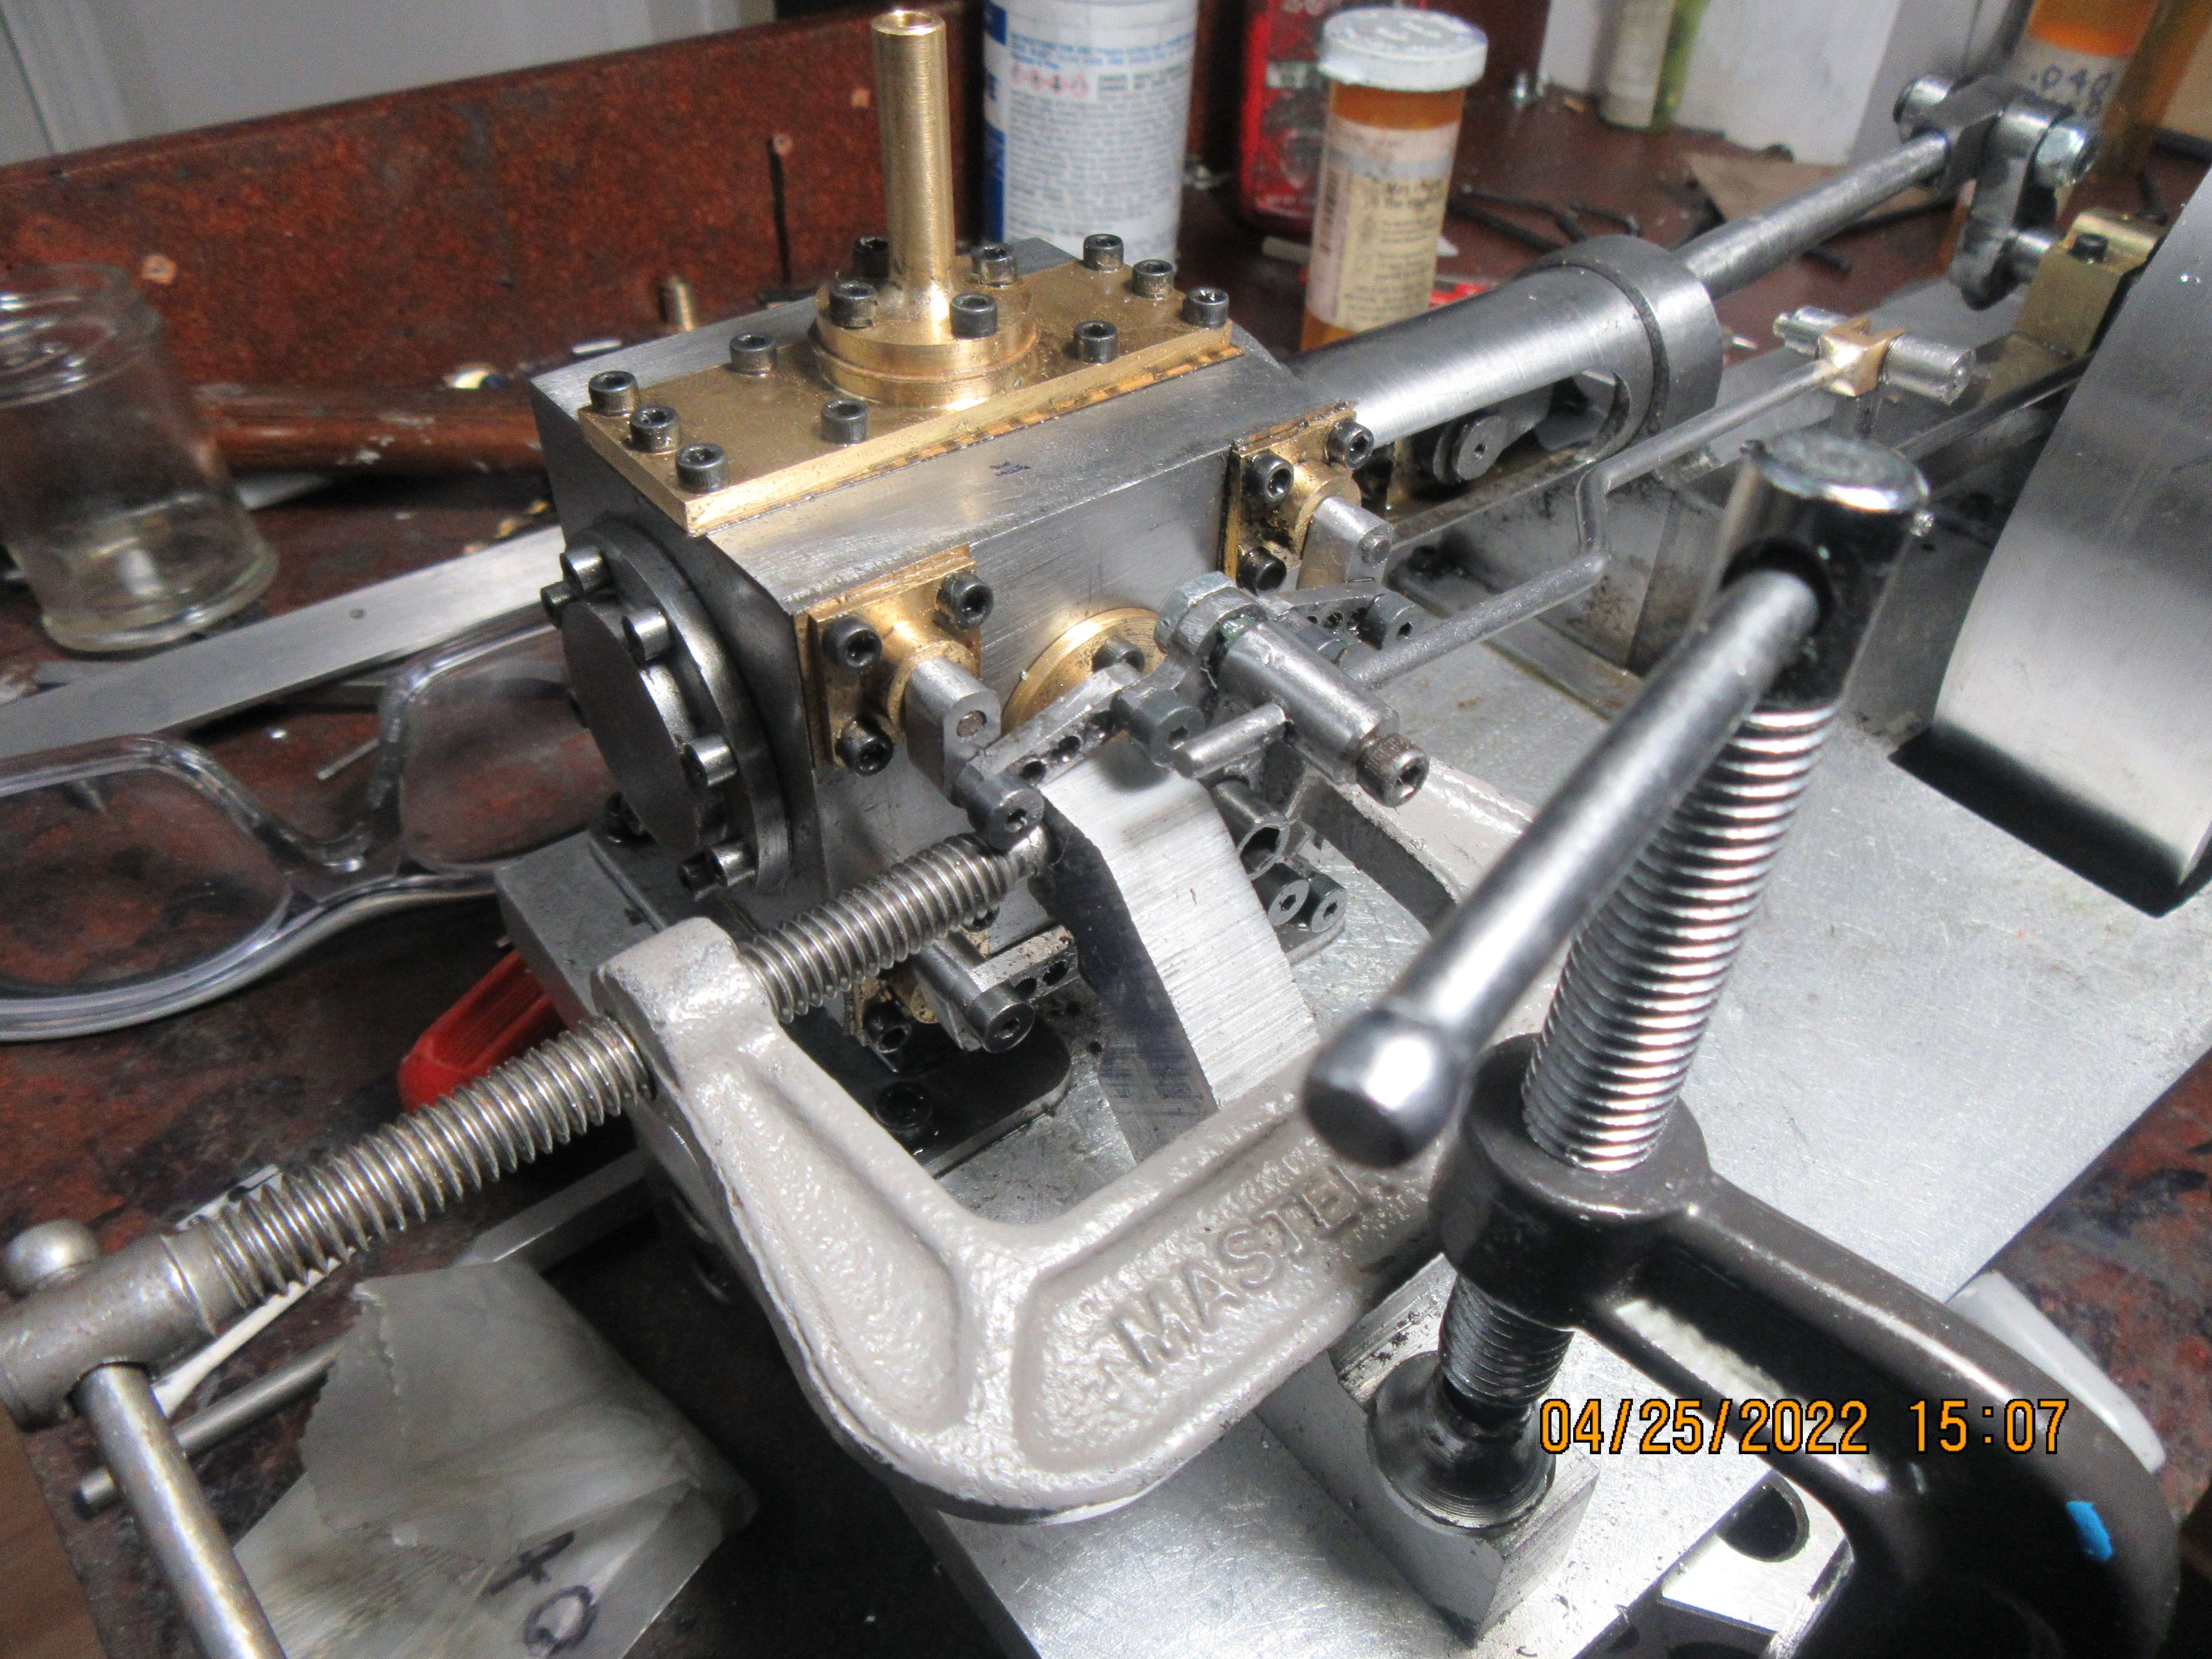
After a couple of weeks off, dealing with my achy knees, I finally found some time to make different valve levers and fiddle with the engine some more. That first video I posted two weeks ago was running at 60 psi. After much fiddling the engine will run quite happily now on 20 psi. I don't have the rear covers and gaskets mounted on the far side of the engine to seal off the rotary valves, and when they are added I think the engine will run on less than the 20 psi as shown in this video. If my arthritis leaves me alone, I will work on painting the engine and making a wooden base for it.
 
Delightful! Well done Brian!
Hope the aurthur-itus keeps away... Have you tried avoiding ALL foods with Acids in them? Fruit, Whisky, Wine, Cheese, etc? Means you have to drink Gin and Beer, and eat Cabbage, Carrots and Beef with roast potatoes, instead of Beef Bourguignon in Tomatoes!
But it works for me....
K2
 
Two grandchildren came and raked my yard today. I helped a little bit, and my wife helped the kids rake up 18 bags of oak and maple leaves. There is still a couple of hours raking left to do, but they will do that some evening this week. As for the engine--I can not get the levers to grip the rotary valve-shafts tight enough---they slip and throw the valves out of time. It seems that no matter how well I get things set, the engine will start and run slowly, but if you rev it up very much, the levers slip and the engine gets out of time and won't run. I think I will make up one more set of levers, get everything set correctly, and then silver solder the levers to the end of the rotary valves. This may sound rather extreme, but if I do that, I can guarantee that they aren't going to slip on the shafts.
 
Brian, you may have to set them so it runs as well as you can get it to, then pin the levers to the valves.
Cheers
Andrew
 
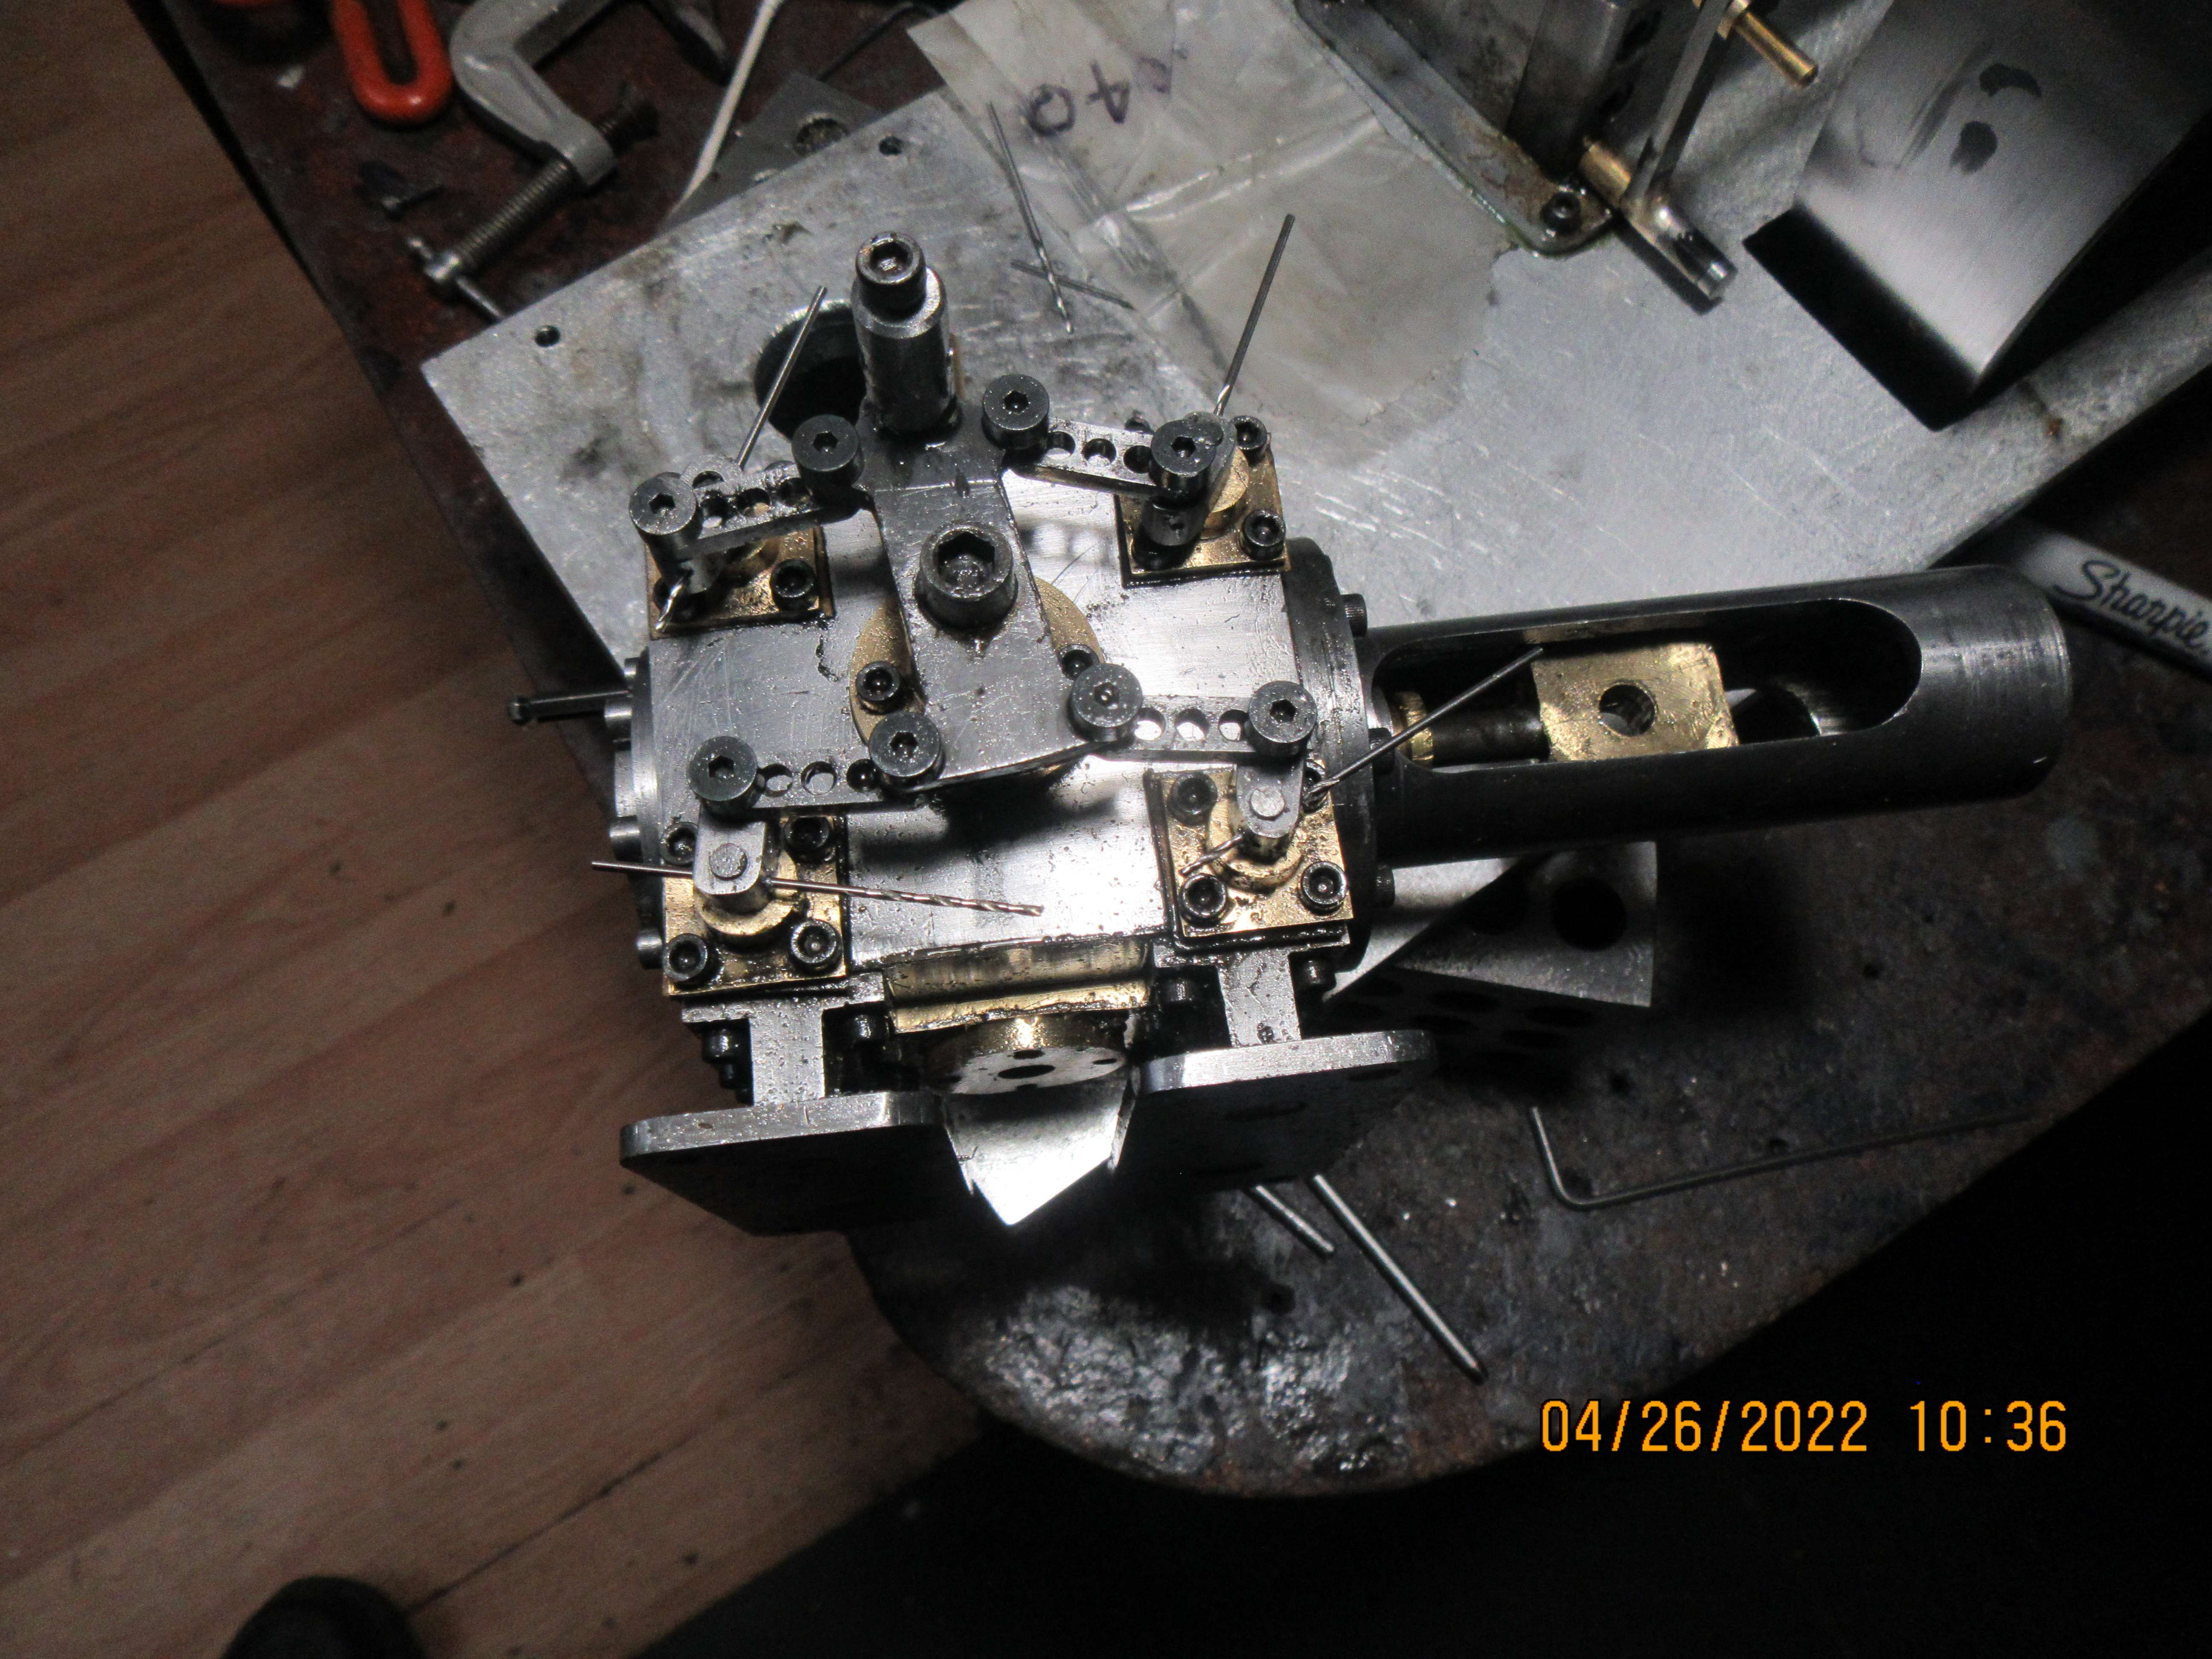
The rotary valve shafts are not too tight. They rotate freely by hand. I have made two sets of "clamp bolt style" levers. The first levers had very little thickness on the threaded side, and the threads stripped out before they could draw tight enough to clamp the 1/8" diameter valve shafts securely---they slipped. The second set of levers were thicker in the threaded area, and still slipped on the valve shafts. Today we have a third set of levers, and they are not "clamp on" style. They will be pinned in place with a 0.039" diameter steel rod which passes thru them and the end of the valve shafts. This is to give the correct angular position. Then things will get torn down and the new levers will be silver soldered to the valve rods. The intermediate lever which the valve actuator rods attach to will get a hub welded to one side to keep it from pulling sideways during it's operation.
Hr6Ye4.jpg
 
This is a very nasty picture of the levers and valve shafts cross drilled and pinned. Guarantee no slippage now. The drills are 0.040" diameter-they will be replaced with 0.039" diameter shafts, cut to length and then silver soldered as a final operation.
qMFUe1.jpg
 
Hi Brian. Pinning should be totally secure, although the hole does weaken the shaft considerably. But there is so little force (bending and torque) on the shaft, I can't see you having problems with just a pin, so have you considered just trying a tight pin secured with a drop of Loctite, then at least you have an option of checking security with a test build and a run before committing to silver soldering? Alternatively, slightly peening over the ends will secure a pin (like a rivet, but just enough to secure it? In fact, if thesteel pin is not ahard grade, it may expand slightly during a peening operation which will also eliminate any slack. I have a small compressor (inflates car tyres) that runs off a small electric motor, and that is how the motor shaft and compressor shaft are connected. Simply, the pin is a press fit.
When I looked at my Unimat lathe pulleys (One takes full torque from the motor) they are sliding fits on their shafts, and at the 5mm dia. motor spindle there is a 2mm pin through it (just-tight fit) and the ends are locating in a related groove in the aluminium pulley. This has had decades of use and isn't worn-out, so the pin can take the torque, and the pulley can cope with the load from whatever reaction there is from the cutting load, so maybe that is all you really need? The original motor ran between 4000rpm free load, to ~2500rpm loaded. I realised this different application is basically a "DC" load with ripple, not an "AC" load like your valve oscillation (torque positive and negative through a zero-point). But the valve is purely rotating so the only forces are against the inertia and friction involved. Or am I missing something here?
Cheers!
K2
 
Pinning should be totally secure, although the hole does weaken the shaft considerably. But there is so little force (bending and torque) on the shaft, I can't see you having problems with just a pin, so have you considered just trying a tight pin secured with a drop of Loctite, then at least you have an option of checking security with a test build and a run before committing to silver soldering?

Thanks, K2.

Obviously I'm not Brian, but this is helpful to me in general terms. I'm not building a Corliss.

One of the great things about HMEM is that we can see new solutions for problems we all come across. I don't have a problem with Brian's solution, but I couldn't implement the silver soldering - at least at the moment. I have used red Loctite in some applications where it really holds up well. I've even tried to break it down with a small torch and been unsuccessful. In this situation, I'd be inclined to try it.


Bob
 
Guys
Do any of you use tapered pins? I find these very secure and lock the parts together without any play. Down side is that a tapered reamer is needed and great care needs to be taken with reamer depth. They just seem to work!
Any views?
Mike
 
I have tapered reamers, because my Dad used them on his models. But I have not searched for tapered pins (yet).
Used reliably for centuries in wood, metal and other proper engineering materials. (Not sure about plastics...).
K2
 
This is a very nasty picture of the levers and valve shafts cross drilled and pinned. Guarantee no slippage now. The drills are 0.040" diameter-they will be replaced with 0.039" diameter shafts, cut to length and then silver soldered as a final operation.
Hi Brian,
It might be my clock making background, but have you considered tapered pins for this application?

Cheers,
Stan
 

Latest posts

Back
Top