.....Well it sounded like a cool 8) solution to just press fit........mussta came to me in a dreamBrian Rupnow said:Dave---Aint no way in Hell you pressed a hub with a 1/4" bore onto a 5/16" axle!!! RadfordC--You may very well be right. Even after running for an hour, the piston is very tight moving in the bore of the cylinder.
You are using an out of date browser. It may not display this or other websites correctly.
You should upgrade or use an alternative browser.
You should upgrade or use an alternative browser.
Anybody want to guess---
- Thread starter Brian Rupnow
- Start date

Help Support Home Model Engine Machinist Forum:
This site may earn a commission from merchant affiliate
links, including eBay, Amazon, and others.
Dave---You're right. It is only available with a 1/4" bore. Ah well, no fear.--its made of stainless, not sintered metal, so I should be able to drill and ream it to 5/16".
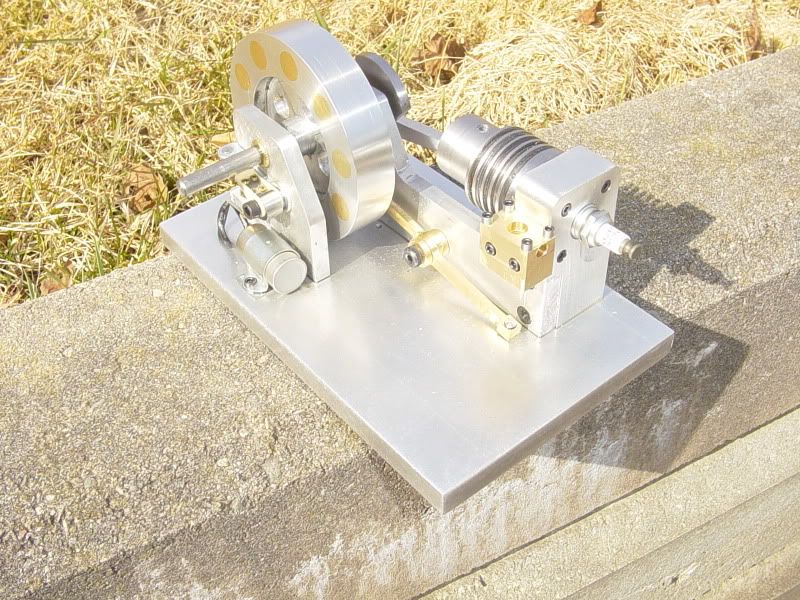
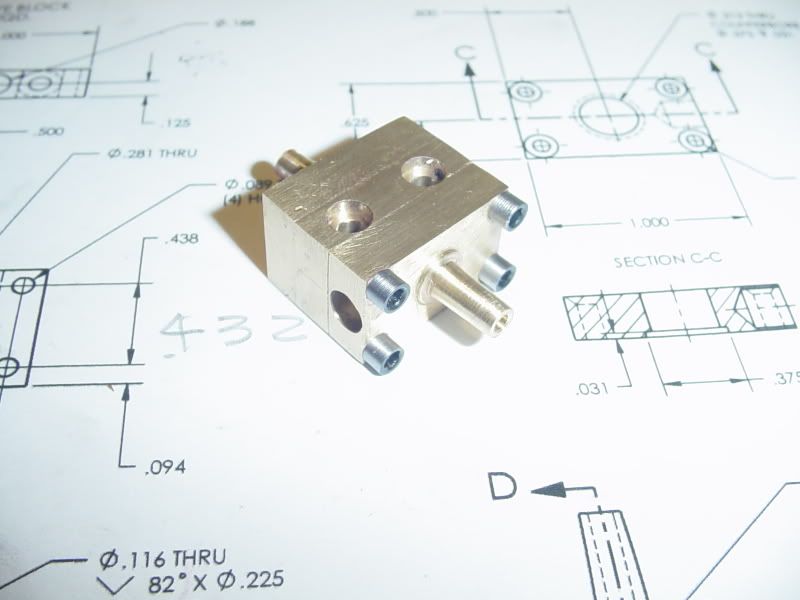
For this mornings offering, we have a brass valve body. These pieces are not very big, and I changed the fasteners from #2-56 to #5-40, so it gets pretty tight. You will notice that I have turned the heads on the #5 shcs down so they don't hang over the edge. ;D ;D Maybe later this weekend I will build the valve guides that install in the block.

crankshafter
Well-Known Member
- Joined
- Jul 17, 2007
- Messages
- 367
- Reaction score
- 24
Brian.
Oh isn't she nice. ;D
That clean alu/brass is just beautiful.
CS
Oh isn't she nice. ;D
That clean alu/brass is just beautiful.
CS
No, I don't think I'll do Cookstown again. I wanted to try it once and see how it went, but really, there wasn't that much interest shown in the little engines I have. Like many other things, I had to try attending a show and exhibiting at least one time, but I don't think I would do it again.---Brian
$99.90
$109.90
5PCS/Lot ISO30 ER32-60 Balance Collet Chuck G2.5 30000rpm CNC Tool Holder Stainless Steel Nickel plated With Pull Stud Woodworking Machine
david PA system

$40.02
$49.99
Becker CAD 12 3D - professional CAD software for 2D + 3D design and modelling - for 3 PCs - 100% compatible with AutoCAD
momox Shop

$53.00
$59.99
Keetopteep Hot Air Stirling Engine Motor Education Model Electricity Power Generator LED Lights Kit Teaching Stirling Engine Kit for Adults Desktop Educational Toy Gift for Engineers (KTP01)
wanrongxianzhisuojiatingnongchang
![DreamPlan Home Design and Landscaping Software Free for Windows [PC Download]](https://m.media-amazon.com/images/I/51kvZH2dVLL._SL500_.jpg)
$0.00
DreamPlan Home Design and Landscaping Software Free for Windows [PC Download]
Amazon.com Services LLC

$54.46
Amana Tool - 46280 CNC 2D & 3D Carving 6.2 Deg Tapered Angle Ball Tip x 1/32 Dia x 1/64
Express Tool Supply

$443.98
TM NEXDYNAMI AT29618 Water Pump Compatible With/Replacement For John Deere 1020 1520 2020 300 301 400 401 440 440A 480 AT29618
VIVID MARKET CORPORATION

$39.99
$49.99
Sunnytech Low Temperature Stirling Engine Motor Steam Heat Education Model Toy Kit For mechanical skills (LT001)
stirlingtechonline

$519.19
$699.00
FoxAlien Masuter Pro CNC Router Machine, Upgraded 3-Axis Engraving All-Metal Milling Machine for Wood Acrylic MDF Nylon Carving Cutting
FoxAlien Official
SAM in LA said:Brian,
What a clean engine.
Looks like you are getting a break from the rain/snow.
Thanks for posting, I really enjoy reading along with your builds.
SAM
Sam--Its a gorgeous day here today. Snow is all gone, temp. is about 77F with beautifull sunshine. Wife and I spent 2 hours setting out on our back deck just enjoying the first real warm day we've had.
Time for a (probably dumb) question. How do I go about putting a 45 degree valve seat in the bottom of a 0.219" bore, as called for on the Webster drawings? All I can think of at the moment is to regrind a drill to a 90 degree point (and I would have to do that by eye, which is pretty 'hit or miss"---or to buy a 90 degree countersink IF I can get one small enough to fit into a 0.219" hole. I don't want to get into a whole lot of specialized tool building here, but right now I'm kind of pooched for ideas.---Brian
Belay that last question----It really was dumb!!! I was just studying the drawing of the valve, and I see the valve head is 0.25" diameter.---Doesn't fit into 0.219 dia. hole ---HUH---Looked at drawing again---45 degree angle is at surface, not down in the bottom of the hole.
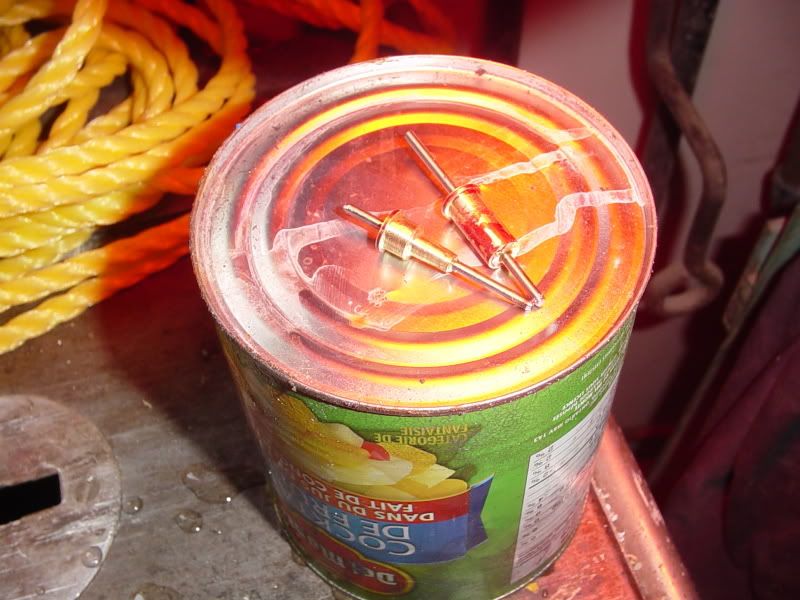
There is a right way and a wrong way to do everything!!! Here is the perfect example, laying on an overturned tin can, basking under the glow of a heat light. The valve guide without the taper on it was done first. I started with a piece of 1/2" brass round rod, and thought---The first diameter I turn should be .312, to fit through the valve body--that way I can keep checking for fit, untill its perfect---and I did. Then I stepped it to 3/8" diameter, and was able to try it for fit also in the valve body counterbore.---untill it was a perfect fit. Then I drilled and reamed a 0.094" dia hole 1" deep in the end of the rod while it was still in the lathe. About then, The light came on, and I realized that if I but the taper on it, I wouldn't have anything to hold onto when I cut it off and flipped it around in the chuck to put in the counterbore and the 45 degree valve seat.---So I didn't put the taper on it. Then after putting in the conterbore and the valve seat, I realized I had no way to hang onto it to machine the taper on it.---So---right now its loctited to a piece of .094" cold rolled rod---Hopefully I will be able to put the rod in the chuck and finish machining the taper on the outside of the brass, then knock the rod out.-----So, why is the one with the taper there also----Well, when I machined it, I used a different process that let me do all the machining steps in their correct sequence---but I couldn't try it for fit untill I parted it off the 1/2" rod.---And when I did,--SURPRISE--The part at the end of the taper isn't .312---its .315" diameter!! So it to is loctited to a piece of .094 cold rolled so I can chuck it up and turn .003 off the diameter so it will fit where its supposed to. I'm sure that the second one was at least CLOSER to the right way!!!

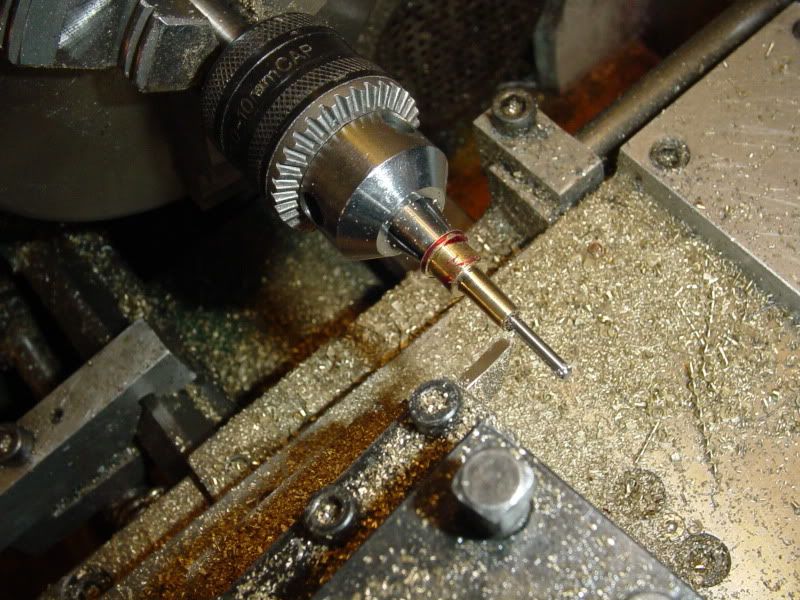
And once again, good triumphs over evil----After setting up under the heat lamp for 15 minutes, I was able to mount the .094" rod in the lathe chuck, turn the appropriate taper on the o.d. of the guide, and save the day!!! (What???-Doesn't everybody use their cut off tool for turning??)

Brian, Your problem is obvious. Your Fruit can has a foreign language on it.Brian Rupnow said:There is a right way and a wrong way to do everything!!! Here is the perfect example, laying on an overturned tin can, basking under the glow of a heat light.

SAM
U. S. of A.
Vive Le Quebec Libre---Or something like that----
All's well that ends well----Maybe tomorrow I'll get a piece of 1/4" stainless and make some valves. Does anybody know---Can I cut stainless with HSS tooling? I haven't done that before.

Brian, try some 416.
If you can sharpen a tool well, meaning really sharp, you should do fine with HSS.
Don't dally with stainless steels. Once you start a cut, keep it going. If you pause during a cut and let the tool rub, it will have a tendency to work harden that spot. 416 and 303 are pretty decent to cut, though, and it you follow through smoothly with your cut, it won't give you any problems.
I'm glad your brass valve bits came out well. You must be living right, stacking a couple of three jaw chucks like that and not having run out give you fits.
Dean
Brian, just wanted to let you know that I have been looking, copy paste and not saying anything, guess I should have, I really enjoy your work attention to detail and the drawing, that part alone is so neat, that is what I call really expressing your self, want to thank you so much for the learning experience, I hope you get done before you take off on your trip, love the ride, thanks again for your hard work, Lathe Nut
My local supplier only has 304 stainless round stock. I think I will make the valves from mild steel I have lots of 1/4" cold rolled in stock. Anybody see a problem with that?
- Joined
- Aug 25, 2007
- Messages
- 3,890
- Reaction score
- 715
Brian,
I've never used mild steel, but have used drill rod for the valves on my IC engines. I wouldn't be afraid to use mild steel. Those valves are never going to get real hot and there should be enough oil to keep things from rusting.
Chuck
I've never used mild steel, but have used drill rod for the valves on my IC engines. I wouldn't be afraid to use mild steel. Those valves are never going to get real hot and there should be enough oil to keep things from rusting.
Chuck
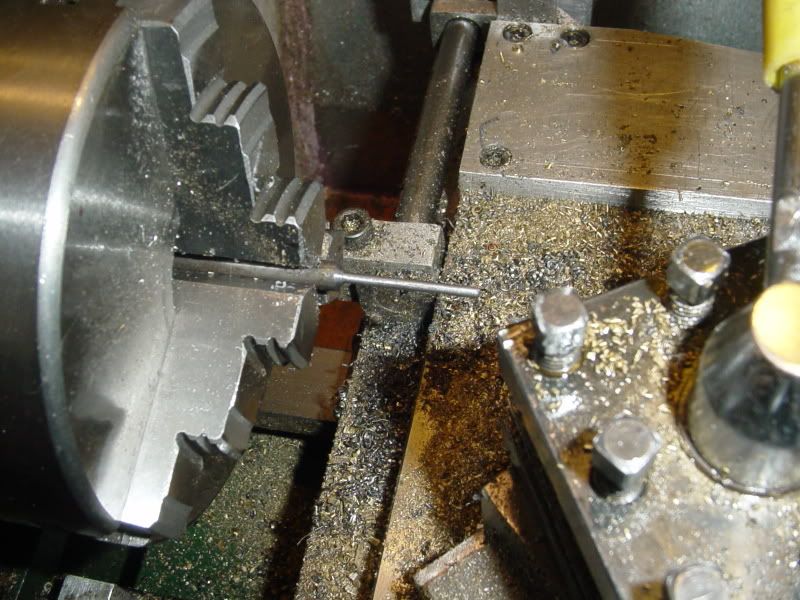
Thanks Chuck---Mild steel it is!!! Pretty straightforeward turning, but 1" is a lot of "stick-out" unsupported from the chuck. Very light cuts, and going back over 5 or 6 times without changing the depth of cut to take the material out of the free end which wants to deflect away from the cutter. I set my micrometer for .094 and locked it, and just kept taking miniscule cuts untill it fitted over the valve stem. When you get that small in diameter, you can't go by the feed dials because of the deflection in the part, so you just keep advancing half a graduation at a time and then stop and measure, untill you get to where you need to be. Then swing the compound rest around to 45 degrees to do the tapered bit.

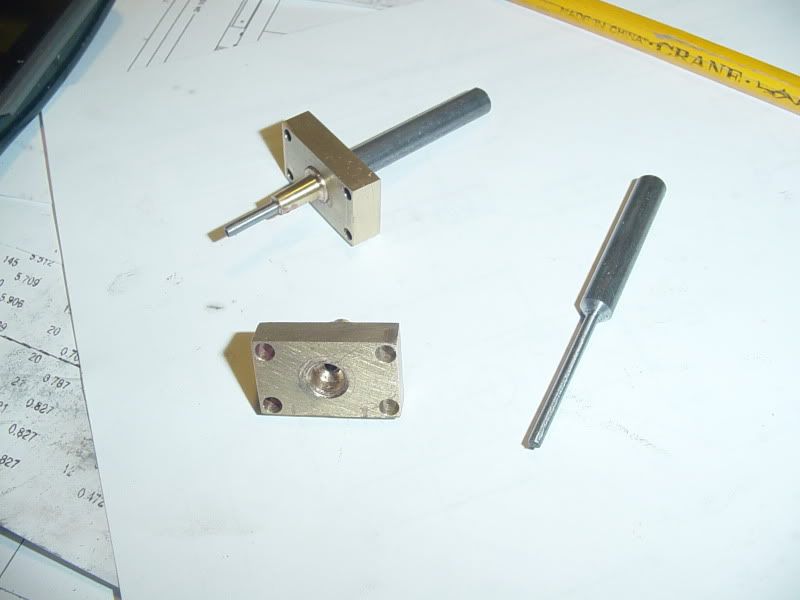
What I really like about this is that you can then cut the shanks as long as you want, to be used as a "handle" when lapping the valve to the seat with compound. Then after lapping to an air tight seal, I can trim the valves to the correct length. I may even just use the bandsaw for that, because I don't want to mess up the valve stems by chucking them in my lathe, and no one will see the head of the valve after assembly anyways.

Similar threads
- Replies
- 14
- Views
- 1K
- Replies
- 30
- Views
- 2K
- Replies
- 18
- Views
- 2K


![TurboCAD 2020 Designer [PC Download]](https://m.media-amazon.com/images/I/51UKfAHH1LL._SL500_.jpg)


