A Waterwheel Tale----

Home Model Engine Machinist Forum

Help Support Home Model Engine Machinist Forum:

This site may earn a commission from merchant affiliate links, including eBay, Amazon, and others.

Brian Rupnow

Design Engineer
Project of the Month Winner
Joined
May 23, 2008
Messages
15,298
Reaction score
8,577
Location
Barrie, Ontario, Canada
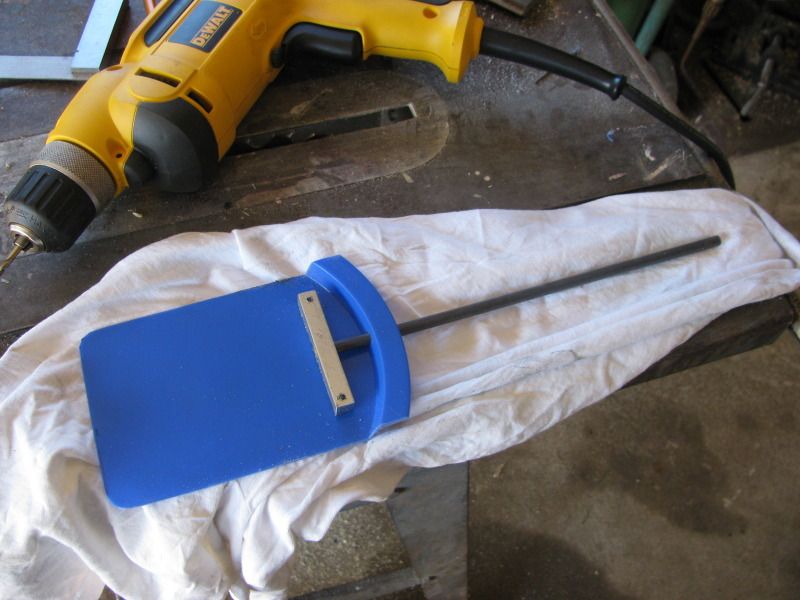
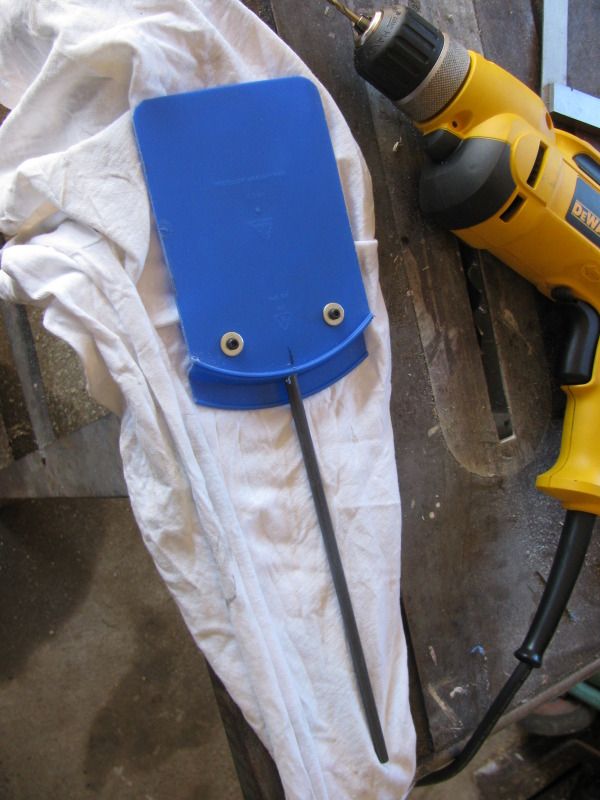
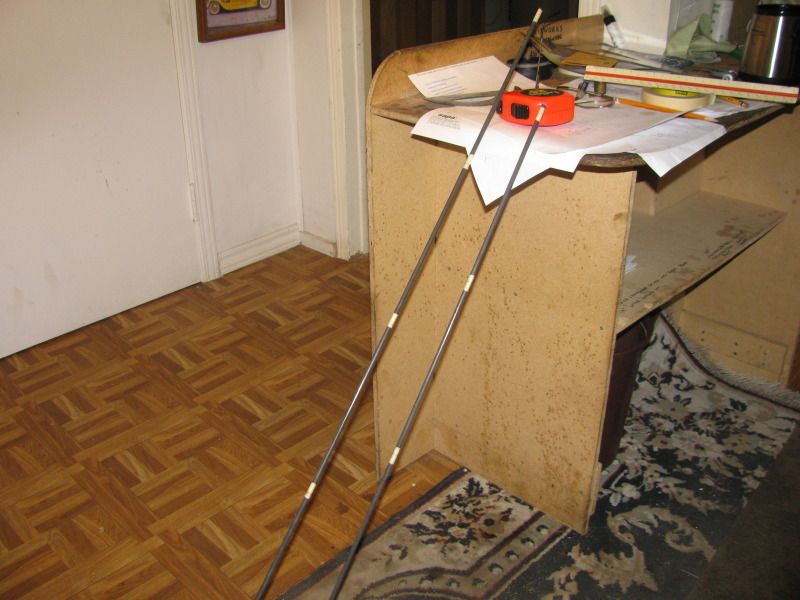
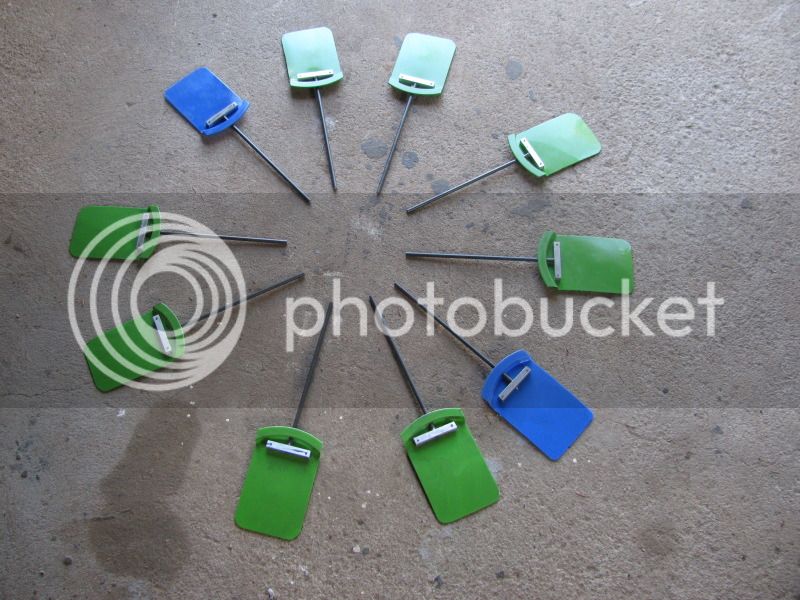
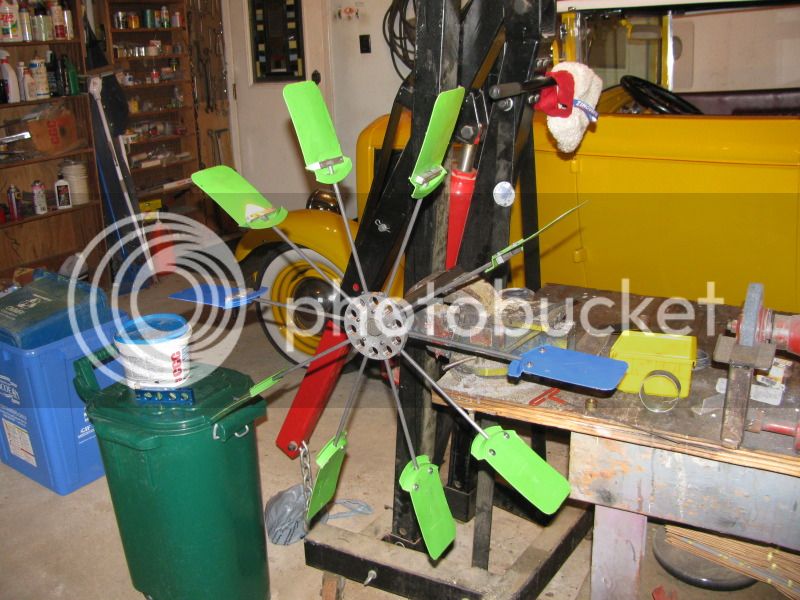
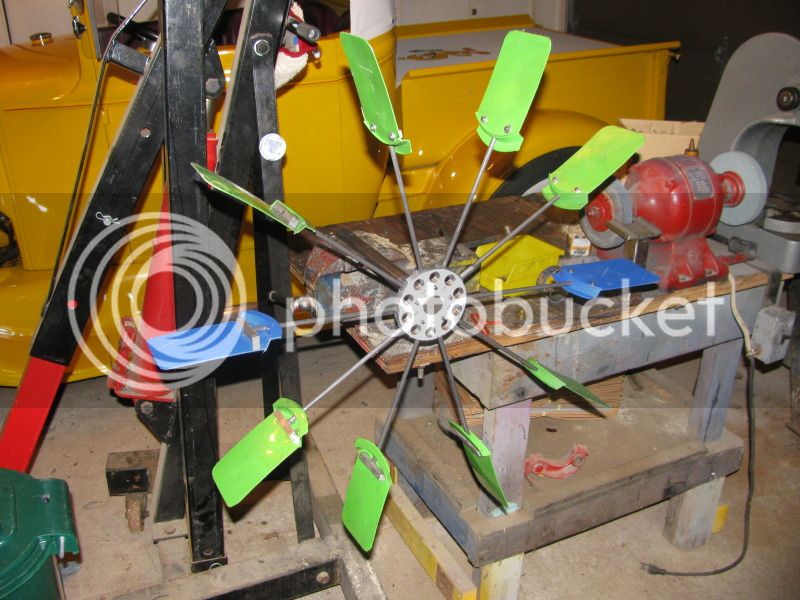
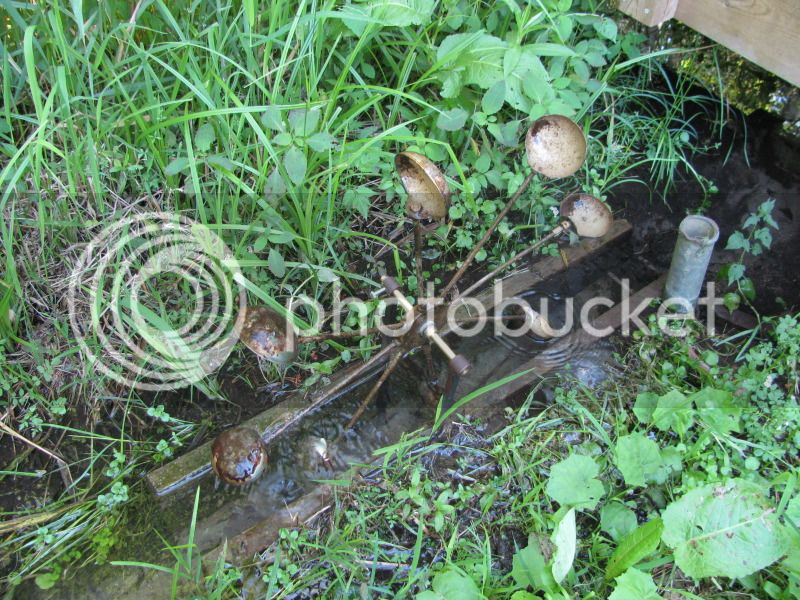
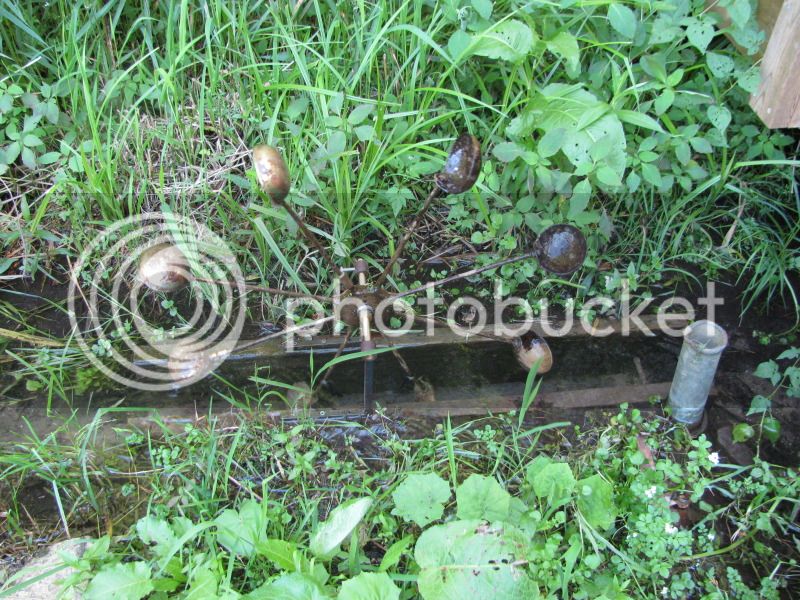
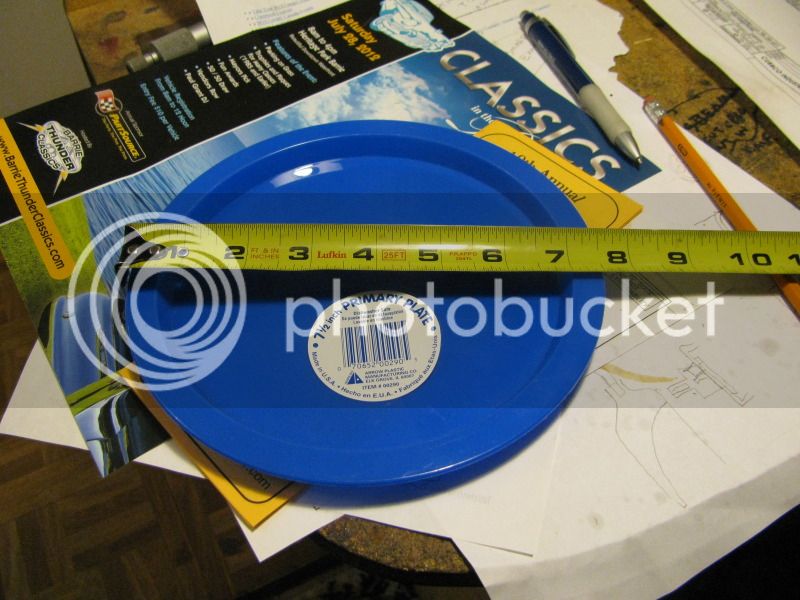
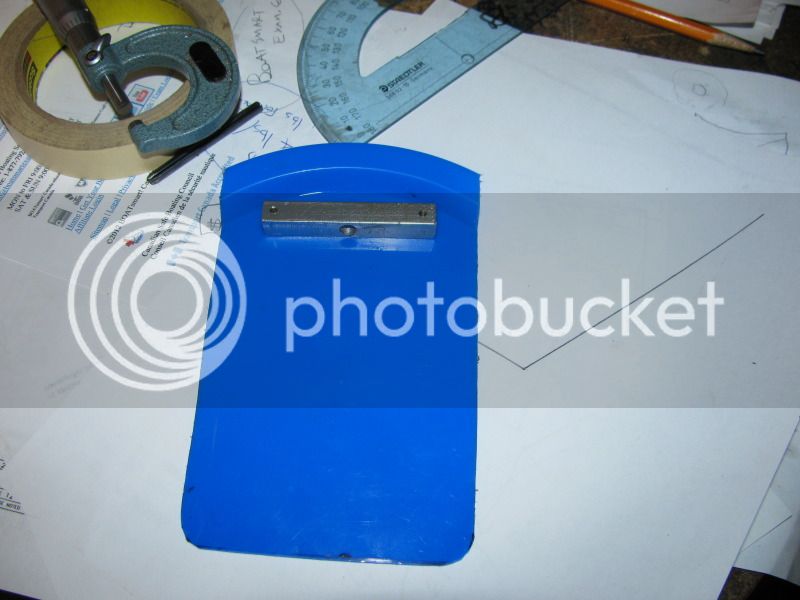
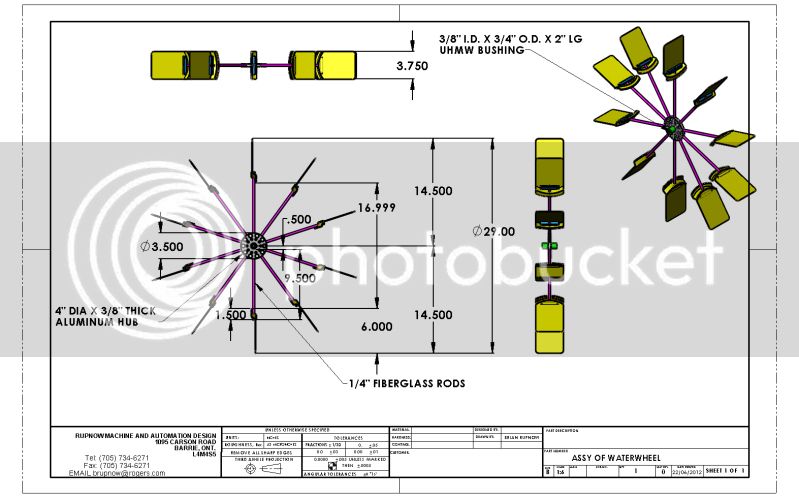
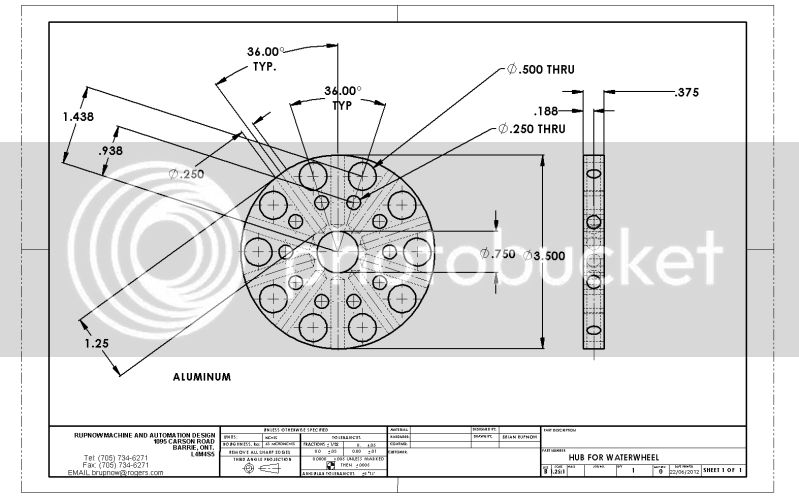
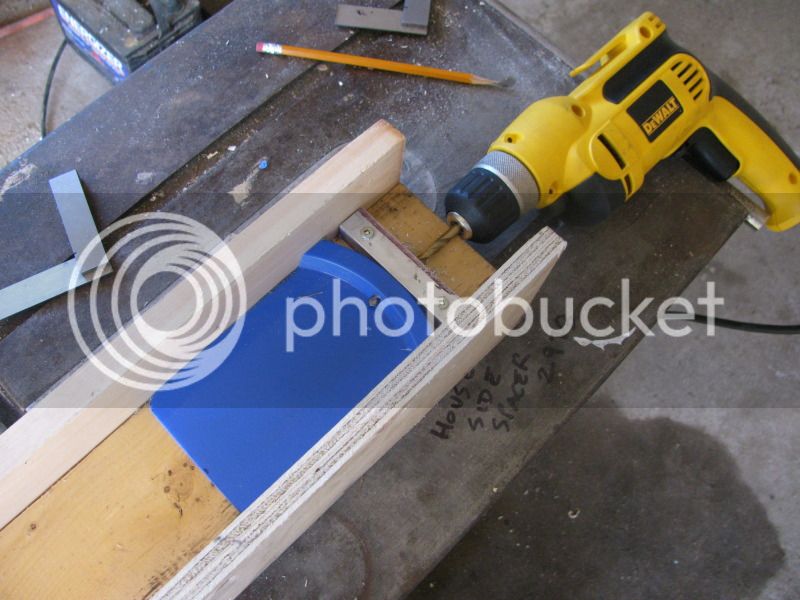
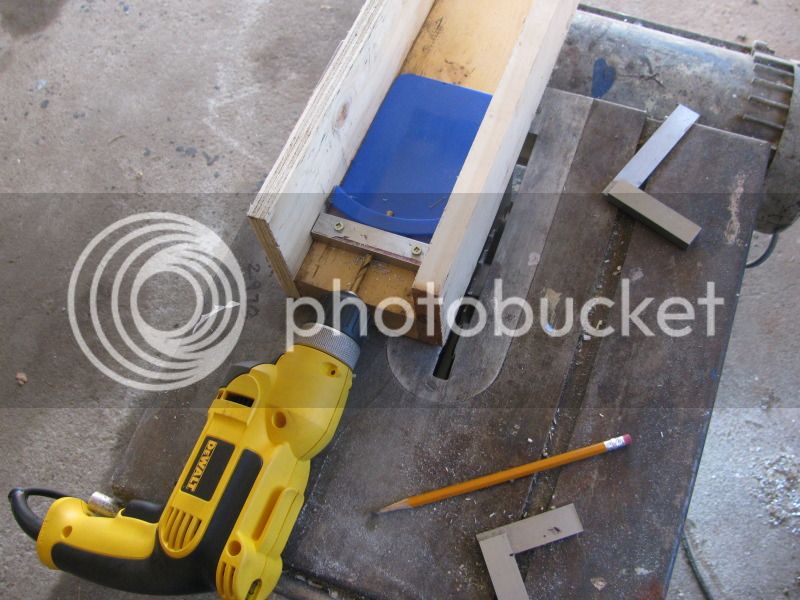
Four years ago when I first bought my lathe and mill, one of the first things I built was a waterwheel to run in the spring fed stream that wanders through my back yard. It is only a small stream, with just enough flow to turn the wheel, with virtualy no extra capacity to power anything. The wheel has turned faithfully for four years, but due to the unusually high mineral content of the water, I get a severe buildup of minerals on the waterwheel, and as it gets heavier and heavier, it turns slower and slower, to the point where I have to bring it in and dismantle it and soak it in CLR to get rid of the deposits. The "arms" are made from 1/4" diameter aluminum rod, and the "paddles" are the ends cut off stainless steel soup ladles. The soup ladles are 3 1/2" in diameter, and the flume box that the wheel runs in is 4 3/4" wide x 8 1/2" deep. (And that holds the entire flow of the stream). As the soup ladle enters the flume box, it is submerged approximately 2 1/2" below the surface of the water when the arm which supports it is vertical. The current waterwheel has 8 spokes at 45 degrees. My intent is to redesign the waterwheel and make the arms from 1/4" fiberglass (which weighs about 62% of what the aluminum arms weigh). The new paddles will be made of plastic and be 3 3/4" wide and a full 6" long, to take better advantage of the water flowing through the flume box. I will take pictures and do a bit of a write up as I proceed with this magnificent feat of engineering, so welcome along for the ride.----Brian
WATERWHEELPICS002.jpg

WATERWHEELPICS001-1.jpg
 
Yesterday I drove down to Everett and purchased an eight foot length of 1/4" fiberglass rod from a fellow who makes telecommunication antennas. then a hunt through the local Walmart yielded a 7 1/2" diameter plastic plate which was made of heavy enough material that I thought it would make decent paddle material. It has to be sturdy but lightweight, and strong enough to withstand the pressure of the water without flexing.
WATERWHEELPICS001.jpg
 
A fit of bandsaw and scissors work yielded a "paddle" 3 3/4" wide x 6" long, and I scrounged around in my junk bin untill I found a piece of aluminum bar 3/8" square x 2 1/2" long. I will post more as this develops.
WATERWHEELPICS003.jpg
 
And in the interest of lighter weight and more power, this waterwheel will have 10 arms and a hub drilled full of lightening holes----
HUBFORWATERWHEEL.jpg
 
Since I will have 10 "paddles" and they all have to have a hole in the same spot, a simple wooden jig and aluminum drill guide ensures that they all get the hole in the same place.
paddleandarm002.jpg

paddleandarm003.jpg
 
Using the same jig, the fiberglass rod is inserted thru the drill guide and thru the 3/8" square aluminum. A measurement is taken from the end of the fiberglass rod to the end of the blue paddle, and a drill small enough to pass thru the #5-40 threaded hole is drilled thru the blue paddle to mark where the clearance holes have to go. Then the paddle and fiberglass is removed from the jig and a 0.128" drill is ran thru these previously marked holes.
paddleandarm005.jpg
 
And "Hey Presto" we have one paddle and arm assembly. The jig should ensure that all 10 arms end up the same.---And Oh Yeah, the fiberglass rod is held in the 3/8" square bar and the hub with two part epoxy.
paddleandarm006.jpg

paddleandarm007.jpg
 
Er 16.999". Are you sure? Nice water wheel. Should last a life time :bow:
 
;D Yeah, at 17" it would bottom out in the creek! Thm:
 
16.999???? sometimes my computer does some strange "rounding off" In the picture is a little trick I learned a long time ago for cutting fiberglass rods to length. Wrap a couple of thicknesses of masking tape around the place you want to cut. When you cut through at these points with a hacksaw or bandsaw, the tape keeps the fiberglass from splintering. Same thing applies to house doors that have a veneer finish on them---a double layer of masking tape over the cut line will keep the veneer from splintering and pulling away from the body of the door. I know that not many people are going to be building waterwheels, but everybody that owns a house is going to have to trim a door bottom or top sooner or later.
cuttingfiberglass001.jpg
 
So there we have it gentlemen. A short, sweet, succesful project with just enough machining content to make it worth posting.-----Brian
 

Latest posts

Back
Top