
You are using an out of date browser. It may not display this or other websites correctly.
You should upgrade or use an alternative browser.
You should upgrade or use an alternative browser.
3cc Diesel - My first ICE
- Thread starter Maryak
- Start date


Help Support Home Model Engine Machinist Forum:
This site may earn a commission from merchant affiliate
links, including eBay, Amazon, and others.


Maryak
Well-Known Member
- Joined
- Sep 12, 2008
- Messages
- 4,990
- Reaction score
- 77
Well another day almost down the gurgler on the model front.

Sometimes, with some people, the only thing their head is for is to keep their ears apart

Enough, lets talk about important things like model engines
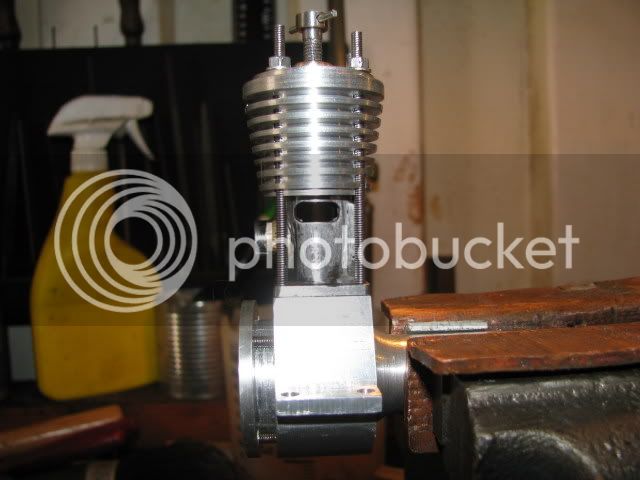
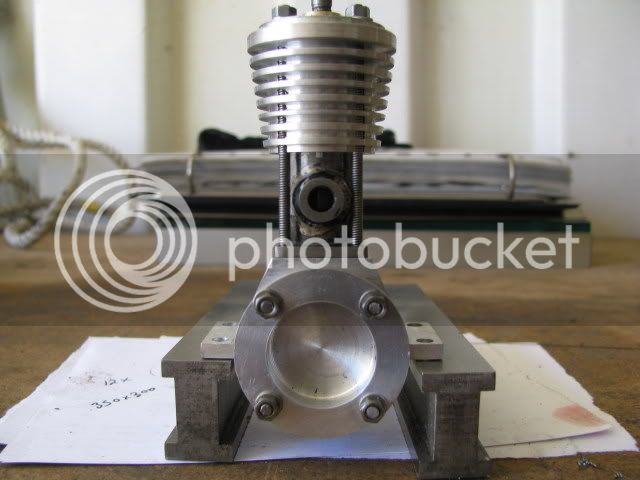
I did manage to get the engine assembled

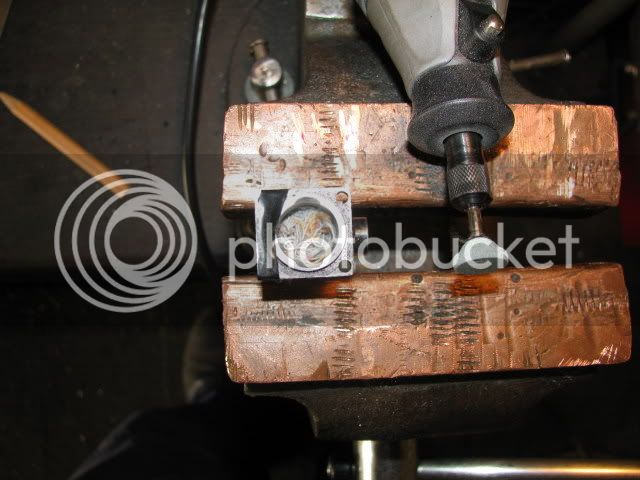
Drilling the mounting holes in the crankcase lugs.
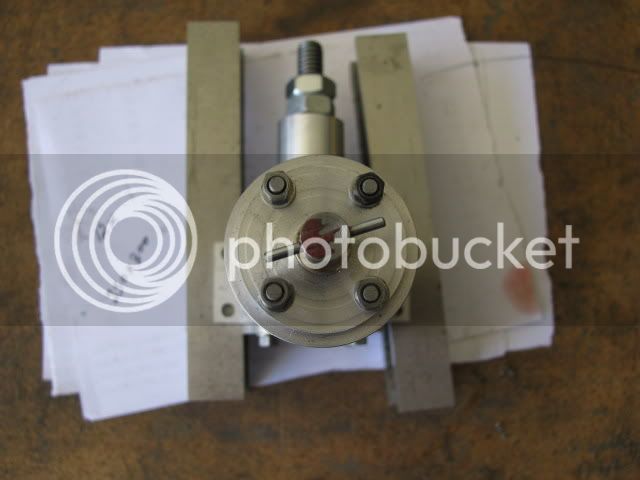
The crankshaft and holding down bolts.
Next the piston assembly.
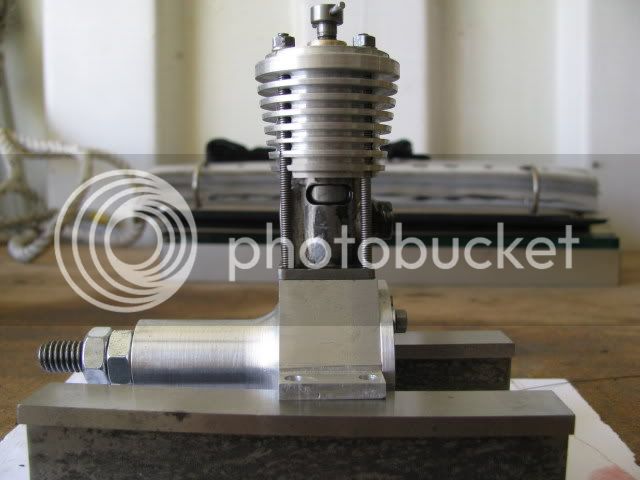
Now its starting to look like an engine
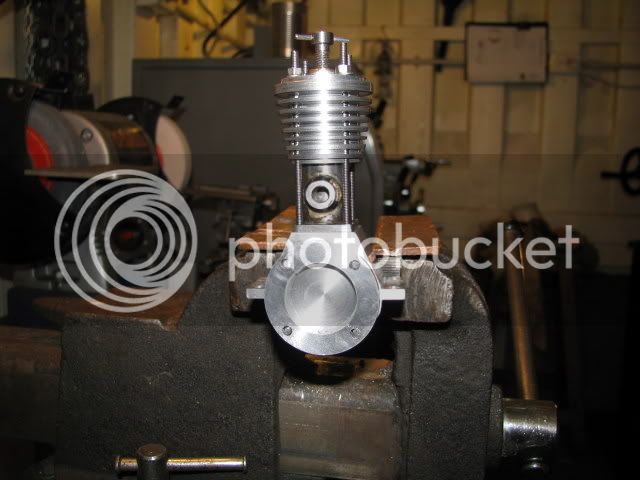
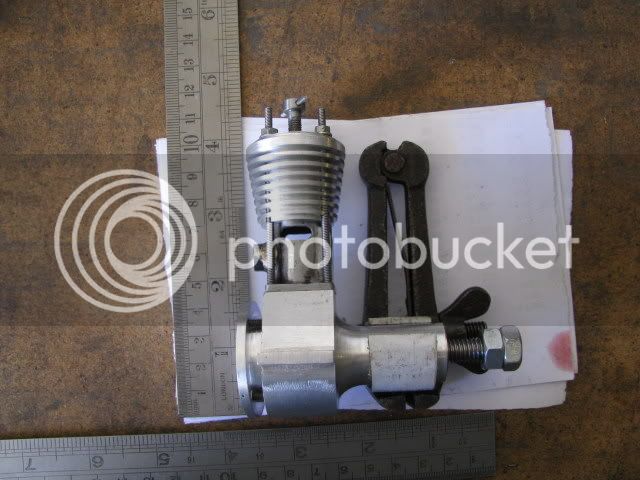
A couple of rulers to show the size.
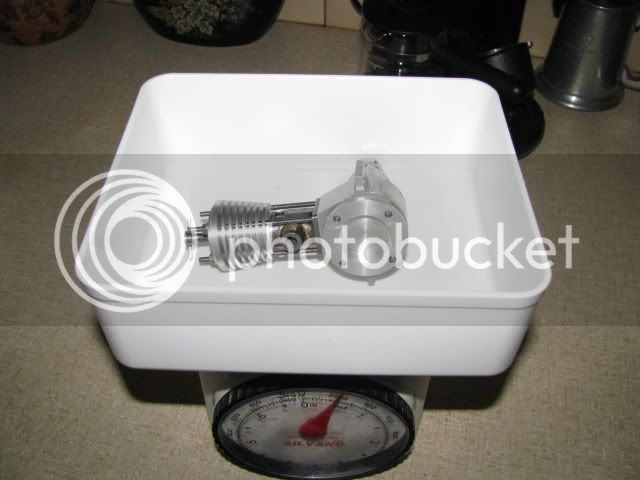
Snuck it home, past SWMBO and onto the kitchen scales
 235grams, a bit over 8ozs
What the first assembly revealed
 :
:
1. It goes together

2. There is a tight spot which on closer inspection, (with a magnifying glass and a torch, (flashlight))
 revealed that the conrod was just catching on the cylinder at about 300 before and after TDC. Some judicious use of a small file will be required to clear the obstruction on the rod.
3. There seems to be compression, but I'm not convinced that the contra piston is a good as it could be, because there were air bubbles around the compression screw.
 Maybe it's a result of the very slow rpm, I sure hope so. Any advise/comment will be gratefully received. I was sorta, kinda half expecting this

Well TTFN and for our correct way up friends it's goodbye from him

Sometimes, with some people, the only thing their head is for is to keep their ears apart
Enough, lets talk about important things like model engines
I did manage to get the engine assembled
Drilling the mounting holes in the crankcase lugs.
The crankshaft and holding down bolts.
Next the piston assembly.
Now its starting to look like an engine
A couple of rulers to show the size.
Snuck it home, past SWMBO and onto the kitchen scales
What the first assembly revealed
1. It goes together
2. There is a tight spot which on closer inspection, (with a magnifying glass and a torch, (flashlight))
3. There seems to be compression, but I'm not convinced that the contra piston is a good as it could be, because there were air bubbles around the compression screw.
Well TTFN and for our correct way up friends it's goodbye from him
Bob,
The dynamics of you compression will change when the engine is running. With the speed at which the compression takes place, there won't be enough time for the fuel/air the seep past things like the compression screw ofr piston and cylinder wall. Yes, there will be some loss in these areas, but nothing in the magnitude of turning it by hand. Hope that makes sense.
You have done a great job on the engine!! A little tweaking and you're all set. And it looks great!! :bow: :bow:
SandyC
Well-Known Member
- Joined
- Jan 7, 2008
- Messages
- 158
- Reaction score
- 6
Hi Bob,
First off let me say that is one very nice 'Vintage' looking engine.... take a bow my friend.
Quote from WE.
I agree with WE on this score, however, the fit of the contra-piston on these engines is quite critical.
If you can press it into the bore with your fingers, albeit requiring a good deal of finger pressure, then it is TO LOOSE.
The contra-piston fit needs to be somewhere between this type of fit and a press fit.
The idea is that you need the turning/pressing force of the compression screw in order to push the contra-piston further down, whilst the engine compression (when running) will return it if the compression screw is retracted.
If it is too loose then it can, and will, move whilst the engine is running.
On the other hand, if it is TO TIGHT then the engines compression, even on a firing stroke, will not shift it back if it is inserted to far, with the result that the engine will remain OVER COMPRESSED. (which will lead to other damage)
This, as you can imagine, is a tricky balance.
The only real way to find out for sure is to aim for a reasonable tight fit then run the engine and observe it's behaviour.
As for the issue with the con-rod..... on all my CI engines the lower inside edge of the liners are chamfered to give sufficient clearance.
I would suggest that you do this on yours, rather than relieve the con-rod....these need as much meat as possible since they have to take a fair bit of abuse when the engine is running.
I hope this all makes some sort of sense to you.
Very best regards.
Sandy.") ;D
;D
First off let me say that is one very nice 'Vintage' looking engine.... take a bow my friend.
Quote from WE.
The dynamics of you compression will change when the engine is running.
Yes, there will be some loss in these areas, but nothing in the magnitude of turning it by hand.
I agree with WE on this score, however, the fit of the contra-piston on these engines is quite critical.
If you can press it into the bore with your fingers, albeit requiring a good deal of finger pressure, then it is TO LOOSE.
The contra-piston fit needs to be somewhere between this type of fit and a press fit.
The idea is that you need the turning/pressing force of the compression screw in order to push the contra-piston further down, whilst the engine compression (when running) will return it if the compression screw is retracted.
If it is too loose then it can, and will, move whilst the engine is running.
On the other hand, if it is TO TIGHT then the engines compression, even on a firing stroke, will not shift it back if it is inserted to far, with the result that the engine will remain OVER COMPRESSED. (which will lead to other damage)
This, as you can imagine, is a tricky balance.
The only real way to find out for sure is to aim for a reasonable tight fit then run the engine and observe it's behaviour.
As for the issue with the con-rod..... on all my CI engines the lower inside edge of the liners are chamfered to give sufficient clearance.
I would suggest that you do this on yours, rather than relieve the con-rod....these need as much meat as possible since they have to take a fair bit of abuse when the engine is running.
I hope this all makes some sort of sense to you.
Very best regards.
Sandy.
;DSERCEFLYER
Member
- Joined
- Oct 1, 2008
- Messages
- 24
- Reaction score
- 0
Bob,
I agree with Sandy. Don't relieve the con rod-- you might set up stress areas where a crack would begin. Use a small burr on a Dremel tool to relieve and chamfer the inside of the liner.
On my engine, I had to Dremel the crankcase flange area, too!
Does the compression have a springy, bouncy feel to it? At TDC, does it hold compression for about 30 sec- 1 min? Before making any changes, give the engine a few flips with fuel (touch the fuel on the side of the piston through the exhaust) to see if you get a pop.
Almost there.....
George
Metal Mickey
Well-Known Member
- Joined
- Jul 5, 2008
- Messages
- 612
- Reaction score
- 6
Maryak said:3. There seems to be compression, but I'm not convinced that the contra piston is a good as it could be, because there were air bubbles around the compression screw.Maybe it's a result of the very slow rpm, I sure hope so. Any advise/comment will be gratefully received. I was sorta, kinda half expecting this
I had the same signs when making my Mills 1.3cc diesel engine and I made a new contra piston which was a better fit (although I thought the first one was!) and made a big difference. Not least with no bubbles around the compression screw afterwards. So if it was me, I would make another contra piston......for what its worth......
Yours has been a great build and I really have enjoyed the pictures.
Mike


$94.99
$109.99
AHS Woodmaster 4400 Maintenance Kit for Outdoor Wood Boiler Treatment
Alternative Heating & Supplies


$39.99
$49.99
Sunnytech Low Temperature Stirling Engine Motor Steam Heat Education Model Toy Kit For mechanical skills (LT001)
stirlingtechonline


![MeshMagic 3D Free 3D Modeling Software [Download]](https://m.media-amazon.com/images/I/B1U+p8ewjGS._SL500_.png)


$45.99
Sunnytech Mini Hot Air Stirling Engine Motor Model Educational Toy Kits Electricity HA001
stirlingtechonline


![DreamPlan Home Design and Landscaping Software Free for Windows [PC Download]](https://m.media-amazon.com/images/I/51kvZH2dVLL._SL500_.jpg)
$0.00
DreamPlan Home Design and Landscaping Software Free for Windows [PC Download]
Amazon.com Services LLC


$24.99
$34.99
Bowl Sander Tool Kit w/Dual Bearing Head & Hardwood Handle | 42PC Wood Sander Set | 2" Hook & Loop Sanding Disc Sandpaper Assortment | 1/4" Mandrel Bowl Sander for Woodturning | Wood Lathe Tools
Peachtree Woodworking Supply Inc


$99.99
AHS Outdoor Wood Boiler Yearly Maintenance Kit with Water Treatment - ProTech 300 & Test Kit
Alternative Heating & Supplies


$40.02
$49.99
Becker CAD 12 3D - professional CAD software for 2D + 3D design and modelling - for 3 PCs - 100% compatible with AutoCAD
momox Shop


$29.95
Competition Engine Building: Advanced Engine Design and Assembly Techniques (Pro Series)
Amazon.com Services LLC


$89.99
Outdoor Wood Boiler Water Treatment Rust Inhibitor- AmTech 300 & Test Kit
Alternative Heating & Supplies


$12.56
$39.95
Complete Plans for Building Horse Barns Big and Small(3rd Edition)
ThriftBooks-Atlanta


$519.19
$699.00
FoxAlien Masuter Pro CNC Router Machine, Upgraded 3-Axis Engraving All-Metal Milling Machine for Wood Acrylic MDF Nylon Carving Cutting
FoxAlien Official
Maryak
Well-Known Member
- Joined
- Sep 12, 2008
- Messages
- 4,990
- Reaction score
- 77
W/E, Sandy, George, Mike and Phil,
Thanks to all for you support and your sound advise.

Plan of attack is to grind a little off the bottom of the cylinder sides to relieve the rub.
The contra piston is a tight as Sandy suggests but the holding bolts need sizing so that I can adjust the compression and see if there is the desired "pop back" of the CP. If not as Mike says make another.

Best Regards
Bob
Thanks to all for you support and your sound advise.
Plan of attack is to grind a little off the bottom of the cylinder sides to relieve the rub.
The contra piston is a tight as Sandy suggests but the holding bolts need sizing so that I can adjust the compression and see if there is the desired "pop back" of the CP. If not as Mike says make another.
Best Regards
Bob
Bob I've been a little remiss at commenting, both here and in another couple of ongoing builds, that aside I am watching with great interest 8) ........ top class work and superb effort in documenting and photographing the build, it's threads like this which will encourage people to become involved. Good luck with the final stages, we're all waiting for the first "Big Bang" Pop 8) under it's own power.
CC

CC
Maryak
Well-Known Member
- Joined
- Sep 12, 2008
- Messages
- 4,990
- Reaction score
- 77
Crikey CC,
Thanks for your input,
there are so many good things and so much valuable information being posted that it's dead easy to read a topic, think of a contribution and then go on to the next without adding your 2 bobs worth.

All comments are gratefully received and all have been of tremendous help and support.

Best Regards
Bob
Thanks for your input,
All comments are gratefully received and all have been of tremendous help and support.
Best Regards
Bob
Bob, what type of rotary table are you using on your mill, where did you get it? I assume you are using the chuck from the AL320G on it, how do you mount it? Have you used the 4-jaw from the AL320G on it? If so did that mount the same way?
I'm looking at getting a rotab myself and would welcome the input?
Rgds - Gavin
I'm looking at getting a rotab myself and would welcome the input?
Rgds - Gavin
Brass_Machine
Well-Known Member
- Joined
- Aug 28, 2007
- Messages
- 1,314
- Reaction score
- 7
Bob,
It looks the beesknees! Not much longer now. I do agree about modding the crankcase and not the rod though. Can't be of any other help.
Eric
It looks the beesknees! Not much longer now. I do agree about modding the crankcase and not the rod though. Can't be of any other help.
Eric


Maryak
Well-Known Member
- Joined
- Sep 12, 2008
- Messages
- 4,990
- Reaction score
- 77
Hi All,
Had a very satisfying day with the engine today

So here's what happened.
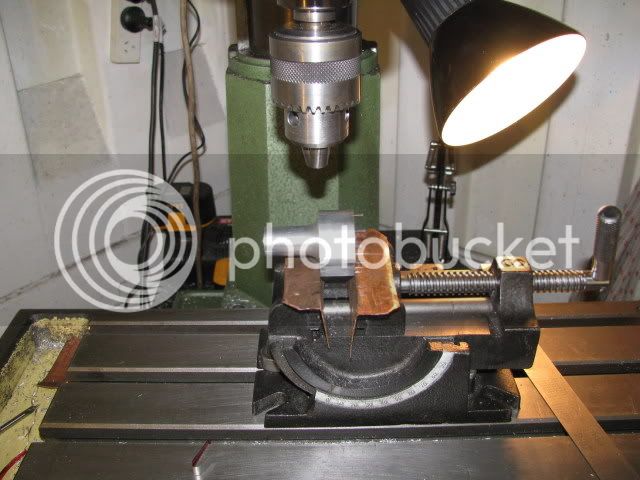
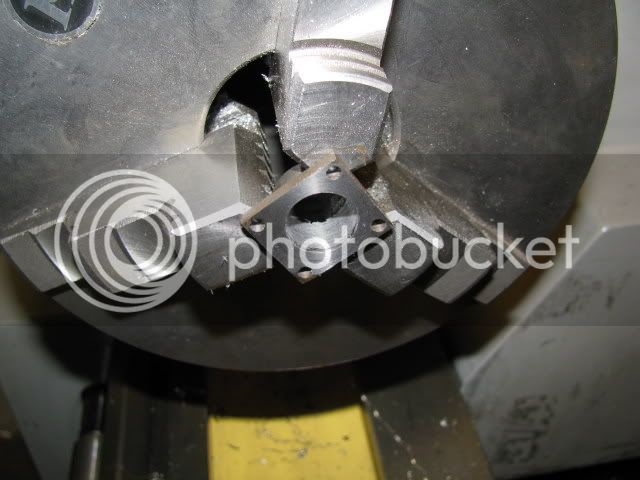
The cylinder set up to relieve the sides where the conrod was touching.
The relief work complete

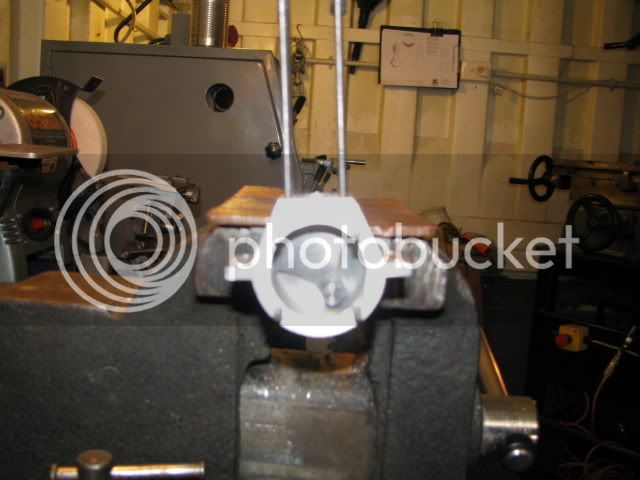
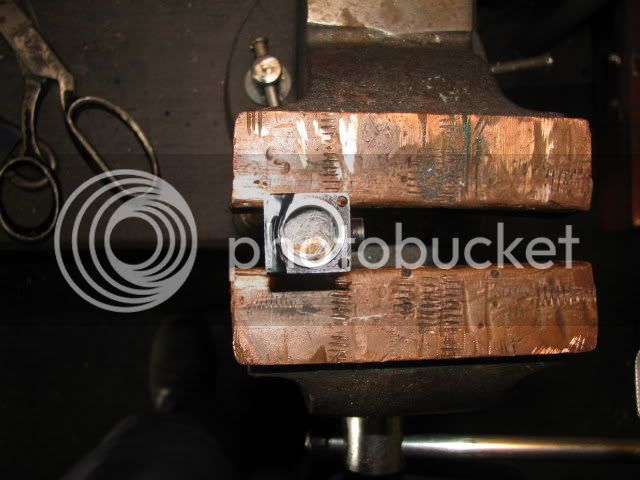
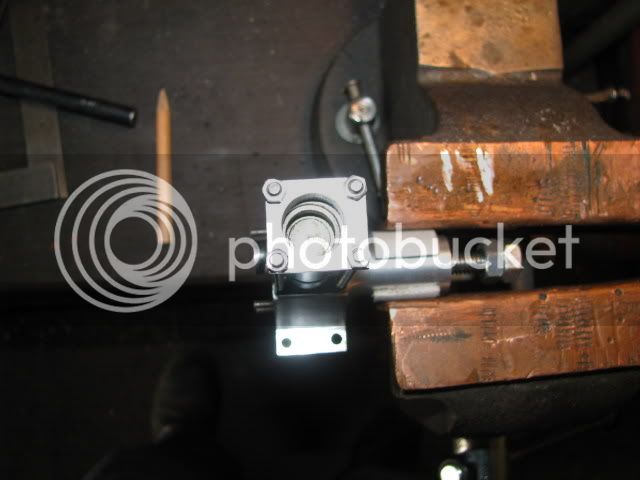
As I needed to find out what was happening with the contra piston, I needed to see inside.
 To do this I modified the drilling jig as a see through head.
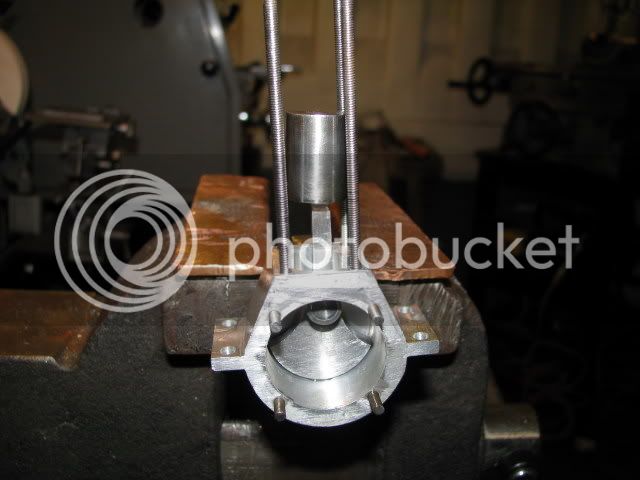
The engine assembled with the CP under my look see head.
I pushed the CP down as far as it would go using a brass dolly and then turned the engine over using a SMALL spanner on the nuts. My reward was a satisfying click as the CP bounced back to the top under the head, (just like Sandy said it should). Couldn't believe my eyes, (and ears), so did it several more times each with a rewarding click as the CP returned to the top of the cylinder under compression.


Made all the adjustments I could, ran it for about 30secs with a drill and Tallow as a lube. Cleaned everything and oiled and reassembled.
Next is the carburretor and a visit from the bling fairy would be nice.

Had a very satisfying day with the engine today
So here's what happened.
The cylinder set up to relieve the sides where the conrod was touching.
The relief work complete
As I needed to find out what was happening with the contra piston, I needed to see inside.
The engine assembled with the CP under my look see head.
I pushed the CP down as far as it would go using a brass dolly and then turned the engine over using a SMALL spanner on the nuts. My reward was a satisfying click as the CP bounced back to the top under the head, (just like Sandy said it should). Couldn't believe my eyes, (and ears), so did it several more times each with a rewarding click as the CP returned to the top of the cylinder under compression.
Made all the adjustments I could, ran it for about 30secs with a drill and Tallow as a lube. Cleaned everything and oiled and reassembled.
Next is the carburretor and a visit from the bling fairy would be nice.
SERCEFLYER
Member
- Joined
- Oct 1, 2008
- Messages
- 24
- Reaction score
- 0
That's one good looking little machine!!!!
George
George

Similar threads
- Replies
- 319
- Views
- 53K
- Replies
- 117
- Views
- 42K
- Replies
- 21
- Views
- 7K