Brian is not screwing around - nice progress!
You are using an out of date browser. It may not display this or other websites correctly.
You should upgrade or use an alternative browser.
You should upgrade or use an alternative browser.
1" Bore x 1" Stroke Vertical i.c. Engine
- Thread starter Brian Rupnow
- Start date

Help Support Home Model Engine Machinist Forum:
This site may earn a commission from merchant affiliate
links, including eBay, Amazon, and others.
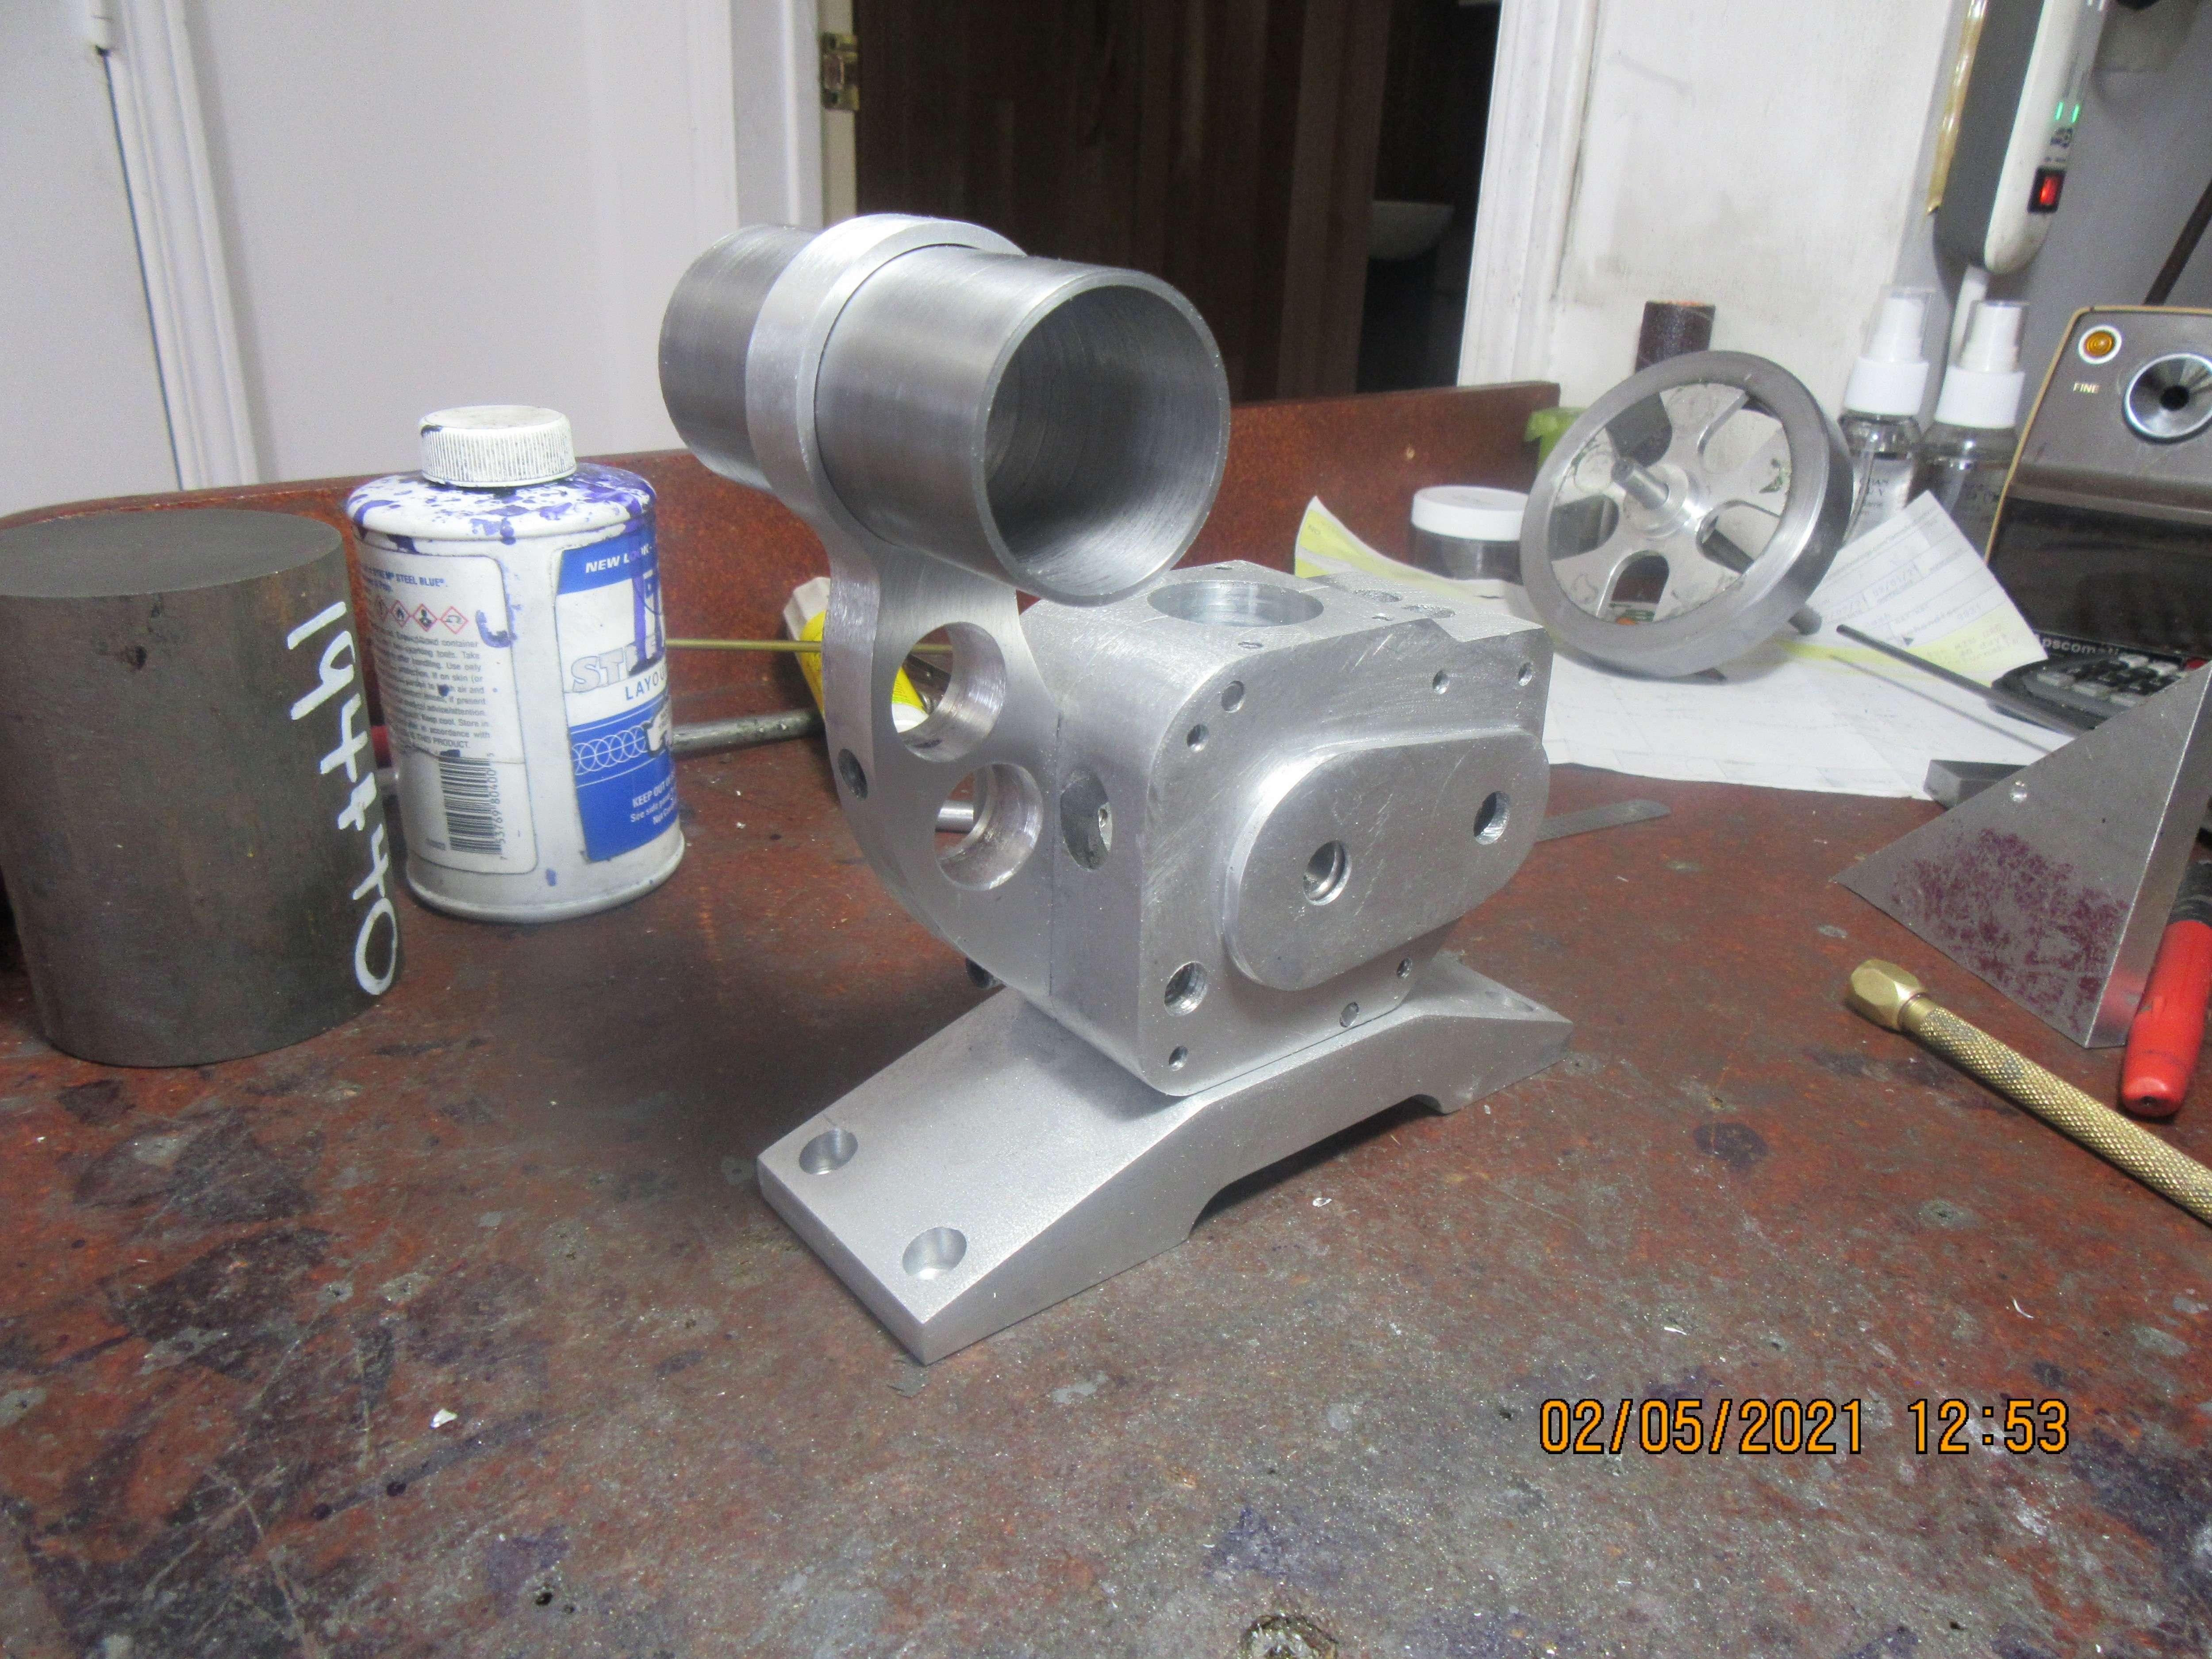
This gas tank support has more of an "artsy-fartsy" thing going on than the parts I usually make, but I like it. I think it adds a touch of beauty to an otherwise "plain Jane" engine.
It's a pretty support.
jack620
Well-Known Member
I originally generated the fan using FreeCAD, but I have put together an OpenSCAD version
Thanks for going to the trouble. I use Fusion360 and unfortunately it won’t open the file you posted. Will OpenSCAD export in a file format that Fusion360 can use?
Hers’s a list of compatible file types: File formats supported in Fusion 360 | Fusion 360 | Autodesk Knowledge Network
Nothing wrong with Artsy Fartsy! - Looks good to me!
K2
K2
Thanks for going to the trouble. I use Fusion360 and unfortunately it won’t open the file you posted. Will OpenSCAD export in a file format that Fusion360 can use?
Hers’s a list of compatible file types: File formats supported in Fusion 360 | Fusion 360 | Autodesk Knowledge Network
OpenSCAD can produce .stl files, and not much else - but since I originally modelled this in FreeCAD, I can export to a step file or similar from there. Will do that shortly ...
I couldn't install the gas tank support without machining the body of the gas tank to mount and see what it looked like in place. I'm happy with that. This afternoon I hope to make the cylinder.


$104.99
Sunnytech Hot Air Stirling Engine Motor Steam Heat Education Model Toy Kit M16-CF
stirlingtechonline

$99.99
AHS Outdoor Wood Boiler Yearly Maintenance Kit with Water Treatment - ProTech 300 & Test Kit
Alternative Heating & Supplies
![DreamPlan Home Design and Landscaping Software Free for Windows [PC Download]](https://m.media-amazon.com/images/I/51kvZH2dVLL._SL500_.jpg)
$0.00
DreamPlan Home Design and Landscaping Software Free for Windows [PC Download]
Amazon.com Services LLC

$599.00
$649.00
FoxAlien Masuter Pro CNC Router Machine, Upgraded 3-Axis Engraving All-Metal Milling Machine for Wood Acrylic MDF Nylon Carving Cutting
FoxAlien Official

$39.14
$49.99
Becker CAD 12 3D - professional CAD software for 2D + 3D design and modelling - for 3 PCs - 100% compatible with AutoCAD
momox Shop

$171.00
$190.00
Genmitsu CNC 3018-PRO Router Kit GRBL Control 3 Axis Plastic Acrylic PCB PVC Wood Carving Milling Engraving Machine, XYZ Working Area 300x180x45mm
SainSmart Official

$19.15
$29.95
Competition Engine Building: Advanced Engine Design and Assembly Techniques (Pro Series)
MBC Inc.

$26.89
$34.99
Peachtree Woodworking Supply Bowl Sander Tool Kit w/Dual Bearing Head & Hardwood Handle, 42 Pieces Wood Sander Set, 2 Hook & Loop Sanding Disc Sandpaper Assortment, 1/4 Mandrel Bowl Sander
Peachtree Woodworking Supply Inc
Thanks for going to the trouble. I use Fusion360 and unfortunately it won’t open the file you posted. Will OpenSCAD export in a file format that Fusion360 can use?
Hers’s a list of compatible file types: File formats supported in Fusion 360 | Fusion 360 | Autodesk Knowledge Network
OpenSCAD can produce .stl files, and not much else - but since I originally modelled this in FreeCAD, I can export to a step file or similar from there. Will do that shortly ...
To keep from filling up Brian's thread with OT traffic, I have started another thread on this: https://www.homemodelenginemachinist.com/threads/3d-printed-cooling-fan.32893/ - I have put .step and .iges files there, along with the original FreeCAD files, plus additional explanation of how I generated this.
And just at the point where I was congratulating myself on what a fine machinist I was getting to be---My parting off blade decided to squirm around in the holder, and eat the center fin damn near off. Do you know what "Hubris" is? Ah, poop!!! We'll just cut off all the lower fins and run with it. It won't affect the way the engine works--the hottest part is up near the top of the cylinder anyways.
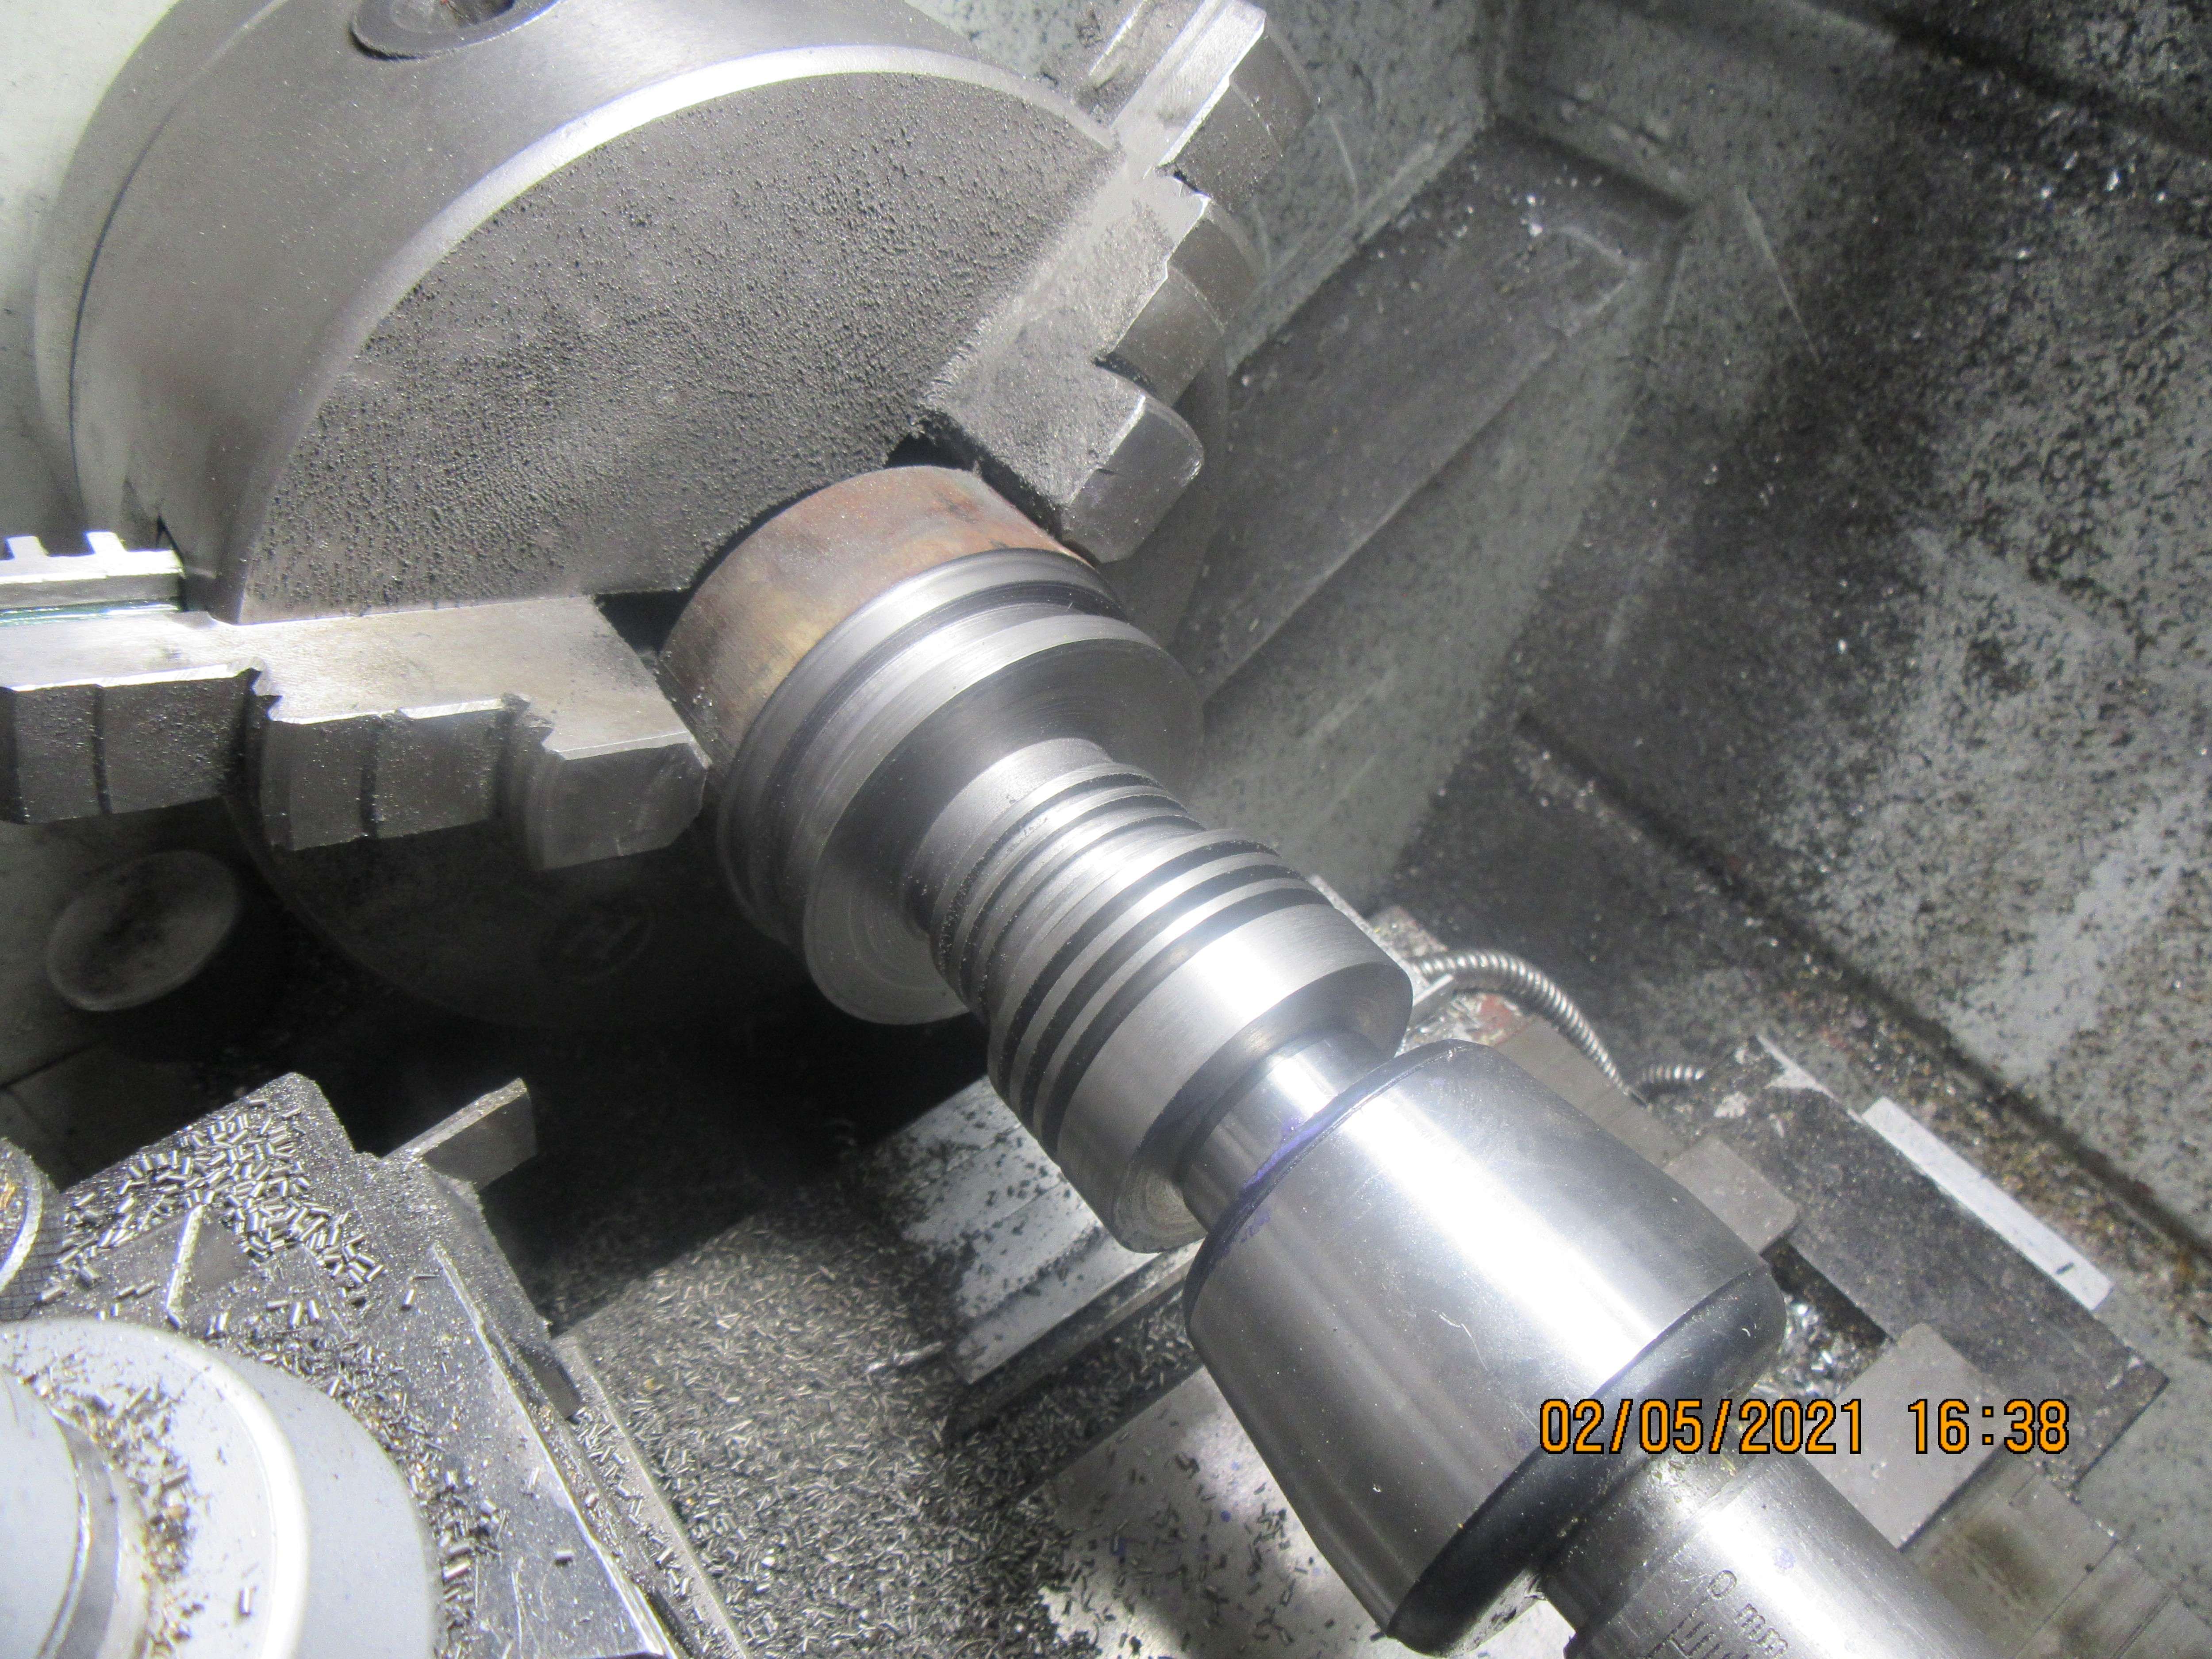

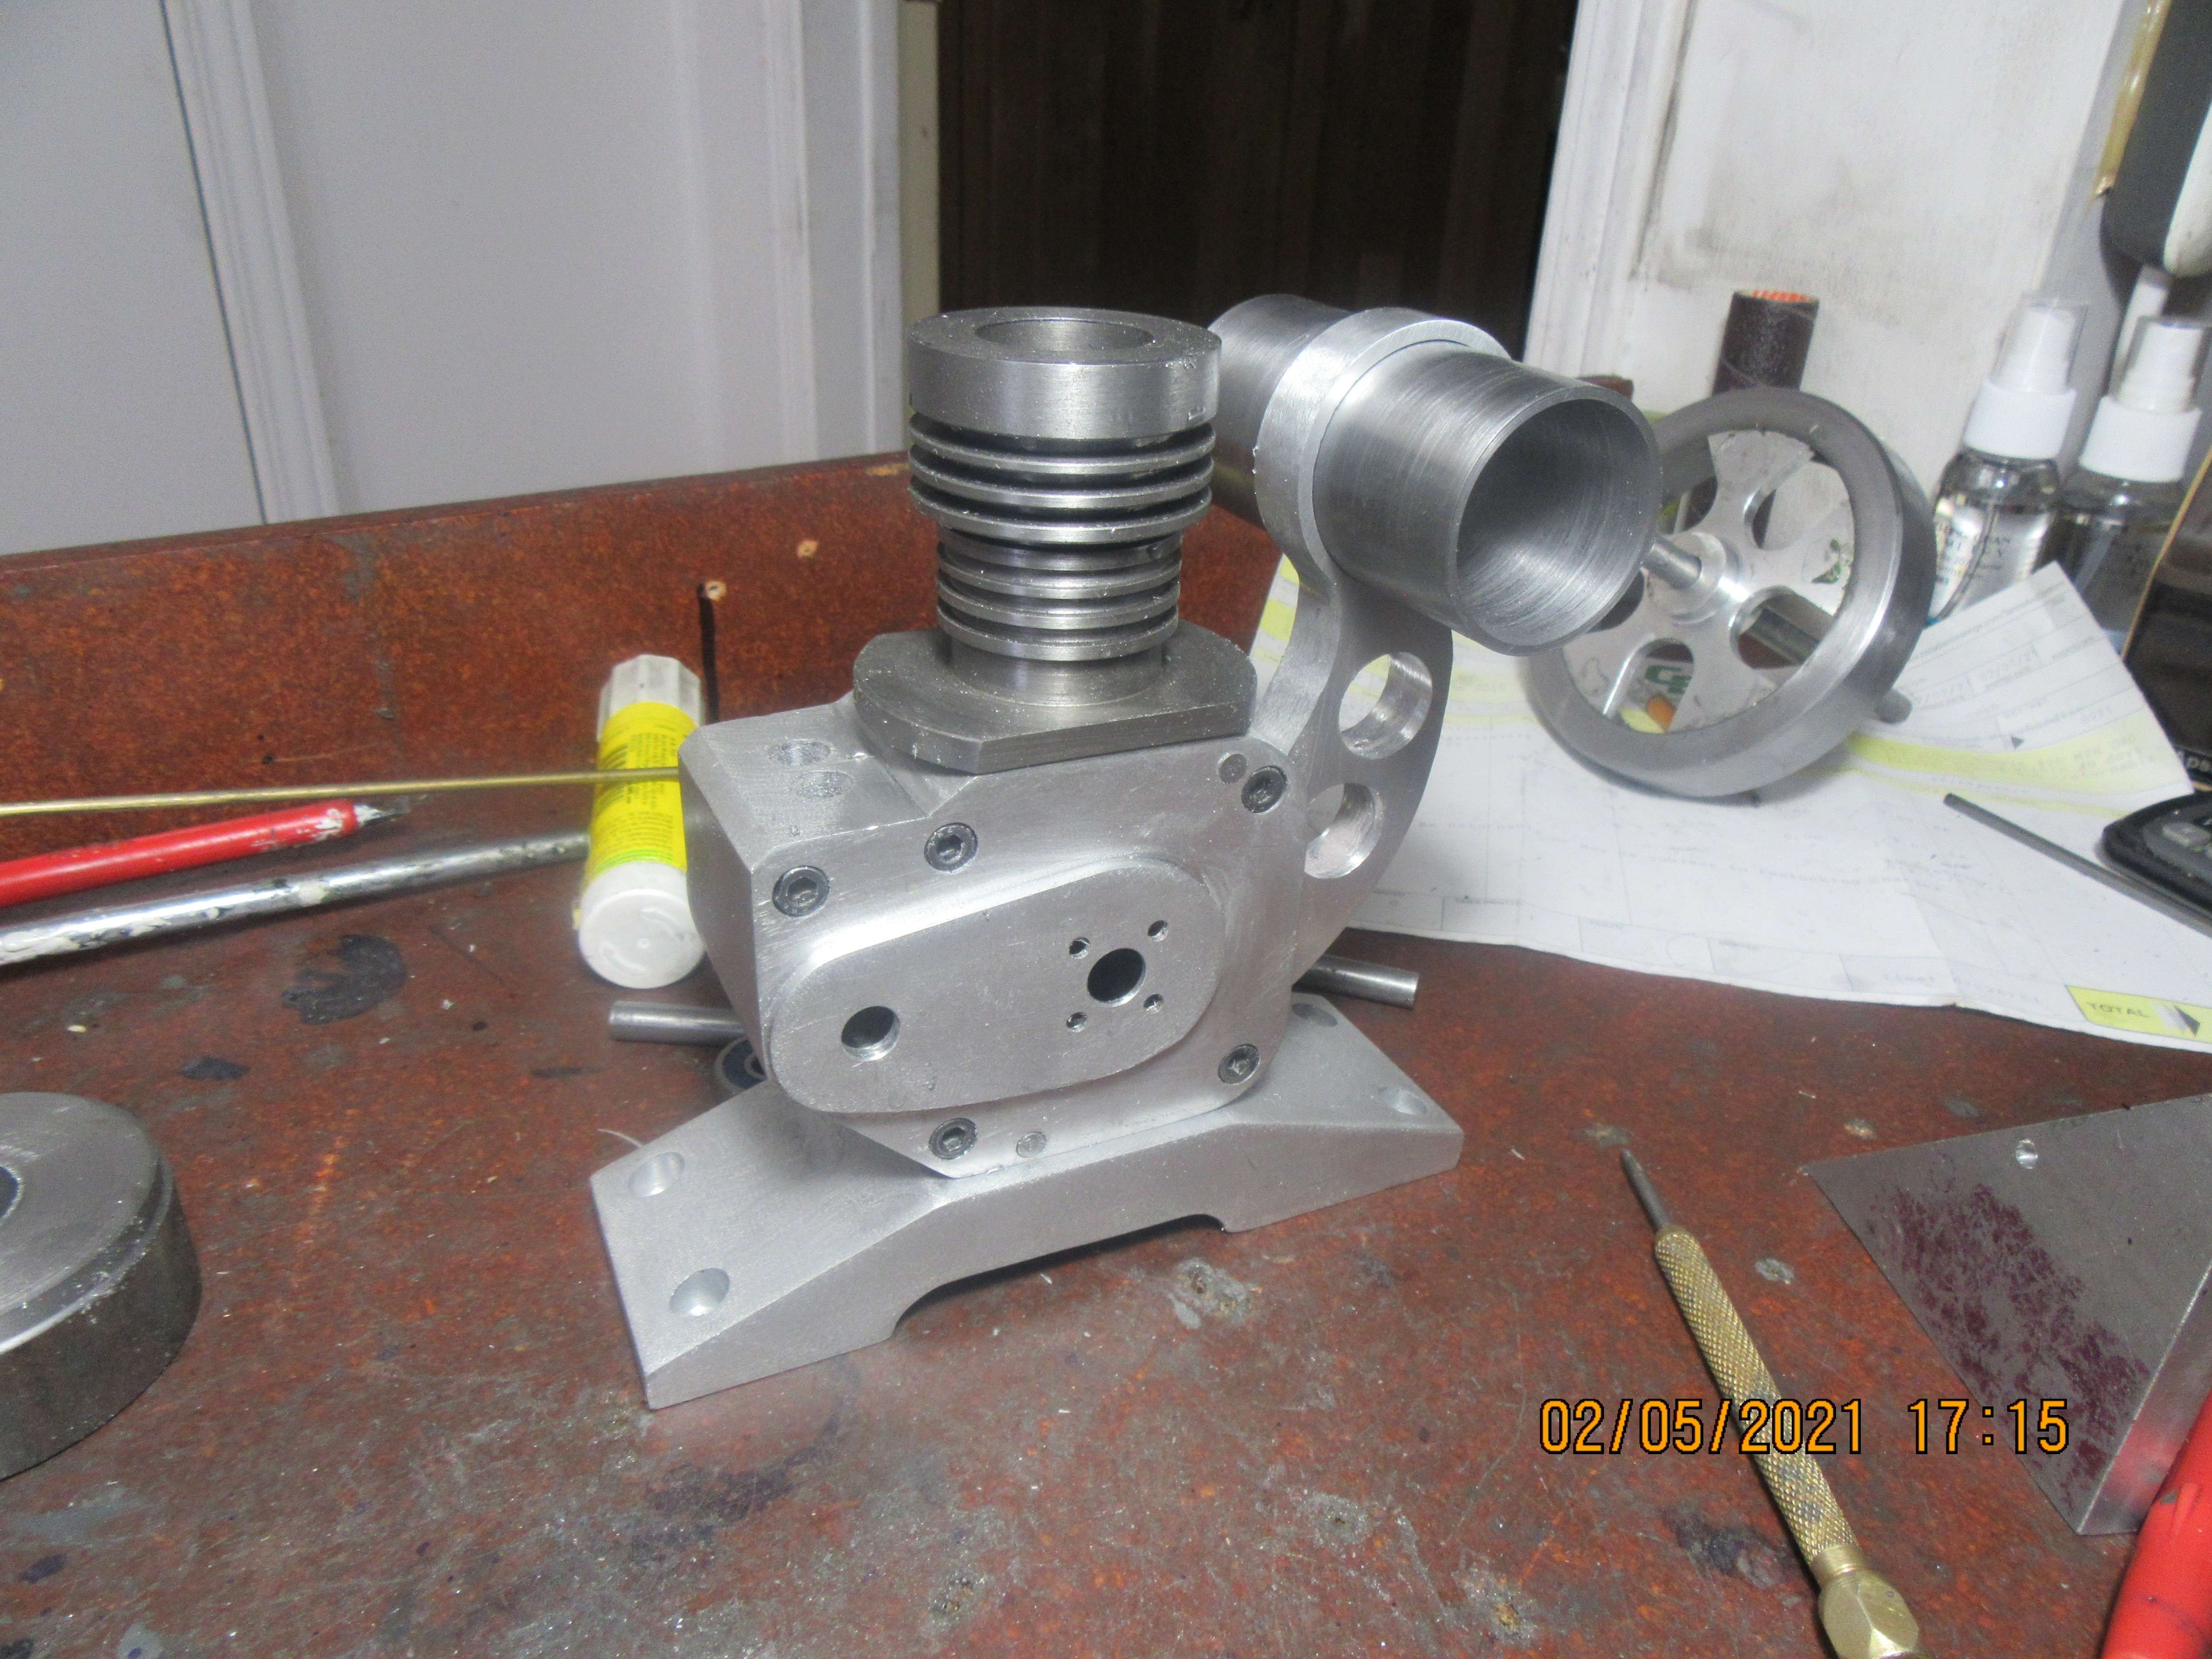
Well, this is a slightly different look than I had in mind, but it will do. By the time the cylinder base gets squared off everything else gets mounted to the engine, it won't be noticeable. If anybody asks, well, "I planned it this way!!" 


jack620
Well-Known Member
I'm just amazed at how quickly you progress Brian. It would take me weeks to get this far. Looks like it's going to be a great engine. I wish I had a milling machine.
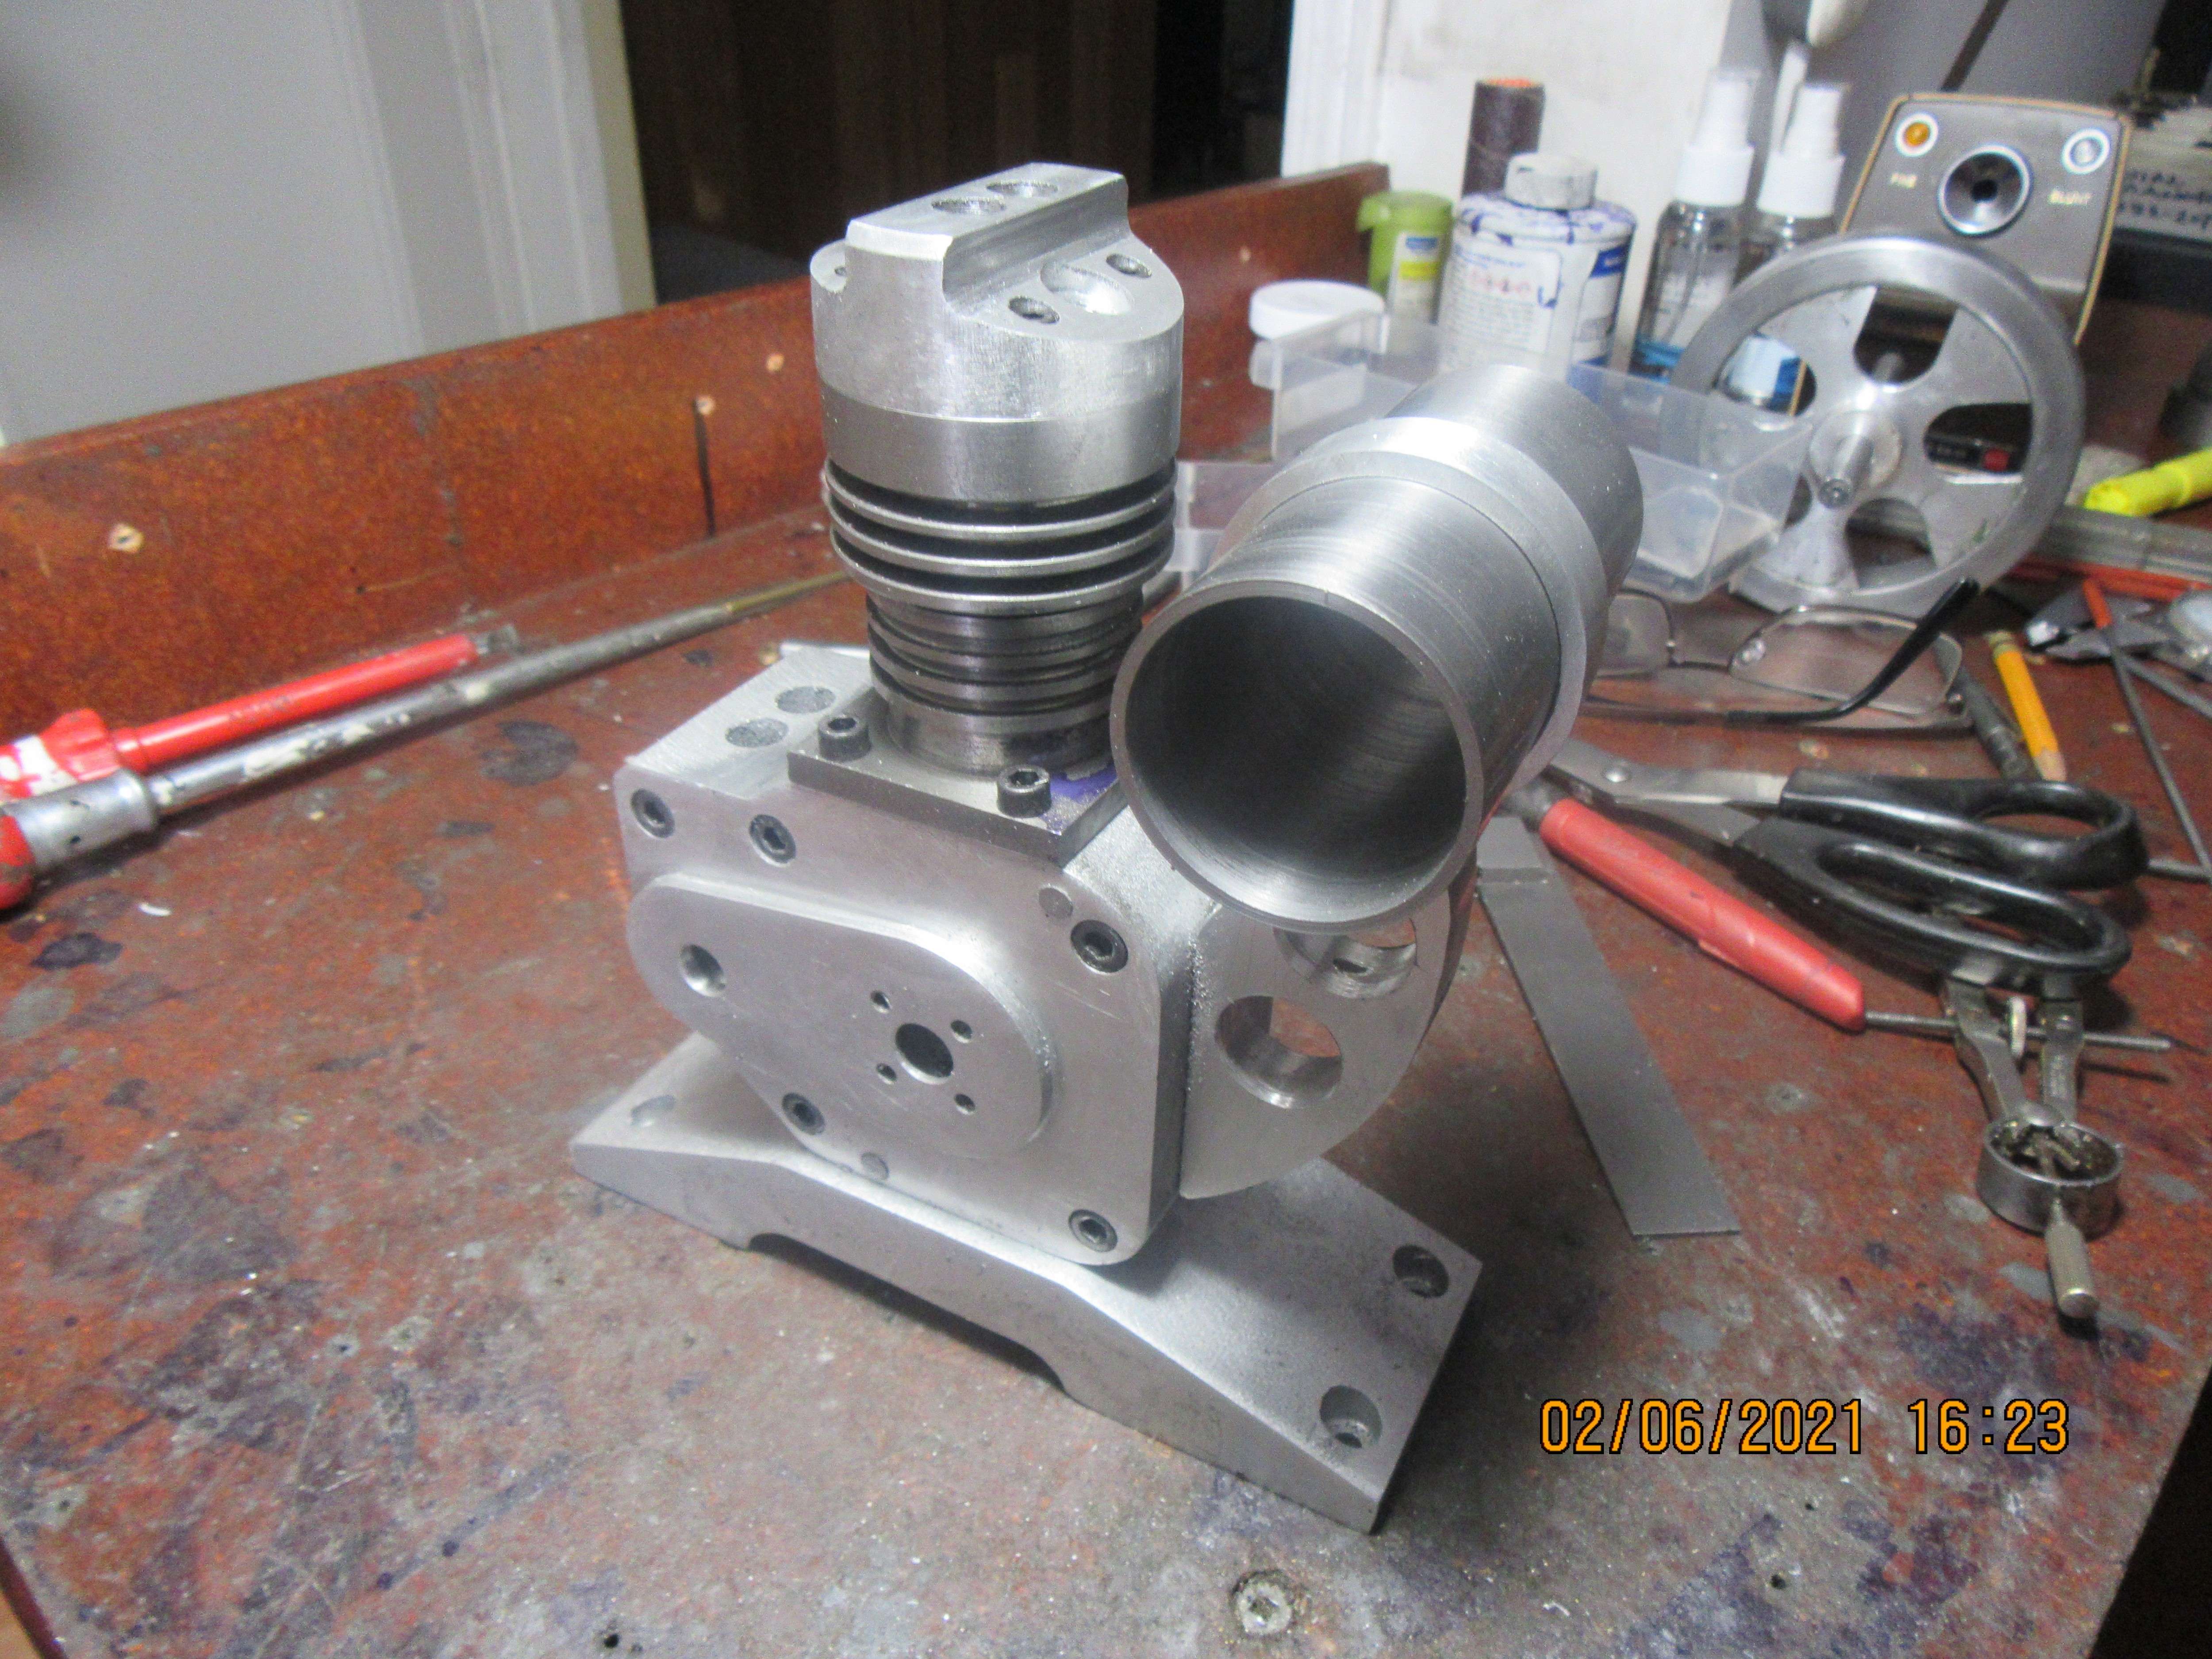
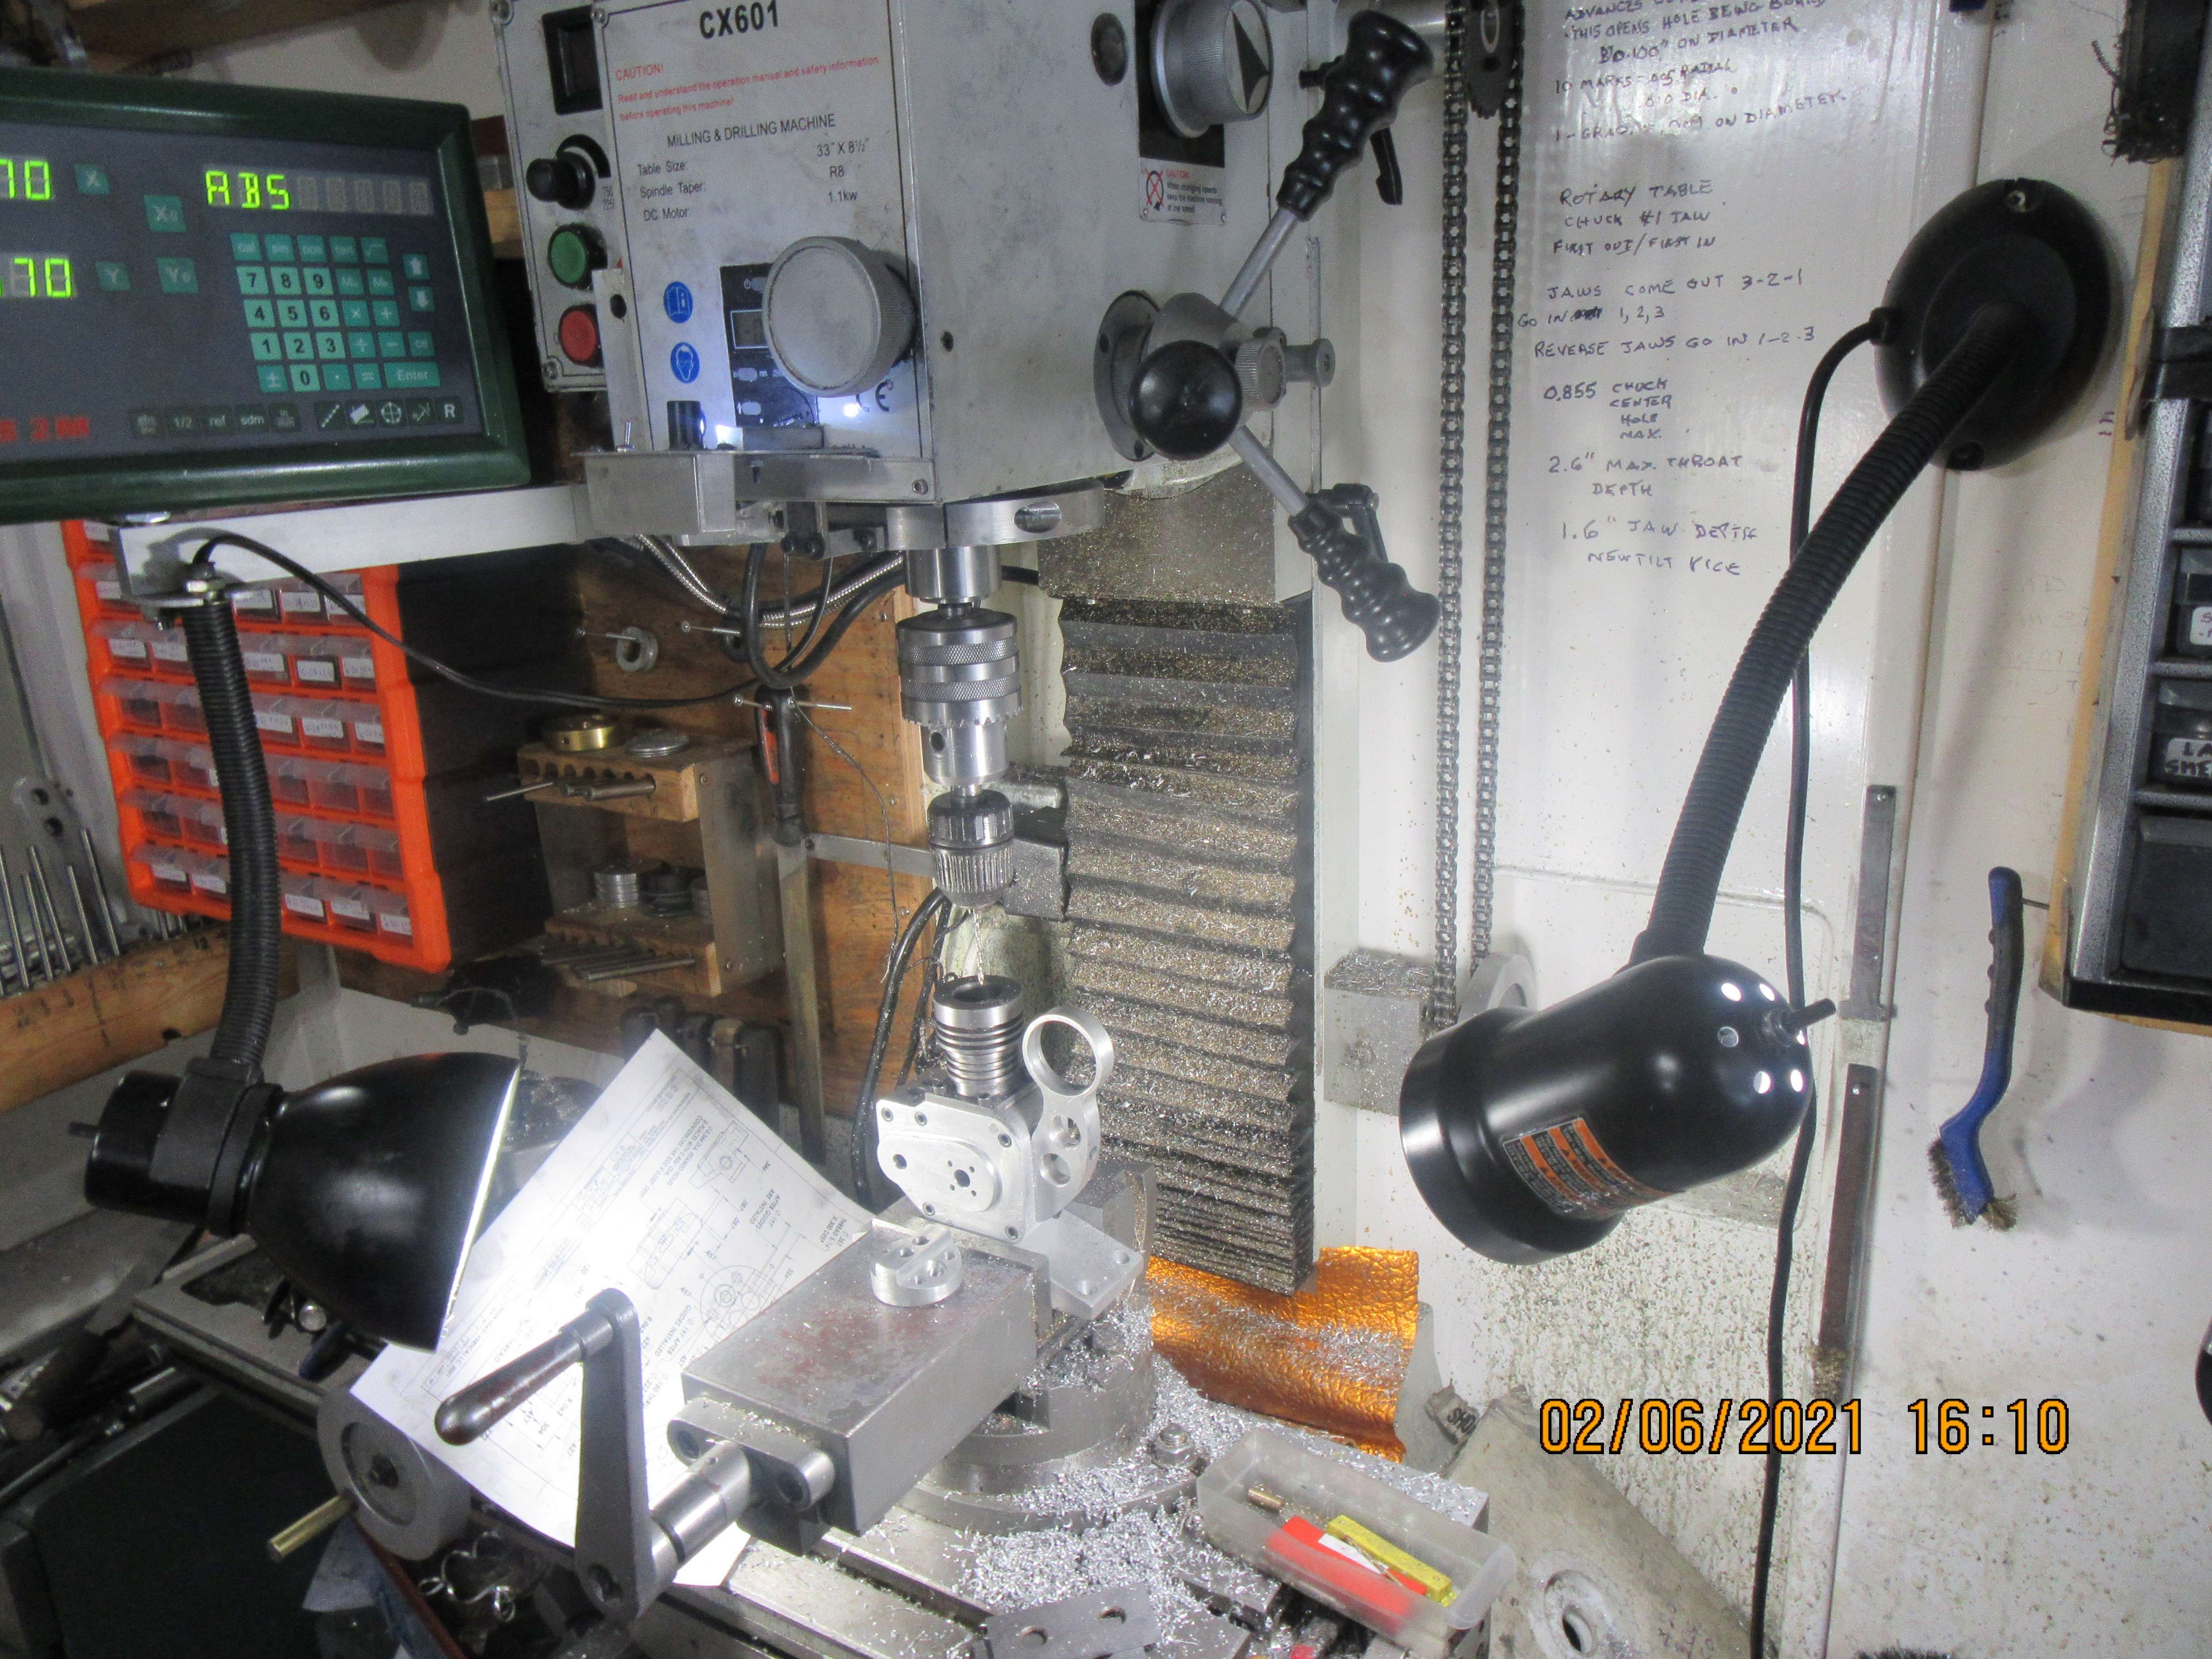
And if you wonder what I've been doing for the last 7 hours, this is it. A cylinder head. It certainly is nice to have a milling machine with such tremendous headroom as this one. In this picture the head is raised almost to it's limits with the engine held in the mill vice while I drill the holes in the top of the cylinder for the cap screws which hold the head in place.


And what exciting things are in store for tomorrow??---A big clean up to get all of the cast iron dust and chips off my lathe and mill. Nasty, nasty stuff!!! I may work up enough energy to pin the spokes in the flywheel with a piece of brass rod I bought, but no seven hour thrash like today.
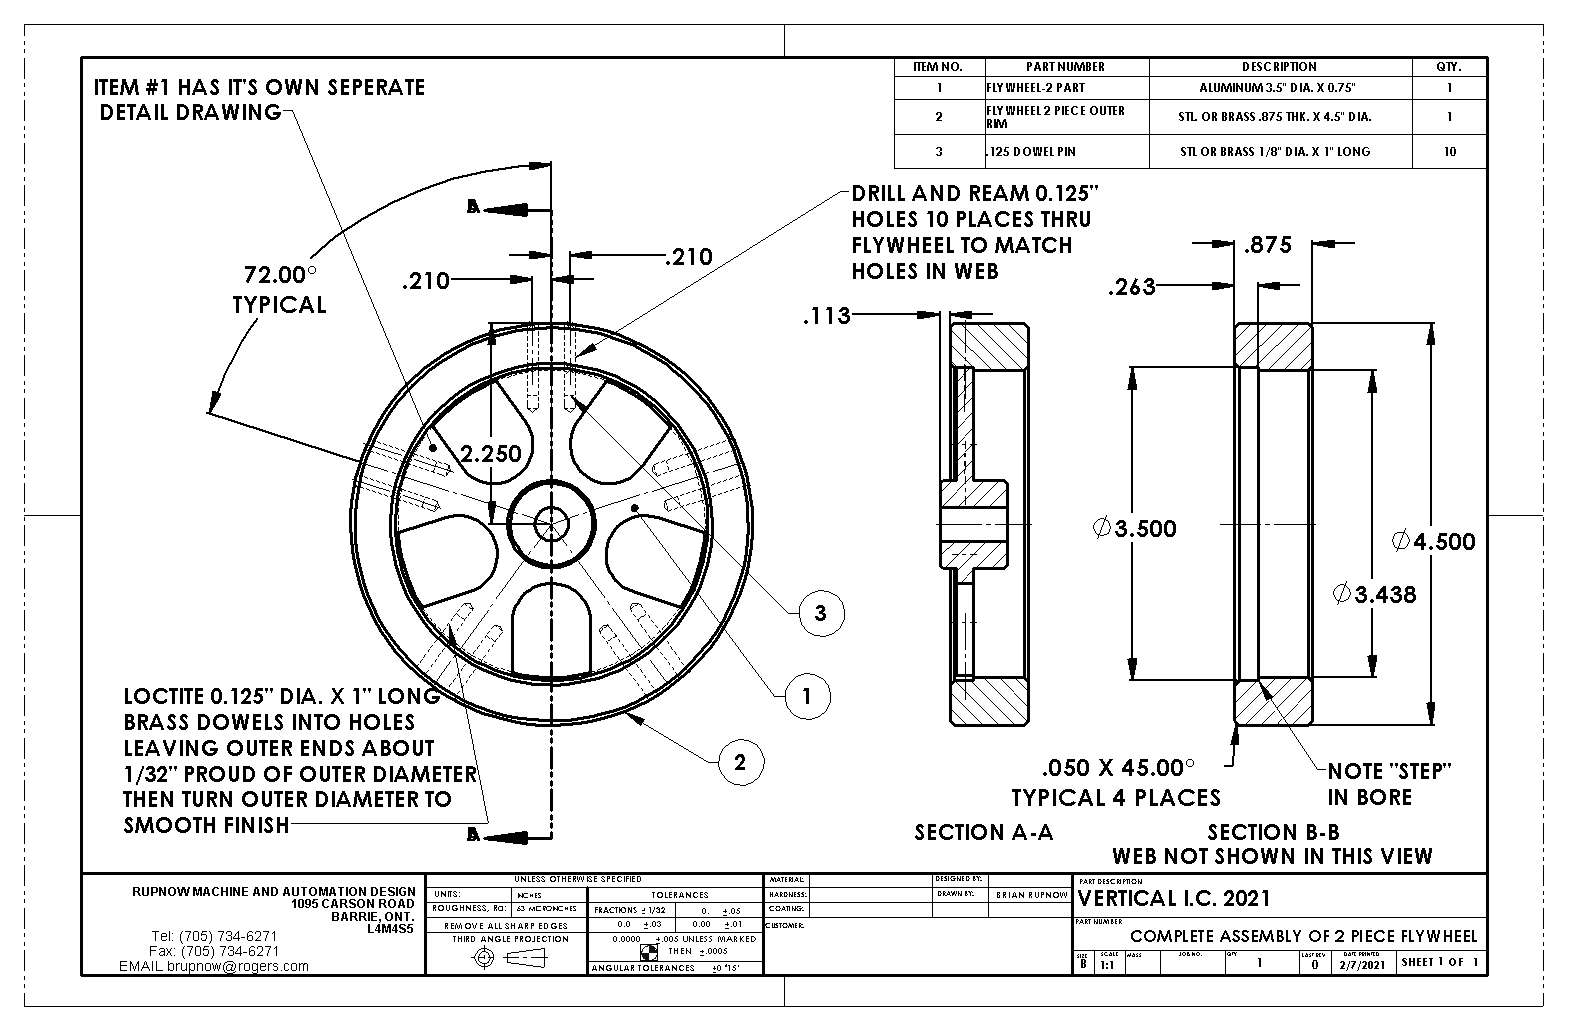
Having a bit of a lazy day today. Lathe and mill clean up and maybe pin the flywheel together as per the drawing.

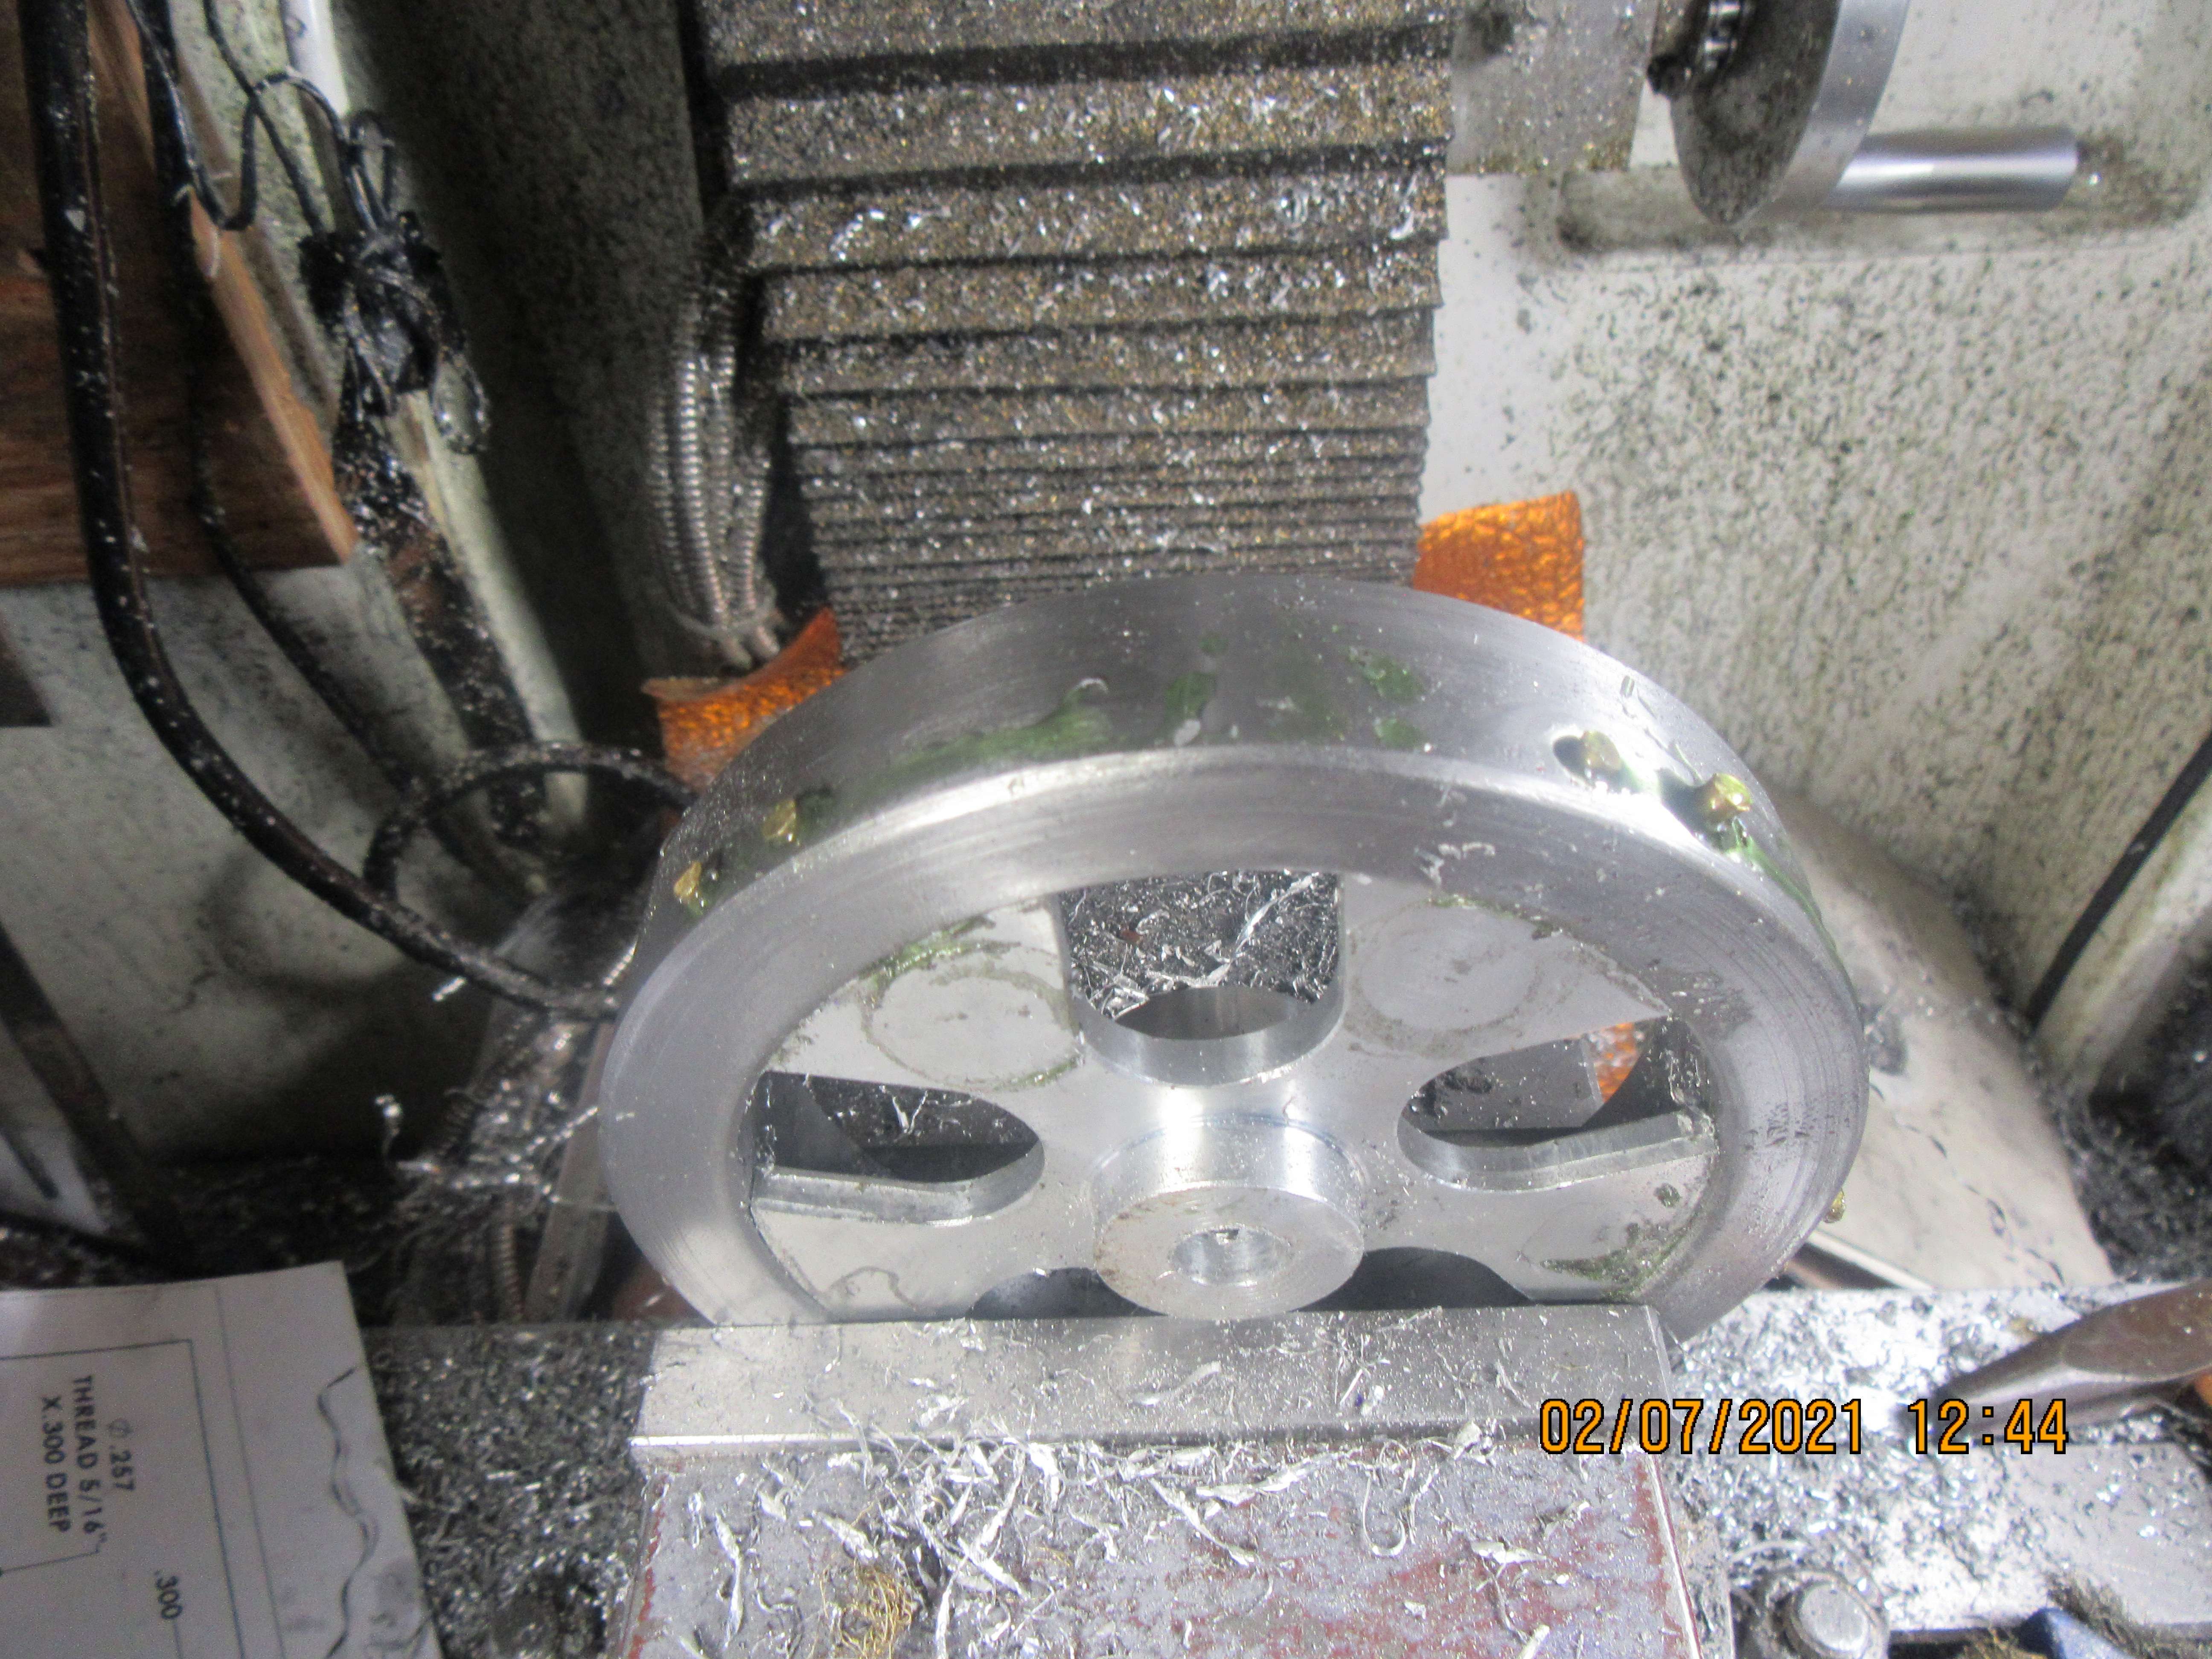
Ugly, but it seems to be working fine. Will post a shot after Loctite has set up and pins have been filed and sanded flush with outer diameter.

A magnet in a polythene bag is my "anti-iron dust" contraption. Turn the bag inside out to removerify the magnet (free of dust) and keep the iron dust in the bag. The black dust not picked-up will be the free carbon from the cast iron. Then a good wipe with an oiled cloth to collect any remain abrasive detritus.And what exciting things are in store for tomorrow??---A big clean up to get all of the cast iron dust and chips off my lathe and mill. Nasty, nasty stuff!!! I may work up enough energy to pin the spokes in the flywheel with a piece of brass rod I bought, but no seven hour thrash like today.
But you know all that, I'm sure, Brian.
I have a shop vac that is almost as old as me. When I finish a cast iron job, I vacuum everything, wash everything down with varsol, and then wipe everything down with a clean cloth. I then apply a bit of #30 oil to the ways and spread it everywhere with my fingers.
Hi Brian, Just Like I was taught in the 1960s for my school workshop job, then, when 13, my Saturday job! - When I learned the Magnet trick. That's more than 50 years ago I started work... I got quite intimate with machinery before I thought of girls - when my school friends were getting "into-mates" on the rugby pitch.
K2
K2
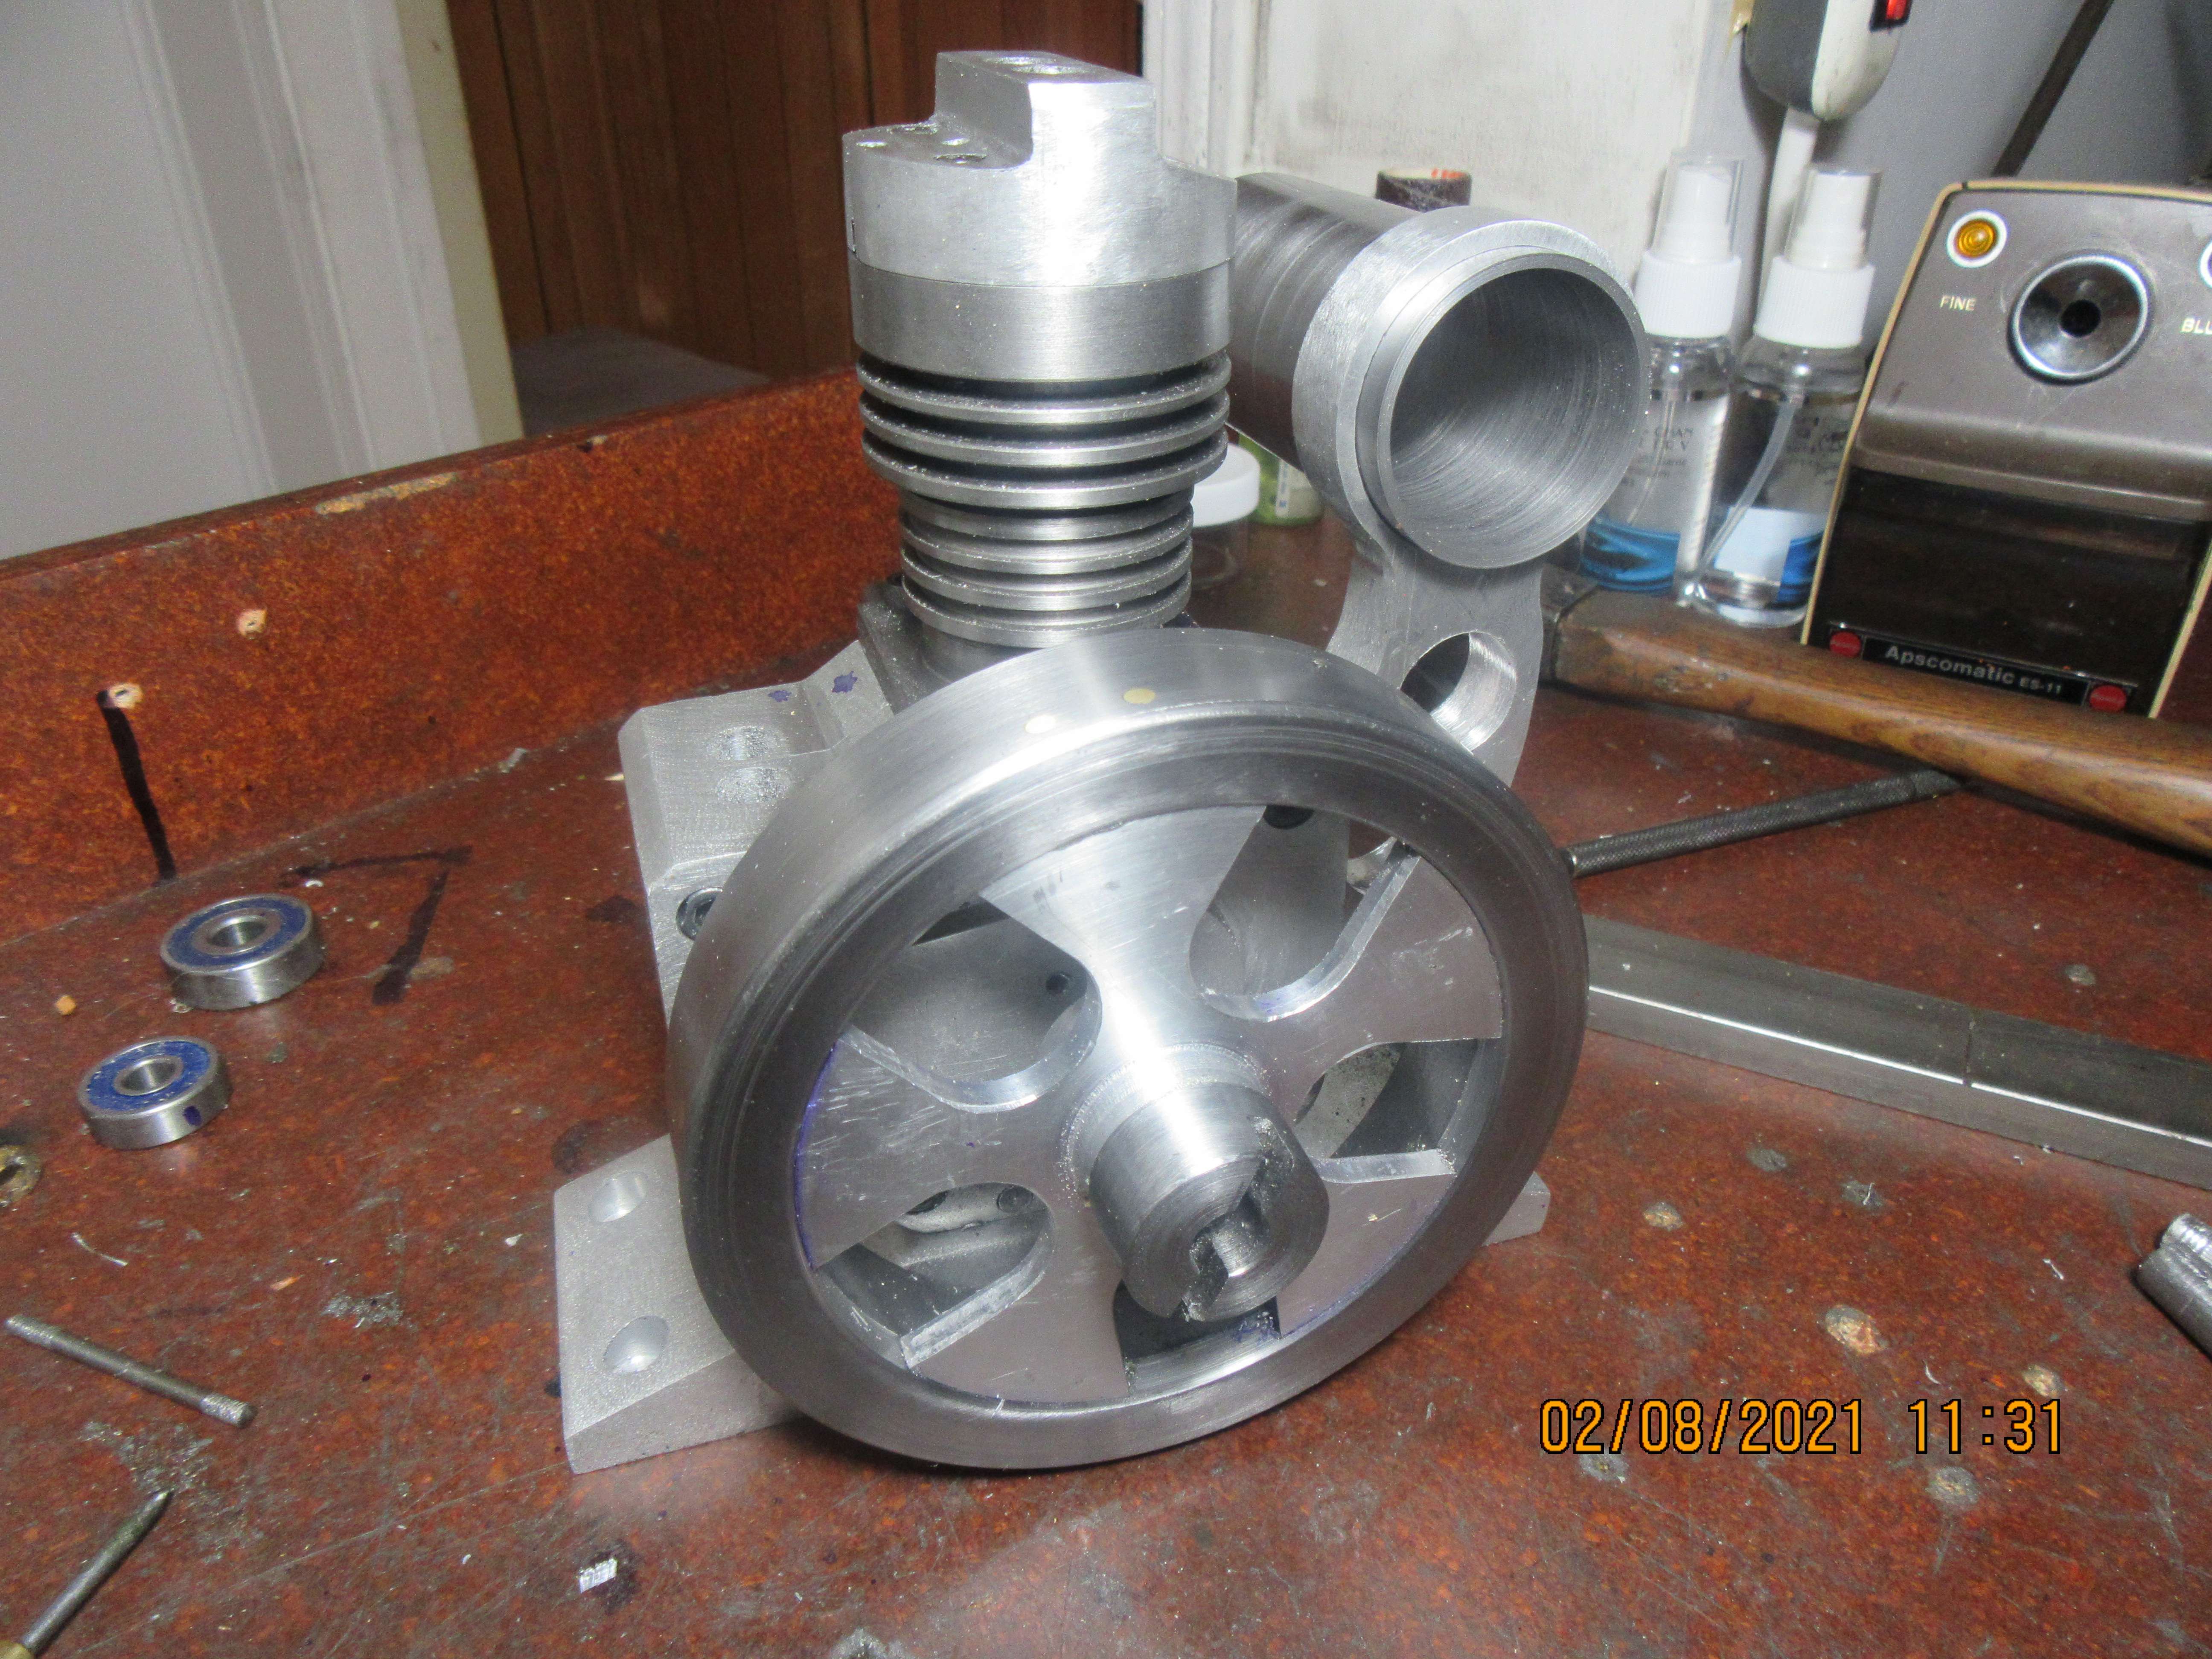
There is more work involved with this flywheel than I like to mention, but it is nice. You can see the top of the 1/8" brass dowels that hold the outer steel rim to the aluminum center. They cleaned up really nice. Also, you can see the steel starter hub on the near side where my electric drill starter connects.

Excellent work Brian. Keep it up.
K2
K2
Similar threads
- Replies
- 11
- Views
- 1K
- Replies
- 1
- Views
- 197
- Replies
- 0
- Views
- 195


