Rod's Aussie Shed

Home Model Engine Machinist Forum

Help Support Home Model Engine Machinist Forum:

This site may earn a commission from merchant affiliate links, including eBay, Amazon, and others.
Oh f(*^%$!!

Damn, if I wasn't on the other side of the country I'd lend you some muscle :(

Can you set up a block & tackle anywhere? Maybe build a makeshift gantry over it?
Pull an engine crane apart and rebuild it in the shed?

All good ideas thanks Simon. It is amazing what stopping and thinking achieves. I have a plan now. I stripped all the looses stuff off and I found a 4" x 4" post behind the shed which is long enough to span the shed about 1500mm off the floor. I have an endless chain and an engine leveller so we should be right. The engine leveller will be handy as you can't level the load with slings with the sideways lift.

Anyway, wish us luck tomorrow night.
 
I found a 4" x 4" post behind the shed which is long enough to span the shed about 1500mm off the floor.
Hah! I was picturing a length of 4x4 in my mind as a makeshift gantry when I posted.

Anyway, wish us luck tomorrow night.
Done. You'll be fine.
Hope the lathe has only superficial damage. Fingers crossed.

I'd have been :eek: for a good hour or more after that.
 
Putting the lathe back did not go so well.


Two of us could not lift it even with a floor jack.
So guys, help me out here. Where to from here?

Sheesh, Rod, what the hell happened? Am I missing a post here? What caused it to fall over?
Please be very careful how you go about lifting it. About 7-8yrs ago, there was a fatality in Sydney when a chap was installing a similar type of lathe in his garage and it toppled over. As you are aware, they are dangerously top heavy.

Hasten slowly...

Regards, RossG
radial1951
_____________

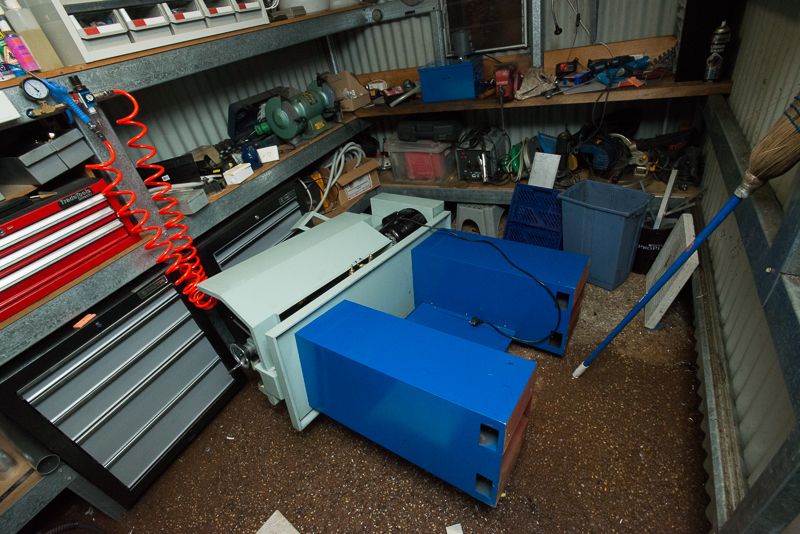
Ross, my shed was built on an existing slab that had a fall away from the house for runoff. Said runoff goes straight through the shed whenever it rains. You can see the floor is wet from rain in the photo. I had it sitting on two of the concrete tiles shown near the broom. I think as I walked the tailstock end back into position, the headstock end walked the other way and fell off the tile.

We have decided that we will pour a level slab that includes some bolts in it before this goes back into position. That will fix the water problem and make the lathe install safe. My son in law gets good results with Lanco self levelling floor in commercial sites.

The fatality is a sobering thought. It was the right call to stop and reassess the situation rather than keep trying silly things. My wife had a sleepless night worrying about what she would have done if I was underneath.
 
BUGGER!
Not much room to do anyhting. Can you unbolt if from the stand so you can stand it on stand it back up at least then maybe roll it out side on some broom sticks then move it back in the way you first installed it?

Brock
 
I've always thought the puny cabinets they sit on are a royal PITA, especially when a lot of them don't have a brake. Mine has a brake but I've decided to build a solid bench with many drawers to sit mine on, and also incorporate the brake. I often look at mine and think not only is the useless stand a shocking waste of space for space deprived workshops, but the whole high centre of gravity thing also worries me.

cheers, Ian
 
I've always thought the puny cabinets they sit on are a royal PITA

Have to agree, I have never liked the look of these flimsy sheet metal cabinets, even tho they are supposed to be bolted to the floor.
They just seem to have a footprint smaller than that of the lathe which never made much sense to me.
Many oldschool lathes had nice cast iron cabinets, nice that is, until you need to move it!
 
i store a lot of metal beneath my lathe to keep it in place.

whenever i have to move it, i empty the cabinet.

but as soon as i can i'm making my own lathe and getting rid of it. 1.2 m length is just too much for my work.
 
Success!


Thanks for everybody's support and for the offers to come round to help.

I have a few more photos which I will post up. I was a bit worried because I had the sling so it would come straight up on its side so I organised another helper to bring the troops to 3 but at the last minute, came up with a much better idea for the sling and got it to come up through the gap in the bed. This let it swing upright and give me a few more inches of lift.

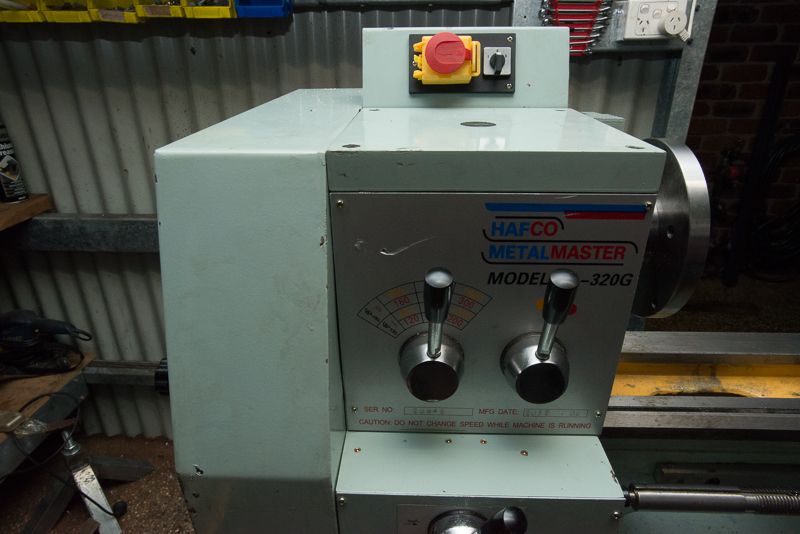
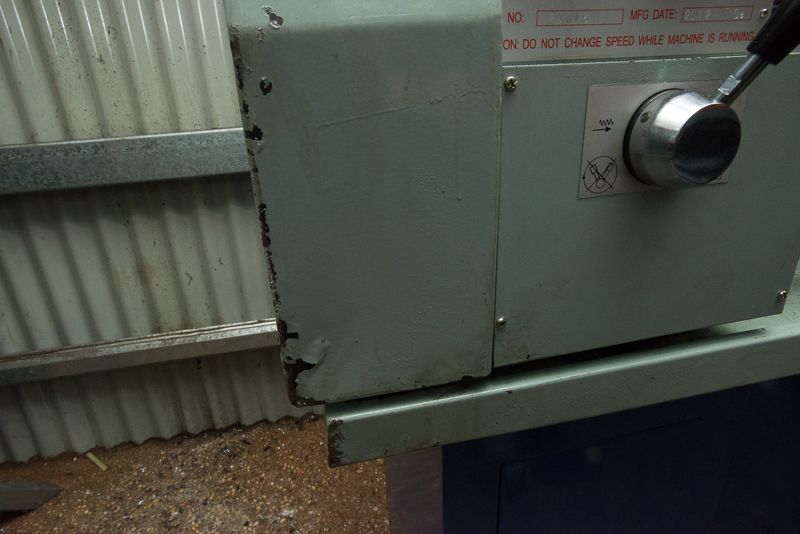
As suspected, aside from the chuck guard, the damage is restricted to a small dint in the corner of the belt guard and a gouge in the Hafco ally name plate. I still need to check it out before powering it up but I am sure it is OK. While it is out, I have a bit of wiring to do so I can run a light, coolant pump and a DRO from the lathe itself.

I think the DRO should be powered on if the lathe has power to it. Does that sound right? The light and the coolant will be controlled by a couple of toggle switches mounted by the switches.

When we pour a level slab to fix this forever, there will be a couple of copper pipes under the concrete so I can run coolant remotely to my mill. It is not very far away and there is enough fall so the return drain can go back to the tank at the lathe. If it ever blocks, a squirt if air will fix it.

I do agree, these stands are a joke, the weight of the lathe extends well forward of the legs so it is an accident waiting to happen if not bolted down. It may have been worse because I had taken all of the stuff stored in the lathe stand out and had them stored in my new, now partly destroyed drawers.
 
Good to see not much damage from what could have been a disaster Rod! I can't remember if I saved these from here or cnczone, but this blokes idea I reckon is just about perfect! I'll be something similar but adjusting the bottom as I'll need to re-fit the brake so it's fully functional and not impeded in any way.

cheers, Ian

PICT0442s.jpg


PICT0441s.jpg
 
Ian, very nice and food for thought. It took me a while to work out the hand winch purpose and then I saw the removable wheels!
 
Good to see not much damage from what could have been a disaster Rod! I can't remember if I saved these from here or cnczone, but this blokes idea I reckon is just about perfect! I'll be something similar but adjusting the bottom as I'll need to re-fit the brake so it's fully functional and not impeded in any way.

cheers, Ian

Ian, I have been pondering this on my way to work today. I've already got one of the drawer units he has used. They cost $198 from Tradetools which I think are down your way too. http://www.tradetools.com/products/EP333-I3X

The other one which is 110mm deeper is the Hare and Forbes unit at $165 but they will give a good customer a discount so I should be able to get them for a bit less
https://www.machineryhouse.com.au/A422
I have plenty of thin drawers already and the Hare and Forbes 100mm deep drawers are probably better for me. I just have to decide if I can afford to give up the extra 110 mm of floor space for them!

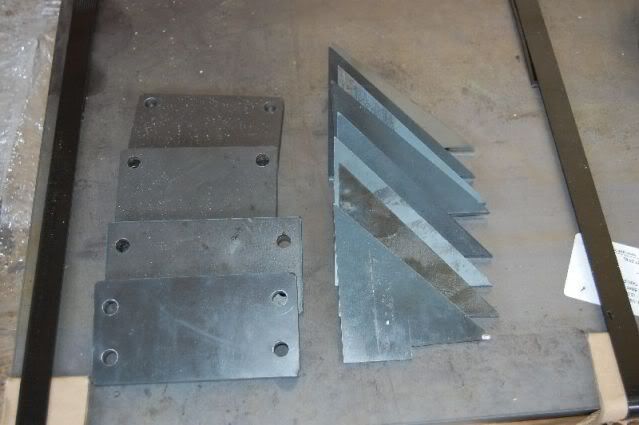
When I made my welding table, I got some components lasercut which made it very easy (and let me get a small piece of plate steel)


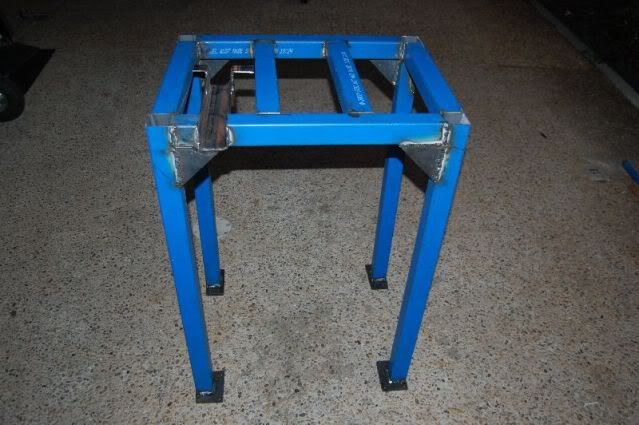
The table is very similar construction to the lathe table and it did not take long to knock together.


It has provision to hold a 2" SHS to mount a vice in case you are wondering what's going on in the left hand corner!
 
Ross, my shed was built on an existing slab that had a fall away from the house for runoff. Said runoff goes straight through the shed whenever it rains. You can see the floor is wet from rain in the photo. I had it sitting on two of the concrete tiles shown near the broom. I think as I walked the tailstock end back into position, the headstock end walked the other way and fell off the tile.

We have decided that we will pour a level slab that includes some bolts in it before this goes back into position. That will fix the water problem and make the lathe install safe. My son in law gets good results with Lanco self levelling floor in commercial sites.

The fatality is a sobering thought. It was the right call to stop and reassess the situation rather than keep trying silly things. My wife had a sleepless night worrying about what she would have done if I was underneath.


Rod,

Please take care and get the right lifting equipment to lift and place lathe safely. Have heard of fatal injuries.

Gus Teng.
 
Rod,

Please take care and get the right lifting equipment to lift and place lathe safely. Have heard of fatal injuries.

Gus Teng.

Thanks Gus, we did use slings and an endless chain rated for the lift at hand.

This weekend's project is to make a start on a new lathe stand based on aarrgh's design. Thanks Ian!

It must be a large lathe in the photos as the minimum width I could make a stand using that style of drawer unit is about 1450mm which is too long for me. The Hare and Forbes drawers are shorter but a bit deeper and will work for me so hopefully they have them in stock in Brisbane here. I have to muck about to make sure there is enough room for my coolant pump as well which might be a challenge.
 
Success!


Thanks for everybody's support and for the offers to come round to help.

I have a few more photos which I will post up. I was a bit worried because I had the sling so it would come straight up on its side so I organised another helper to bring the troops to 3 but at the last minute, came up with a much better idea for the sling and got it to come up through the gap in the bed. This let it swing upright and give me a few more inches of lift.

As suspected, aside from the chuck guard, the damage is restricted to a small dint in the corner of the belt guard and a gouge in the Hafco ally name plate. I still need to check it out before powering it up but I am sure it is OK. While it is out, I have a bit of wiring to do so I can run a light, coolant pump and a DRO from the lathe itself.

I think the DRO should be powered on if the lathe has power to it. Does that sound right? The light and the coolant will be controlled by a couple of toggle switches mounted by the switches.

When we pour a level slab to fix this forever, there will be a couple of copper pipes under the concrete so I can run coolant remotely to my mill. It is not very far away and there is enough fall so the return drain can go back to the tank at the lathe. If it ever blocks, a squirt if air will fix it.

I do agree, these stands are a joke, the weight of the lathe extends well forward of the legs so it is an accident waiting to happen if not bolted down. It may have been worse because I had taken all of the stuff stored in the lathe stand out and had them stored in my new, now partly destroyed drawers.

Hi Rod,

Much relieved to see lathe up on its feet with the appropriate safe lifting equipment and Rod in one undamaged piece.:):):)
Plan to buy a Proxxon PD400 lathe which is 45kg and has to go up 2nd floor.
Now working out manpower planning to move lathe when it arrives.:D:D


Gus Teng.
 
Hi Rod,

Much relieved to see lathe up on its feet with the appropriate safe lifting equipment and Rod in one undamaged piece.:):):)
Plan to buy a Proxxon PD400 lathe which is 45kg and has to go up 2nd floor.
Now working out manpower planning to move lathe when it arrives.:D:D


Gus Teng.

Gus, looks like a nice lathe. I reckon a burly fisherman like you could just carry it up the stairs.:hDe:
Surely with the chuck and tailstock etc removed you can slim it down by 10kg?

My plans have had a bit of a setback. My Hilux let me down on the way to work on busy Ipswich Rd peak hour traffic. I managed to sneak down a side street and wait patiently for a tow truck to arrive. My guess is a rear wheel bearing but the mechanic thinks it is a diff centre. So I probably won't be able to collect the steel as planned for the weekend.
 
This weekend's project is to make a start on a new lathe stand based on aarrgh's design. Thanks Ian!
Not my design Rod! I just plundered the images when I was searching for ideas on convenient ways to move machinery. I've been searching like a madman, but for the life of me I cannot find the original post at all. I have a habit of marking good things to return to them later, but it's gotten lost somewhere along the way!

Good luck with the ute mate, I have a hilux myself, and loooove it, so I can feel your pain!

cheers, Ian

Yes they are a good car Ian, I play with a few bits and pieces for them on my web site
http://www.vehiclemods.net.au/index.php
Hmm, I was wrong it was a shattered pinion in the rear diff.
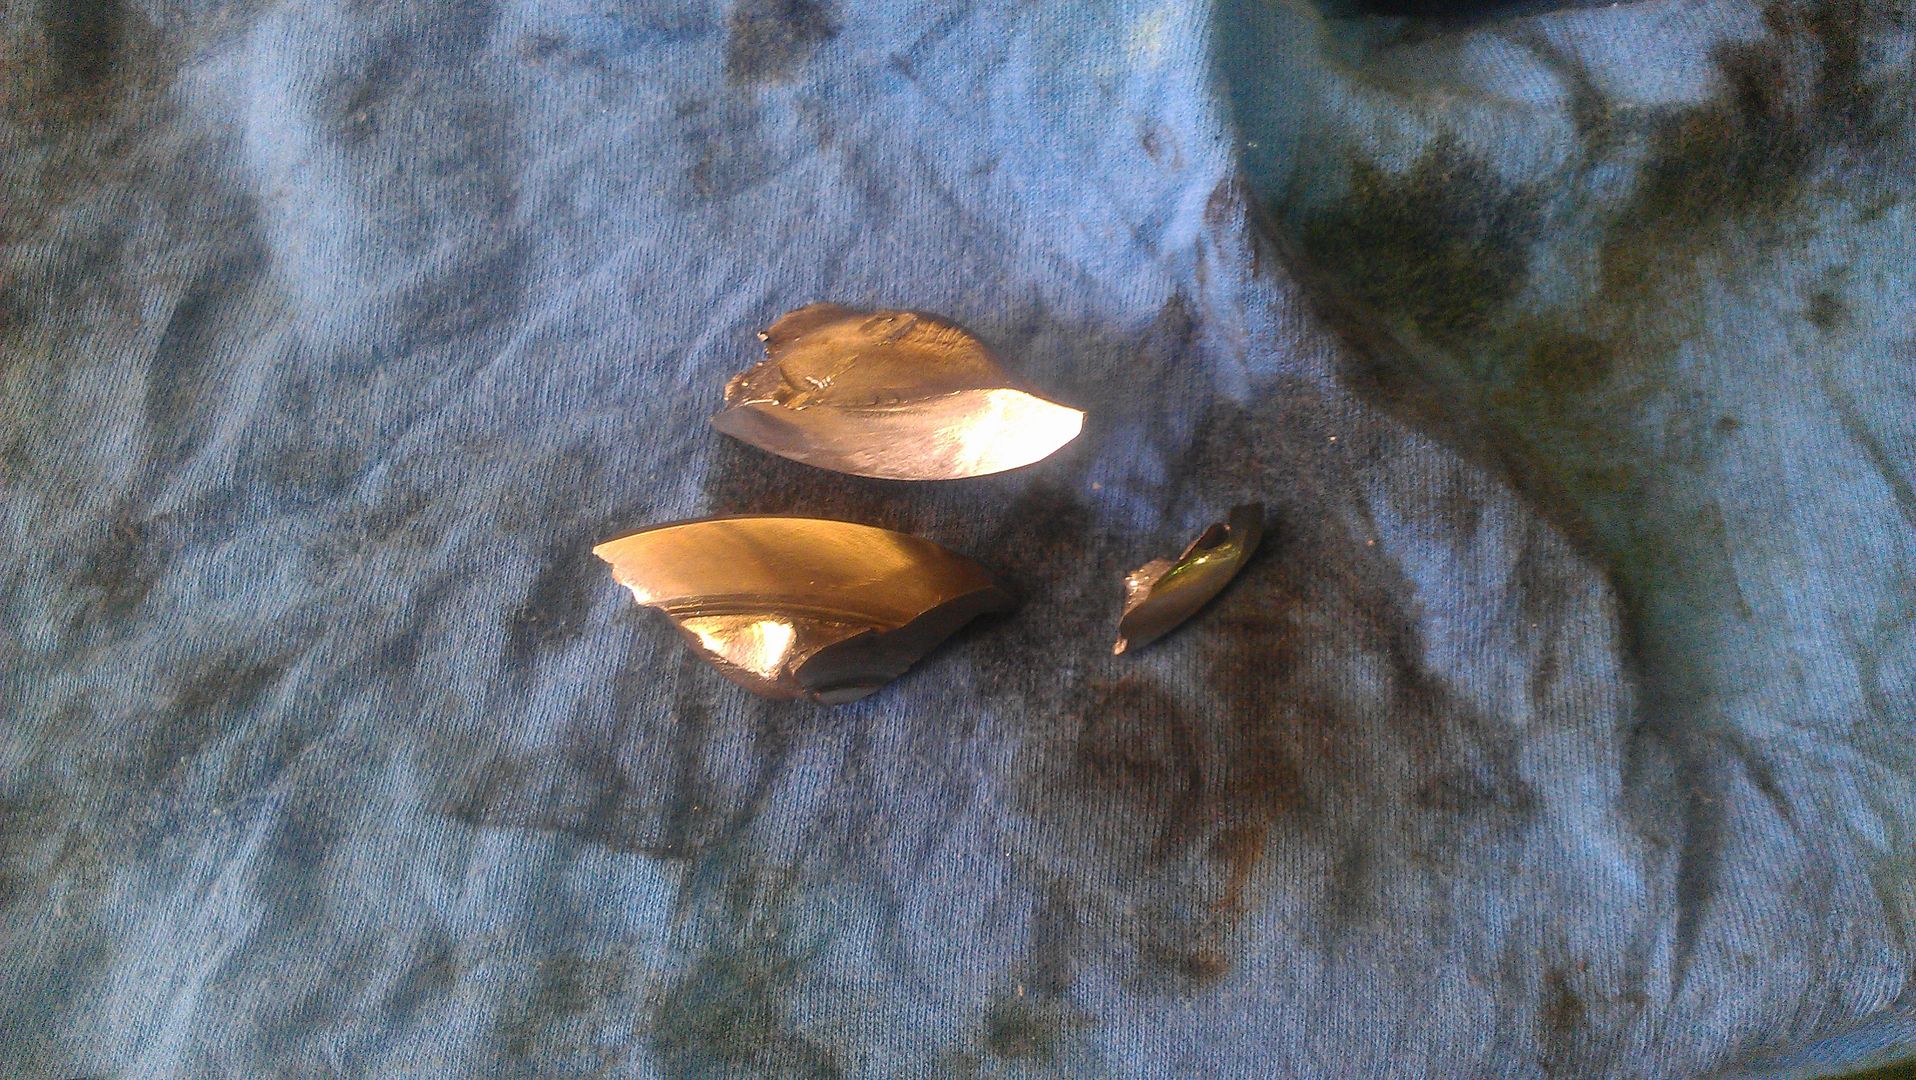


Hopefully Insurance will cover this. The mechanic said it was impact damage whilst the vehicle was stationery which is consistent with when this:
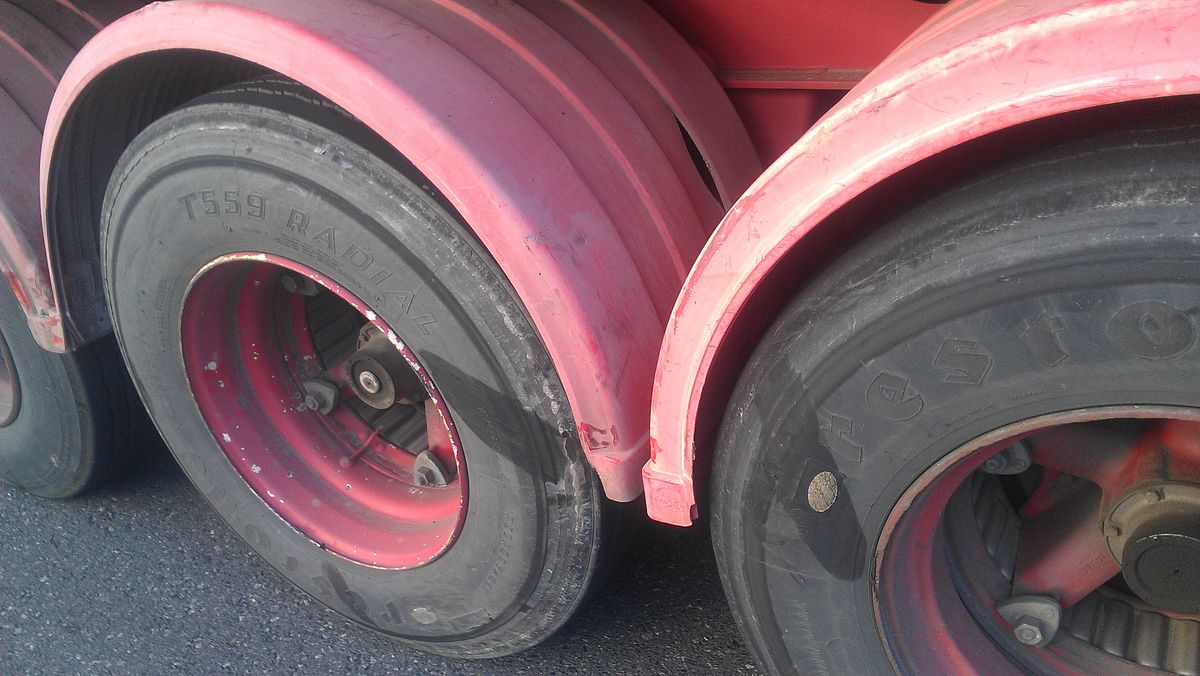


Did this to me
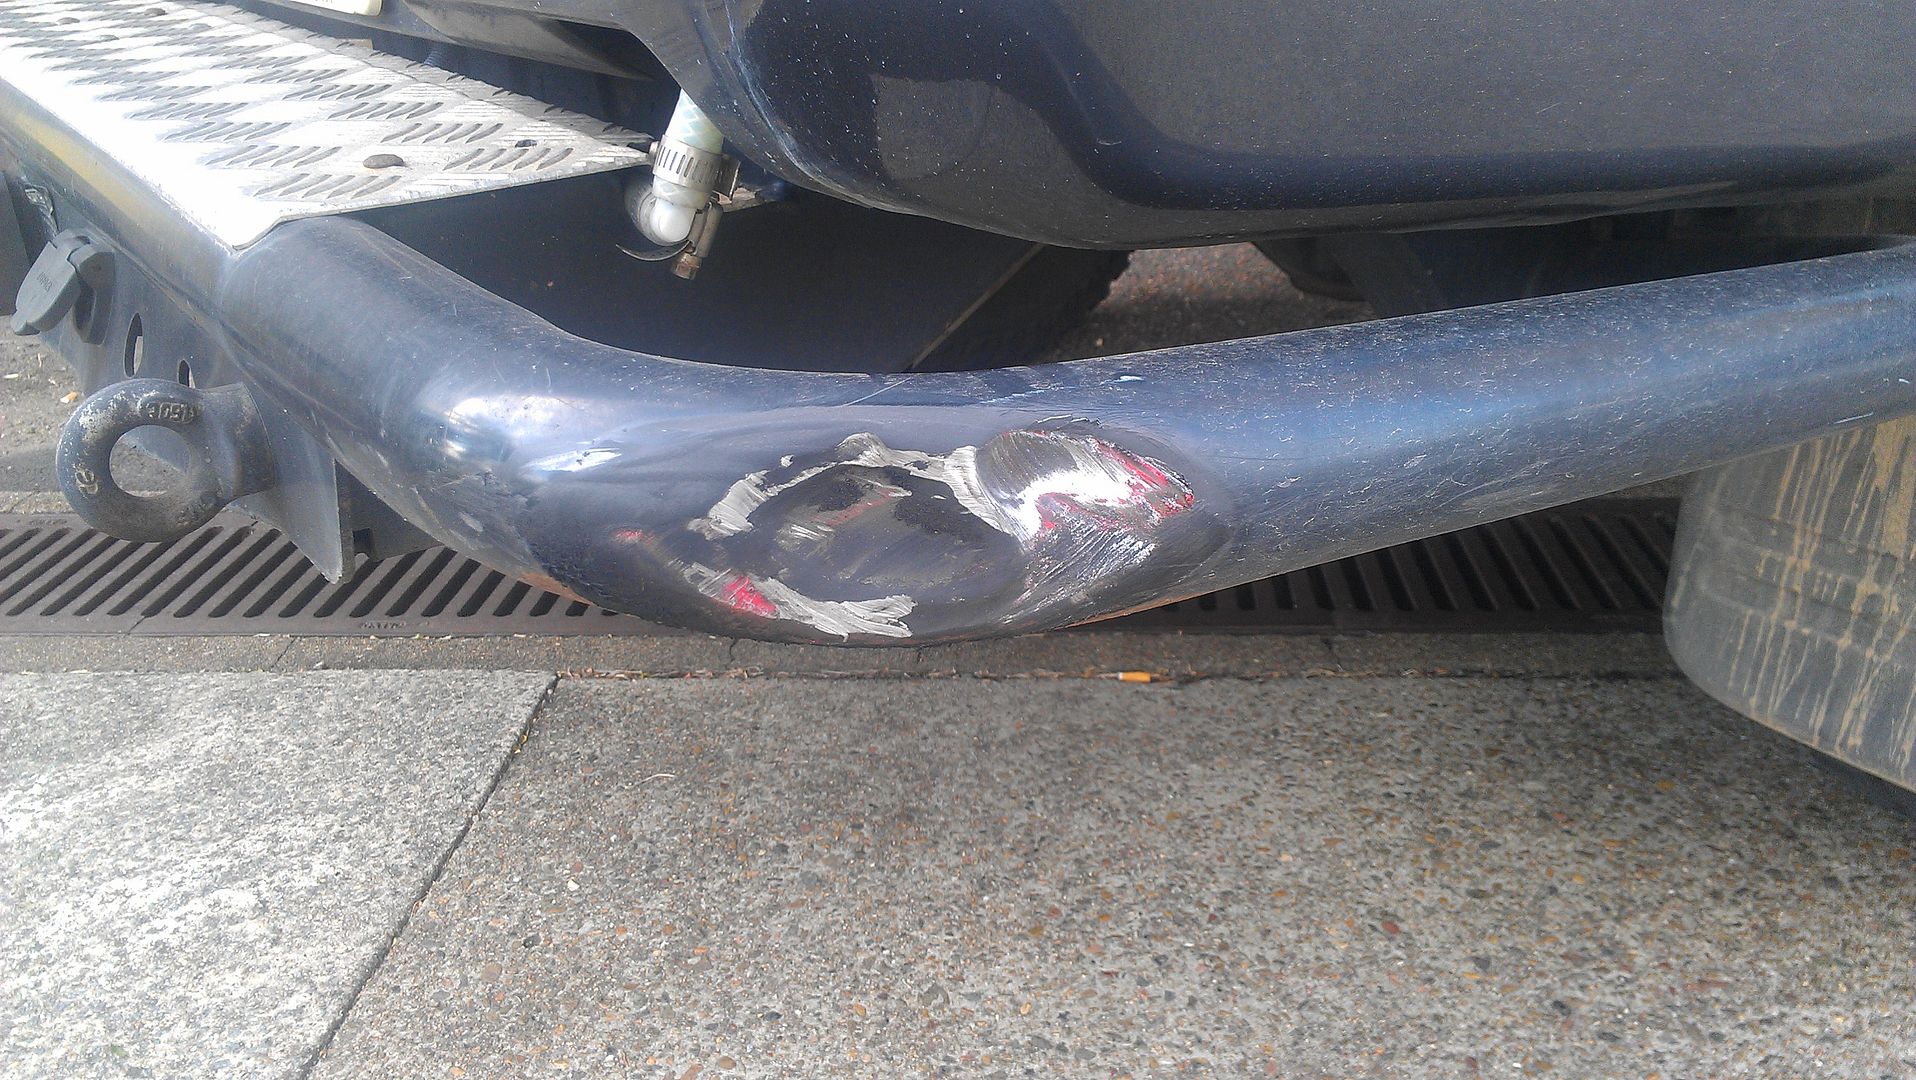

last week.

It has not been a good couple of weeks as last Friday my alternator went which cost e $900 in repairs. I almost got to the Auto electrician but walked the last 200 metres after it stopped dead!

Anyway, Here are some better photos instead of my phone ones.

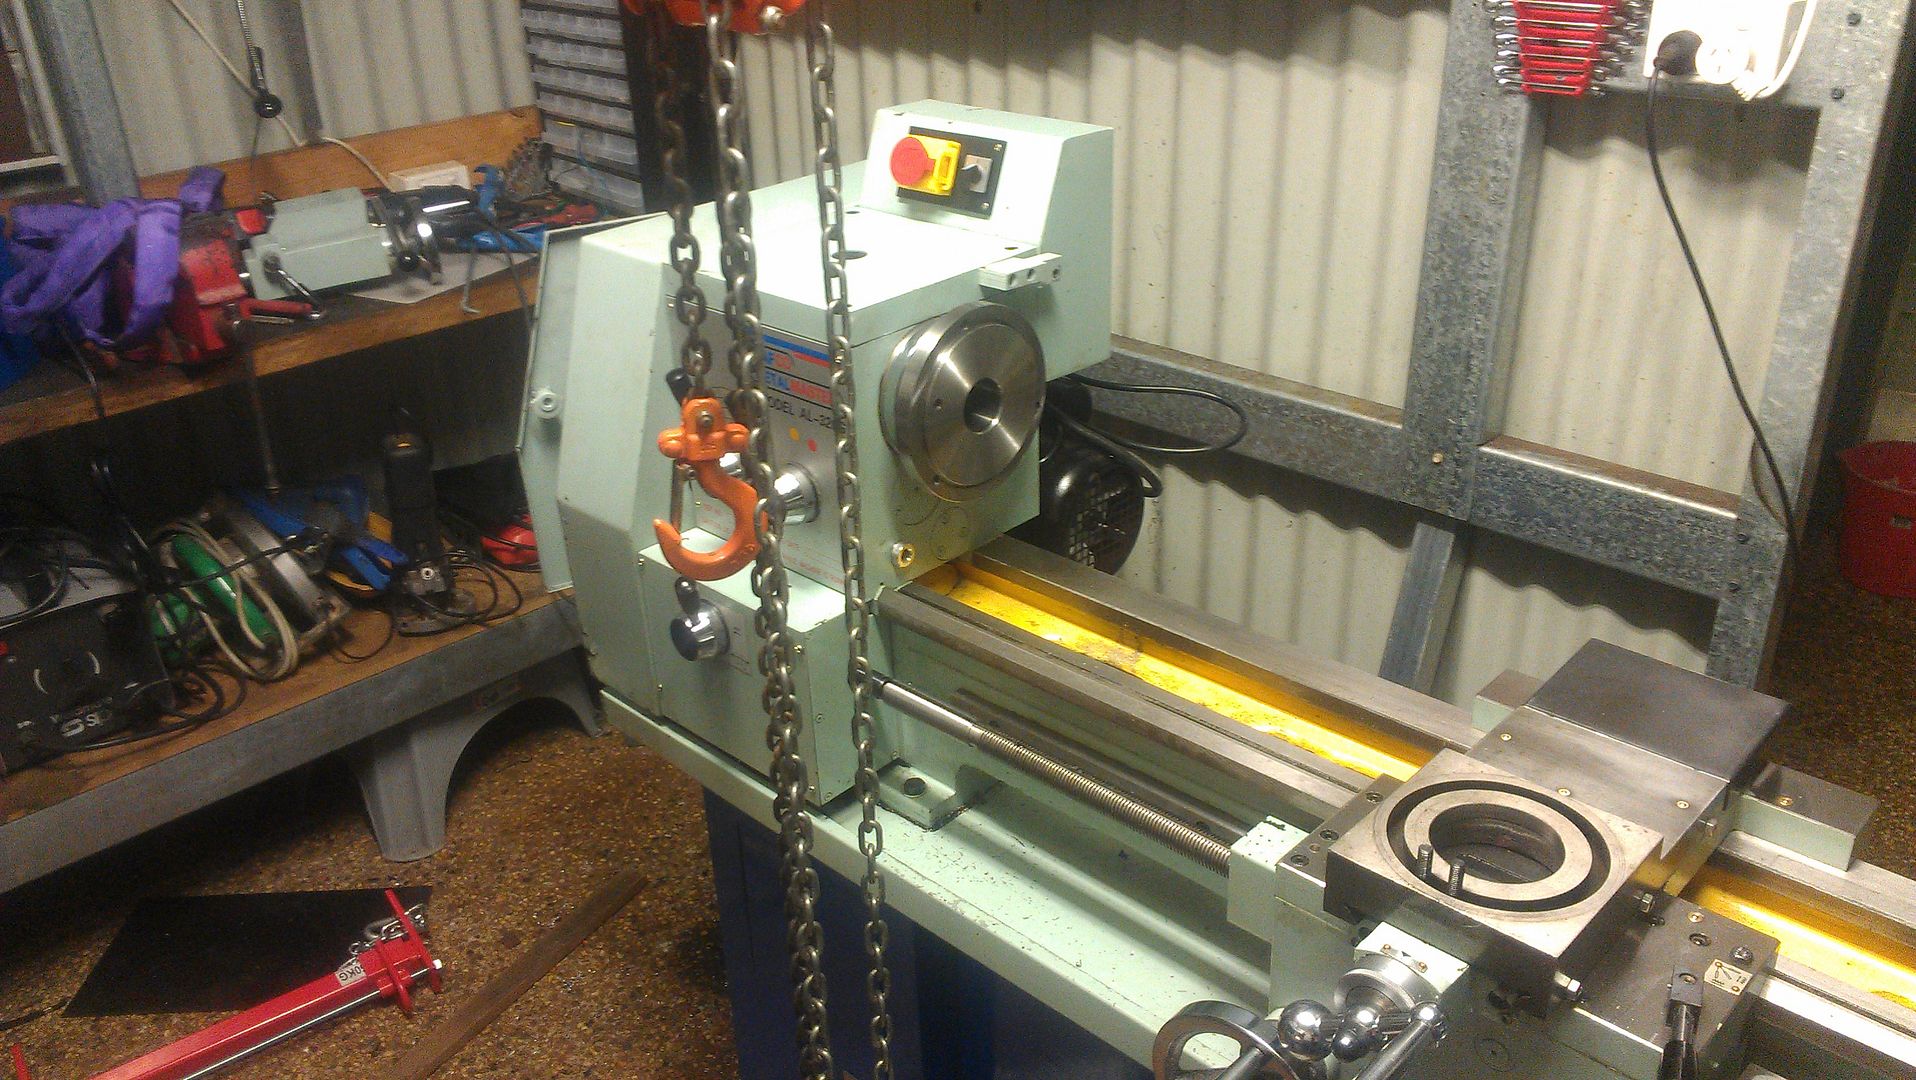
Setting up to lift it with snatch blocks, slings and an engine leveller
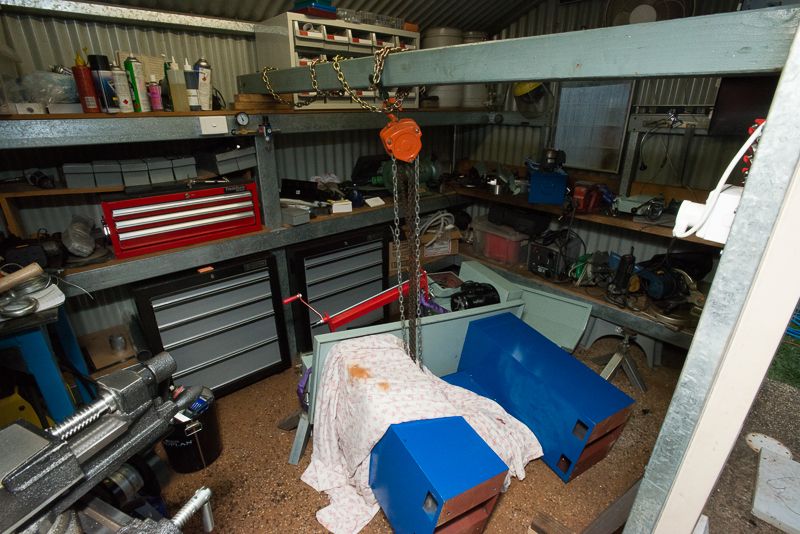


Not enough lift, so had to rearrange things
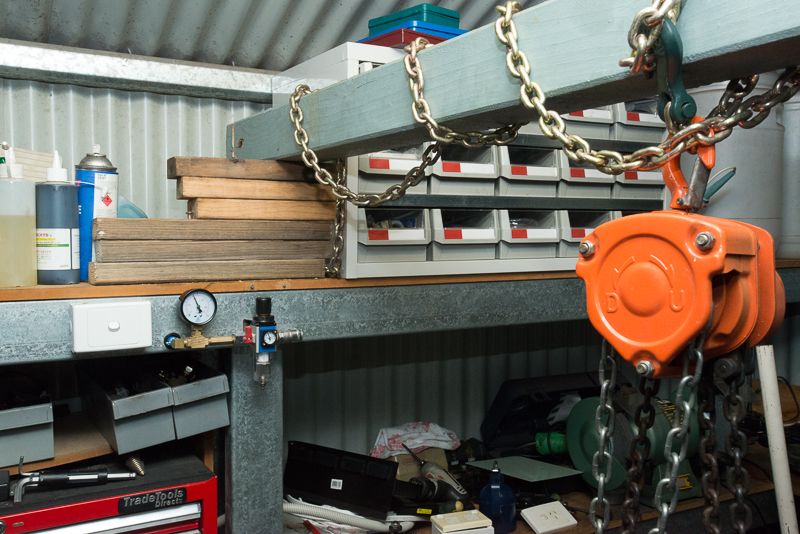


I think I had room for one more block on the second side but the stick of timber I had ran out.

And a prop I added just in case
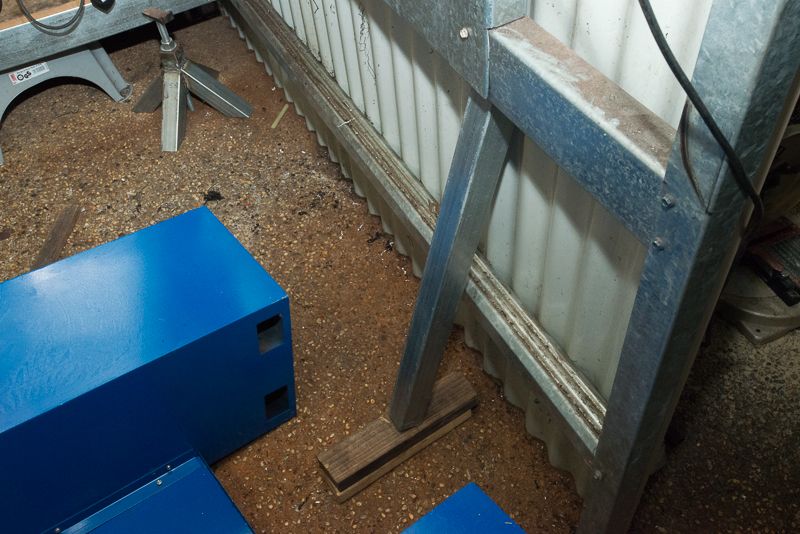


Sorry, I had removed the slings before I thought to take photos but I ran the slings around the headstock base and poked the ends out this hole so it could straighten up when lifted.
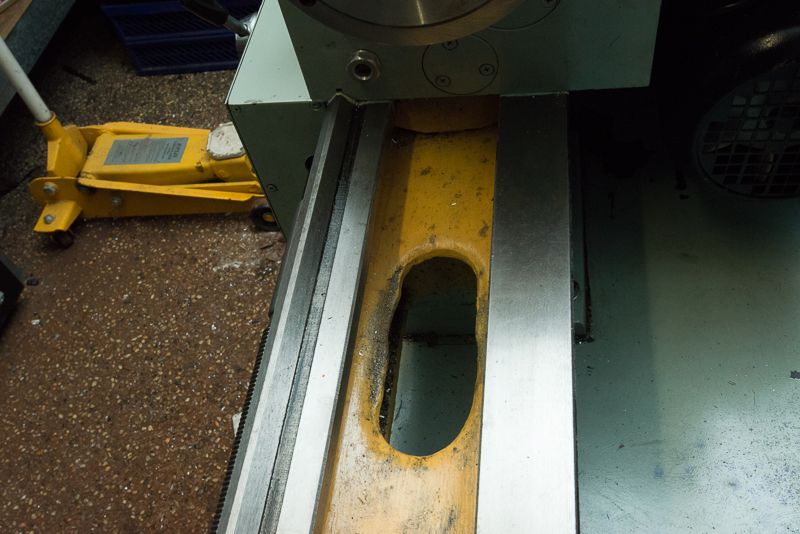


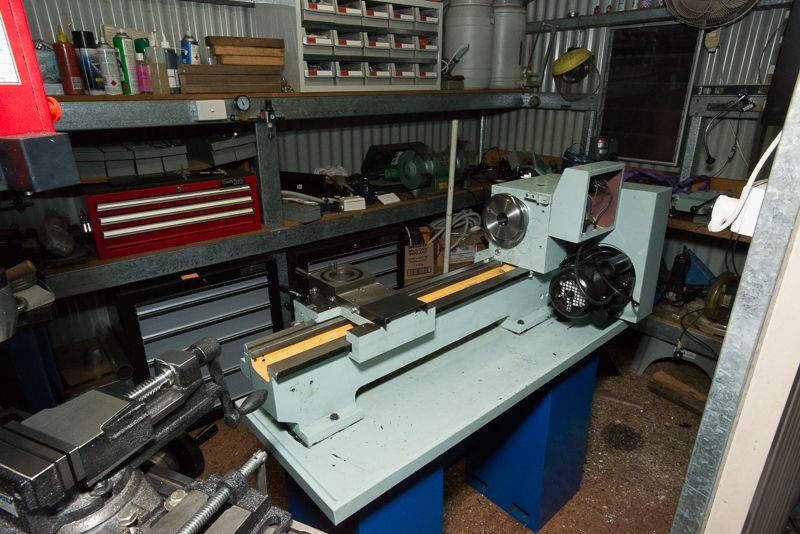
Finally upright


And some of the damage


I did not notice initially that the control box had a bit of a lean backwards and that was because the mounting holes had bent out but a hit with a hammer flattened the dimples back down.
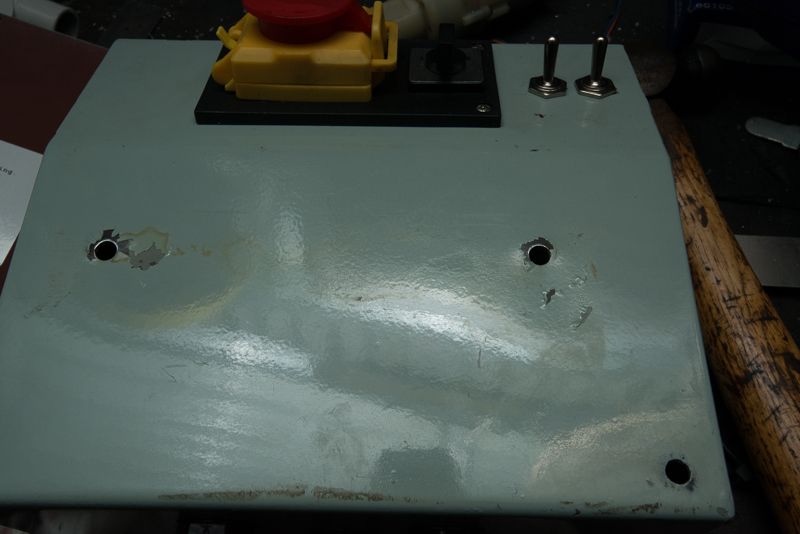


While I had it off, I decided to add a few more holes to it.
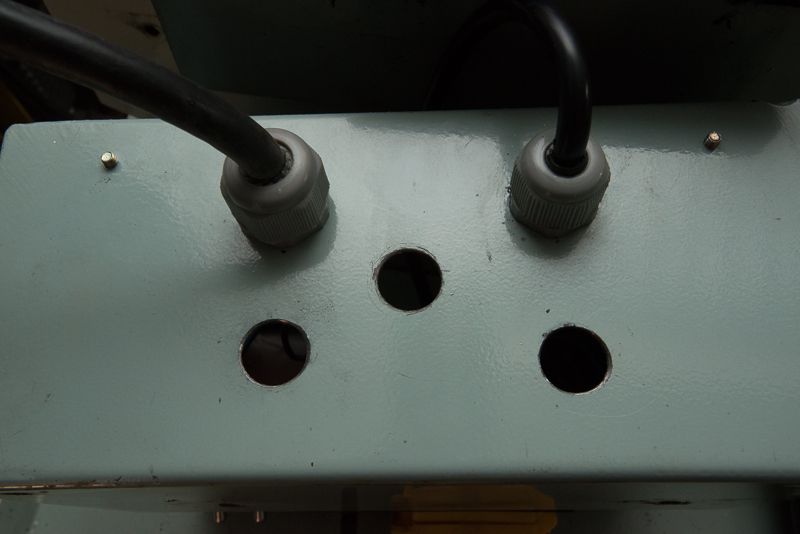


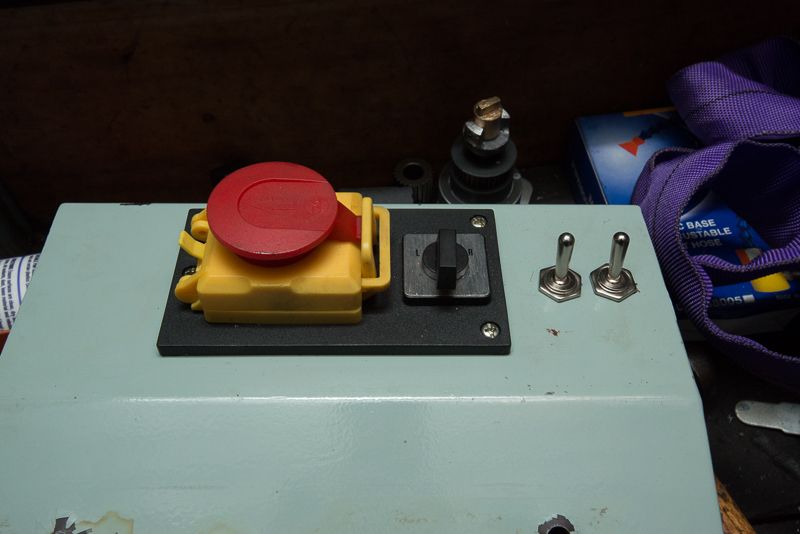
and mount a couple of switches


And rounded up three different coloured extension leads and threw half of each away
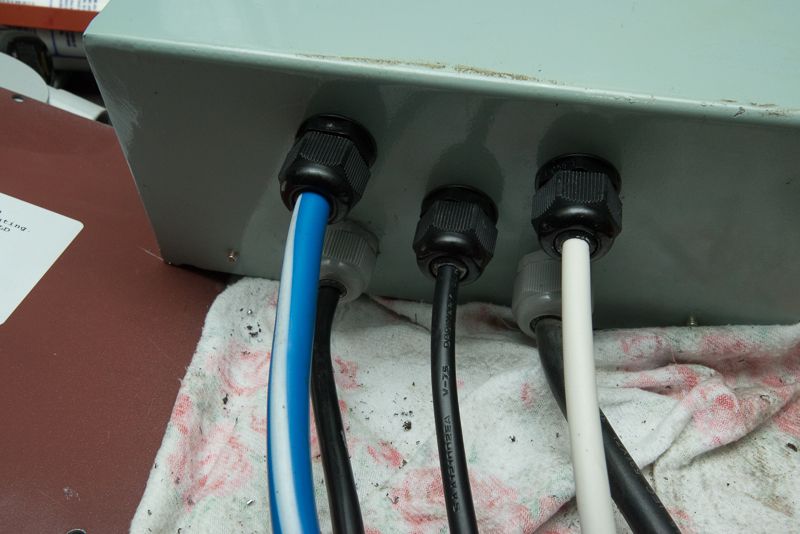


The grey cable glands are the originals and now I have three colour coded power outlets.
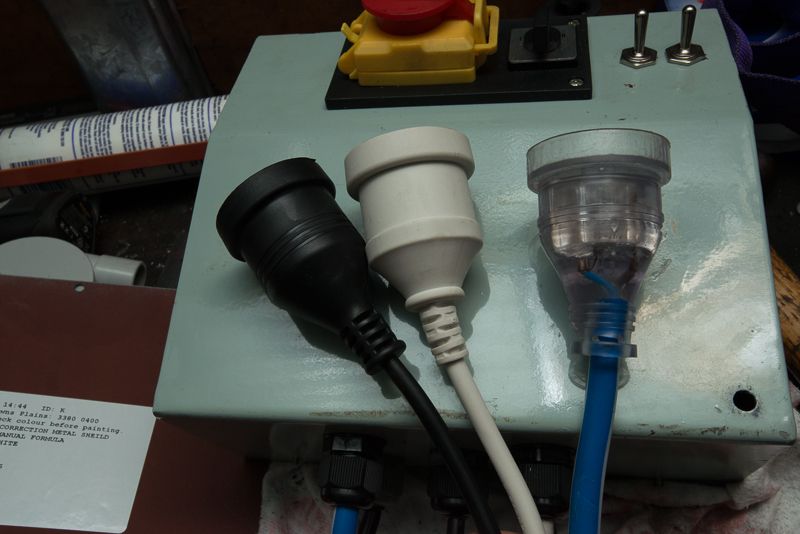


The two switches are for coolant and work light. The third is for a DRO but I was not planning on having a switch on it.

I will pull everything off this control box and give it a coat of paint. I took the back plate of the control box to Bunnings and they mtched the grey paint pretty well and I stuck the sticker with the paint codes onto the inside of the control box cover so it is there for next time.

I have also purchased a replacement drawer unit for this one but need a vehicle to bring it home
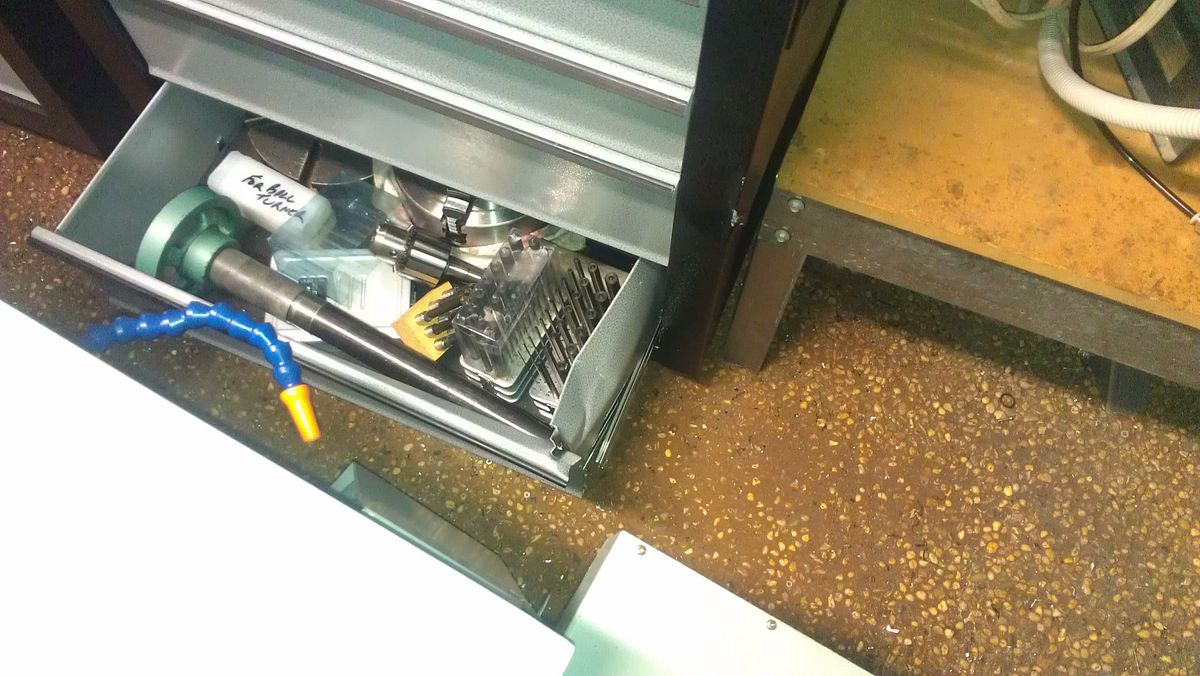


I've had a couple more ideas about what to do with the stand in relation to drawer units. It is hard to get clearance for the coolant pump and of course the coolant drain from the drip tray needs to get past the cabinets too. I am going to browse through TradeTools tomorrow and see what I come up with. One idea is to use the 4 good drawers from the busted unit, the other is to use a small 3 drawer tool box as one of the drawer units so that there is heaps of clearance behind it to mount the coolant pump.

Incidently, I had a chance to play with it briefly with some water, it does not take long to empty the tank!
 
Back
Top