Rod's Aussie Shed

Home Model Engine Machinist Forum

Help Support Home Model Engine Machinist Forum:

This site may earn a commission from merchant affiliate links, including eBay, Amazon, and others.
I agree with a lot you say. It is 30 years since we only taught metric in high school and I think I was lucky because I started high school the year before. I do remember being relieved that we did not have to do sums in quarts, pints and gallons and the like any more!

For me, measurements of rainfall, property areas and temperature were the last to gel. Gowing up on a 40,000 Ha property like I did never sounds as impressive as saying 100,000 acres! But then I lived briefly in northern Queensland where properties were measured in square miles. This sounded really impressive but when a guy told me he had 100 square miles. I eventually did the maths in my head to find he only owned 64,000 acres (stuff the Ha!) which was a small holding by my experience!

However, having studied some engineering along the way, there is no doubt that the SI metric system is vastly easier to work with when calculating things like power, force and the like. However today, the software which did not exist in my time probably does it all for you. I think when we are just in the workshop choosing between feet and metres, we never get to appreciate this logical systematic approach underpinning the SI system.

I have long since personally adopted the metric system, I never buy a tape measure with inches and am a member on this forum simply because your EZ steam engine has a metric plan available!

This Wiki link about the Aussie Metrification process and the links at the top of the page to the US and UK experiences makes interesting reading.

http://en.wikipedia.org/wiki/Metrication_in_Australia

Interesting that only 3 countries in the world remain in the imperial world. Whether we like it or not regardless of where we live, we are all going to have to deal with both systems due to the rich legacy of Imperial units and the logical thought behind the SI system as a whole. I think it is only in the last 5 years or so that our houses are fastened with M12 bolts instead of 1/2". I always found this frustrating when I went bolt shopping to have to come home with imperial ones!

Hi Rod.

Like you ,I grew up with Pounds,Shilling,Pence and Farthing. Ounces,Pounds,
Hundredweights,Tons. Furlong,miles,leagues etc. Took a 8 year old some time to absorb.Properties here are still in sq. foot.!!!:D
Upon graduation,fortunately I worked with an American Company which stuck to HP,CFM,GPM etc till 2001.But I adjusted very quickly to metric when working in China till 2011.
Took me a long time to reconcile and use Metric Threads and all because BSW,BSF,BA fasteners are hard to buy.:wall::wall:
Pipe threads here are still to Imperial.:D:D

Going Burma for deep sea fishing tomorrow. The 3rd Genearation Deep Sea Rod Holder will be to put to use. Fotos will follow.
Thanks for helping me decide to buy the BandSaw. Just Discovered I cannot live w/o the BandSaw.Wee bitty tapping fluid makes sawing easier.:D:D
The Makita BandSaw Blade is still very sharp after so many cutting.:D:D
 
Hi Rod.

Thanks for helping me decide to buy the BandSaw. Just Discovered I cannot live w/o the BandSaw.Wee bitty tapping fluid makes sawing easier.:D:D
The Makita BandSaw Blade is still very sharp after so many cutting.:D:D

Gus, I am sure my part was very small. I had never seen a bandsaw like yours until you posted pics on the forum! Yes, I do find some cutting fluid helps and in my experience the blades break before they wear out! Still, they are a lot cheaper to run than a cutoff/chop saw and can cut a much larger range of material.

Anyway, this morning, I finally got up to date with my production of HDPE plastic blocks which I was meant to get done before Christmas. My new lathe makes it so much quicker, probably at least twice as fast and the finish is so much better, particularly if running a fast feed rate. In fact, it was so good, I started to skim the faces I cut with my previous lathe as it was embarrassing to see the previous quality.

It started to rain this afternoon and because I ave been promoted to a senior member without ever building a model engine, I decided I better have a go at one.

DSC_2483_zps5a4ad6ef.jpg


I made the base and frame of the EZ and drilled and tapped all of the holes. I also cut a flywheel out of 6mm plate but I am a bit worried because the metric plans say to make it 50mm (2") but the imperial plans show it as 3". Hope it works out OK with the smaller flywheel, but it won't be too hard to remake it!
 
Gus, I am sure my part was very small. I had never seen a bandsaw like yours until you posted pics on the forum! Yes, I do find some cutting fluid helps and in my experience the blades break before they wear out! Still, they are a lot cheaper to run than a cutoff/chop saw and can cut a much larger range of material.

Hi Rod, Those cut-off band saws would have to be one of the best bargains on the planet. Very useful. As you probably know, he blades break because they are being twisted during each rev around the wheels. The blade usually starts making a rapid "ticking" or "clicking" sound not too long before it breaks.

If you have a careful look at the blade, you will see minute cracks heading across the blade from the gullet of nearly every tooth. These are the result of the twisting and that's what makes the noise.

The trick is to have the blade only just tight enough to drive. It will still break eventually, but will last a bit longer...

Regards, RossG.
radial1951
______________
 
Rod, where do you buy your brass and aluminium material from? I am in Qld and looking for a good source that will do mail order. Due to health I can't get around the junkyards much and need a not-to-expensive supplier for a couple of Stirling projects I want to do.
 
Rod, where do you buy your brass and aluminium material from? I am in Qld and looking for a good source that will do mail order. Due to health I can't get around the junkyards much and need a not-to-expensive supplier for a couple of Stirling projects I want to do.

Hopper, I have got brass in 300mm lengths from each of these guys
http://www.hobbymechanics.com.au/ at Sunnybank

http://www.minitech.com.au/ at Brendale (who have a shop)

Larger pieces you could probably get cut at Bohlers discussed earlier in this thread. Minimum order is $50 and they won't cut material under an inch thick somebody said.

The aluminium I get from Action Aluminium at Coopers Plains http://www.actionaluminium.com.au/. You can see them from Beaudesert Road but the access winds in off Bradman Street. They have everything and cut to size regardless of order quantity. Most of the stuff I have bought from them has been short offcuts but have seen the cutting gear blanks a few mm long for machine shops.

For structural steel in lengths I go to Metalcorp at Oxley. They will usually sell half a length.

Thanks mate. Should save me a lot of running about.
 
I thought I would update this thread from time to time about things tools I add or make for my shed as opposed to making something.

My shed is starting to evolve OK now. I have been collecting a few bits and pieces via eBay over the last week but still have more stuff on its way.

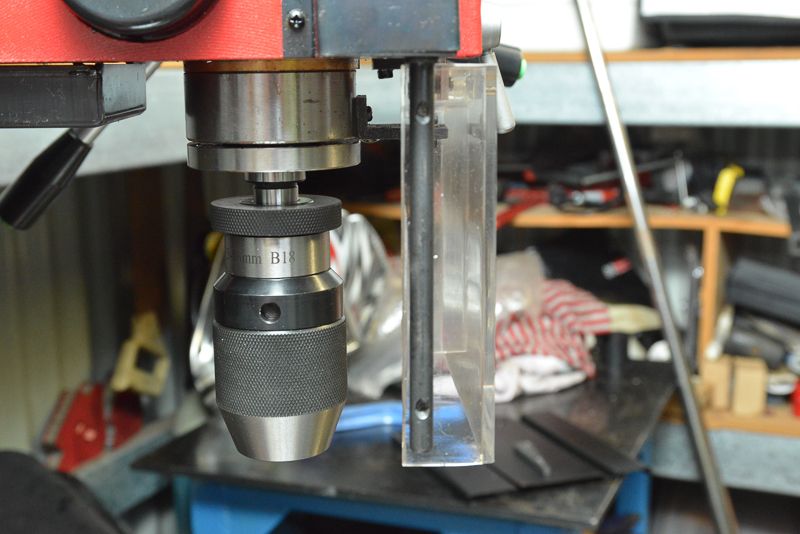
I was getting sick of swapping over the drawbars whenever I wanted to drill a hole, so I got a 16mm keyless chuck with an M12 thread in the arbor.

DSC_2499_zps27a68e8d.jpg


I have not had one of these before It is very big so perhaps a 13mm one would be better on the Seig SX3. If I decide to buy a 13mm one, this one can move to my lathe where the extra length won't be a drama.

Some of the other goodies I rounded up

DSC_2500_zpsf1a8ab90.jpg


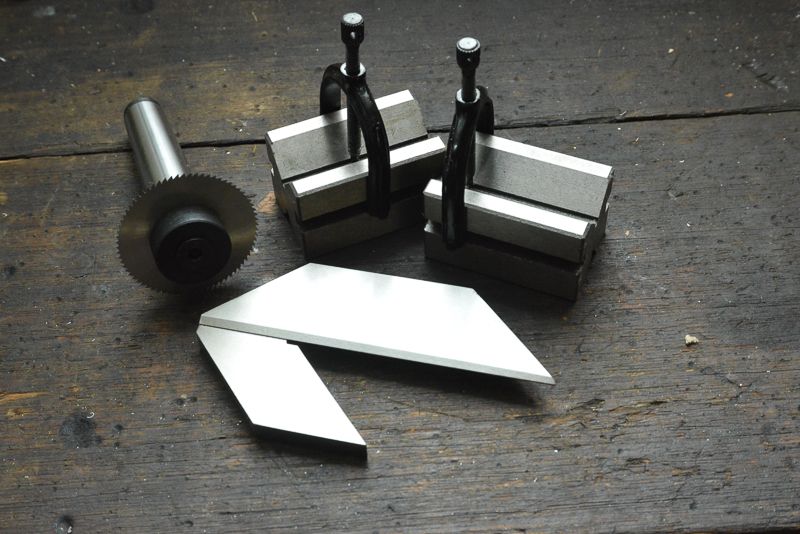
I had seen the circle centre finder before and I thought they were really clever. I also bought a slitting saw and 4 assorted blades. I guess I will find a use for it. I also bought a tailstock die holder for 1" dies which was pretty cheap so I thought it would be handy. I did have a go at making one ages ago, but I was not happy with the arbor I made for it, one day, I will give it another go.

I have got some transfer punches still coming. Australia is a big country. It takes a long time to get a parcel from the west coast to the east it seems!

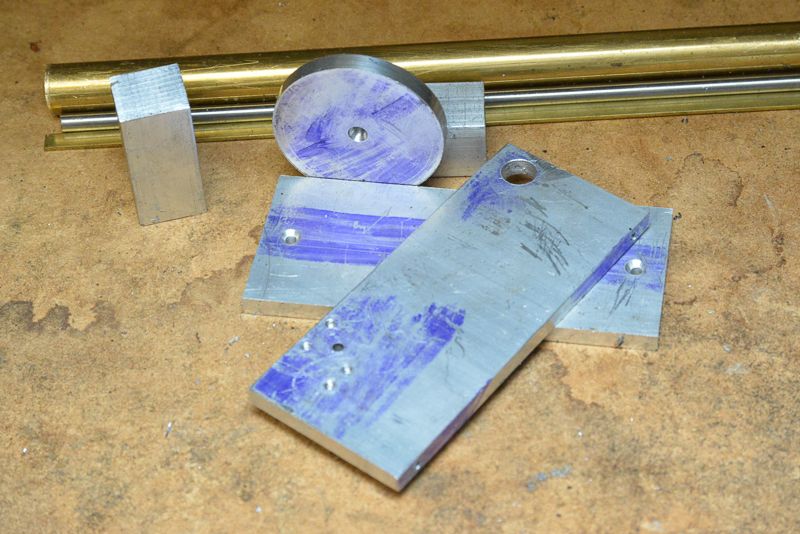
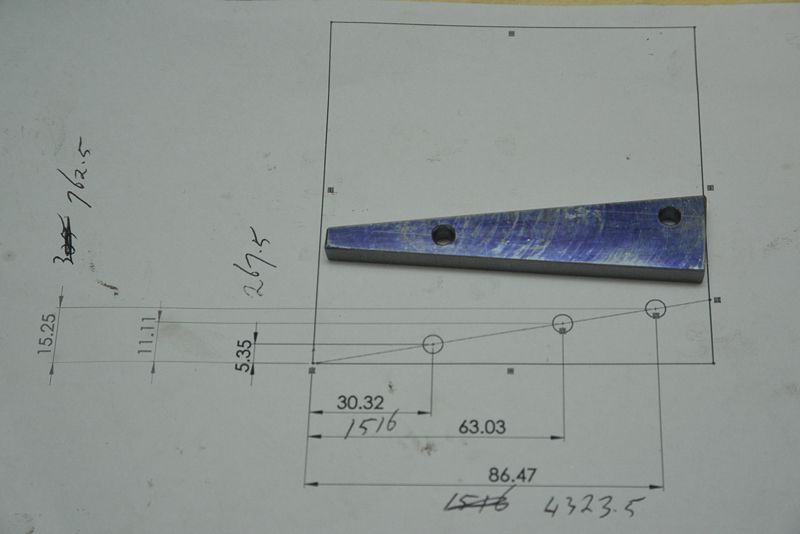
I decided to have a go at making a 10 degree angle block for a job I have in mind while I was waiting for the V block to turn up. Based on some feedback from the forum, I made a quick sketch and placed a couple of 5mm holes on a 10 degree angle from the origin. I started by hacking some mild steel down to size.

DSC_2484_zps02471b13.jpg


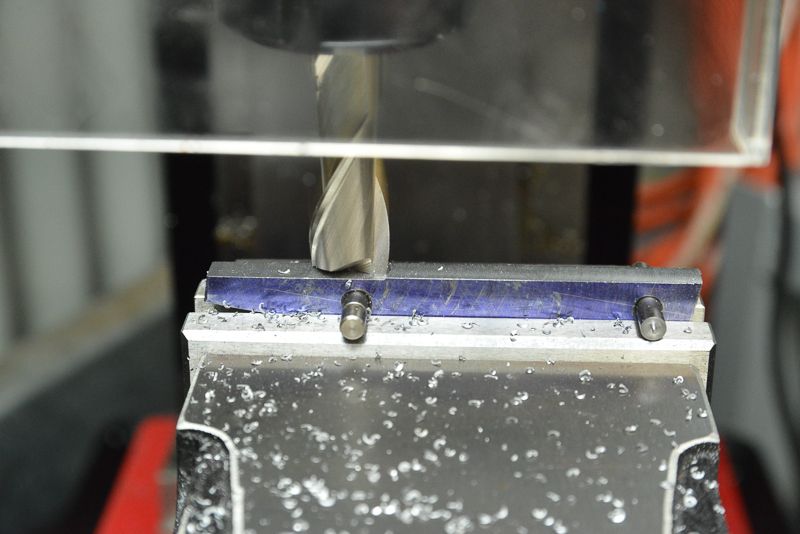
I worked out the number of clicks I had to move the mill and wrote them on the plan. The Seig has 100 clicks per revolution. Then I indicated in the origin and wound the mill out to the hole positions and drilled some 4.5m holes which I reamed out to 5mm. Then I held a 1/8" parallel against the pins and scribed a line to mill to.

DSC_2487_zpsbc293336.jpg


I parted off couple of pieces of 5 mm rod ratted out of an old laser printer and hung the part on the top of the milling vice.

DSC_2486_zps61b56836.jpg


I was very happy with the accuracy of my second freehand cut on the bandsaw as it only took 2 passes with an endmill to clean it up.

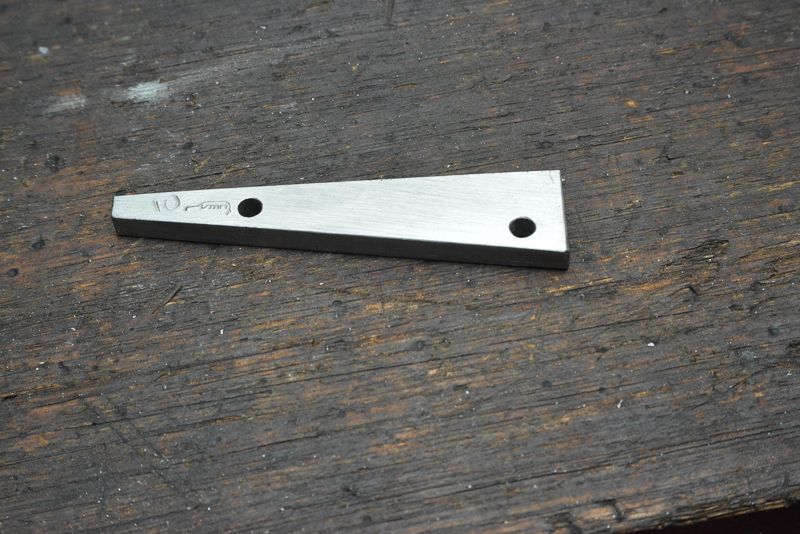
It did not take long to finish it off. I number stamped the angle on it in case I forget and added a logo stamp just because I could!

DSC_2492_zpsdd86d930.jpg


I don't have a linisher in my shop but cleaned it up OK on a metalwork belt sander. Not ideal, but it worked!

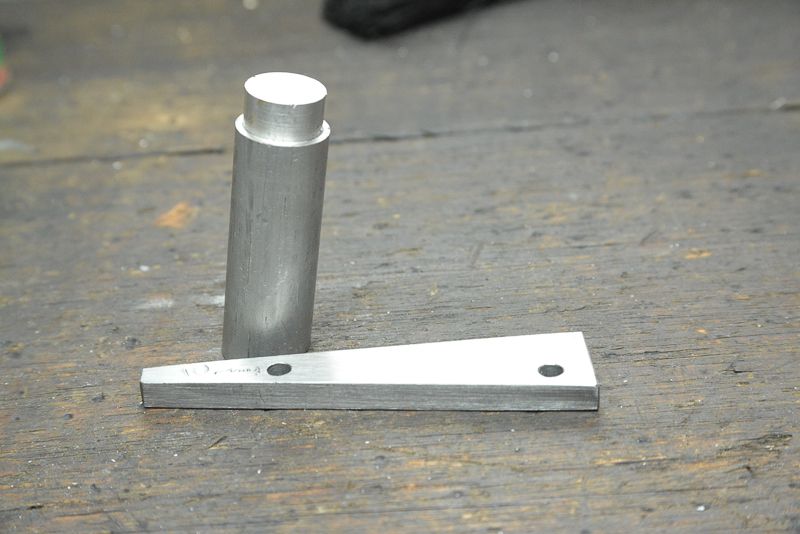
I did a quick trial cut of some ally bar using one of my new V blocks and it works a treat.

DSC_2496_zps1fc472c2.jpg


I am slowly making progress on my EZ steam engine, got the piston and valve finished off today, and will post something once I get it going. I was happy how the piston came together, so I think it will run when I get it done I think the hard stuff has been done now. I will say I have to get better at reading plans, I am not used to following others instructions it seems!

I can't believe how easy a decent lathe has made my life. I wanted to turn the base of the piston to 6mm. I worked out I needed 18 clicks on the crosslide to get it to size I ran 2 passes of 9 clicks and it was spot on to 0.01 of a mm so I am very happy with the improvement over my last lathe.
 
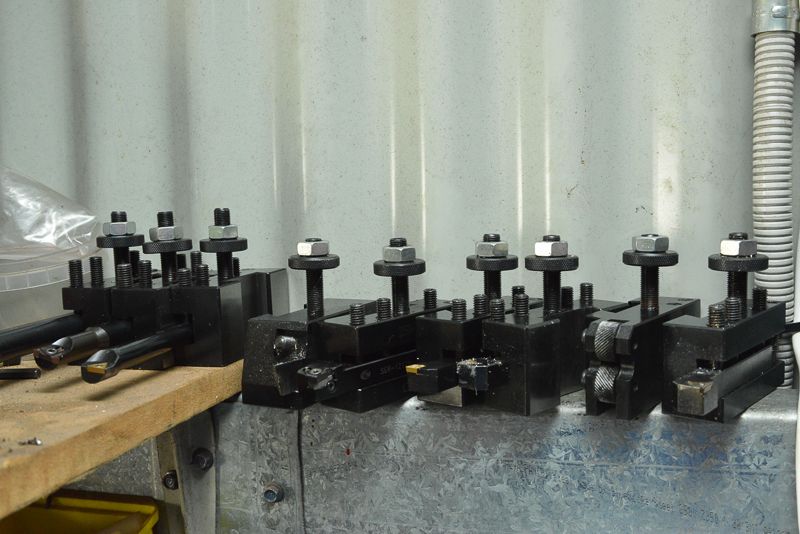
Well, I have been slowly adding to my tooling list making a few things and buying stuff when I can afford it. My QCTP holders seem to be breeding like wire coathangers

DSC_2592_zps9d565518.jpg


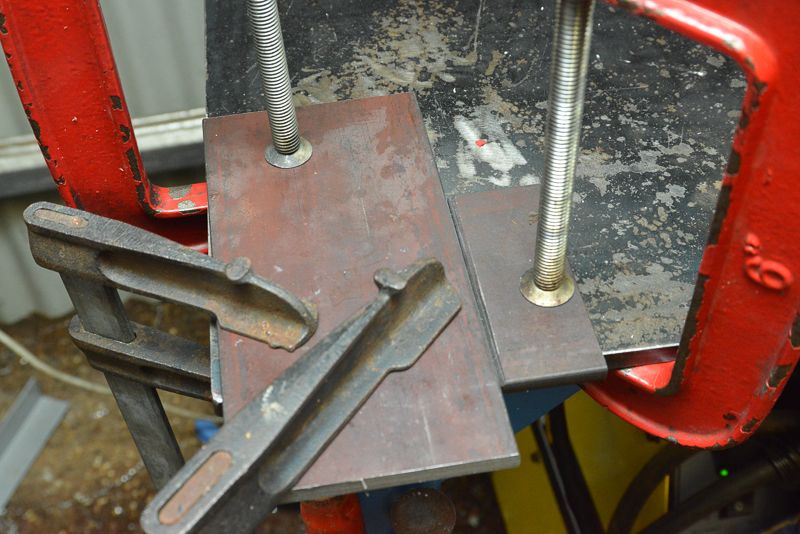
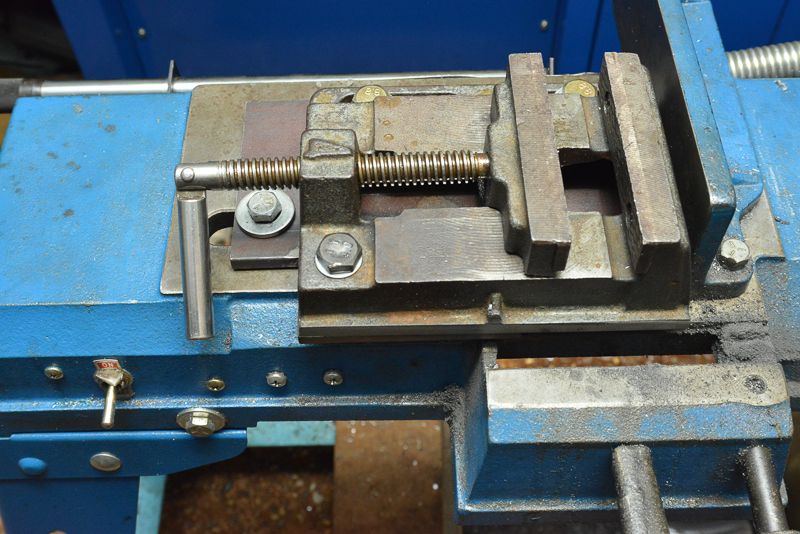
I also decided to try mounting up a spare cheap drill press vice to my bandsaw. I started with weding up a 10mm plate as the material I had was not quite big enough

DSC_2502_zpse9ec65c6.jpg


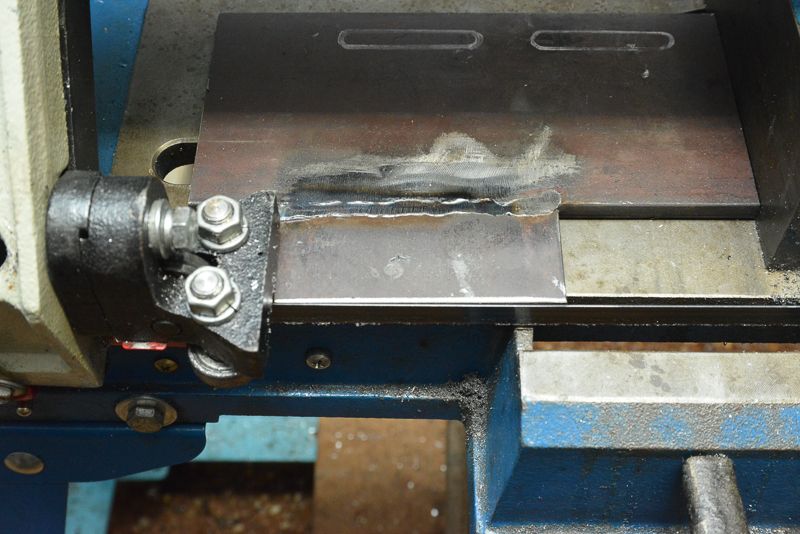
I always forget to remove my glasses when welding and can never see so I ground off the weld before being game to publish a photo

DSC_2503_zps66301ee1.jpg


And after drilling and tapping a couple of holes including a hole in the vice itself, it was ready fr its first cut.

DSC_2505_zps00994253.jpg


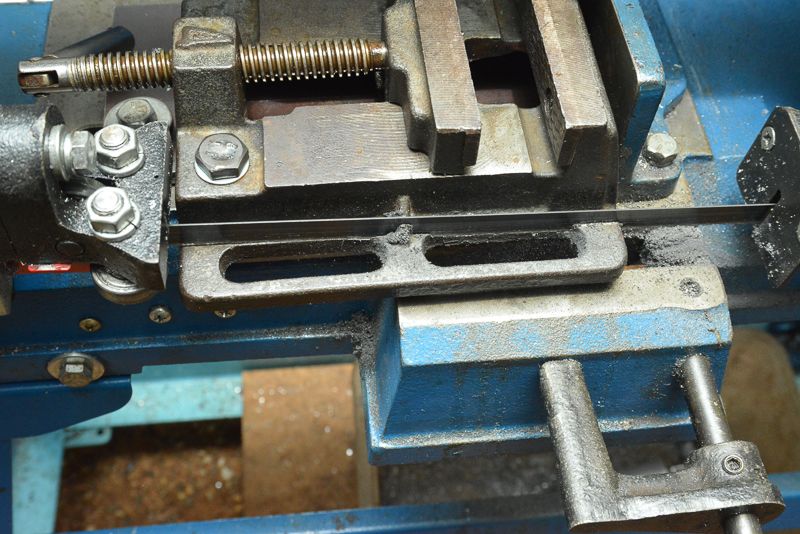
Which finally ended up with something that looked like this

DSC_2507_zps3c7bed3b.jpg


You can see that the vice now just bolts on in place of the swivel jaw and is tightened up against the fixed jaw after squaring with the blade. It might not be as clever as some other ideas with bolts to adjust at the back of the vice and it can't cut on an angle but it handles what I want to do.

Now that I had this done, I had this 30mm wide L shaped scrap left over from my carriage block that was screaming make something out of me.

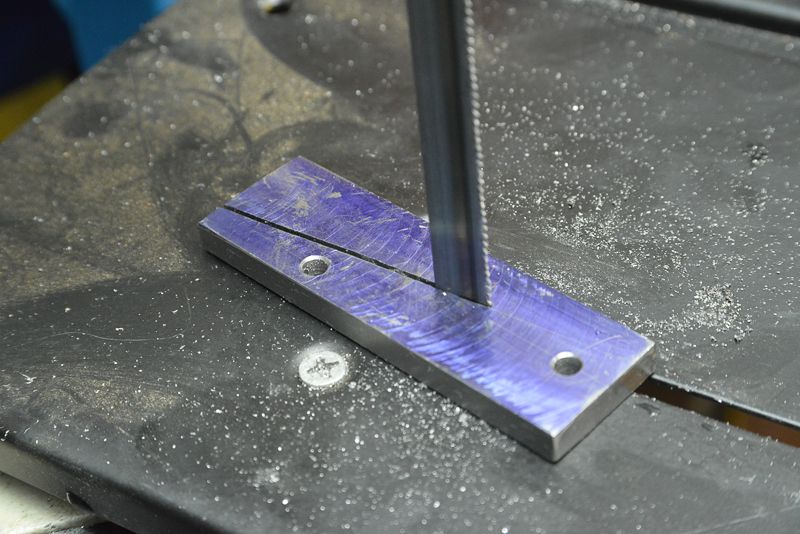
The vice is about 5 mm away from the blade and I found it easy as to split this piece in half without any dramas at all. The cut was nice and straight so I got stuck into it and got an opportunity to use my slitting saw for the first time.

This is what I came up with.

DSC_2589_zpse0917a05.jpg


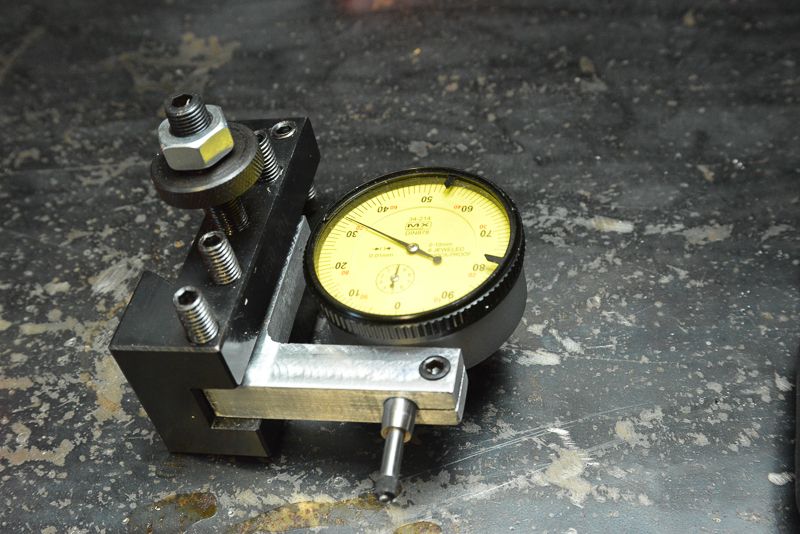
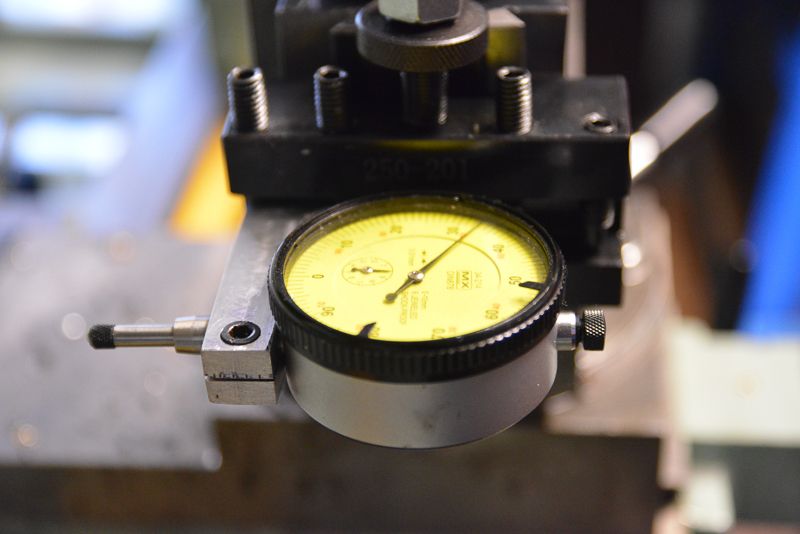
The scrap started out in life as being a 30mm offcut of 5x65mm ally and the 5 mm was just long enough to hold it in a BXA holder with three screws. I am looking forward to trying it out with my 4 jaw chuck which I have not used on this lathe yet.

DSC_2586_zps37be0cac.jpg


The holder is about 15mm square and I used an M5 bolt for the clamp. I drilled the hole through, counter bored the end with an end mill and then tapped it using the tapping feature on the SX3. I had heard this was pretty average but I found it worked perfectly much to my surprise! I may not use my geared tapping attachment any longer! The hole for the indicator was drilled 7.5mm and then reamed to 8mm. You can see I still have not bought a linisher yet but it is very serviceable even if not pretty. I am looking forward to using it!

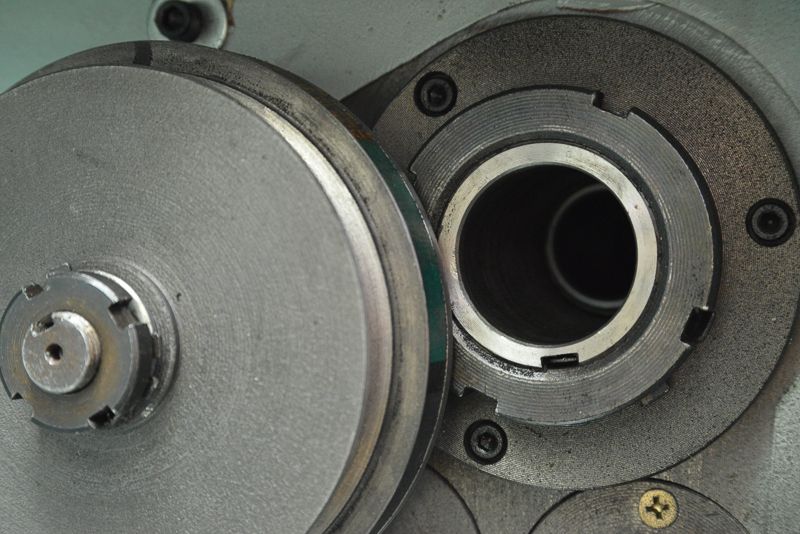
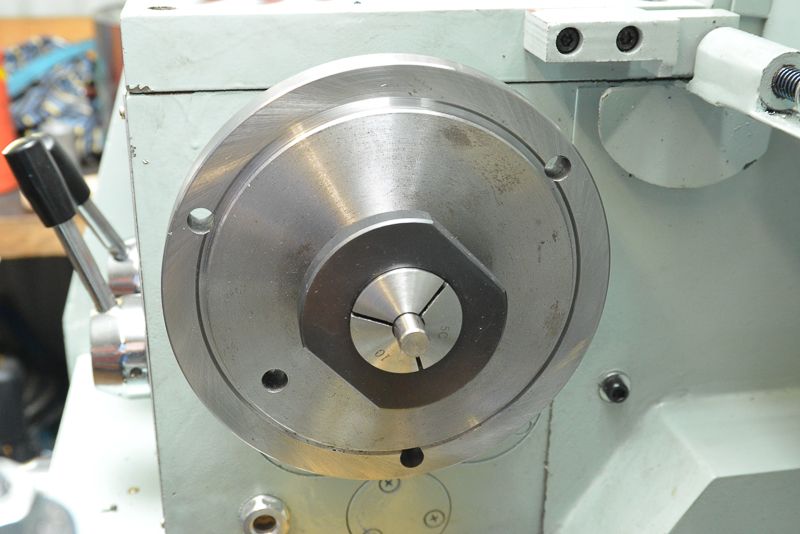
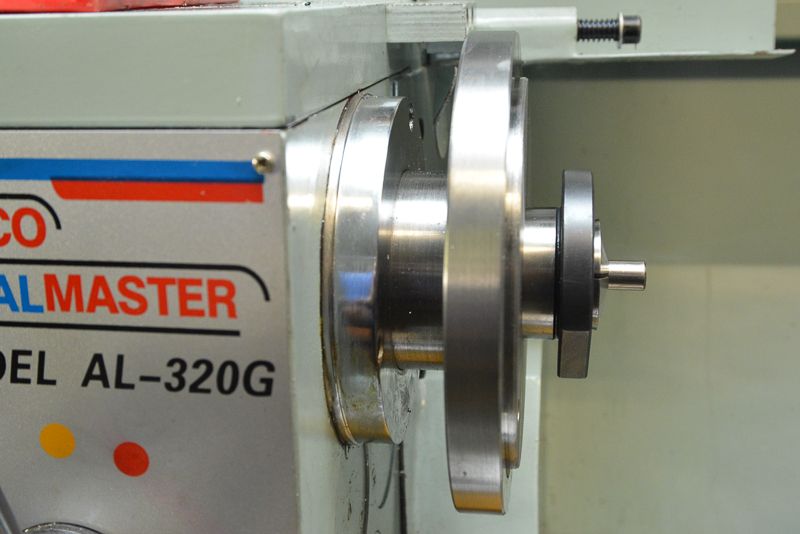
The next modification was a bit more complicated. I was quite intrigued with 5C collets and then found that there was a 5C collet fixture that would fit the 38mm spindle on my lathe. Trumpy on the forum here gave me a few surplus 5C collets so I was hooked! ON hte first day of Hare and Forbes sale, I was down here to pick up a collet block and a spindle fixture.

I thought I had the clearance but when I got it home, I found the drive pulley was very close to the spindle and I could not get a spacer flange past it. I was a bit despondent at this and got as far as putting it in my car to return it but Trumpy spurred me on and I did a deal with Chriss down the street who turned the pulley down in exchange or a beer one afternoon. He took a couple of mm off the pulley so it was flush with the belt, not sticking up proud.

DSC_2579_zpsb74800a6.jpg


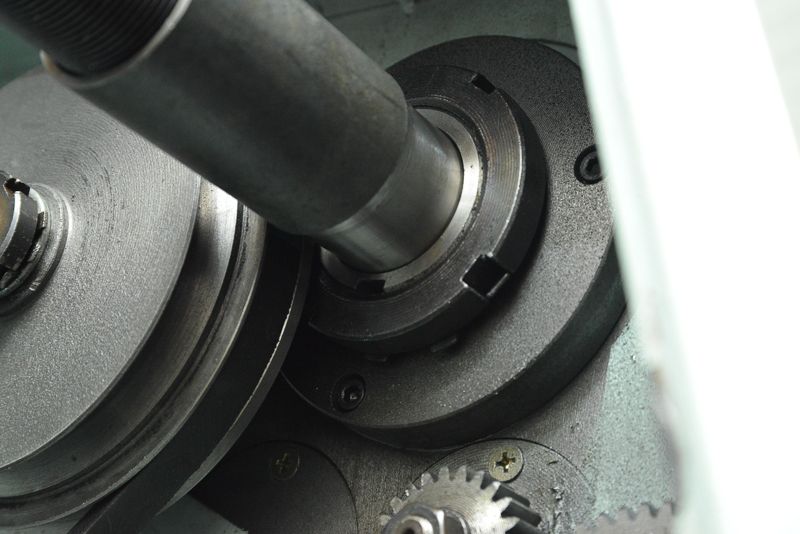
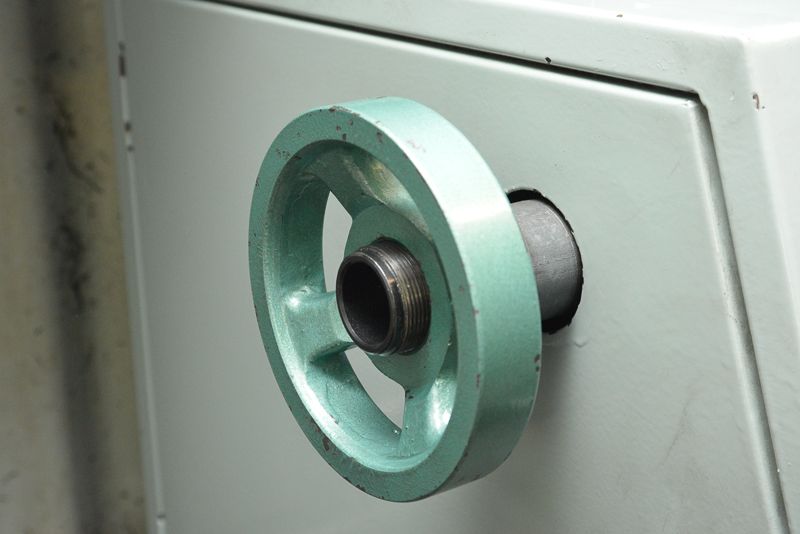
You can see there is not much room. I had a piece of 1 1/2" water pipe here and I polished out the bore with a light cu on the lathe so it would fit over the collet drawbar and turned it down to get past the pulley.

DSC_2580_zps4d463850.jpg


We are on a winner now!

DSC_2575_zps11dd9b3a.jpg


DSC_2576_zpsbfbd617e.jpg


DSC_2577_zpsce8b339c.jpg


I actually made the reduced section a bit too thin so I need to remake it now I have a bit more room but of course I am out of water pipe! Anyway, it is quite serviceable as it is.
 
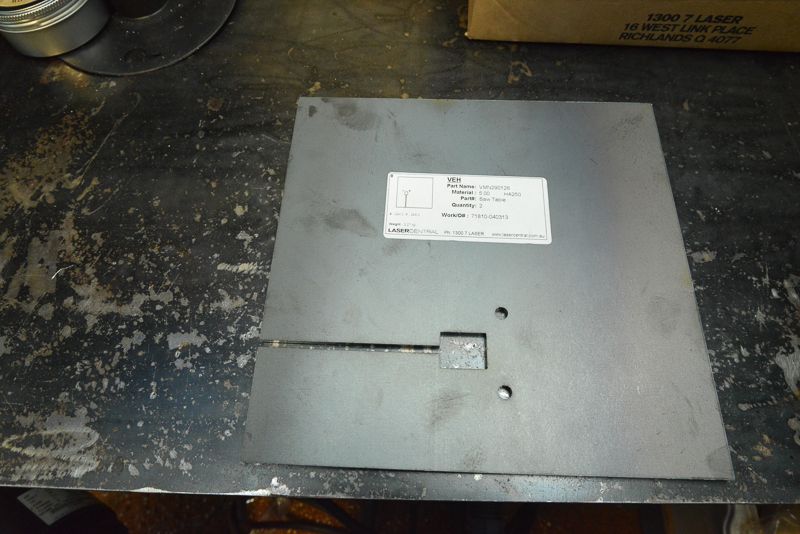
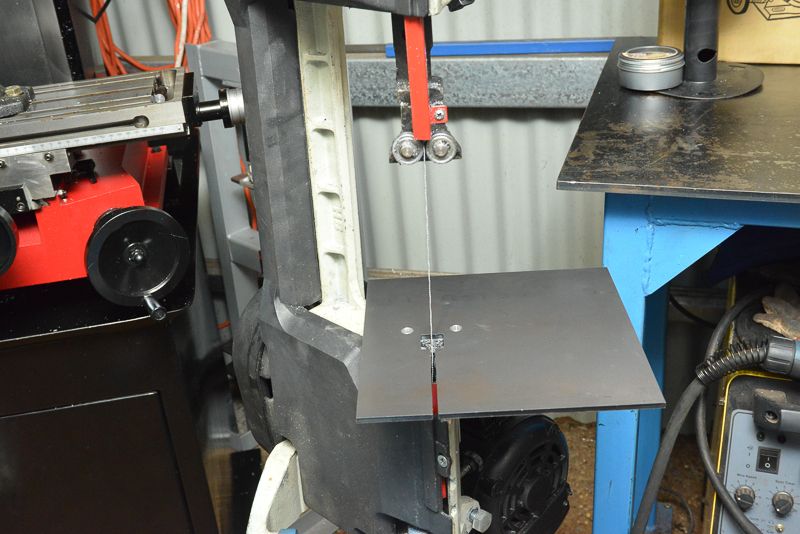
I thought the last post was long enough. Today was a busy day. I had some components to collect from my laser cutter and I had designed a saw table for my little bandsaw which they cut for me at the same time out of some 5 mm plate. It worked out awesome! Here is what I got back

DSC_2593_zpsc65c3467.jpg


well actually I got two of them cut, one for me and one for Trumpy. We have different model bandsaws from H&F but worked out that this will fit his as well.

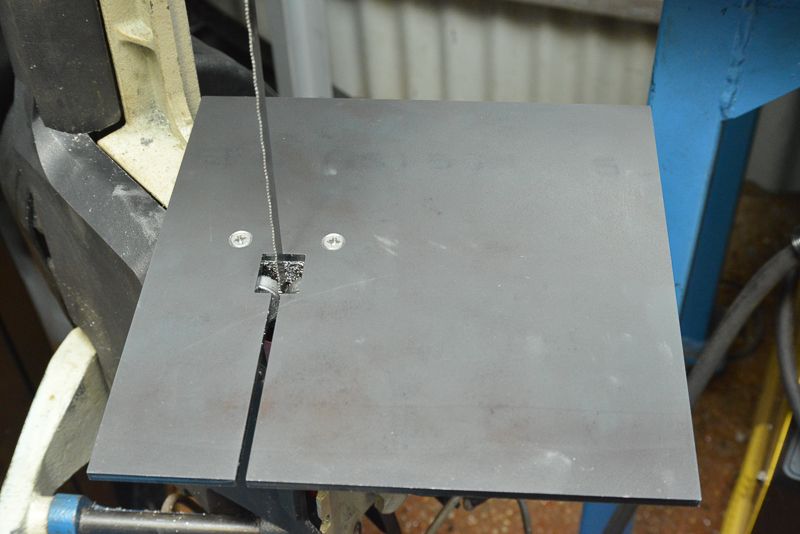
All I had to do was to countersink the laser cut holes and we have a goer!

DSC_2594_zps0b2f7286.jpg


DSC_2595_zps288dc4da.jpg


I think this will be an awesome mod to the saw and should fit any 4" or 5" bandsaw. The table is as sturdy as and does not need any braces. I think it could benefit from using some normal M6 countersunk machine screws to mount it with as the factory screws have a non standard countersink angle but they work fine.

Anyway, this was the first time I have designed a part and handed off a digital file for cutting. Previously, I have given them hand sketches which they then convert to CAD for me.

Also today was the first official day of H&F's 3 day sale and despite my best intentions, I could not help myself and called in on the way to work and picked up a Vertex 6" rotary table and matching chuck plus a few other pieces while they were discounted by around 20% Unfortunately, their linisher attachments were not discounted so you won't see any fancy finishes on my projects.

I will post up an update after I get the table cleaned up and mounted on my mill.

My wish list is getting shorter, nothing that another $500 or more won't fix and then I might start thinking about DRO's.
 
Well, I have been slowly adding to my tooling list making a few things and buying stuff when I can afford it. My QCTP holders seem to be breeding like wire coathangers

DSC_2592_zps9d565518.jpg

Damn, it's a shame these holders are BXA, I wont be able to use 'em if one or two went walkabout ... lol
 
I thought the last post was long enough. Today was a busy day. I had some components to collect from my laser cutter and I had designed a saw table for my little bandsaw which they cut for me at the same time out of some 5 mm plate. It worked out awesome! Here is what I got back

DSC_2593_zpsc65c3467.jpg


well actually I got two of them cut, one for me and one for Trumpy. We have different model bandsaws from H&F but worked out that this will fit his as well.

All I had to do was to countersink the laser cut holes and we have a goer!

DSC_2594_zps0b2f7286.jpg


DSC_2595_zps288dc4da.jpg


I think this will be an awesome mod to the saw and should fit any 4" or 5" bandsaw. The table is as sturdy as and does not need any braces. I think it could benefit from using some normal M6 countersunk machine screws to mount it with as the factory screws have a non standard countersink angle but they work fine.

Anyway, this was the first time I have designed a part and handed off a digital file for cutting. Previously, I have given them hand sketches which they then convert to CAD for me.

Also today was the first official day of H&F's 3 day sale and despite my best intentions, I could not help myself and called in on the way to work and picked up a Vertex 6" rotary table and matching chuck plus a few other pieces while they were discounted by around 20% Unfortunately, their linisher attachments were not discounted so you won't see any fancy finishes on my projects.

I will post up an update after I get the table cleaned up and mounted on my mill.

My wish list is getting shorter, nothing that another $500 or more won't fix and then I might start thinking about DRO's.

That's a great looking table compared to the flimsy sheetmetal affair of the original. I can't wait to get me mits on it ... lol
 
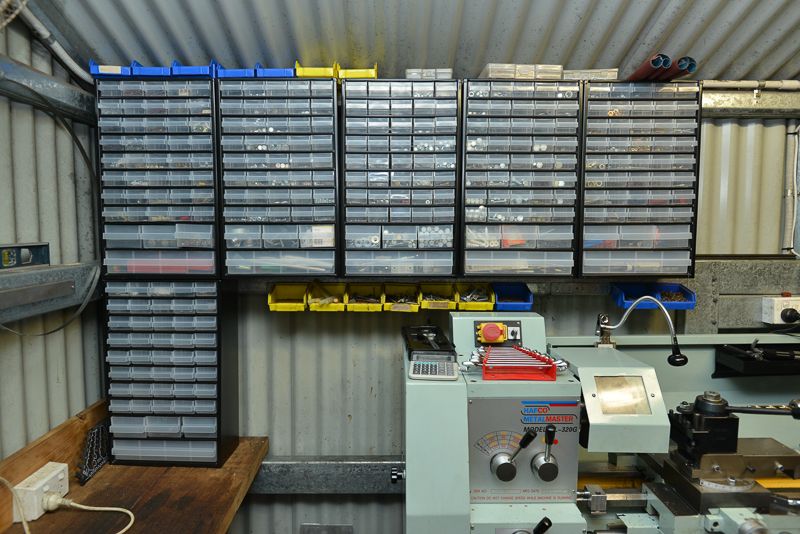
Well, I have been working on a storage makeover for my little shed for a while now but time is limited so it is still not complete but here is what I have been up to.

First off, I purchased three heavy duty storage shelf units (from Hare and Forbes) to put in my garden shed which helped me get some stuff out of my workshop shed and then started off with these from Hare and Forbes


they were not cheap but they are 450mm deep and each drawer is rated for 20 kg (44 lb) and it let me get a lot of stuff squared away..

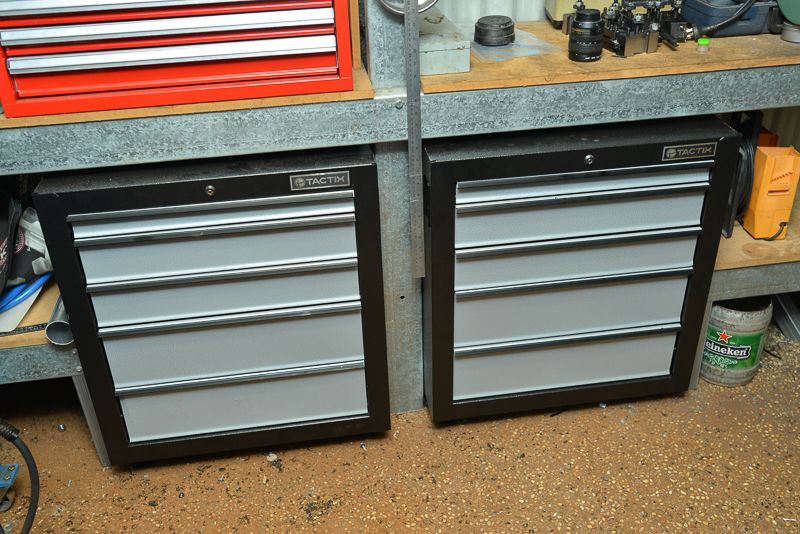
Then I found some cheap roller drawers (At Hare and Forbes again!) which were low enough to fit under my shelves so I added some adjustable feet I had made previously (see earlier in this thread) in lieu of casters so I could level them on my sloping floor and screwed them to the shed frame so they could not tip over.


These drawers are only rated to 35 kg and are not particularly robust but I think they will last for ages in a home shop situation. You can see that I had to hack out some shelving to make holes for these fit in.

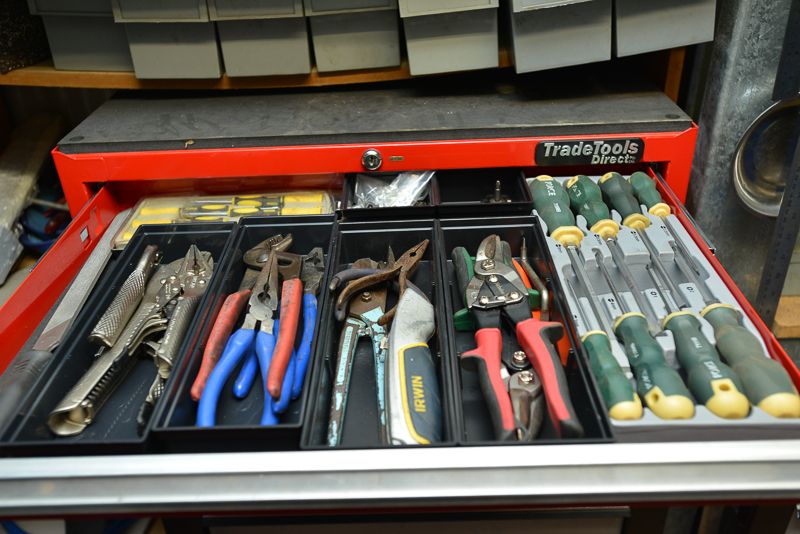
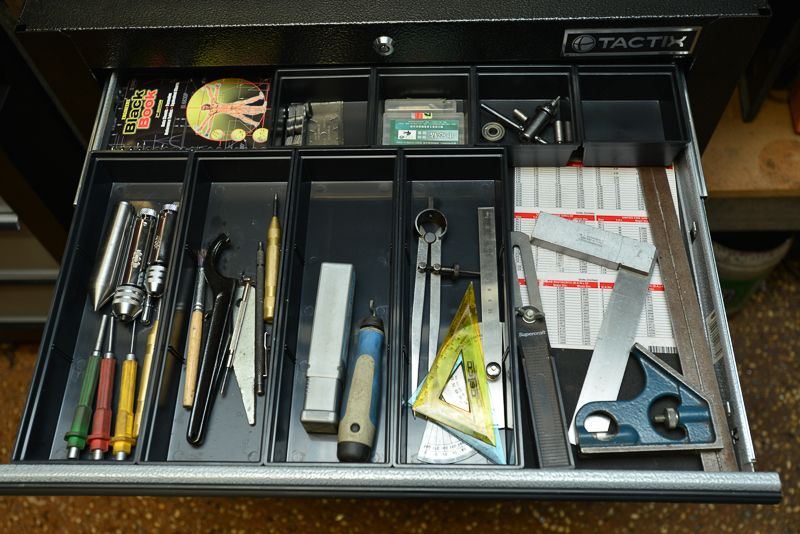
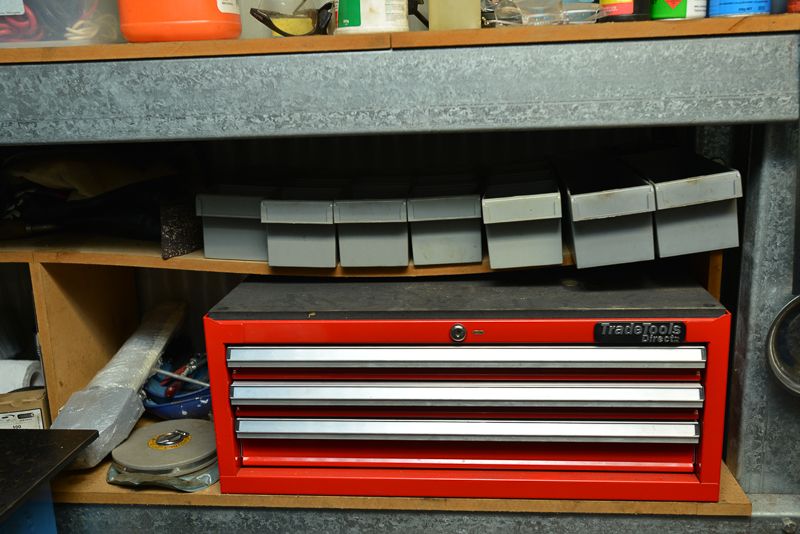
So the next cheap addition was three sets of roller drawer inserts from Trade Tools which let me store heaps more stuff in my roller drawers starting with the every day tool drawer


You can see I can fit say three sets of pliers on top of each other which takes up 1/3 of the previous space! What a bargain at $12.50 a set! :)

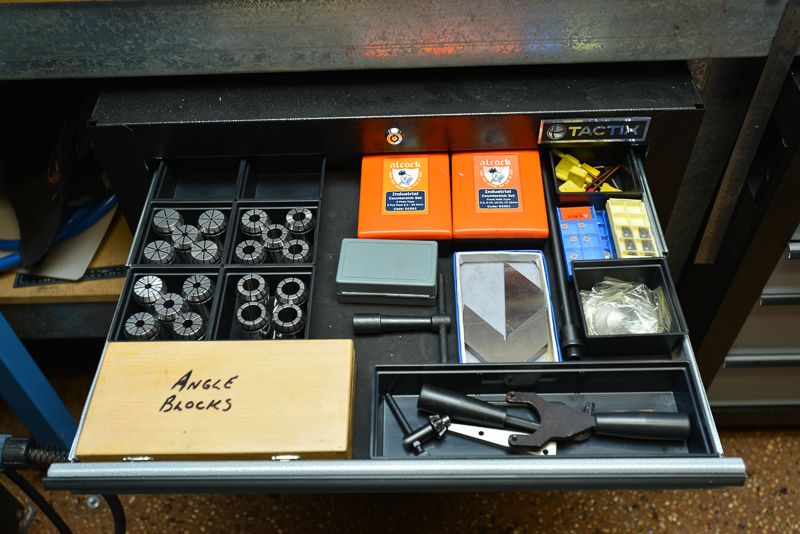
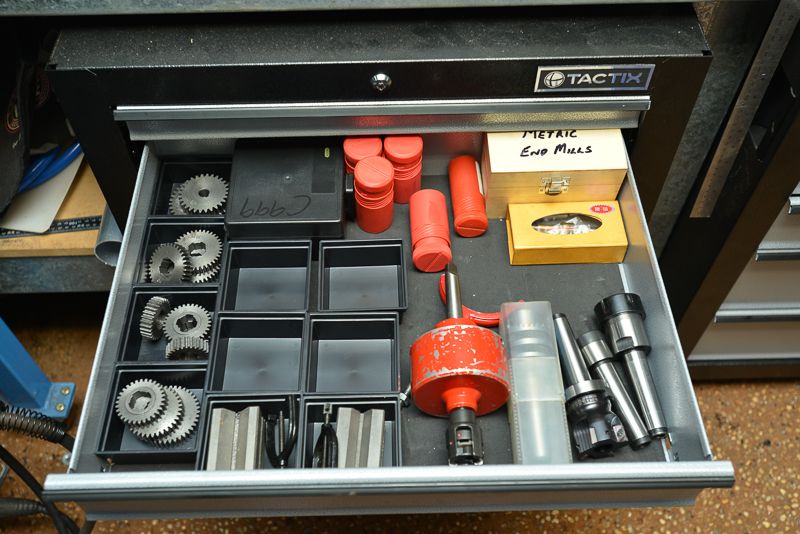
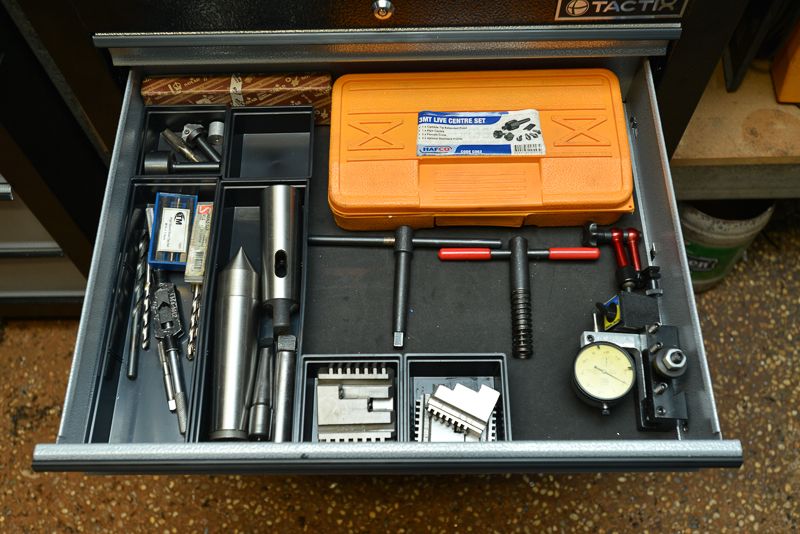
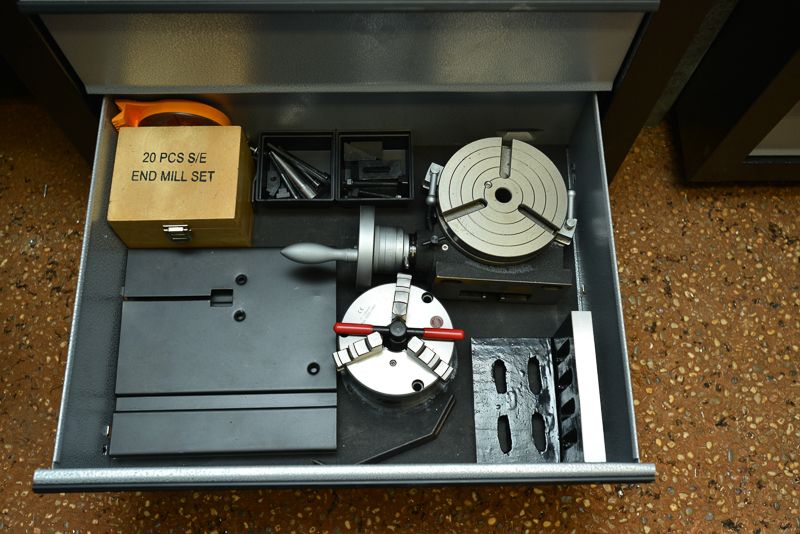
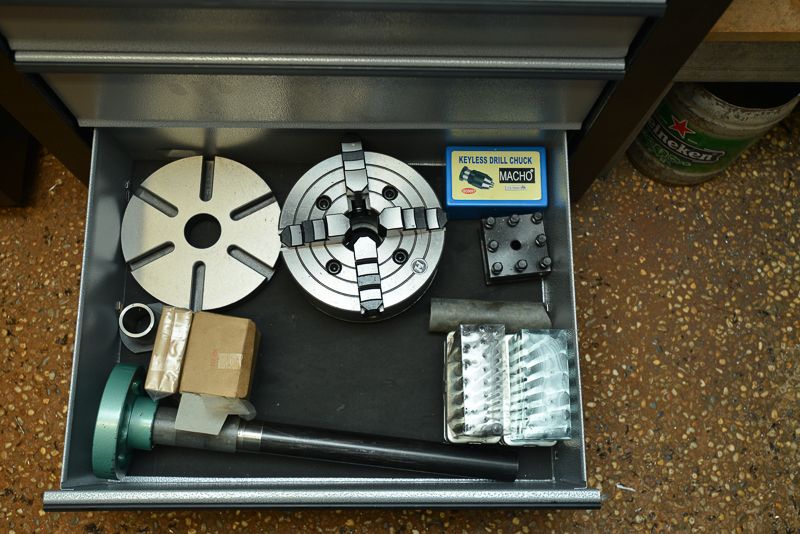
And they let me start to sort out the lathe and Mill tooling too.


Somewhere I found a copy of the little black book so I made room for it too...


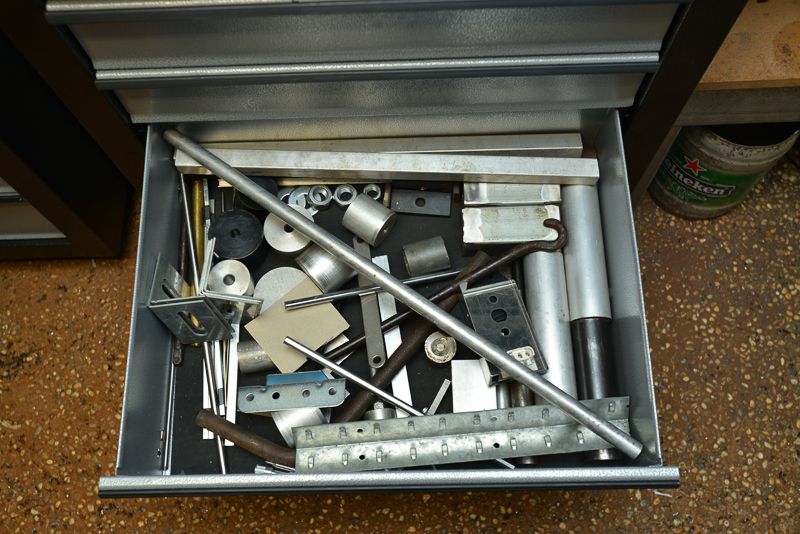
I also freed up some precious bench space by dedicating one drawer for a jumble of material. I might review this later and move this stuff somewhere else


By the time I had got this far, I had pretty well emptied the lathe and mill stands and everything had a home. :D:D:D

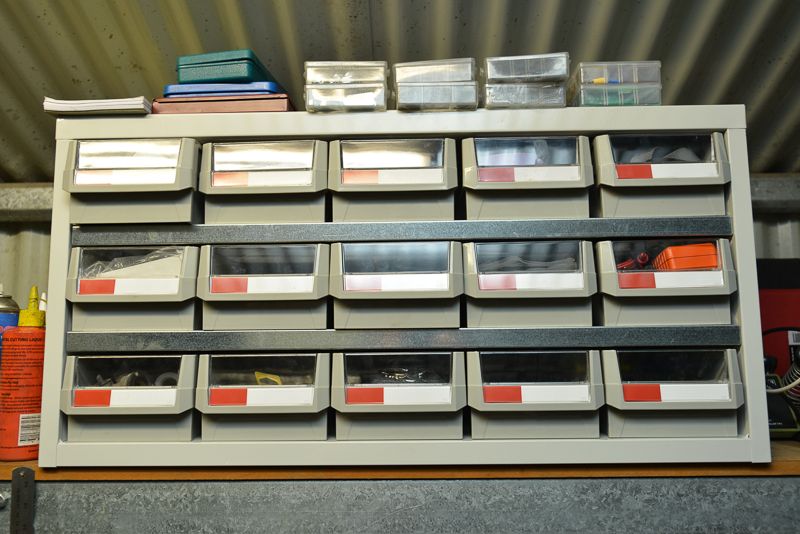
Then Chris down the road told me where he got his parts drawers and an order to element14 (used to be Farnells) had 5 of the Raaco parts drawers on their way at $35 a set freight free. One of them got damaged in transit and they sent me another one to replace it no questions asked and I was able to repair the bent one much to my surprise so I got six for the price of 5 ;)


I mounted thse to the shed frame using nutsert rivets and some M4 bolts as I wanted something stronger than a self tapper as some of these drawers are holding a fair bit of weight. It has taken me weeks to sort out my fasteners, nuts and bolts and all sorts of electronic components and parts. I still need to label the shelves but being a metric convert, there are several rows of bolts, nuts and washers for each size (M3, M4, M5, M6, M8, M10 and M12) and a few rows of imperial ones for good luck.

I think I will get another one of these cabinets to put against the lathe to fill in the hole to the left of the lathe but my bank balance needs to recover after spending over $1500 on storage stuff!

You can see I have removed some of the plastic buckets from behind the lathe chuck for safety reasons. I think ultimately I will take all of the buckets away.

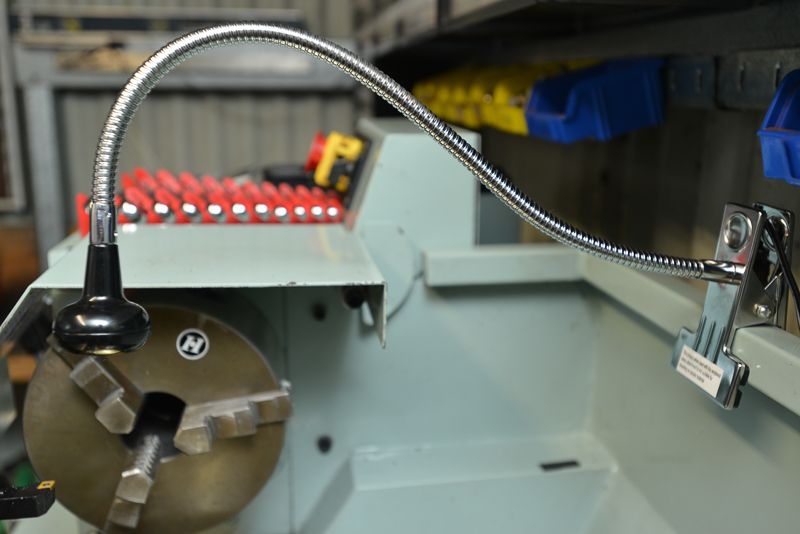
One day I was at Officeworks and I saw this neat little LED light for just $15 and I had an awesome work light for my lathe!


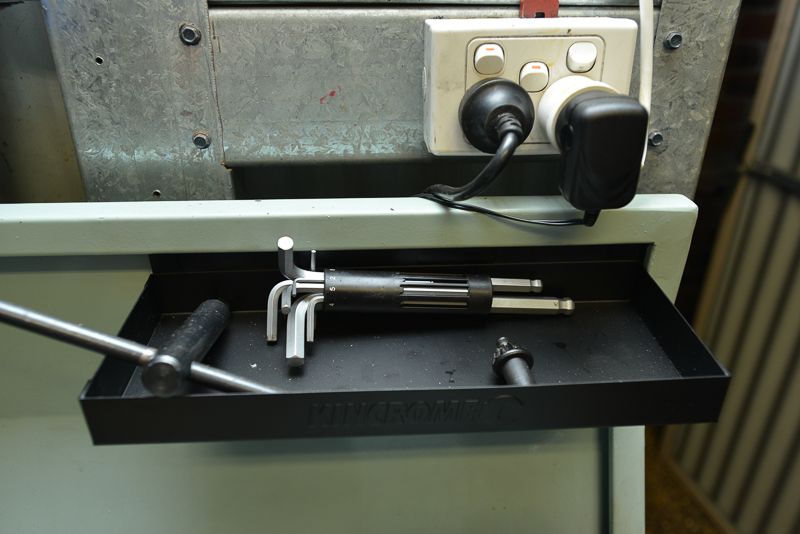
Then I was at Bunnings Hardware and they had some magnetic Kingchrome shelf units designed to stick on the end of a roller drawer tool chest for $10 so one of them came home as I had the perfect place for it on the lathe splash guard


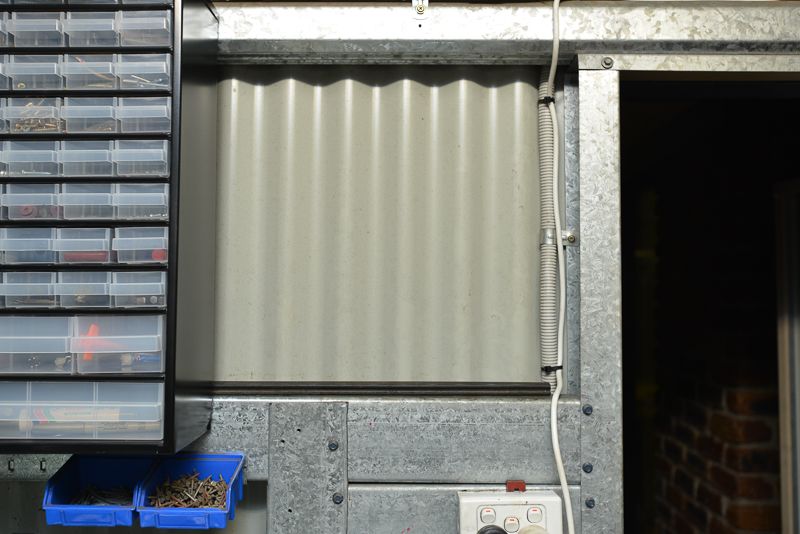
Some of you might have noticed there is a bit of wasted wall space at the tailstock end


This is deliberate. I have got the timber here for the job and the plan is to make a shelf to hold all of my QCTP holders that have been breeding like flies.

I also have to redo this bit of saggy shelving to hold the legacy parts bins


One day, I might add another 3 drawer unit above the current one in this space but that will entail cutting away some of the C section cross member so I won't rush into it.

Another project is to make up a nice Collet holder to fit inside the drawers out of some 1.2 mm Aluminium plate I purchased for the task. I also plan to invest in a set of 5C collets and a holder for them will also be needed.

Anyway, I still have to tidy up the rest of the shelves but what I have done is a massive step forward to making my tiny space as efficient as possible.

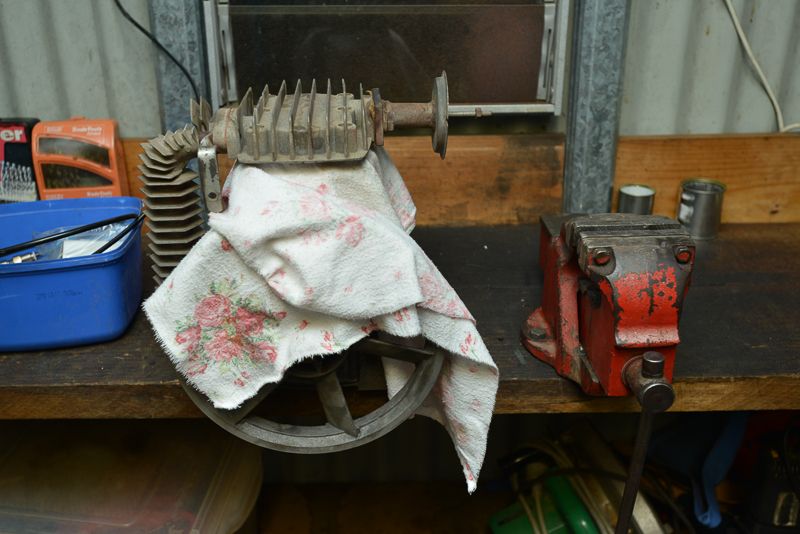
I even have room on my bench for my latest project which is rebuilding an old compressor


And the receiver out of the weather until I get time to finish this off.

Unfortunately, I did not get time after work this afternoon, to put this back together as I was planning, there is always tomorrow!

Hope you guys enjoyed the update to my mini shed.
 
Looking good Rod. Some excellent storage tips, those drawer inserts are really neat, I wonder if they are available in Sydney. I can see a couple of those LED lights coming in handy too. And those $35 parts drawers, and ....

RossG
radial1951
_________
 
Looking good Rod. Some excellent storage tips, those drawer inserts are really neat, I wonder if they are available in Sydney. I can see a couple of those LED lights coming in handy too. And those $35 parts drawers, and ....

RossG
radial1951
_________


Ross, you should be able to get them on line

Drawer inserts http://www.tradetools.com/products/A1001E

Raaco Cabinets http://au.element14.com/raaco/126762/cabinet-organiser-44compartment/dp/136709101

I was also thinking of getting some drawer dividers for the small drawers
http://au.element14.com/raaco/150-00-dividers/dividers-for-150-00-drawer/dp/1674861 I think they would be handy to store nuts and washers in the one drawer on the smaller sizes.

I think on orders > $50 Element14 do free freight so get two of them at least. Also I am told they do specials on this unit from time to time but I was too impatient to wait. :wall:
 
Ross, you should be able to get them on line

Drawer inserts http://www.tradetools.com/products/A1001E

Raaco Cabinets http://au.element14.com/raaco/126762/cabinet-organiser-44compartment/dp/136709101

I think on orders > $50 Element14 do free freight so get two of them at least.
Rod, thanks for that. Half the battle is knowing what's available and where to get it. These guys have a huge range... actually over $45 for free freight.

Regards RossG
radial1951
_____________
 
Element14 are brilliant.
I've been a customer for close to two decades(as Farnell)
More recently, I ordered a couple of small items for work.. we needed them urgently but that wasn't mentioned in the order (it was processed normally) I placed the order at about 4pm local time(Western Australia) so ~7pm Eastern states DST.
It was waiting for me when I got to work the following morning!!! Approx 4000km's overnight. Insanely fast, almost didn't believe it possible!
Sure, they may not be the cheapest supplier around, but that is the price you pay if you need it NOW.
Best of all, they are now quite happy to do small orders to individuals than they were in times gone by... a great boon to hobbyists and tinkerers.
I have even received a phone call out of the blue by a real human just to check if I was happy with an order. Cannot praise them enough. This is something more big businesses in Australia could learn from.

Edit: Also worth noting, they stock a limited range of engineering materials: http://au.element14.com/engineering-materials
Not cheap... but again, if you need it now....
 
Last edited:
Element14 are brilliant.
I've been a customer for close to two decades(as Farnell)

I must say I have been impressed with them too. I have bought a few small things from them before these cabinets and they offered to let me open an account with a $1,000 credit limit. I have not taken them up on their offer yet.

It is a shame RS components are not as well priced because they are only 10 minutes from me.
 
Hmm,

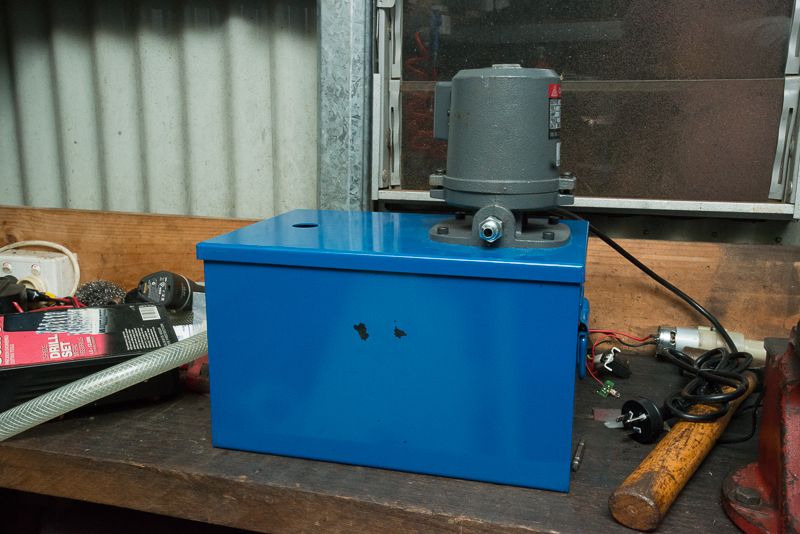
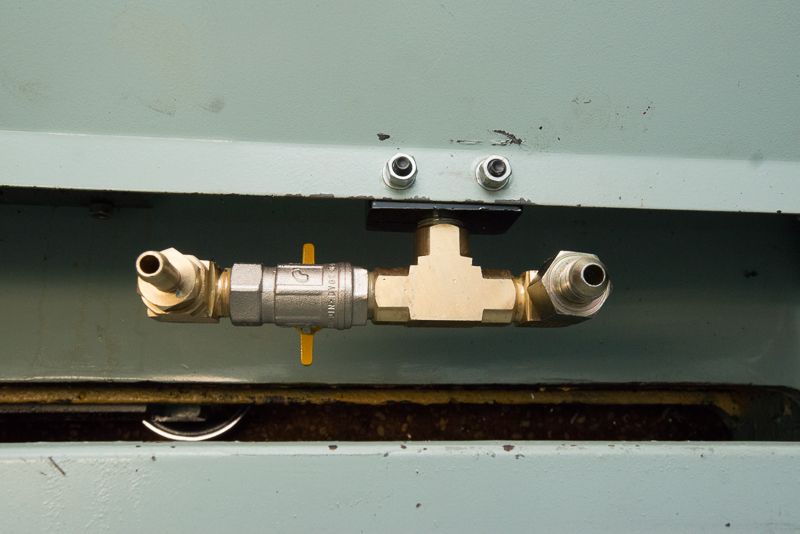
Fitting the new coolant system went well


The inlet shown from the back with a secondary outlet for my mill.


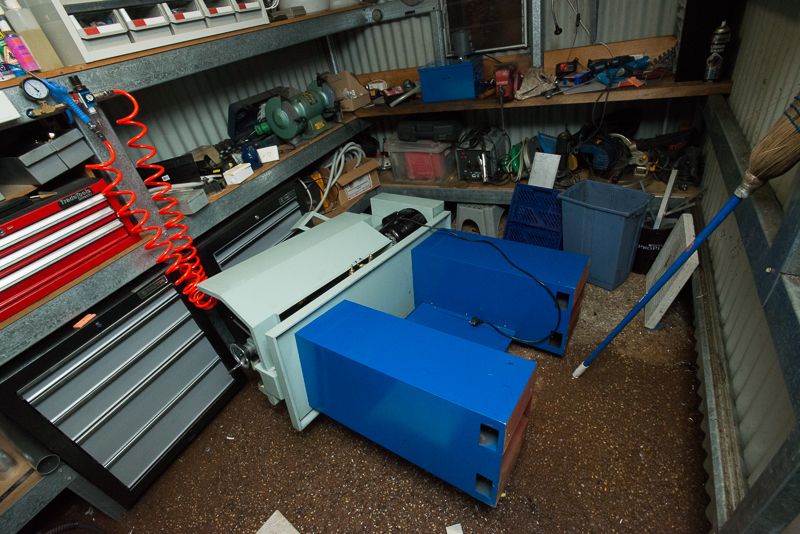
Putting the lathe back did not go so well.


Two of us could not lift it even with a floor jack. We thought of standing it on its headstock end where all the weight is and turning it round until we could stand it up but I decided to stop and reassess and talk to my insurer. Turns out that counting the $250 excess and the loss of premium discounts of about $500, it would cost me $750 to go through them. I don't think the lathe has been damaged other than the chuck guard as I had one of my nice new drawers open and it caught it on the way down. I don't think the costs would get to $750.

I think the roof might need to come off the shed and pick it up with an engine crane but I suspect the wall needs to come off to get the crane legs in position. I might be able to get one leg of the crane in the door.

So guys, help me out here. Where to from here?
 
Oh f(*^%$!!

Damn, if I wasn't on the other side of the country I'd lend you some muscle :(

Can you set up a block & tackle anywhere? Maybe build a makeshift gantry over it?
Pull an engine crane apart and rebuild it in the shed?
 
Last edited:

Latest posts

Back
Top