Quick and Easy Rounding Over Fixture

Home Model Engine Machinist Forum

Help Support Home Model Engine Machinist Forum:

This site may earn a commission from merchant affiliate links, including eBay, Amazon, and others.

BobWarfield

Well-Known Member
Joined
Dec 27, 2007
Messages
1,151
Reaction score
1
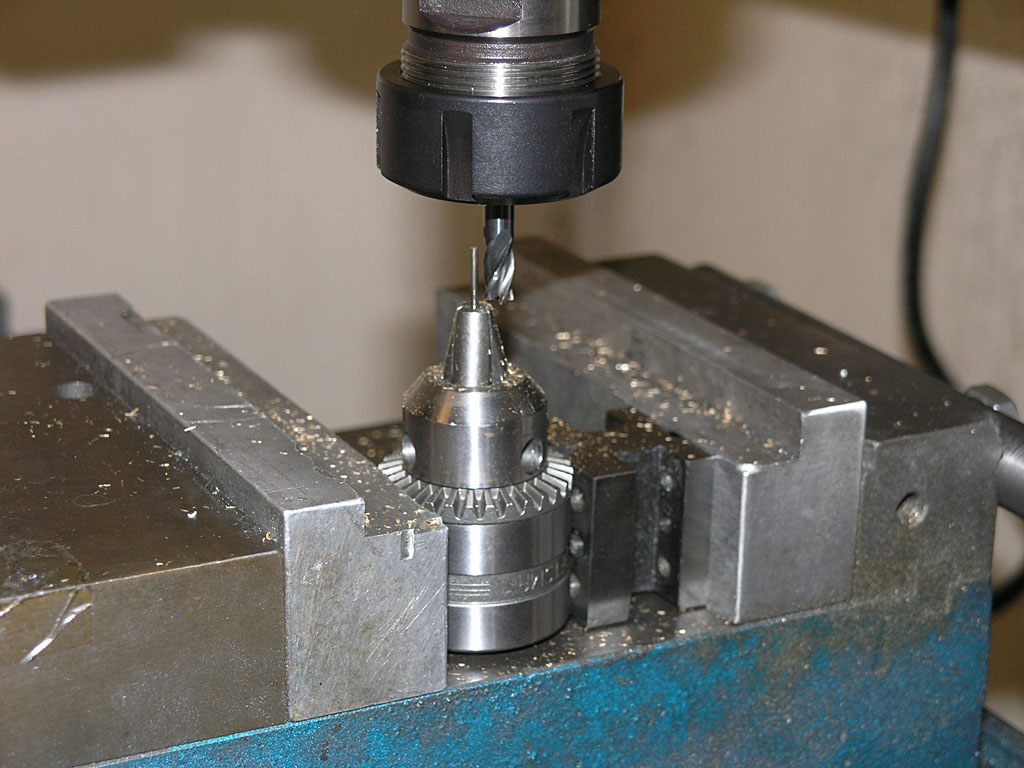
Rounding over involves using a pin so you can rotate a workpiece close to a milling cutter to round over one end. As part of my Team Build for a little Elmer Verburg steam engine, I had to round over a bunch of connecting rods on the small end. Here is the fixture I hit on after looking over the bits and pieces in my shop:
P1010706.JPG


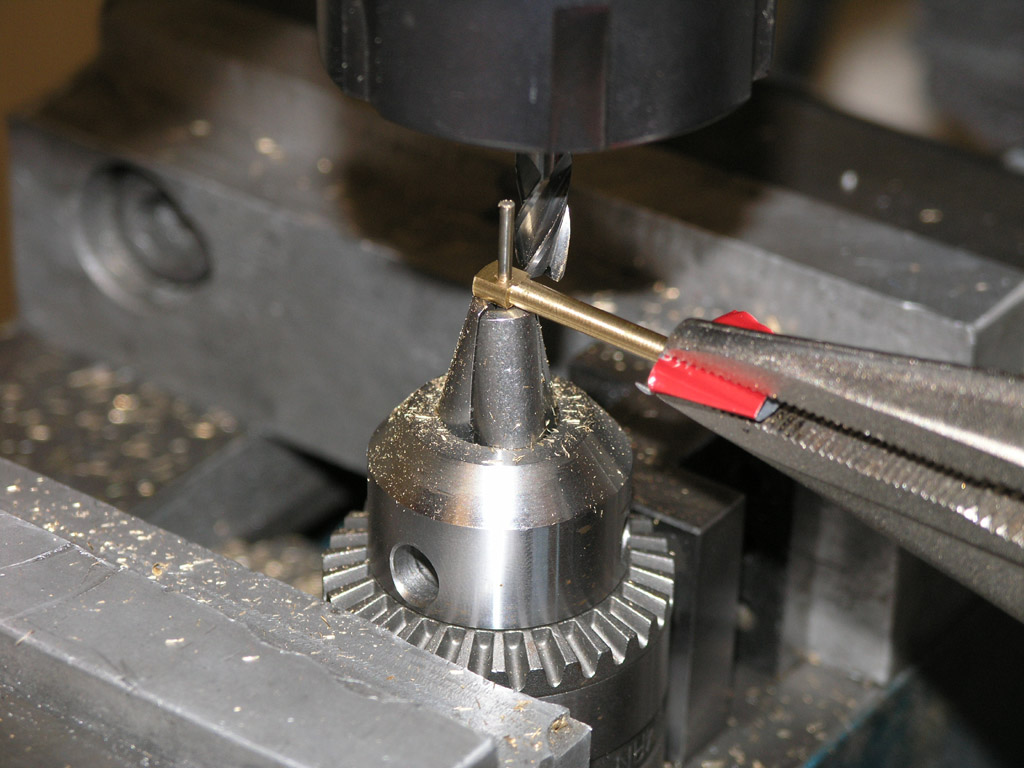
Take an unused drill chuck, a v-block, your mill vise, and an upside down twist drill of appropriate pin size. The chuck holds the pin very nicely and at a convenient height for my Kurt vise. I centered the pin on the end mill along the X axis, and positioned Y so I am a little ways back from cutting. It pays to keep up with this initial position on your mill dials!
P1010705.JPG


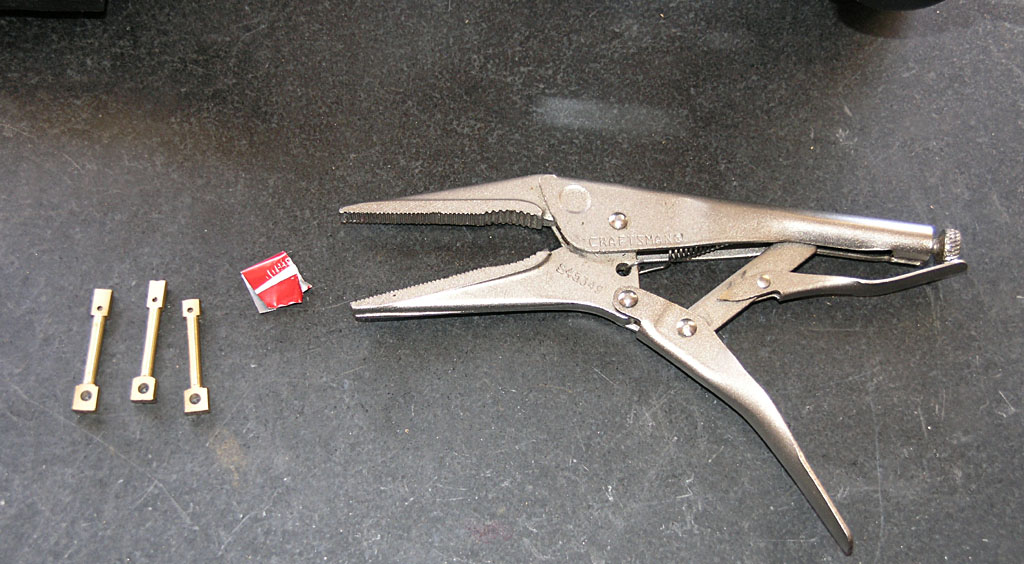
I'm going to use that little bit of aluminum soda can to make sure I don't damage my con rods holding them with the vise grips....
P1010707.JPG


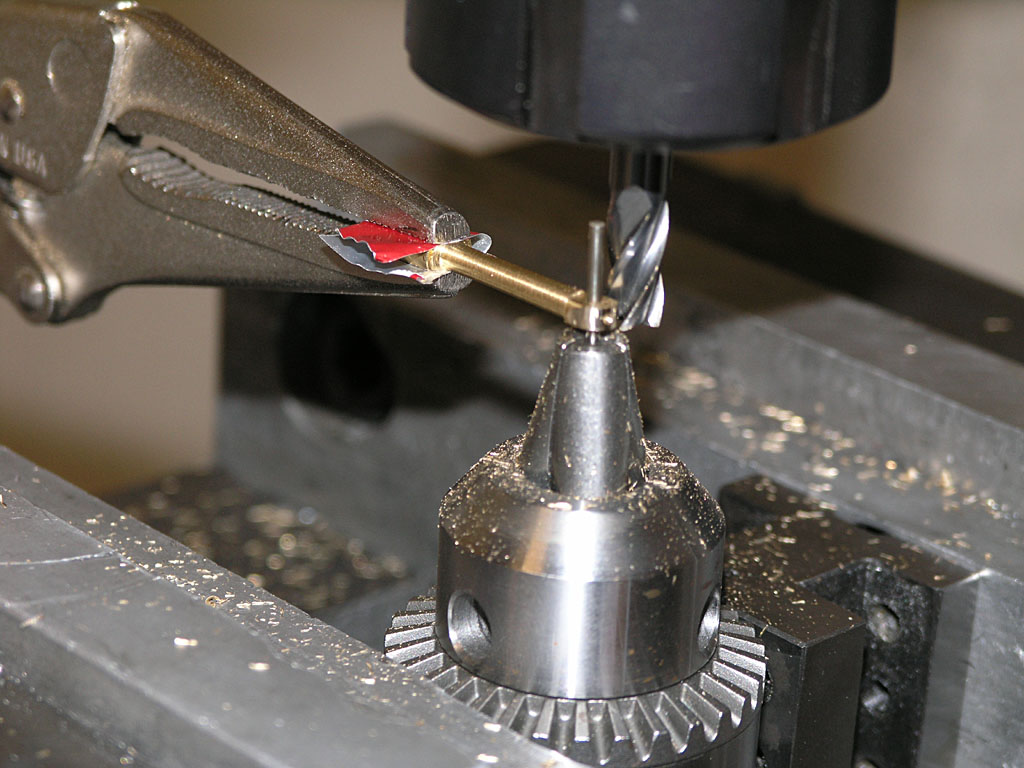
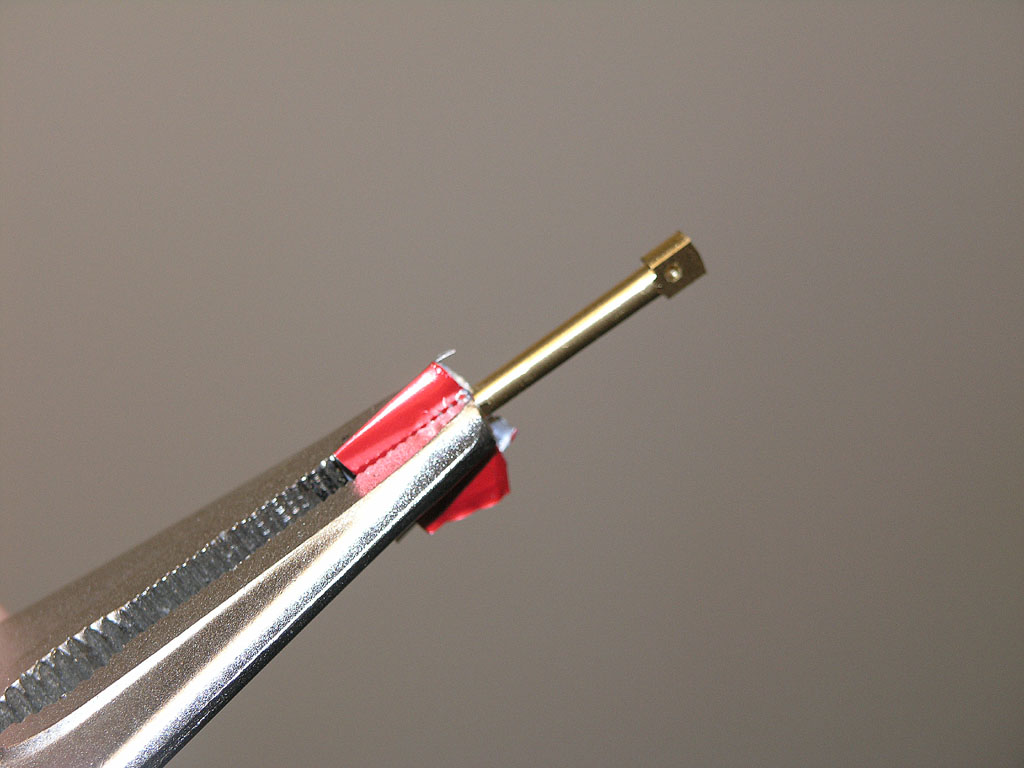
We just clamp the big end using the soda can as protection from the vise grip's serrated jaws...

<continued>
 
P1010708.JPG


Place your workpiece on the pin of the fixture. I am using a 1/4" 4 flute end mill running at my mill's fastest speed...

P1010709.JPG


I work the con rod from right to left because this ensures I am not climb milling. If I go the other way, the end mill tries to suck the work in and also tries to pull it up...

P1010710.JPG


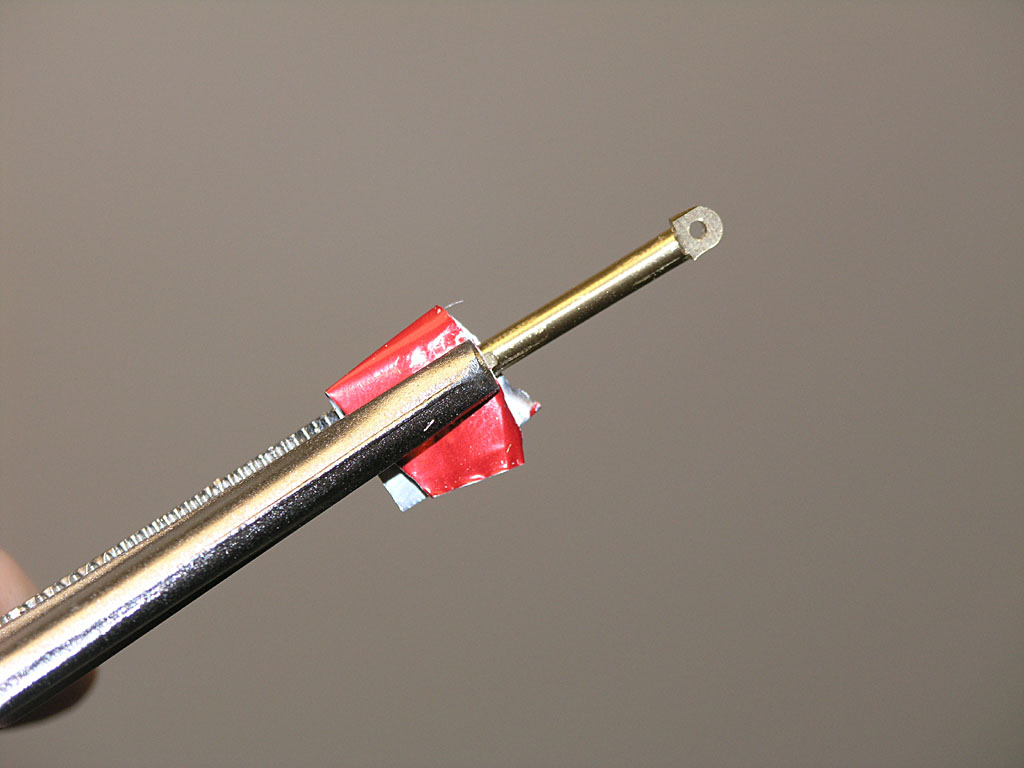
There's the rounded over end. I'll give that little bump near the bottom a little file work to clean it up.

I was feeding with Y and cutting perhaps 0.015 - 0.020" per pass.

The drill chuck sure makes it easy to throw together a rig like this. If I wanted to, I could rig stops pretty easily with some clamp. The vise grips have one side that takes less clearance than the other. It's easier to position the part so that side is down.

Cheers,

BW

 
Thanks Bob, that's a dam good tip 8)

Cheers

Dave
 
Having left the chuck on the shelf for quite some time, I'm not thinking it'll be handy for other quick fixtures. I got it cheap on eBay thinking I'd upgrade my drill press chuck, which is junk. I never got to it and will likely now put a keyless on the drill press.

It's a Craftsman that I paid $12 for on eBay.

Cheers,

BW
 
i just did some of this kind of work on the week end, i used a drill bit for the pivot and instead of an end mill i used a carbide burr.

i was thinking the burr might not be as aggressive in cutting.
but after doing this i think i will make a fixture such as the one posted here the other day (can't remember the posters name)

i will try the end mill the next time and see how that works as well.

thanks for the great ideas
chuck
 
Bob
That's some high caliber cat skinning there...LOL

Steve
 
Cool trick! I guess one could build a different type of fixture if needed for larger parts pretty easily. I'll have to put this little tip in the archive! Bob, thanks for sharing!
 
radfordc said:
As you discovered there can be some issues with trying to round over the end of the conrod against the side of the cutter. Ron Chernich uses a modified method in which he rotates the rod against the end of the cutter.

http://modelenginenews.org/restored/conrods.html

Nice way getting the job done. Looks like another fixture I'll need for my shop!

Chuck
 
Okay, this is ubercool. No, really, I mean it! Most decidedly ubercool.

While I tend to prefer tools that I can put in matchboxes - small matchboxes - as has been pointed out once or twice, I think I know how to adapt this to one of my machines using a 1/8" chuck I've got laying around here somewhere.

Cedge, why cats when the position title was "mule skinner"? ;D

BEst regards,

Kludge
 
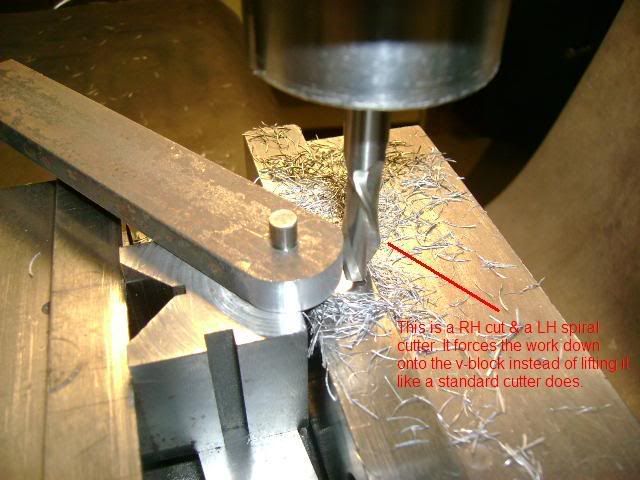
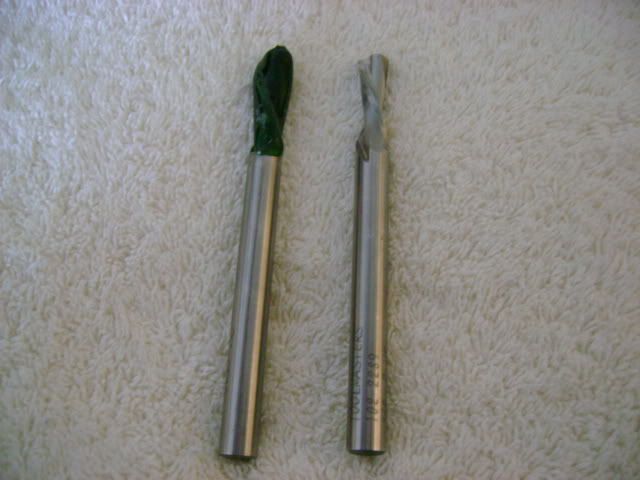
Many years ago when I first got into the trade we used that method for swinging radius on linkages for the machines we built. It was quite a dangerous practice unless you were very careful. The bigest problem was the work lifting up into the cutter. One day I found a cutter with a RH cut and a LH spiral. That worked very well for swinging these radii as the cutter forced the work down instead of up.
HSSCutters008.jpg

Don't confuse this with just a LH cutter. I kept that cutter for that purpose only for many years. It has since dissapeared.

After retiring and setting up my own hobby shop I have looked for those cutters. Last year I found some reground ones on Ebay. Problem was there were 100 of them in one lot. Well I bought them with the idea I would resell most of them. I never got around to it.

When I saw this post I thought maybe some of you model engine builders might like these cutters. A few will last me the rest of my life. I have used one cutter to machine the connecting rods and linkages on the last three engines I have built.

These cutters are also good for machining light materials the have been glued or taped don onto another piece of metal for holding purposes. Again the reason is that they push down on the work rather than lift up.

They also work very well for cutting wood as they don't pull up splinters.

They only work on edge cutting as the chips are forced down. They will not work for cutting blind pockets were the chips get bound between the bottom of the cutter & the work.
Cutters006.jpg

These cutters are 3/8 dia x 4-1/2 long with approx 1" length cutting edge. The one I have been using is reground to .370. I assume they are all that way. I haven't removed the wax off any of the rest of them.

If anyone would want to buy some of these cutters I will sell them for $3.00 each plus shipping. I think I can ship several in a USPS flat rate envelope for $5.00. If anyone is interested please PM me and we will see what we can work out. I will only ship within the USA.
 
Good point you're making, Arv. Not too many folks know about the LH twist end mills and that they will "push down".

I see those cutters on eBay fairly often, and they go for a little less than a RH usually.

They have one little problem you will discover the first time you stick one in the mill and just start up "business as usual". When you get to wondering why it is hardly cutting and making all kinds of racket, stop the mill and check it carefully. You'll learn that you've rediscovered the fastest way to dull a cutter is by running it backwards!

Don't ask me how I know!

:big:

BW
 
Bob

Put a splash of red paint or tape on the upper part of the bit on all Counter Clockwise turning bits to make them easier to find and remind u to spin them the other way.

Cheers :)

Don
 
I'm not sure I described the cutters clear enough. They are a right hand cut so you run the mill in the normal direction that you run any standard cutter. The left hand spiral is the difference. It forces the work down.

These should not be confused with a LH Cut & LH spiral cutter.
 
Back
Top