PMR 5bi

Home Model Engine Machinist Forum

Help Support Home Model Engine Machinist Forum:

This site may earn a commission from merchant affiliate links, including eBay, Amazon, and others.

PaulG

Well-Known Member
Joined
Jan 9, 2009
Messages
119
Reaction score
1
Hello All,

The PMR 5BI is is my first build. I have limited machining experience & I am hard headed about asking for help. To tell you the truth, I am more nervous over trying to type something that makes sense, than cut into a $$$ casting. I must say that I have had a lot fun working on this engine, and lost more hair too. I have made mistakes, boo boo's, tell ya later. I found getting so involved that I forgot to take pictures at points. I would like to thank all people that have contributed to the wealth of information within HMEM, newbie's to Pro's. Thank you all !!!

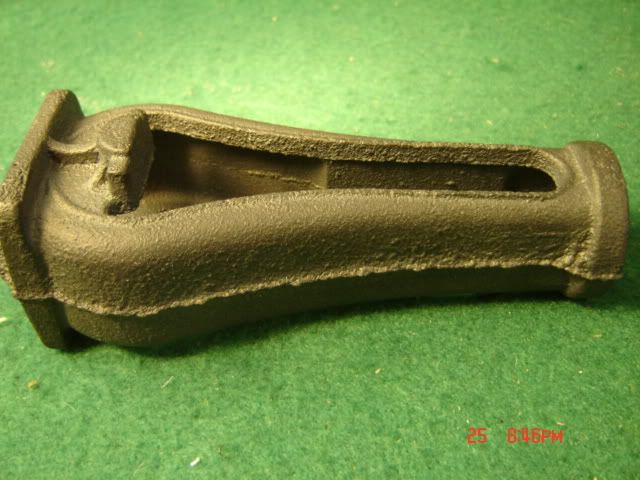
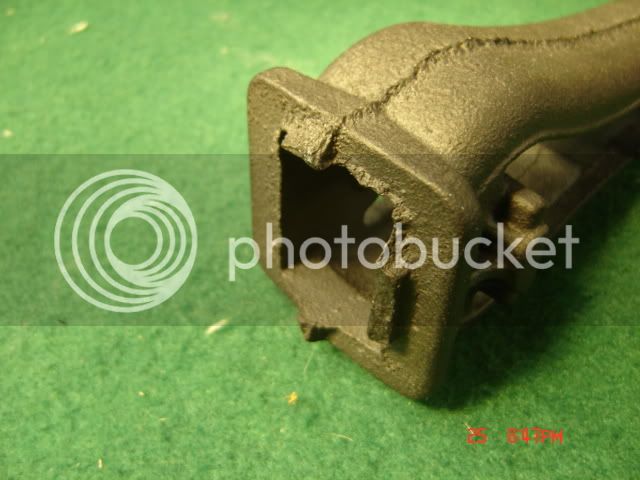
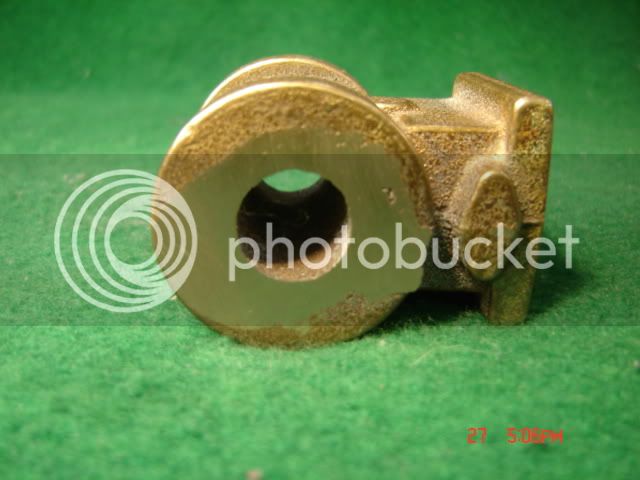
The following is just my opinion from one PMR casting kit: The thinner cast Iron parts have very hard edges, causing extreme cutter wear. Bronze flywheel and belt wheel's suffer from casting shift, my kit anyway. Overall a nice kit.

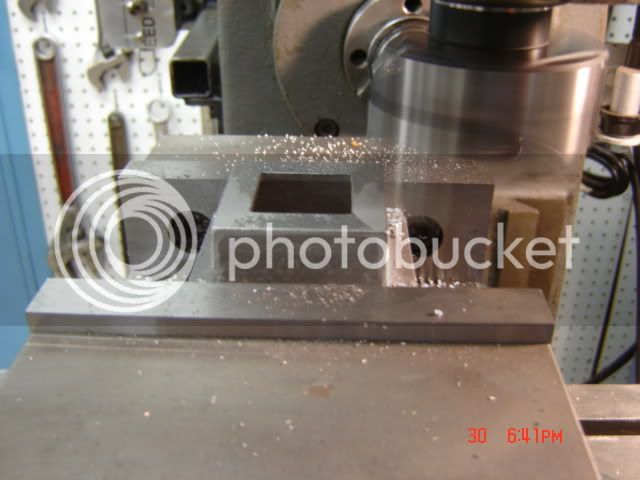
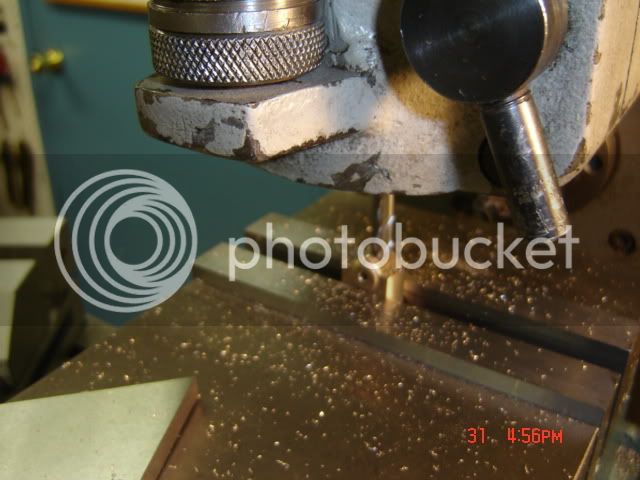
Ok, here we go, I should complete this project by the weekend, then we''ll see if it will run.

DSC02668.jpg

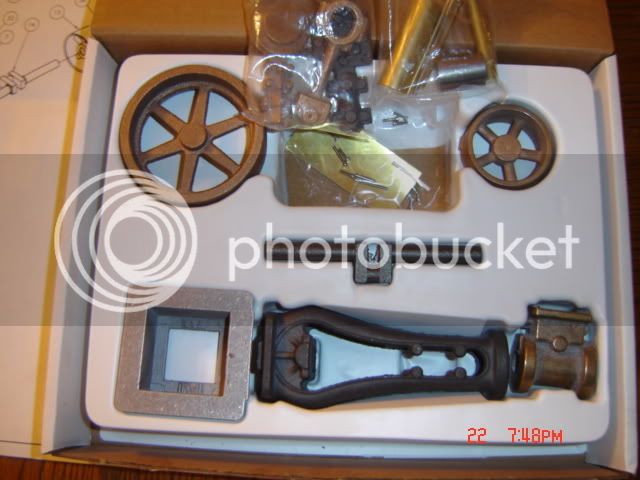
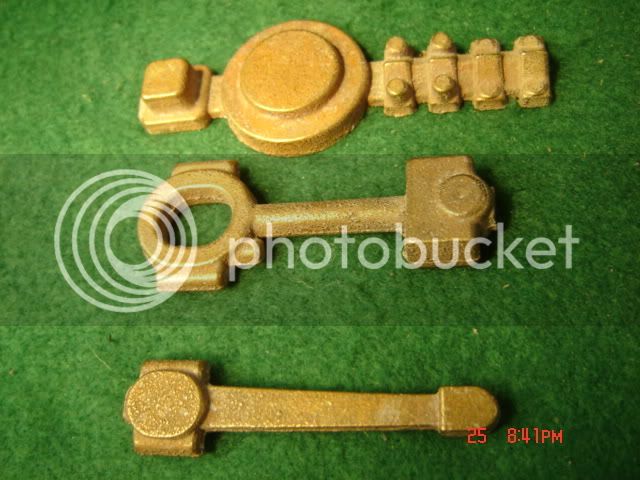
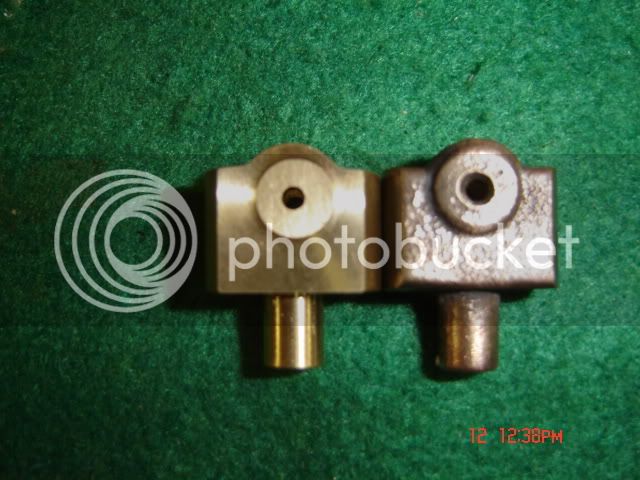
PMR 5BI kit as received.

DSC02671.jpg

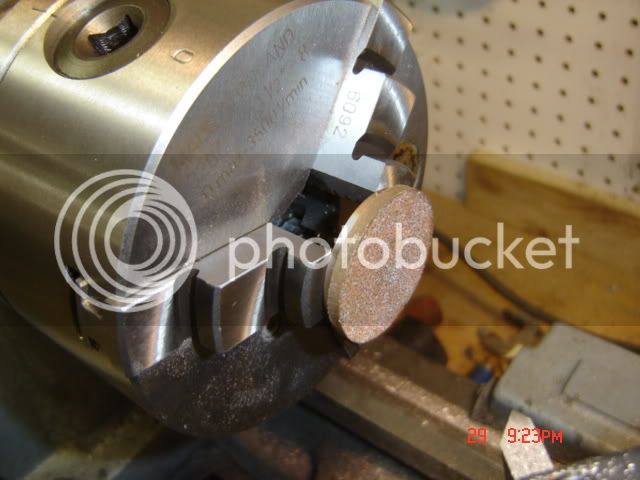
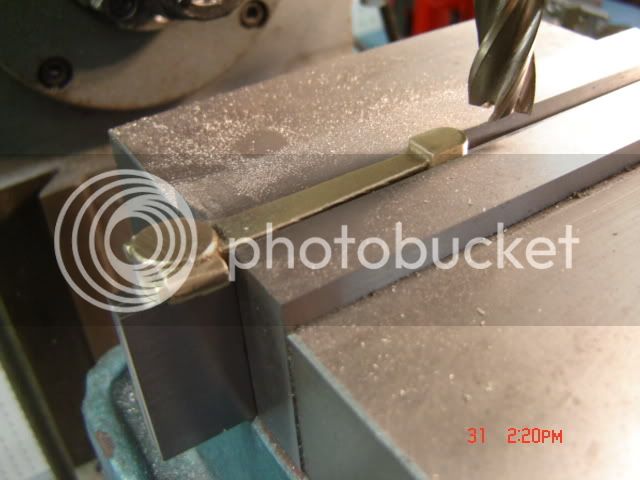
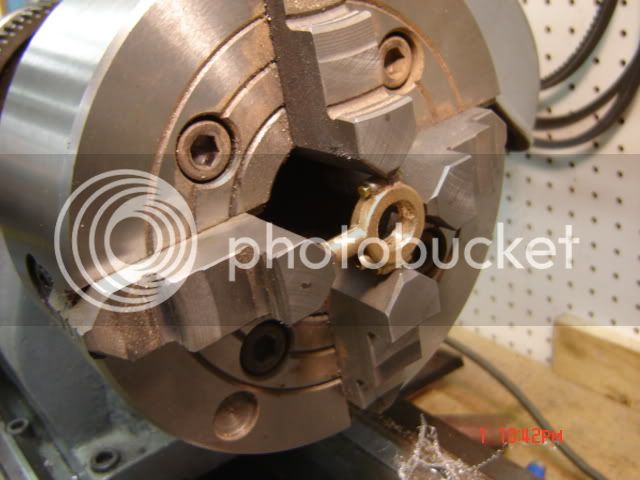
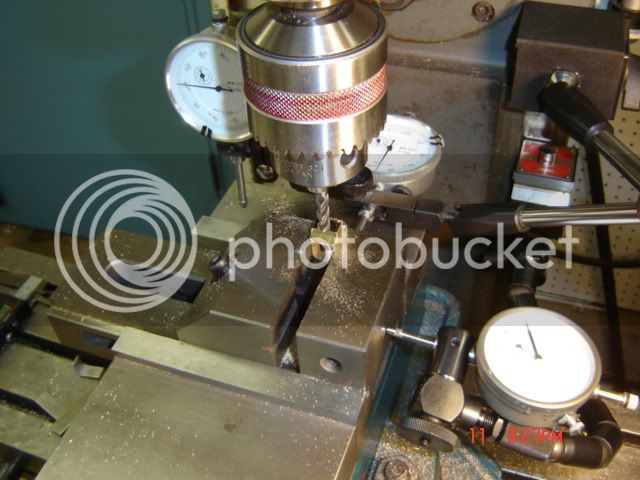
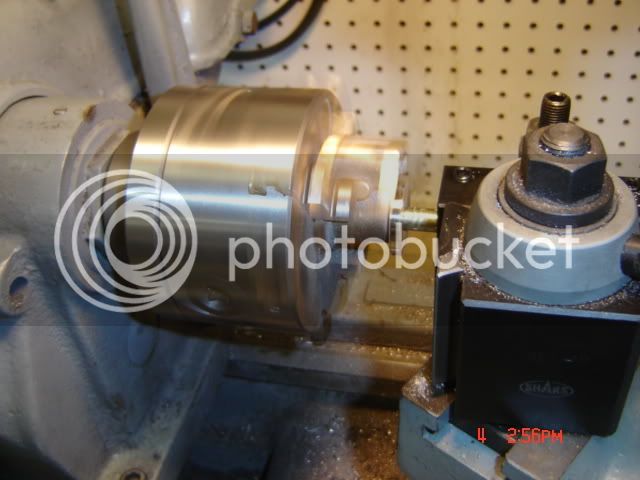
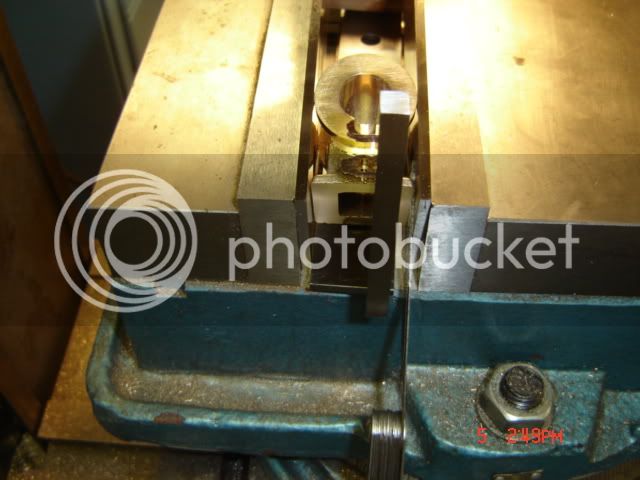
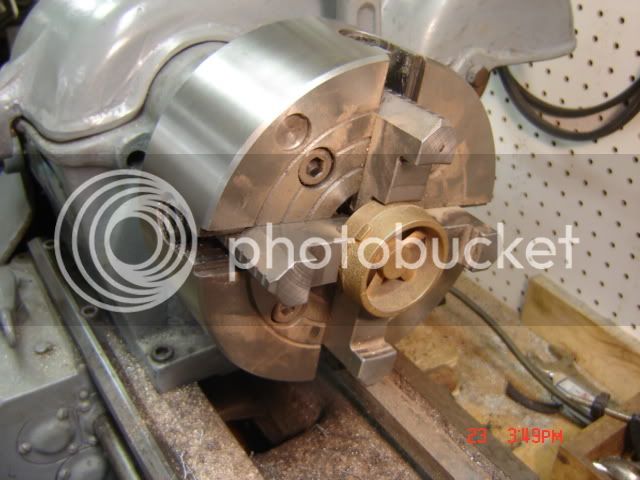
I found the best wheel side, edge of hub to inner, outside rim, drilled & reamed.

DSC02687.jpg


DSC02670.jpg

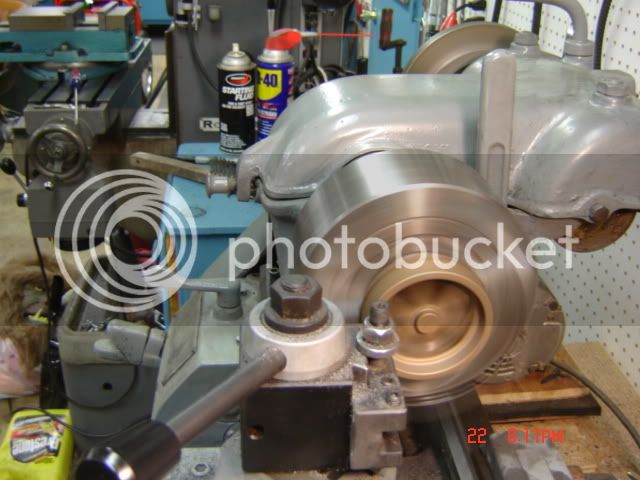
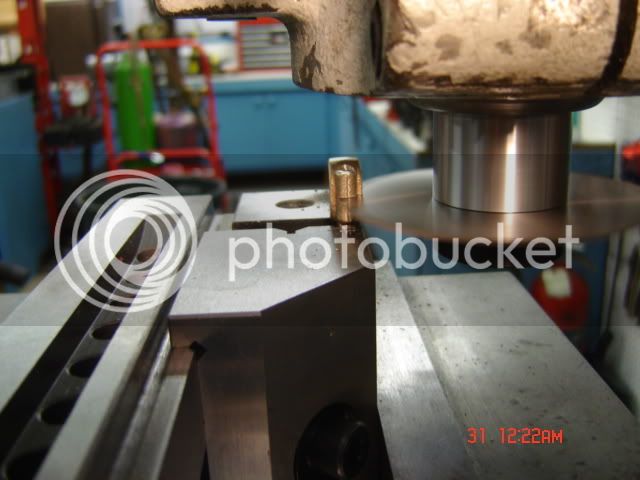
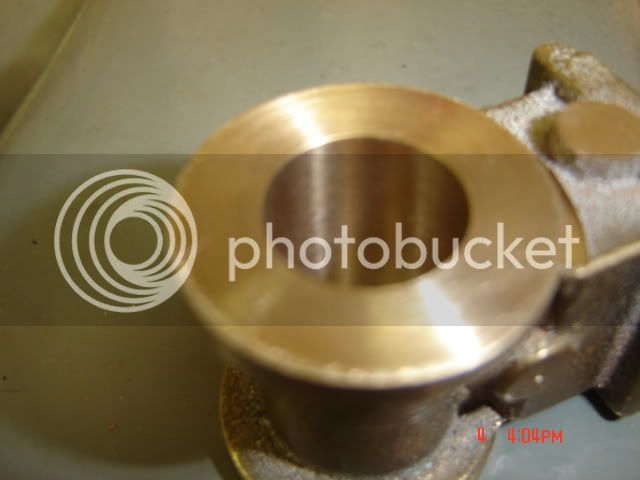
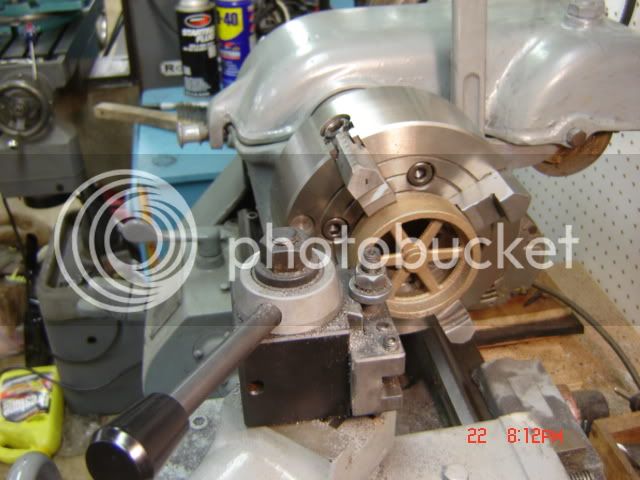
I gave em spin to see how they looked, hub/rim

DSC02672.jpg

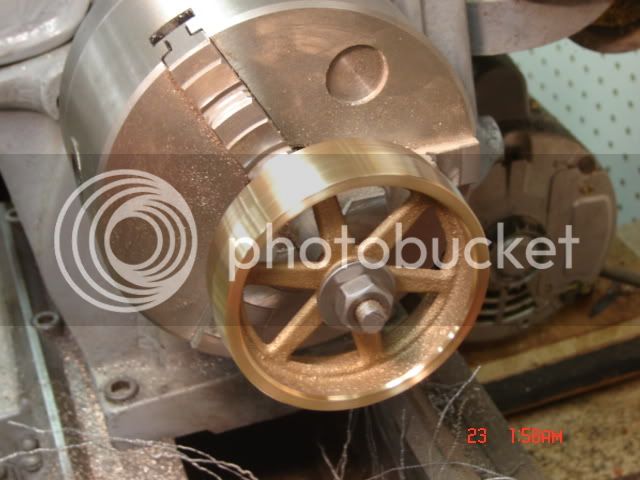
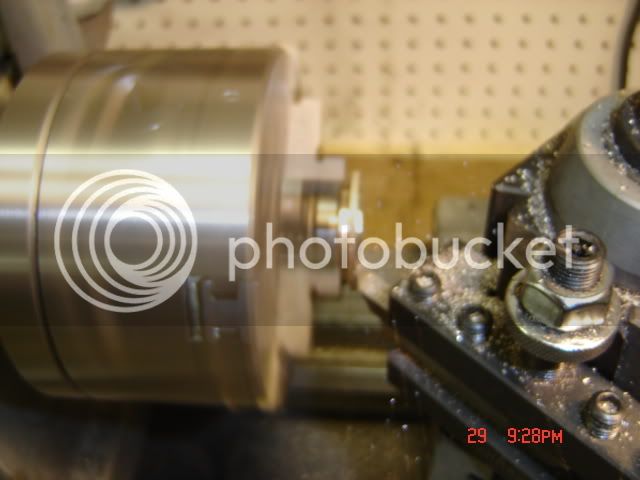
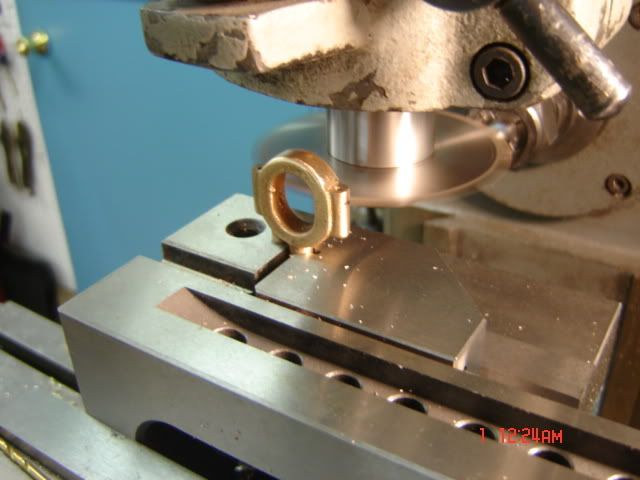
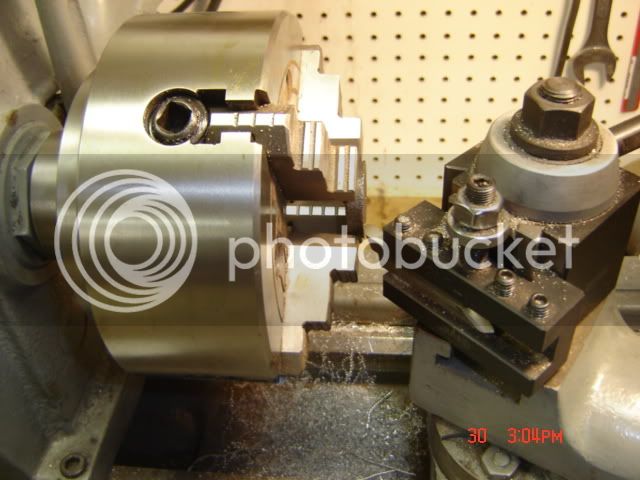
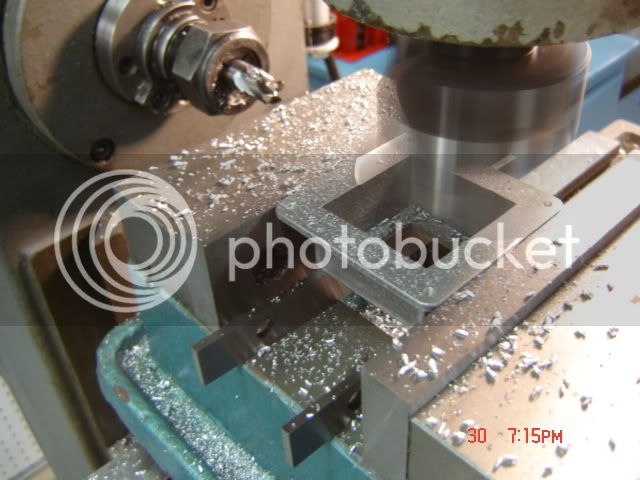
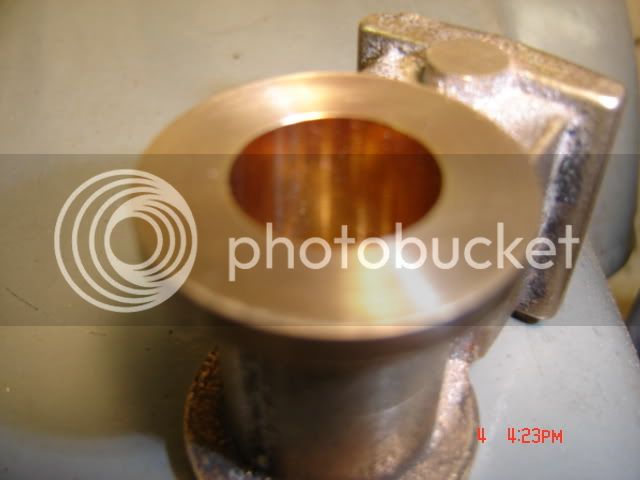
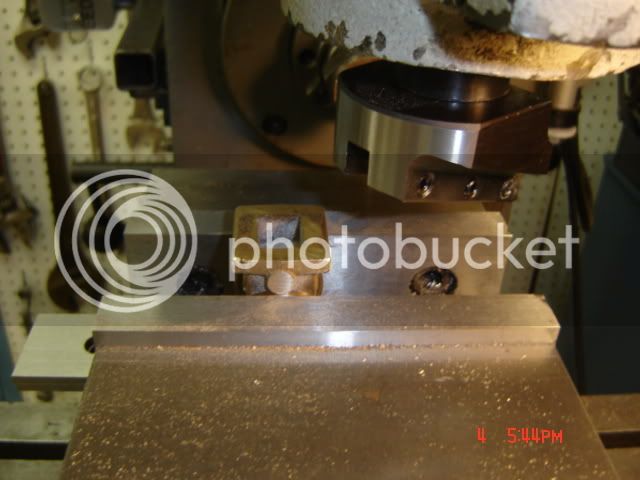
Turned & threaded a mandrel. snug fit to wheel bores, faced & crowned wheels.

DSC02673.jpg


DSC02696.jpg

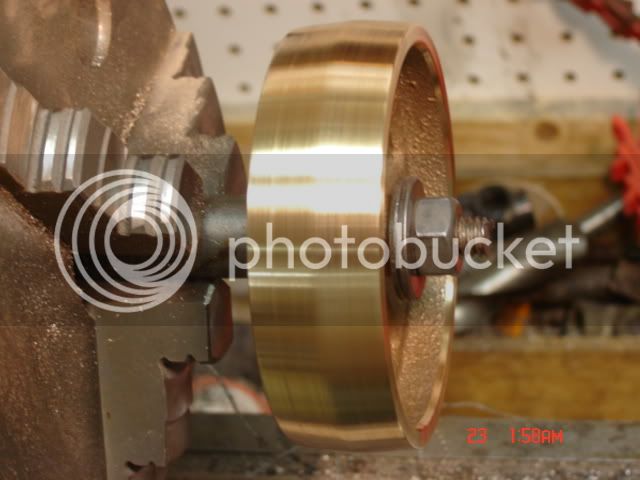
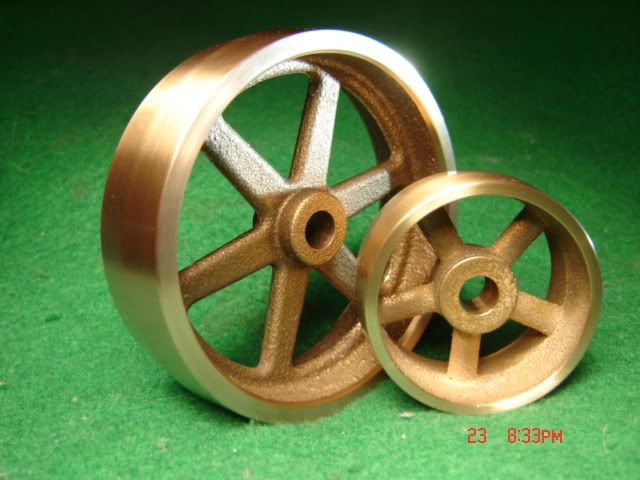
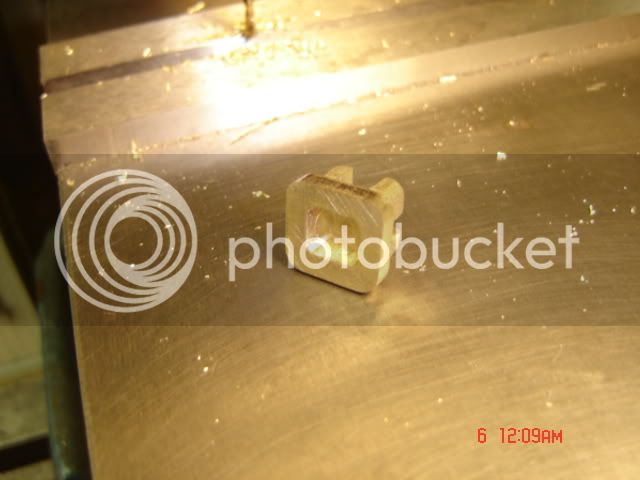
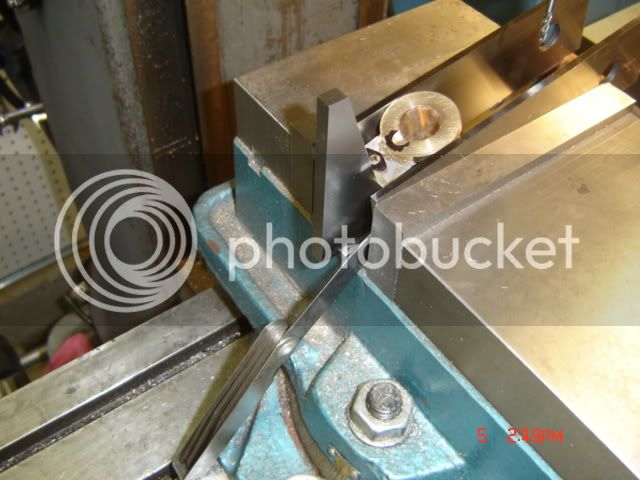
Finished, except for set screw's.

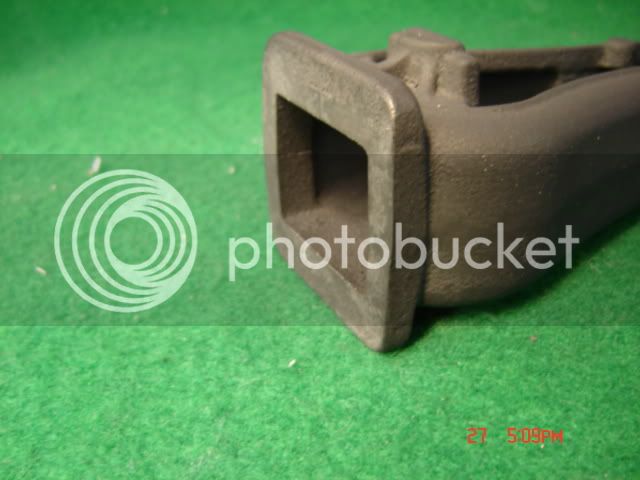
On to flashing removal next....see you all later, taking Mom to the dentist, at 92 and her NOT wanting to go...this should be fun.

Paul


Looking forward to seeing your build progress.

So your Mom is 92 and still puts up a good fight. *knuppel2*

Good for her.

I'll be lucky if I'm still around.

SAM
 
Nice work Paul. Great pictures, thanks for sharing your progress. :bow:


Cheers,
Phil
 
Great start Paul.
The wheels look great from my perspective.
I'll be interested to see the rest.
 
I have a 5BI also waiting to be built. It'll be a while though before I get around to it. So I look forward to your build :)

Mike
 
Hello again, Back from the dentist, not a bad trip, Mom only only got after the office girls for accounting practices. Thanks for the comments. Please, feel free to make comments, criticisms, or whatever about my methods, set-up"s, anything... as I don't know what I am doing, I look at the print, part & go for it. I need to stop and look at big picture... I started this project on January 22 according to the camera, so this stuff is past tense. You might notice pic's at 3am. or later, up late, up medium early, 8 ... 8:30.

Ok, flashing, sprues.

I just ground them off with the bench grinder & disk/belt sander.

DSC02730.jpg

Before

http://i997.photobucket.com/albums/af91/pgablehouse/PMR%205Bi
/DSC02751.jpg

DSC02731.jpg


DSC02752.jpg


DSC02722.jpg


DSC02745.jpg


Paul
 
A little more on making or ruining parts.

DSC02727.jpg


Lower cylinder head, used to locate bolt holes in bottle frame & cyl. block. All done except for piston rod bore & packing gland recess, easy enough :big: The print says, " 1/8" DRILL THRU, 3/16" DRILL 5/32" DEEP" 8th in. fine, 3/16" lost my mark on tail stock, pull it back, mic the depth, .01 short, pull TS back up & crank the new cobalt drill in for a little more, sucks the drill right though the last .07 of material, Dumb, A$$ forgot to lock down TS... I had some 6061, made a new one. Now we don't have a wall of shame at Paul's shop, we have a black lagoon that keeps things like this from view, it will be pictured at post end.

DSC02759.jpg


DSC02762.jpg


DSC02757.jpg


When I remade the part I reversed drill procedure, I recommend drill the big hole to depth, then drill through on a part like this, just in case you forget to lock down your Tailstock...

Just outside my shop is the Black Lagoon, I deposit all bad parts here, in hopes of appeasing the rotten Beaver that chews my trees half. :mad:

DSC02712.jpg


DSC02715.jpg


You might get to see this one a LOT, I will try to change it with the seasons, just to keep thing fresh. Test, how many rocks did this old fool throw, to get the Pic.

Paul
 
A few more


DSC02781-1.jpg

Connecting Rod

DSC02778-1.jpg

Sawed off after drilling & tapping

DSC02785-1.jpg

same with Eccentric strap

DSC02786-1.jpg

Eccentric strap, faced one side, bored, inside groove, faced other side on mill.

DSC02763.jpg

Cylinder head

DSC02801.jpg

Slide Valve

DSC02797.jpg


Paul
 
Just outside my shop is the Black Lagoon, I deposit all bad parts here, in hopes of appeasing the rotten Beaver that chews my trees half.

Aaaargh! Carefully stow 'em in your 'future parts' box - the beaver are probably best appeased with a thutty thutty.
 
Great pictures Paul. You seem to be going through this casting kit in "fast forward" mode.

If I look carefully at the picture you took of the lake, in the background I can just make out what looks like an angry furry animal making an obscene gesture in your direction. Would that be "Bucky"? Rof}

Cheers,
Phil
 
Hi, Tel & Phil

I give Bucky that same gesture back!!! If the little bugger doesn't like the Brass hes going to get that lead pill that Tel suggests. Phil I started on January 22, sorry about that...

Paul
 
Great thread Paul. I've got one of these waiting...er...aging in the wings too. Just no time to get to it for now. The set-up pics will be nice to review though when that time comes. Keep up the good progress

Bill
 
Phil & Tel, OT. a little bit of "Buckys" fine work, I wish I could make chips as fast ;D

DSC02892.jpg


DSC02894.jpg


DSC02895.jpg


DSC02896.jpg


I had wire mesh around the trees when small, no problems for eight years. The last two years Bucky has dropped 7, dead standing 2, working on 2. I never see him, hes much smarter than Axe Men.

Paul
 
Hi Bill,

Thanks, I hope some of this can be of help. The worst part was the Valve Chest Cover, very hard edges, ruined a new USA cutter.

Paul
 
And More....

DSC02774.jpg

The engine base Alum. The casting was .06 shorter, as received, than finished specs. Milled both sides W/fly cutter. Thanks for the tip's on grinding fly cutter bits, nice finish. I took off .035 in one pass ?? don't know if this is wise or not?

DSC02767.jpg

The engine will be shorter now, so it should be easier to slide through a scale doorway ;)

DSC02765.jpg

Valve Cover

DSC02783.jpg

Cross Head

DSC02830.jpg

Messed up Cross Head (Beaver Treat)

DSC02857.jpg

New Cross Head, doesn't look as good as casting, but it should work.

Paul
 
Honestly Paul, I like the brass part better than the beaver treat... er, I mean casting.

:)
 
Excellent writeup on the build Paul. The only PMR kit I have built is the lathe and all of the castings were aluminum. I had read another post some time back where the author was having trouble with one of his castings. It was recommended that he send it back to them as they are good people to deal with.
gbritnell
 
Nice work Paul, I had similar problems the last time I tried to use castings, I was pretty young at the time but it put me off enough not to attempt anything with them again in the last 12 years! I'll have to do a similar project to yours to get into the swing of maching castings one day though I guess.
 
Twmaster, gbritnell, NickG

Hey, Thanks for your comments, just trying to learn. I bought the casting kit because looks like one used in the family sawmill, 1930 ... 1960. The engine ran the trim saw & two chip conveyors. Starting to think about a semi-scale replica. I enjoy making parts from rod & bar stock, but the castings require a lot more pre-planing, on my part anyway... especially when the darn things are under finished size to start with.

Paul
 
Hello All

Cross Head: I don’t know where I messed up, bad calculations, backlash, it happens. I use a Hermann Schmidt edge finder, seems to repeat well, just part of being a Grub at this. I guess you just keep making bad parts, until you learn how to make good ones. On the new Cross Head, I had to pull out all the stops, no DRO, just dials & indicators. Turned C/H OD & sides, back in mill, find center, and added this stuff.

DSC02853.jpg


The new one was spot on ???

Small, short parts are hard to see under the quill. I have developed a bad habit of using the drill chuck to hold end mills under .250 to facilitate clearance & vision at times. I admire the members that make little bitty parts, you guys are awesome!!!

Cylinder Block: I lightly faced one end, same on OD. measured everything , flipped it end for end, faced, turned OD, and bored .004 under. Flip, and finish other end. Turned a Mahogany dowel, snug fit (that was a mistake, to tight) and lapped cylinder. I started with valve grinding compound. I handheld the cyl, that lasted about four seconds, seized, put a strap wrench on cylinder, lathe in back gear and give it a go. After 1… 2 minutes of sliding it back & forth on the lap, and one end to end change it was to hot to touch. Cooled it down, mic it .003 over. Well crap, I am not a machinist, just Grub, no piston yet anyway, more surface area, more power!!! Next compound used was Meguiars Heavy Cut Cleaner #4, used on auto paint, then finished with Brasso. The final bore size is secrete, unless I get tech inspected at some steam engine competition.

DSC02788.jpg


DSC02789.jpg


DSC02792.jpg


I almost messed this up, we will see. I believe that I bumped the hand wheel after setting up the cut, yep, forgot to lock table. The 20deg. Angle hole, end of cylinder to valve port. The cutter just took a little chip out of the port side, inside the steam chest.

DSC02794.jpg


DSC02795.jpg


Paul

DSC02793.jpg


Latest posts

Back
Top