Wow---Beyond cool!!! I like the way the ram stops about 8" short of the anvil. No way to get hurt there unless you get your hand on TOP of the block-----or stick your head in!!! Thanks for such a cool video.---Brian
You are using an out of date browser. It may not display this or other websites correctly.
You should upgrade or use an alternative browser.
You should upgrade or use an alternative browser.
Philip Duclos "Odds N Ends" hit and miss engine
- Thread starter Brian Rupnow
- Start date

Help Support Home Model Engine Machinist Forum:
This site may earn a commission from merchant affiliate
links, including eBay, Amazon, and others.
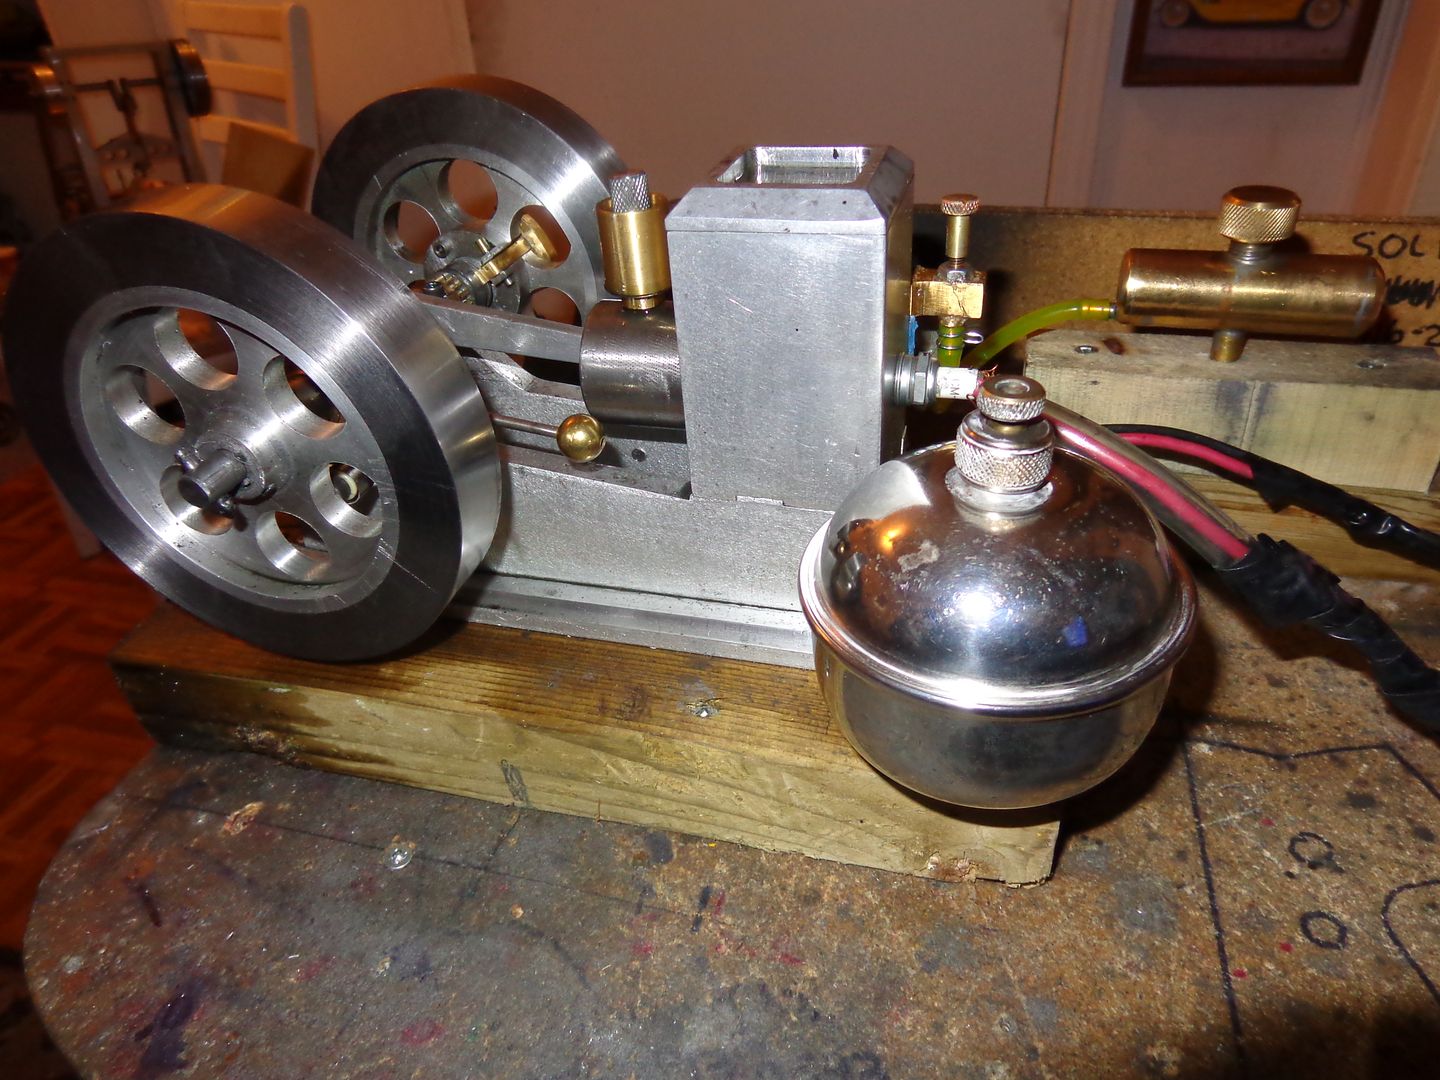
Now I ask you---Is that a beautifull thing or not!!! That is one of the fuel tanks off a gas Coleman iron that I have been trying to chase down to use as a fuel tank for my Odds and Ends engine. It is just the right size, and even from the right time era. I'm as pleased as a can be!!!!

Nice job Brian. With my odds & ends build I'm at the point of making the cast iron rings. My questions are how much larger od are the rings turned then the id of the cylinder wall before you cut the slot in the ring?What is the id of the ring as to the od of the od of the ring grove on the piston? I would like to try to make the rings be fore I go to the O ring. Ed
It's amazing what you find out when you read the contents of a book.on page 112 of Philip Duclos book is a chapter telling me every thing I wanted to know.With simple formulas that I can do.Just to let you know sometimes it's good to re read a book. Ed

$40.02
$49.99
Becker CAD 12 3D - professional CAD software for 2D + 3D design and modelling - for 3 PCs - 100% compatible with AutoCAD
momox Shop

$94.99
$109.99
AHS Woodmaster 4400 Maintenance Kit for Outdoor Wood Boiler Treatment
Alternative Heating & Supplies

$24.99
$34.99
Bowl Sander Tool Kit w/Dual Bearing Head & Hardwood Handle | 42PC Wood Sander Set | 2" Hook & Loop Sanding Disc Sandpaper Assortment | 1/4" Mandrel Bowl Sander for Woodturning | Wood Lathe Tools
Peachtree Woodworking Supply Inc

$519.19
$699.00
FoxAlien Masuter Pro CNC Router Machine, Upgraded 3-Axis Engraving All-Metal Milling Machine for Wood Acrylic MDF Nylon Carving Cutting
FoxAlien Official

$29.95
Competition Engine Building: Advanced Engine Design and Assembly Techniques (Pro Series)
Amazon.com Services LLC

$39.99
$49.99
Sunnytech Low Temperature Stirling Engine Motor Steam Heat Education Model Toy Kit For mechanical skills (LT001)
stirlingtechonline

$24.99
$27.99
HOZLY 5PCS/Lot ISO30 Tool Holder Clamp Flame Proof Rubber Claw CNC Machines Automatic Tool Changer
HOZLY

$89.99
Outdoor Wood Boiler Water Treatment Rust Inhibitor- AmTech 300 & Test Kit
Alternative Heating & Supplies
![DreamPlan Home Design and Landscaping Software Free for Windows [PC Download]](https://m.media-amazon.com/images/I/51kvZH2dVLL._SL500_.jpg)
$0.00
DreamPlan Home Design and Landscaping Software Free for Windows [PC Download]
Amazon.com Services LLC

$12.56
$39.95
Complete Plans for Building Horse Barns Big and Small(3rd Edition)
ThriftBooks-Atlanta

$99.99
AHS Outdoor Wood Boiler Yearly Maintenance Kit with Water Treatment - ProTech 300 & Test Kit
Alternative Heating & Supplies
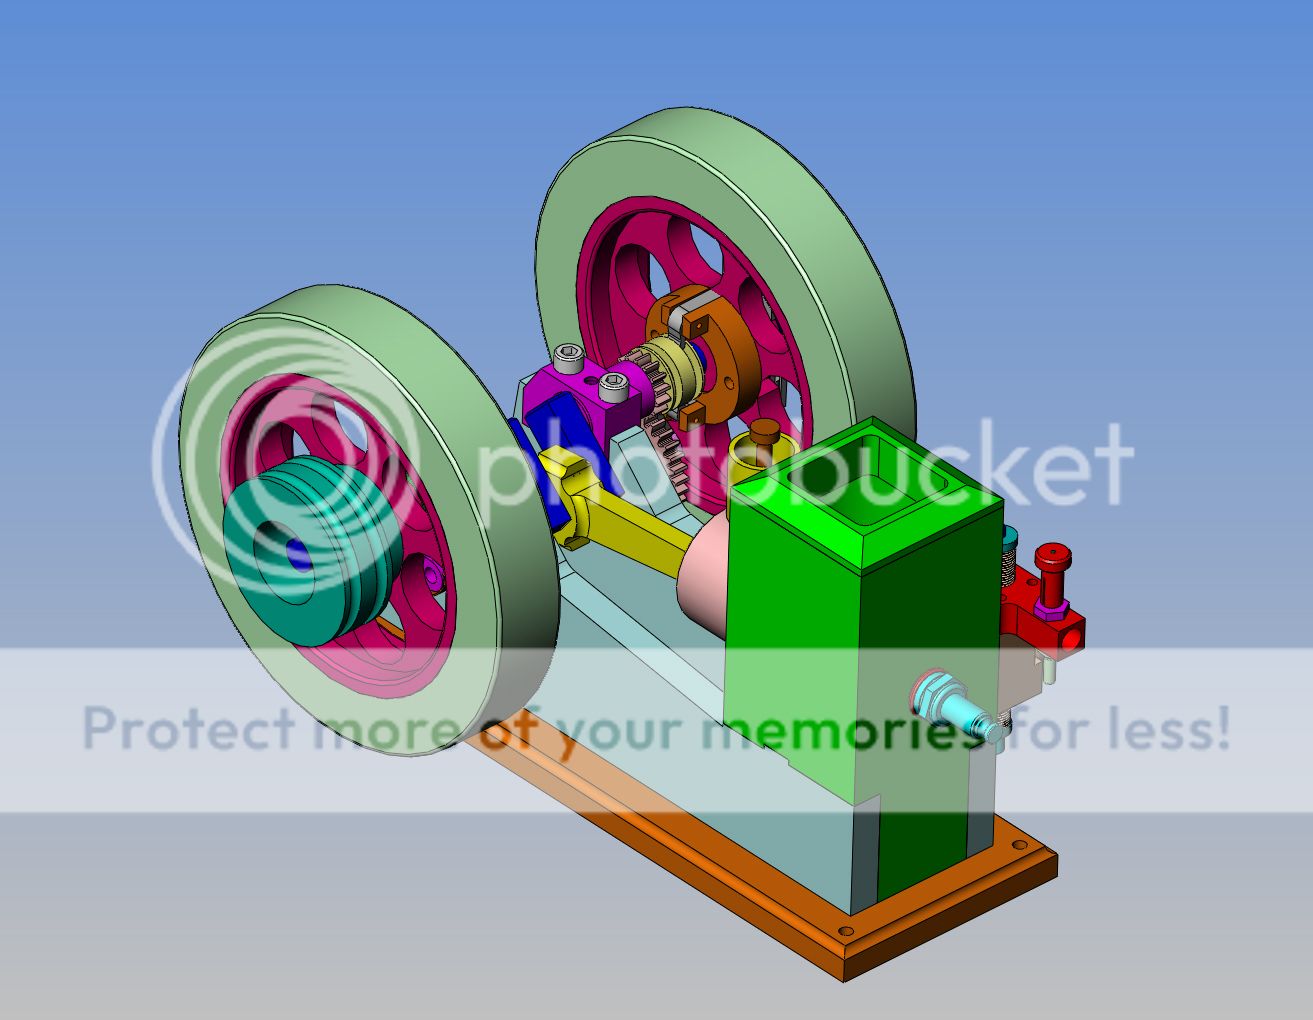
Its time to put this engine to work---But first its going to need a drive pulley. A twin o-ring drive pulley to be exact!!!
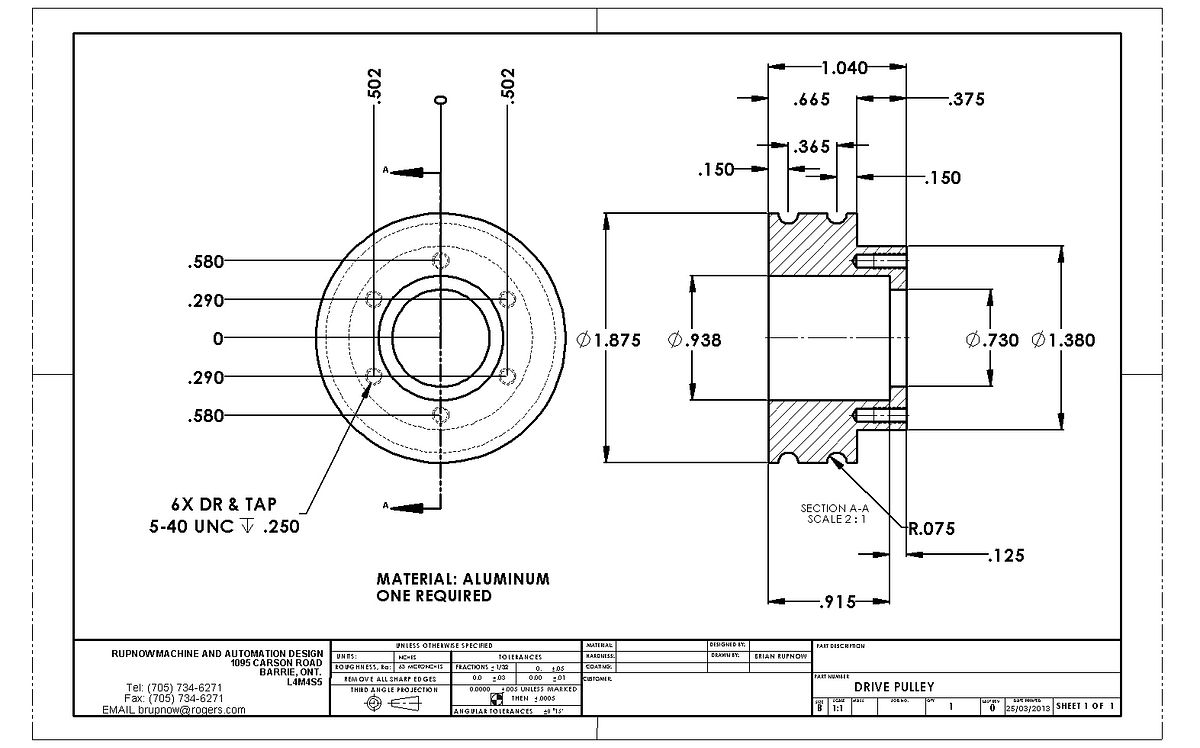


So---There is one time that I can think of when you actually welcome chatter marks!!! When you are doing a plunge cut in the outer diameter of a pulley for an o-ring drive belt, chatter marks are actually a good thing. They help the belt to grip the pulley and not slip. If I can just get my gas tank mounted, this engine will be ready to go to work for a living.
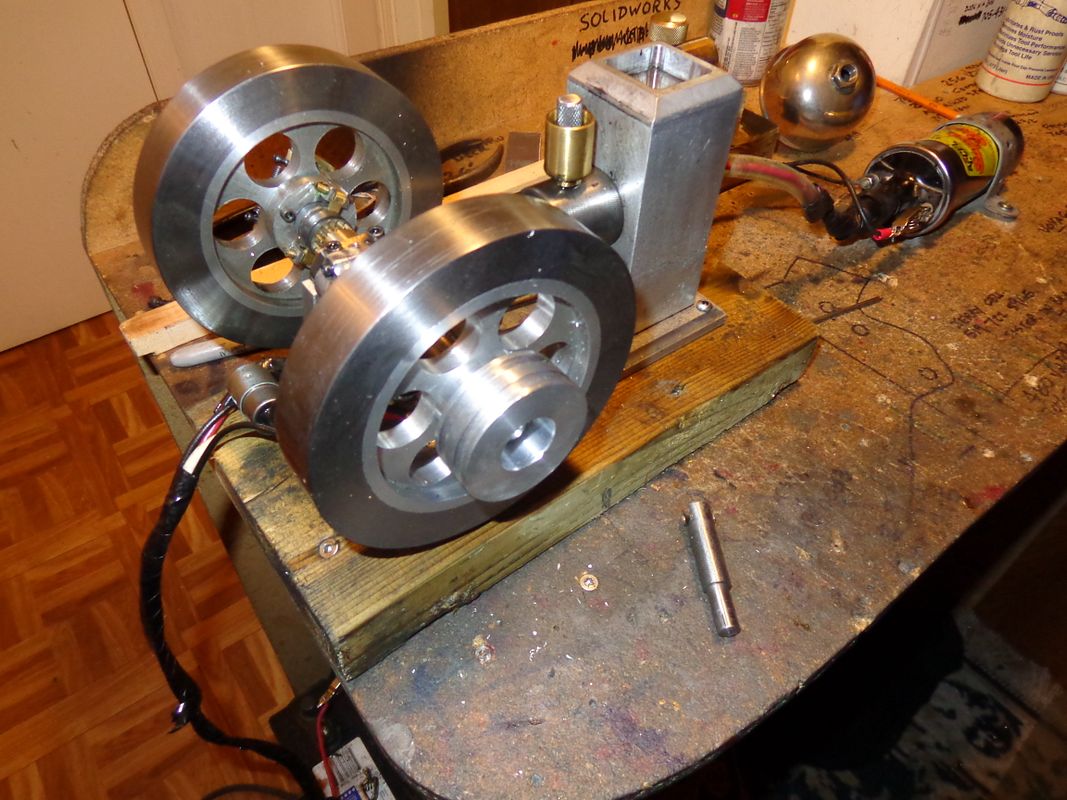
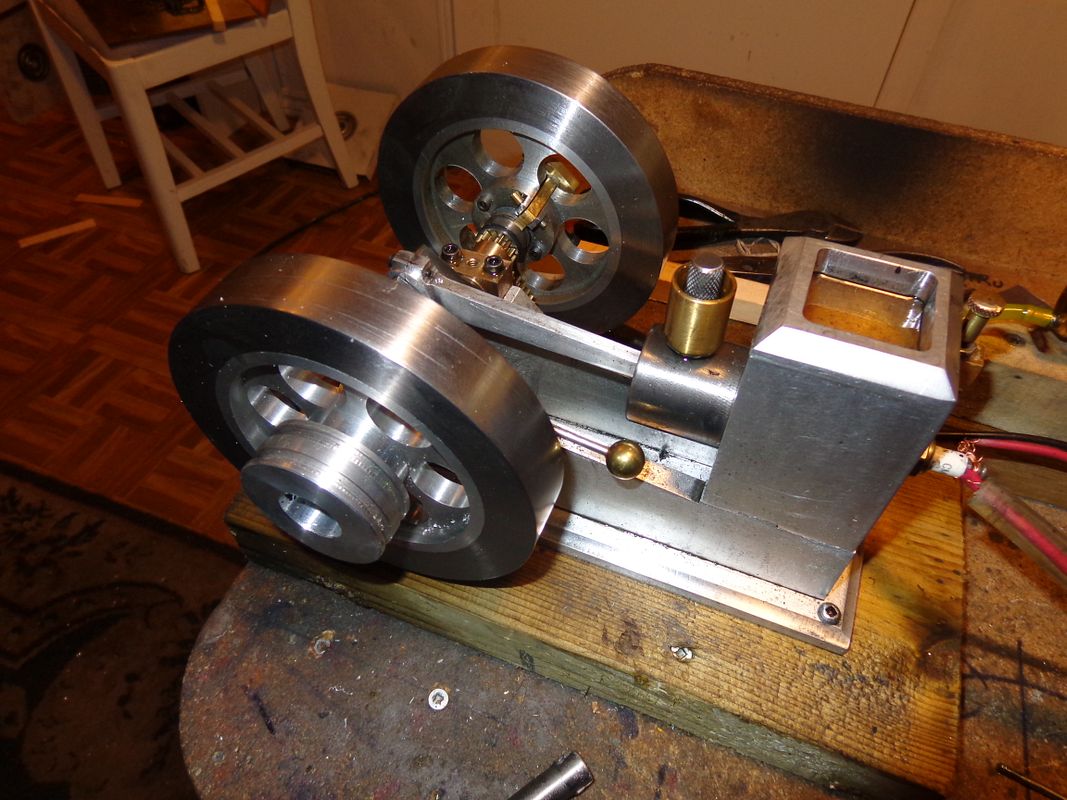


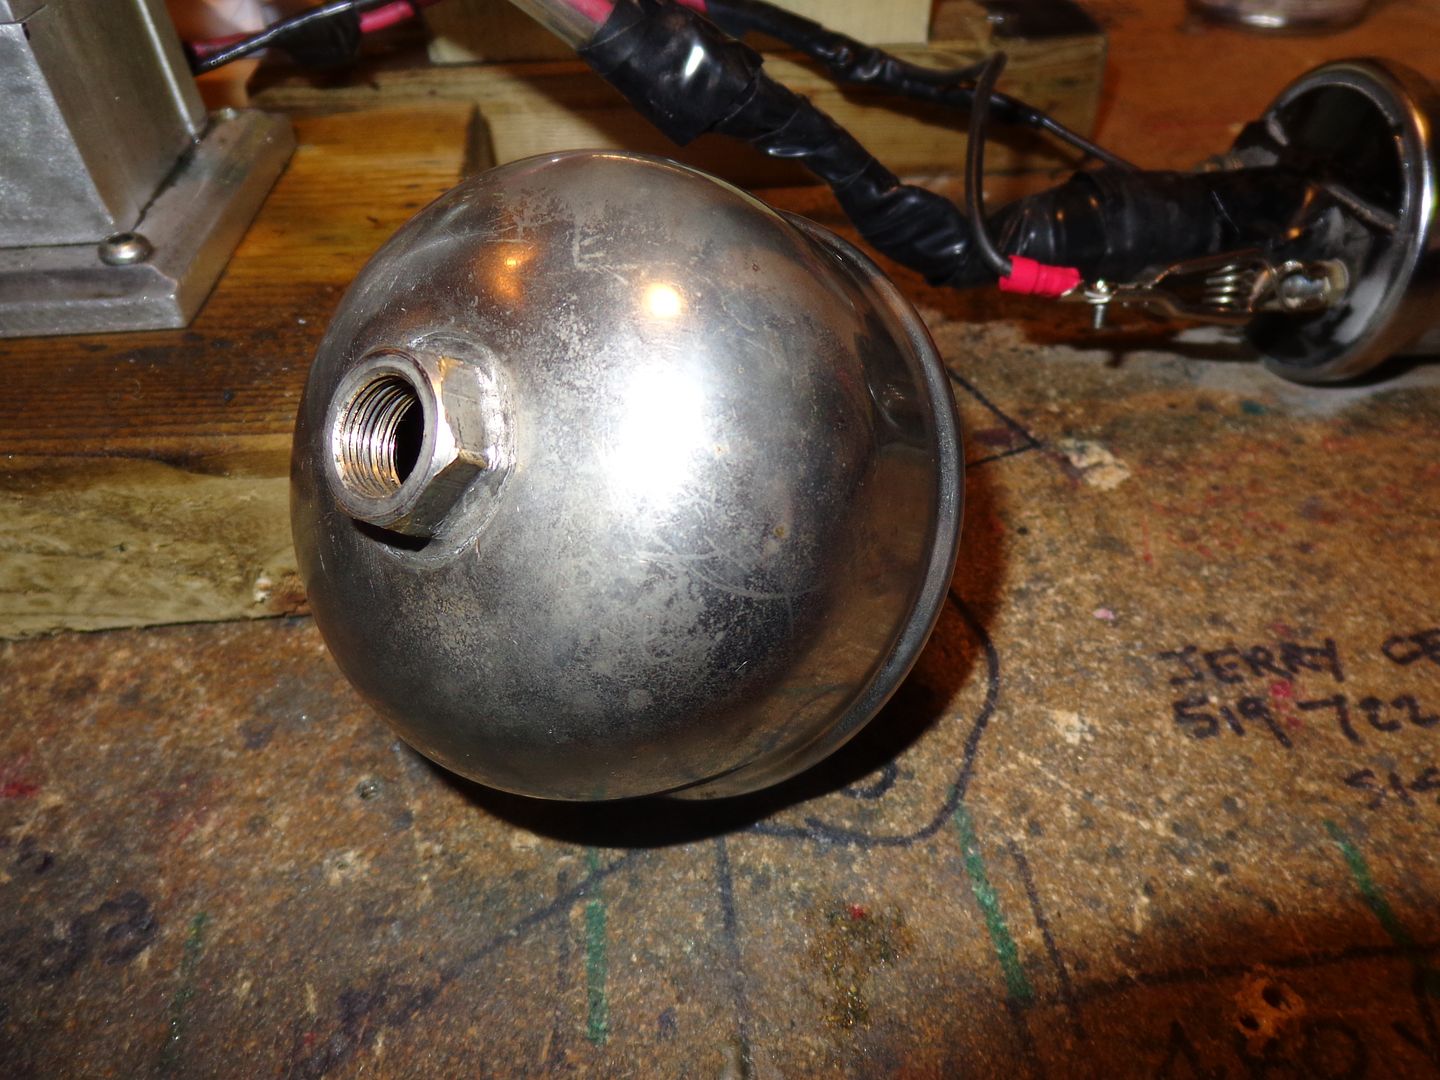
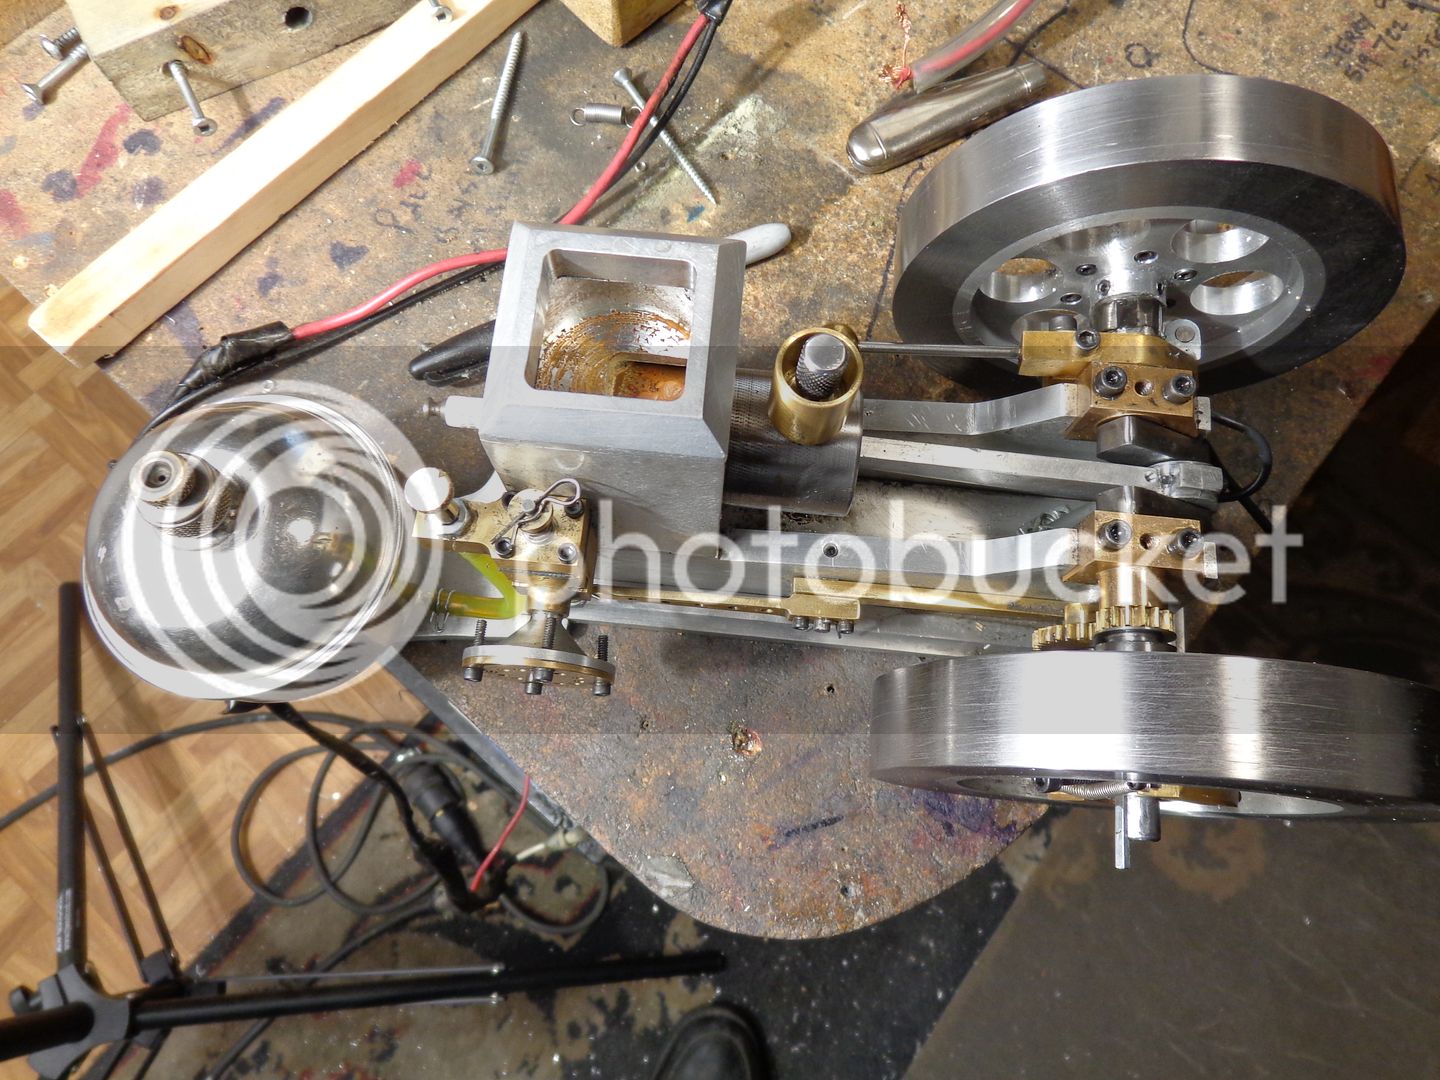
I am playing at mounting the Coleman iron fuel tank to my hit and miss engine. Its going to be a close thing, keeping the tank lower than the carburetor. I can just squeeze it in there. I'm going to have to seal up the threaded hole in the bottom of the tank, and add a fuel outlet on the lower curve of the tank. I show it mounted to a peice of brass (dark blue) which is bolted to the aluminum base. The tank is made from non magnetic stainless steel, and has obviously been soldered together at the tank seam and at the hex hut attached to the bottom where the threaded outlet hole is. (I don't think they had tig welding when this tank was made). Question---Can I silver solder this tank to the brass base and solder in a brass or mild steel plug in the threaded hole? Would it be better to use soft solder? I've never soldered anything stainless before.
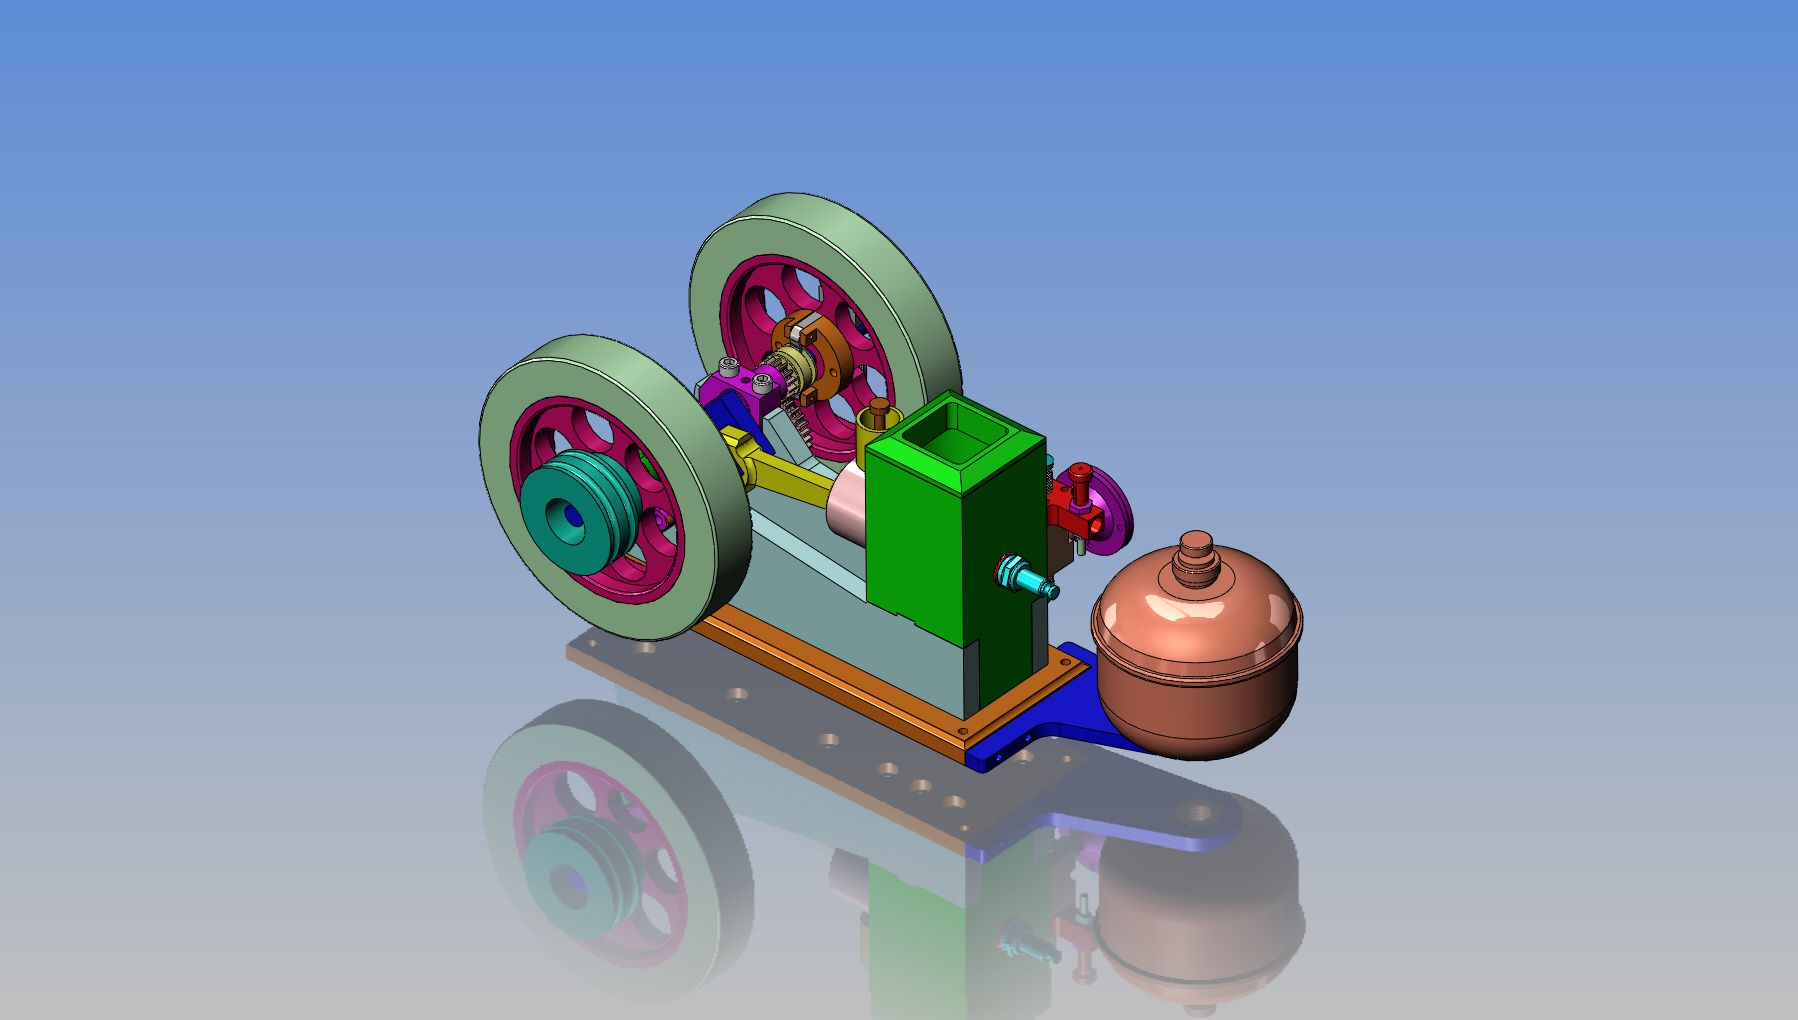
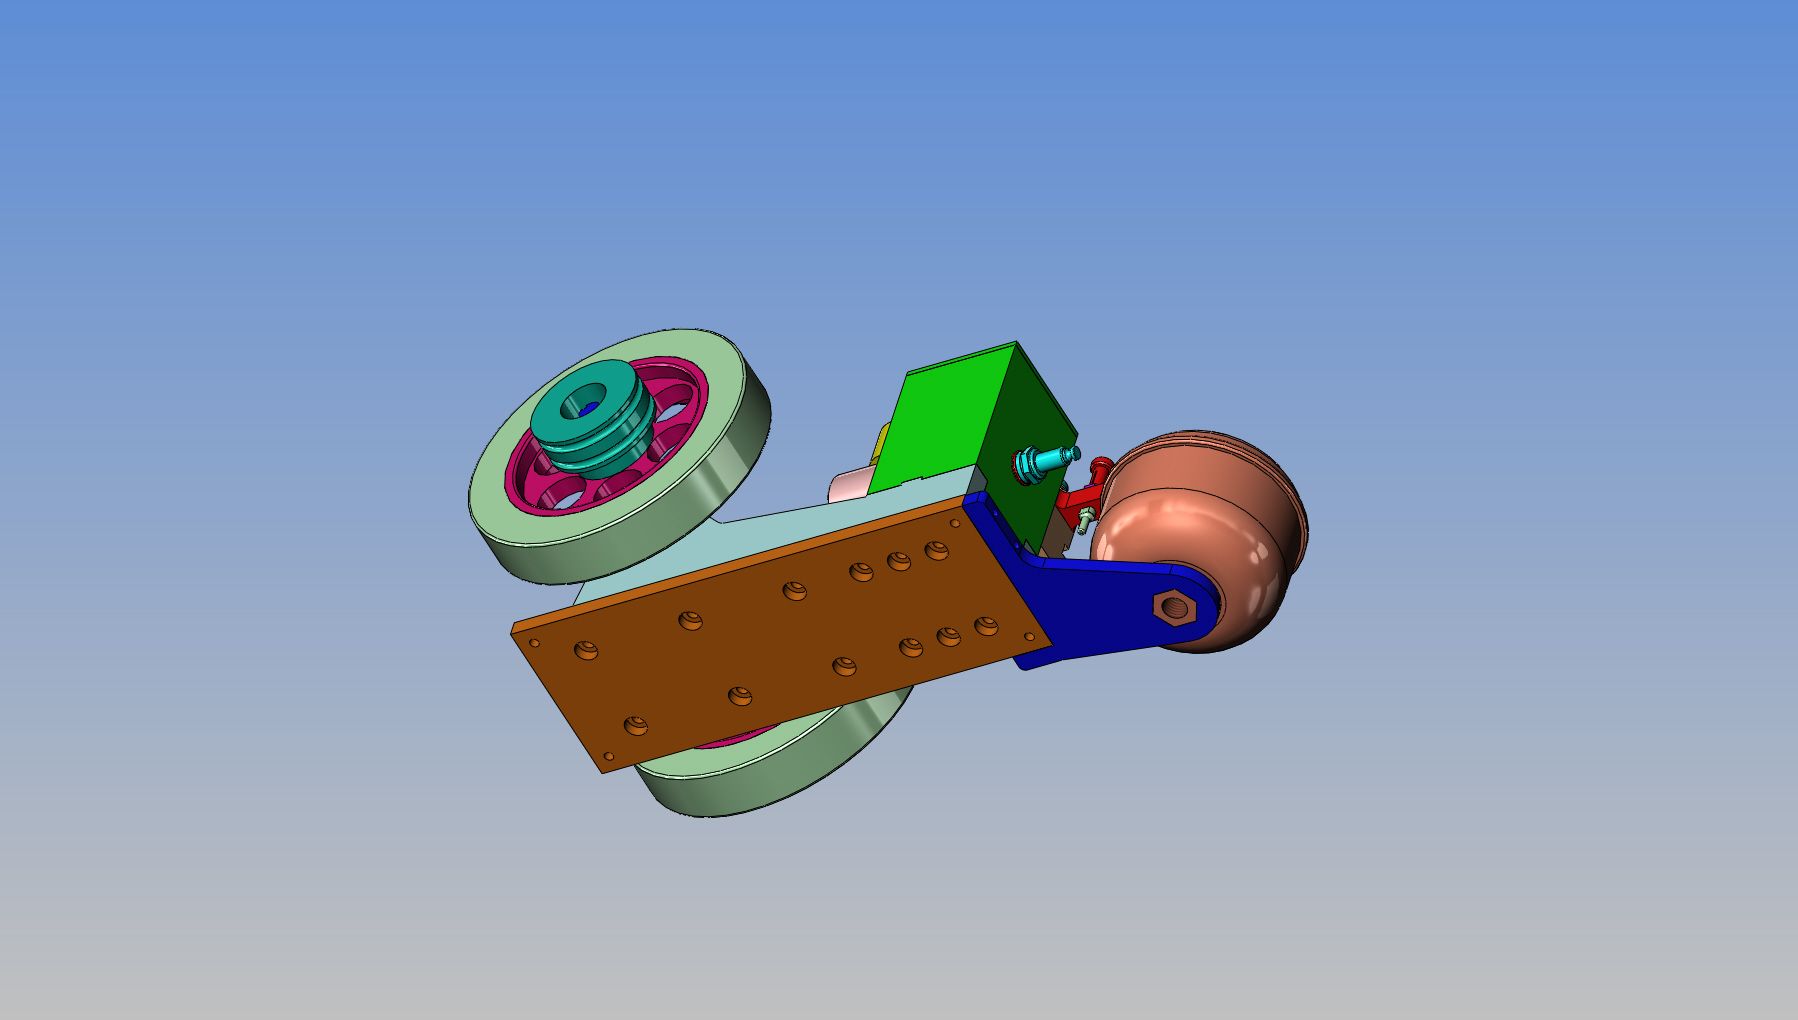


Can't do that Pete. The tank is too tall, and if any part of the tank sticks up higher than the carb, all the gas runs out onto the table, and/or floods the engine so bad it won't run. I have to keep the top of the tank lower than the carb, which means mounting it down as far as I can get it.
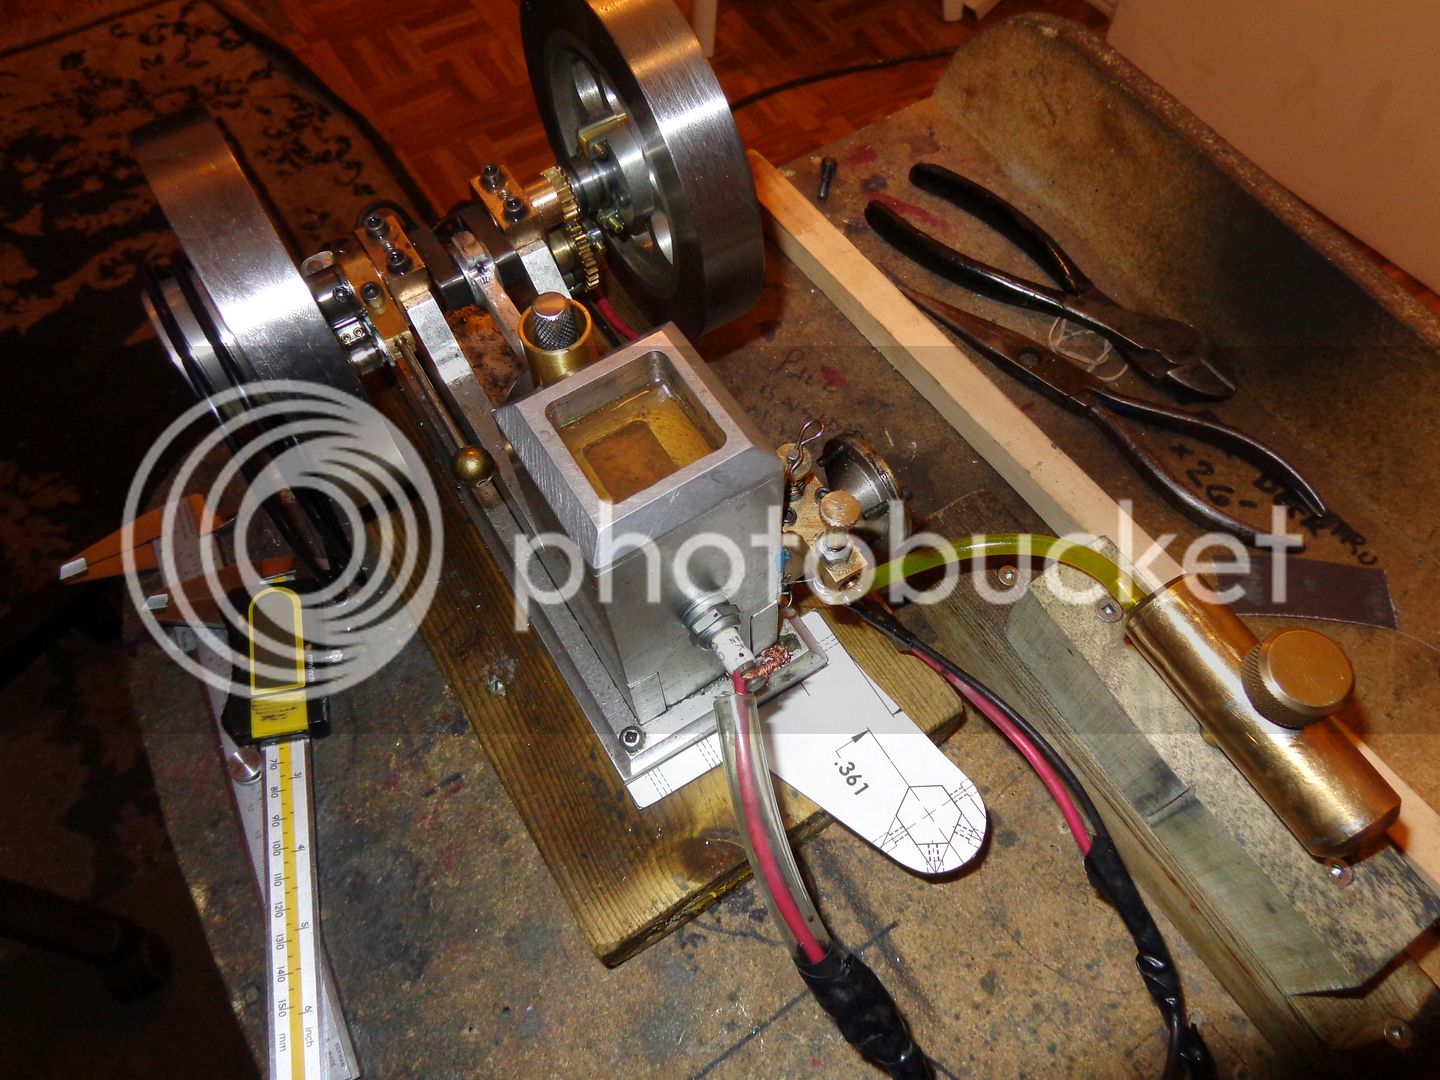
NEWS FLASH!!!! Making parts from cardboard is MUCH easier than making them from metal!!!! But I bet you knew that already. I have decided to go ahead and make the support bracket for the fuel tank from aluminum, and to hold the tank to the bracket with some hidden screws. The threaded hole in the bottom of the tank will be plugged with a peice of M12 bolt and JB Weld----no solder. The only soldering involved will be to solder a small 0.170 dia. brass spigot into the tank near the bottom for my fuel line outlet. I want to keep the tank far enough away from the sparkplug that there is no random arcing from the sparkplug to the tank. I'm not sure what would happen, but I really don't want to find out. I will be adding a rubber "boot" to the sparkplug wire. After designing the bracket, I print it out at 1:1 scale, glue the print to a peice of cereal box cardboard, and try it for fit. Its much easier to change the design and the cardboard if I don't like it than to make another different bracket.
NEWS FLASH!!!! Making parts from cardboard is MUCH easier than making them from metal!!!! But I bet you knew that already. I have decided to go ahead and make the support bracket for the fuel tank from aluminum, and to hold the tank to the bracket with some hidden screws. The threaded hole in the bottom of the tank will be plugged with a peice of M12 bolt and JB Weld----no solder. The only soldering involved will be to solder a small 0.170 dia. brass spigot into the tank near the bottom for my fuel line outlet. I want to keep the tank far enough away from the sparkplug that there is no random arcing from the sparkplug to the tank. I'm not sure what would happen, but I really don't want to find out. I will be adding a rubber "boot" to the sparkplug wire. After designing the bracket, I print it out at 1:1 scale, glue the print to a peice of cereal box cardboard, and try it for fit. Its much easier to change the design and the cardboard if I don't like it than to make another different bracket.

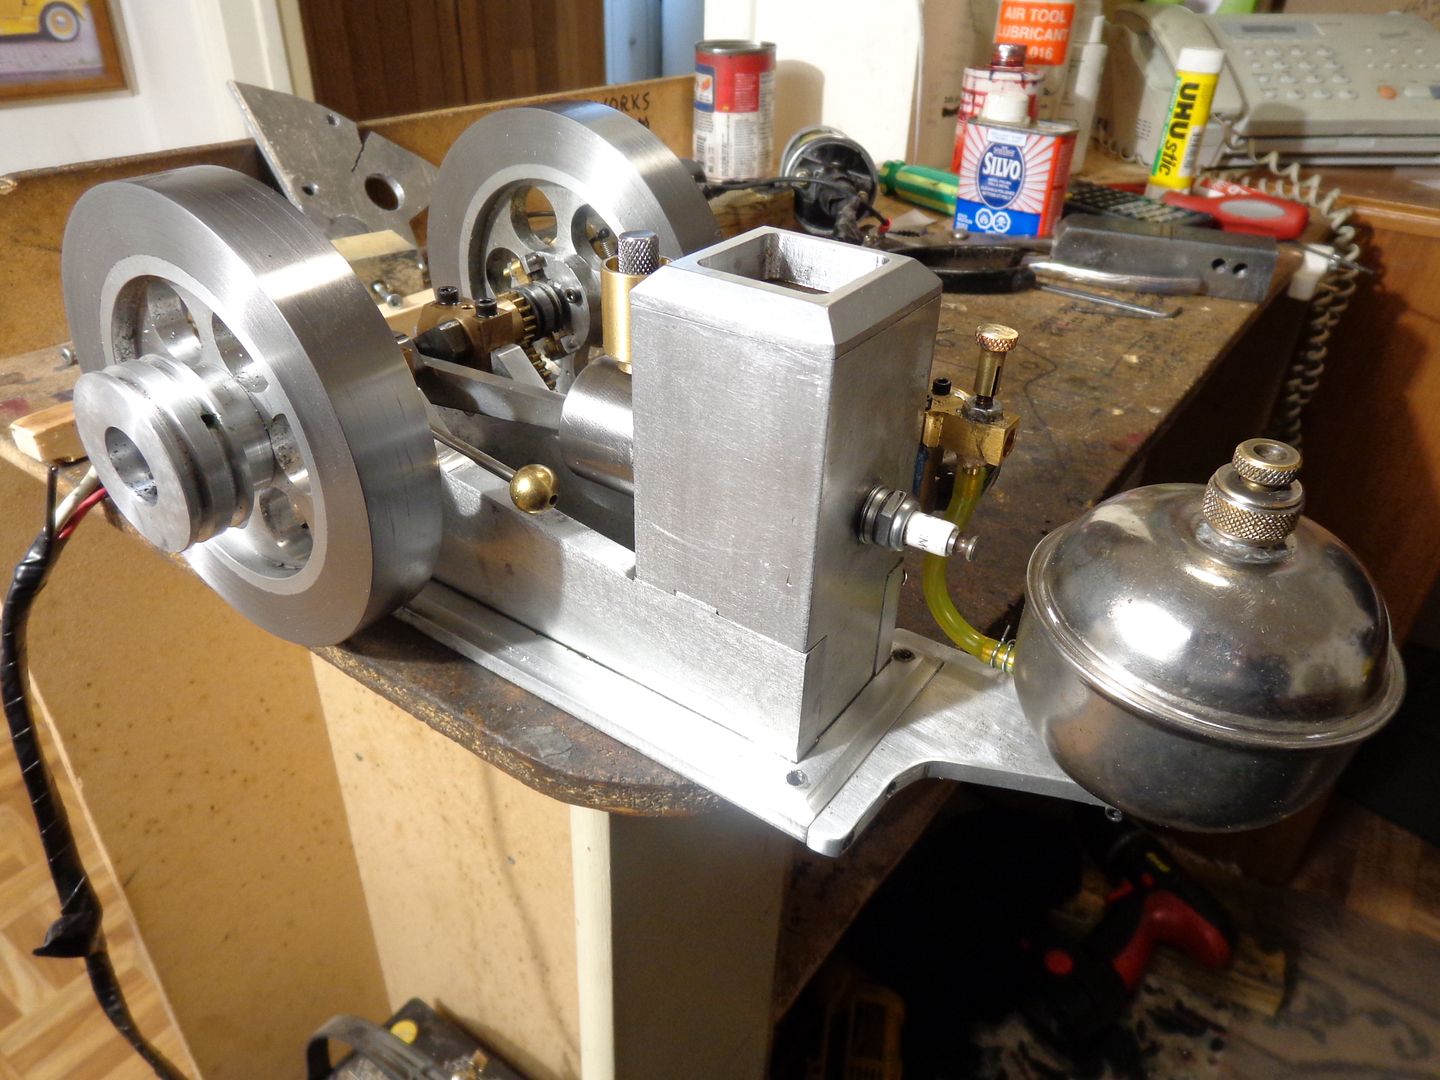
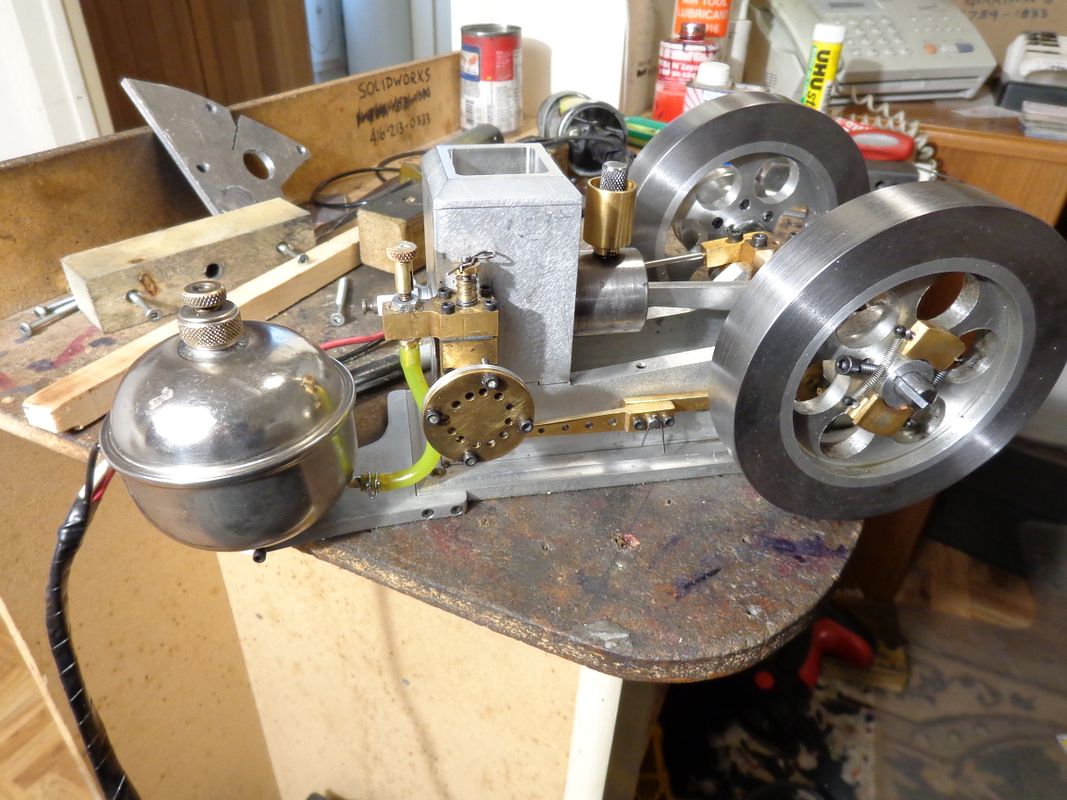
Oh Yeah!!!! That will do. That will definitly do!!! My Coleman iron fuel tank looks right at home on the engine. I silver soldered a 0.172 diameter peice of round brass with a .095 dia hole drilled thru the center into the side of the tank near the bottom for my fuel line take off. I coated an M12-1.5 bolt with the head removed with J B Weld and screwed it into the hole in the bottom of the tank to seal it. In order to get the tank low enough so that no part stuck up above the carburetor I had to cut a hex shaped hole in the aluminum bracket and set the nut on the bottom of the tank down into the hole, and hold it in place with set screws tapped through the sides of the bracket. I think that for all intents and purposes, this engine is finished. You will see it again coupled to my sawmill, but as far as this engine build, I'm done. Its been a great ride, and it got me through the worst part of the winter. Thanks for riding with me.----Brian


aonemarine
Well-Known Member
- Joined
- Nov 18, 2012
- Messages
- 887
- Reaction score
- 212
Looks good Brian!
akitene
Member
- Joined
- Nov 29, 2008
- Messages
- 9
- Reaction score
- 2
Such a nice job!
Because of its reservoir, it kind of reminds me of Cugnot's "Fardier", the very first steam automobile:
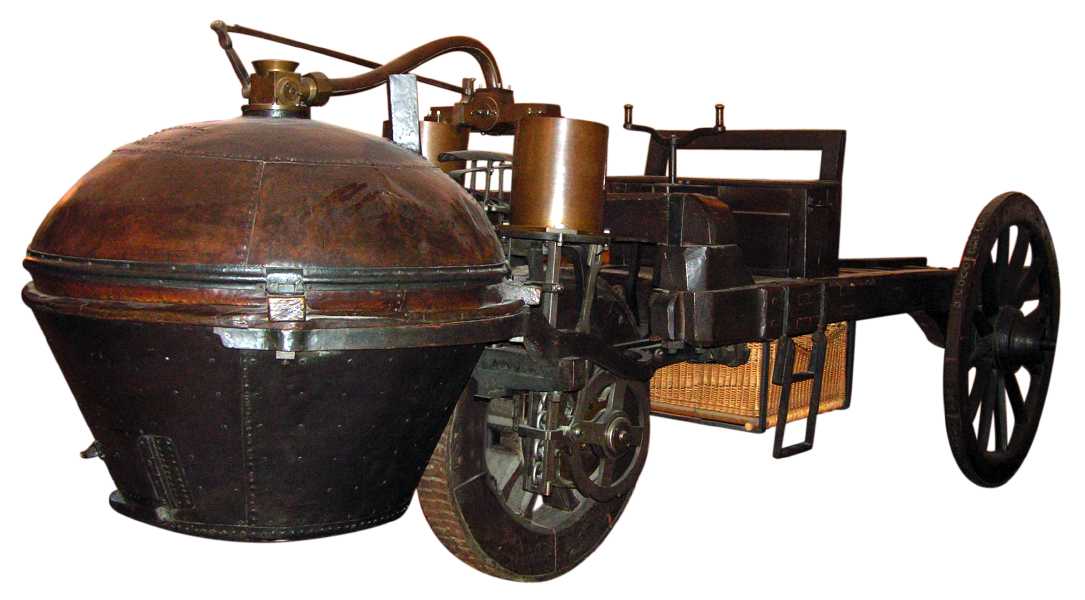
Here's a link to the related topic in Wikipedia: http://en.wikipedia.org/wiki/Nicolas-Joseph_Cugnot
Because of its reservoir, it kind of reminds me of Cugnot's "Fardier", the very first steam automobile:

Here's a link to the related topic in Wikipedia: http://en.wikipedia.org/wiki/Nicolas-Joseph_Cugnot
A follow up after a spell away from this beast. Although I was able to get the engine to run long enough to make the videos I posted, I had one ongoing problem which I just couldn't solve. After about 5 minutes of running fine, the engine would just gradually die and quit. I changed coils---I changed sparkplugs---I took off my home brewed carburetor and put on a purchased model airplane carb. Nothing really seemed to help. Then I got very busy with my design business, and was happy to just walk away from the project. Even though when it quit I could turn it over easily by hand, I thought that perhaps the aluminum piston was "growing" from heat expansion and seizing in the bore. I had no real proof of that, but absolutely couldn't imagine what else the problem could be. I put the old cast iron piston back into the engine with one cast ring at the top and a Viton o-ring in the second groove. The engine was also leaking air between the manifold body and the cylinder head, and burning away the gasket material. I took Lane's advise and put a small counterbore into the cylinder and into the manifold body, and inserted a thin wall tube into this counterbored area, to bridge the flat spot between the two surfaces. Then made a new gasket from a better grade of material and used high heat Permatex to reassemble everything. Today, for the first time in about 3 or 4 weeks I actually ran out of design engineering work, so I decided to play with the odds and ends engine. I didn't really like the gas tank I had put on it, so I removed it and made up a temporary tank. (All you guys who suffer from arse end issues will appreciate the new gasoline container.) I filled the water reservoir, adjusted the timing, and away it went.---And ran for an hour. I actually had to shut it off by lifting one of the wires off the battery. I am SOOOO happy to have it run for an hour!!! Now I can proceed with hooking it up through my new clutch to the sawmill. Jim Dunmyer is sending me a new sawblade which he found works very well on the sawmill he built, so I will install it on my sawmill as soon as it gets here and MAYBE I can make the video of a i.c. powered sawmill sawing a log, that I have been promising for months now.
 !!!
!!!
 !!!
!!!aonemarine
Well-Known Member
- Joined
- Nov 18, 2012
- Messages
- 887
- Reaction score
- 212
glad to hear you have it up and running well. Wish I had one of those fuel tanks fresh from the store too, could use it ATM
Similar threads
- Replies
- 356
- Views
- 66K
- Replies
- 394
- Views
- 79K


![MeshMagic 3D Free 3D Modeling Software [Download]](https://m.media-amazon.com/images/I/B1U+p8ewjGS._SL500_.png)


