Lathe problems

Home Model Engine Machinist Forum

Help Support Home Model Engine Machinist Forum:

This site may earn a commission from merchant affiliate links, including eBay, Amazon, and others.

Parksy

Well-Known Member
Project of the Month Winner
Joined
Dec 9, 2015
Messages
327
Reaction score
350
Gday all

I'm in the process of making valves for the nitro v8 im building and having the typical valve stem taper issues that arise from turning such small diameters. At least I thought I was.
I'm starting with 10mm stainless, and after the first pass, taking maybe 0.5mm off the diameter, I'm left with a taper. This taper remains, even when I'm down to the final stem diameter of 4mm. The end of the stem is supported, and this is where Iv got the smallest diameter and the closer I get to the chuck, the diameter increases. About 0.3mm over 50mm!!
What is going on here??

Thanks all for reading

Andy
 
Andy
You could be suffering from a whole host of problems.
The first one is that you are using stainless which may not be the best or easiest material to machine. Again, your support of the rod may not be the ideal one or you could be cutting with the wrong tool, set at the wrong height and -heaven forbid- the whole thing is work hardening. I have no doubt that others here will add comments.

If I was suffering, I would machine a piece of metal-say aluminium at the same size which is far more forgiving to see how it miked. At least, you will have established and possibly discovered why things are not working out

Meantime, my regards

Norman
 
Andy, you say that you are supporting the end of the stem, I assume with a centre in the tailstock. First thing that needs to be checked is to make sure that the tailstock is in line with the chuck. Tailstocks are made to be adjustable to correct for tapers, or to deliberately turn tapers. One method is to clamp a dial indicator in the chuck and check the bore in the tailstock, it should be ok for up and down, but if it's out it will show up front to back.

Another method is to use a test bar with centres in both ends and hold it between the headstock and tailstock and using an indicator check that it is parallel.

Paul.
 
Sounds like either the tailstock is out of alignment, or the headstock is out of alignment.

If you can grip a test piece, say 25mm round and 100-150mm long in the chuck, with no centre in place, and take a light test cut along it should come out parallel all along within say .02mm or so. This shows the headstock is aligned to the bed axis. If it tapers like your valve stems, it shows the headstock is out of alignment with the bed.

To check tailstock alignment you need a test bar turned between centres. Not held in the chuck but turned between two centres. If the tailstock is set right, after a light cut along the test bar, it should be parallel within .02mm or so. If it has the same taper as your valve stems, the problem is your tailstock alignment.

What kind/model of lathe are you useing? Got a pic of the tool and mounting set up you are using?
 
As learned members above have added, I would agree. It sounds like your tailstock is 'out' and probably the easiest( not necessarily the most accurate) is to put two centres into the spindle and tail stock and see how they support either a short steel rule or perhaps a single safety razor blade.

Again, this sort of simple system of things establishes( pretty well) whether the lathe tool is at the wrong height and for those with mill drills whether a piece of round, is aligned correctly or- not, for drilling.

Of course, I have a test bar as suggested, I also have a ground test bar with a Morse taper shank for clocking but
often the simplest tools are not as crude as people suggest. I even have bits of cigarette paper stuck with spit!

Cheers again


Norman
 
Thank you all. I forgot to be specific, but the work is being supported using a live centre. I was concerned that the headstock was out of alignment, but I was able to correct the taper on the valve stems using a Dremel and grinding wheel mounted on the tool post holder. This took a long time as I took very very light passes to stop the stem deflecting, but it worked. So Im hoping this should eliminate the headstock as being the issue?
I will investigate the tail stock as I have suspected it, but wasn't sure whether it would create the taper issue like it has, but you guys have mentioned it several times so I'm keen to check it out.
It's only a mini lathe btw, a sieg SC3.

Thanks again

Andy
 
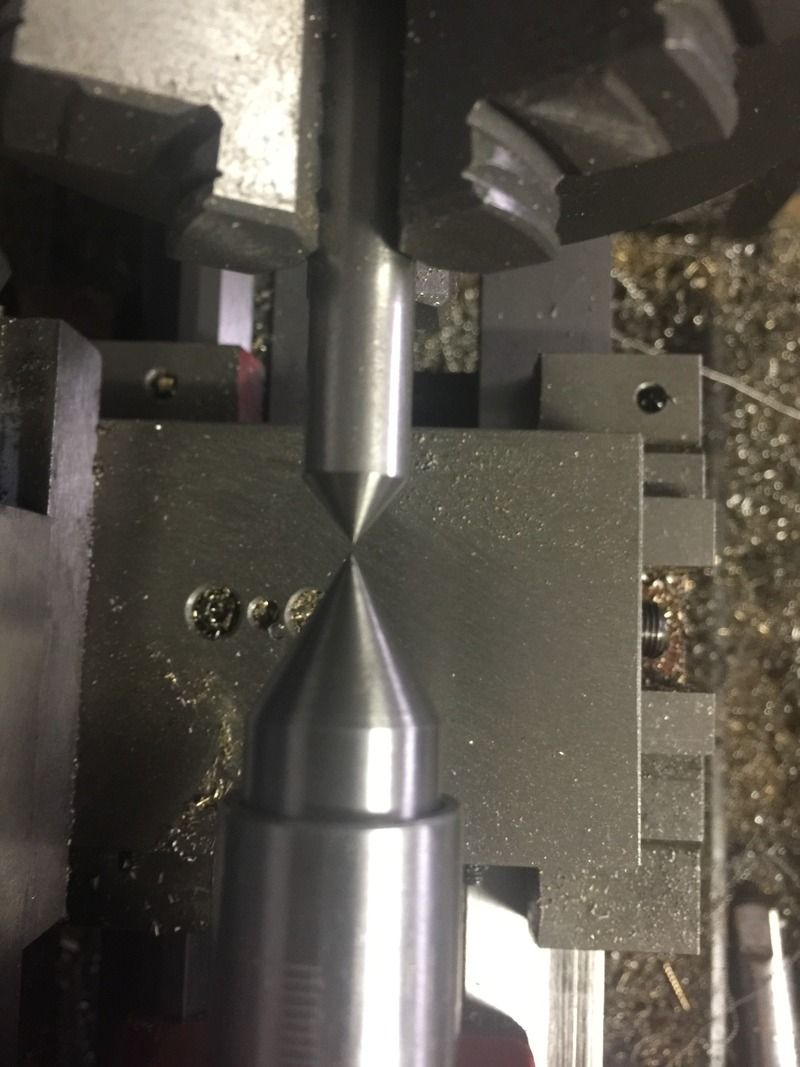
Turned some steel down to a point and checked it against the tail stock and sure enough, it's not aligned.

I had a quick attempt at fixing it and was able to improve it a little, but instead, I tried another method that was mentioned to me with turning the valve stems, and that was machining it in 10mm sections at a time. I tried only having a small section prodruding at a time, turning it down to final diameter, then loosen the chuck to expose more material and repeat. Worked well and it's a much quicker way of making valves compared to grinding.
 
Hi Parksy

You could use a 'rose bit' cutter, in case you don't know what a rose bit cutter is imagine looking at the working end of a 4 flute milling cutter with a hole down the centre, the hole size is same as the valve stem. You can easily make the cutter to the size you want from silver steel or drill rod.
Now that your tailstock is set to centre correctly use the cutter mounted either in a collet or chuck in the tailstock to cut the last finishing pass on the valve stem, all stems then are the same diameter and parallel.

Emgee
 
I use the method of machining the stem in steps as well but I don't loosen the chuck each time. I start with the full length of the valve sticking out and machine it roughly 10mm at a time. With light cuts and a few spring passes on final diameter it works fine and no chance of lost concentricity.
 
This will not help you improve the accuracy of your lathe but may reduce the demands that you put on it. The only part of the valve stem that needs to be finished accurately is a section that is in the valve guide at any point in operation. This means that the section that must be correct is only the length of the valve guide plus the lift of the valve. The portion of the stem above this section to the driven end can be undersize by several 1/1000 pf an inch as it only needs to pass through the guide during installation. Likewise the portion of the stem between the head and the guide can also be undersize as it can never enter the valve guide.

I generally start by turning the driven end undersize and putting in a groove for the spring retainer. I use e-rings and a spring keeper at this end. Then I turn down the section that must be accurately finished slightly oversize, about 1/1000 of an inch. Then I turn the section down to the head and turn the head. I do this undersize the same as I did the other end of the stem. To finish the section that must be accurate I usually just use an inexpensive set of EZE-Laps starting with a 400 grit and progressing through a 600 grit and finishing with a 1200 grit. This generally takes me about two minutes per valve and I end up with the working section of the stem accurately sized and with a mirror finish.

As I build small engines, most of my valve stems are 0.078 inch diameter by about 0.75 inches long so you might want to alter the allowances I quoted for your valves.
Gail in NM
 
I tend to agree with the suggestions that you need to look at the tailstock. However it never hurts to inspect a machine from time to time. Here is one method to consider: http://www.neme-s.org/Rollie's_Dad's_Method.pdf which concentrates on the other end of the machine. When dealing with problems you really want to get the machine right throughout.
 
My two cent's,get a set of lathe buttons from Brownells catalog ,you put them between centers in the head stock and tail stock and measure with a micrometer .

They are a precision ground set of buttons ,and they should measure exactly 1 inch when measuring across the gap where the two buttons meet .

If not adjust the tail stock till they do ,very simple and fast solution to tail stock alignment.
 

Latest posts

Back
Top