Petertha--That is good advise, and well taken. I will probably do exactly what you said, to avoid messing up this box which has taken so much effort.---Brian
You are using an out of date browser. It may not display this or other websites correctly.
You should upgrade or use an alternative browser.
You should upgrade or use an alternative browser.
Engine transportation and display box
- Thread starter Brian Rupnow
- Start date

Help Support Home Model Engine Machinist Forum:
This site may earn a commission from merchant affiliate
links, including eBay, Amazon, and others.
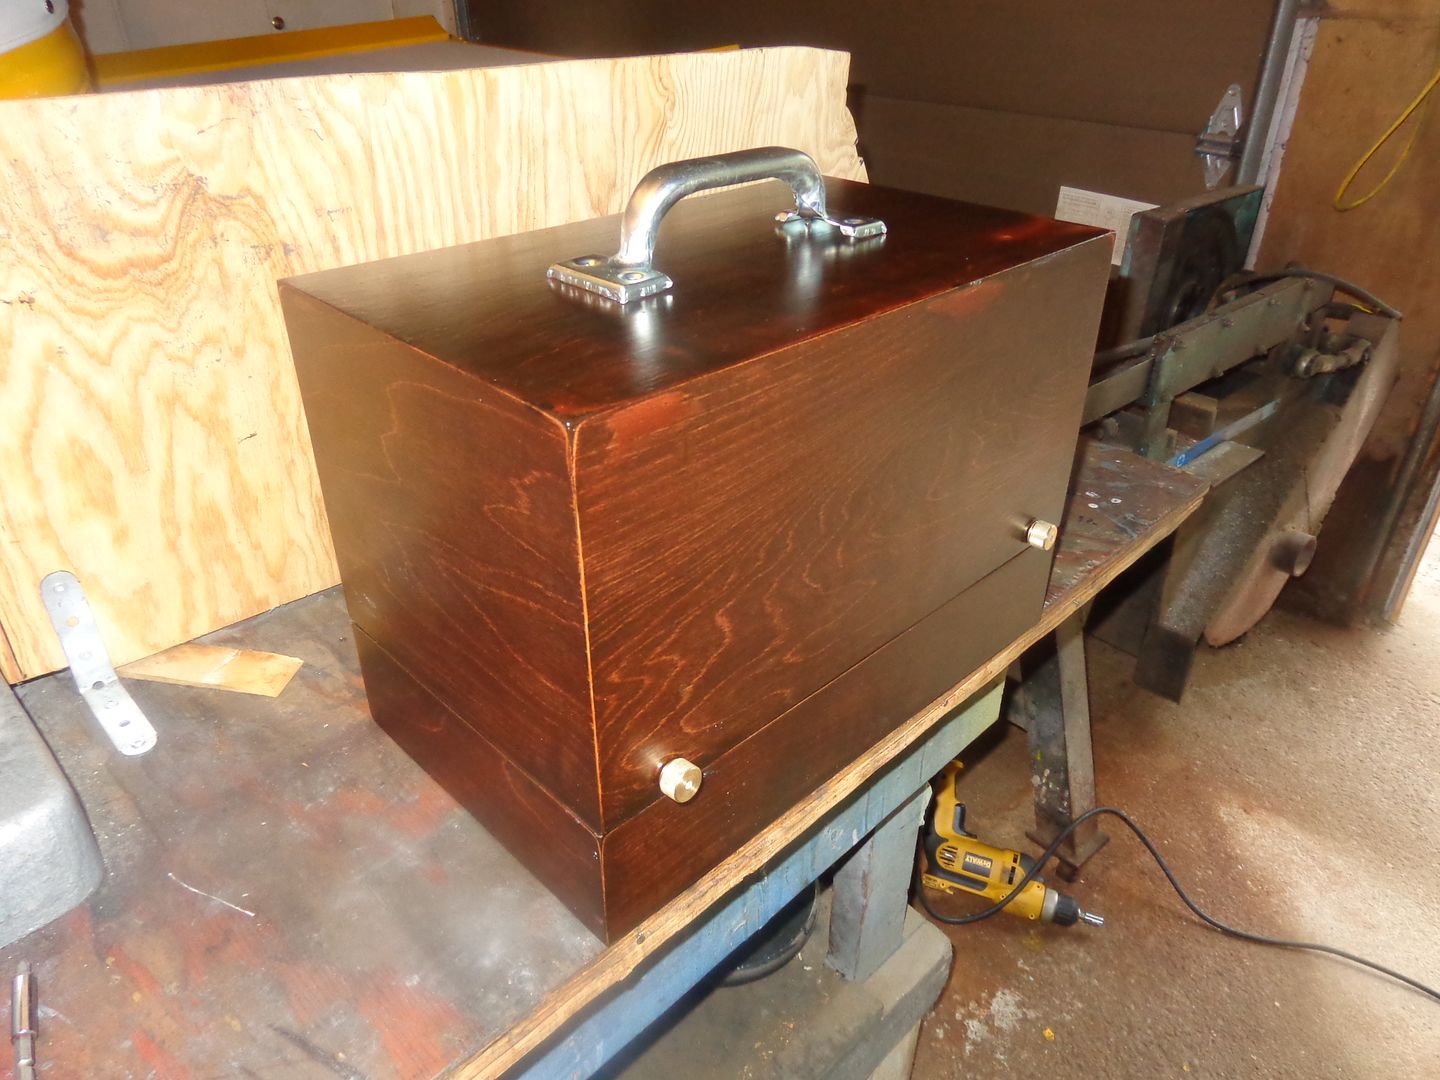
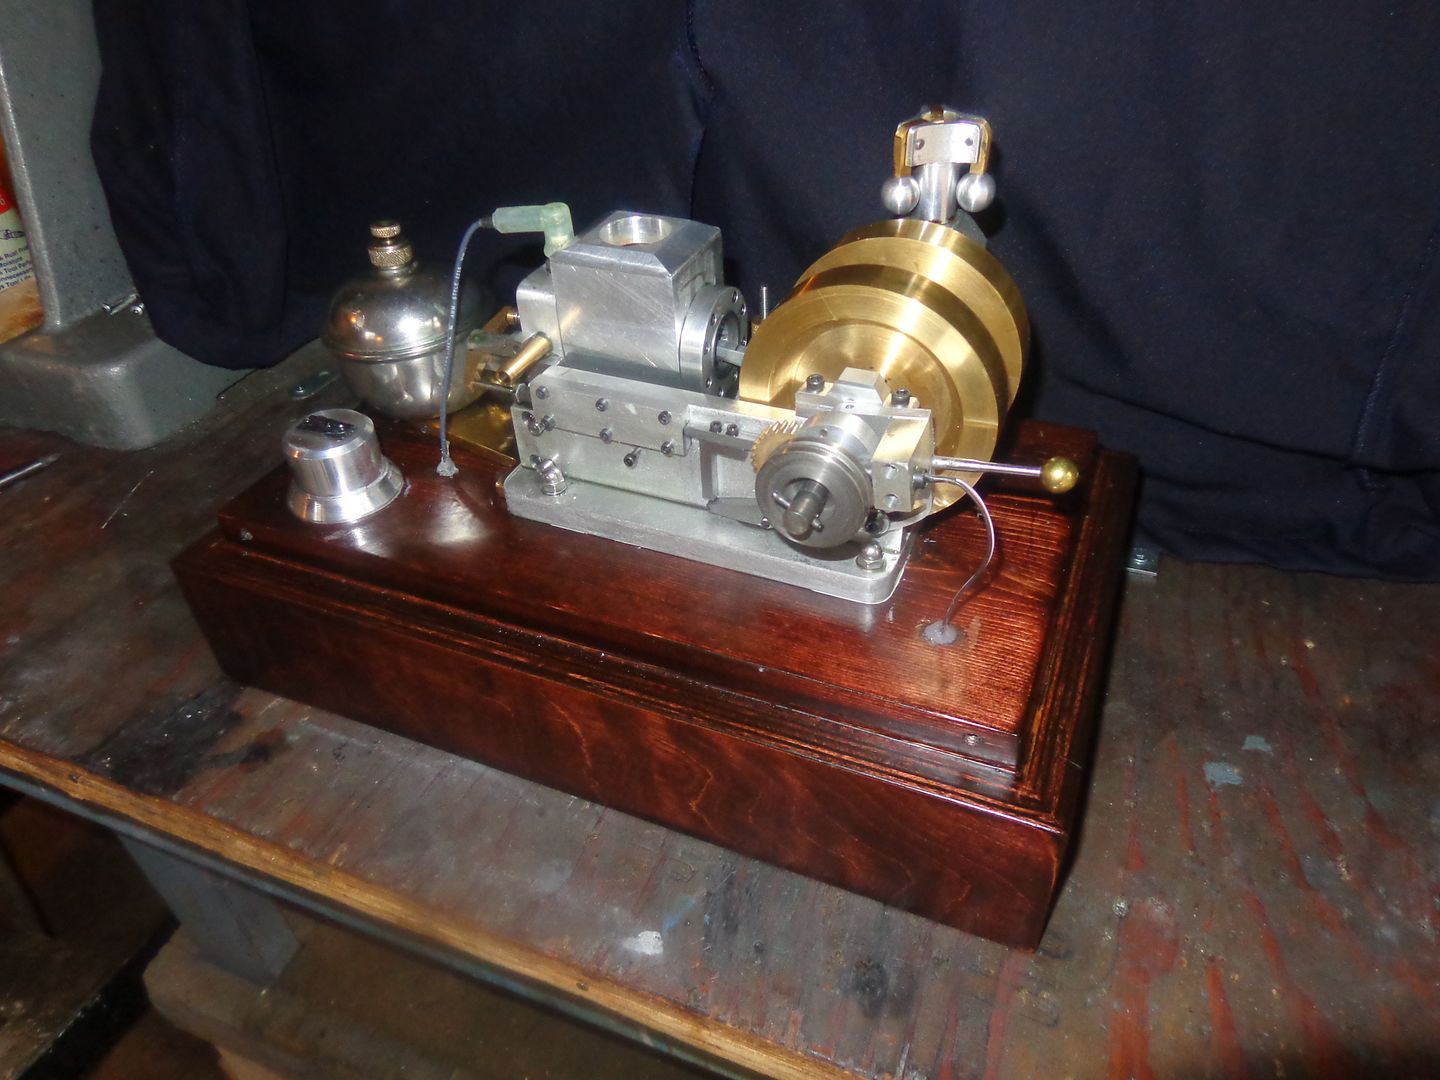
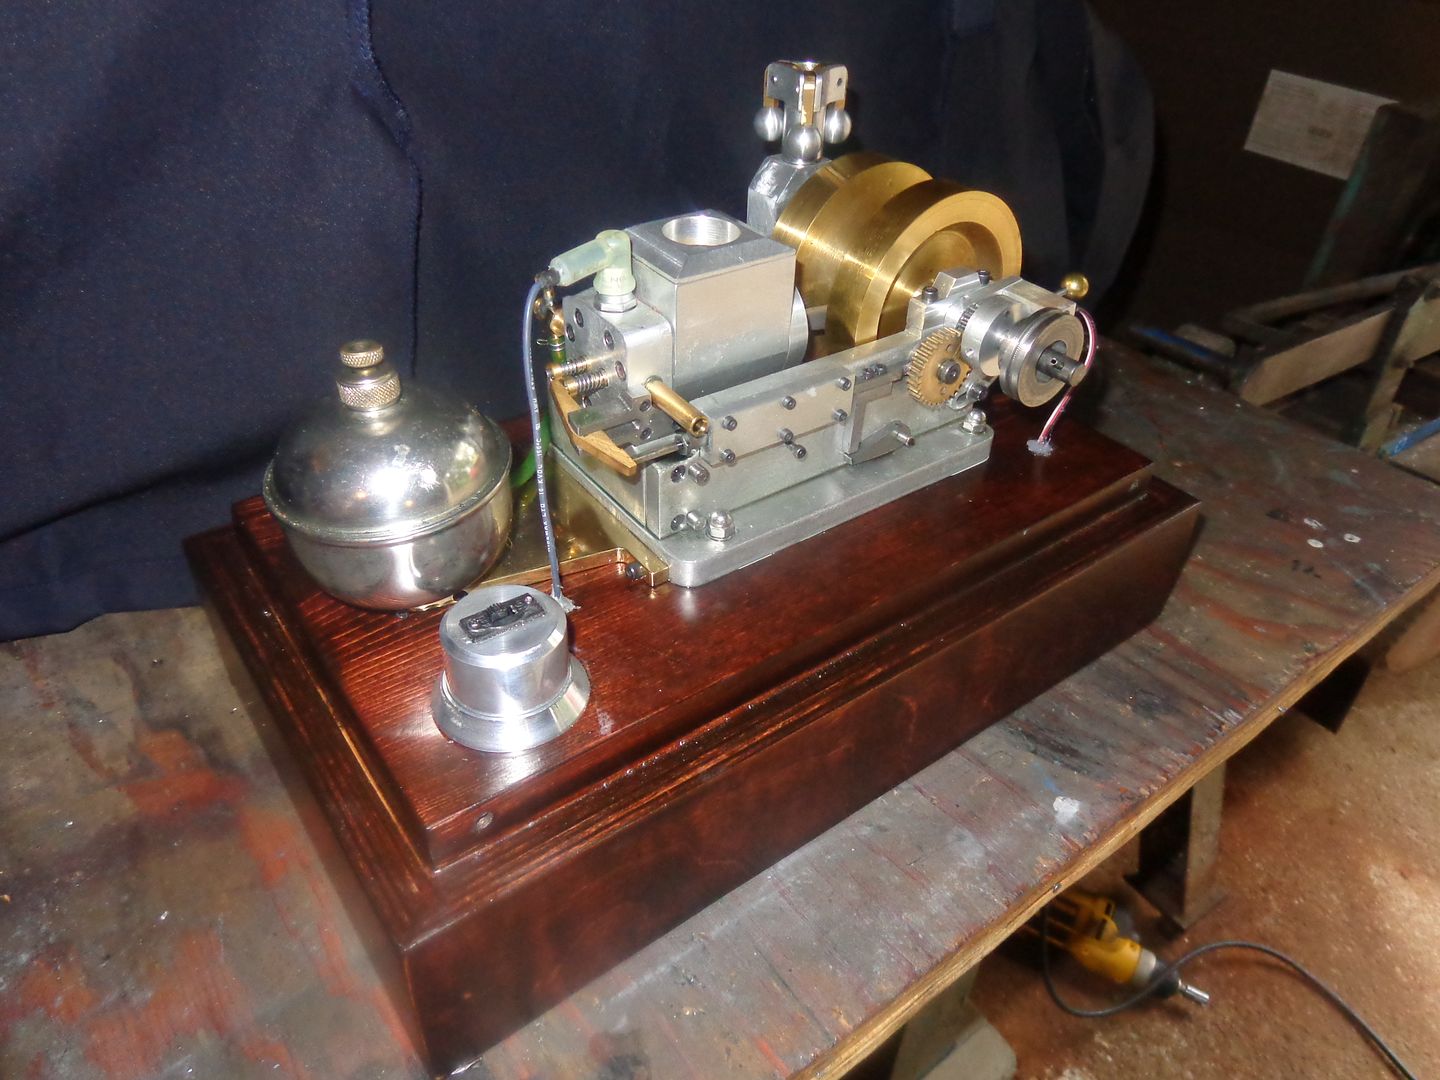
The "Engine Transportation and Display" box is finished. Woodworking has never been my strongpoint, and as I've gotten older, this is one area where I have definitely not gotten better.--at least in the "fine finish" department. The box is built mostly from 3/4" birch veneer plywood, with a bit of 1 1/2" thick pine for the engine base. All of the electronics are hidden in the false bottom of the engine base. It has 2 coats of Minwax oil based stain on it, "Red Mahogany", and 3 coats of Minwax fast dry polymer satin finish clearcoat which is also an oil based product 1877-570. Once dried for 24 hours, this combination of stain and clearcoat seems to be impervious to both Naptha fuel and to Varsol, and engine oils. The hardest part of the job, I found, was to get accurate 45* mitre cuts on all of the joints so that no endgrain was visible anywhere. All the joints were glued with "Elmers white wood glue" and clamped for 48 hours as the glue dried. Sanding sufficiently to remove all of the wood glue which had squeezed out of the joints was a horrible job. Even after much careful sanding, there were areas that showed up after the stain was applied where the glue had soaked so deeply into the wood that it couldn't be removed. This causes no structural problem, but screws up the finish because the stain won't color those areas the same as the raw wood. I made the 4 screw in latch mechanisms that attach the top of the box to the base from brass which I knurled on the o.d. and tapped for 1/4" all thread rod about 2 1/2" long.
The engine fits well on the base, and the tube which I made to hold the on/off switch turned out really nice. Any wires leading from the engine side down into the electronics compartment were sealed with epoxy, as was the switch tube, so I can wash the engine down "in place" without having to remove it from the base.
----So---This was my big adventure into woodworking for this decade, and hopefully the last.----Brian


Last edited:
Thank you Nelson. This is not the type of project I take on very often. Just knowing the "how" of building something, doesn't mean that one can necessarily do a "good" job of it.---Brian
Luc--Just for interests sake, I had sent drawings of the top section of the box out to two different shops who work with Lexan, and asked them to quote on building it from 1/2" Lexan. One shop refused to quote, the other shop quoted $250.---Brian
Brian- A couple of suggestions for your next woodworking project, and other builders making wood bases for model engines.
Don't use pine. It doesn't stain well, and the grain is too large for a small project to look good. Use a tighter grained wood. Go to a hardwood dealer, and if possible, buy quarter-sawn wood, so it is straight and fine-grained. For a small project, the extra cost of a good hardwood isn't much. Resist the urge to stain it a dark color, or for that matter, any color at all. Use a wood like quarter-sawn cherry, and just finish it with a clear finish. It will darken by itself over time. Use glue very sparingly, and figure out a way to clamp so that you have access to the joint, so that you can immediately wipe away any squeeze-out with a damp rag. rotate the rag as you wipe, so that you are lifting the glue off of the wood. Some people finish the surfaces before glue-up, so that the glue wipes off easier. Do all of your sanding with a sanding block, so that you don't round over corners and edges. Don't use a high gloss finish, as it shows off minor imperfections in the smoothness of the finish. Sand lightly with 220 or higher grit between coats of finish. After putting on the last coat, I use a hard felt block and fine rottenstone with parafin oil to smooth the last coat, take out any little bubbles or other imperfections, and give it a satin finish.
Not meaning to criticise your work. This has just been on my mind for some time, based on lots of wood bases I have seen on this and other model sites, and I've been looking for an opportunity to make these suggestions in general.

$519.19
$699.00
FoxAlien Masuter Pro CNC Router Machine, Upgraded 3-Axis Engraving All-Metal Milling Machine for Wood Acrylic MDF Nylon Carving Cutting
FoxAlien Official

$24.99
$34.99
Bowl Sander Tool Kit w/Dual Bearing Head & Hardwood Handle | 42PC Wood Sander Set | 2" Hook & Loop Sanding Disc Sandpaper Assortment | 1/4" Mandrel Bowl Sander for Woodturning | Wood Lathe Tools
Peachtree Woodworking Supply Inc

$39.99
$49.99
Sunnytech Low Temperature Stirling Engine Motor Steam Heat Education Model Toy Kit For mechanical skills (LT001)
stirlingtechonline

$99.99
AHS Outdoor Wood Boiler Yearly Maintenance Kit with Water Treatment - ProTech 300 & Test Kit
Alternative Heating & Supplies
![DreamPlan Home Design and Landscaping Software Free for Windows [PC Download]](https://m.media-amazon.com/images/I/51kvZH2dVLL._SL500_.jpg)
$0.00
DreamPlan Home Design and Landscaping Software Free for Windows [PC Download]
Amazon.com Services LLC

$40.02
$49.99
Becker CAD 12 3D - professional CAD software for 2D + 3D design and modelling - for 3 PCs - 100% compatible with AutoCAD
momox Shop

$94.99
$109.99
AHS Woodmaster 4400 Maintenance Kit for Outdoor Wood Boiler Treatment
Alternative Heating & Supplies

$45.99
Sunnytech Mini Hot Air Stirling Engine Motor Model Educational Toy Kits Electricity HA001
stirlingtechonline

$12.56
$39.95
Complete Plans for Building Horse Barns Big and Small(3rd Edition)
ThriftBooks-Atlanta

$89.99
Outdoor Wood Boiler Water Treatment Rust Inhibitor- AmTech 300 & Test Kit
Alternative Heating & Supplies

$29.95
Competition Engine Building: Advanced Engine Design and Assembly Techniques (Pro Series)
Amazon.com Services LLC
- Joined
- Jun 24, 2010
- Messages
- 2,457
- Reaction score
- 974
... because all my other engines need a great big 12 volt battery that I can barely lift, so they are not readily portable.
Just out of interest, is this for cranking the engine to start, running the ignition, or both? What is a typical amp draw? Reason I ask is, maybe a typical RC lipo battery would meet the demand & be a lot less weight to pack around for a typical demo show?
Example (just for discussion purposes, not sure if this would even work or I'm barking up the wrong tree).
4S, 4000maH capacity lipo, cost = $50, weight = 476g, just over 1 pound
14.8v nominal voltage (3.7v/cell * 4S)
160 amps continous capable = 40C * 4.0
200 amps peak capable (10 sec) = 50C * 4.0
59 watt-hr power duty = 14.8v * 4.0 Ahr
http://www.hobbyking.com/hobbyking/store/__10303__Turnigy_4000mAh_4S_40C_Lipo_Pack.html
12 volt battery to supply the 12 volt automotive coil.
- Joined
- Jun 24, 2010
- Messages
- 2,457
- Reaction score
- 974
Yes the voltage is a good match, should be no issues there. A typical 12v nominal car battery is probably closer to 13v unloaded & a typical RC lipo is probably closer to 14v semi -depleted. Not sureif coils are sensitive to slightly (+1v) higher voltages. The issue is how much amp draw for the coil to figure out how long it would last.
I'm not an auto electronics guy, maybe some of the smart guys here can chime in. But googling turned up ~4A. Now is that intermitent? or average? or feeding accross multi cylinders? Easiest way is measure accross your wire while its running.
Anyway simple math: 4000maH pack like above depleting at 4A load = 1 hr of continous running. If actual load was 2A, you get 2 hrs etc.
Didnt mean to turn this into an electrical discussion, just trying to save your back lugging the big battery around
johnny1320
Middle aged Member
- Joined
- May 15, 2013
- Messages
- 149
- Reaction score
- 17
looks nice and neat Brian, two thumbs up
Similar threads
- Replies
- 30
- Views
- 8K
- Replies
- 302
- Views
- 71K


![MeshMagic 3D Free 3D Modeling Software [Download]](https://m.media-amazon.com/images/I/B1U+p8ewjGS._SL500_.png)


