British 0-4-0 Toy Locomotive: he said

Home Model Engine Machinist Forum

Help Support Home Model Engine Machinist Forum:

This site may earn a commission from merchant affiliate links, including eBay, Amazon, and others.
And here I just thought Lil' Zeep just had a glass of milk with his cookies. Man, I am glad that you are OK Z', this afternoons adventure could have been "The BIG One". ;D

Tell T, that she will just have to try harder next time. :big:

BC1
Jim
 
Zee,
A couple years ago I came across a silver solder ribbon at McMaster-Carr http://www.mcmaster.com/#solder/=7kbvpv
Part number 7617A14, $32 per ounce. The ribbon is 1/2 inch wide and about 6 feet long. At .005 thick it is easily cut with scissors and formed around any shape I need or cut into little squares. I've used maybe 2 inches in the past 2 years, so I fully expect the coil to outlive me!

Since finding the ribbon I've pretty much given up on using wire except on "big" jobs.
 
zeeprogrammer said:
This is about $75 worth of stuff...

ksouers said:
A couple years ago I came across a silver solder ribbon at McMaster-Carr http://www.mcmaster.com/#solder/=7kbvpv
Part number 7617A14, $32 per ounce.

Sorry to state the obvious but it is silver solder with 56% silver and the silver price right now is $18.5/oz. I nearly fell off my chair when I was quoted $1000 for a kilo, I ended up buying $100 worth. We established at the time firebird was paying just about the same price in the UK.

Just don't tell her indoors what it is and what you paid.

Pete
 
zeeprogrammer said:
Got the Bag-7 56% silver solder today.

This is about $75 worth of stuff...

If you think thats bad go to a jewellers supply shop and ask for 1/2 gram each of 18K yellow gold hard, medium and soft solder, then you will really fall off your chair at what that costs and when you drop that 1mm square you just cut off it you do get down on your hands and knees and look for it. :big:
 
Carl, I think you understood my question correctly, and Dean beat me to answering the concern about opening the hole after soldering.
Its not a big issue though; you could even use a small center-cutting end mill to open the hole after soldering instead of the modified drill or center drill.

Man, am I jealous of your silver solder wire... The thinnest I can get locally is 1.6mm (1/16"); I guess I'll have to start trusting some serous money to the Internet...

Regards, Arnold
 
Zee, a center drill should do great. Didn't know if you had one long enough.
Looks like you got all the right stuff in you silver order. That .025" will be great for making
small rings. SRA has flat .005" strip in that same alloy, too, for $29 per oz.

Pete, the price of silver wire still isn't all that much when you figure an oz of .031 is about
20 feet long. It goes a long way.

Dean
 
Dean

It does go a long way, I think I'm about $9 into my $100 investment, and it doesn't take much to fill a 2thou gap. Probably most of us beginners waste more solder in other places than the joint we are soldering. I was just empathising with the shock we've all had the first time we've bought the stuff.

Pete
 
Ooooooh....silver solder envy here. It looks like they did a quality job of packing and labeling too Zee. I have the site bookmarked in case in need to order some which I probably will here shortly. Good luck with your practice :)

Bill
 
zeeprogrammer said:
Got the Bag-7 56% silver solder today.

I know at least one person here has suggested using a pencil to color where you don't want the solder to go. I would second that suggestion. Perhaps even go so far as to mix a thin paste of charcoal powder and apply with a water color size brush. Use a solvent that evaporates completely(like naptha or acetone or alcohol)

(Hint: burnt wooden matches make a quick source of wood charcoal. And a spoon applied to the bottom of ceramic or glass bowl makes a quick mortar and pestle device.) ;)

Kermit


I wasn't complaining about the cost of the silver solder...I expected as much after having done a little research...

My intent was to show you (or rather, others) what you get from SRA and what the cost is. $29 to $32 an oz seems pretty normal.

To some extent...it's not the cost I was demonstrating but what you can get. You can't just go to the local corner store (HD or Lowes) and get this stuff...you pretty much have to order it. In this diameter. At least in my area.

I was surprised by Dean's post. .005" strip. That's small and I'm thinking the smaller the better in this hobby.

I'd be interested in seeing the difference in cost due to packaging...SRA sent their stuff in a simple baggie. Why would I spend more for a blister pack? But then..am I? A lot of cost is due to volume/demand.

I am so looking forward to experimenting. I'm especially interested in using pencil lead to try and control the solder.

The one boiler end sheet isn't cleaning up as much as I'd like. It's okay because you can't see it...but still...I wish it were more controlled.

Ah well...experience will come.

I'm not as concerned about how well the loco looks as much as it runs. Looks will come with experience.

Just take a gander at my pic of me in Trout's thread. I look better than I run. :big:

But there may be those who wish for the opposite.

 
A little practicing today...

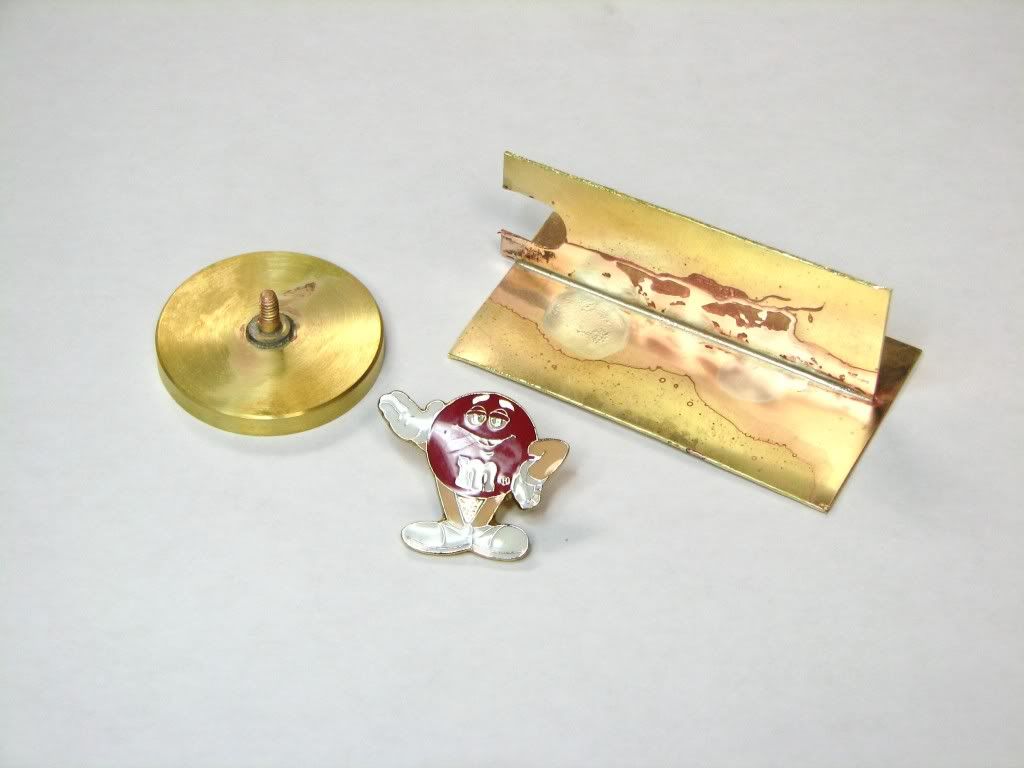
I wired up a bit of brass sheet to another. Fluxed it...then heated it up. I had the solder wire in my hand. I went at it too early. Hot enough to melt a bit of wire off but not hot enough yet to wick. So the solder bit fell on the part and laid there a while. Happened twice.

Then it got hot enough and like magic the solder wicked into the corner.

You can see the two small areas where the solder first pooled.

On the left is the boiler end sheet I did last weekend after pickling. The stud looks kind of funky but it's the lighting.

15035d9a.jpg


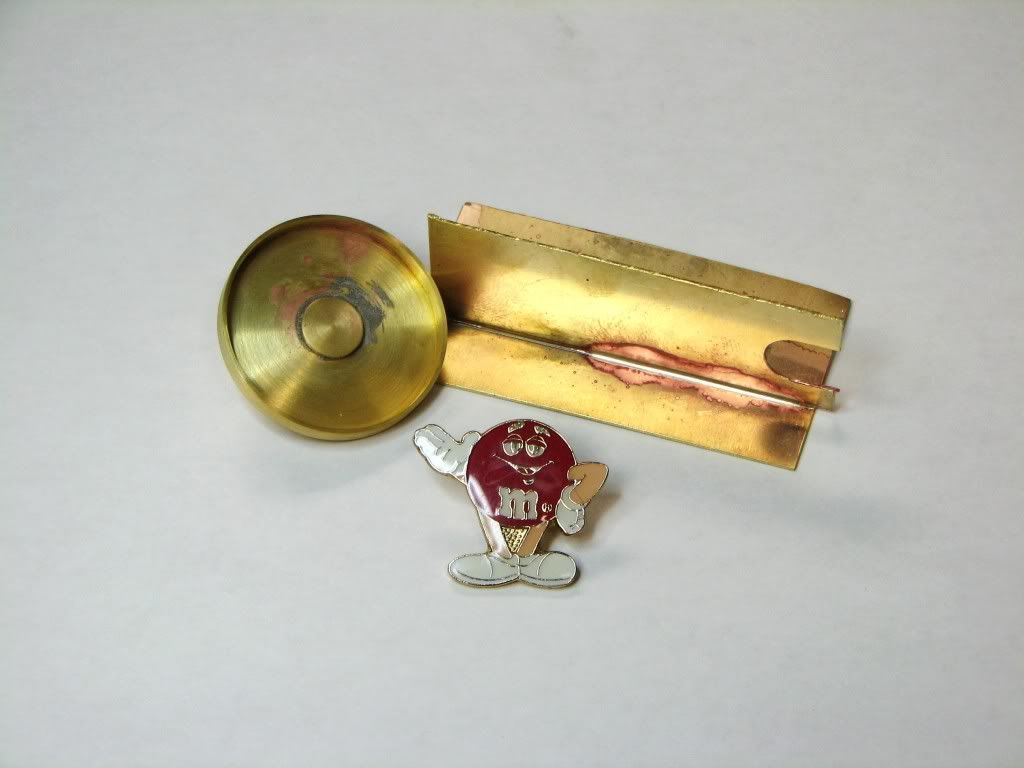
Here's the back sides.

ead0e0fd.jpg


You can tell the one end got more heat than the other...but the solder is all along the joint.

I was somewhat surprised how bright the brass got from the flux melting/burning off. I have no idea how well that will clean up.

I'm thinking the parts on the loco are going to get pretty discolored. I'm less concerned about how it ends up looking...I really hope it runs. Still...it'd be nice to keep it as good looking as I can. (That way if it doesn't run...it's good to look at. ;D -- yeah yeah...I hear you...it'll run.)

Next run I'll try forming the solder wire instead of poking with it.

By the way...the flux seems a bit more liquidy than the stuff you used Dean. Not that it should matter once it gets hot. I imagine I can the stuff I got from Harris as well.

Is it worth hitting the boiler sheet with some brasso to see what cleans up?

 
Just to show yourself the difference, you should now try the following...

Clamp two pieces of sheet brass together as for your practice piece. Put in a wire frame so the joint is facing up like a V-block (each piece of brass at 45 deg to horizontal). Flux the joint and lay some small pieces of solder in the joint. Use less solder than you think you need - most novices use too much solder. Now, heat both pieces from below waving the torch back and forth along the length of the joint constantly. Watch for the flux to turn transparent and soon after, watch the solder melt and flow like water.

I'm betting you'll get a damn near perfect joint with a minimum of sloppage.
 
Zee, the flux changes consistency over time. It has water in it, and as you open and close the container a number of times it goes from being fairly watery to quite thick. That will take a few months. When it starts to get too thick to spread easily, put a little distilled water in it and mix it up.

What Marv says about using less solder is true. After you've done it a number of times, you'll get it pretty well figured out.
The test piece looks to be about 4" long. Using .031 wire, if you put a 1/4" piece at each end, and 3 to 4 more pieces spaced evenly between them it should probably be plenty.

In the first pic, it looks like you got a nice fillet along the complete length of the piece. On the back side, it's a little dark in the left corner. Can't quite see if it's in there, but it looks pretty darn good, overall.

Which wire did you use for your new test piece?

Dean
 
I used the 1/32 wire.
Yeah...left corner looks dark but the solder is there.
It's a very tough joint. Played with it and it doesn't budge.

Next practice is the .025 wire wrapped around a tube. Most of my soldering for this engine will be that way...only the fuel tank has some straight edges.

Maybe two more practices and then I think I'll go for it. One on the cut off drain pipe and see what happens to the chrome.

I suspect I won't be able to prevent a lot of discoloration...if that happens I'll just swap the pic for the one that starts this thread. :big:


Looking good Zee.

By now you have noticed that the silver solder wire is quite stiff and springy. It is work hardened from being drawn to the diameter you buy. If you are going to make small diameter preforms for some of the tubes you can anneal it so it can be formed around a mandrel. You have to be careful so you don't melt it. I do a foot or so at a time by hanging it over an edge horizontally and playing a propane torch over it from one end to another. You can watch it go limp when it anneals. It does not get as soft as annealed copper, but it does get soft enough to be able to wind on a mandrel and then snip out little preforms.

After annealing I wipe it with a bit of Scotchbrite to remove any oxidation but it probably is not necessary as the flux will take it off when you make your joint.

If you accidentally melt a little bit, it will ball up on the end of the wire and you can use these little balls as preforms also for other joints.

Gail in NM
 
Thanks Gail. That's really good info. I did notice the springiness on my last two runs and was wondering how I might be able to do it better. Your post was very timely. Now I need to try it.

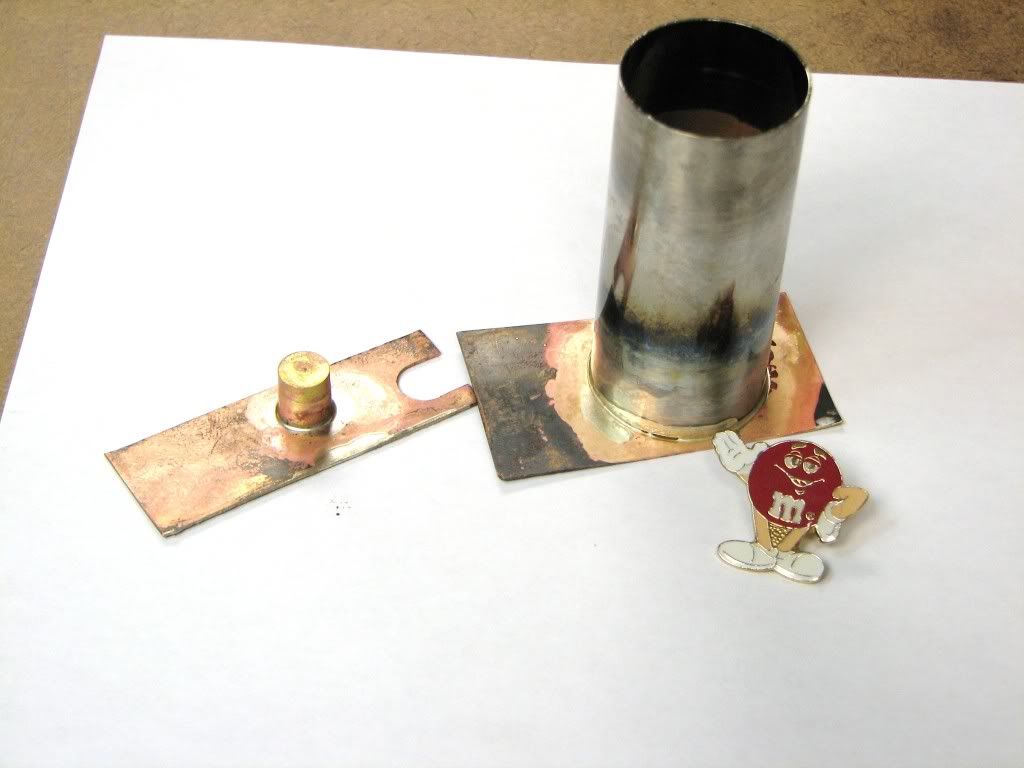
Here's a pic of the last two tries...

e08d0c96.jpg


On the left is a bit of round brass on top of sheet. I'd made a ring of solder using the .025. Probably still too much. But a pretty nice fillet.

On the right is the drain pipe on top of sheet. You can see a gap...it was on the backside and I didn't get to it very well. I'll have to watch out for that when I set up for the real thing. On the other hand...this was just sitting on top...no overlap.

Well I'm thinking there's no way the drain pipe and brass bits will look like the pic at the start of the thread. I have no idea how they did that...although I have a suspicion that they didn't use silver solder.

If you hear a dim wail from Southeast PA....
 
I dunno Z', when I was riding motorcycles the exhaust pipes were chromed. The heat from the engine would discolor them just like what you are experiencing on your test part. I used a paste polish by the name of SimiChrome and it seemed to reduce the discoloration down quite a bit. Although one had to spend some time with a terry cloth towel buffing it out. Try doing something like that on your test piece and see what happens to it, don't use any abrasives. The sheetmetal workers use purple scotch brite pads to buff up stainless steel after it has been welded.


BC1
Jim

*** Modified *** in order to correct spelling of product (thanks Marv)
 
I can certainly do some experimenting.
As you would expect, I don't have any Simichrome on hand.
This is what I have...

Mother's Aluminum
Brasso
Various polishing sticks (that waxy stuff for buffing)
Toothpaste

I can try things as I work the loco.

Thanks Jim and Marv.
 
Back
Top