Sprut cam help needed

Home Model Engine Machinist Forum

Help Support Home Model Engine Machinist Forum:

This site may earn a commission from merchant affiliate links, including eBay, Amazon, and others.

aonemarine

Well-Known Member
Joined
Nov 18, 2012
Messages
887
Reaction score
212
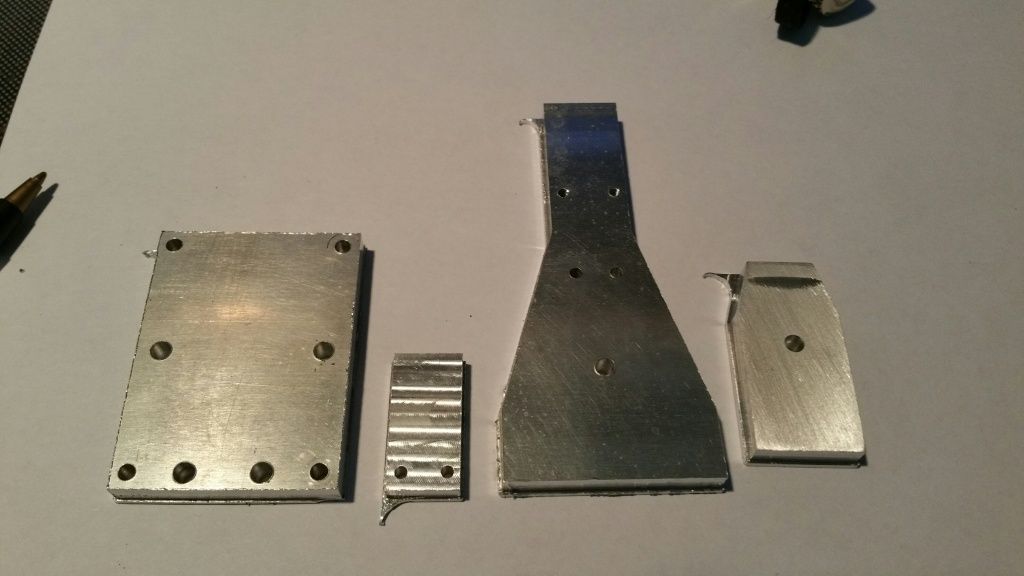
Im trying to learn some more about sprut cam. I have made a couple of parts using it and have modeled up the frame and base for Elmers wobble plate engine and am working on the G code for them. I put all the parts on one piece of stock to help cut down on set up time and have been running it on the simulator. I had a couple of bugs that I edited out in the g code thru mach3, but was looking for some more guidance. If there is any experienced users out there would you please look at the attached file and see what you think. Im also posting the post processed file to run in mach3 if anyone wants to look at it. Runs fine on the simulator, but I wouldnt try it on your mill just yet.....:fan:
Hmm need to play with file extensions to get it to load......
 
Tool path looks good in Mach4, but your first line has a name without parens around it and that throws an error. Either remove the line or put parens around it and it looks fine.
 
Tool path looks good in Mach4, but your first line has a name without parens around it and that throws an error. Either remove the line or put parens around it and it looks fine.

Thats interesting. It doesn't throw that error in mach3.
post processors are a pita! LOL
 
Hi,
I can't load the STC file because my version of Sprutcam is older than yours and Sprutcam doesn't allow its software to load a project file created on a newer version. I watched your simulation and it looked pretty reasonable except for the squirrelly moves on the last 2D contouring operation. It looks like you might have inadvertently turned on cutter radius compensation for that one. Look in your curve options for the part to be machined for that operation and I think you might find you forgot to remove the cutter compensation checkmark.
When I use the 2D contouring operation I normally use the helical path option under the strategy tab to get a nicer edge finish.
It looks like what you've done is working. The ipad I'm currently using won't let me look at the gcode, but Ron's comment about Mach not liking the filename without parenthesis is valid, and so I don't understand why Mach isn't stopping at that point and refusing to go on. - Terry

Thanks for the help (I need it). On that last part i was trying to sprial down instead of plunging in. Just ran the g code on my mill, ran pretty well but there are a few things I need to fix up. One biggie was that the sprial pocketing did not run in mach at all, just skipped right over that part. The second was it was supposed to leave .005" at the bottom to hold the parts together. I have a pretty good idea what caused that one.:hDe:
Think I may drop back and punt....Ill have more time later on to play some more.


EDIT: my 1/4" plate measures .240" thick LOL
 
Hi A1
I opened it in SC9 and it all looks pretty good. I think I might do things another way but if you had an intention for it, it is all fine.

First off. Your stock and part are .25" and your finish depth is .245". .005" is not much to hold it all together, that last cut might cause a lot of chatter. If you clamp your stock down to some spoil board after you drill your holes, if you could run some screws into the spoil board that would secure your parts and you could likely cut them to full depth.

Next
On your "flatland operation" On the strategy tab/page change your pass angle to 270 degrees and it will plunge outside of the part instead of in it.

On your 2D contours you are going to see step marks by finishing at each cut level. ( But this will also give you more chip clearance and make it a little easier on your cutter )
But if you think you have a good rigid setup you may want to try this.
Turn off "Roughing step parameters" And turn on "Finishing Parameters" set finish pass to something like .005" and check the box for "finish at bottom level" And it will do all the cuts at .005" oversize and take a finish pass at the bottom.

That goofy move Terry saw was it plunging in with a big radius. Not sure which version you are running but in 8 & 9 you can grab the little circle in the tool path and drag it anywhere you want it to start . You can also grab the little handles to move your lead in and lead out. I dragged it around to the bottom and changed the lead in/out so it will plunge in a previous cut. see picture.

Now, as I said earlier " This is just another mans opinion" yours will work just fine.

Let me know if you have any other questions.

Scott

Capture.jpg
 
Whoops
Looks like we were cross posting. Glad you got your parts done !! They will probably clean up fine.

But consider my thoughts.

Holler if you need help.

Scott

Im going back thru the code and reworking a few things. I ran into the canned cycle thing before. I was trying not to have to secure them to a fixture plate thats why I left the .005" at the bottom and was cutting the middle part out first, then working out from there. I really appreciate your help on this.
Ill post up new code later on tonight or tomorrow....

Maybe I should leave .010??
 
.010" would help a lot.
Another way around is to elevate the workpiece and use "Tabs" to keep the part secured to the stock. Do one 2d contour to about .025" from the bottom. Copy the operation and paste it back in so all the params are the same and then change the depth of cut to full depth or 1 pass. Then in 2D geometry draw a couple of boxes or circles around the perimeter of the part. Go back to the job assignment and call them "restrict zones" and the cutter will lift to avoid them and go back down after passing leaving you with tabs to secure your part. I'll try and get you a screen shot or 2.

What version are you running ?

Scott
 
Im running sprut9 master. Scott, you sound like you are really on top of your sprut cam. Thanks again for your help.
Tabs....hmmm....havent tried that yet, im likely to go tab happy once I figure that out. LOL
 
Downloaded the file and checking it out. Learning quite a bit :)
Thanks for posting your stc file looking at how you did things makes it much easier to figure it out. I wish sprut cam had more documentation, or maybe a training module.
 
No problem, run the simulation, I turned a few things around and did the finish pass at the bottom.

SprutCam America has some real good videos if you haven't already seen them.

Good luck and holler if you need help.

Scott
 
Scott, what are you doing to get those screen shots?

Ive been thinking about what I have done so far and might change things up a bit. I was tying to put everything onto one piece of stock and mill it out without fixture, but then I decided to look at other milling machines and the X-Y capabilities and think it may be too much for some. The piece of stock I was using was 4.5" by 6" and it looks like the sherline is limited to 4" Y travel. So I may go ahead and and do the parts with a single fixture plate to screw them down to and mill them out one part at a time basically like this.

1 Make a fixture plate from corian 3" x 4.5" x 1/2" with holes drilled and tapped so each part can be attached to it for the 2d contouring cuts.
2 Have separate program to drill the holes in the pieces of stock (which would be used to attach to the corian for profiling on next step)
3 Run the profiling cam for each of the parts keeping 000 in the same location so all you have to do is switch the piece of stock and hit cycle start. (hopefully)

Doing things this way would also let you just use a vice for set up and avoid clamping and the possibilities of crashing into one. ??
 
In Windows 7 & 8 there is a tool called "Snipping Tool " in Windows accessories. You start it , it turns your screen grey and you draw a box around what you want to "snip". Incredibly handy !
It would be better if you could add text :( but you can at least draw some annotation.

Did you play with "Tabs" any ?

Scott
 

Latest posts

Back
Top