New 2.5 cc Model Diesel design and build.

Home Model Engine Machinist Forum

Help Support Home Model Engine Machinist Forum:

This site may earn a commission from merchant affiliate links, including eBay, Amazon, and others.

edholly

Sydney Australia
Project of the Month Winner
Joined
Jun 14, 2013
Messages
227
Reaction score
234
Location
Sylvania, Sydney Australia
I haven't been too active here for a while, as I have been busy with finishing off a 1964 Lotus Seven which is so much fun to drive, along with building a 160% Tomboy powered by a modified Owen Mate for the recent Oily Hands weekend at the Cowra Model Aero Club in honour of David who I miss very much.

With 14 model diesels now made and running over the last few years - 2 of which totally my design, I think the time has come to lay down another engine along the lines of the Owen Mate, the BollAero 18 the Midge and many others. I want to keep it very simple, but with a good turn of power for the weight of the engine and have penciled a few ideas over the last little while.

What I would like to do is to go through the planning process as an insight how this might be done by other budding designers and for someone to follow these ideas and rough drawings up with a CAD plan. So if there is anyone out there that would like to put these ideas into this format please let me know. I want the end result to be freely available to those that would like to build it, maybe HMEM might have a suggestion in this regard.

The initial idea is for front induction, bulkhead mount, around square bore/stroke, not too tall, conservative timing and ball bearing suspended shaft. To this end I have settled on a 14.6mm bore x 14.6mm stroke giving a capacity of 2.44 cc Initial drawings show a 13mm piston length and timing of 107 deg inlet and 122 deg exhaust. The initial drawing is working out timing etc and is to scale 2:1 it is attached along with a couple of photos of the engines built so far. Once the bore / stroke / piston length / port placement thereby read timing is decided then the bones of the engine can be designed around it. That will be the next phase.

Re the images, the first one is this latest design in progress drawing, next is a .5cc engine with longish stroke but good power only finished a few weeks ago after about a year of hap-hazard work, the next is a 1.6cc side/piston port design which gives reasonable power, Next is of a batch of others and the final one is of all the engines with names to them.

This proces may take a little while, but I think it should be a bit of fun and hopefully inspires some others to have a go at designing an engine, which is very rewarding.

Ed

scan0009.jpg


IMG_2807.jpg


IMG_8574.jpg


Ed's motors 1st 8.jpg


MY Engines.jpg
 
Nice collection you got there Ed. looking forward to the 2.5cc build.
 
Here is the next installment - about 2 hours work laying out the cylinder. This aspect was done using the parameters developed from the initial sketch above. Note that the exhaust port has been narrowed from 3mm to 2mm. The various lengths have been decided now and incorporated into the drawing.

I ran the Type 14 again yesterday and from its .5cc it gave 10100 on a 6x4 Tornado prop and was getting better with each run, that equates to an Allbon .5cc when on the same size prop. Now the Type 14 has only 2 inlet transfer ports and 2 exhaust ports, and is very easy to start. So I have decided that this engine will have the same, 2 only transfer ports of reasonable size, I am sure this will enhance starting as you get better gas speed at flicking speed than you do with bigger transfer area. Like wise it will have 2 exhaust ports 90 degrees away, again as per the Type 14.

Next step is to design the crankcase and crankshaft and rod etc ...

Note correction --- the 2 transfer ports should read Drill 2 x 8mm holes at a PCD of 10.5mm ... this will leave 1.05mm meat to the outside of the cylinder at the widest point. These are the little things that make designing so much of a mind exercise except when you have to start a drawing again from scratch because of a big stuff-up the eraser can't get rid of !!

Have fixed the drawing now with a new scan.

scan0010l.jpg
 
OK next phase of the design is to decide on a few crankcase details.

1. gudgeon pin height - free to choose, if a bit lower down the piston than half way means the conrod can be a bit beafier and still have freedom of movement, so lets say 7.5mm from the top which is 5.5mm from the bottom.

2. The thickness of the bigend. For a 2.5cc engine somewhere around 4.5mm should be sufficient, smaller is slightly less friction but higher point loading, too big and it means the tunnel is expanded. I would think 4.5mm is a good compromise.

3. Bigend conrod surround thickness. I would say a 2mm thick rod with square shoulders should be sufficient. I like square shoulders as you get more strength in the rod, maybe not as aesthetically nice as a round rod, but strength is more important to me in a home built engine.

4. Now we can decide on the tunnel diameter. So we have stroke 14.6 plus outer half of crankpin over hang = 4.5mm, conrod surround 2mm either side = 4mm plus some blending of the crankdisc to the bigend say 2mm = 4mm but this is negated by the conrod surround so can be discounted, and some clearance say .9mm all round = 1.8mm. So the sum is 14.6+4.5+4+1.8 less = 24.9mm - so lets say a tunnel diameter of 25mm.

5. We need some meat in the crankcase and around 1.5mm wall thickness at narrow point would be about right which makes the crankcase 28mm wide for the tunnel. Tunnel length is pretty open but it is easier to make the crankcase a square so 28 x 28 and the minimum length can be determined from the drawing allowing for the piston to descend fully without hitting the crankdisc, and this works out to 40mm from the land at the bottom of the exhaust ring of the cylinder to the bottom of the tunnel plus the 1.5mm wall.

6 The next step is to incorporate these parameters into the drawing and see how it all fits.
 
Have now put the crankcase parameters into the drawing and initial thoughts on crankshaft design within the crankcase.

Note the inlet transfer ports have been slimmed down to 6mm from 8mm. I think 8mm would slow the gas speed too much. Have also shown the exhaust ring with either a slitting saw cutting the apeture, or you could use a slotting drill to make them if you don't have a slitting saw. I've shown a 20mm diameter saw, but any smaller diameter one will do, just go in so that the length of the slit is about the same.

In this drawing you will see the crankdisc with the crankpins 5mm long drawn at tdc and bdc. The disc is 5mm thick relieved a bit to create a land for the 10 x 19 x 5 deep ball bearing, a pretty common and not expensive size that will run to over 30,000rpm on the NTN catalogue.

Now as I am writing this I realise that there is a problem - the housing for the bearing is going to block a major portion of the forward inlet transfer port, so in the design of the housing it will have to be relieved here to create a free passage for the gases.

The crankdisc will be 21.1 diameter (14.6+4.5+2)and the shaft size at the ball bearing will be 10mm.

Having said all this - with this cylinder design you are not limited where you rotate the cylinder, to have the ports 90/180/270/360 degrees to the engine or maybe better still 45/135/225/315, that way no blanking of one of the inlet transfer ports. Although for aesthetics I would like them 90/180/270/360 - but you can always experiment by turning them once it is running of course. although once assembled and run in not a good idea o disturb the hard won piston/cylinder finish.

If you are still with me on this you can see there is a bit in just coming up with a simple design, sure wish I knew how to do CAD, as my penciling skills are pretty slow !

scan0012.jpg
 
No need to worry about CAD, rough line drawings are just fine.

But if I can make a suggestion, either use a softer pencil or a much darker felt tip as the sketches are a little faint and difficult to make out.

Keep up the good work.

John
 
We are now in the final phase of the design. A myriad of notes are on the drawing, I am using a 5.5mm hole at the bottom of the venturi with a 5.5mm hole in the shaft with a timing of 50 degrees BTDC on the upstroke of rotation. This gives around 135 degrees of inlet opening which then gives a timing of 118 degrees BTDC to 17 degress ATDC, which is quite a reasonable timing for a higher performance sport engine.

The drawing incorporates most of the other parameters so now just the conrod and the ancilliaries - backplate, cooling muff, drive washer and compression screw to go. I won't worry about a needle valve, the PAW ones are terrific, can tell you it is a very tedious job making them and I cheat by using bought ones!

With regards the muff, I will draw one, but it is very much a personal preference as to how they look and I encourage anyone tackling this engine to have a go at designing their own, like wise the backplate. After all this whole excersize is about encouraging others to do a bit of design work, and hopefully the steps here will help a bit.

As to a name - well I've though long and hard and was wondering if

the "Holly Buddy" might suit.

I have the utmost respect for David Owen and I love his Owen Mate, and this name is a bit of a take on what David called his - anyone care to comment ?

Ed

scan0013.jpg
 
Here is the piston and the conrod drawings. The notes on them are pretty explanatory. Note the piston/rod assembly is probably a bit heavier than normal, so there will be some metal removed from the crankdisc to help counter-balance this. I think making these components just a bit heavier and therfor more robust is very worthwhile for a non-commercially produced engine.

A lot of PAW engines don't remove crankdisc material yet do not suffer from excessive vibration, so anything we do to help reduce that tendency should be good.

Note the conrod crankpin to gudgeon pin centre to centre length is 26.05mm

scan0017.jpg
 
Terrific news,

Aussie Steve has been working with me converting the rudimentary drawings onto CAD. He is now up to date with all I have done so far and I can tell you it is very impressive. Steve has his own way of doing things, which is a bit different than past CAD drawings I have used and I have to say Steve's way is quite a bit easier to understand with regards the various radius's.

It will soon be getting to the time to start carving up some metal. :thumbup:
 
Here is the start of the making of the crankcase. Had some beautiful heat treated 42mm diameter aluminium, it machines like a hot knife through butter.

Machined off a piece just over the 41.25mm length then milled it 28mm square.

So we have made a start - now to do the lawns before dinner, or I will be in big trouble!

Note Steve's CAD drawing adjacent to the block.

IMG_0054.jpg


IMG_0056.jpg


IMG_0059.jpg


IMG_0060.jpg


IMG_0061.jpg
 
Here's the maybe finished crankcase - maybe because not sure now if I will radius the outside edges above the nose and rear cover - was going to but don't mind the look of it with the square edges.

total time so far 5.5 hours, with 4.5 hours spent this morning carving up this piece.

Have to say again how easy it is to achieve this with digital read outs on the mill don't know how they got on before they were invented, although I do know with good marking out you can get to within a few thou - but with DRO's that is a few microns !

Made this directly of Steve's CAD drawing. Next thing is the cylinder.

1st photo is removing bulk of the tunnel
2nd is boring the tunnel to 25mm
3rd is using the mill to hold the tap square to start the M3 tap
4th is the finished piece.

IMG_0063.jpg


IMG_0065.jpg


IMG_0068.jpg


IMG_0070.jpg
 
Well here's another hours and a half's work, yet to be lapped.

But I have to admit I spent about another 90 minutes playing with some 10/20 then 10/40 material that I was never going to be happy with the finish. Eventually found my 12L14 in a big enough size - then stuffed up the first attempt because I didn't do my homework reading Steve's CAD drawing - even though Steve did it from my ones !

In a way that was a good thing, because Steve has now changed the drawing and the wrong garden path I went down no longer exists. The things we do for future builders :)

OK so here are some photos of the cylinder in its raw state straight off the mill and lathe. Internal bore looks pretty good, and I have about 2 thou left to work with to get the nominal 14.6 mm bore size pretty much exact. This of course doesn't matter too much unless you want to use it in competition ! Yet to cut the exhaust slits.

Shown here is a drill making the 6mm bypass holes - I took this to .5 mm short of the correct length and used a slot drill to finish to depth to get the square edged finish as can be seen in the photo.

The bearing is the right size, came with seals which will be flicked off to make it open.

Will leave the lapping for now, and get on with the front housing.
.

IMG_2951.JPG


IMG_2952.jpg


IMG_2955.jpg


IMG_2956.jpg
 
Here is the cylinder with the slots cut in. Used a 40 mm diameter 2 mm thick slitting saw and went in 7 mm. I have a slotting arbor but it is too bulky for this type of work so made up a simple saw holder as shown and it works a treat.

But you could achieve the same result almost using a slotting drill. If doing this I would machine on the lathe a 2mm wide relief, 2 mm deep to reduce the flex on the slot drill, and I would make multiple plunges and then join them up by slotting it in multiple passes.

For info held the cylinder in one of my 5C collets - something David Owen told me to buy and they are terrific for holding work like this.

Hate how the photos always seem to enlarge the blemishes !
.

IMG_2957.jpg


IMG_2958.jpg


IMG_2959.jpg
 
Hi,

Thanks for sharing all your hard work of designing. For us newbies to engine building, learning how to think about engines and how the parts all must work together can difficult to grasp.

I will be following this your work!

Dale
 
Thanks Dale.

Making the crankshaft next. Reason - it is easier to ream the bore of the crankcase nose to size, rather than machine the shaft.

There are various ways of doing the crankpin onto the shaft, I used to prefer a pressed in pin, but more recently I have changed to machining it on using the 4 jaw.

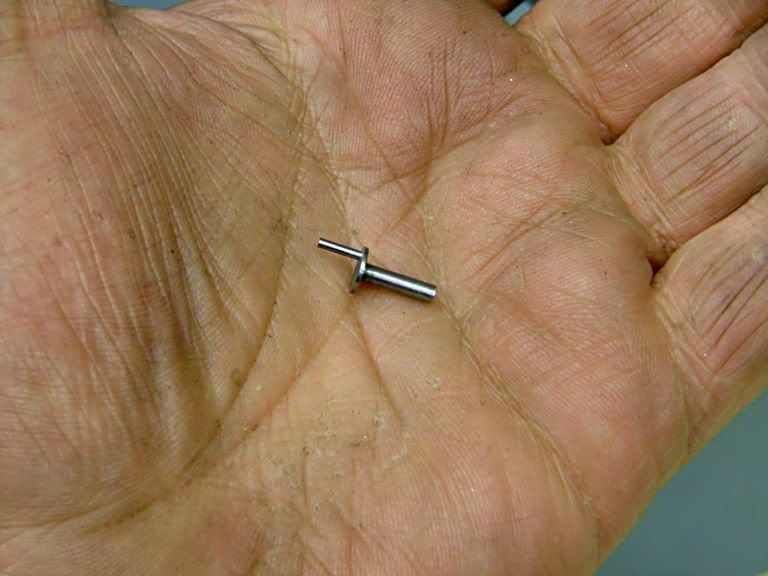
Here you will see the dimple at 1/2 stroke length done with the DRO's on the mill so that I can accurately align the end of the crankshaft in the chuck. You could of course mark it out instead.

You can also see I have roughed out some of the bulk the other end of the shaft so that it better fits in the 4 jaw, I prefer to do the interrupted machining holding the large diameter of the piece rather than stressing the smaller machined end, probably doesn't do any harm, but better this way, that is why I have left a bit of "meat" on the end of it near the crankpin.

Next job will be to machine the front end of the shaft to size, and to that end there is a small centering hole at the front end. I will machine it about 5mm along the length of the large diameter, then move it out of the 3 jaw and machine the next 5mm and so forth - that way I am not stressing the small thickness of the crankshaft web with cuts on a big overhang off a small chuck engagement.

Once this is done turn it around and bore the intake hole down the centre, otherwise it would have to be held on the finished crankshaft which is not a good thing.

Then turn it round again and mount it on the 4.8mm crankdisc and take smallish cuts down to nose shaft size.

Last thing to do is the drill the 5mm venturi intake hole - but this has to wait till the engine is further advanced - after assembly of the nose to the case, place the shaft at the correct rotation - ie 50 degrees BTDC then rotate it till this point is under the venturi hole - then with a sharp pin like instrument, scribe around the hole to mark the shaft. Then drill the hole in this position. Make sure you get the right side of the shaft, otherwise it will only run backwards!
.

IMG_2960.jpg


IMG_2961.jpg


IMG_2962.jpg


IMG_2963.jpg
 
Very nicely done and shown.

It was because of making a very tiny one just like yours that eventually led to a contract to make very small parts for model steam locos and me basically getting a new workshop paid for by a company I used to work for.

Crankshaft-1.jpg


Cut from the solid silver steel using a 6" 4 jaw independent chuck on an Atlas 10F lathe using a HSS toolbit.

Big things from little acorns grow.

John
 
Last edited:
John, Beautiful work, machining long cuts off centre is a pretty difficult exercise and just holding that sort of thing becomes a nightmare. Thanks for sharing it.

Here is the almost finished crankshaft, just needs the venturi hole drilled when the nose is made and some weight removed for better balancing. A few notes ..

The taper is 8 degrees, the length of the threaded front portion is a bit longer than specified, but can be trimmed down later. The thread calls for 6M but I didn't have a 6M die, so used a 1/4UNF. The ball bearing is a light press fit onto the land next to the crankdisc. I didn't read my own instructions above and forgot to drill the inlet hole. I didn't want to hold it with the finished bearing portion so held it further out where the thread is, Thankfully it had no run out so drilled it and just chamfered the opening slightly, taking care not to knock the crankpin with too big a centre drill that I used.

I normally start the thread using the thread cutting facility on the lathe, but this time I used a very good die and made sure it was 100% square with the work by chasing it down the threading action with a flat disc (pic 3)held in the drilling chuck. I have had a thread wander off and cut more one side than the other, especially on a long thread such as this, and the die I use is quite large and unforgiving of any angle at the start.

Note that the piece is held with the crankpin in the middle of the chuck jaws so as to not bruise the area around it which will be quite stressed when running and if bruised could be prone to cracking.

Finally note the high tech way of determining where to start the taper !
.

IMG_2964.jpg


IMG_2966.jpg


IMG_2967.jpg


IMG_2969.jpg


IMG_2970.jpg


IMG_2971.jpg
 
Ed,

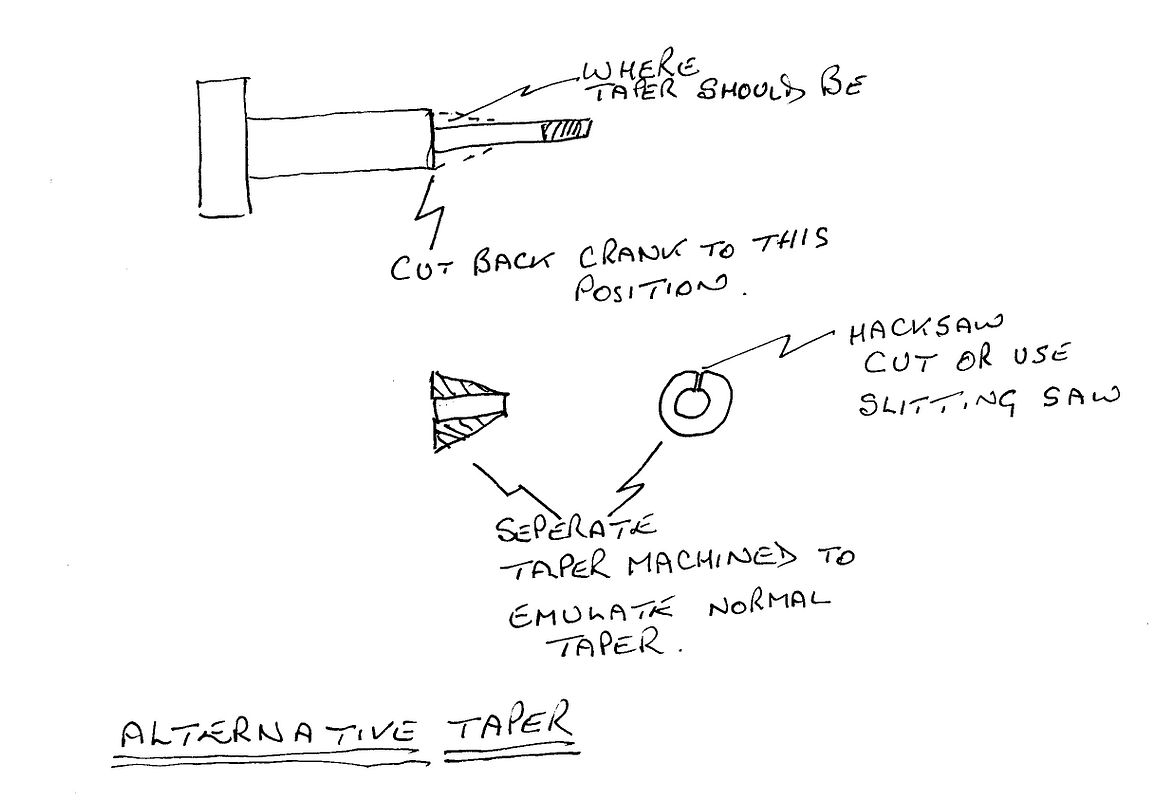
Maybe you can use this method some time in the future.

When you have cut your taper, most probably by using the topslide (compound), you usually have to move the topslide back to where it started so that you can complete the job in hand before you have had chance to cut the taper in the prop driver, so sometimes it can be a little difficult getting the taper to be exactly the right angle as the taper on your crank.

I have used this method on a few engines in the distant past and it has worked perfectly every time. Not my idea, but one I pinched off a plan by ETW.

scan0004_zps7qtyndeg.jpg


What you do is to machine your crank without the taper, leaving a nice smooth corner face for the separate taper to fit to.

The advantage of this method that the taper cone and the taper in the prop driver can be cut at any time but at the same time, ensuring you don't have to move your topslide between cutting each one.
All I used to do is cut the taper cone first, in the same orientation as you cut yours, then when machining the prop driver, just try the taper for length fit in the taper being cut, once it is within a couple of thou of being all the way into the prop driver (to allow for a slight compression of the cone), only then do the saw cut.

Just maybe it helps in the future

John
 
Thanks John, can see how the split collar frees up using the angle of the compound slide, I will try it in the next engine. I usually try to leave the angle set after putting it on the shaft, till I make the prop driver, that way I get a perfect match, but I have also managed to dial it in after moving it with reasonable success.

Here is the nose almost completed - just need to mill the overhangs straight off the bottom and the 2 sides, will leave the curve at the top, but this could be removed too of course.

A few photos of it being made.

1. machining the ball bearing land.
2. reaming the crankshaft tunnel to size.
3. finished inside with just a small lead on the end of the tunnel
4. mated to the case with the shaft installed for the first time.
5. setting the "flat" of the cutter to the angle I want for the nose. (high tech)
6. machining that angle.
7. the result with a bit of polish.
8. attached after boring the 30mm pcd holes and counter boring to hide the heads.

Next instalment will be the muff, need this to hold the cylinder in place before making the piston, contra and rod.

Once again want to remind everybody - this is not just an excersize in making a new engine - it is mainly to try to inspire anyone who wants to design an engine how I have gone about it, with the help of Steve who is following up each piece with a CAD drawing which will be available for anyone who wants to build this. Well assuming it runs ok .... Ed

IMG_2974.jpg


IMG_2975.jpg


IMG_2976.jpg


IMG_2977.JPG


IMG_2978.jpg


IMG_2979.jpg


IMG_2985.jpg


IMG_2986.jpg
 
Job for the morning was to make the prop driver and washer. Now for a surf at Wanda beach.

There are a couple of things about making the prop driver which might be helpful in other situations. The photos tell the story, but firstly I want to mention BOKUM tooling. I was very fortunate that a mate gave me some of these and until then I had great difficult boring very small holes to size and that includes tapers. But with these gadgets, it is now a simple task. They are not cheap, but I would recommend if you intend to do any engine building, then you definitely should source at least 3 - 1 very small - 1 medium and 1 for internal threading. They are made of magnificent tooling steel and I have never had to sharpen one, admittedly mostly used in alloy, but I have used them in steel too, especially for internal threading where I normally go for about 32tpi. Their website is at http://www.bokumtoolco.com/PRODgallery1.htm

I will divide this post up a bit as too much for just one. Note the compound slide was still at the same setting from when I made the taper on the crankshaft, so a perfect fit is assured.

Photos:-

1. raw plug for prop driver with a BOKUM boring tool about to go to work.
2. trial fitting the crankshaft, taking the taper out bit by bit to be within about .4mm to the crankcase.
3. taking a bit more out of the taper.
4. happy with the fit, about .4mm or 15thou
5. turned the slug around to machine the back out of it, note the flat in the chuck to ensure the work is totally square.
6. machining the taper to match the crankcase.
7. to faciltitate moving the cutter out of the way, I use a simple digital read out on the longitudinal bed - this has been a huge boon to machining an absolute must to put the toolpost exactly where you want it for work like this and especially internal work where you cannot see what is going on.

IMG_2991.jpg


IMG_2992.jpg


IMG_2993.jpg


IMG_2994.jpg


IMG_2995.jpg


IMG_2996.jpg


IMG_2997.jpg
 

Latest posts

Back
Top