Mayhugh--you may have different information than I do. What size do you think the rings should be.--Brian
You are using an out of date browser. It may not display this or other websites correctly.
You should upgrade or use an alternative browser.
You should upgrade or use an alternative browser.
Horizontal Air Cooled Engine
- Thread starter Brian Rupnow
- Start date

Help Support Home Model Engine Machinist Forum:
This site may earn a commission from merchant affiliate
links, including eBay, Amazon, and others.
stewart drummond
Member
rings correct size (tension in cylinder), correct (proportional to cylinder) ring gap , honed & crosshatched cylinder , lubricated cylinder (splash,drip fed ,anything but dry cylinder wall) , but 'piston material to increase compression'? thats not really how these things
work
work
If you're putting cast iron rings on an aluminum piston, the piston diameter should be 1-1/2 to 2 thousands less than the bore diameter. The installed cast iron rings should be exactly the same size as the bore within a few tenths. The rings must be round and contact the cylinder wall all around for maximum compression. How to accomplish this is covered in the Trimble articles you already have as well as in numerous ring-making posts in various builds on this and other forums using the same method.
If you can hold tenths with a toolpost grinder, use it to grind the blanks for your rings rather than a cast iron piston. Most of us, though, turn the ring blanks to within one or two thousandths of their final diameter and then polish using 400g - 600g paper to get the final OD with a great surface finish to boot. You also should be making all your measurements with a micrometer if you aren't already. Calipers just aren't accurate enough for piston ring work. - Terry
If you can hold tenths with a toolpost grinder, use it to grind the blanks for your rings rather than a cast iron piston. Most of us, though, turn the ring blanks to within one or two thousandths of their final diameter and then polish using 400g - 600g paper to get the final OD with a great surface finish to boot. You also should be making all your measurements with a micrometer if you aren't already. Calipers just aren't accurate enough for piston ring work. - Terry
Last edited:
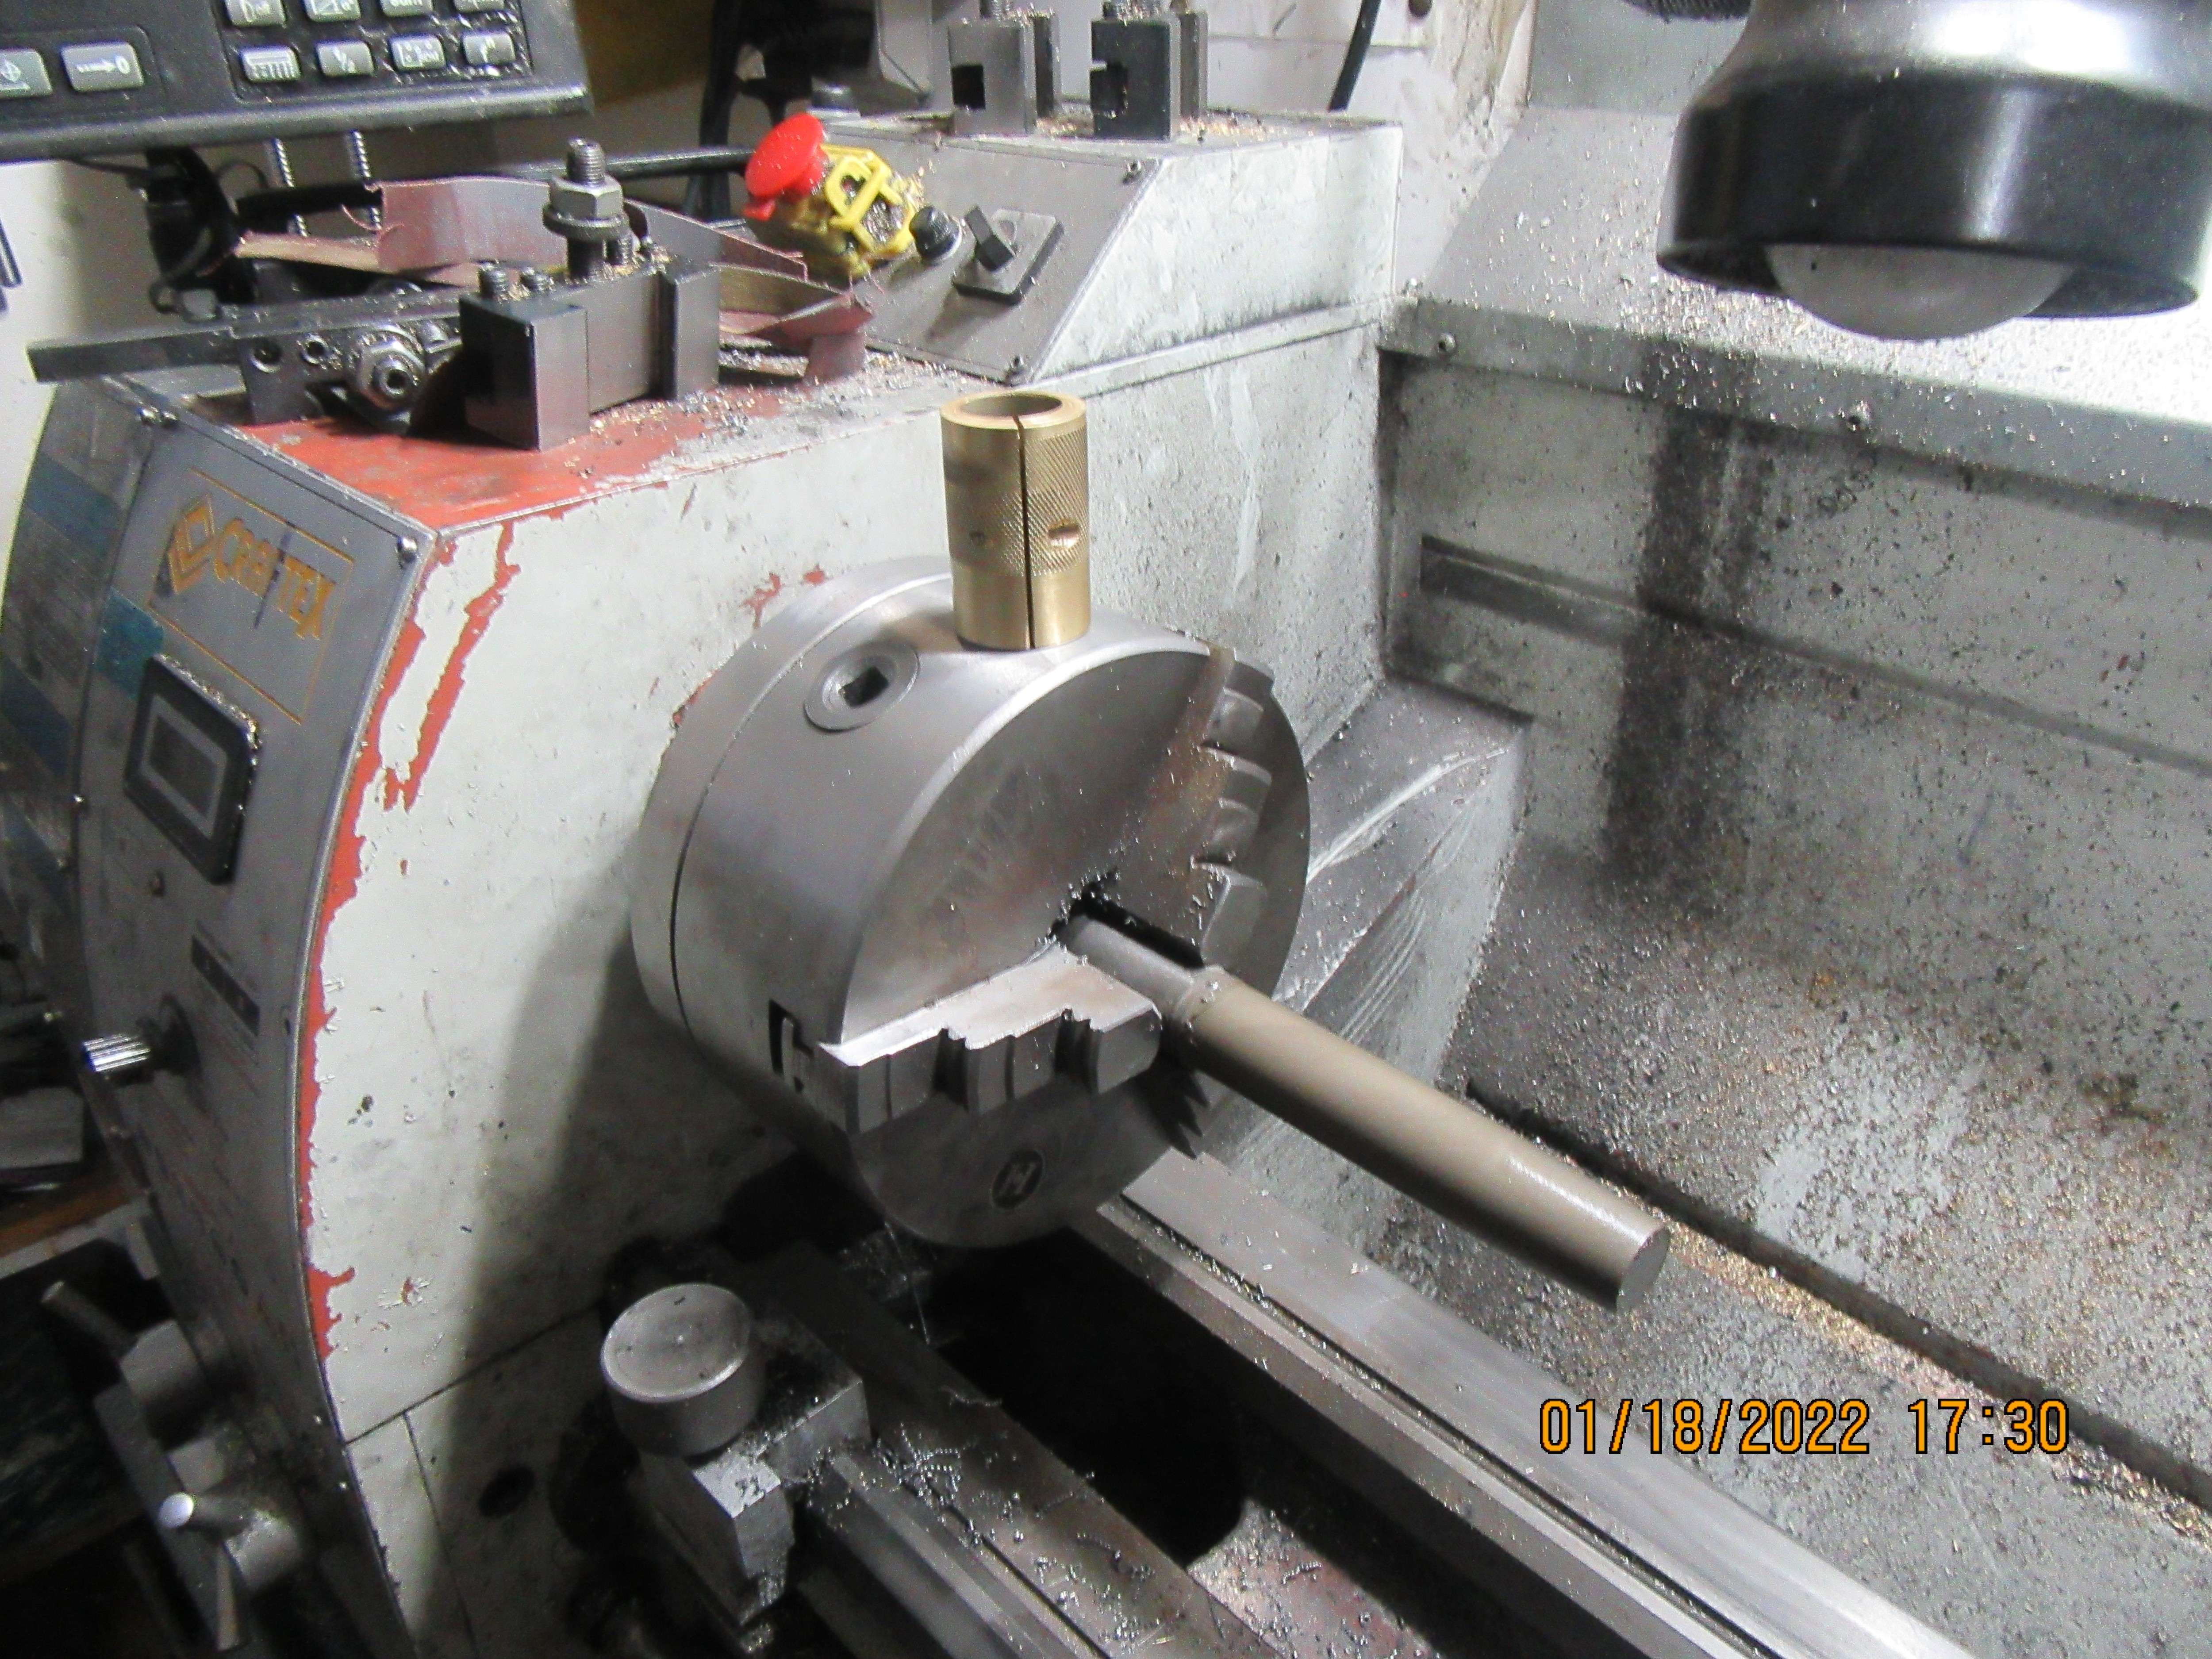
Okay--Back to the external lap. When I made this lap, I drilled and reamed it with a 7/8" reamer, and it was a perfect 0.875" i.d. Then after I put the sawcut in it, it closed up to something less than 7/8". I thought about this for a while and decided to set it back up in my mill and run the reamer thru it again. That worked, but the lap still wanted to close up a bit. I mounted a piece of 7/8" cold rolled steel in the lathe and turned a 1 degree taper on it. Then I coated the cold rolled with 600 grit aluminum oxide paste and with the lathe turning about 70 rpm I worked the lap back and forth slowly over the tapered end by hand until it slid freely over the 7/8" cold rolled steel shaft. This was done without the clamp screw in place. After it slid freely over the shaft, I took it out to my bandsaw and ran the blade thru the existing cut again. Then back into the shop to run it over the shaft a few more times to knock down any internal burrs from the sawcut. Cold rolled steel comes in about half a thou undersize, so I know that at this point my lap is 0.8745" inside diameter. Next step will be to gradually tighten the clamp bolt and continue running the lap over the cold rolled with the 600 grit paste. When the clamp bolt has been tightened up enough to close the sawcut, then I know that when I release the clamp bolt the lap will spring open to something greater than 0.875". Not sure how much greater, but then it will be at a point where I can begin lapping my cast iron piston from "oversize" to a "perfect fit" in the cylinder.

Last edited:
The external lap is finished. When the clamp bolt is loose, the lap measures about 0.880" inside. When the clamp bolt is tightened, it measures 0.870" inside. I will machine my cast iron piston to 0.880" diameter, and then with the lap I will lap it down to a point where it is a snug fit into the cast iron cylinder.
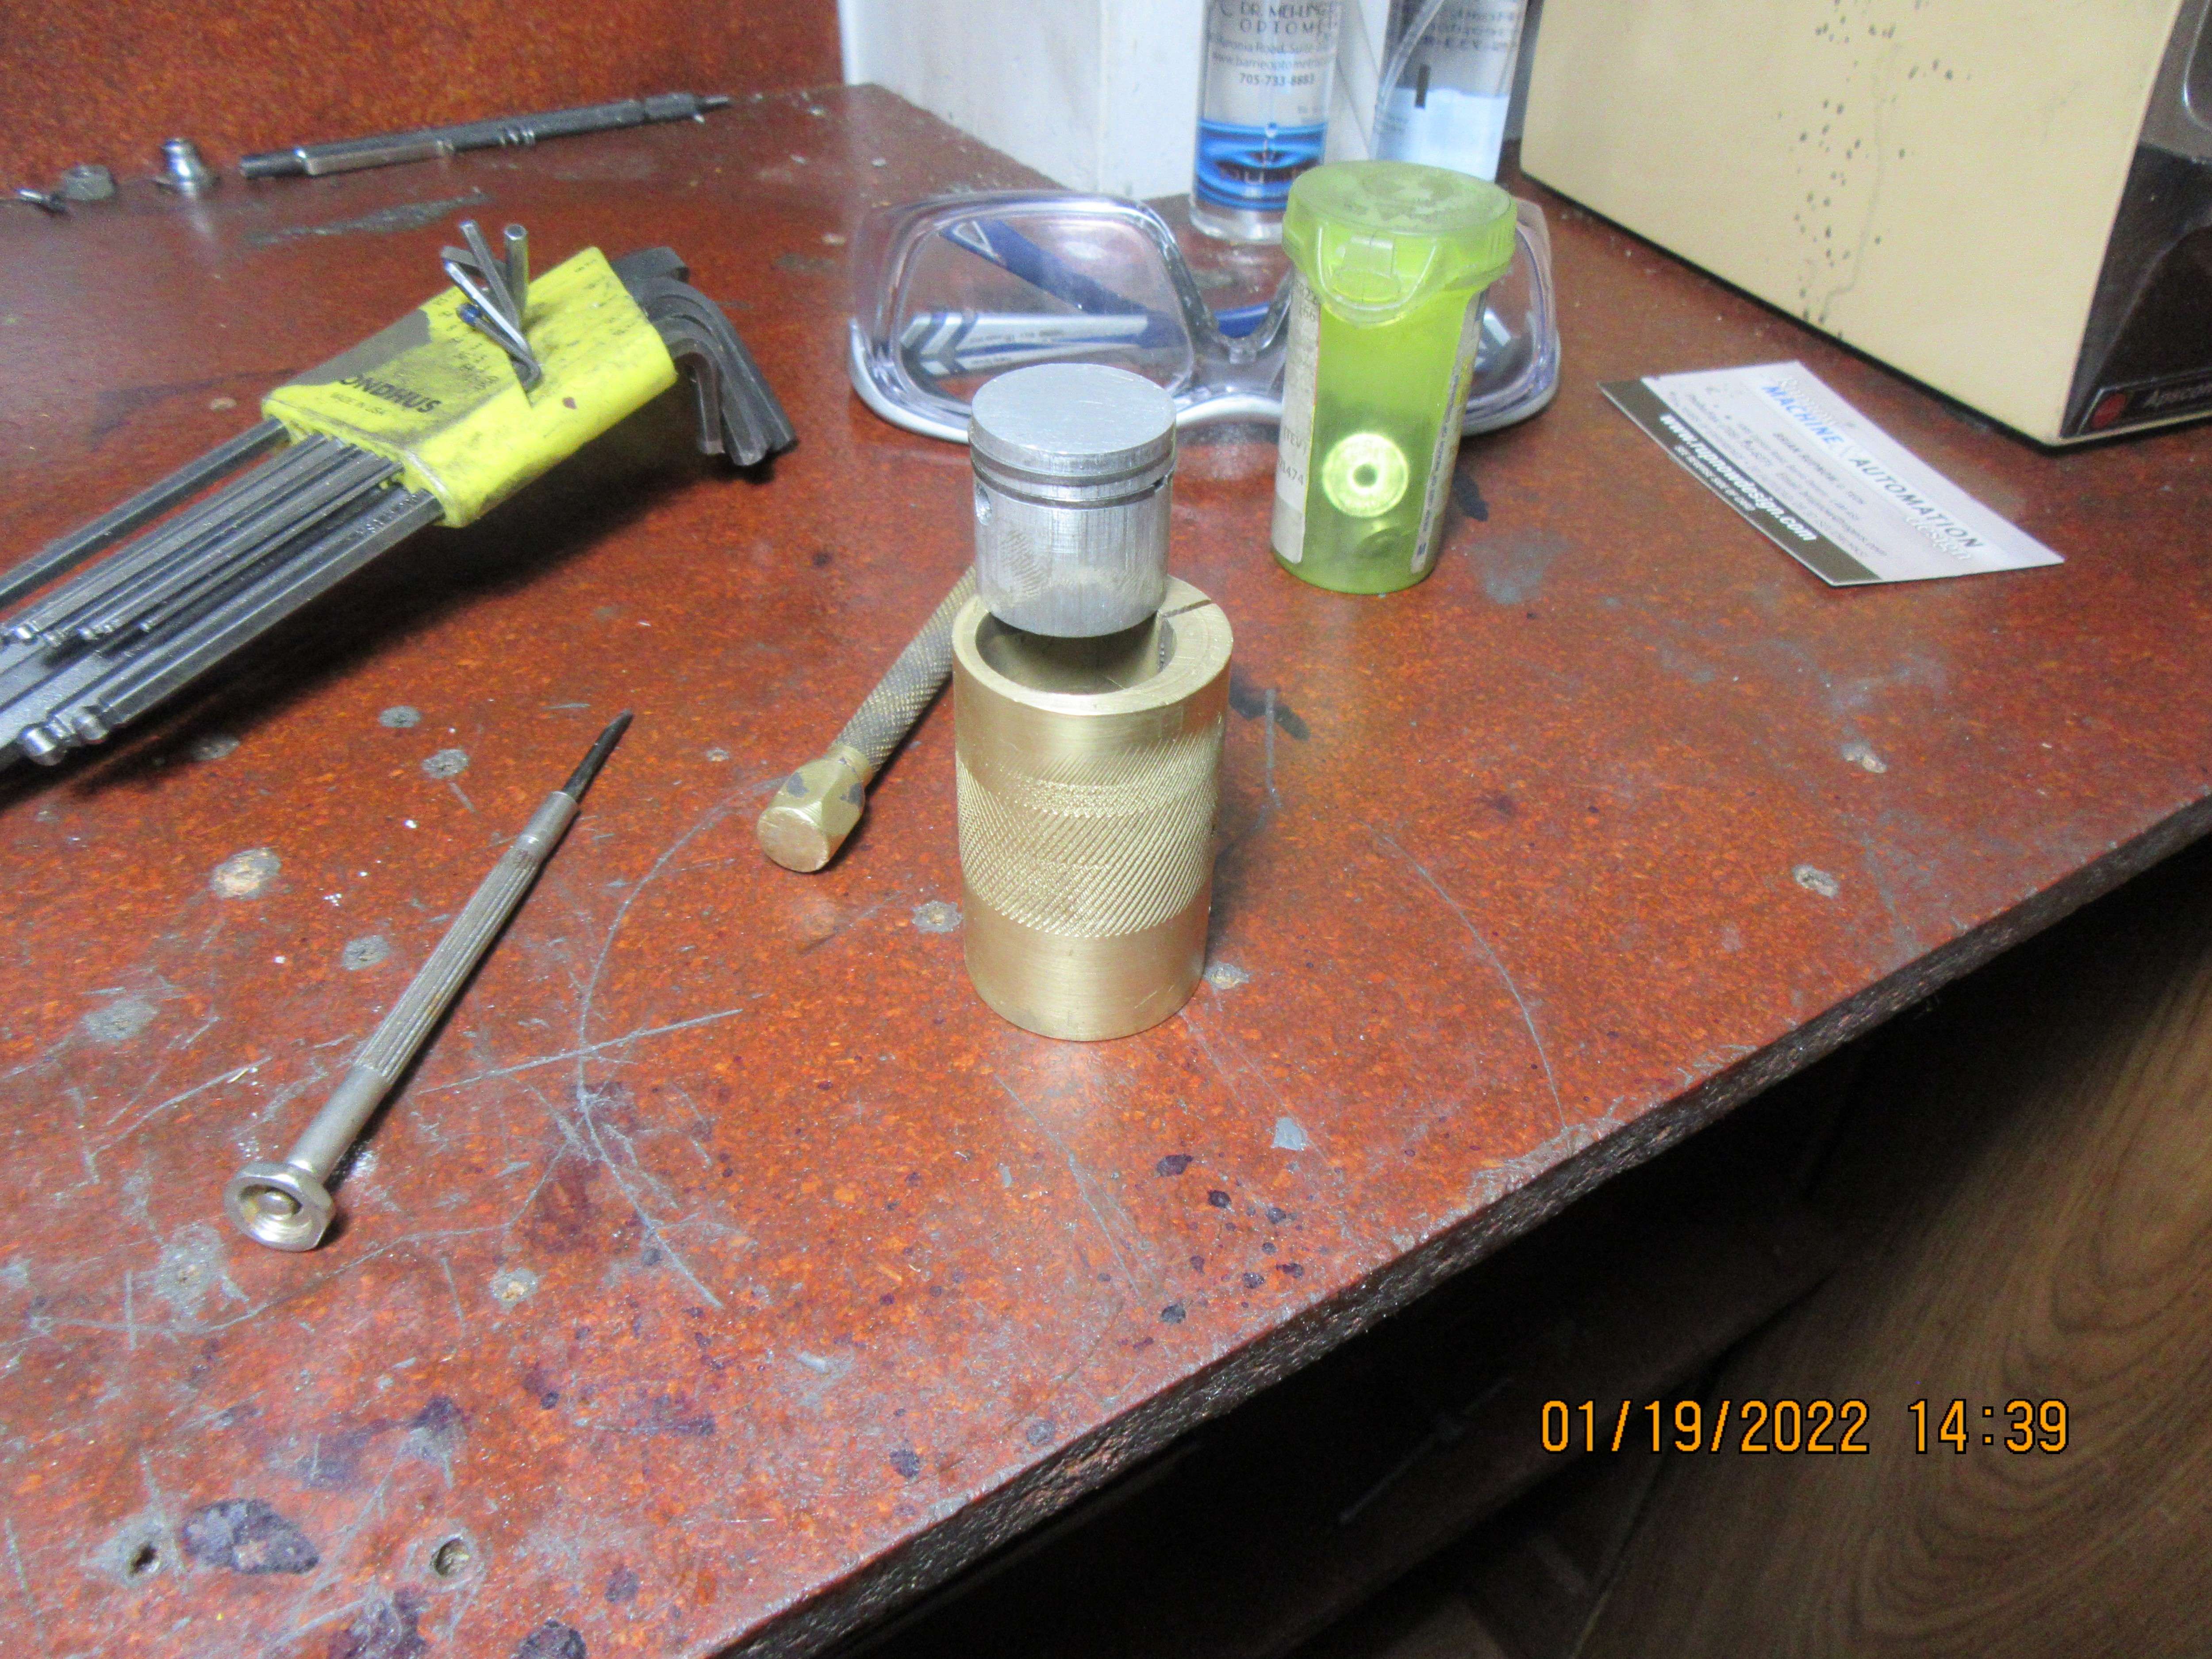

A bit of explanation now, on what I've been doing. I was very surprised when the engine didn't want to run with the new cast iron rings I made for it. And then, I figured out that I had used the wrong kind of iron to make the rings from. This was surprising, because the rings were made from the same stick of iron that made two or three sets of rings that did work in the engines they were made for. The shop I buy my iron from didn't seem to know if this was ductile iron or the other type of iron. I found out after the fact by seeing how easily the rings bend. My current piston is aluminum and is 0.873" diameter, riding in a cast iron cylinder. When the engine wouldn't run, I made a second aluminum piston the same diameter with a viton ring for a reality check, and the engine ran fine with a viton ring. I then ordered a stick of the correct type of iron for making cast iron rings from Wisconsin, and it showed up here yesterday. I have a choice now--I can make new rings and put them on the existing aluminum piston----or---I can make a new cast iron piston which is a closer fit in the cylinder and put new cast iron rings on it. This is why I made the brass external lap, to lap the new cast iron piston so it would be a closer fit in the cylinder.-not an air tight seal, but much closer to it than the aluminum piston was. I'm not worried about thermal expansion, because the piston and cylinder will be the same material so if the piston grows a bit from heat, the cylinder will grow as well so it shouldn't seize on the piston. At the same time I was waiting for my new iron, I started a new thread about the possibility of using my Toolpost Grinder from Little Machine shop to grind the piston to the exact outside diameter instead of lapping it. I got so many varied answers to that question that I decided not to do it. So, armed with the knowledge I have collected, I will now make a new lapped cast iron piston from the old stick of cast iron from my local supplier and new cast iron rings from the new correct material from Wisconsin.

$39.58
$49.99
Becker CAD 12 3D - professional CAD software for 2D + 3D design and modelling - for 3 PCs - 100% compatible with AutoCAD
momox Shop

$39.99
$49.99
Sunnytech Low Temperature Stirling Engine Motor Steam Heat Education Model Toy Kit For mechanical skills (LT001)
stirlingtechonline
![DreamPlan Home Design and Landscaping Software Free for Windows [PC Download]](https://m.media-amazon.com/images/I/51kvZH2dVLL._SL500_.jpg)
$0.00
DreamPlan Home Design and Landscaping Software Free for Windows [PC Download]
Amazon.com Services LLC

$45.99
Sunnytech Mini Hot Air Stirling Engine Motor Model Educational Toy Kits Electricity HA001
stirlingtechonline

$24.99
$34.99
Bowl Sander Tool Kit w/Dual Bearing Head & Hardwood Handle | 42PC Wood Sander Set | 2" Hook & Loop Sanding Disc Sandpaper Assortment | 1/4" Mandrel Bowl Sander for Woodturning | Wood Lathe Tools
Peachtree Woodworking Supply Inc

$94.99
$109.99
AHS Woodmaster 4400 Maintenance Kit for Outdoor Wood Boiler Treatment
Alternative Heating & Supplies

$29.95
Competition Engine Building: Advanced Engine Design and Assembly Techniques (Pro Series)
Amazon.com Services LLC

$519.19
$699.00
FoxAlien Masuter Pro CNC Router Machine, Upgraded 3-Axis Engraving All-Metal Milling Machine for Wood Acrylic MDF Nylon Carving Cutting
FoxAlien Official

$89.99
Outdoor Wood Boiler Water Treatment Rust Inhibitor- AmTech 300 & Test Kit
Alternative Heating & Supplies

$99.99
AHS Outdoor Wood Boiler Yearly Maintenance Kit with Water Treatment - ProTech 300 & Test Kit
Alternative Heating & Supplies

$180.50
$190.00
Genmitsu CNC 3018-PRO Router Kit GRBL Control 3 Axis Plastic Acrylic PCB PVC Wood Carving Milling Engraving Machine, XYZ Working Area 300x180x45mm
SainSmart Official

$17.54
$18.99
Product-Led SEO: The Why Behind Building Your Organic Growth Strategy
The Quality Books
Hi !
I know you have measured the inner diameter of the cylinder
, but ...maybe...try making a ringless piston, and test it with the cylinder , if they have good compression, it means your cylinder is fine and just focus on the rings or grooves on the piston.
I know you have measured the inner diameter of the cylinder
, but ...maybe...try making a ringless piston, and test it with the cylinder , if they have good compression, it means your cylinder is fine and just focus on the rings or grooves on the piston.
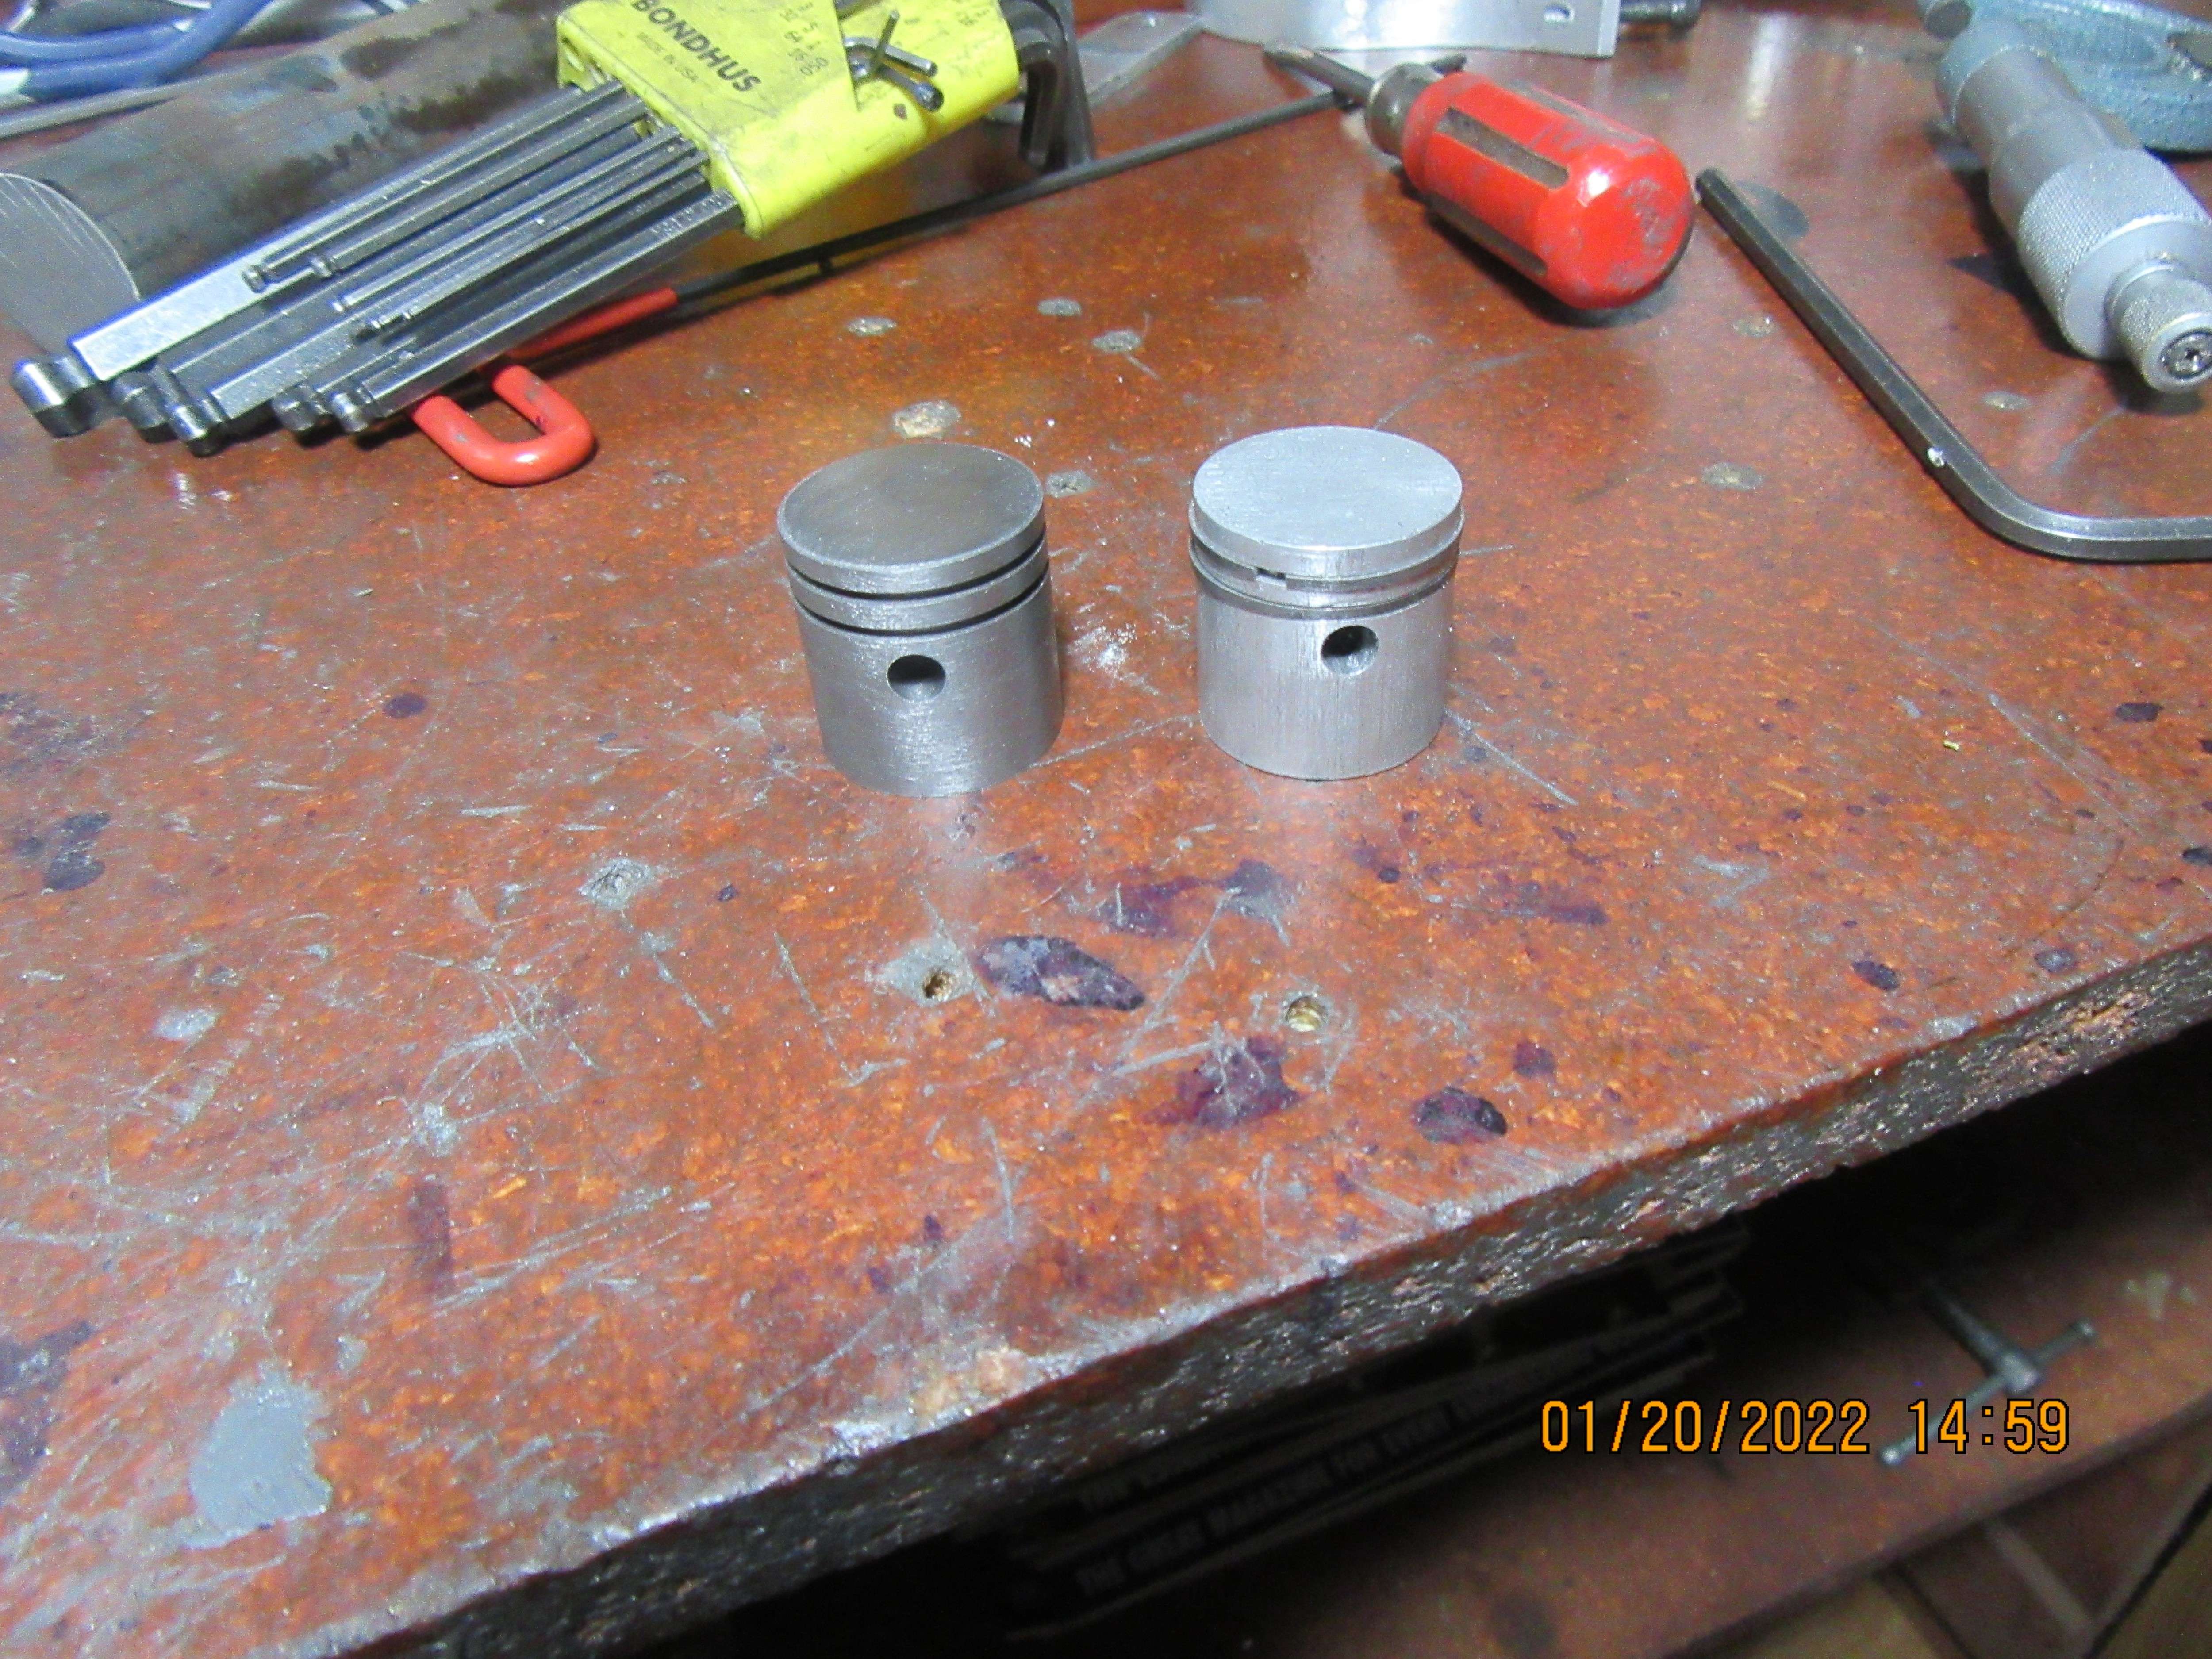
Meet the new piston--Looks an awful lot like the old piston. However, it's made of cast iron, not aluminum, and it's 0.003" larger in diameter than the old piston (the one with rings on it). I had hoped for 0.005" larger in diameter, but you work with what you get. If it works better than the old piston, we're golden. If it doesn't, I had the material anyways and it's 2 1/2 hours out of my life that I can spare. Sometimes I'd swear that my lathe is bewitched.--It never takes off less than I wanted it to, but frequently takes off more!! Tomorrow I'll make some new rings and heat treat them.

Last edited:
Things didn't go the way I had it planned. My plan was to turn the new piston to about 0.880" diameter, and then use my external lap to bring it down to around 0.877" for a snug fit into the cylinder. On the last pass, which was intended to bring the piston down to 0.880"', the machine Gods laughed and when I measured the piston with my micrometer it was 0.876". Didn't leave enough on the diameter to even bother using the lap. I think it's probably time to pull the topslide off my lathe and tighten up the nut which the cross-feed screw engages with, and then tighten up all the gibs. The new piston is good enough to use, but I would have been happier if things had worked out the way I planned.
What are you measuring the bore with ? a few posts up it was "a perfect 0.875" ?
Brian, did you read my post earlier about TCGT inserts or sharp HSS, you will be able to sneak up on the size far easier with them as a standard TCMT insert being blunter tends to ride over the surface when a small cut is applied until you sudden lt find it cuts but will be several times more than the feed.
Two small grub screws in the back of the cross slide nut to adjust backlash but that is not likely to be the cause of your overcutting.
Last edited:
Jason, re: your post earlier "about TCGT inserts or sharp HSS, you will be able to sneak up on the size far easier with them as a standard TCMT insert being blunter tends to ride over the surface when a small cut is applied until you sudden it find it cuts but will be several times more than the feed." = an interesting theory.
I think I have experienced that.
But I have also taken to honing a razor sharp edge on the tungsten carbide inserts - especially blunt worn inserts - to get a bit more work from them. I use a diamond hand dresser or diamond wheel. That sharp edge seems to make them much more controllable. I have brazed various broken segments from inserts onto square steel bars to make my own tools - very successfully. Especially useful on some incredibly hard cast steel bar I have been making swarf with! But I do find the key to machining cast iron (grey, hard, or whatever) is to get the cutting speed slow enough that it cuts cleanly into dust. Needs bags of torque from the motor. But too fast - there always seems to be a specific speed for the material hardness - and the tool doesn't cut, but "burnishes" the surface - when the cast iron wins and erodes the tool faster than the tool can cut metal. I was taught to listen to the cut as a teenager, I still use that and I'm sure I can hear when the tool hits a harder spot and fails to cut properly if running too fast... To that end, I don't run as fast as I possibly could on "unknown" cast iron, in case of harder inclusions that could spoil the cutting action. The tool always need redressing afterwards... as the proper edge will have gone.
BRIAN - for finer finishing cuts on cast iron/steel, I always use a hard, re-sharpened tool, and drop the speed 10~20% so it cuts cleanly at the low pressure for the tiny cut. Try it on some scrap (Then tell me if it doesn't work?),
Thanks,
K2
Brian - and anyone interested - a bit of my history. When I started work in the engine refurbishing machine shop (about 1967?) one of my first jobs was to clear the shelves of all the pistons, and put them back (after cleaning shelves etc.) in numerical part number order. I found that most of the older pistons were iron. Even in the late 1960s some old engines were still being re-furbished that had cast iron pistons. I remember that aluminium pistons were supposed to have really appeared during WW2 - for high performance engines, but many old (pre-1940s?) cars had side valve engines with cast iron pistons. However, I do know of the Austin A7 side-valve engine from 1930s with aluminium pistons, and Triumph, Sunbeam, etc. motorcycle engines of 1930s with aluminium pistons.
Does anyone else know when Aluminium superceded Cast Iron for pistons on car engines?
K2
Does anyone else know when Aluminium superceded Cast Iron for pistons on car engines?
K2
- Joined
- Sep 2, 2011
- Messages
- 1,396
- Reaction score
- 387
on the subject of CI pistons, when i did the rebuild on my old farmall tractor, it origionally had CI pistons. the new sleeve/piston kit had aluminum pistons. one thing i noticed right away after the rebuild is that i had to always choke the engine on a cold start whereas with the CI pistons i never had to use the choke at all. once it ran for 30 seconds or so it was fine. i always wondered what the difference was. was it the added weight of the pistons? CI maybe heating up quicker than Aluminum? idk but is something i always wondered about. the old CI pistons and sleves were very worn with a huge lip at the top. the engine was very worn before the rebuild.
Okay--I'm going to run with what I got. The new cast iron piston is marginally smaller than I had intended, but it is still within the recommended 0.002" smaller in diameter than the cylinder bore. The piston rings will be cut from my new piece of iron from Wisconsin, and the o.d. will be turned to match the cylinder bore of 0.878". The o.d. of my piston is 0.876" dia. and I cut the ring grooves to be .046" wide x 0.045" deep. So---the rings will be cut to 0.045" thick, and 0.876-(.042+.042)=.792" i.d. That will give 0.001" total side clearance when the ring is setting in the .046" wide groove, and 0.792" i.d. will give 0.003" radial clearance between the inside of the ring and the bottom of the groove on the piston.
Hi Brian I take it you are using the Trimble method to make your rings but don't over cook them. Please make a sleeve that just slides over the heat treatment fixture no air gaps around the fixture and sleeve. and wrap clean paper around the ring pack this will burn and consume any oxygen and prevent oxidation of the ring surface. Cook for 15 minutes at the red heat of the assembly let cool naturally. Push the finished ring over a gentle taper to split you will find the ring sealing surface should be clean without any scale. A couple of slides up a honed or lapped bore should give you great compression. Doing this never had a sealing failure. Good luck John.
When I part these rings off from the parent stock, there are a few things to consider. First, I know the ring thickness I want. My target figure is 0.045". Second thing is that I must know the thickness of my parting off tool, which in this case is 0.039". Third thing to know is that I want to make the rings about about .004 to .005" thicker than my target figure, because each side has to be lapped against a cast iron surface plate. Fourth thing to keep in mind is that every time I part off a ring, I must sand and deburr the end of the parent metal before I cut the next ring. That means that I only have one face on each ring that must be lapped. So, in my case, it meant that every time I parted off a ring, I had to move the carriage 0.088" before I parted off the next ring. Then I go thru all the parted off rings and check to see which side is the "bad side" and needs to be lapped. When all of the rings are brought down to "finished thickness" they have to be split. Then the ends are filed so that when the ring is in the cylinder there is a 0.004" gap between the ends. Then they go into my oven, mounted on a special fixture that spreads the ends apart to a "target dimension" for a four hour heat treatment to "set" the gap .
Hi Brian, I know I don’t have anywhere your experience, or that of the other modelers on this site, but I’d like to pass along a method I’ve found to be very effective for parting off cast iron rings. I have set up a die grinder with a dremel abrasive cutoff blade in my tool post, and it does a remarkable job of “parting” off my rings. This leaves a very precise cut with no remaining lip to clean up, and preps them perfectly for polishing the sides on my plate covered by 400 and then 600 grit paper.
Thanks for letting me shoot my mouth off, and I hope you have as much good success with your rings as I’ve had with mine!
John W

Thanks for letting me shoot my mouth off, and I hope you have as much good success with your rings as I’ve had with mine!
John W

A41capt--yes, I see that recommended in my files on how to make rings. Unfortunately I don't have any thin cut off wheels for my grinder. Thank you for stopping by and saying Hi.---Brian
So, as of this morning I have parted off 13 cast iron rings from my new stick of iron from Wisconsin. The o.d. is equal to the bore of my cylinder. The i.d. is calculated so that when installed there will be 0.003" radial gap between the inside of the ring and the bottom of the groove in the piston. The rings have been deburred and had the edges broke on one side---they were deburred and sanded on the exposed side before they were individually parted off. They are all "over thickness " by .004 to .005 and that will be addressed when I dress the side which is not deburred on a cast iron surface plate with a sheet of 600 grit aluminum oxide paper on it. They have all been examined under a magnifying light and the "bad side" marked with a black marker.
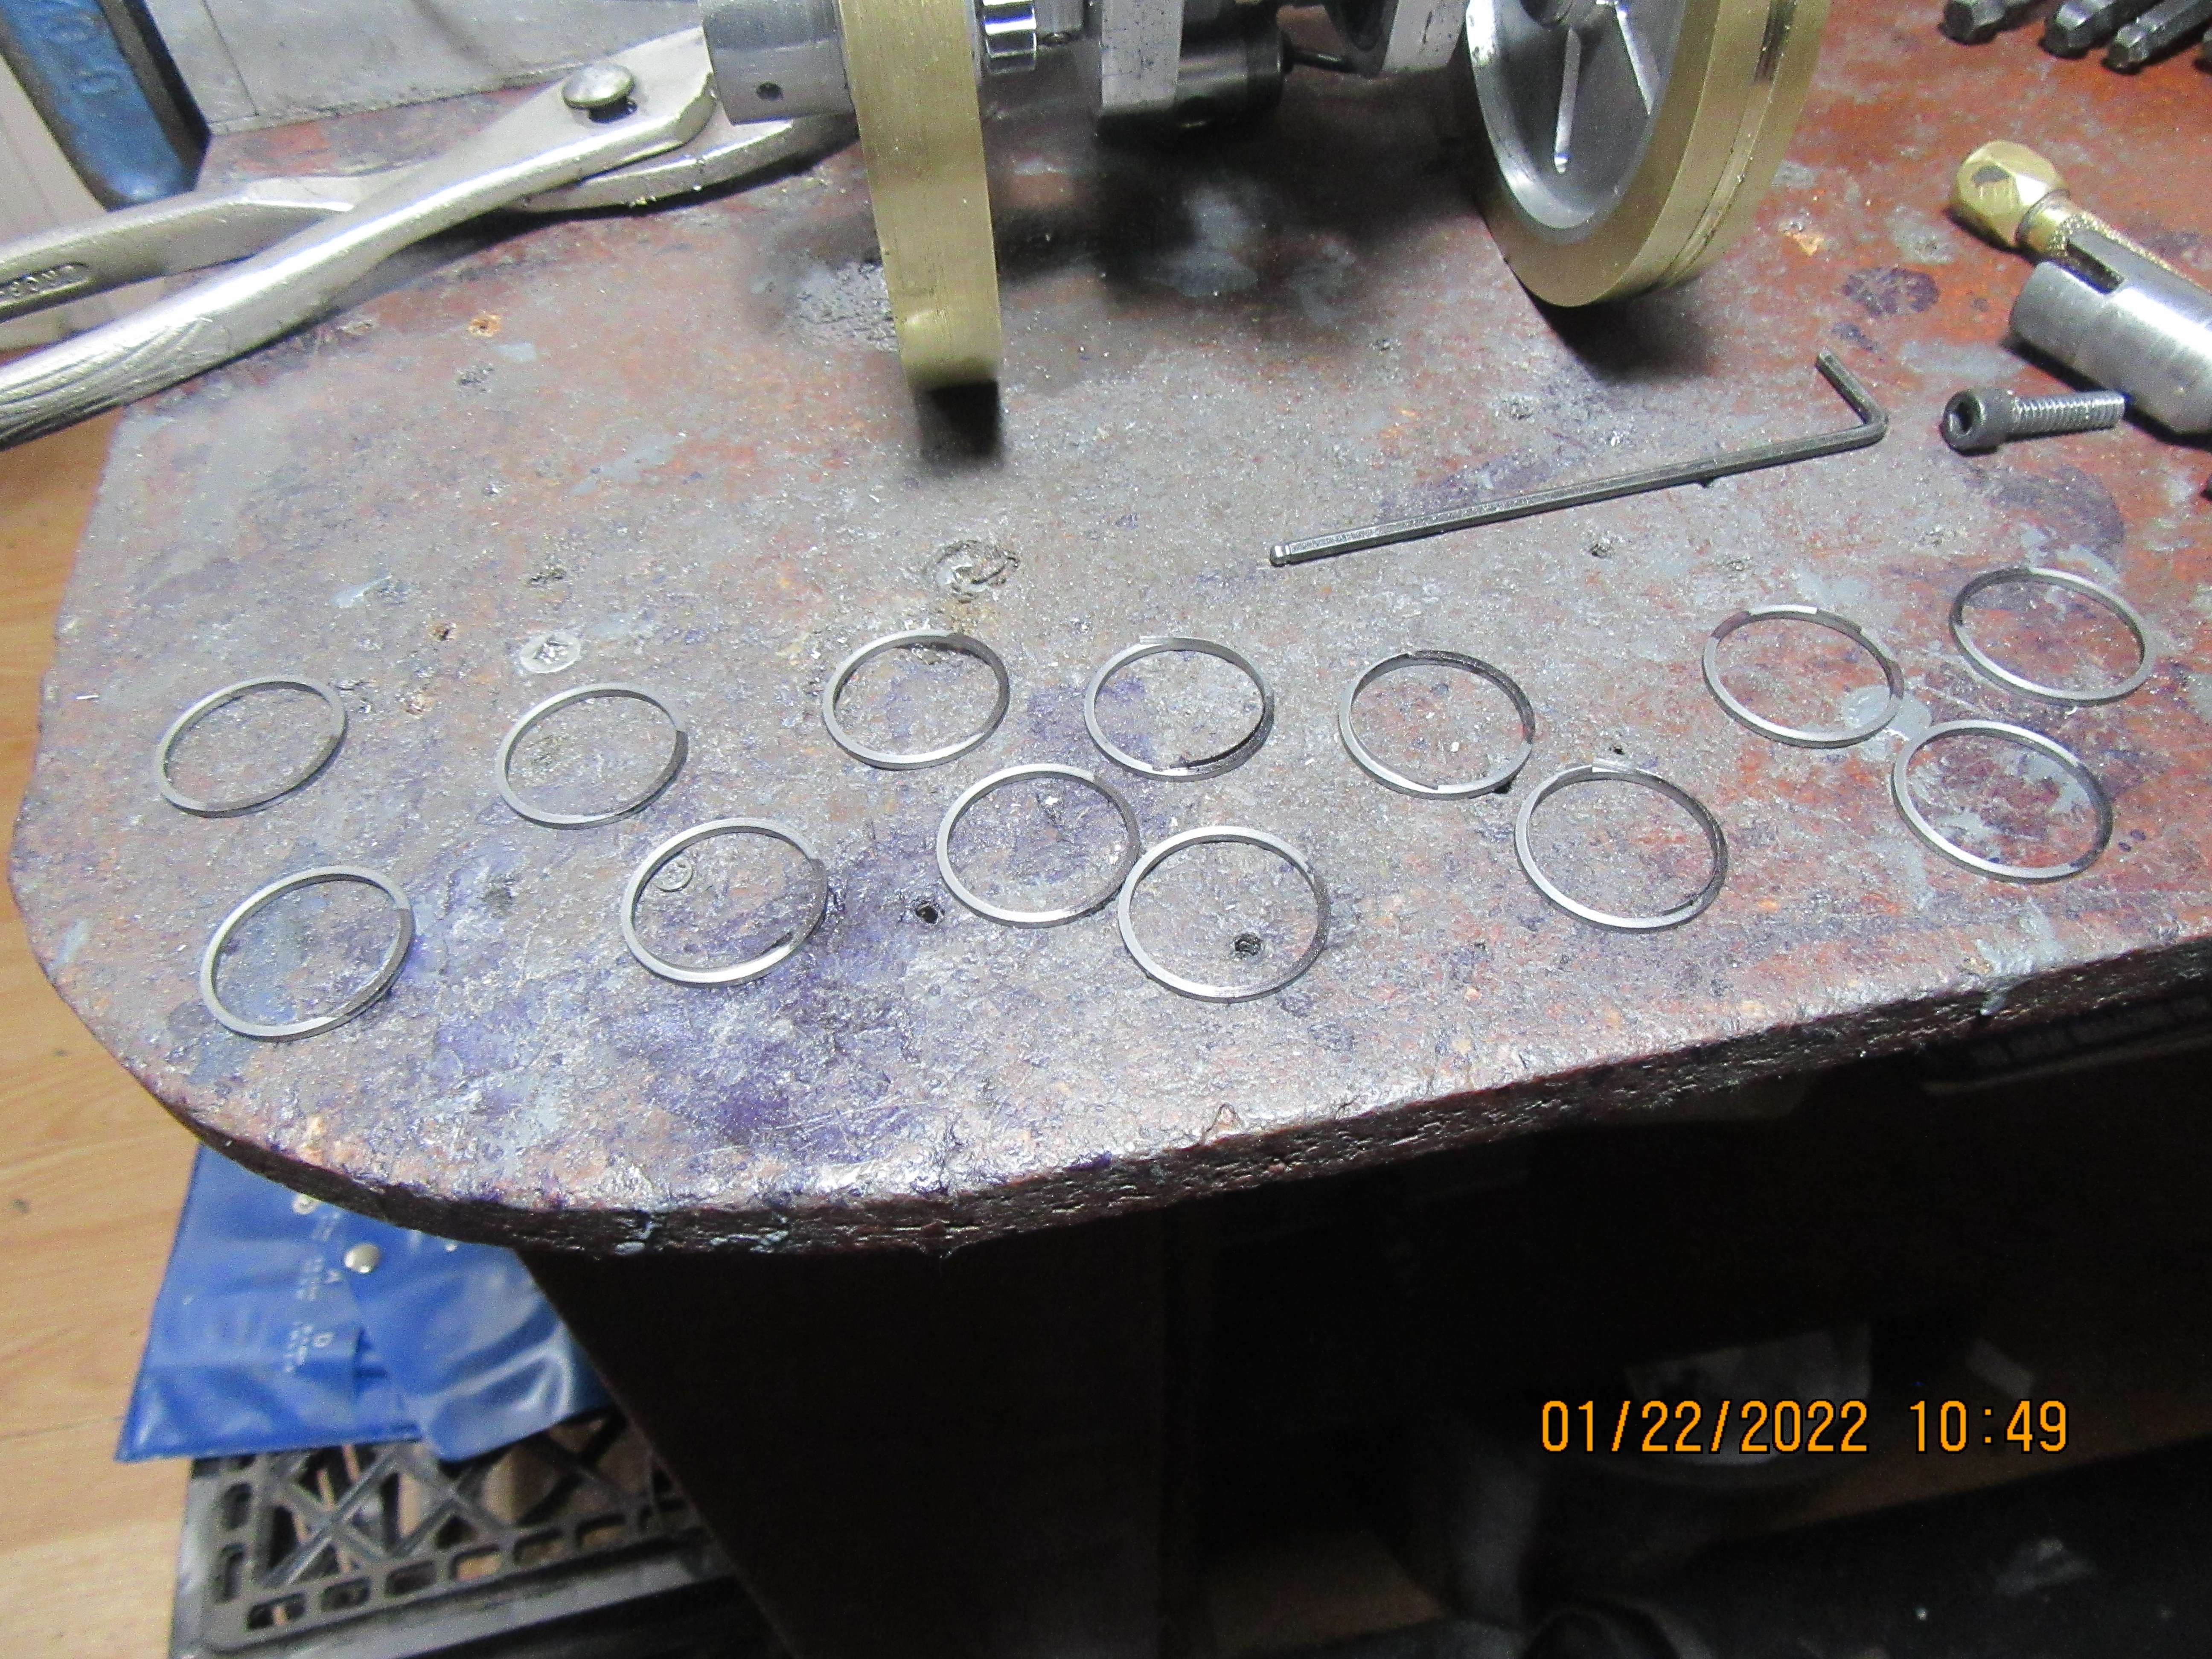

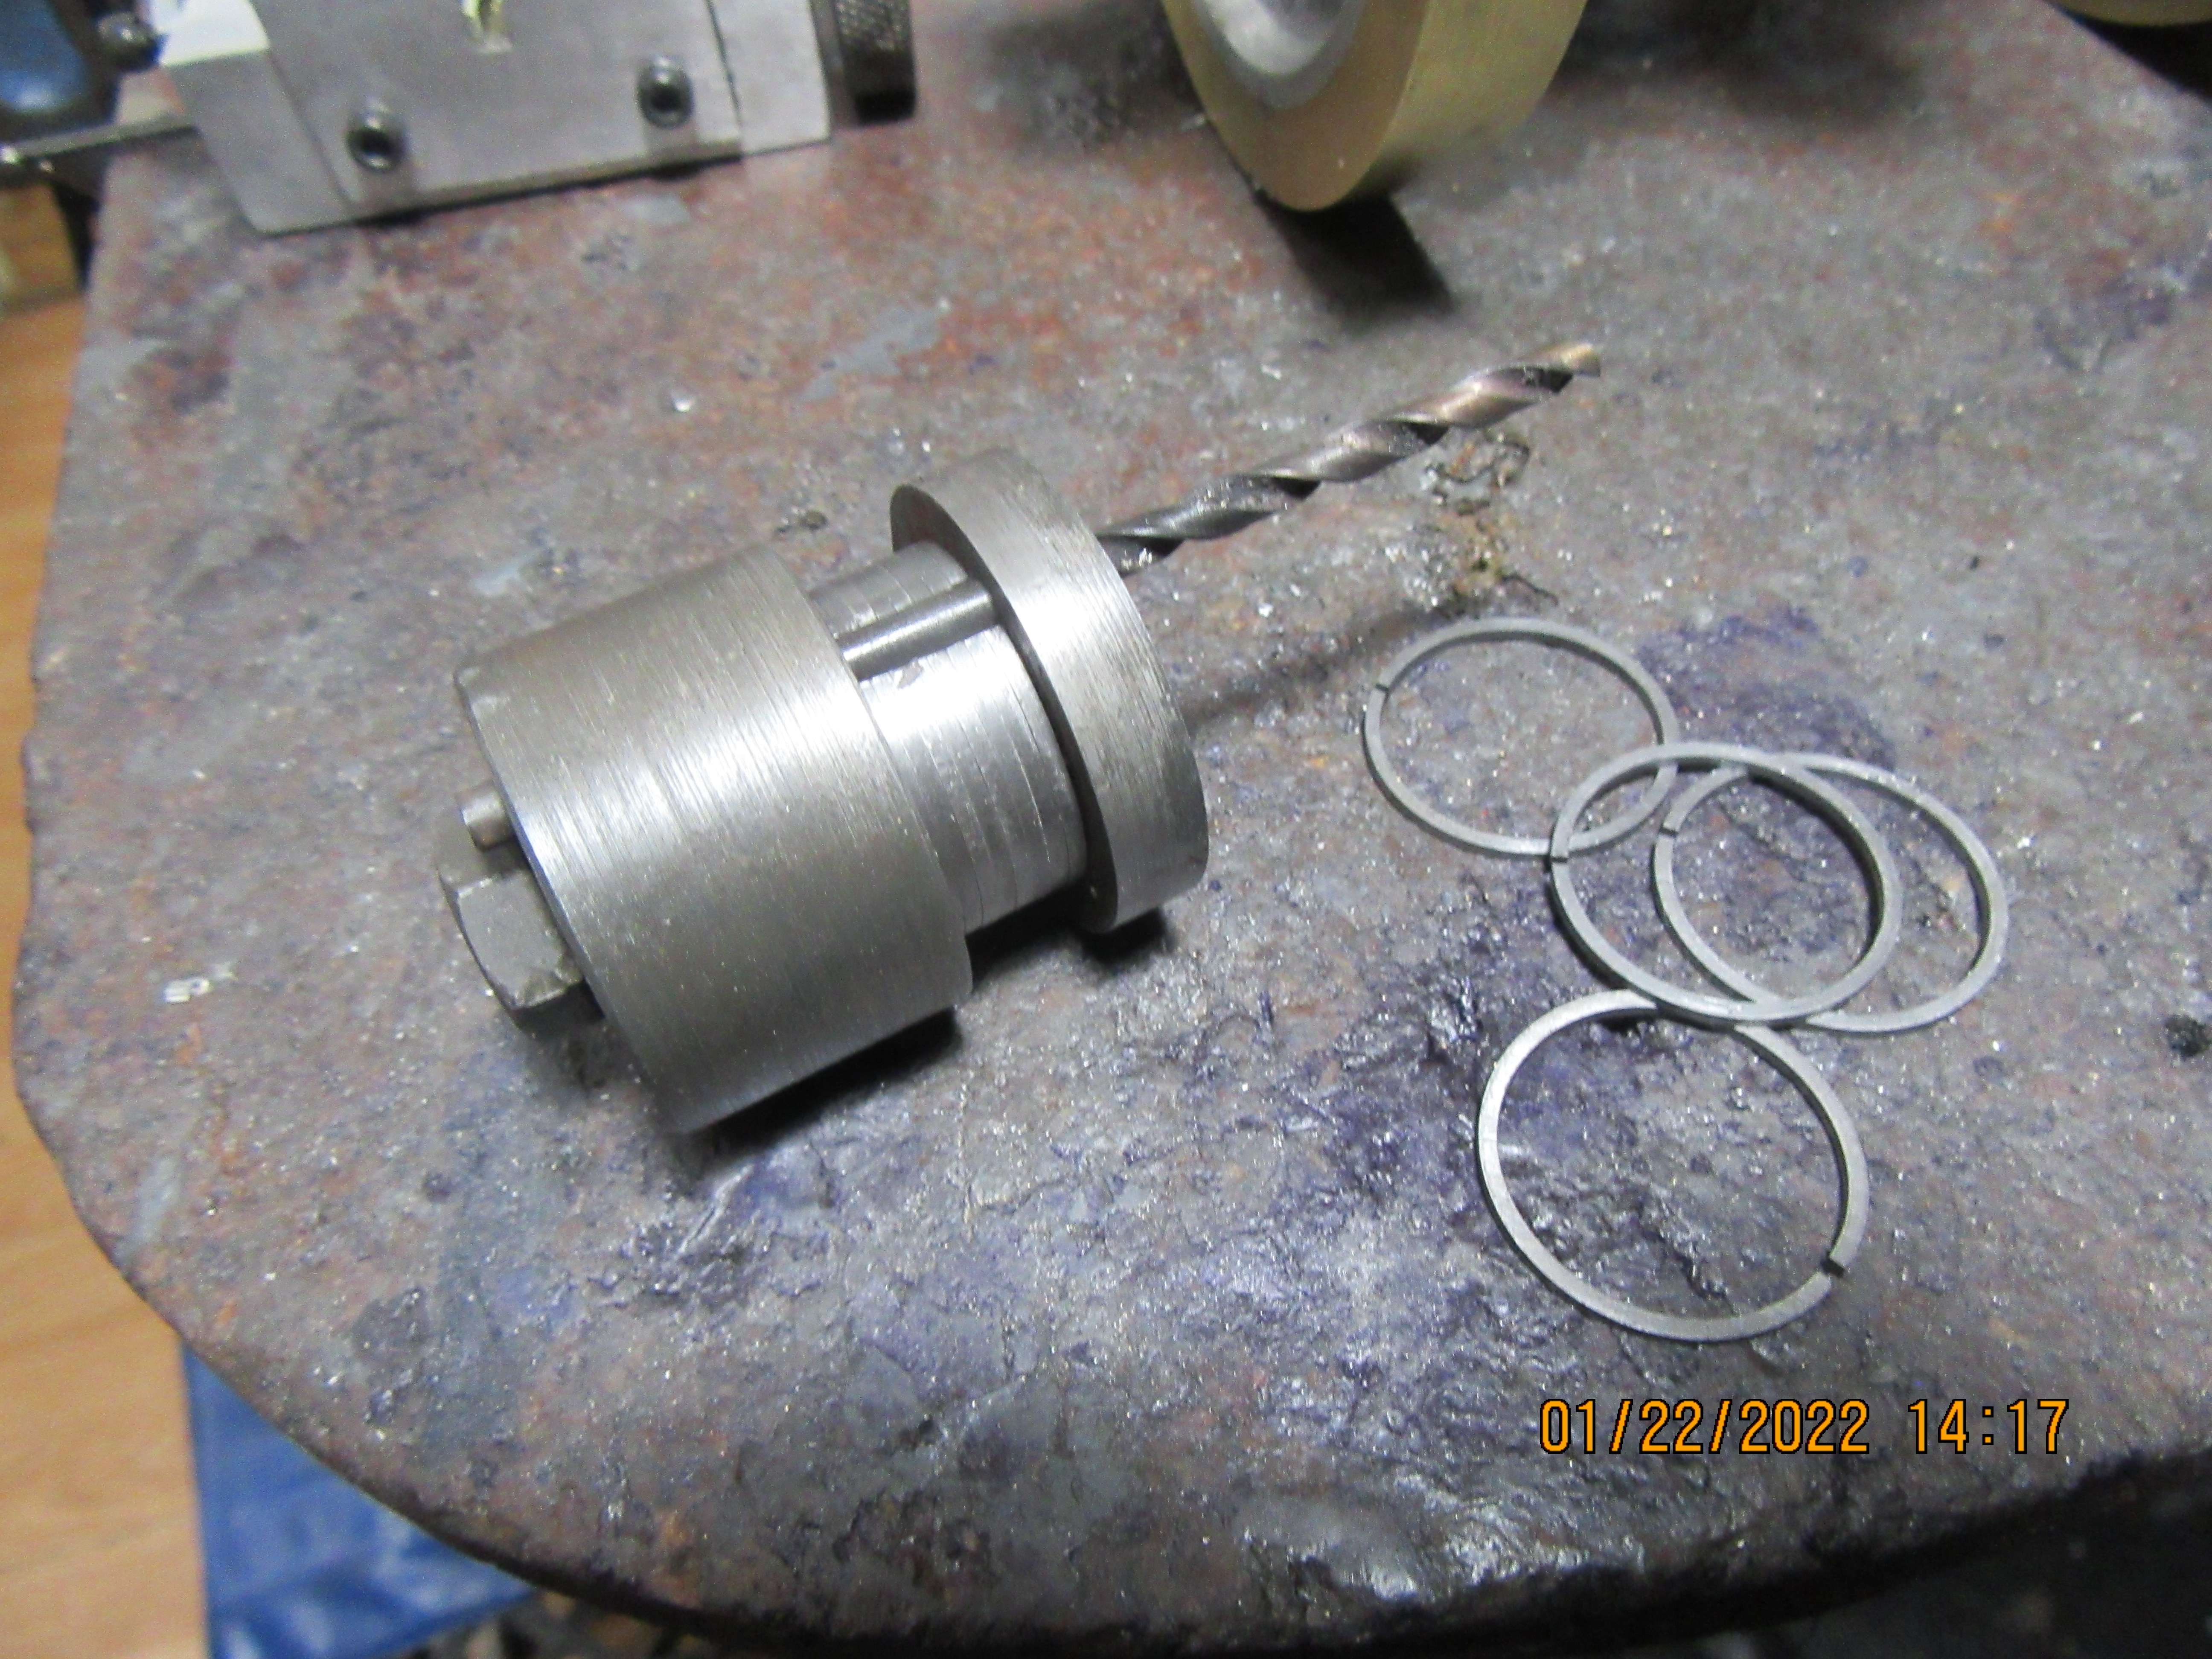
The rings have been fully deburred and taken down to the correct thickness. They have been split using a very sharp cold chisel, then the ends have been filed so that when inserted into my cast iron cylinder they have a 0.004" gap. Here they are mounted on my heat treat fixture and spread over a 0.131" drill and ready to go into my heat treat oven for 4 hours at 1100 degrees. The extra rings which didn't fit on the fixture will be appropriately identified and kept for a future build.

Similar threads
- Replies
- 2
- Views
- 379


