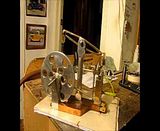
Free plans for a larger, simpler, beam engine

Home Model Engine Machinist Forum

Help Support Home Model Engine Machinist Forum:

This site may earn a commission from merchant affiliate links, including eBay, Amazon, and others.
Ariz, nice job on the build, congratulations. I do have one guestion. On Brians plans part #14 is the piston rod guide and I didn't see that on your build. Did you do this intentionally? It appeared you had drilled the hole for it but never used it. I was thinking about eliminating this part also but questioned if it was actually needed. Looks like yours if running great without it.
 
Without the piston rod guide, the action of the link at the top will try to kick the piston rod sideways, and cause rapid wear of the cylinder head where the rod passes though it. This will let air pressure escape around the piston rod. Probably not such a big deal on these little engines, but on a bigger engine that was actually required to do some work this could really affect the efficiency of the engine. Go ahead and use the piston rod guide, but open the hole up a few thou. so that the rod doesn't bind over the length of its travel.---Brian
 
Brian,
I have the flywheel and the eccentric made and went to make the other bits and I may be going blind, but I can't seem to locate where the specs for the crank and flywheel shaft are in the plans.
I suppose I could guess at it, but I would rather not. ;D

BTW, I just completed your Hit/Miss. (almost! the little fiddly bits in the governor are driving me nuts)
It runs like a champ!!

Dean
 
Back in 2008 when I built this engine, I posted a link to a video of it running. Over the years I have had numerous people email me from all over the world, telling me they would love to see a video of it running---But somehow Photobucket lost the video and the link no longer works. Today I made a new video of the engine running, and its a great video---Only problem is that since it has been 4 years since I built it, some of the brain cells have died, and in the video I say that it is 1 1/2 scale. Thats not right---It is twice the scale of Elmer Verbourgs original design.---Enjoy!!!
 
Brian,
thanks for sharing you efforts with us. I am sure many will be built.
I like bigger models too, nothing smaller than a 4-40 thread.
Mike
 
The difficulty with multiplying by 25.4 comes when I try to find a 3.175mm drill amongst my tools. Drill conversion seems, to a newby like me, to be virtually impossible. The 'numbered' drill sizes mean nothing to me as I have a garage full of metric tools and don't know the equivalents
 
Brian,
I have all the conversion charts but its not simply a matter of multiplying by 25.4. All my tooling is metric & my builds are very slow due to having to convert hole, bush, drill, reamer sizes etc, & ensure the matching parts fit.
Unfortunately I'm too old to be learning a cad program let alone the time to use it - much rather be doing a build. I envy those that can knock up a set of drawings as you have done, & thanks for that.
Leonard
 
lennardhme--I know its a bugger, trying to convert from British Imperial to Metric or vice versa. I'm a design engineer, and all I learned in school was British Imperial, feet and inches. I went to work in 1965 and used it daily untill about 1974, when the decree came down that Canada is going Metric. It was 5 years before anybody in Canada knew how long anything was, how much anything weighed, or what the temperature was outside. Many still don't!!! To complicate matters, USA, our biggest, closest, trading partner didn't go Metric. You can't buy metric steel in Canada, without paying a really big premium. Metric tooling still costs much more than Imperial tooling. Bah!!! Humbug!!! It sucks brother, but thats the way life is.
 
Yep, but it keeps the old brain ticking over. After all this time in Oz. we are still only half metric. Buy a piece of wood & it will be 19mm [3/4"] x 1.7meters [for instance]
I'll spend a few weeks doing the conversions.
thanks - let you know when its running.
 
Hi, excellent place to share information. Other possibility to convert inch to mm is (as i read many time ago) multiplying for 32, not 25,4. You scale up the proyect 25% but the operation and numbers are easyer to get. 1/8" x 25,4 = 3,175 mm, or 1/8" x 32 = 4 mm (32/8), 1/16" x 25,4 = 1,5875 mm or 1/16" x 32= 2 mm (32/16). Sorry for my english, I´m from Argentina
 
Excellent tip Oasanti. I'm new to the forum but have been in machining a long time and that is a new one for me. Thank you and your English is MUCH better than my Spanish!

-Jerry
 
this is awesome. thank you brian!!! everything is so clear and very well laid out for us newbies. when i get back to california in december i might have to try this at my buddies house!
 

Latest posts

Back
Top