Design and build side-shaft hit and miss engine from bar stock

Home Model Engine Machinist Forum

Help Support Home Model Engine Machinist Forum:

This site may earn a commission from merchant affiliate links, including eBay, Amazon, and others.
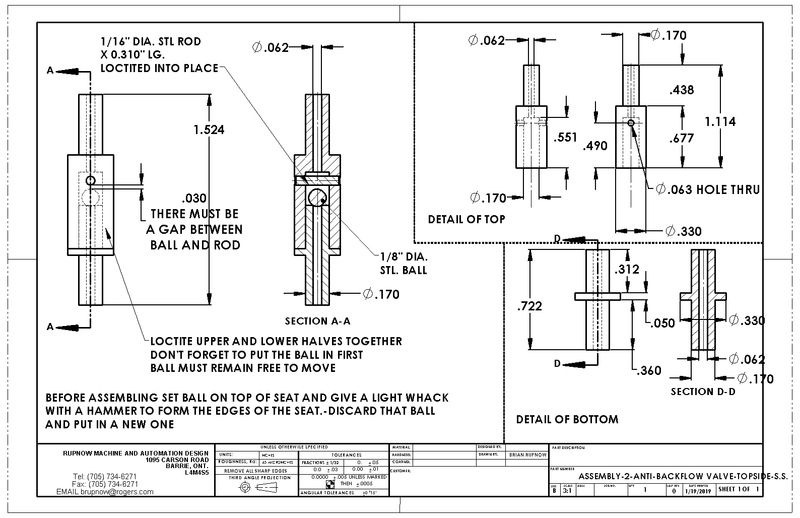
Oh well--You live--you learn!! I did a little research as to why my own check valve didn't work as well as I would have liked. I was on the right track, but I had my check ball setting in a tapered seat, which was cut by the end of a drill. Conventional wisdom seems to be that you shouldn't have a tapered seat. Just a square cut end on the part which the ball sets against. Before assembling, set ball on top of part it seals with and give it one good whack with a hammer. Not enough to deform the outside of the part, but enough to form a very small area which conforms exactly to the shape of the ball which formed it. I will now build another check valve like this.
aG41c2.jpg
 
The Sullivan valve probably doesn't have a spring. Look inside, you may be able to add one or change their plastic ball to a metal one.
 
Last edited:
. I broke the shear-pin in my lathe today. I have wondered ever since I bought that lathe what would happen if I ran it past the limits in power feed. Now I know---"SNAP" and that's all she wrote. It has a brass shear pin 1/8" diameter x 1" long between the gear box and the rod that runs along the front of the lathe to move the carriage. I was power feeding towards center, not parallel to the ways. I adjusted the angle of cut, and that moved the cutting tool towards the front of the lathe. I never wound it across manually because I had been taking many cuts exactly the same. Ran out of travel and broke the pin. I have removed the broken pin and will buy a piece of 1/8" dia. brass tomorrow to make a new one. The good news in this is that nothing broke except the pin.
 
Doom, despair, and agony on me---the damned purchased anti backflow valve from Sullivan #S756 doesn't work. Not only doesn't it work, but when I called Great Hobbies in Mississauga where I purchased it, they won't send me another one, claiming I have to ship this faulty one back to them at my expense ($11.00) before they will send me a second valve to try. I am at an impasse now. Not sure what to do. Their customer service man is supposed to call me back this afternoon. If he doesn't make me happy, I may drive to Mississauga and pull his arms and legs off!!!
Brian,
I make my own valves and use a smaller ball say 5/32 diam as they are lighter and tap the ball on the seat to get a good seal. I use a brass or alumiium body for the valve. A smaller choke diameter will raise vacuum with the slower engine speed Cheers and good luck with your good looking engine. cheers John
 
Hi Brian
Have you tried fitting a reasonably long length of tubing, holding it vertically up and filling it gradually to see what head of fuel is needed to seat the valve. I would have thought that once the fuel line was full that would be enough to seat the valve. It might be as simple as moving the check valve closer to the base and perhaps lengthening the line above to give the backpressure required.
 
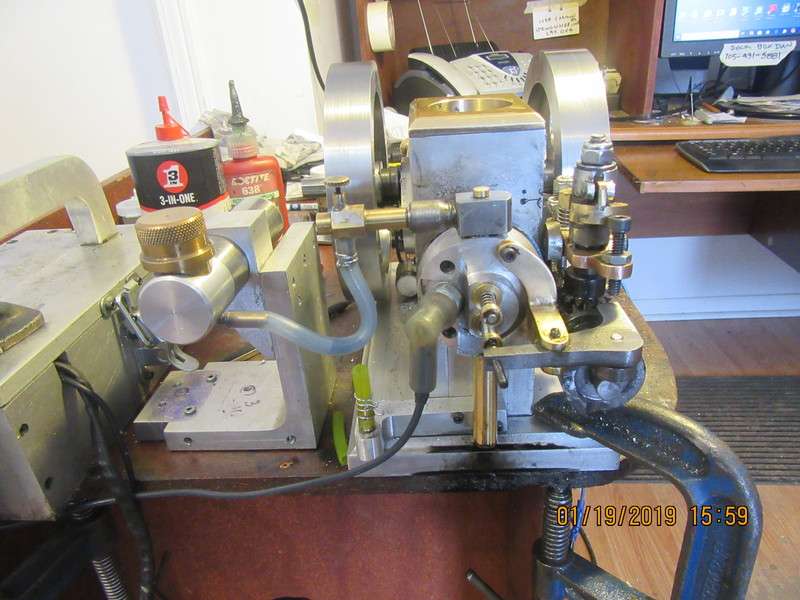
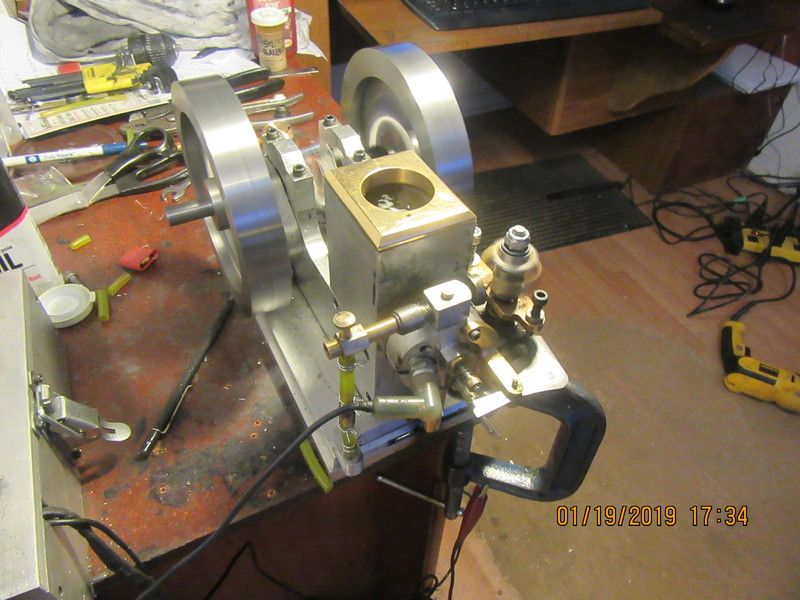
These past two days have been difficult. It seems like all of my engine building skills have deserted me. The engine has not ran properly since I put the new gas tank in place. There are a thousand of these small model hit and miss engines out there with the fuel tanks in the base of the engine. They don't have any problem pulling fuel up from the tank, and they don't have a problem losing their gas back into the tank during their miss cycles. There are a limited number of things that can effect these small engines. Compression, ignition, valve timing, strength of spring on intake valve, and fuel delivery. Everything is fine on my engine except perhaps the fuel delivery. I have to try some other things, one being a spare fuel tank set up to be just below the carburetor.---Brian
 
Ah Ha--something is rotten in this low mounted fuel tank. Now I have to determine if the engine won't pull fuel up from a base mounted tank, or if it won't pull it up thru my anti flowback valve. I suspect the anti flowback valve to be the culprit. Engine runs just fine on a tank mounted up very close to the underside of the carburetor. (I said "High carburetor" I meant "High fuel tank".)
qq5q1n.jpg
 
Last edited:
The engine would lift fuel up from the tank when cranked with my electric drill. The engine would start with my electric drill, and then run for about one full minute and quit, as if it had run out of gas. Current theory is that the venturi created vacuum was strong enough to lift the fuel up from the tank when the drill was driving the motor, but when the drill was taken away the venturi created vacuum wasn't strong enough to keep the 3/16" steel ball off the seat AND suck the fuel up. I have taken the 3/16" steel ball out and substituted a 1/8" diameter steel ball--and yes, I give the 1/8" ball a whack with the hammer to "seat" it in the end of the tube, then discarded that ball and put in a new one. Loctite on the two sections of valve is drying as we speak, and in half an hour we will try that lower tank again.
 
Brian, what if you used an elbow on the intake and dropped the carby down below the spark plug, or make up an intake out of some brass tube bent around the head down below the plug, just a thought.

Cheers
Andrew
 
Yes Cameron, there is a 0.039" hole thru the center of the screw on filler cap. Update--Engine now runs like a fiend on gas from the lower tank. What did I change?--I took the 3/16" check ball out and put in a 1/8" steel ball. If I shut off the engine, the fuel drains past my home made check valve and runs back down into the tank. This says a lot for my diagnostic skills but gives me very poor marks as a check valve maker. Conclusion--there wasn't enough vacuum to lift a 3/16" ball but there is enough to lift a 1/8" ball. Now all I have to do is figure out how to make a check valve that works. In fairness to myself, I modified the existing 3/16 ball check valve to accept the 1/8" ball. The ball seat may have been a bit screwball because of this. I will try one more time to make a check valve that actually works with a 1/8" steel ball.
2F7QKr.jpg
 
Andrew--On a hit and miss engine, the intake runner should be kept as short as possible. That is because, as the engine slows down during the miss cycle, and then tries to "hit" again, you need to have the fuel vapour "right there" or the engine will just slow down and stop before it has a chance to suck vapour thru a long intake runner.--I'm not practicing what I preach because my carburetor could be 3/4" shorter than it is. I robbed that carb off one of my other engines just to get the engine up and running. All of the things I'm testing and checking for to this stage don't care if the intake runner is too long---but---the intent is that this is going to be a hit and miss engine .
 
There is great joy in Mudville (Casey at the bat)--The newest and latest anti-flowback valve that I built yesterday evening at the end of the day works. The engine starts and runs well on the tank mounted in the base, and when I shut the engine off the fuel in the fuel line does not run back into the tank. This is what I have been trying to achieve.---Brian
 
My engine is right on the ragged edge of hitting and missing. I don't want to gas myself, so I'm setting in my office with the door open to outside. I'm about to quit because there isn't much to choose between gassing yourself to death and freezing to death. I have things adjusted so that at a specific rpm the governor arm tips and prevents the exhaust valve from closing. The engine slows down, and the governor doesn't tip the other way soon enough and the engine just dies. OR--I have the adjustments set so that the governor arm disengages freely, but then it doesn't want to tip down and hold the exhaust valve open. I have had it hitting and missing beautifully if I operate the governor lever by hand. I think it is simply a matter of refinement now.
 
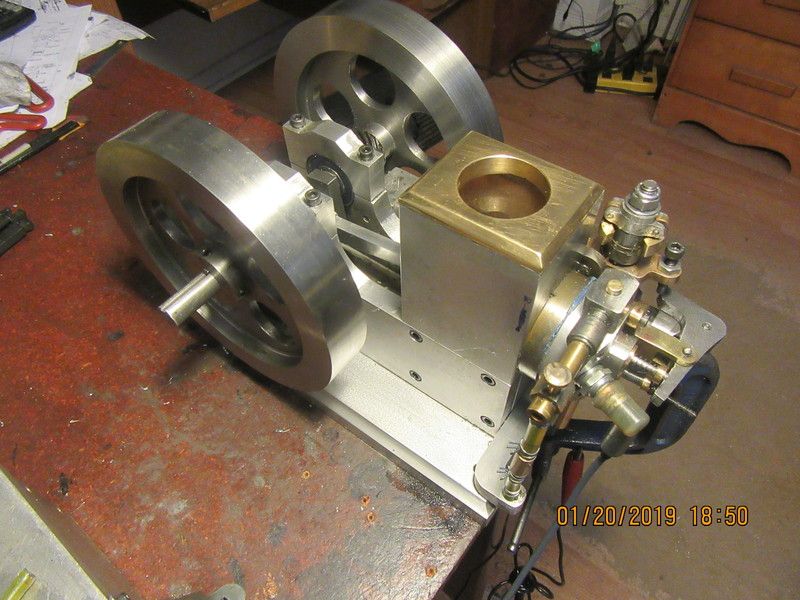
Time for a summary. The engine does start and run very well. This always gives me a complete thrill every times it happens. Yes, it does suck up gas from the tank in the base without any trouble. My initial problems with this was using a carburetor with too large a bore. The air doesn't flow fast enough thru a large bore carburetor to create sufficient venturi effect, and you don't have enough vacuum to lift the fuel. When I went to a smaller bore carburetor, that improved the vacuum, and it sucks up fuel with no trouble. The anti backflow valve gave me some problems, mainly because the 3/16" ball I was using was too heavy. When built with the smaller 1/8" ball as in the second drawing I posted, it performs well to keep all of the fuel from draining back into the tank when the engine stops. The carburetor is intended to be used with a hit and miss governor system, and consequently has no throttle plate. When ran without the governor hooked up, the engine runs fast enough to be rather frightening, and the only way to slow it down is to open the needle valve in the carburetor to the point where it is running too rich, however it does slow things down a bit. The flywheels are very heavy at 6" diameter and 1" wide, however that doesn't really affect an engine which has no acceleration curve and runs at a constant speed. The engine has "loosened up" a lot with all of the running it has been doing. As in all of my other i.c. engines with steel valves and brass seats, the compression has improved remarkably after being ran for a while. I am using one 1/16" Viton ring on the piston, in a groove .093" wide x 0.060" deep. The face cam seems to be a success. I had never built a face cam before, and my thanks go out to George Britnell and to Jason for help with the design. My next step will be to tame the hit and miss function so that it operates smoothly.
KzKm2Q.jpg
 
Still in set up mode here, trying to get the hit and miss action sorted out. I changed from a shcs to a piece of 1/2" dia. cold rolled round and milled a notch in the rocker arm.
 
I've worked enough today. I can not find that sweet spot for the hit and miss action. I believe I have tried every combination of spring pressure on both ends of the governor pivot, have added weights, have taken away weights, and that bit of action seen in the last video was about the best hit and miss action I've had. I may have to make a design change to something, but right at the moment I'm not sure what. One thing that I've seen, and seen repeatedly, is that the action of the rocker arm is so fast that the portion of governor which is supposed to interact with the rocker arm to hold the exhaust valve open doesn't have a chance to get in where it has to be to stop the rocker arm.--Hope you understood that!!! You can see a good example of what I am talking about in the last 10 or 15 seconds of the video. I have to think on this for a while.
 
Bear with me folks.--Thinking out loud here. When the engine is running like it did in the last 10 or 15 seconds of the video, and the latch won't engage, if I touch the end of the governor arm very lightly, the latch will engage. It seems to need a little more force than the flyweights provide to make it engage. The way to fix that is to either run the engine faster or to make the governor weights a little heavier. I don't have much control on how fast the engine runs. Without the governor in place it goes so damned fast its rather terrifying. The engine speed is totally a function of the governor. HOWEVER---I can make the governor weights heavier. If I do, the governor will provide more force to make the latch engage every time the engine speed starts to pick up. The other end of the stick, is that the latch has to disengage before the engine slows down so much that it dies out. At low speed such as near the end of a "miss cycle" the governor weights aren't having much effect on the rocking governor arm. The compression spring on the other side of the governor arm pivot provides the force required to disengage the latch and return the governor balls closer to the stem post, and enter the "Hit cycle" again. The simplest design change I can make right now is to add some weight to the governor arms. I will make the added weight removeable so that if that doesn't work I can return things to what they were.
0aZhU9.jpg
 
Ah Ha--something is rotten in this low mounted fuel tank. Now I have to determine if the engine won't pull fuel up from a base mounted tank, or if it won't pull it up thru my anti flowback valve. I suspect the anti flowback valve to be the culprit. Engine runs just fine on a tank mounted up very close to the underside of the carburetor. (I said "High carburetor" I meant "High fuel tank".)
qq5q1n.jpg

Hello again Brian never give up as you will win. May I suggest as another follower has suggested Place the carb direct on the cylinder head. I believe your problem will end then Your new foot valve has overcome the drain back and smaller venturi overcomes the slow running. Bringing the carb closer will cure the the drag time in getting the gas flow starting almost immediately the the exhaust valve is released. Cheers John
 

Latest posts

Back
Top