CX601 Milling Machine

Home Model Engine Machinist Forum

Help Support Home Model Engine Machinist Forum:

This site may earn a commission from merchant affiliate links, including eBay, Amazon, and others.
"I'm getting darn well tired of making brackets!!!!"

Been There, Done That. You will get this done and it will work well for you.

I am enjoying your reports on setting up this mill because it is a great insight into your design process and problem solving.

I am also looking forward to seeing the future engine and mechanical projects this new mill will undoubtedly allow you to make.

Best wishes,

--ShopShoe
 
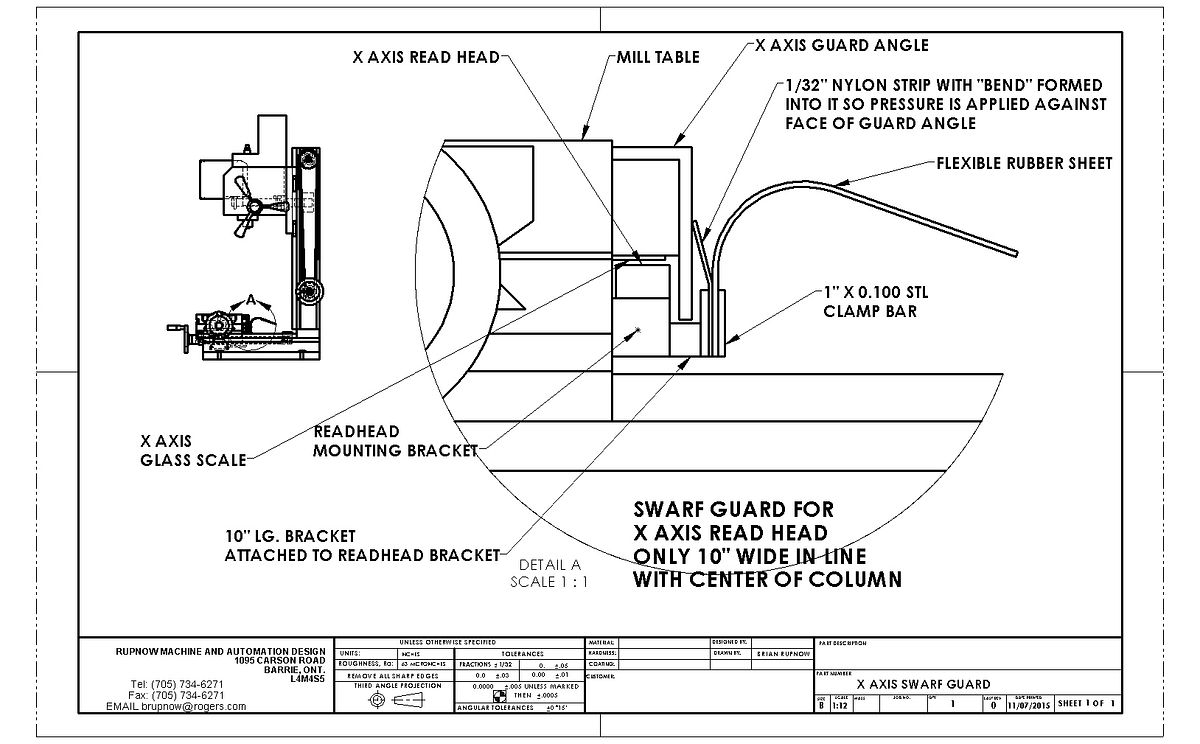
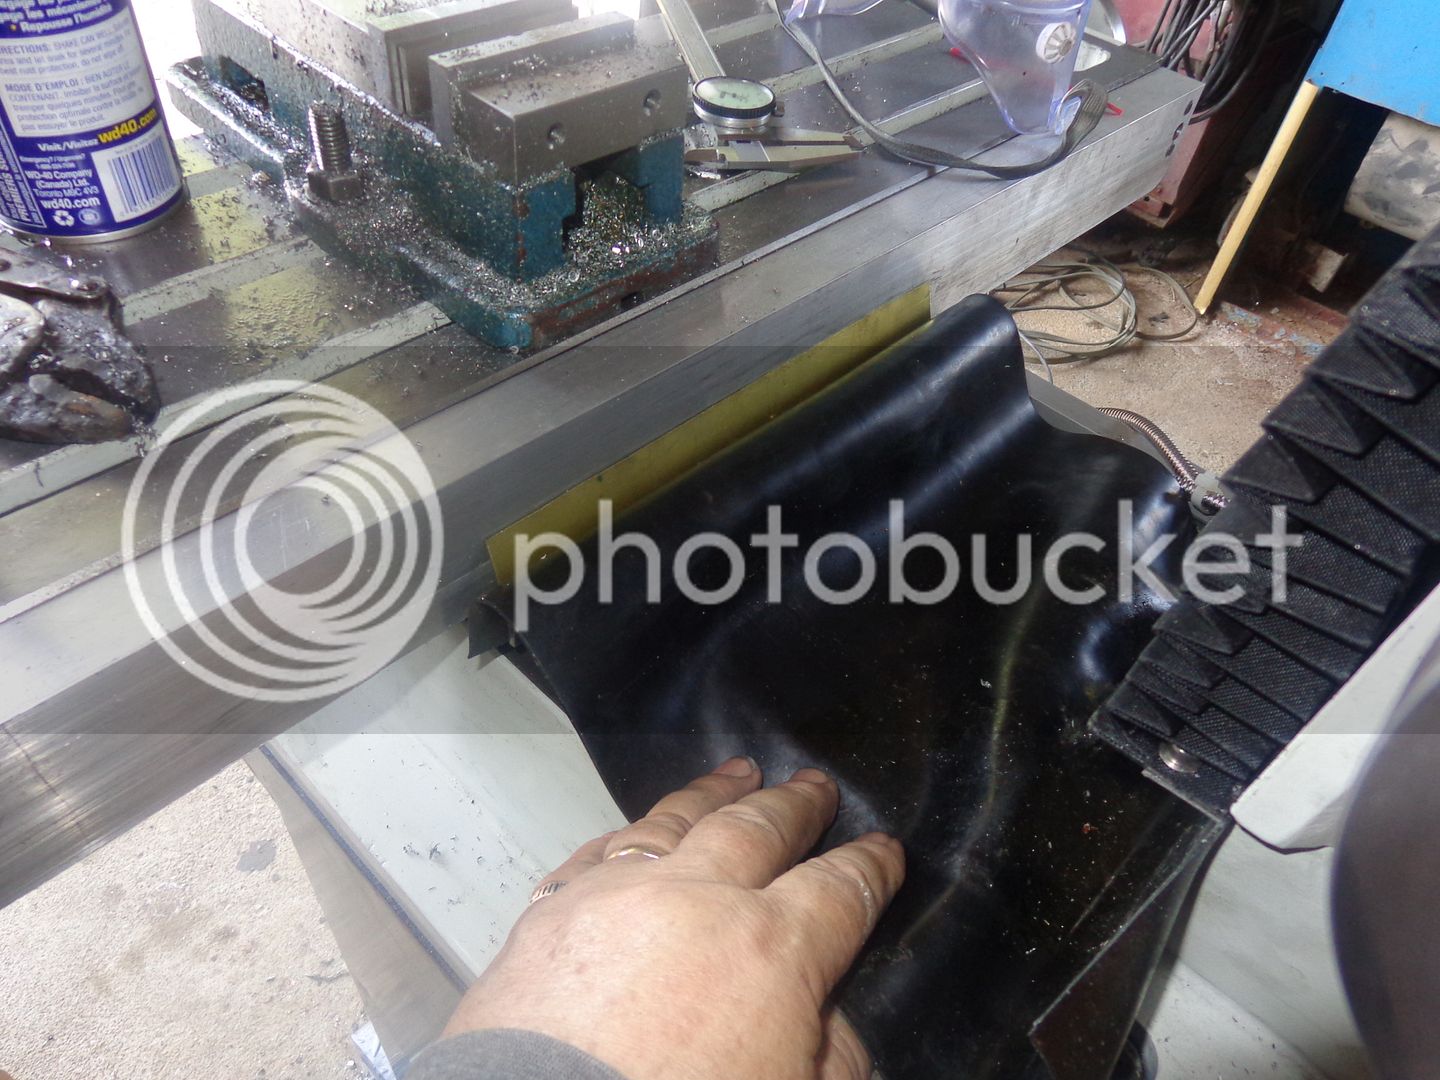
I lay in bed last night with my head on fire, doing what I do best--designing!!! I have to have a way to incorporate that 10" wide rubber strip that covers the X axis ways and the Y axis Acme screw with the new DRO system I have installed. This will work, and it should work well. I'm a little vague right now on where I will get the 1/32" nylon strip, but research should yield something.
 
Eureka!! I have it!! I can use a piece of brass shim stock instead of nylon. That, I know where I can get, and a sheet metal brake will put in whatever bend I desire.
 
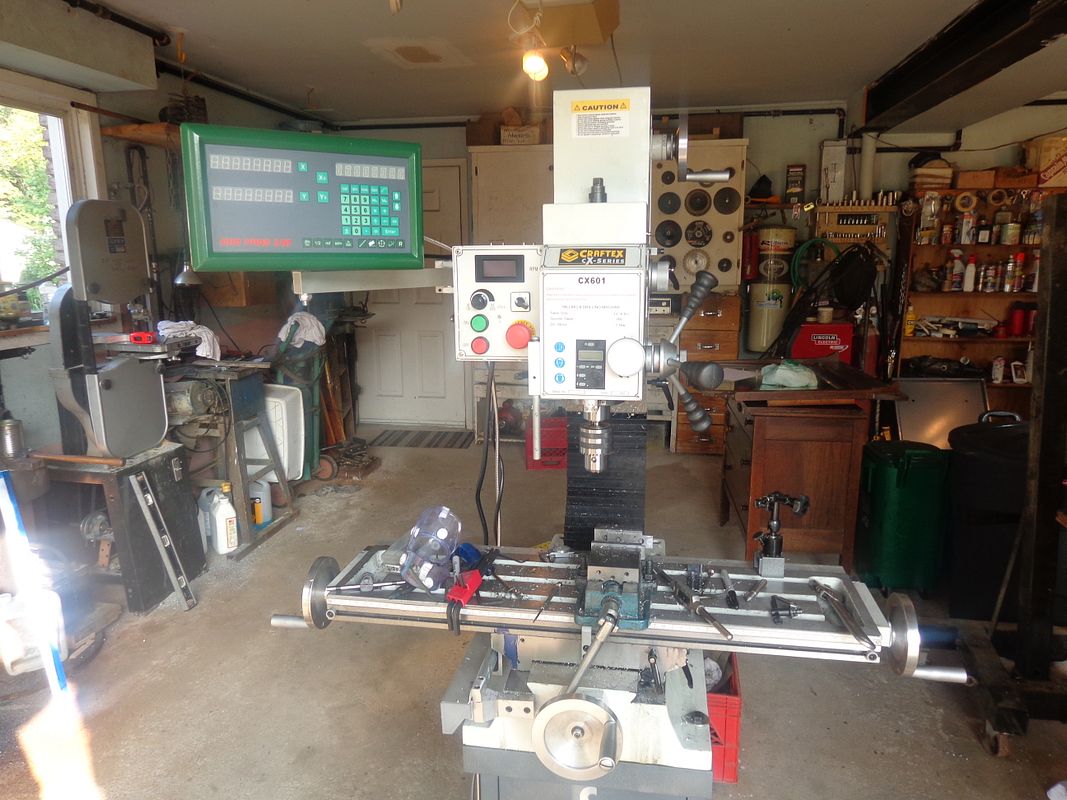
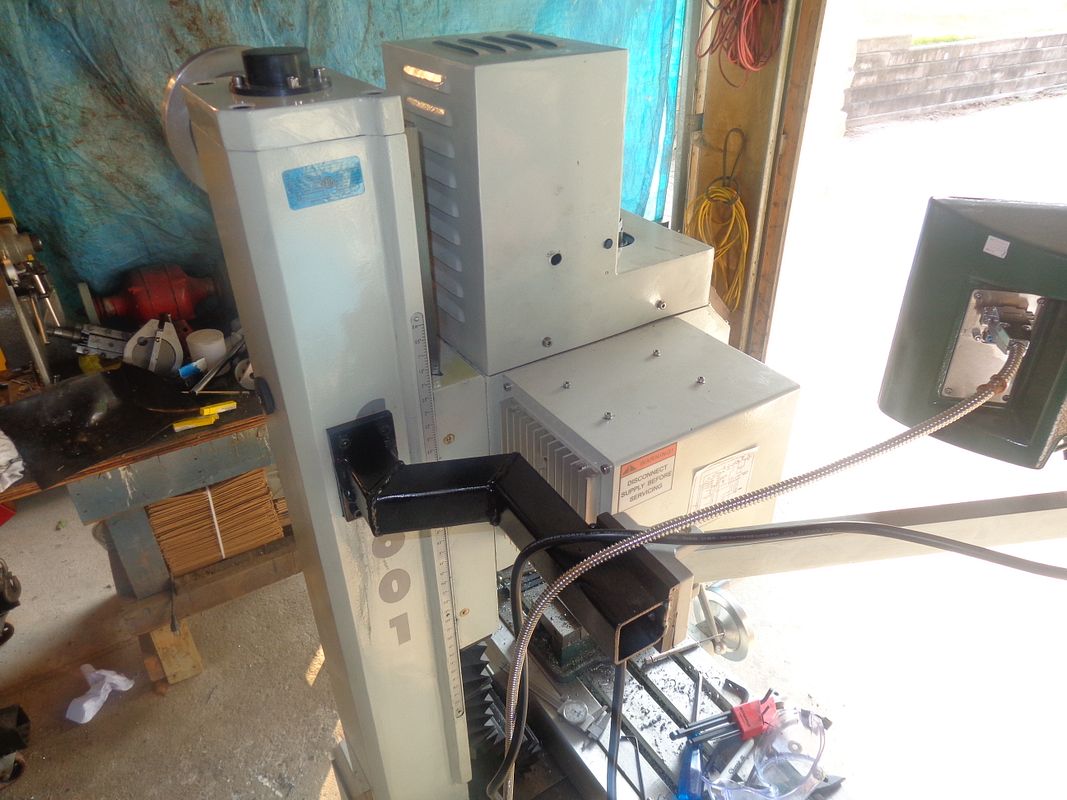
Wife and I just got home from a 240 mile round trip to visit my mother (who is 95 years old and in good health). I had to immediately go out to the garage and fit my new dogleg bracket which lowers the DRO readout by about 8 1/2" from it's previous location, and puts the center of the screen at my eye level. I had to make that dogleg bracket such a complex shape because of the fact that when the mill is in it's final location in my machine shop, the back of it will fit into a 4" recess in the wall, and the bracket had to clear the side of the recess, and also clear the head of the mill which moves up and down. Maybe tomorrow I will bolt on the Y axis scale, set it up true and level, and start thinking about where to run all the cables and wires. I can't do anything about the rubber sheet seal between the table and the column until Monday, when I can buy some sheet brass.

 
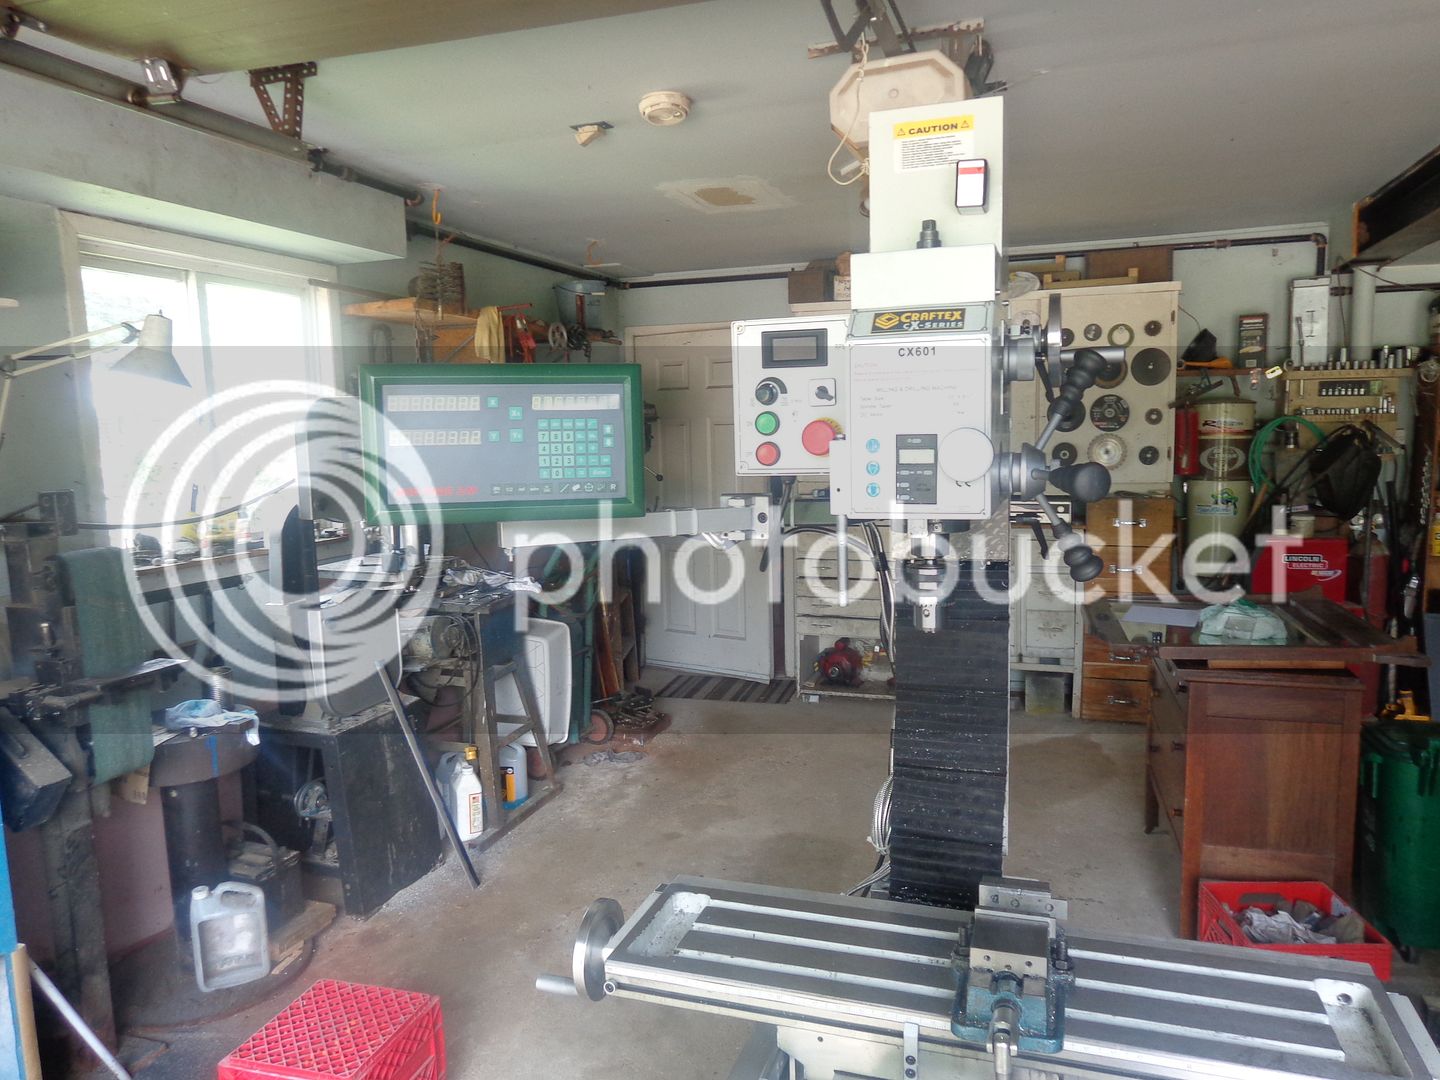
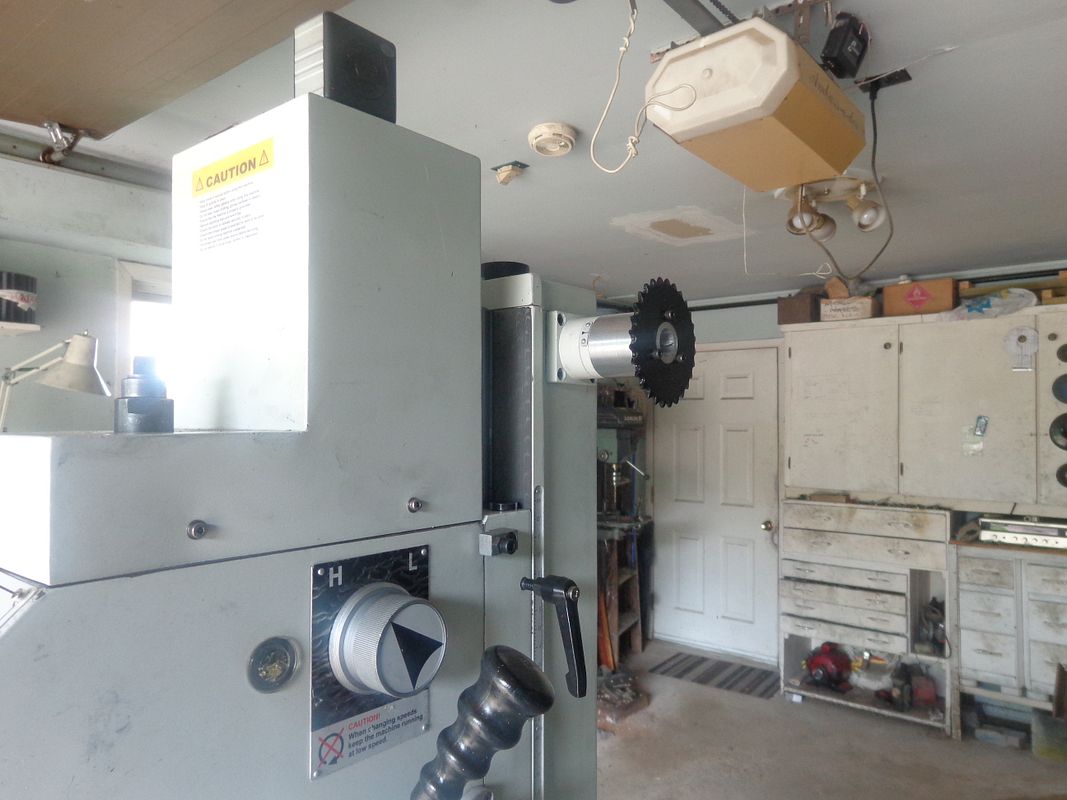
I think I can put this portion of the thread to bed now. The DRO is up and running and seems to perform very well. I still have to finish the bracket and the piece of brass shim-stock to complete the reinstallation of the big rubber guard between the saddle and the column, but that should be a relatively minor act, now that I have figured out what to do. The positioning and sorting out of wires and cables will be ongoing until I find what works best for me. My next act now will be to install the sprockets and chains to reposition the high handwheel that raises and lowers the head to a more comfortable position.
 
Looks good Brian. How will you validate what the DRO is measuring vs. what the display says its measuring over the travel? Be interested in how it compares to your dials after this exercise complete.

Mine was amazingly accurate despite a couple hundred handle turns. Not that it matters with a DRO, but made e feel pretty good about the lead screw at least.
 
Another DRO learning for me: they clearly show you how much the table can move just by tightening the table travel lock screws. Mine would go +/- 0.002". Sometimes you hit the digit target by second guessing travel direction either adding or subtracting. And that's kind of the source of the problem. The typical Asian mill uses a bolt contacting the gib strip & as it applies torque can tractor the carriage & drift it a bit as it tightens. When I examined my strip, it had some nice ugly little crescent markings down it, so also not good.

My fix was just a bit of rod milled at dovetail angle on one end & countersink for a bearing ball locktite'd the other. The original cheesy set screw & plastic knob was replaced with a better quality bolt which I ground a slight dome & made a nice knurl knob. Now it rarely drifts more than 0.0005", usually not at all if I just snug them alternately.

The only thing to be mindful of is how to remove the little contactor it when the day comes. Turns out the ball I had was stainless & the contactor made from brass so my pokey magnet thingy didn't work to retrieve it from teh hole. (uh-oh!). Turns out I just remove the gib strip, unwind the travel until the thread hole is exposed inside & juts poke it out with a bent piece of copper wire.

7-12-2015 0001.jpg
 
I could never imagine, in my wildest dreams, how great a thing it is to have a DRO set-up. My god---It takes away 50% of the time in making something on the mill. It seems really weird at first, not counting full rotations and part rotations of every table adjustment using the dials. At first it seemed kind of strange, zeroing the x or Y axis then making the table move without even giving thought to where the dial is, but it's something you get used to pretty darn fast. It is simply amazing!!!---Brian
 
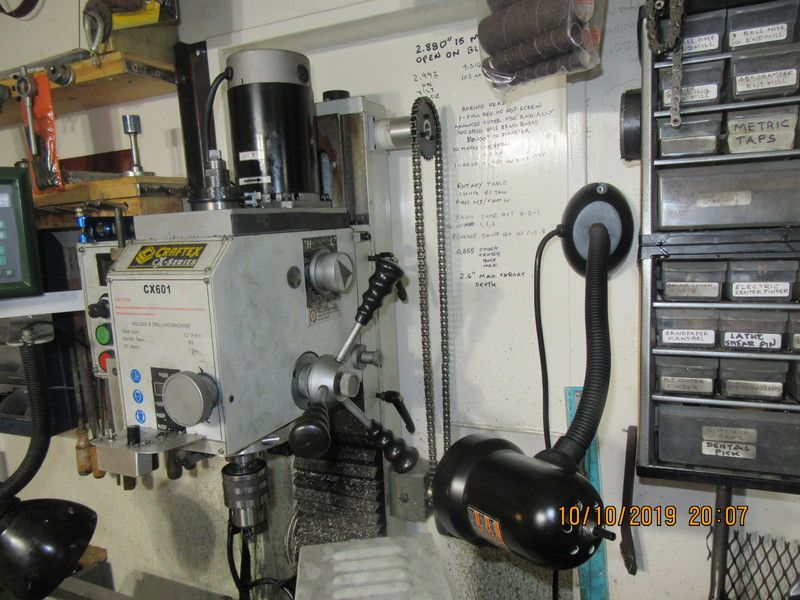
This video shows the modification I made to the handle which raises and lowers the head of my bench-top milling machine.---Brian
[ame]https://www.youtube.com/watch?v=c9tNdf5aJUA&feature=youtu.be[/ame]
 
Great job on the chain drive and the readout. All you have left now is to move the mill into position and your ready to go. I can see that you are extremely happy with the readout, they make life so much easier. Does your readout have circular hole position function on it, it make it very easy to layout evenly spaced holes around a PCD. That's about the only special function that I use on mine, apart from the mm to inch button and half size for when I pick up the centre of blocks. The numbers on the dials are now superfluous, I never look at mine. Life will now be so much easier.

Paul.
 
Swifty--My DRO has all kind of nifty capabilities that I don't know how to use right now. since my Solidworks design software will give me ordinate dimensions for bolt hole dimensions, I don't know if I will ever use that particular function on the DRO.---Brian
 
I'm down to the point of having only one thing left to do, and that is complete the bracket to hold the big rubber sheet between the saddle and the column, yet still let the table move back and forth in the X axis. I purchased a sheet of .015" brass shim stock to make the "sliding seal" portion that rides against the back of the X axis guard angle, as shown in an earlier post. I hope to do that tomorrow morning. My original plan was to fit everything, then disassemble it all to move it into my machine shop. I am now rethinking that, and may move everything just as it is on my heavy duty machinery moving cart. I may hire two great big healthy fellows to help me---not so much to help me move the thing, as to steady it while I pull the cart. It has to go through the doorway from my garage into the office, then through a second door from my office into my machine shop. Clearance is not an issue, and both transoms are very low. I don't want to end up like the poor fellow on one of the forums who upset his brand new lathe and crushed his foot in the bargain.
 
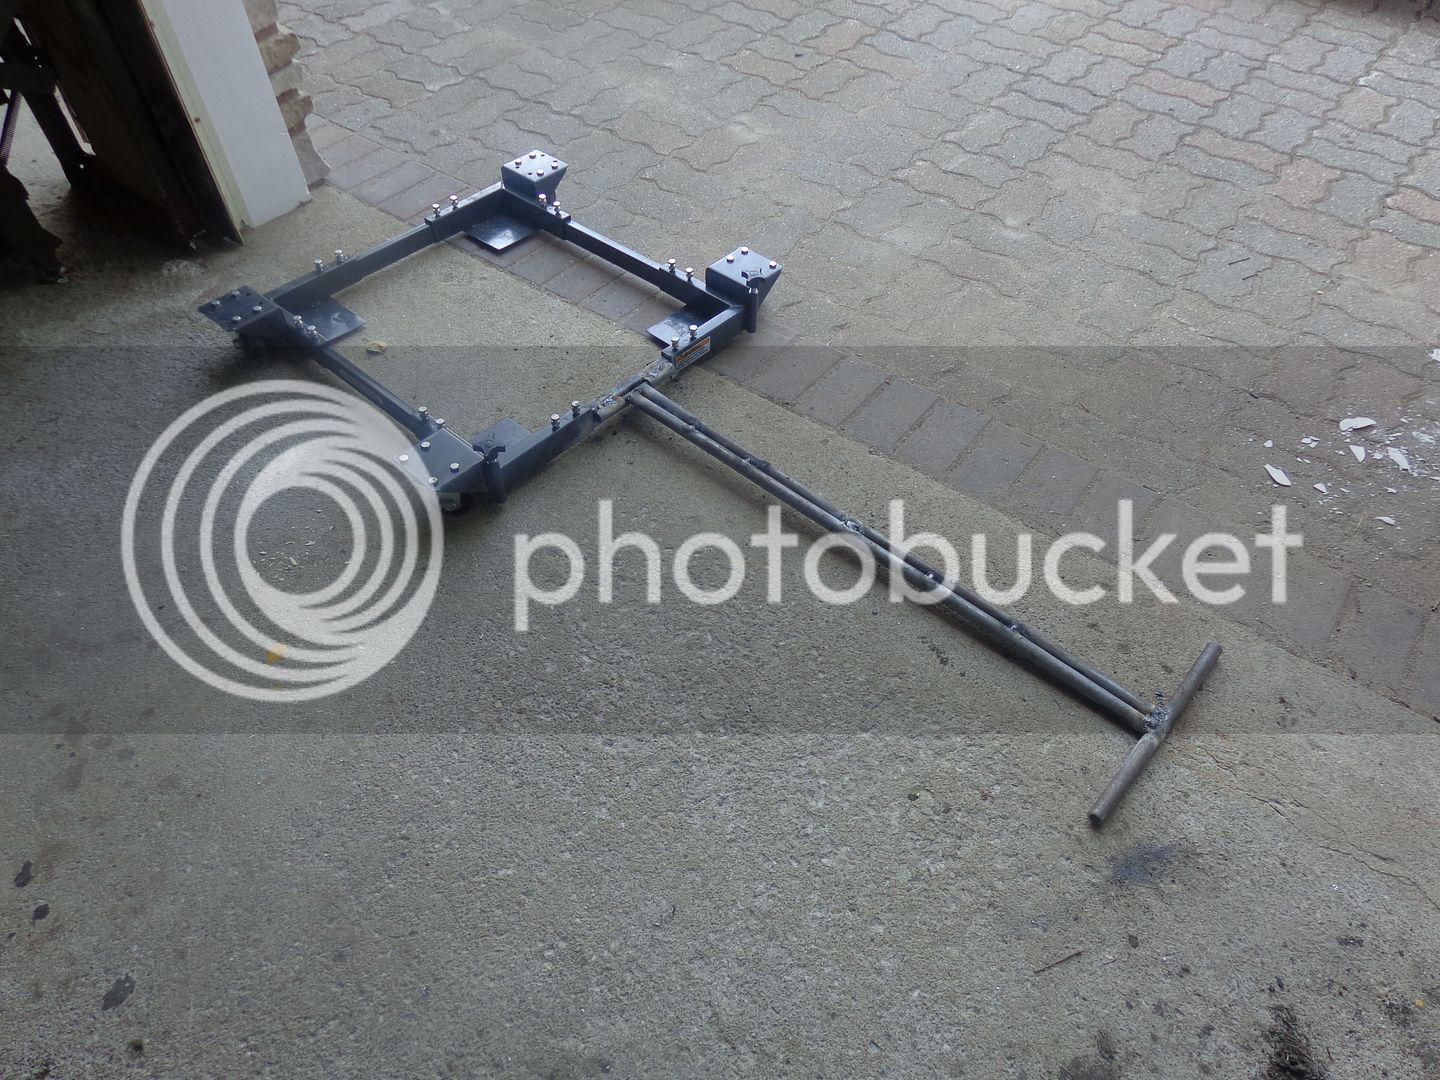
I'm finished!!! The big rubber seal is back in place between the saddle and the column, and the piece of .015" brass seals tightly against the edge of the table but still lets it go back and forth. I have modified the "machinery cart" by welding up a handle to pull it with.--I found that while it has no problem supporting the machinery, it is almost impossible to steer the damn thing with a load on it, even with two steerable casters and two fixed casters. This way, the pivotting handle will let me steer and pull, while a couple of strong fellows can steady the machine. I have checked and the cart does fit through all my doorways. (barely). The machine will be bolted to the cart for the duration of the move.

 
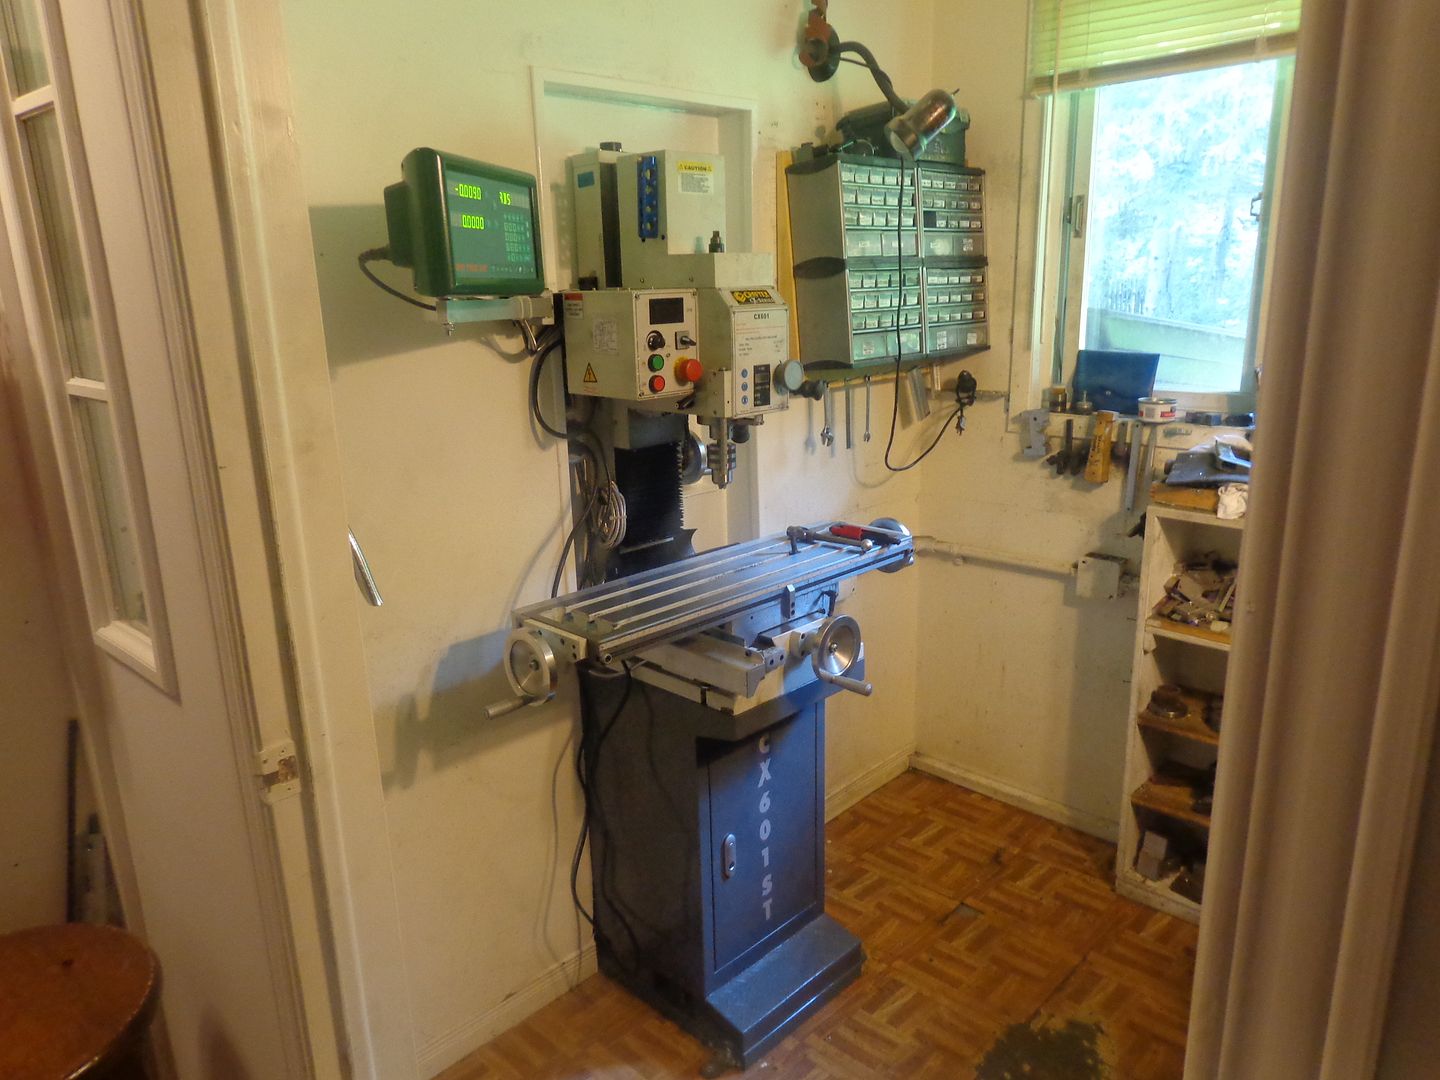
And so, my friends, with the grace of God, the help of a neighbour, and lots of "huffery and puffery", the mill made it's way from my garage, through my office, and into my machine shop this morning. Nothing was dropped or broken, no fingers were crushed, and best of all, it fits into the hole in the wall I had prepared for it. Obviously, there will be some serious rearranging of the shop vac, belt sander, and chest of tooling drawers that were in there with the old smaller mill, but I will make that up as I go along. Thanks to everyone who has followed this long winded thread, and if anyone learned something on my journey, then that is the greatest reward of all. This thread is now ended.---Brian
 
Today I have to add a new chapter to this story. This mill has a high speed/lo speed selector knob, which gives the same effect as putting a lathe into "back gear". About a month ago, during heavy drilling with a 1" diameter drill, in "lo speed" the selector knob jumped out of gear. I said "Oh Dear" or something to that effect and clicked the selector back into "lo-speed". That fixed things for a little while, but the mill kept doing that repeatedly on any heavy drilling jobs I had from that point on. Yesterday, during a heavy drilling job, the lathe went "crunch" and I totally lost the "lo speed" function. I'm sure I have stripped the teeth off a gear in the head of the machine. I called Busy-Bee head office in Toronto this morning, and they do stock spare parts for this mill, which was purchased in 2015. Sometime this week I will pull the top off the mill, and try to find what I need to replace. If I find that it is too complex to fix in my shop, the entire head of the mill can be stripped from the column by removing two bolts, and I can take it down to Busy Bee for repair. The high speed function still works correctly, but I need that "lo-speed" function more than you would think. I really like this mill, and it has given me excellent service since I bought it.---Brian
 
Brian your new machine looks great. But you still have one thing to do. This alteration is just as impressive as adding the DROs. Replace the X & Y lead screws and nuts with ACME zero backlash setup. I did this with my SX3 bench-top mill and it was world changing. My conversion is now several years old and still working great, zero maintenance and no lubrication needed.

https://www.homemodelenginemachinist.com/threads/new-lead-screws-and-nuts-for-sx3-mill.24448/

Mark T
 
This is a picture of my mill with the top cover removed. Don't let the sprocket and chain fool you--that is a modification I made so I wouldn't have to reach up so high to raise/lower the head. (I have a torn rotator cuff in my right shoulder that can't be repaired). Unfortunately I don't have access to the back of the mill, so I will have to remove the motor and the motor-mount plate and go in through the top.---Brian
9Cbl93.jpg
 

Latest posts

Back
Top