Building the Trevithick engine

Home Model Engine Machinist Forum

Help Support Home Model Engine Machinist Forum:

This site may earn a commission from merchant affiliate links, including eBay, Amazon, and others.
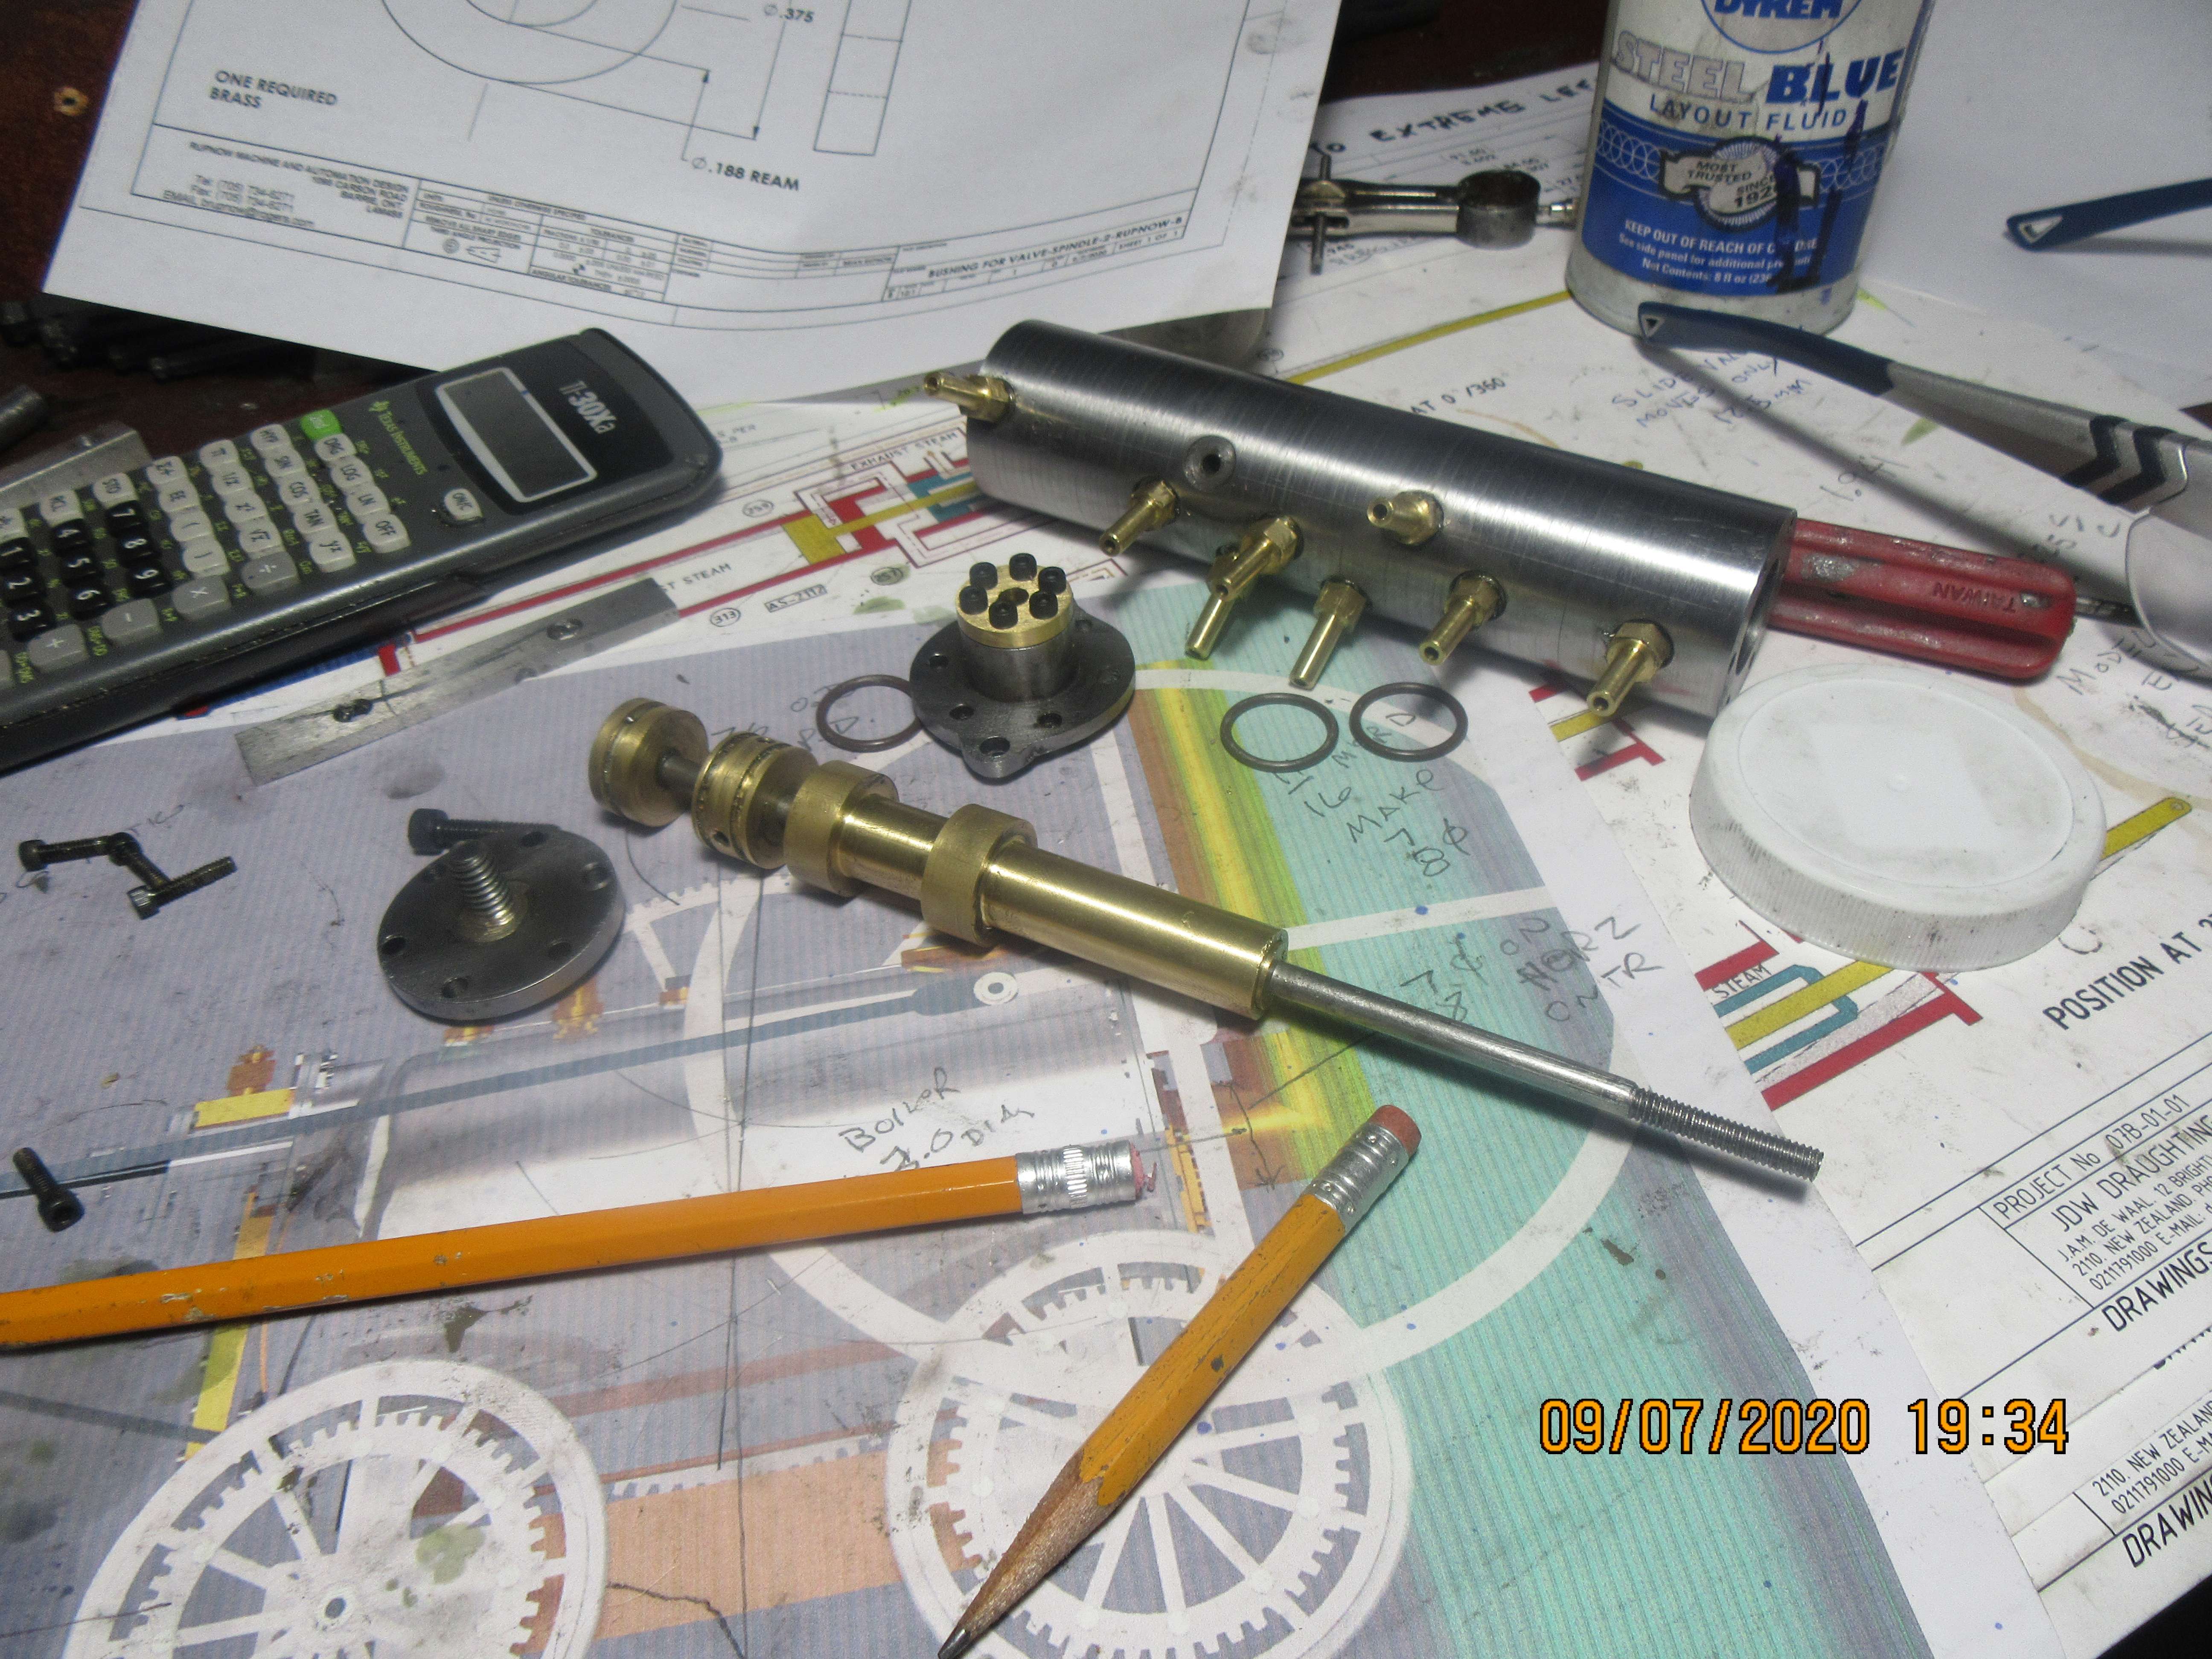
The self reversing cylinder as designed by Julius is almost ready for final assembly. I have all the parts finished, but I have to buy a very small center drill tomorrow to use for starting a 1 mm diameter drilled hole thru a collar which sets out of site inside the spool. I honestly don't know what to expect here. If it works, I will be greatly impressed. If it doesn't, I will go ahead with a design using a rotary valve as used on the original Trevithick engine.
g1SIRb.jpg
 
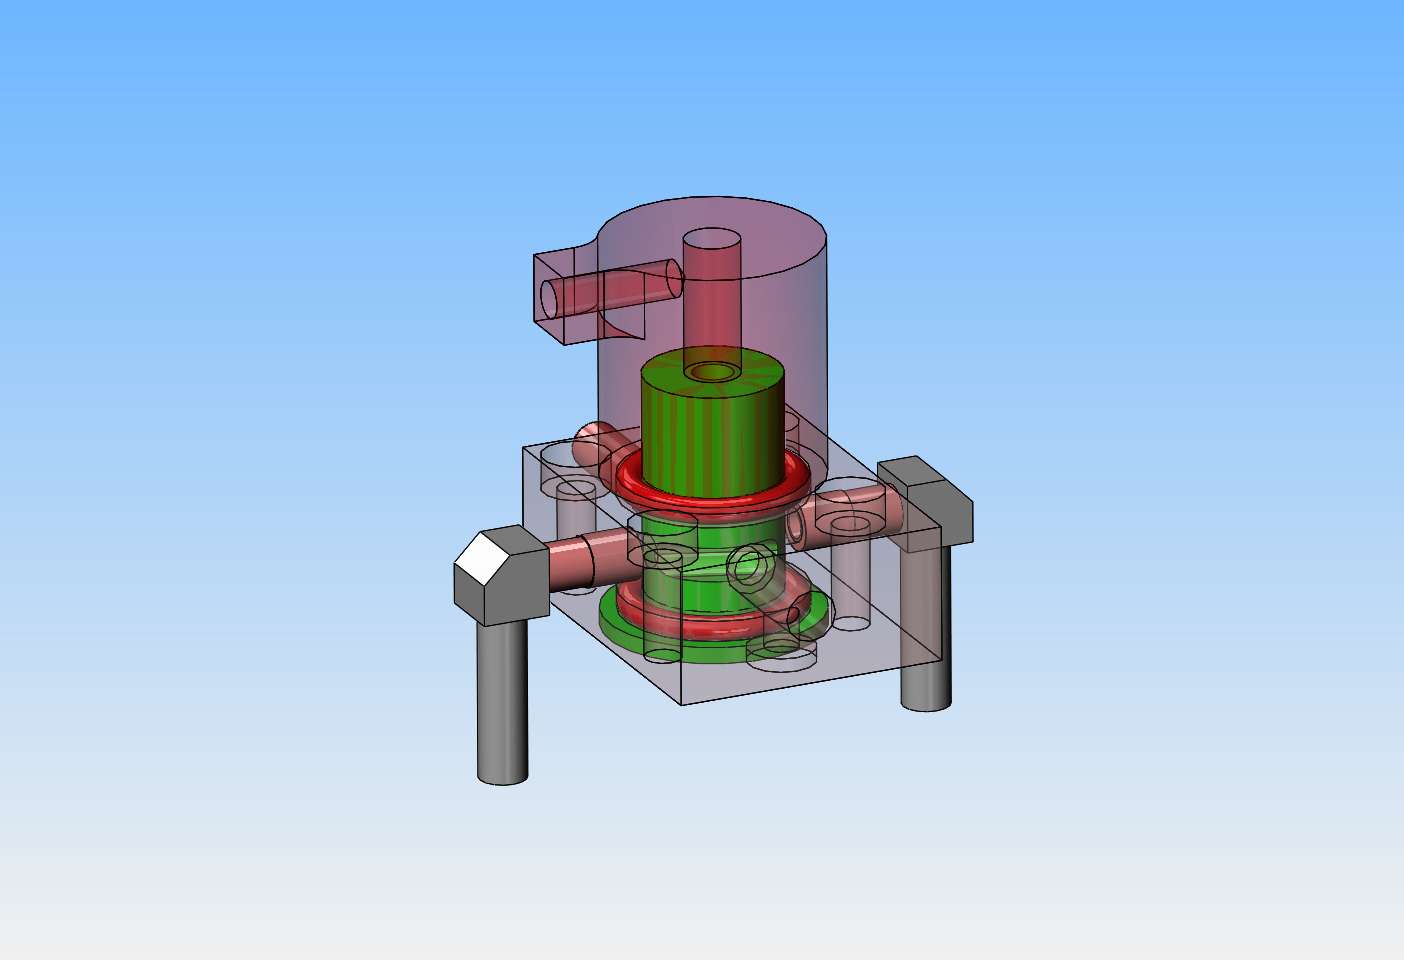
I had to do it. I've been thinking of a 4 way valve for the last week, so this morning I had to spend a bit of quiet time and model one. I'm not even sure of what I will do with it yet, but at least my head is clearer now that I have a model that I can understand.
IYIhsK.jpg
 
Unfortunately, I couldn't get the cylinder with the spool valve to work. I have tried all of the tricks that I know, and it just isn't happening for me. There is a small diameter cross pin (1 mm) thru the center shaft and a collar that is pinned to the shaft, and they are both hidden inside the spool when assembled. When trying this out with 20 psi of air pressure, the 1 mm diameter pin immediately sheared off. The pin was made of 1 mm diameter unheat-treated drill rod, so it was certainly the strongest steel that I had. I am going to go ahead and re-use the piston, piston rod, and front and rear cylinder caps and guide bushing. I will make up a new cylinder which is operated by a 4-way rotary valve, same as the original Trevithick engine.
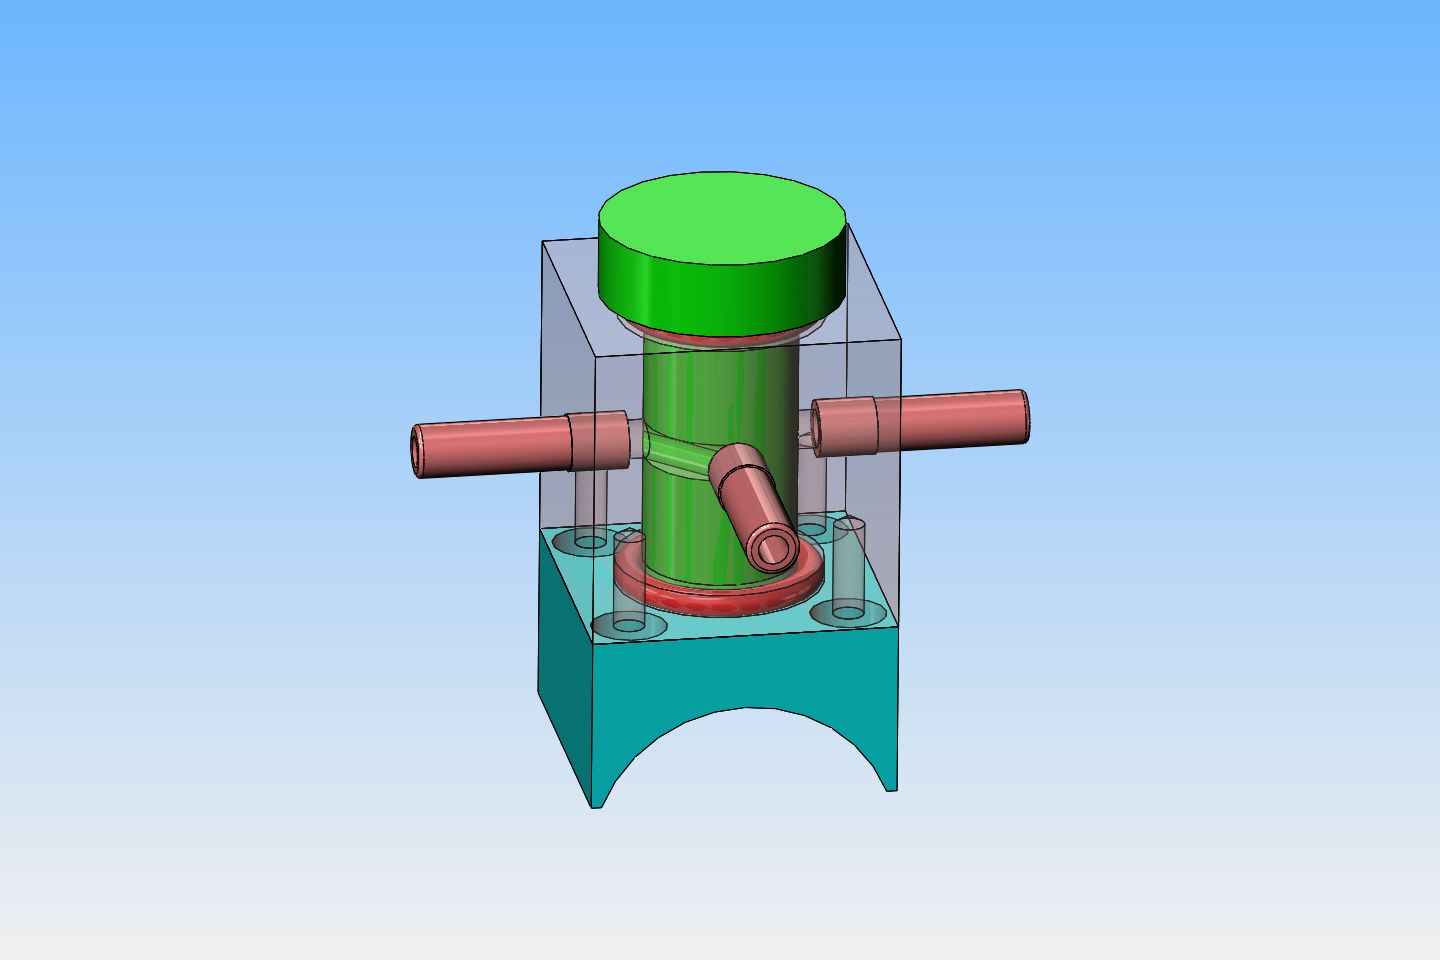
 
Brian, the parallel 4-way valve you have drawn would need to have a very good fit to prevent leakage. Traditionally this type of cock is tapered and the parts are lapped together. Alternatively, you could use a flat face valve. You have already done this fairly recently when you made a reversing valve.
 
So, after a rather questionable beginning, we start again. This time it will be with a 4 way valve which I design, and a rather plain Jane cylinder. I changed the shape of the boiler, because the convex end adds a level of complexity that I don't need to deal with. This entire project is going to depend on my ability to design and build a 4 way valve, so that is where I will begin.
56F7Q0.jpg
 
As Charles Lamont suggested a tapered version of your 3D will offer improved sealing (I said as much in an earlier post) Mine was 8mm drill rod running in a reamed hole and it works fine.
Does it leak - yes a little but only noticeable in the stopped position otherwise its just lost to the exhaust when running and therefore isn't really noticeable and mine doesn't even have "O" rings at the ends - like yours.
Regards - Ken.
 
Tomorrow I will start building a 4 way valve. The main body will be mild steel, while the green center spindle is machined from cast iron and will be lapped into the steel housing for a very close fit. First, before I machine anything, I have to go across town to Hercules O-Ring and buy the o-rings I need to seal things up. (They are shown in red in the assembly model.) There is no heat involved here, so they will be Buna-N material. My design is very much dependent on the actual size and cross section of the o-rings. When the transparent red cap is attached to the green spindle with a #10 shcs., the rubber o-rings will be partially compressed.
UI3ME3.jpg
 
Brian, I controlled the end "leakage" without "O" rings by shaving the spool until end float clearance was eliminated.
Throtle.jpg

The above is the afterthought throttle and reversing gear I stuck on top of my V4 wobbler.
v4wobble.jpg

This was only Ø6 ground silver steel running in a reamed hole worked just fine.

Also my earlier comments on a non-self locking taper - not strictly true - I have an MT3 turning quite happily as a rotating axle where it is held in place by a thrust face, thus preventing it from moving in to "lock".

Not trying to teach you to suck eggs - you've probably forgotten more than I'll know - just thought you'd appreciate any input here.

Since your valve is going to rock back and forth at speed, I would be concerned for "O" ring wear - "O" rings just hate that kind of motion as they cannot self lubricate - doing just the opposite and wear out rapidly. So for your application I would try for metal to metal.

Regards, Ken
 

Attachments

  • THROTLE.pdf
    82.9 KB
Last edited:
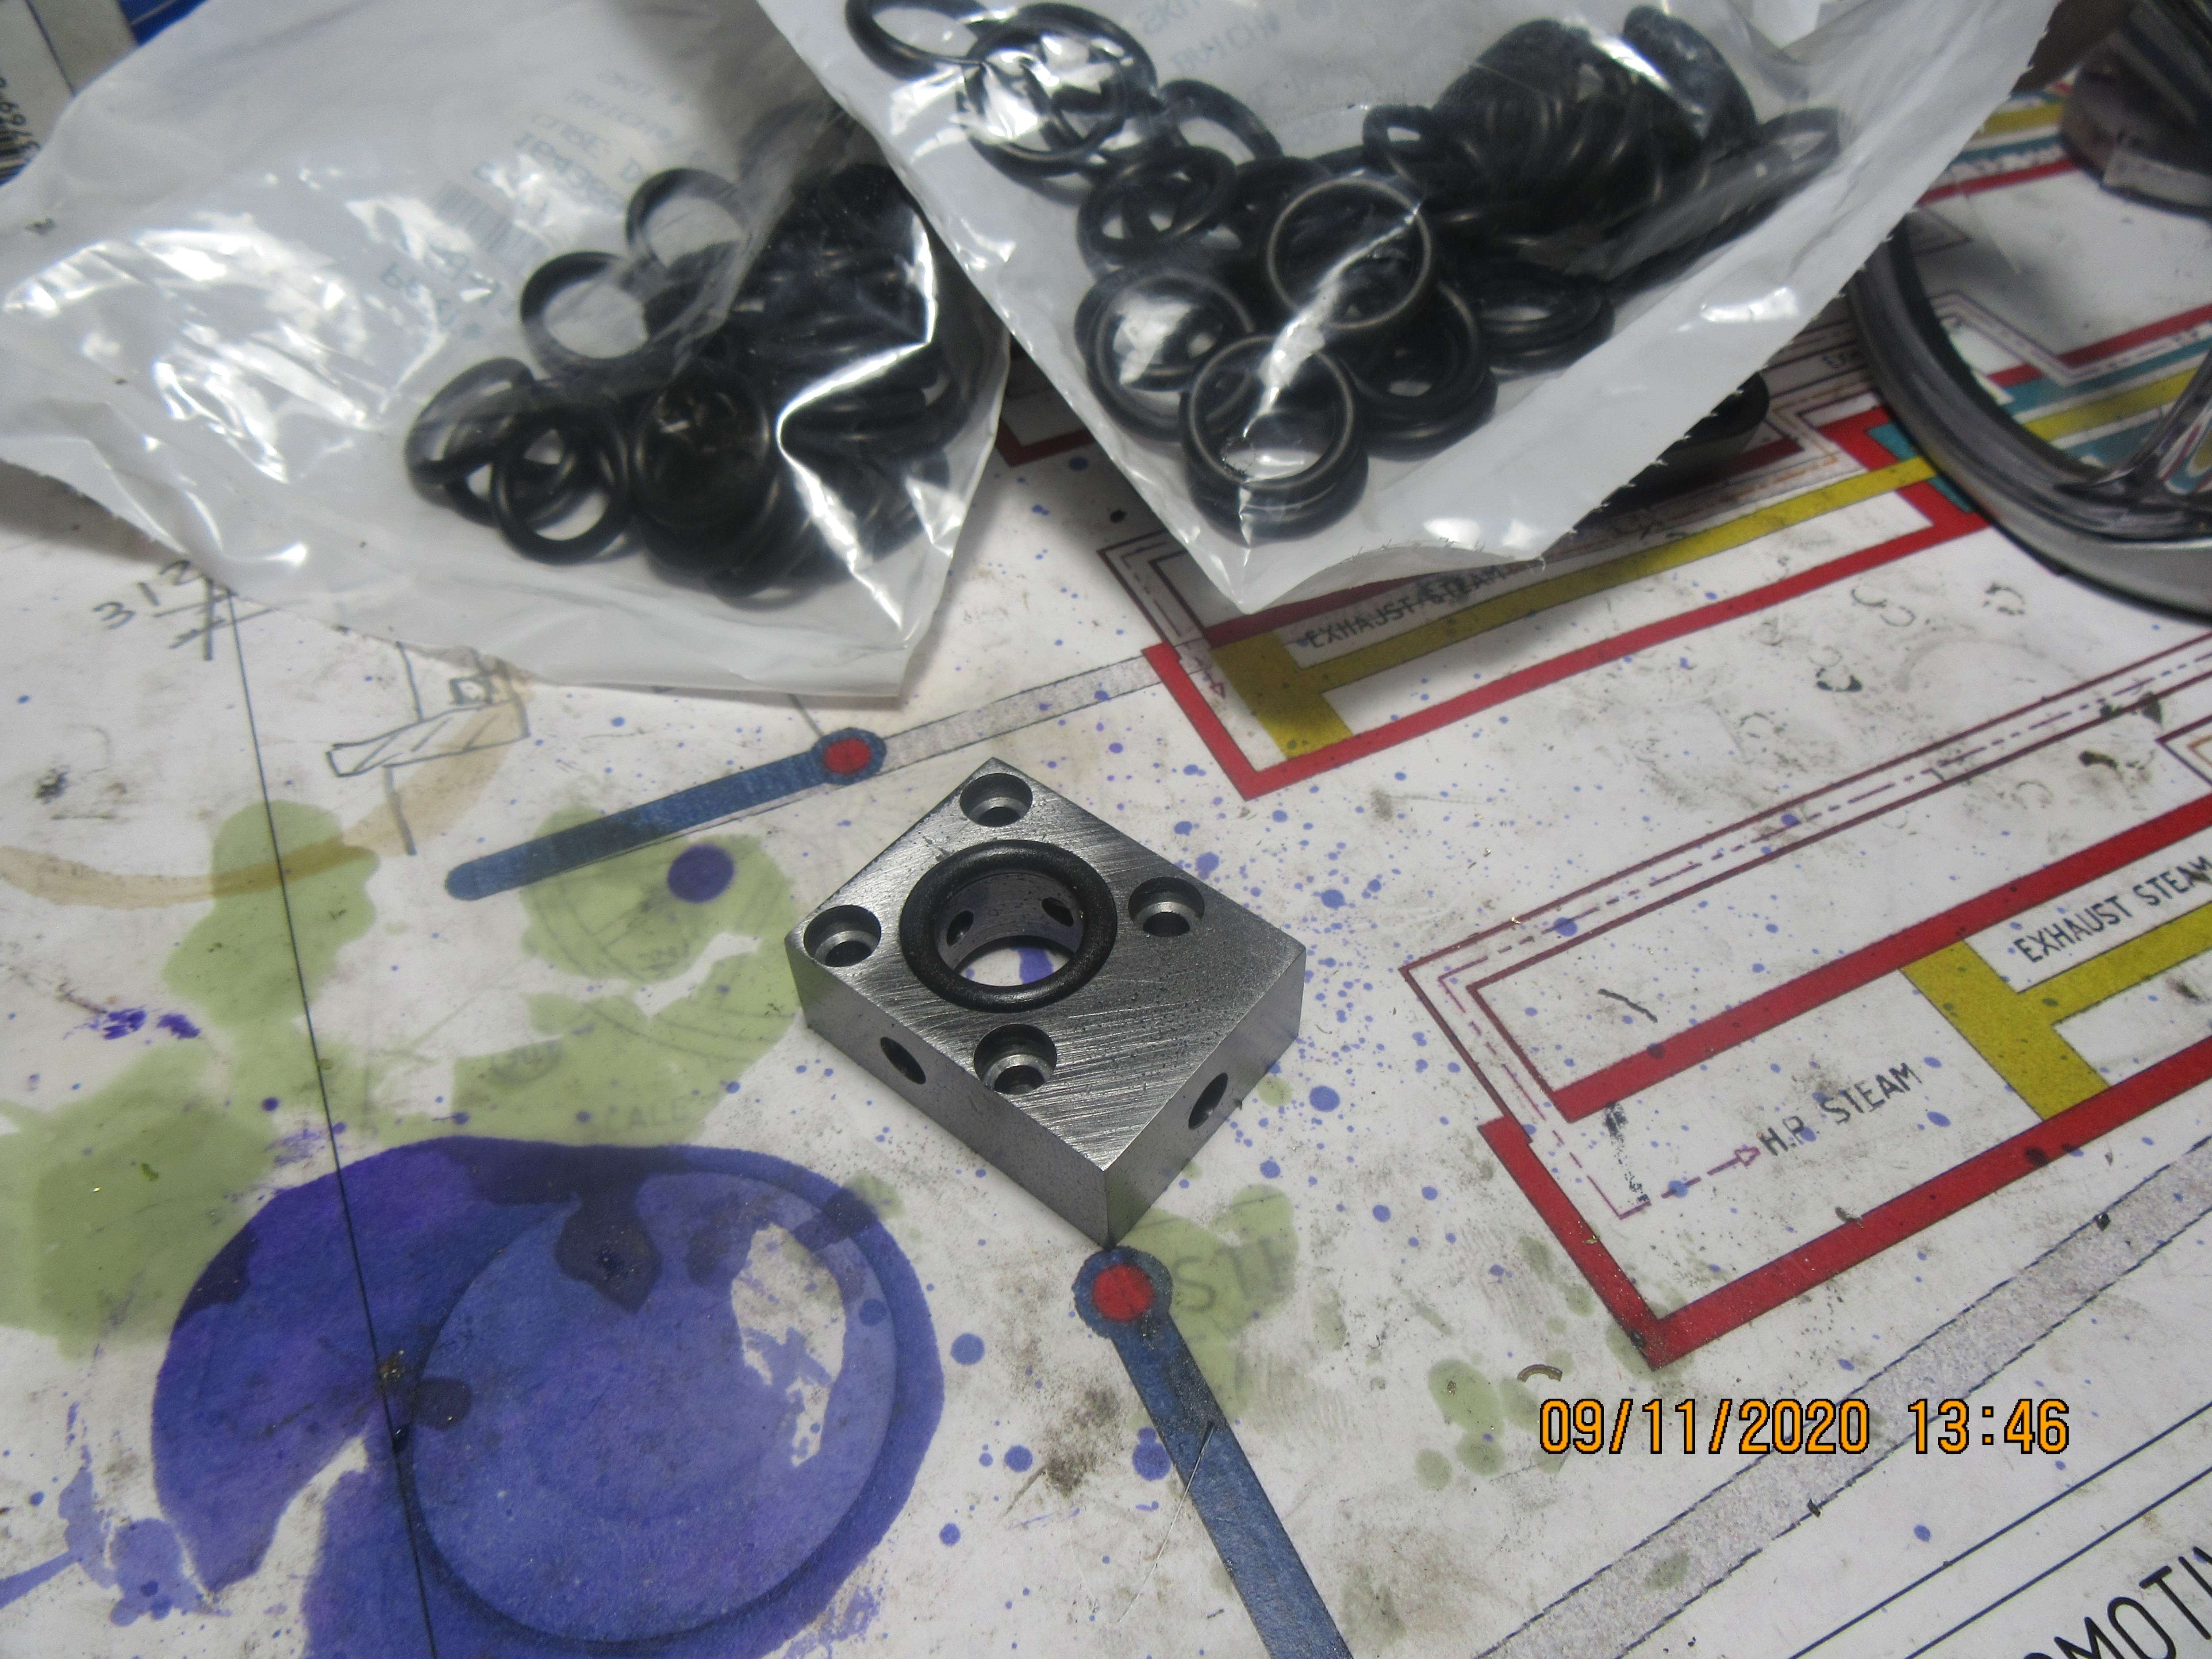
Well, that was pretty painless. The only catch was that the o-rings are 9 cents each, but the minimum sale is $15.00---As a result of this I have enough of that size of o-ring to last for the rest of my natural life!!!
dq7ofl.jpg
 
Hi Brian, If you made the valve a running fit in the bore then a one or two thou end clearance would not let but a minimal amount of air escape without any o rings. If it is not leaking at the ports then it most likely can't leak at the ends. My opinion Brian. a smear of moly grease on the valve would take up a thou or two clearance mine thinkit.
 
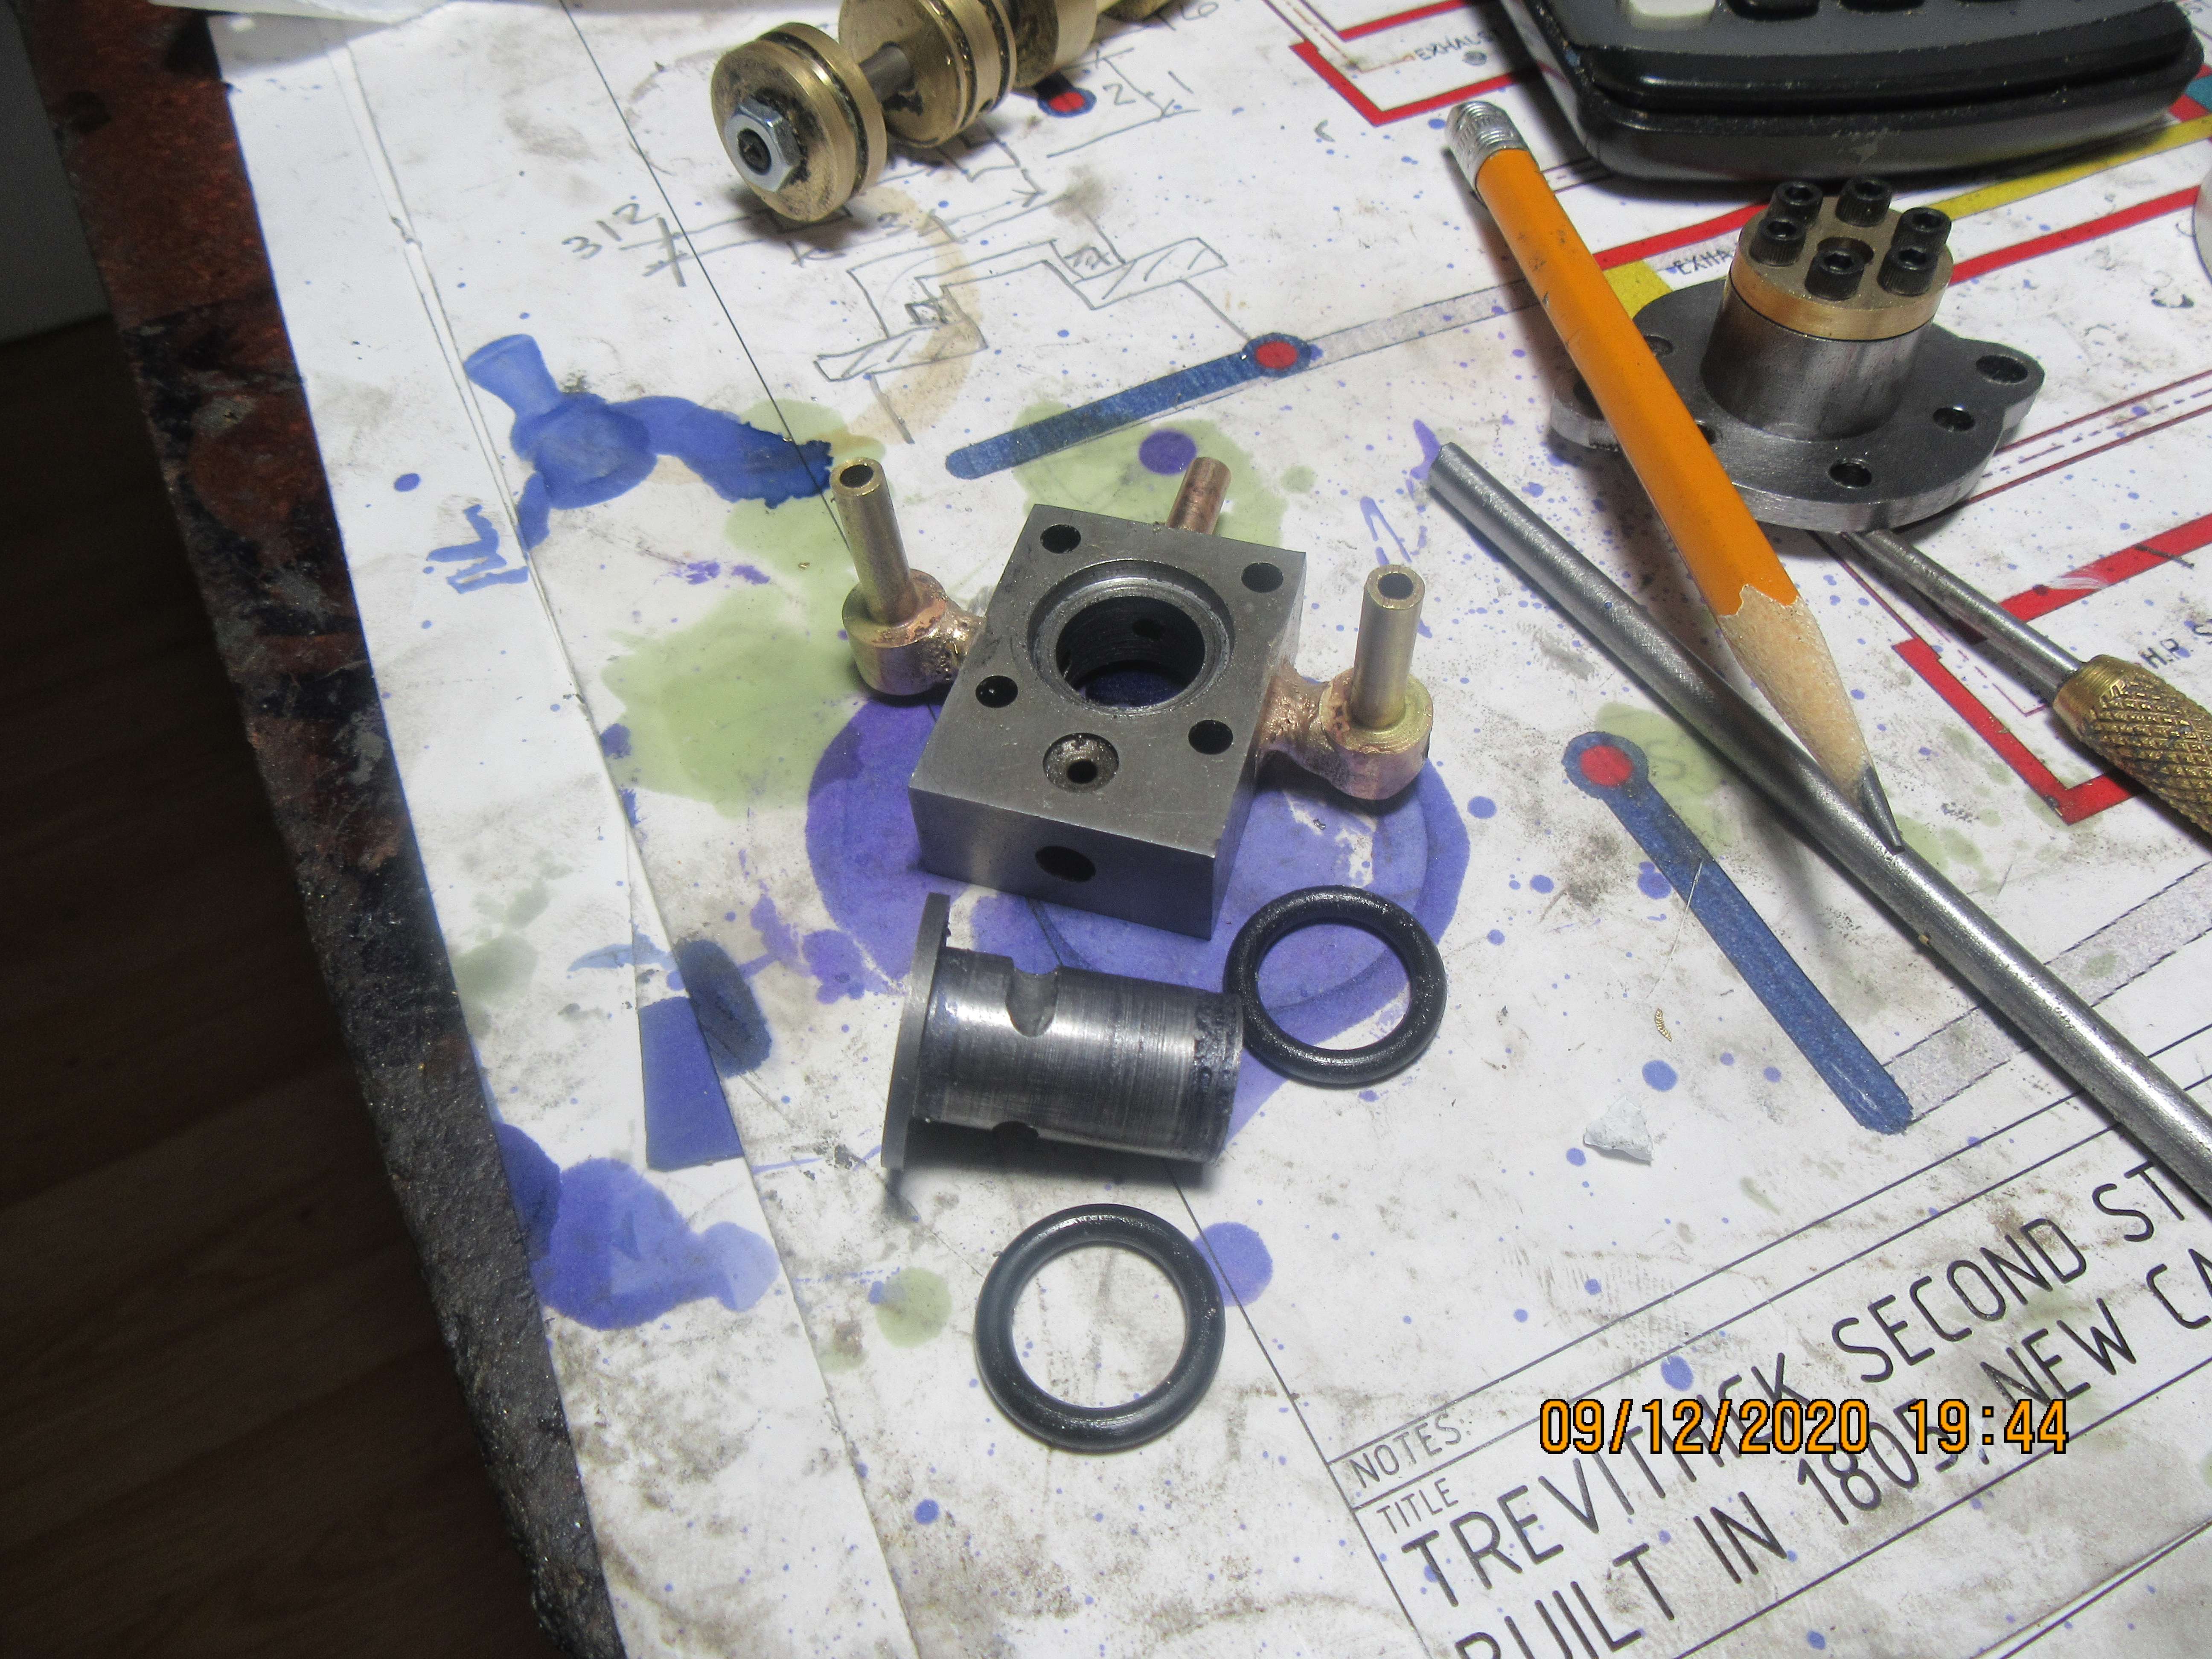
I think this is going to work. So far, I have only tested it with the "Blow your guts out" method, and when the spindle is turned so that the slots don't align with the port you are blowing in, you can't blow.--When they are aligned, you can. I know, that's a pretty cheesy way to test something, but it's cheap and quick. I still have to make the cap which attaches to the end of the spindle which doesn't have a flange, and compresses the o-rings. I will make that last part tomorrow, and hopefully the valve will function the way I want it to. I am attaching a video link about Trevithick's engine, and about 13 minutes in you can see an animation of the same valve as built by Trevithick over 200 years ago.
wOBzVC.jpg

 
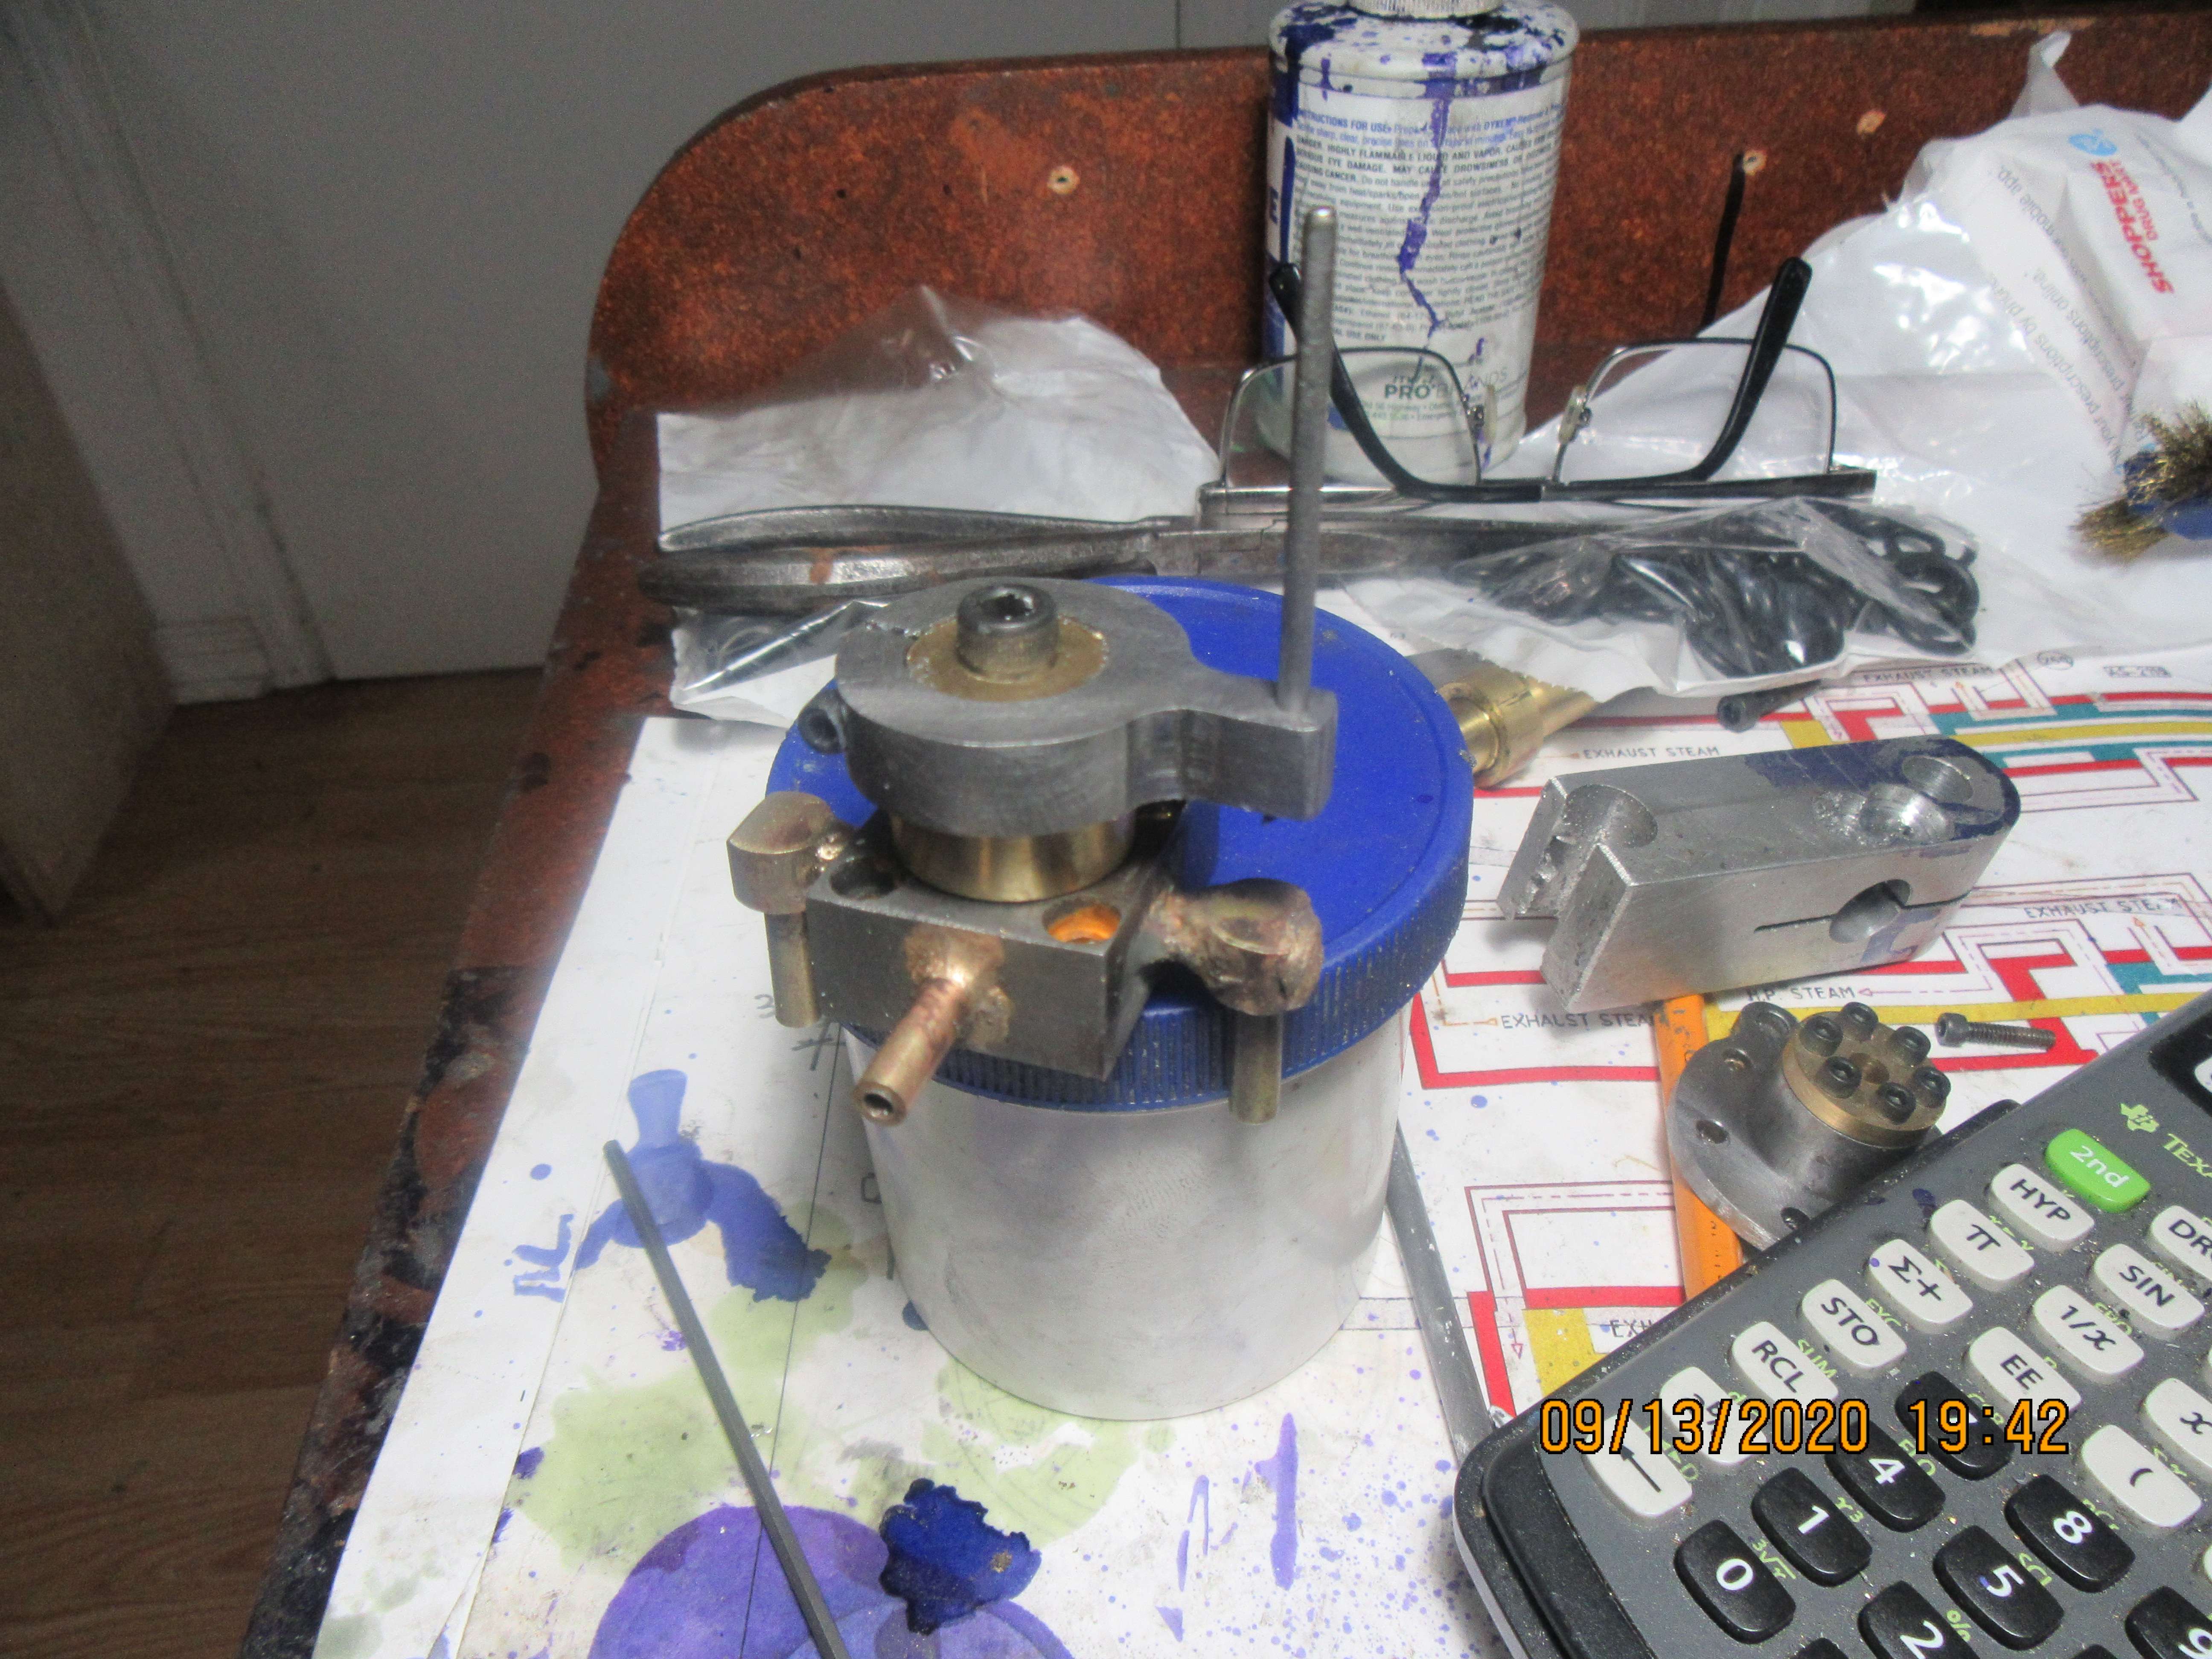
The 4 way valve is finished. Not the handsomest piece I've ever crafted, but only the round metal top part with the 3/32" rod will show above the boiler housing. As the piston travels in and out, a mechanism on the cross head will move that rod thru a 90 degree arc, thus reversing the flow of compressed air to the cylinder. It is assembled dry right now for trial "fit-up", but will be greased with white lithium based grease to make it easier to rotate the center spindle for operating. I have to figure out some way of testing it tomorrow. Might have to "borrow" a cylinder off something else to test the valve and see if it does what I want.
QHrF2V.jpg
 
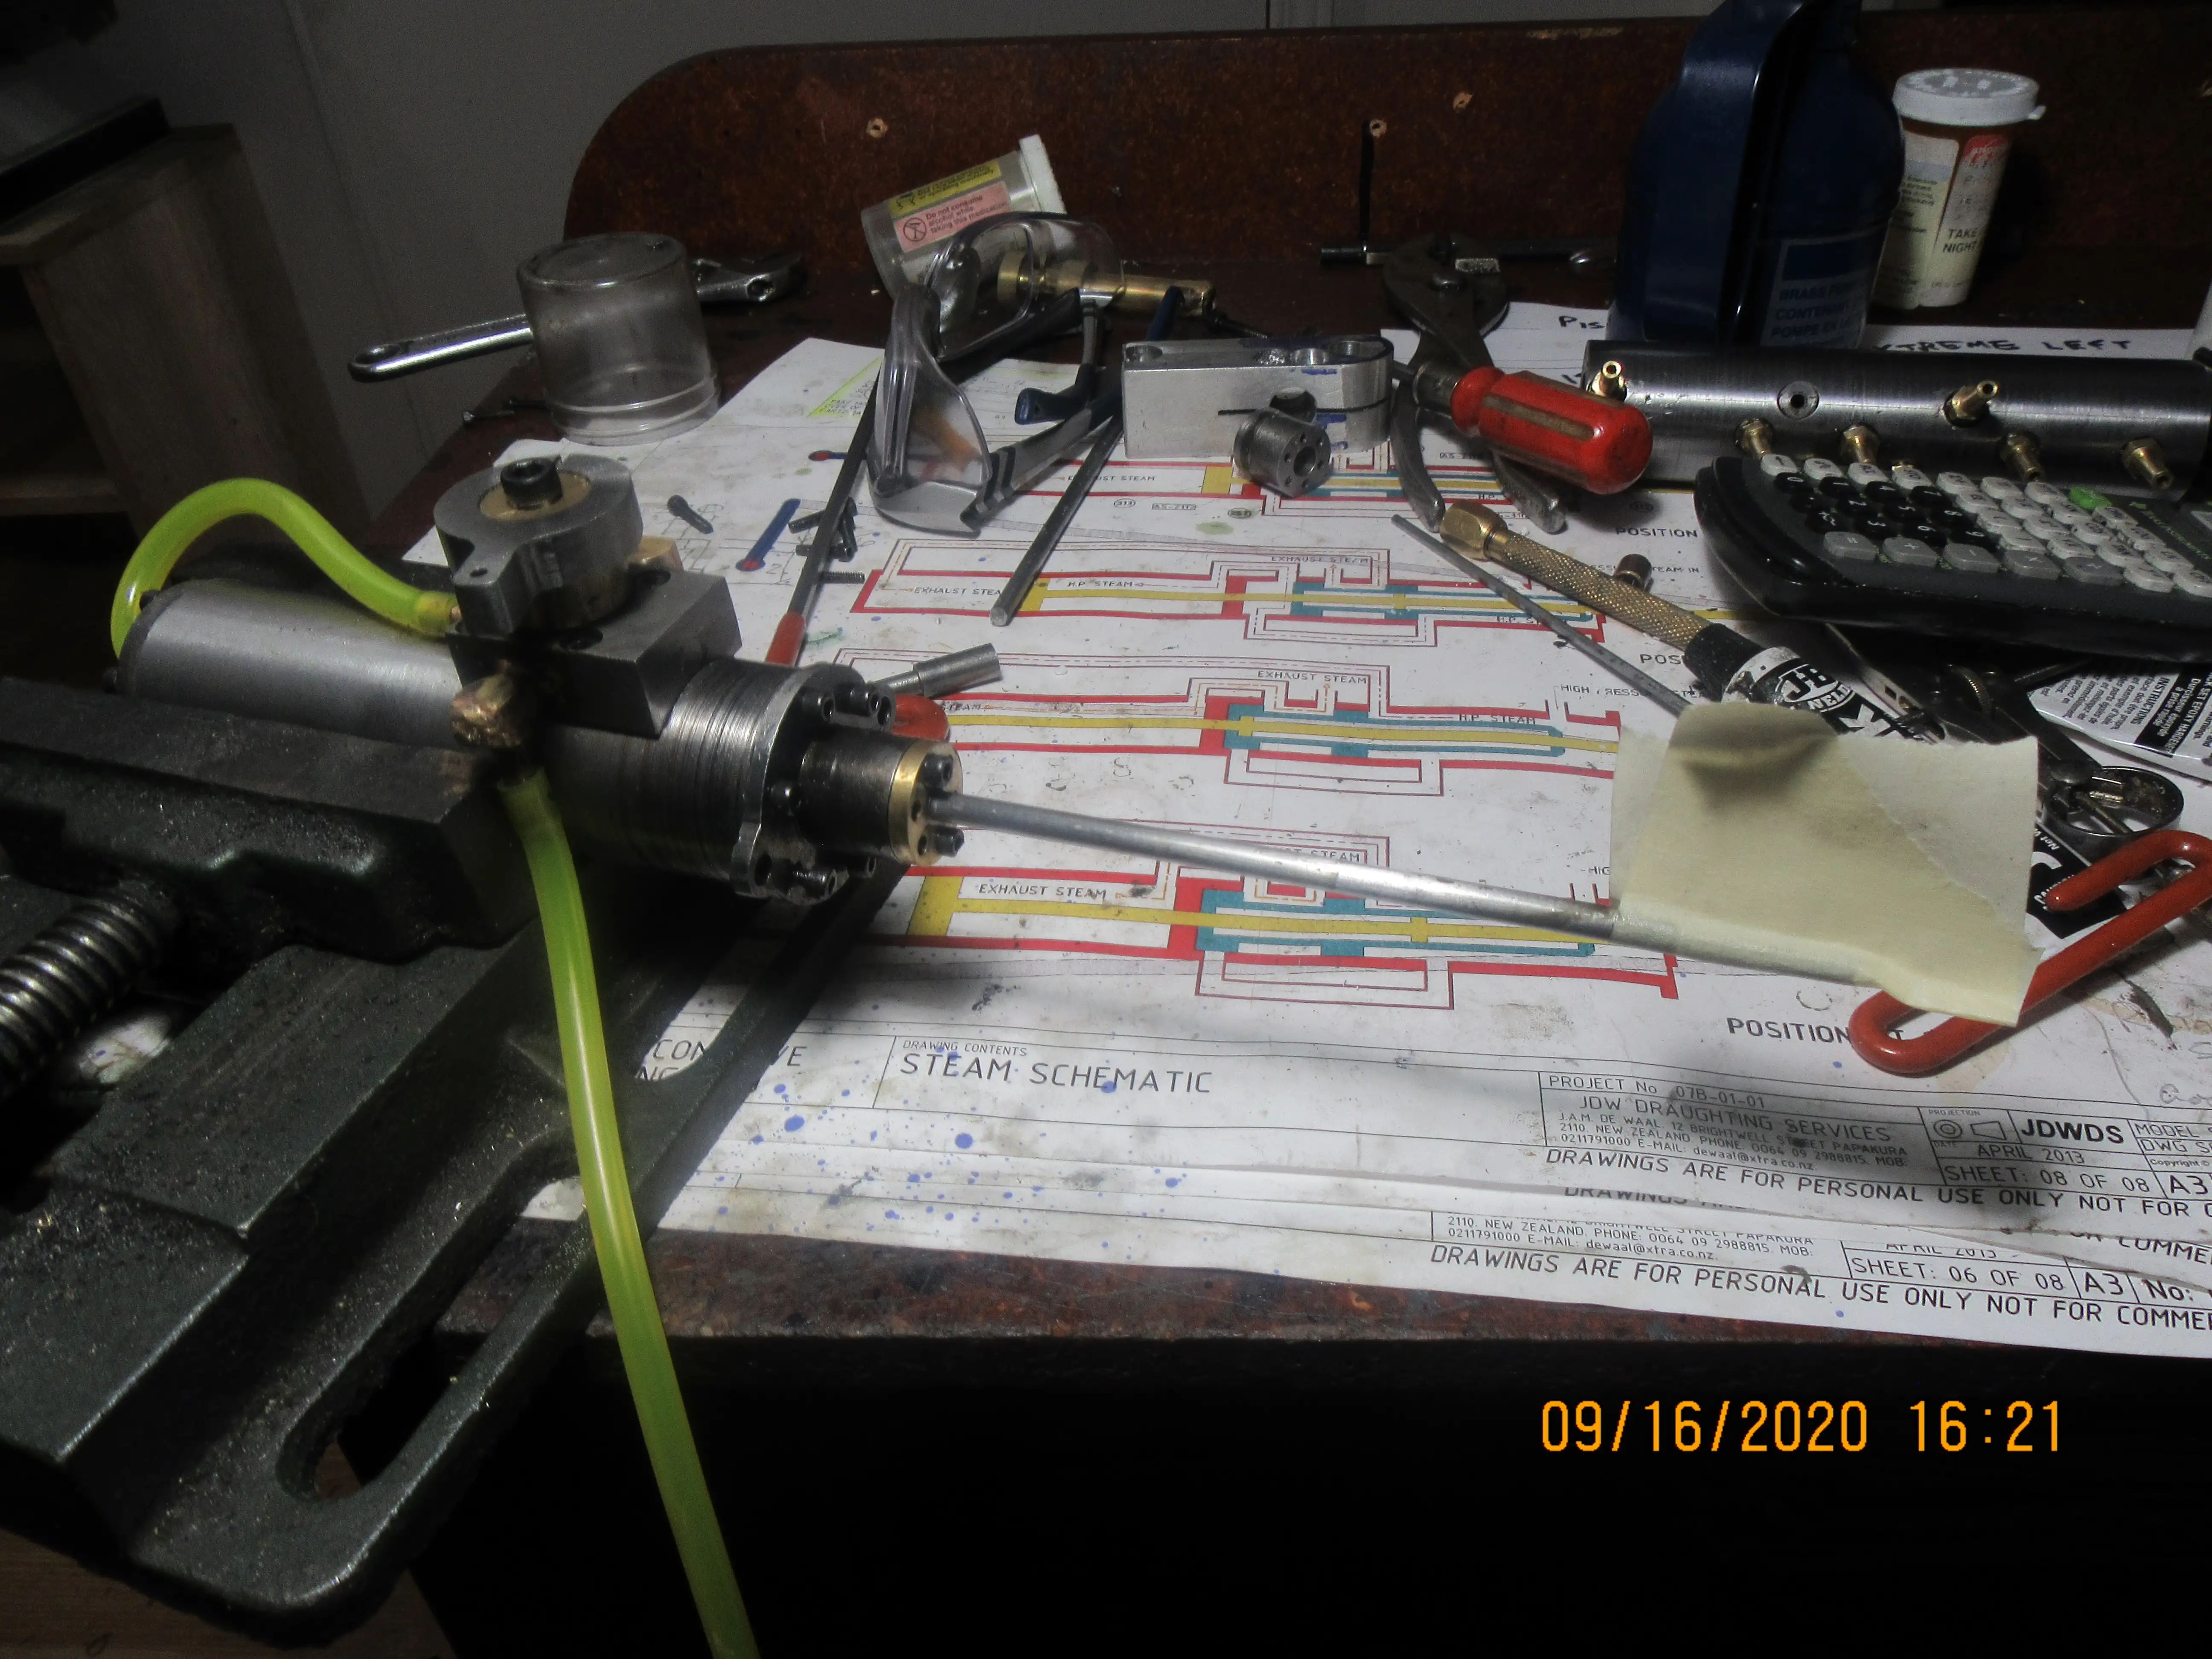
Today was very successful. I recreated Trevithick's rotary valve, and mounted it on a cylinder which it operates quite nicely. I didn't want to go ahead with any of the other parts of the model until I knew that I could make this work. i'm very pleased with the way this worked out.
mkcU3M.jpg

 
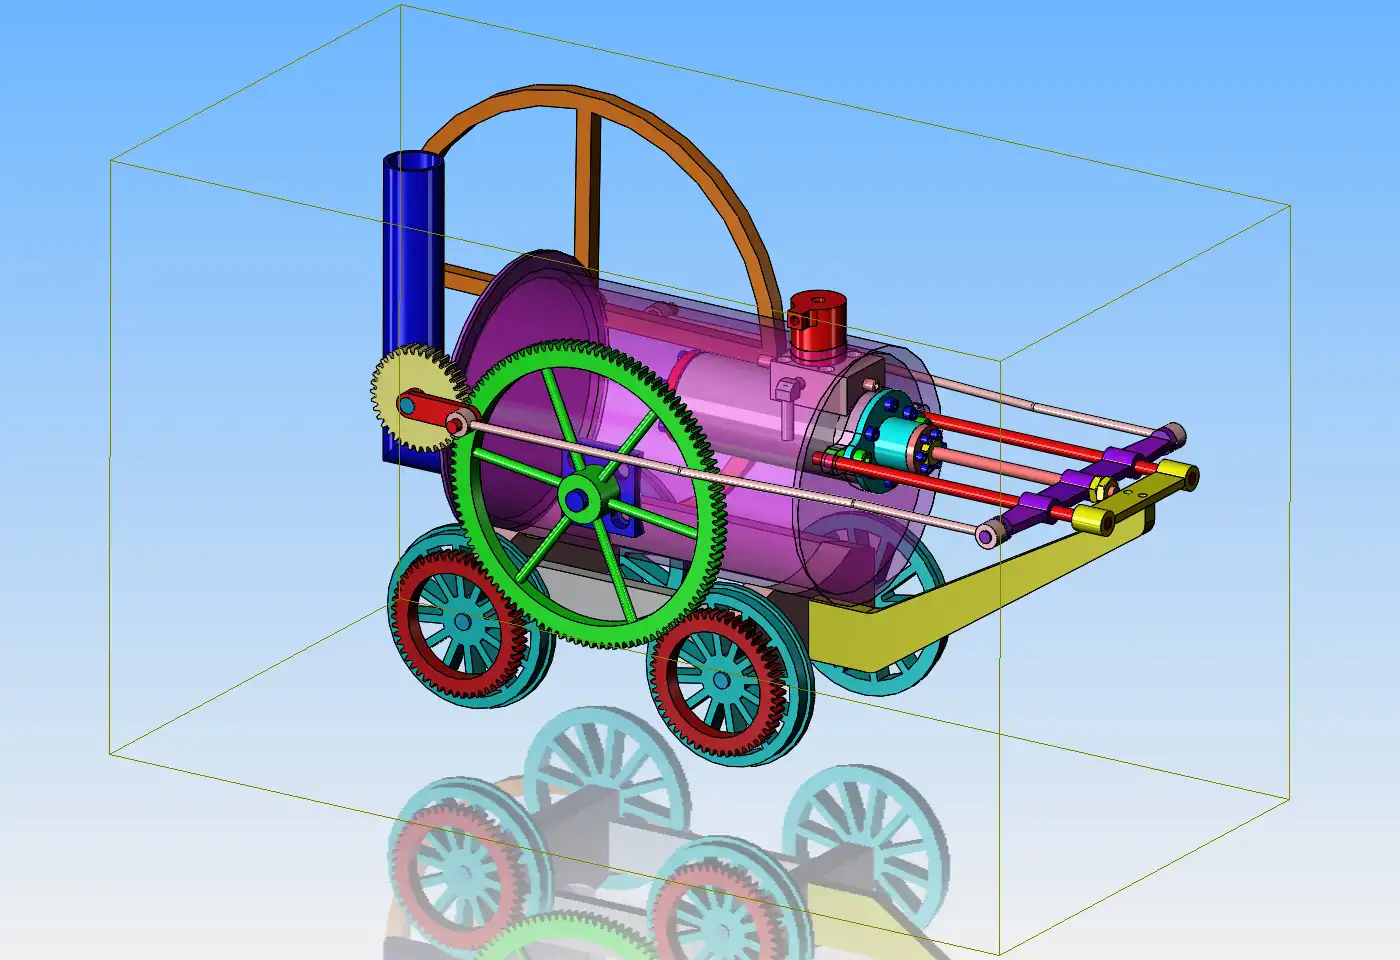
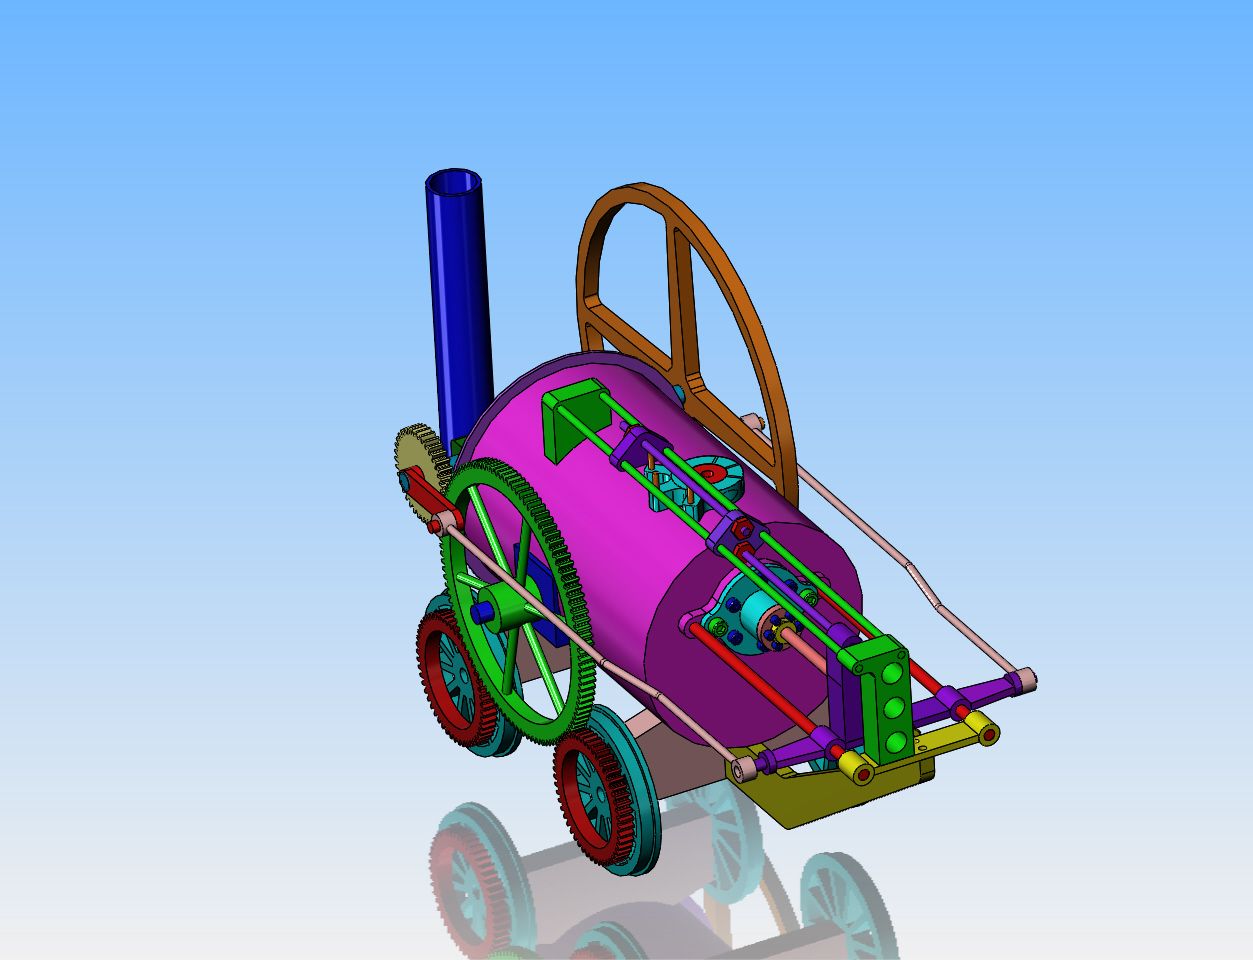
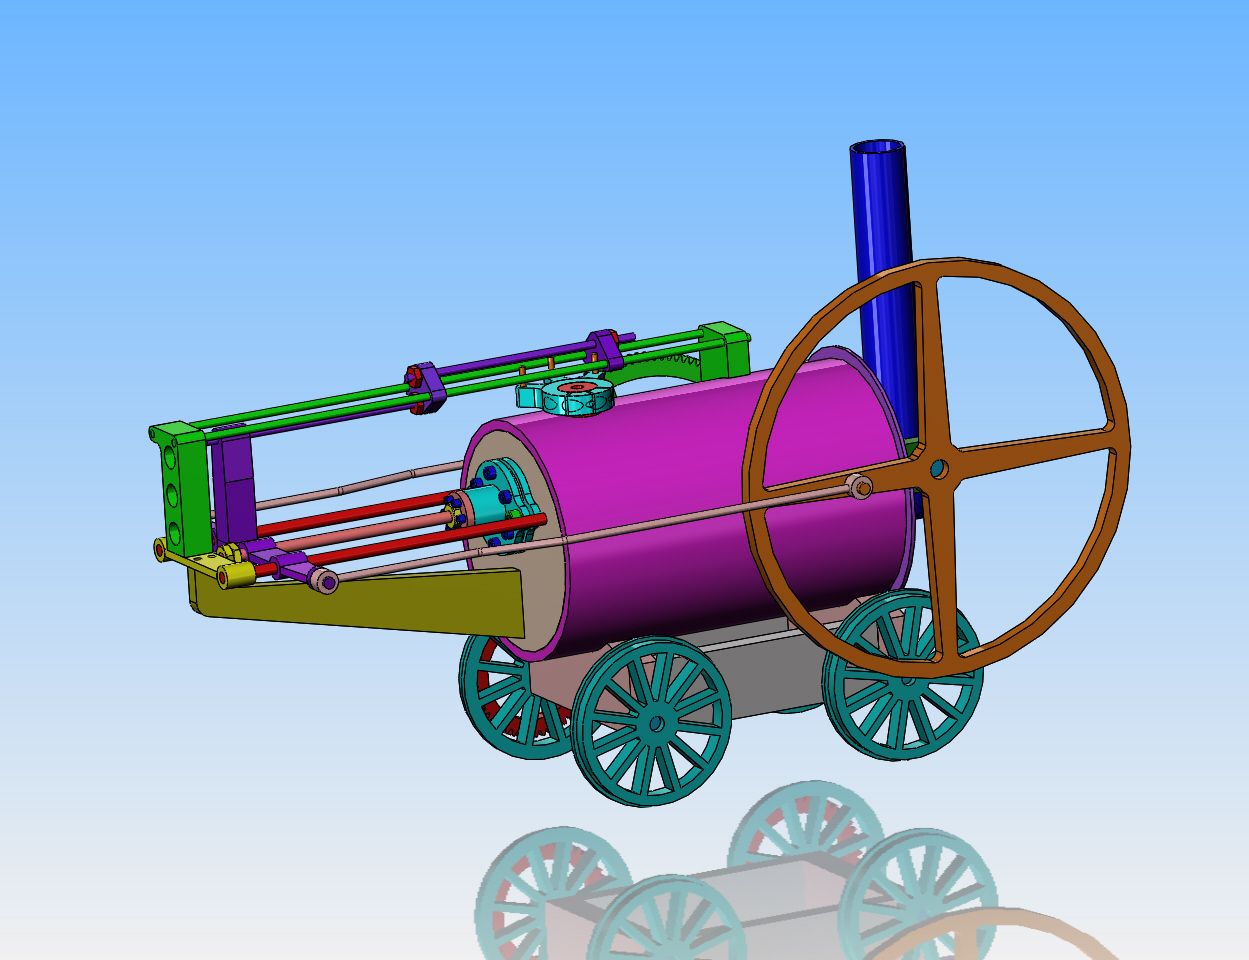
OH MY GOD---There are an incredible number of rods and rod supports to control the cylinder valve on this monster!!! Trevithick was able to get his 4 way valve much closer to the centerline of his cylinder than I have. This is kind of "first draft" to give me some idea of what I'm dealing with. I have shown the arm which actuates the valve in three positions. I show it in the "neutral" center position and in the two "maximum" positions it swings to.
I14l7l.jpg
 
A couple of quick updates this morning. Originally, I had planned on welding a plate to close off the end of the boiler. Only problem with that is that there would be no possible way to get the cylinder with valve attached into place, as it has to go into the boiler endplate with the valve sticking up thru the top of the boiler all at once. So, a quick solution is to make the boiler endplate a separate piece which bolts into the end of the boiler. That way I can mount the cylinder in the endplate, then bolt the endplate into the boiler. Since I can now make the endplate from thicker material (7/16"), then I can mount the long yellow guide rod support to this plate, rather than the axle mount. This makes for a much smaller guide rod support.--In other news, I sent the large flywheel drawing (6 3/4" diameter) out to a waterjet cutter yesterday, and a quote come back for $80 to waterjet cut the flywheel. To me, this is ridiculous, so I sent it out again this morning to three other water-jet cutters for quotes.
3BlBam.jpg
 
I now have three quotes to waterjet cut the flywheel. One for $80, one for $125, and one for $42---it certainly pays to go out for quotes.
 
Yessir, is it steel ? - steel is more expensive than aluminium to waterjet cut (material inclusive) - you can't compare countries but I could probably get that cut in South Africa for U$25 in steel or U$20 aluminium - but I get lots of waterjet cutting and get good prices.
I got all the waterjet cutting on my Hypocycloid done for ±U$30 and the wire cutting of the annulus and pinion for ±U$55.
I like machining anything that presents a challenge but sometimes WTH - just get it done professionally.
Really cool build as always.....
Regards - Ken
 

Latest posts

Back
Top