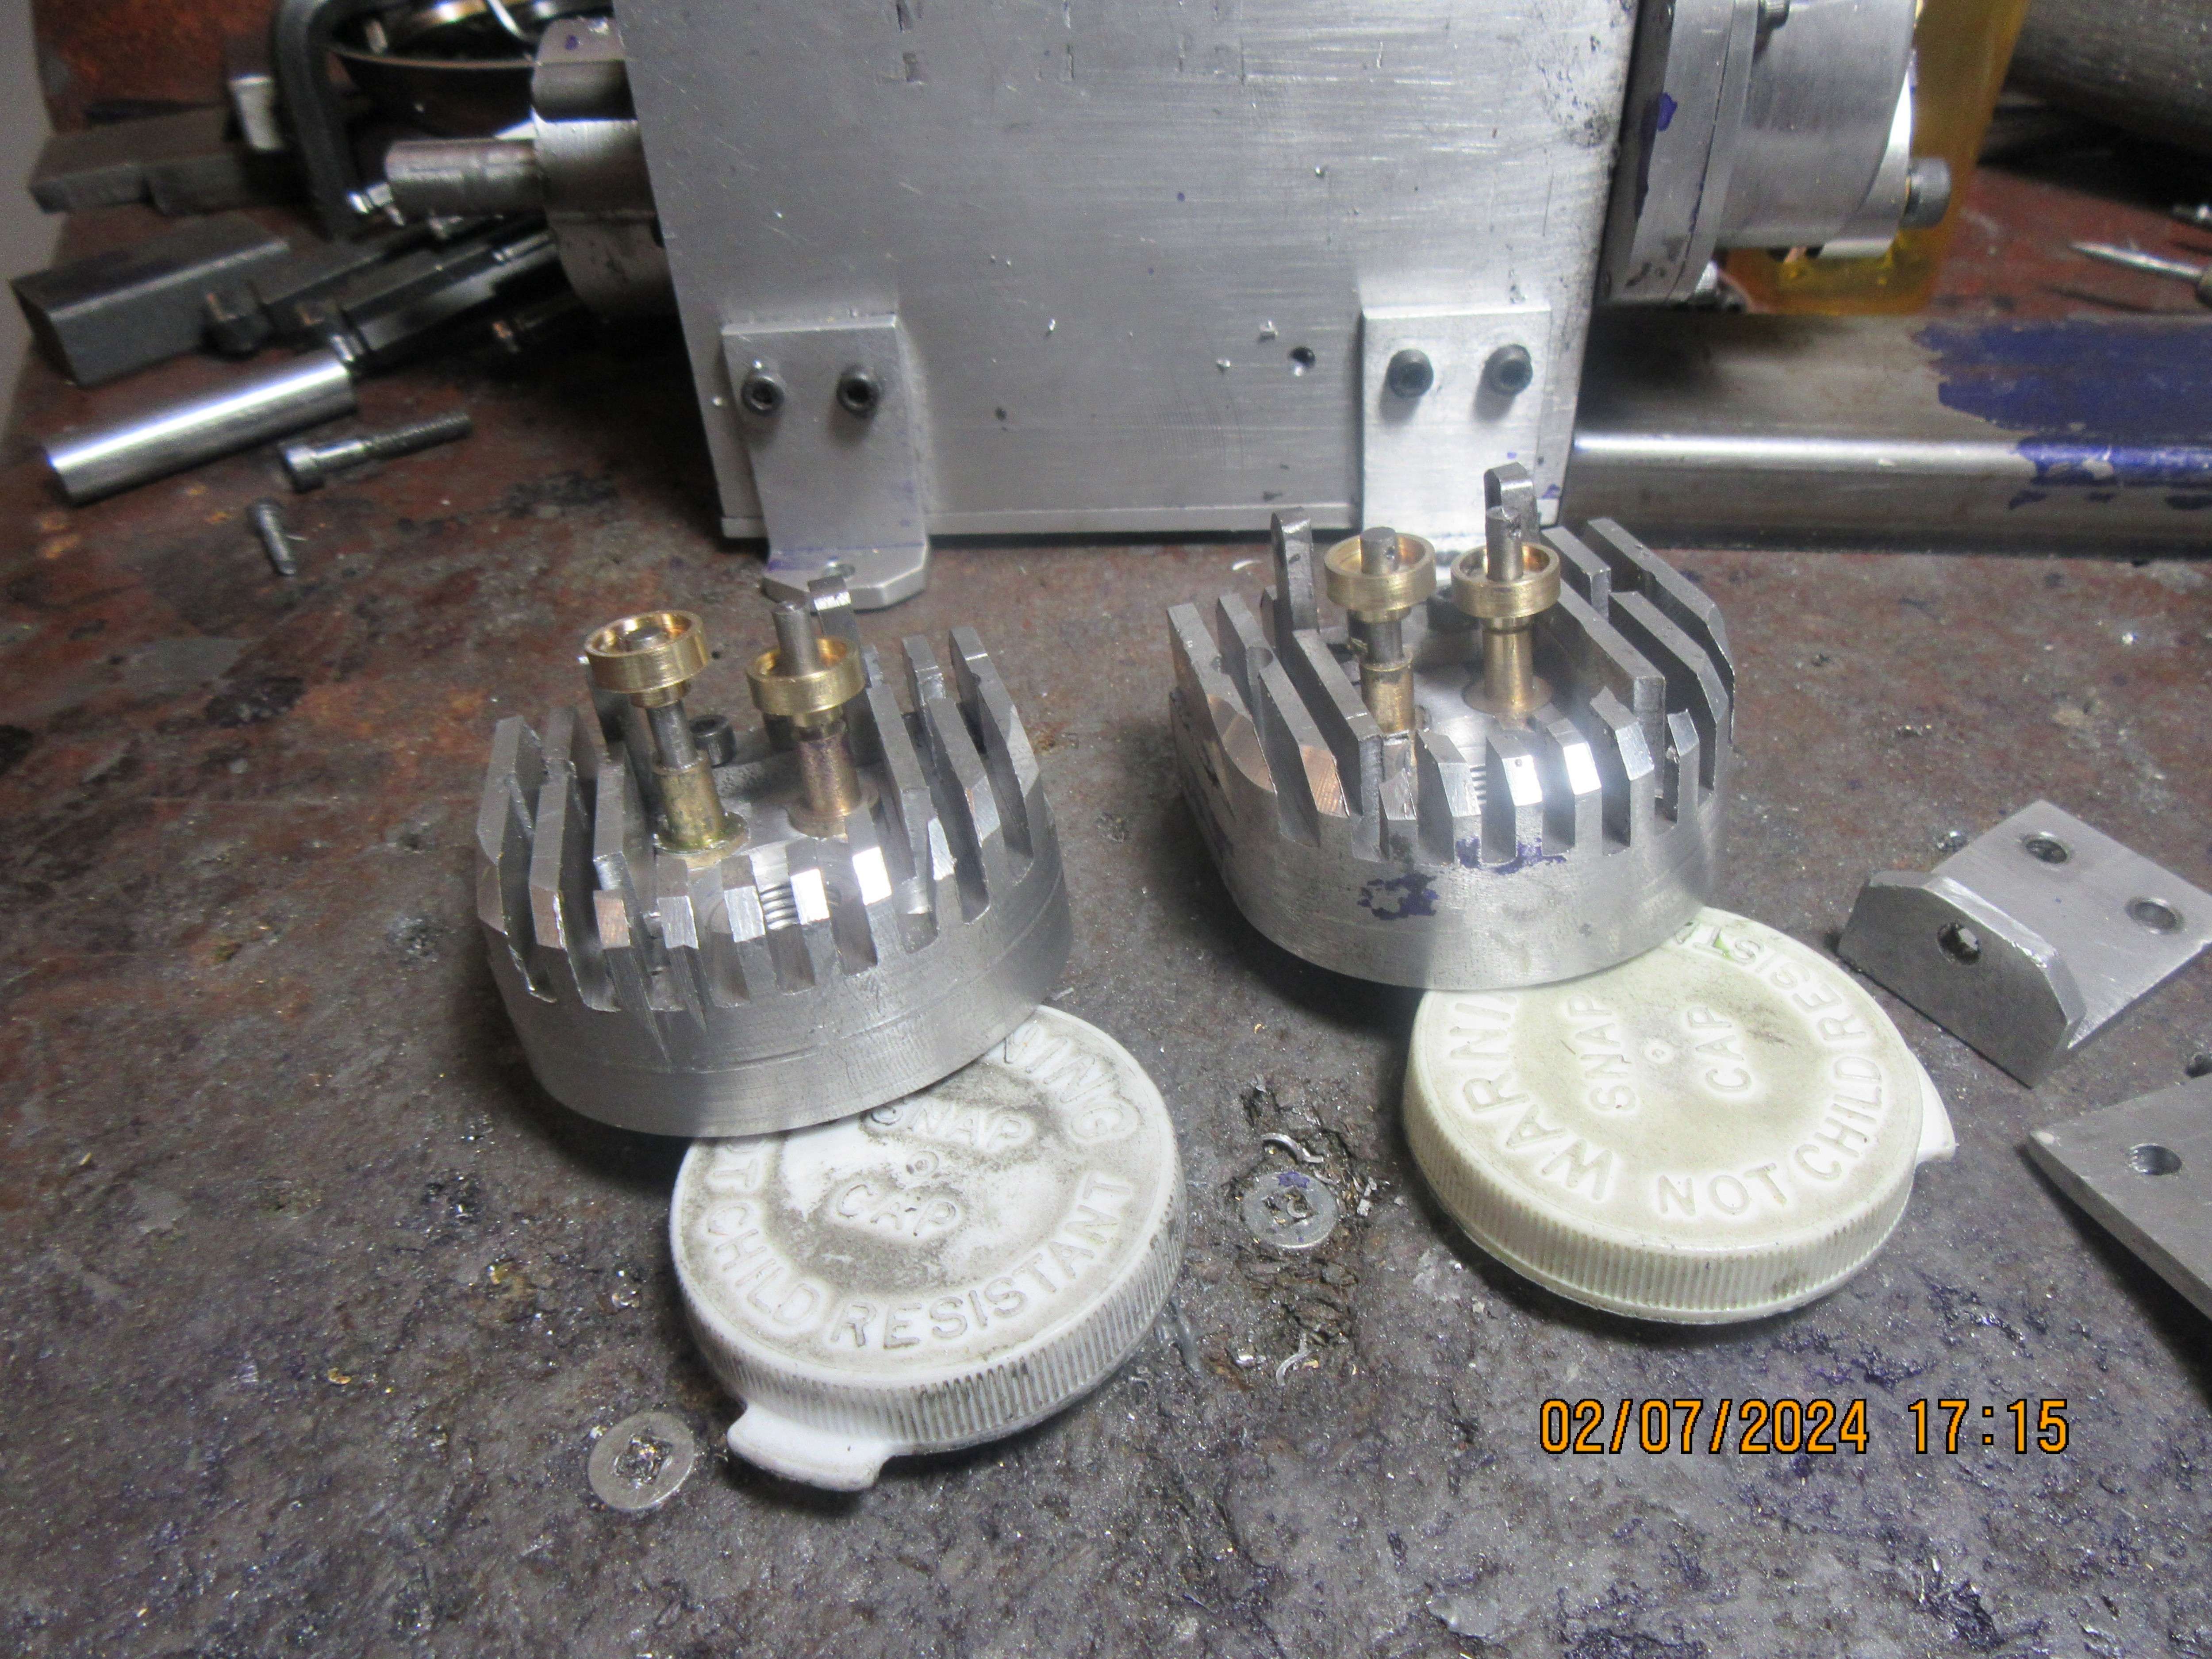
I just get the right grit of silicon carbide powder (sold online for lapidary use) and mix with oil.The valves have been lapped into their seats and had the shanks cut off after I lapped them. The valve spring retainers have been machined and fit the valve stems the way they are supposed to. The valves and their respective seats have been numbered so I don't mix them up as I proceed with the build. No valve springs have been installed yet.--Does anyone know where I can buy a small quantity of 600 grit lapping paste? Many years ago I bought three small jars of 320, 400, and 600 grit lapping paste from some guy who was buying large quantities and then repacking them into small jars about 2" diameter x 2" tall. I am just about out of the 600 grit paste.---Brian
You are using an out of date browser. It may not display this or other websites correctly.
You should upgrade or use an alternative browser.
You should upgrade or use an alternative browser.
Building a twin cylinder inline i.c. engine.
- Thread starter Brian Rupnow
- Start date

Help Support Home Model Engine Machinist Forum:
This site may earn a commission from merchant affiliate
links, including eBay, Amazon, and others.
Or Lee Valley Tools as they are in Canada
https://www.leevalley.com/en-ca/shop/tools/sharpening/compounds-and-pastes/100516-lapping-grits
https://www.leevalley.com/en-ca/shop/tools/sharpening/compounds-and-pastes/100516-lapping-grits
Okay guys, thank you for the information about places to buy valve lapping compound. Today I went across town to a new nut and bolt supply place and picked out a set of compression springs for my engine's valves. The place I used to buy my springs no longer keeps any stock of springs and you have to order them out of a catalogue, which doesn't work very well for me. The new springs are cut to length and installed and everything seems to fit the way I had intended. The original support towers for my rocker arm pivots were too short, so I corrected my drawing and then used my short towers and put a 0.281" thick spacer under the towers I had already made.
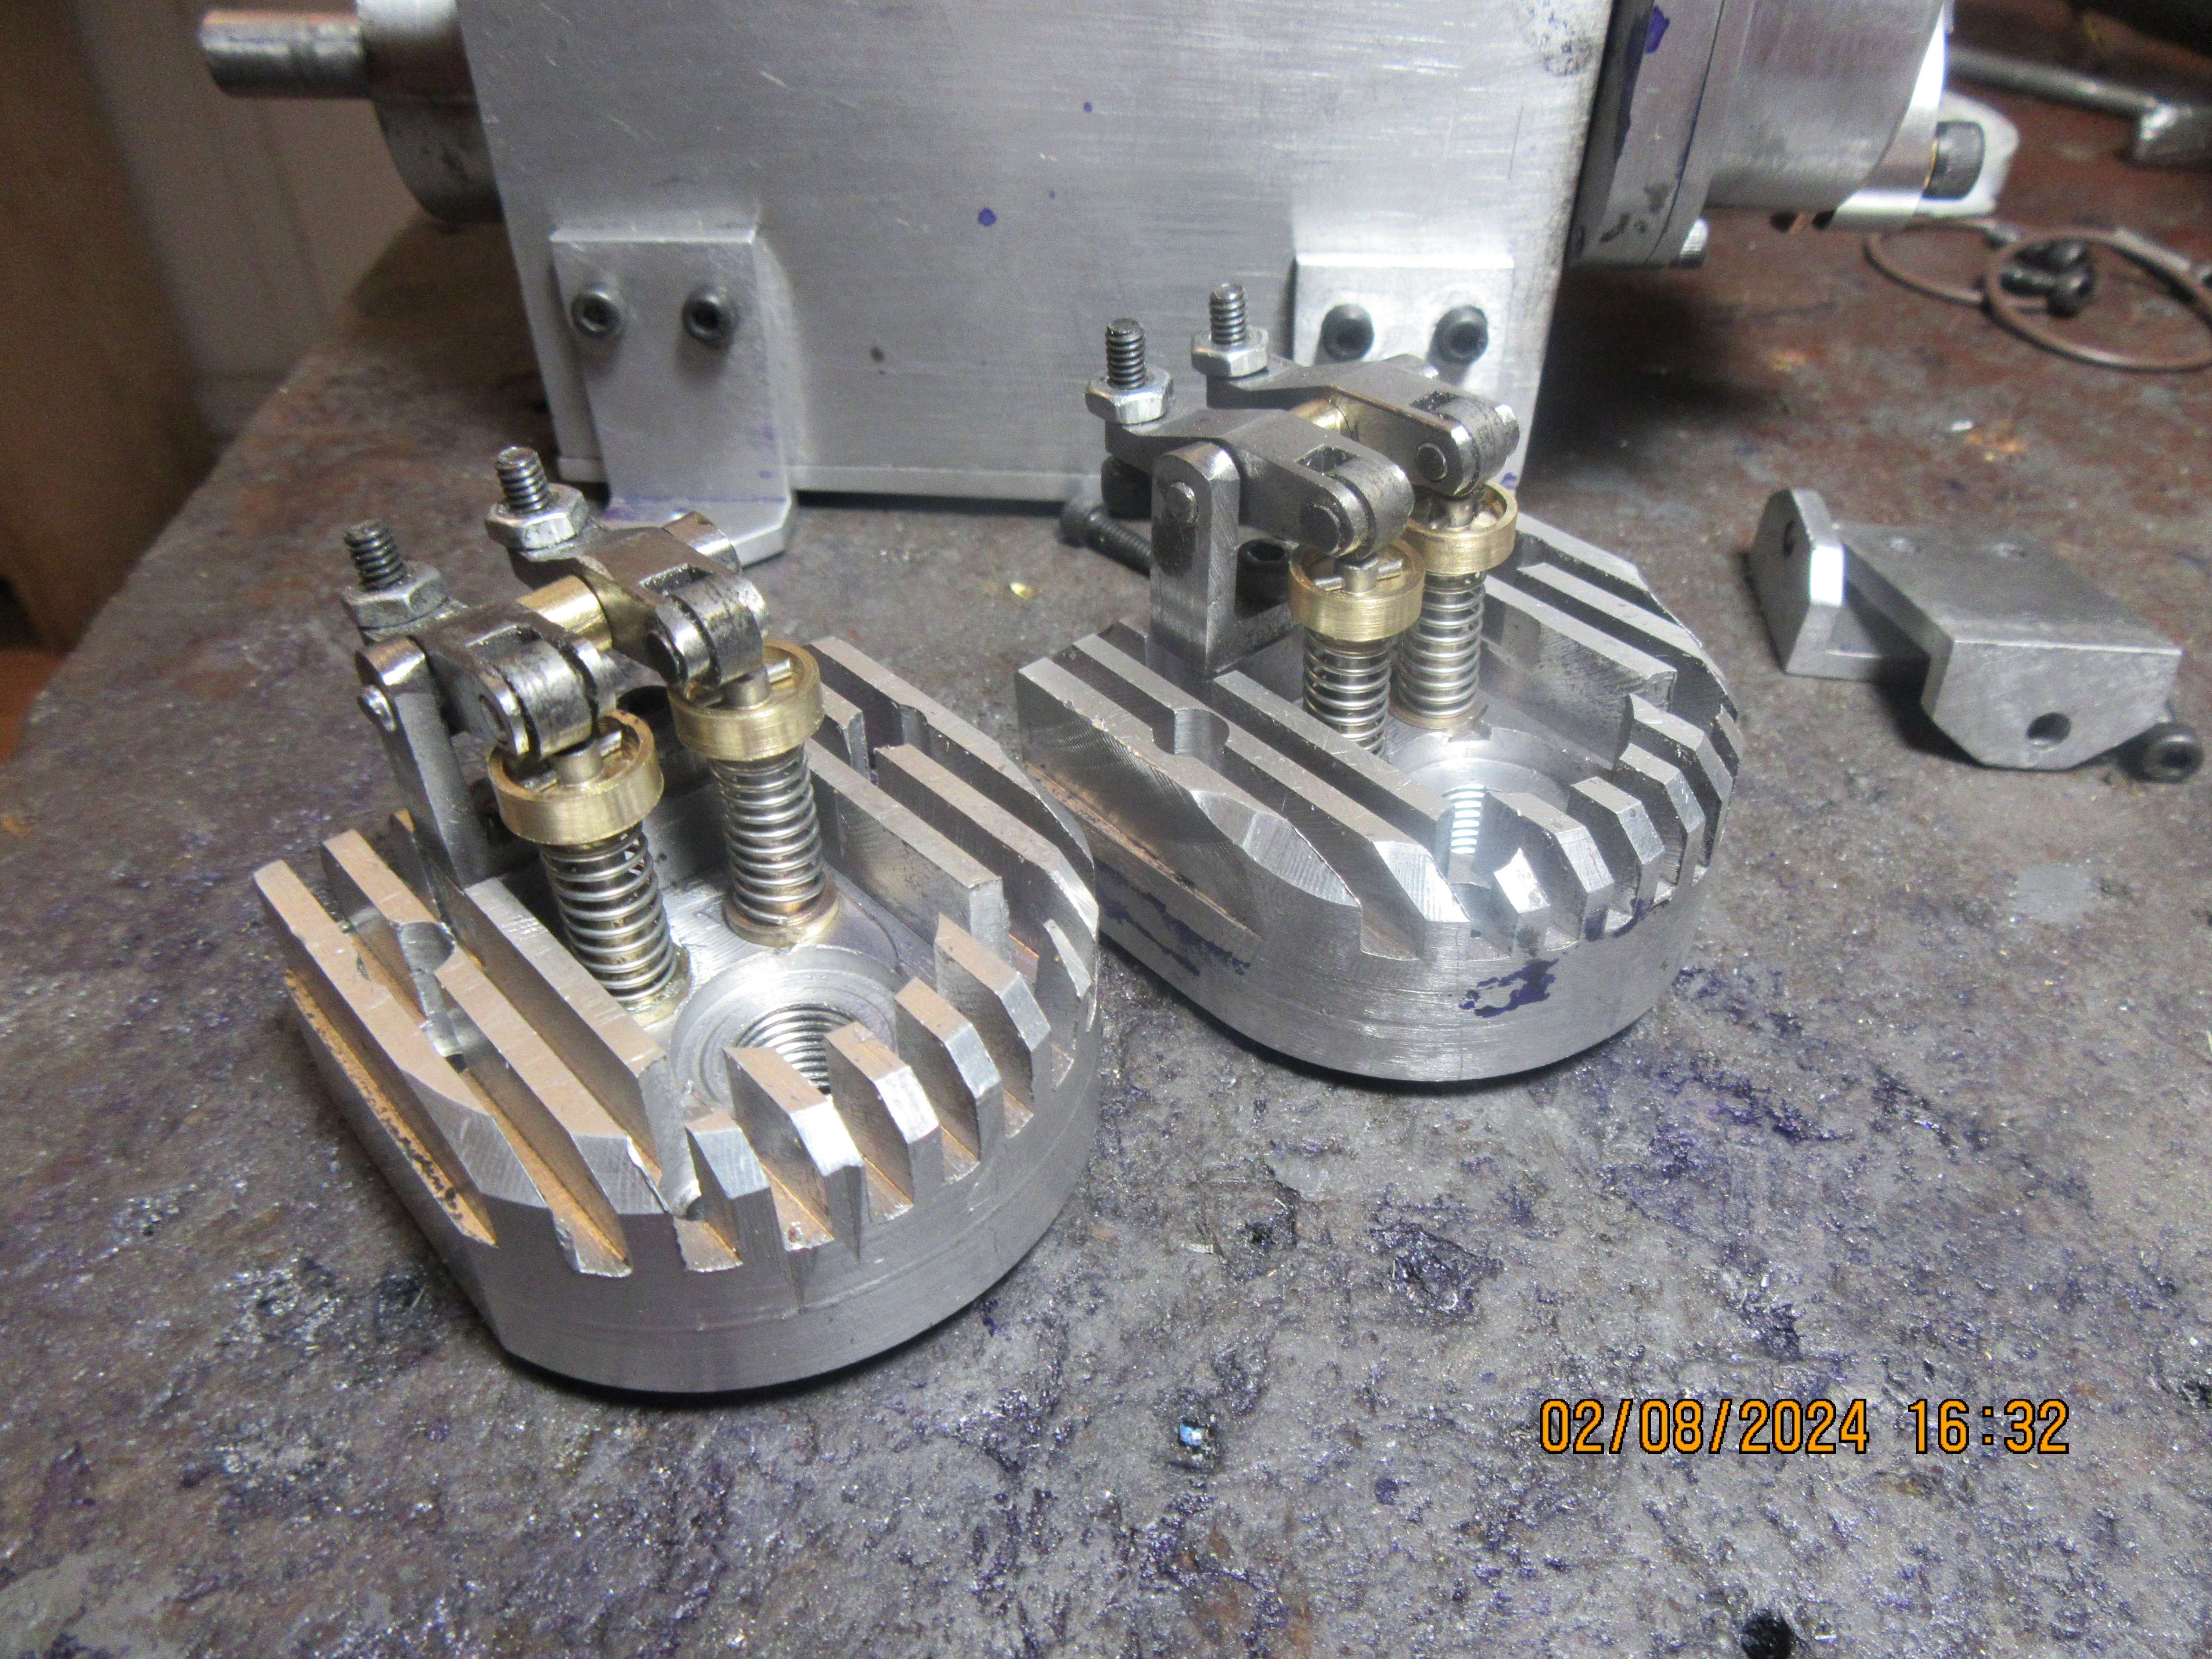

I'm running out of things to machine. I think that tomorrow I will start work on the carburetor, because I have material for that. This afternoon I have been trying to wire up the new coil I bought from amazon, but not having much success. I may still have to buy a used double lead coil from an older snowmobile.
Perhaps the wiring on the coil is for some sort of electronic box to trigger, not a simple contact breaker on DC? I would have expected the coil to have a simple 2 wires on the primary, as that is what I had on many Japanese twin-cylinder motorcycles with redundant spark from "double HT cable" coil. I don't know much about these modern ignition systems so can't help, but I am curious to learn.
K2
K2
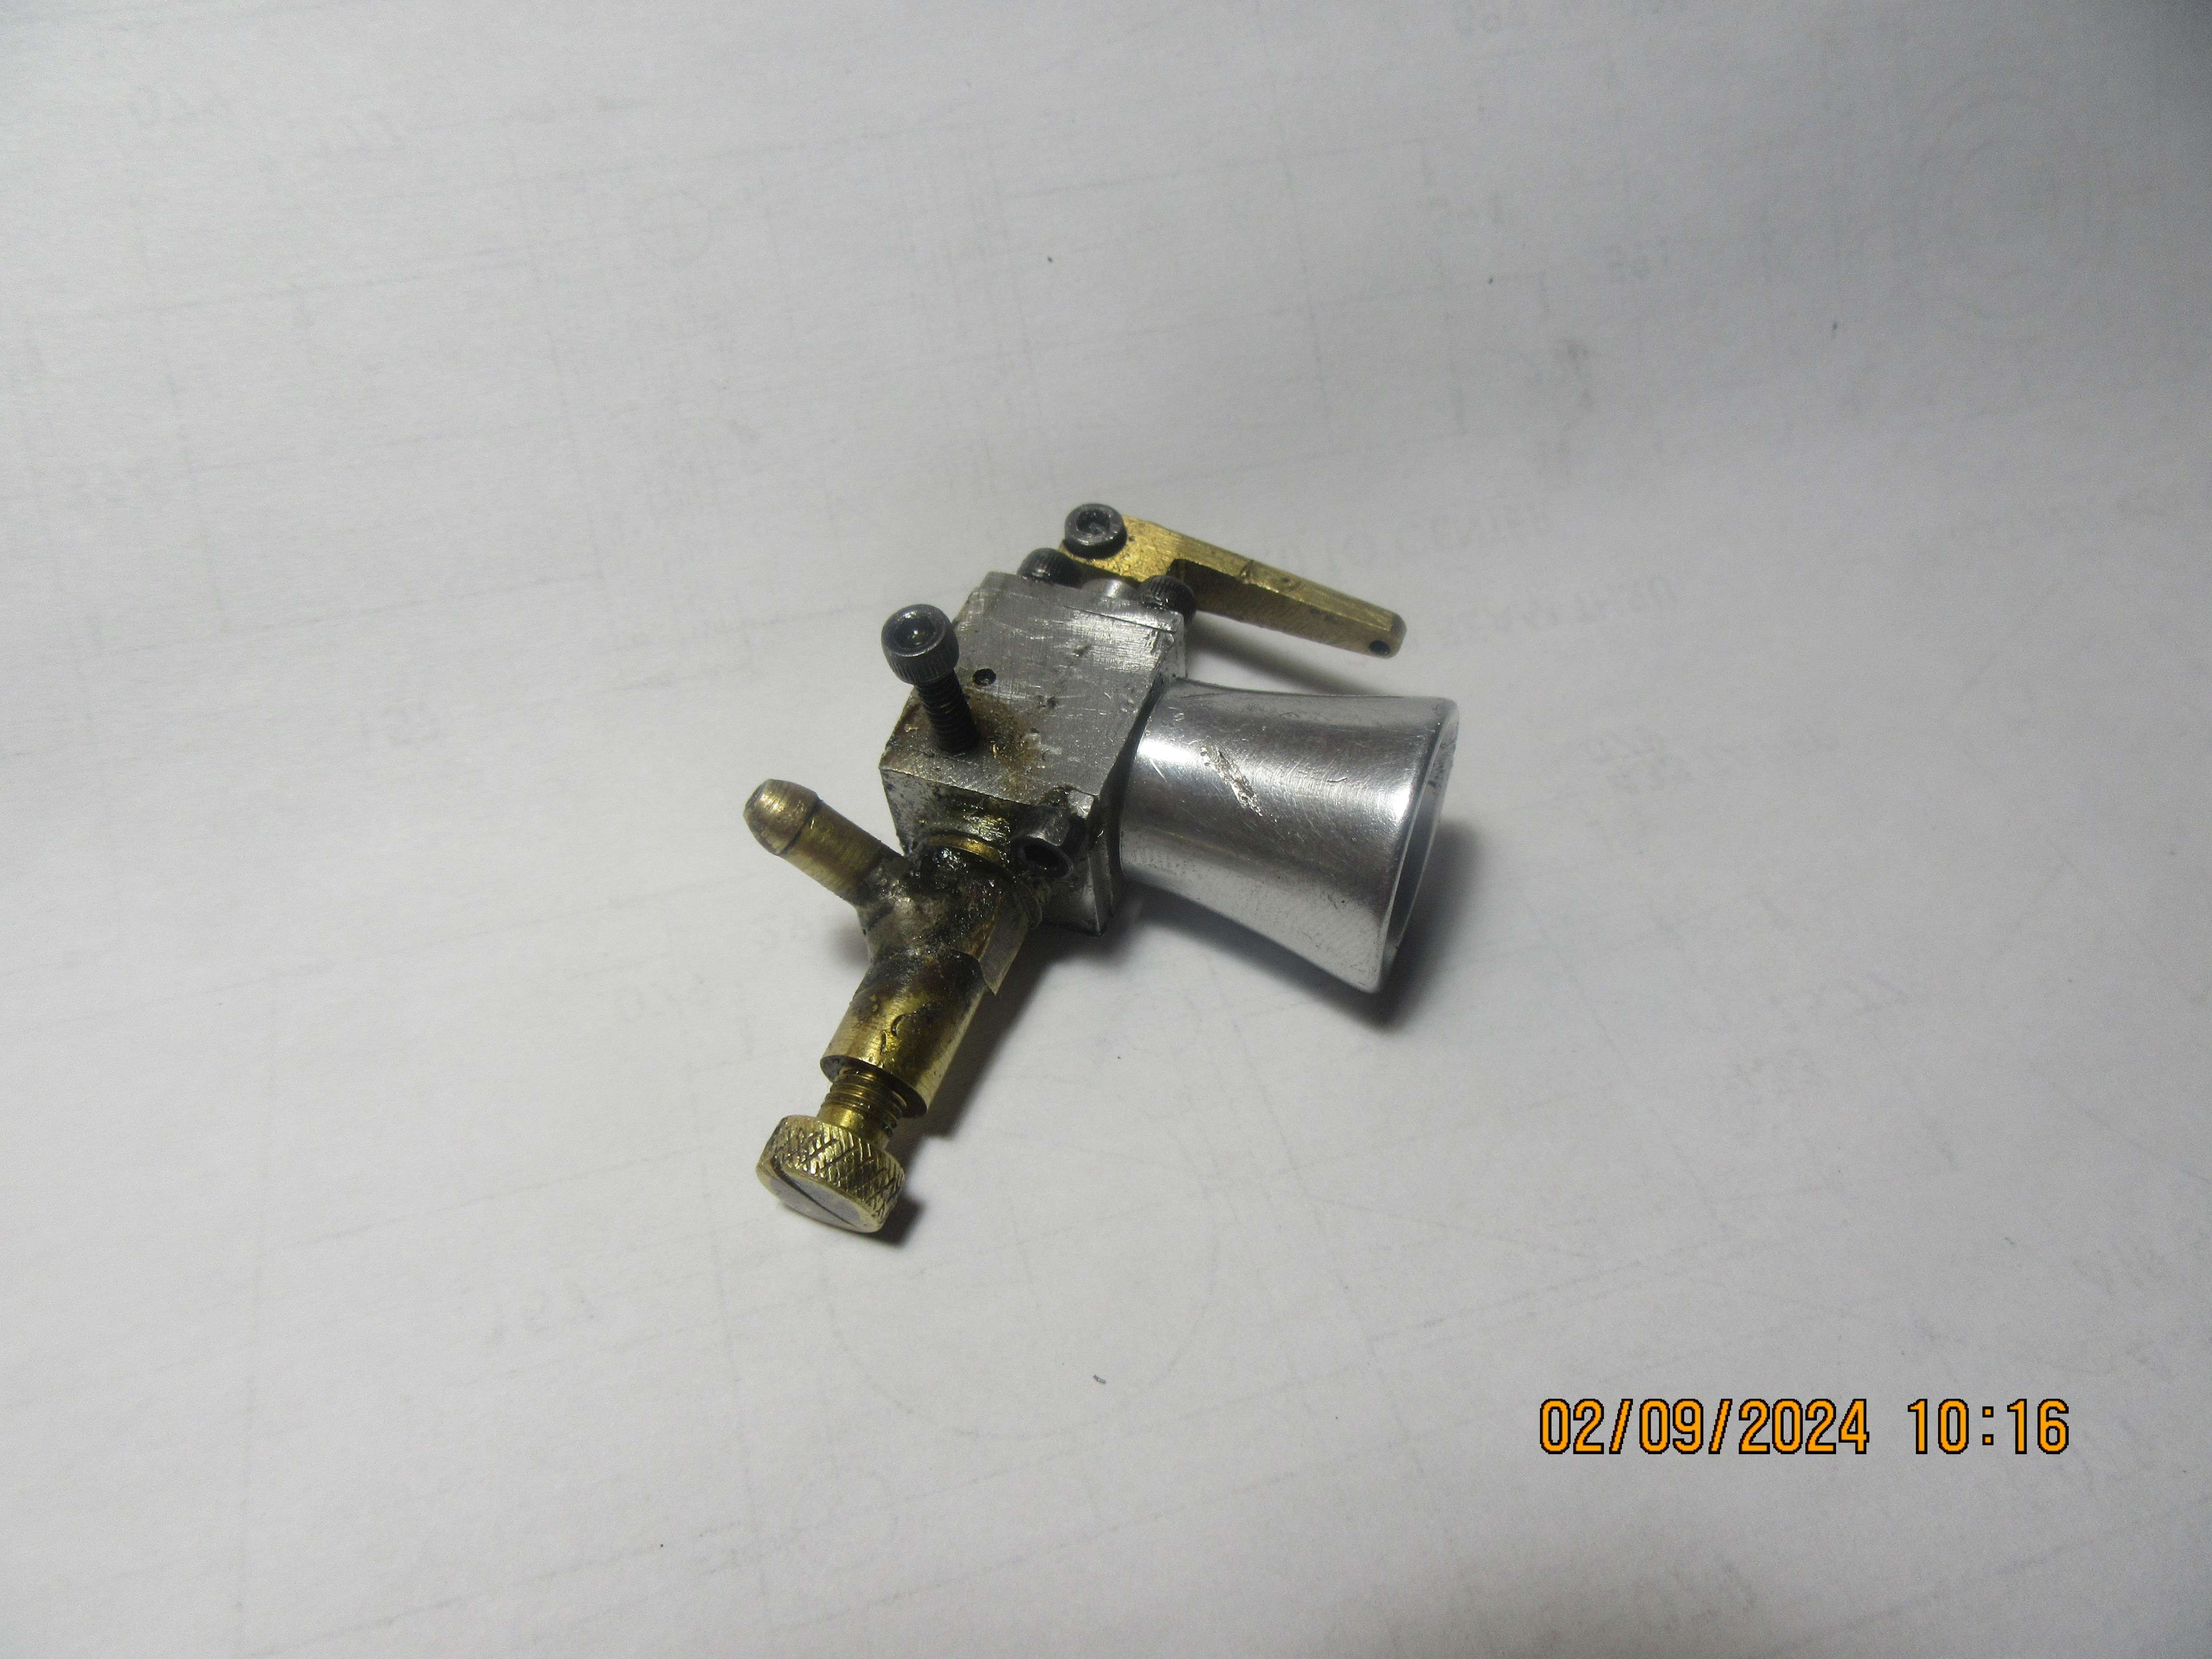
Here is an interesting case of serendipity. Many years ago I had built a carburetor for the "Canadian Cub", which was a carb based on Malcolm stride's Jaguar and Bobcat engines. The new carburetor for the inline engine has all the same component parts with only the carburetor body having a few changed dimensions. I had broken the threaded end off the main carburetor body which I built years ago, but I will be able to use all the rest of the parts I built many years ago. The old carb parts are stained with fuel and tarnish--are there any good ways of cleaning this up with household chemicals?---Brian


$599.00
$649.00
FoxAlien Masuter Pro CNC Router Machine, Upgraded 3-Axis Engraving All-Metal Milling Machine for Wood Acrylic MDF Nylon Carving Cutting
FoxAlien Official

$99.99
AHS Outdoor Wood Boiler Yearly Maintenance Kit with Water Treatment - ProTech 300 & Test Kit
Alternative Heating & Supplies

$40.02
$49.99
Becker CAD 12 3D - professional CAD software for 2D + 3D design and modelling - for 3 PCs - 100% compatible with AutoCAD
momox Shop

$39.99
$49.99
Sunnytech Low Temperature Stirling Engine Motor Steam Heat Education Model Toy Kit For mechanical skills (LT001)
stirlingtechonline
![DreamPlan Home Design and Landscaping Software Free for Windows [PC Download]](https://m.media-amazon.com/images/I/51kvZH2dVLL._SL500_.jpg)
$0.00
DreamPlan Home Design and Landscaping Software Free for Windows [PC Download]
Amazon.com Services LLC

$25.34
$34.99
Peachtree Woodworking Supply Bowl Sander Tool Kit w/Dual Bearing Head & Hardwood Handle, 42 Pieces Wood Sander Set, 2 Hook & Loop Sanding Disc Sandpaper Assortment, 1/4 Mandrel Bowl Sander
Peachtree Woodworking Supply Inc

$171.00
$190.00
Genmitsu CNC 3018-PRO Router Kit GRBL Control 3 Axis Plastic Acrylic PCB PVC Wood Carving Milling Engraving Machine, XYZ Working Area 300x180x45mm
SainSmart Official

$54.46
Amana Tool - 46280 CNC 2D & 3D Carving 6.2 Deg Tapered Angle Ball Tip x 1/32 Dia x 1/64
Express Tool Supply
My $0.02, FWIW - If acetone is considered a household chemical, then that is usually my go-to solvent for cleaning things like this, so long as there isn't any paint or plastic that will be damaged by it. I also find that WD-40 can be an effective solvent for cleaning machine tools.
Perhaps your new coil is for a CDI ignition and if so won't work with points.
Hi Brian, I clean stuff (like motorcycle carb parts) using a £15 ultrasonic bath intended for cleaning spectacles, jewellery and other small stuff. (Cheap = they over heat if you do 8 x 4-minute cleans without cooling time!). I use a bath of water, with a drop of detergent, Or if a solvent is needed use a jar or tin in the water bath with the solvent on the jar or tin. (U/S Sound travels through into the solvent!). Often fresh original fluid is the best solvent for fluid stains.
But it can boil low temperature solvents like petrol! So take care.
K2
But it can boil low temperature solvents like petrol! So take care.
K2
I do not know if Simple Green Pro HD Heavy-Duty All-in-one Cleaner is considered a household chemical, but it works for me. The non-corrosive formula is safe for use on metal surfaces.Here is an interesting case of serendipity. Many years ago I had built a carburetor for the "Canadian Cub", which was a carb based on Malcolm stride's Jaguar and Bobcat engines. The new carburetor for the inline engine has all the same component parts with only the carburetor body having a few changed dimensions. I had broken the threaded end off the main carburetor body which I built years ago, but I will be able to use all the rest of the parts I built many years ago. The old carb parts are stained with fuel and tarnish--are there any good ways of cleaning this up with household chemicals?---Brian

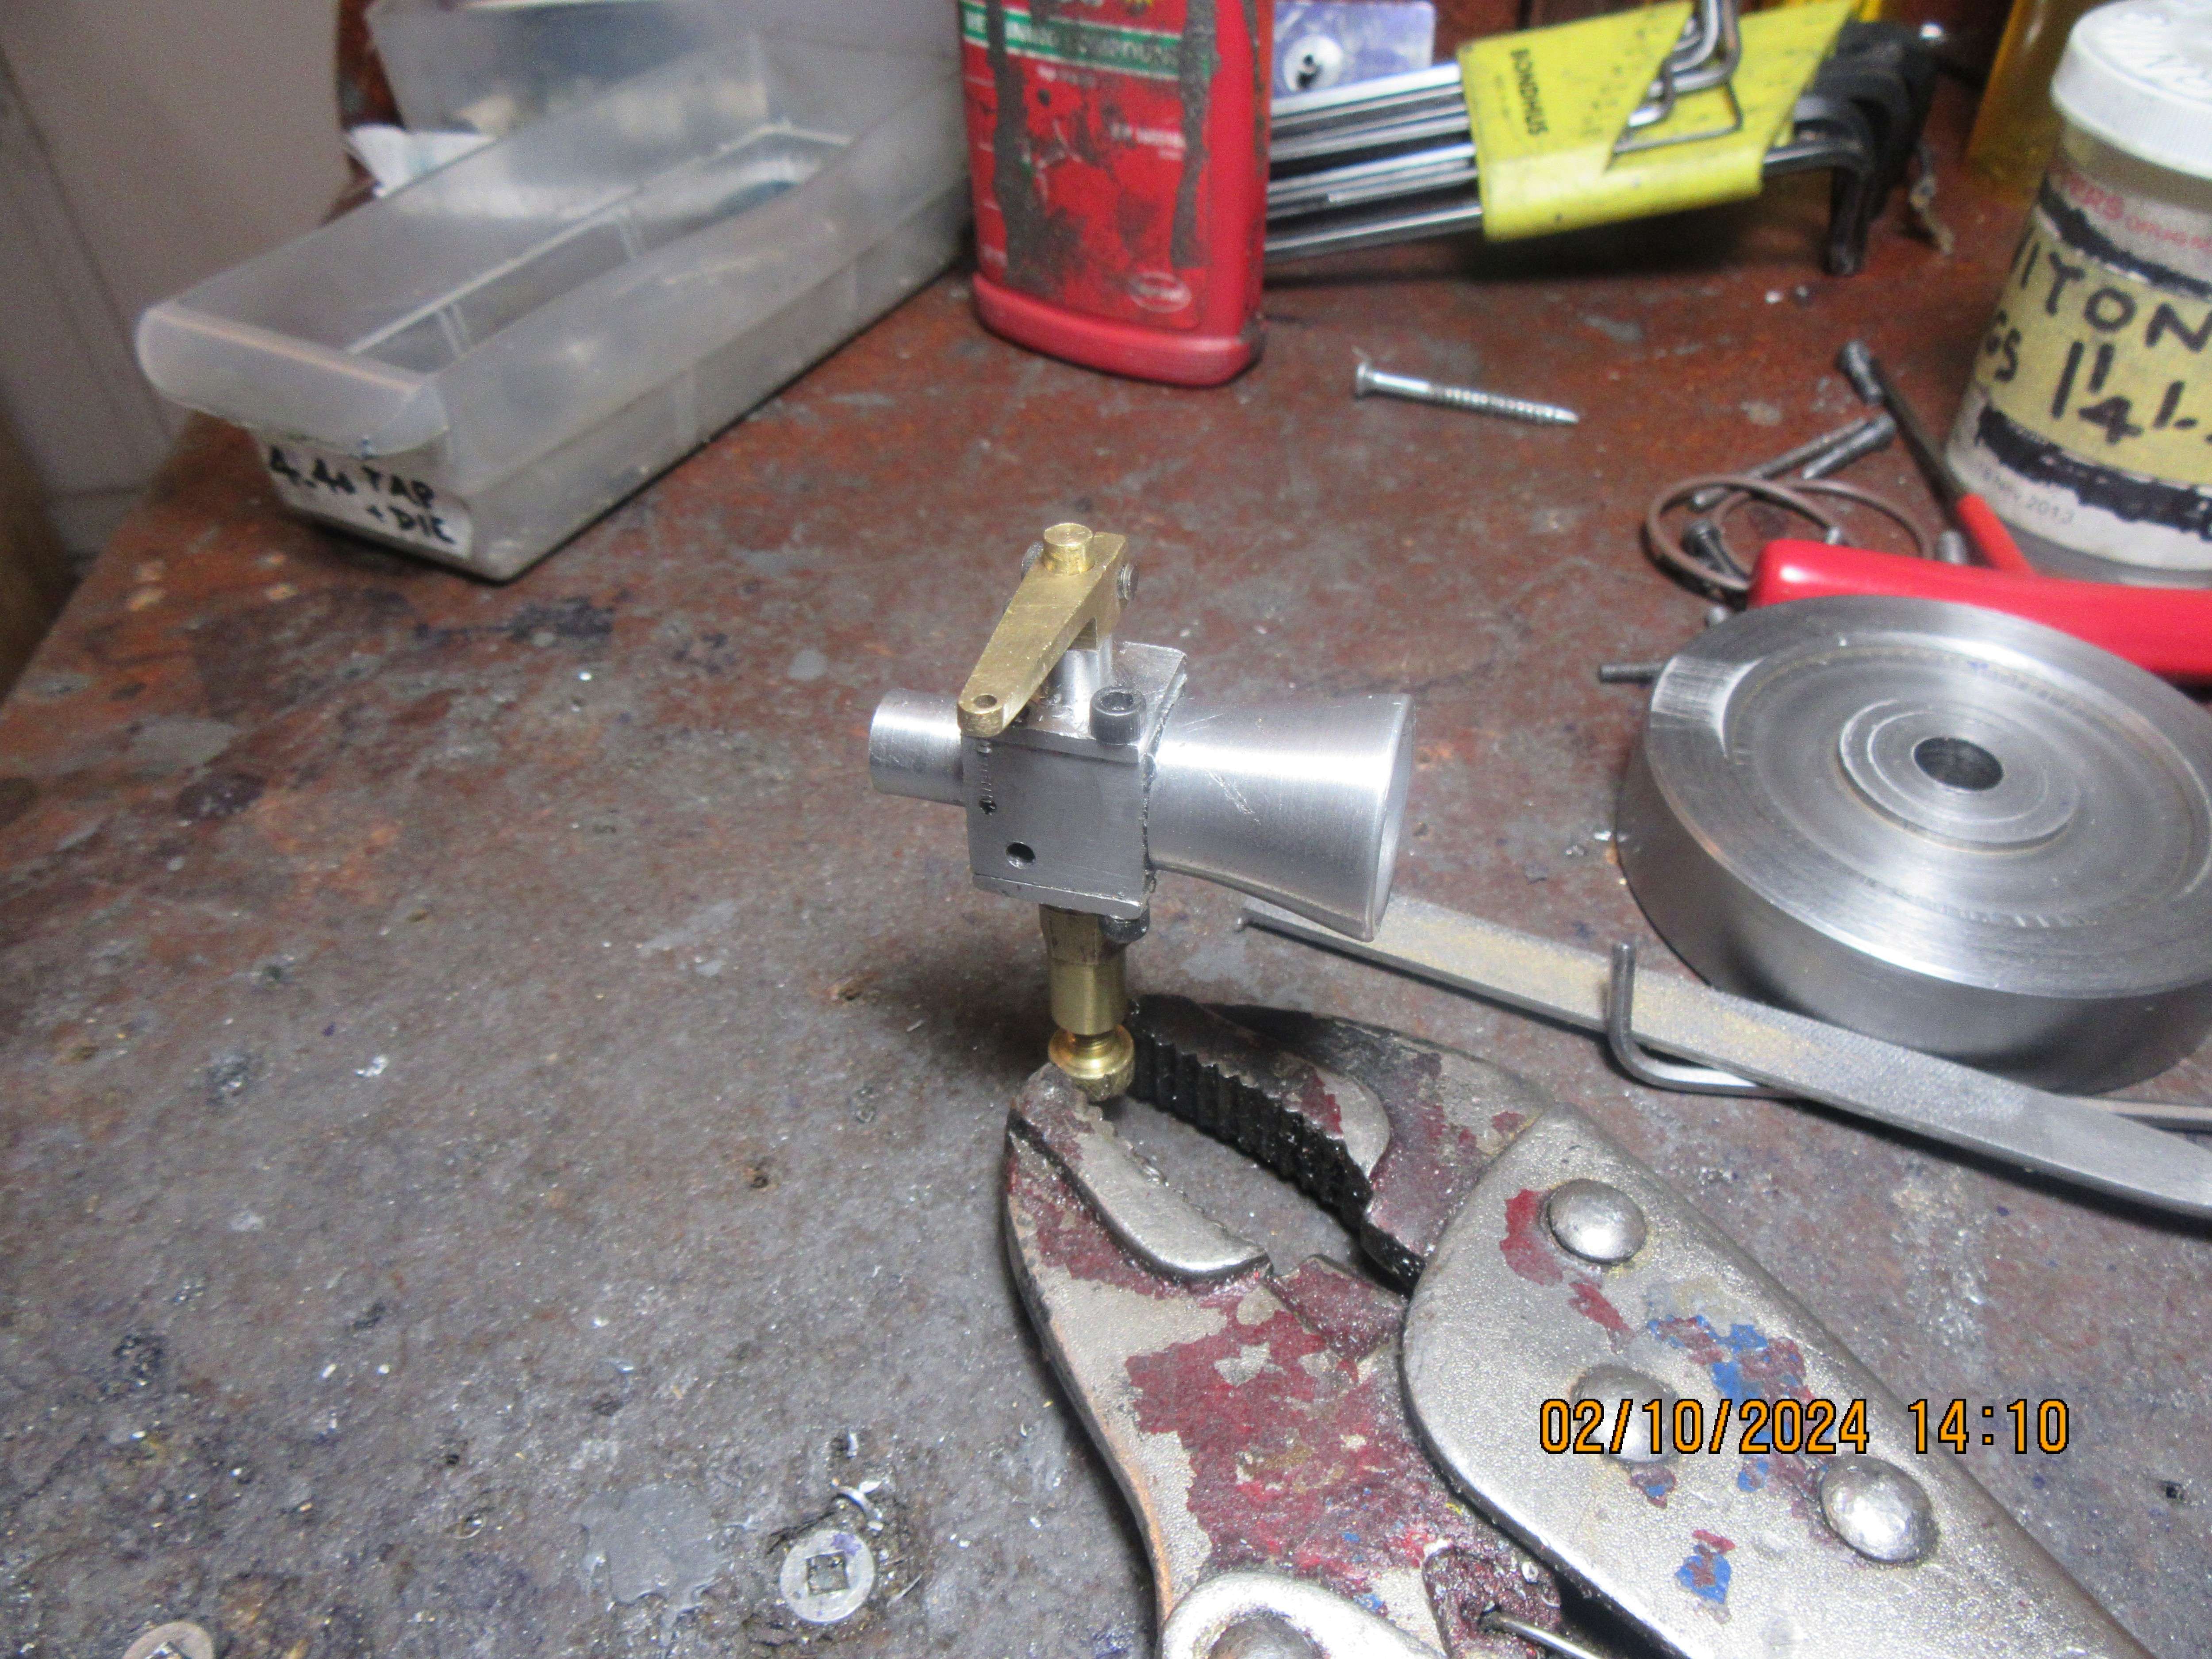
The new carb body is finished. All the parts that bolt to it are going to soak overnight in a can of laquer thinners, and then get washed tomorrow with a strong solution of dish detergent and hot water and be scrubbed with an old toothbrush.
Okay, today we have the new carburetor, which consists of a new main body and all of the old components that were from the carb I built ten years ago. everything fit just fine.

In a conventional manner yes, but.............Perhaps your new coil is for a CDI ignition and if so won't work with points.
1. .......A Ford Falcon (2002 to 2005....possibly others as well ) BA coil of the OTP type will work with points, condenser as normal and 1 x 18650 3v7 Li-ion cell.
2. .......If it is a GY-6 coil from a pocket rocket (mini) motorcycle there is a simple add on answer that does work.
The "4 wire 12v dc black box" can be used with points (hide the black box and coil down under in a box as most do).
A small addition of a miniature relay "coil" to the trigger circuit in the lead from the points and a small 0.1uF capacitor is all that is needed.
Cost for the whole ignition system (if you shop around) for the GY-6 coil, black box, miniature relay, capacitor is around AUD$30.
System can also be used with hall effect and a small 3 x 1 mm magnet without any further modification.
I have all the details and circuit diagrams if anyone is interested.
Video here .........
Last edited:
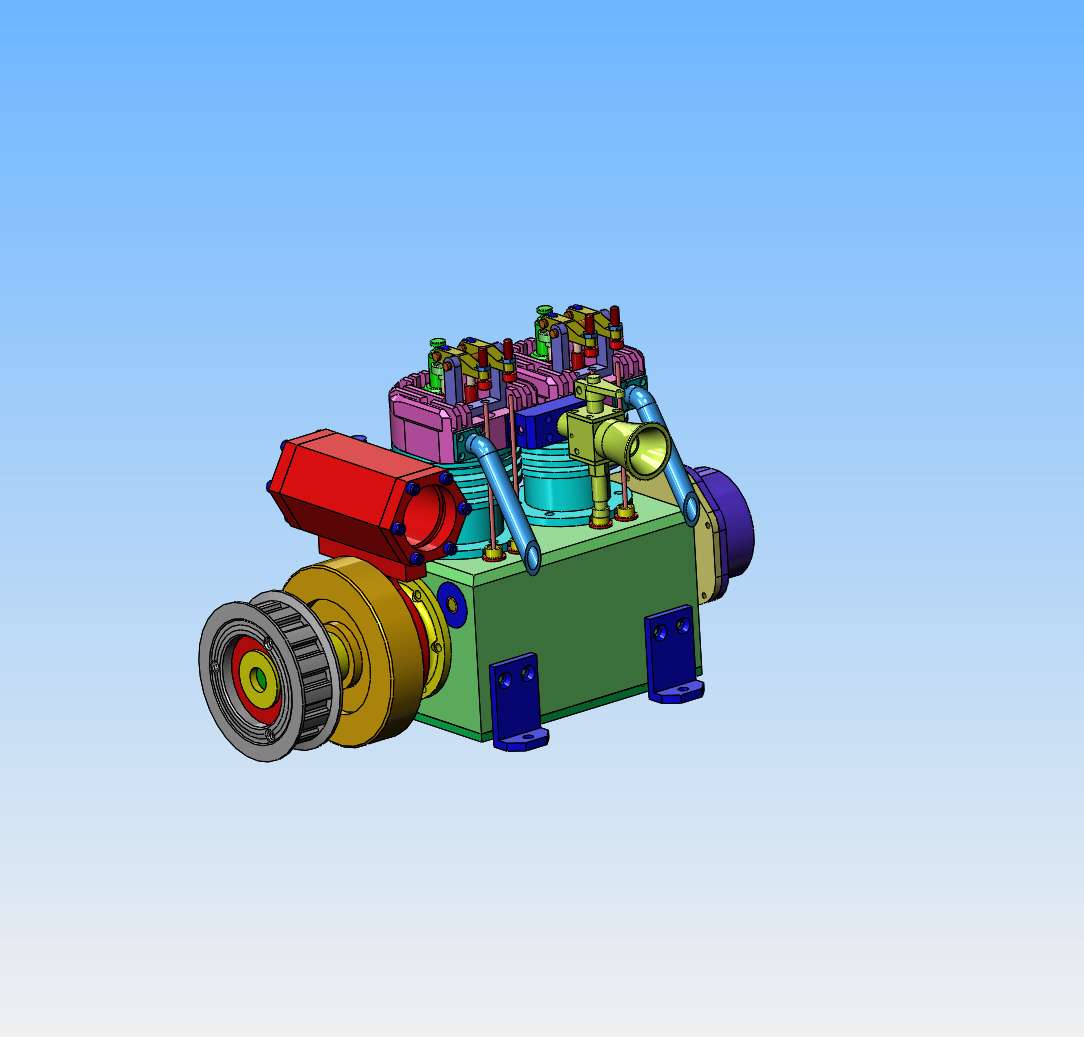
I think that the next thing to be tackled will be the gas tank. I really like the octagon shaped gas tank with the glass ends that Andrew Whale of the U.K. built so I will make my gas tank the same. The model of the gas tank isn't finished yet, as I have to add a filler cap and a discharge pipe, but I will do that tomorrow. I have also switched the tank to be at the opposite end from the gearbox. This still leaves the back side of the engine clear for my ignition coil set up.

Today I built a gas tank. Started at 10:00 and it's 5:00 now. Damned expensive gas tank if I was paying somebody to make it for me.--And, it's not done yet. I saved $10 by starting with a piece of aluminum 2" square, and worked on it 3 hours until is was the shape you see.--$115 worth of work to avoid spending $10.--It has a 31/32" inside diameter, and I still have to counterbore the main tank for the sight glasses and o-rings that keep it from leaking at the ends. I still have to make a filler neck and cap for it, and still have to make and attach a discharge spout, and still have to make the part that mounts the tank to the engine. It will be a $300 gas tank by the time I'm finished.
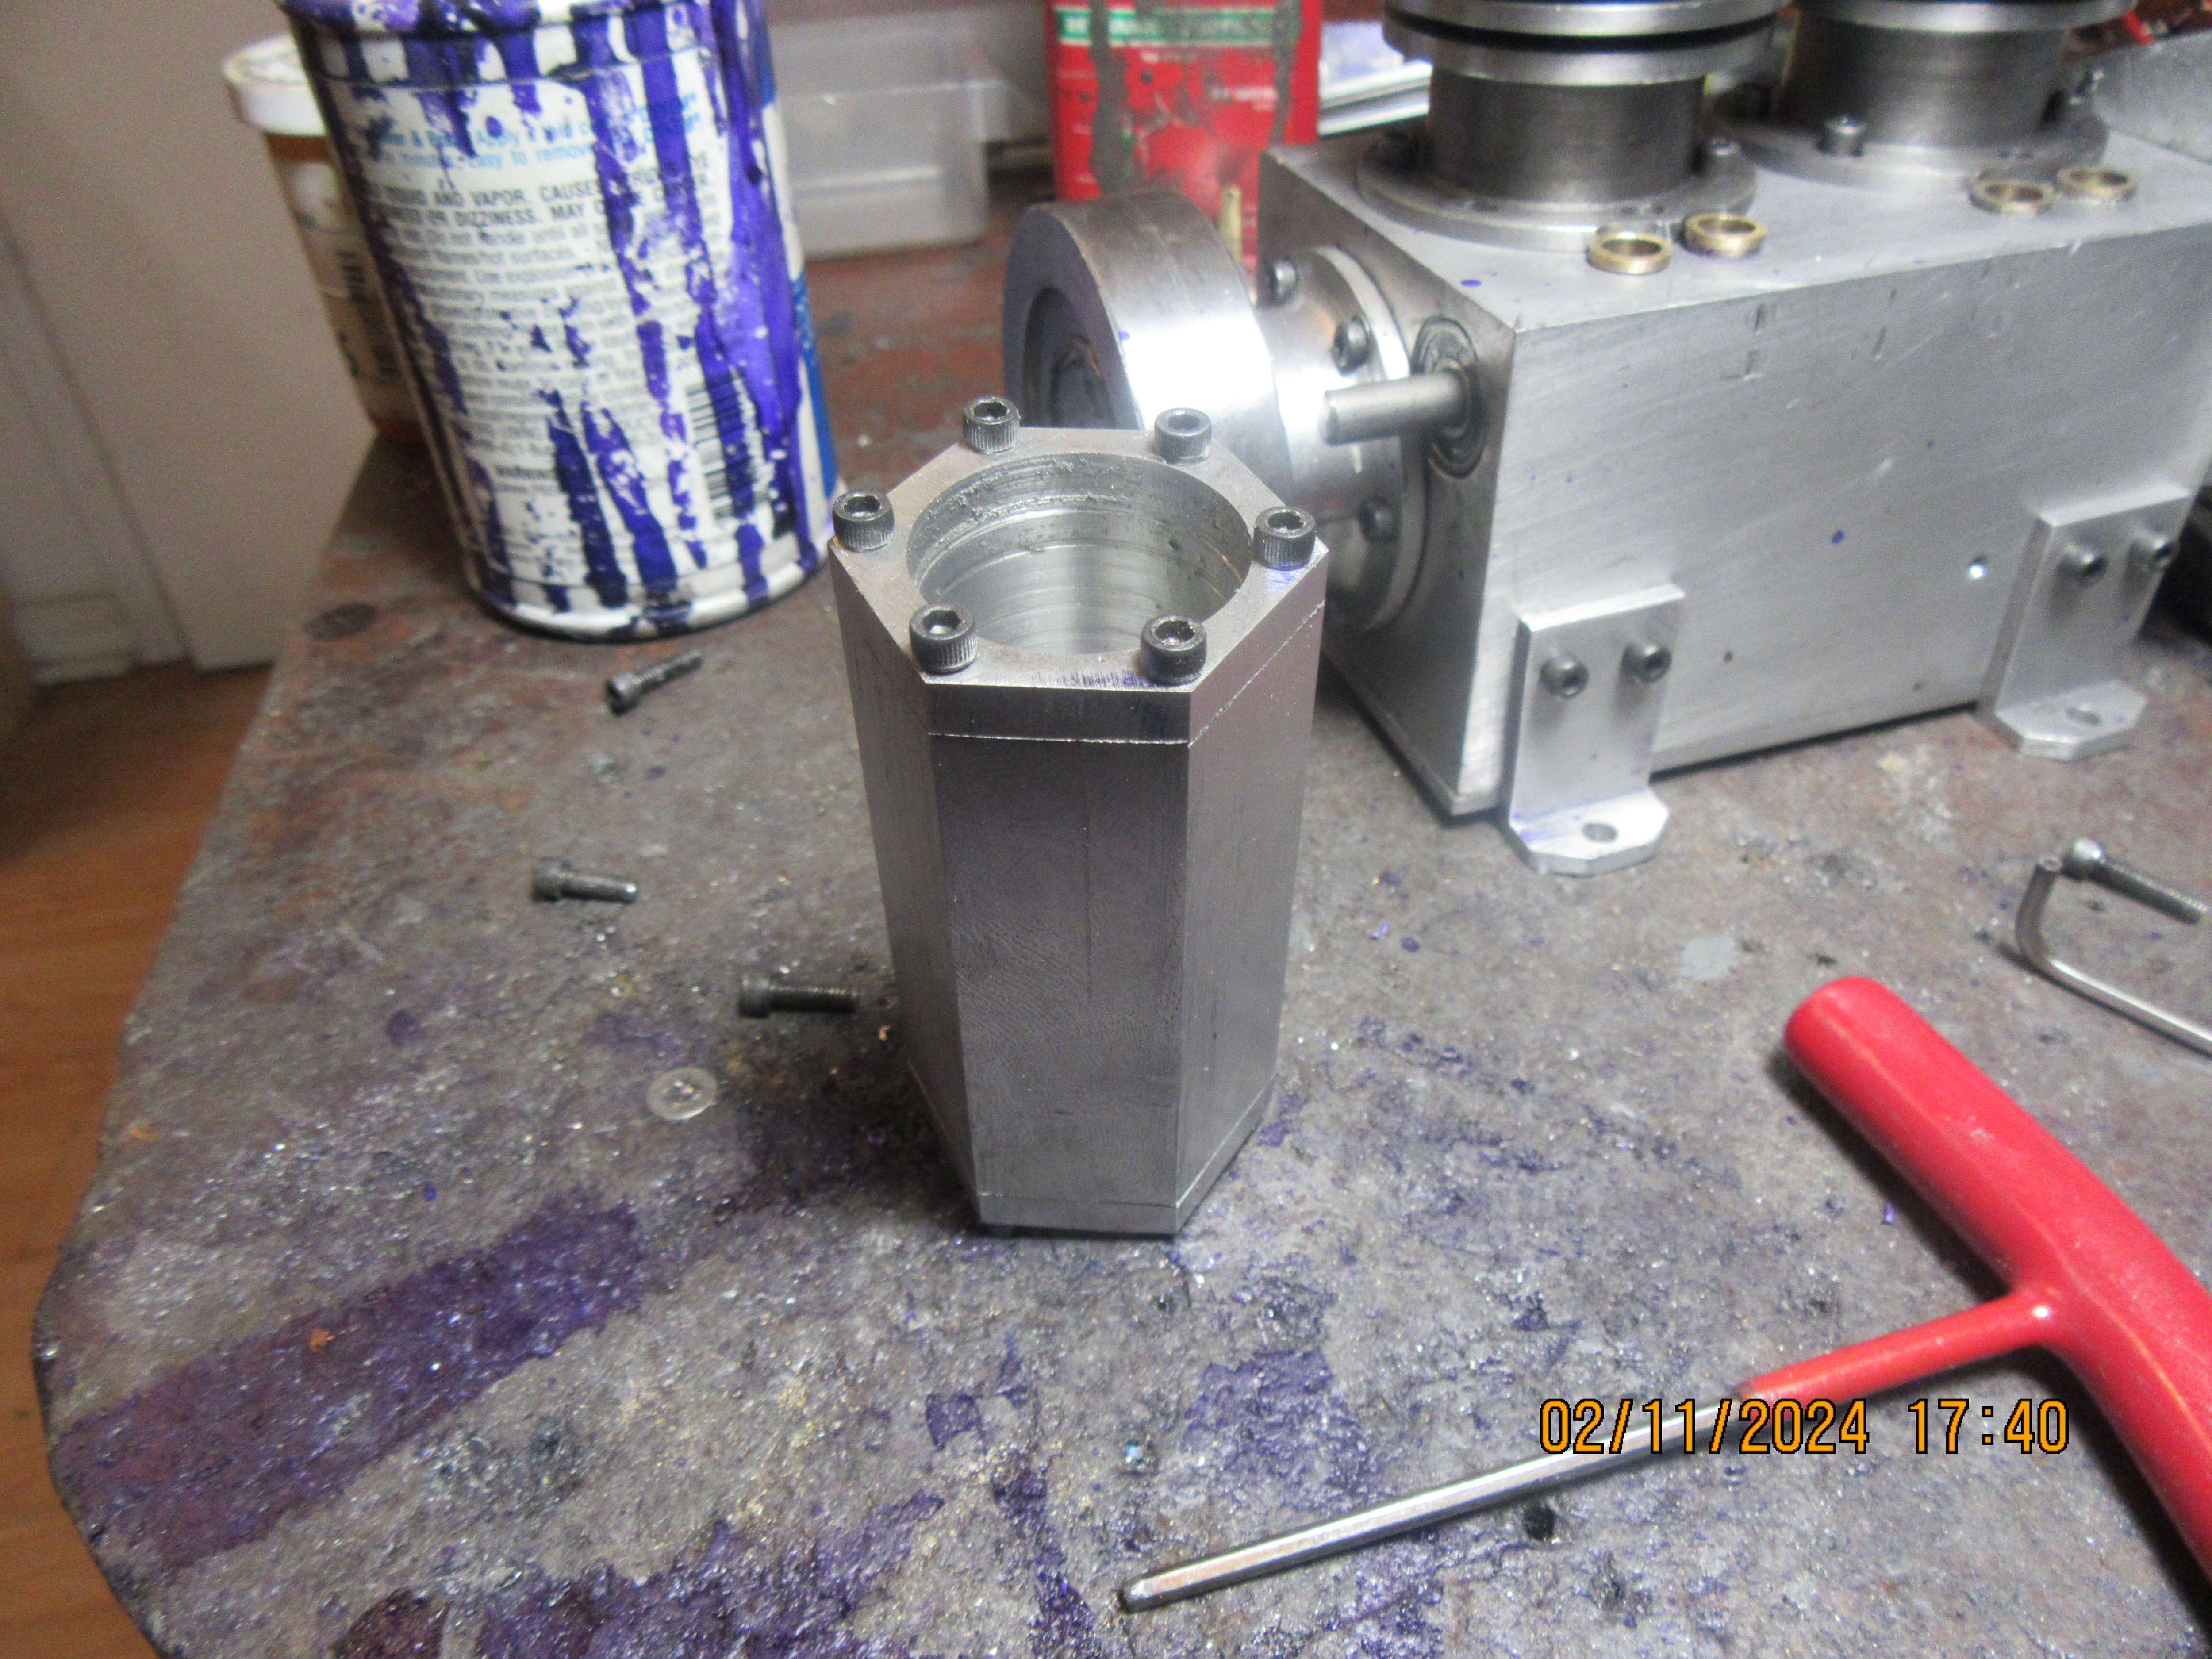

might be pricey but it will look good!
Hi Brian, Maybe in your accountancy you undervalued your machining skills, cost of electrickery, and value of support from your dear lady, but against that you can discount the value of reward you get by having the tank you want. instead of a simple square one. And you had a day of pleasure (so far!) - plus the rest...
So many things simply go beyond the cost, that counting the dollars is almost meaningless. Families, Friendships, Hobbies, pets, etc. can never be valued in simple $,£, etc. If you were on hard drugs to get the same pleasure as those things then you would be bankrupt by now!
And on the side we get all our pleasure reading your posts! So please carry-on.
And well done for your dogged perseverance!
K2
olympic
Well-Known Member
Thanks for telling me how long it takes to do something. If someone as skilled as you spends that much time on a thing like your gas tank, I don't feel too bad about how long it takes me, a self-taught, unskilled worker, to accomplish something. I often feel frustrated because I think something is taking too long to accomplish, but your post tells me that I'm wrong about that.Today I built a gas tank. Started at 10:00 and it's 5:00 now. Damned expensive gas tank if I was paying somebody to make it for me.--And, it's not done yet. I saved $10 by starting with a piece of aluminum 2" square, and worked on it 3 hours until is was the shape you see.--$115 worth of work to avoid spending $10.--It has a 31/32" inside diameter, and I still have to counterbore the main tank for the sight glasses and o-rings that keep it from leaking at the ends. I still have to make a filler neck and cap for it, and still have to make and attach a discharge spout, and still have to make the part that mounts the tank to the engine. It will be a $300 gas tank by the time I'm finished.
Enclosed is a picture of a partially-completed smokebox door for a 3.5" gauge locomotive that I found in a woefully-incomplete state. I haven't kept track of the hours involved so far, but they are numerous, and many more hours will be spent finishing that and the rest of the loco to the best of my ability.
Most of the posts I read here say things like "a boiler was fabricated" (by the way, I dislike the use of the passive voice in such descriptions), but few mention how much time goes into making things. Your post makes me feel better in my relative incompetence, and highlights the skill and care that go into our hobby machining.
Attachments
Last edited:
Olympic--Your work looks fine to me. Don't worry too much about the time it takes, as long as you are enjoying what you do.---Brian
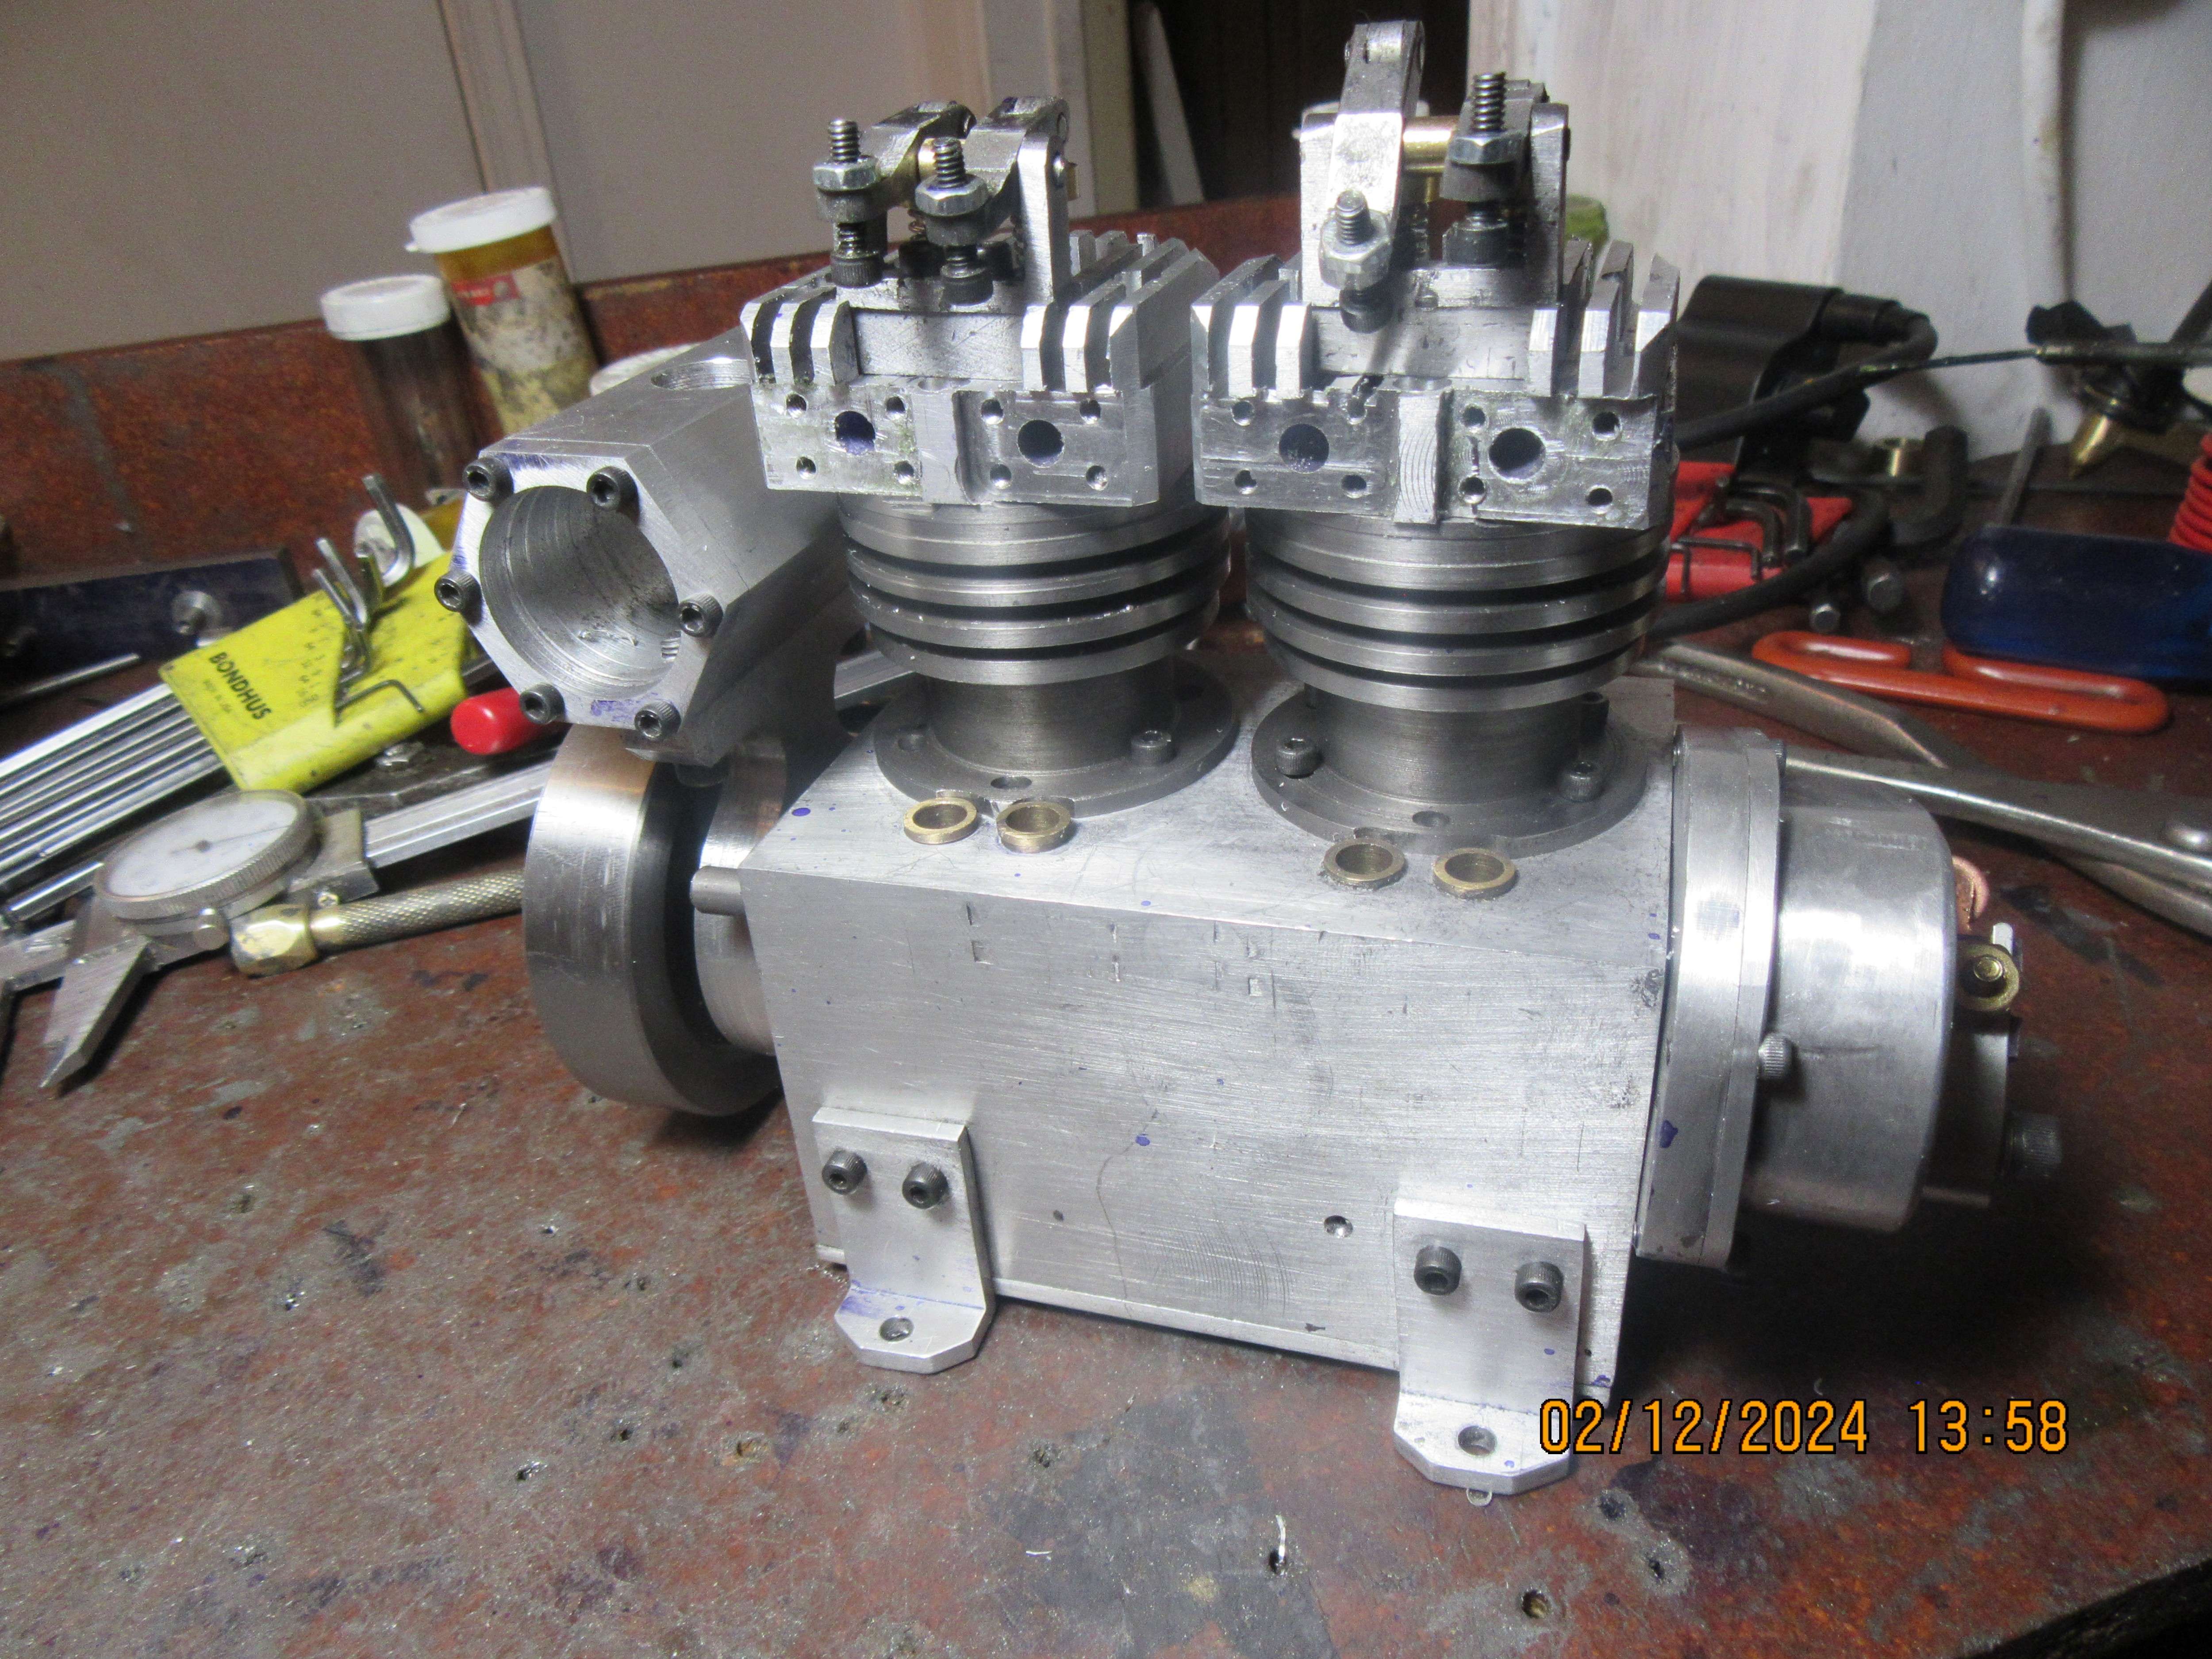
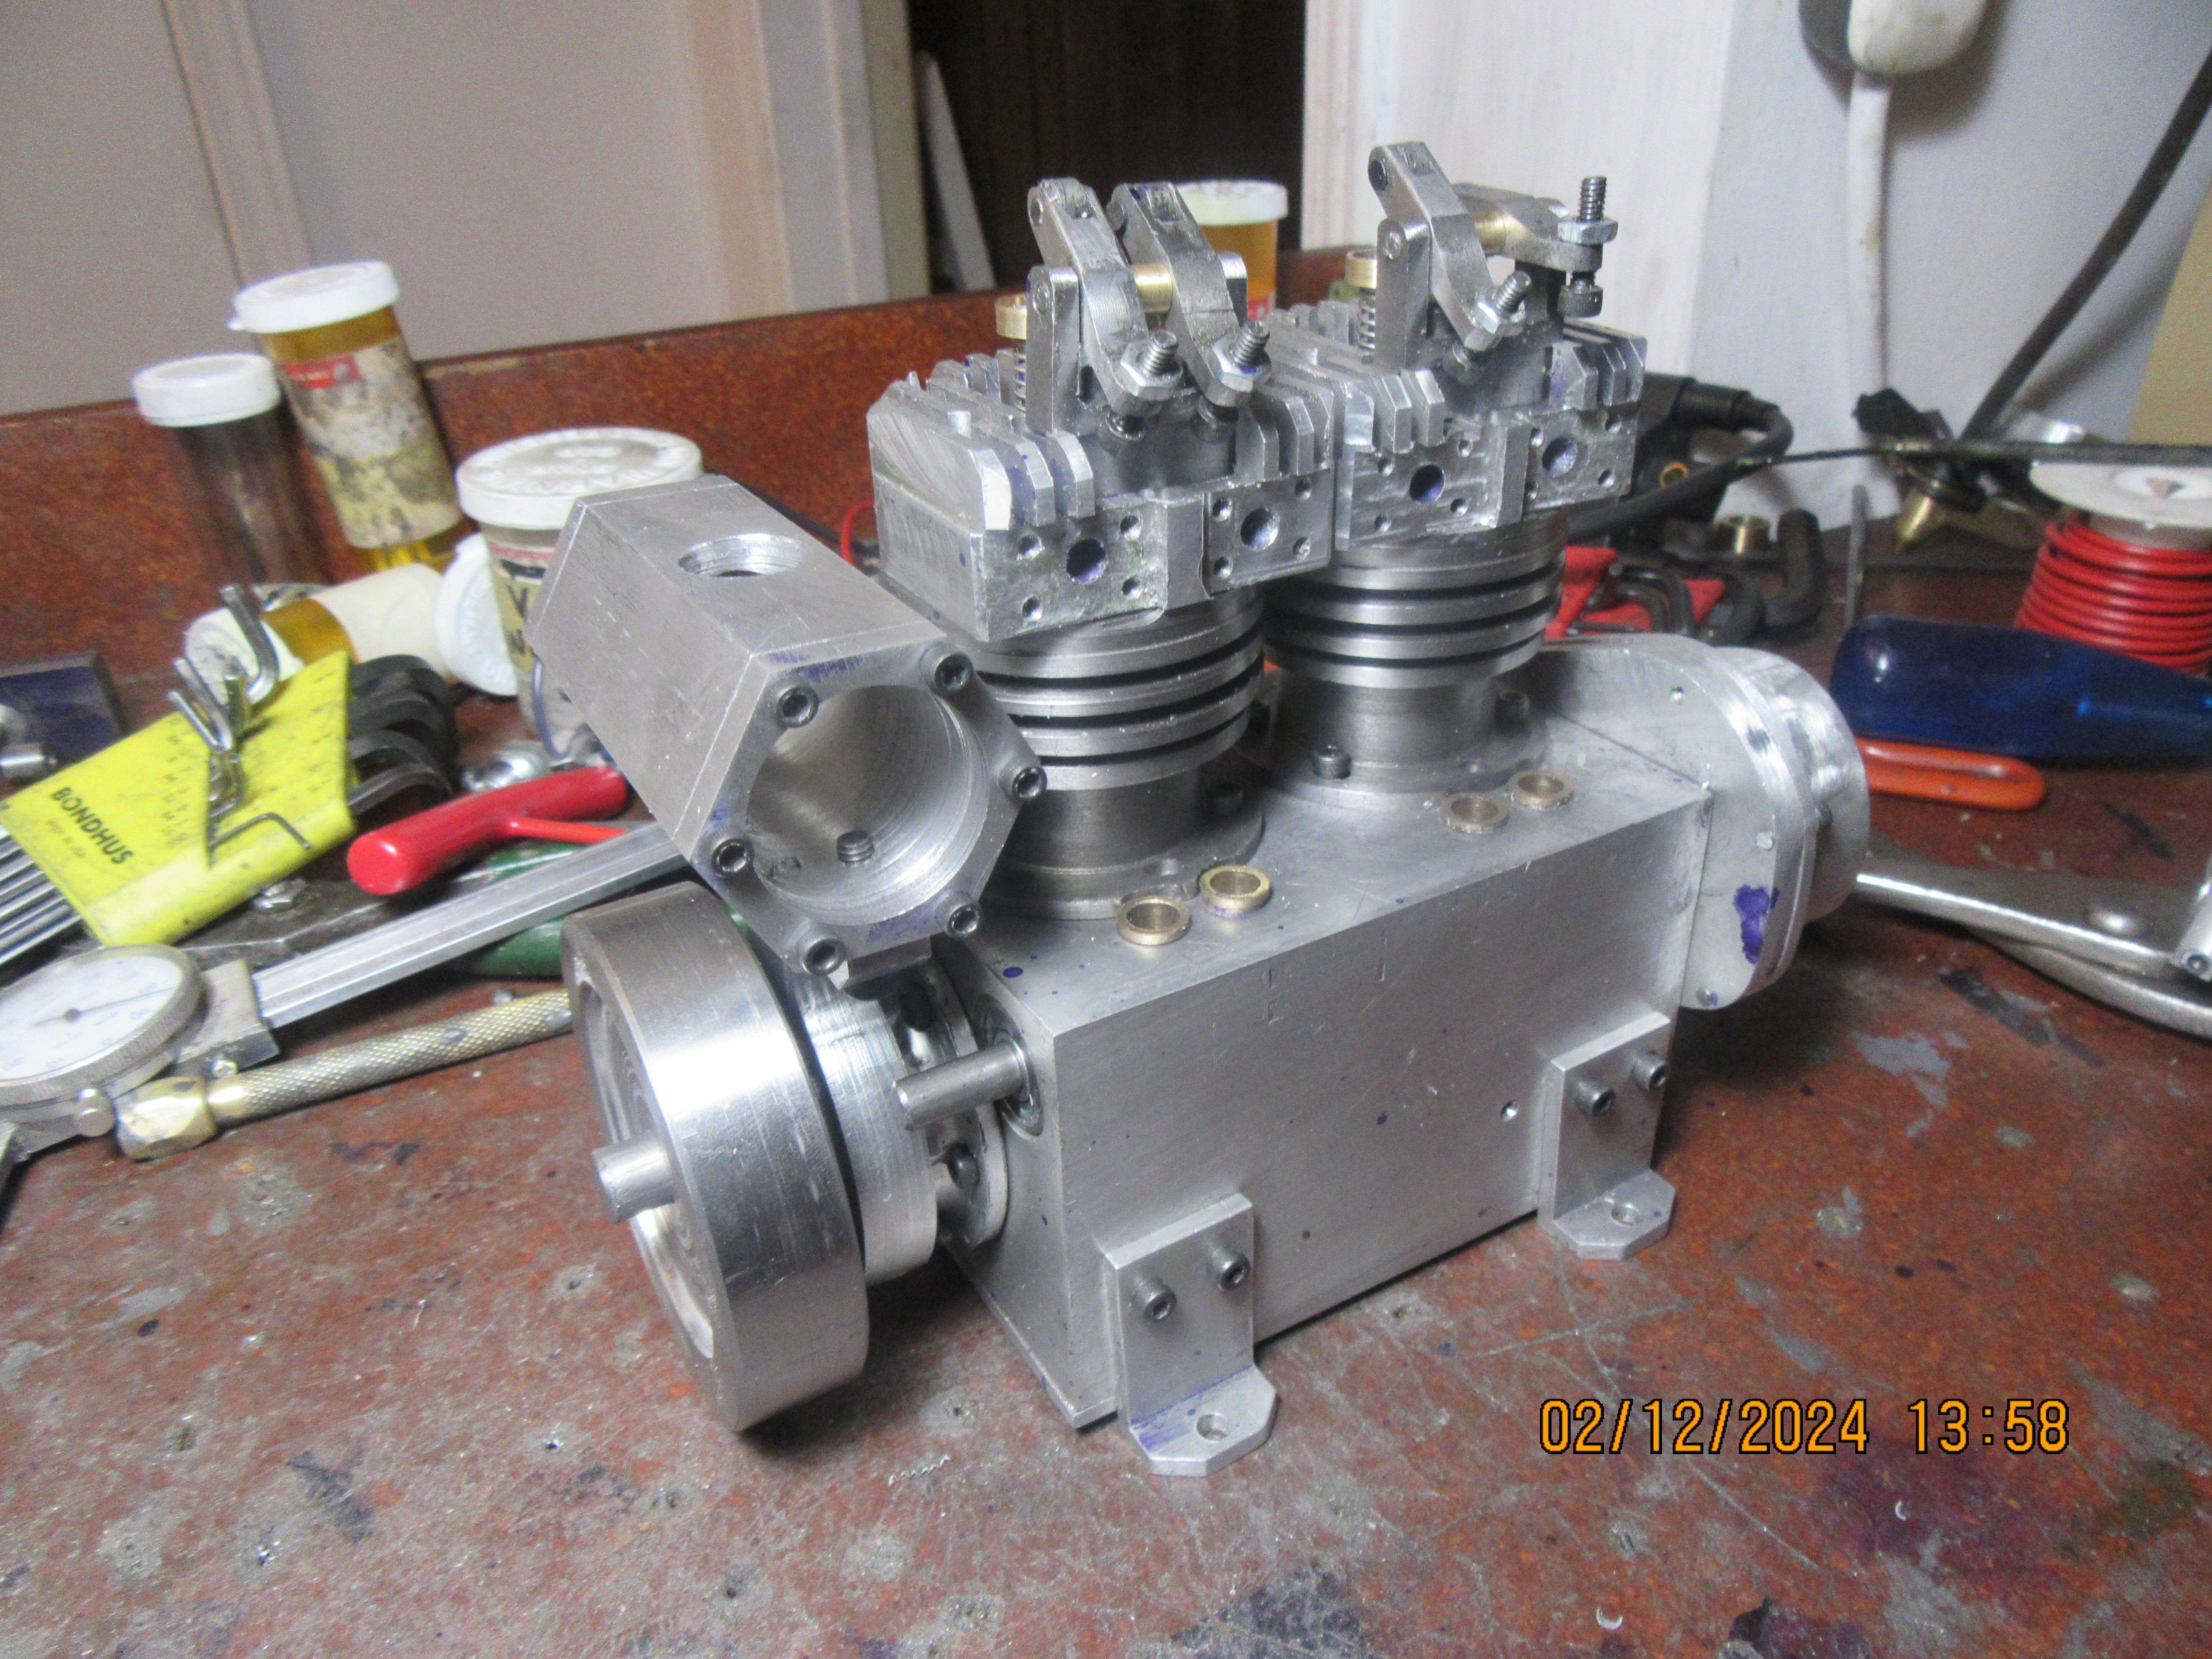
The gas tank mount is finished and the gas tank is in place. I still have to add a filler spout and a discharge spout to the tank itself, and I may machine a scallop into the side of the tank so it doesn't set too close to the cylinder beside it. I'm off now to my tooling supplier to buy a 5/8" fine thread tap.


Similar threads
- Replies
- 510
- Views
- 77K
- Replies
- 27
- Views
- 8K
- Replies
- 11
- Views
- 1K
- Replies
- 95
- Views
- 13K


![MeshMagic 3D Free 3D Modeling Software [Download]](https://m.media-amazon.com/images/I/B1U+p8ewjGS._SL500_.png)


