Thanks for all the comments, I have included a tape measure in one of the shots, 6" rule looked a bit lost. There is also a Coke Can in one of the earlier cylinder photos to give an idea of size.
So with just about all the important parts made I like to test the engine before any painting is done which reduces the risk of chipped paint if you have to strip things down again. I did not bother with any gaskets, gland or piston packing but it seems to show promise. The engine tends to speed up a bit on the down stroke due to gravity so a bit of resistance from the packing should help there.
[ame]http://www.youtube.com/watch?v=VesnzqvZ3W4[/ame]
With that out of the way I could get on with a few of the cosmetics. Firstly there are about 14 oil cups needed for the bearings, these were made from 1/4" hex brass using a small form tool to cut the neck.
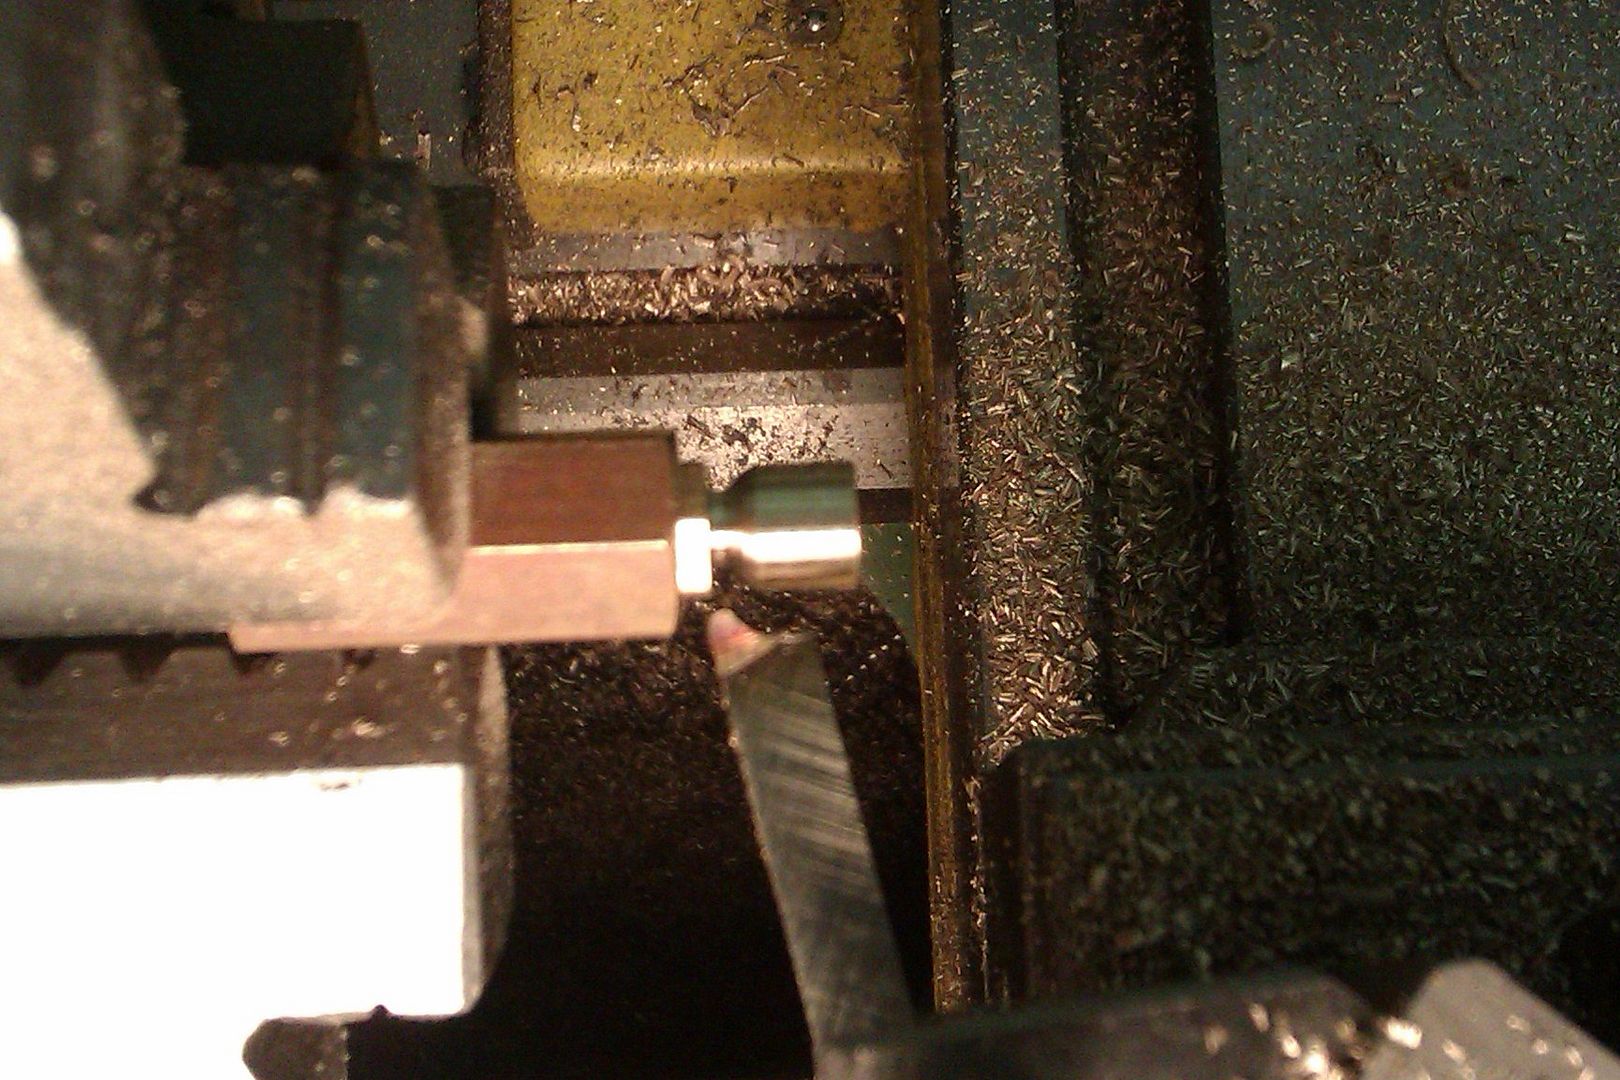
Job done
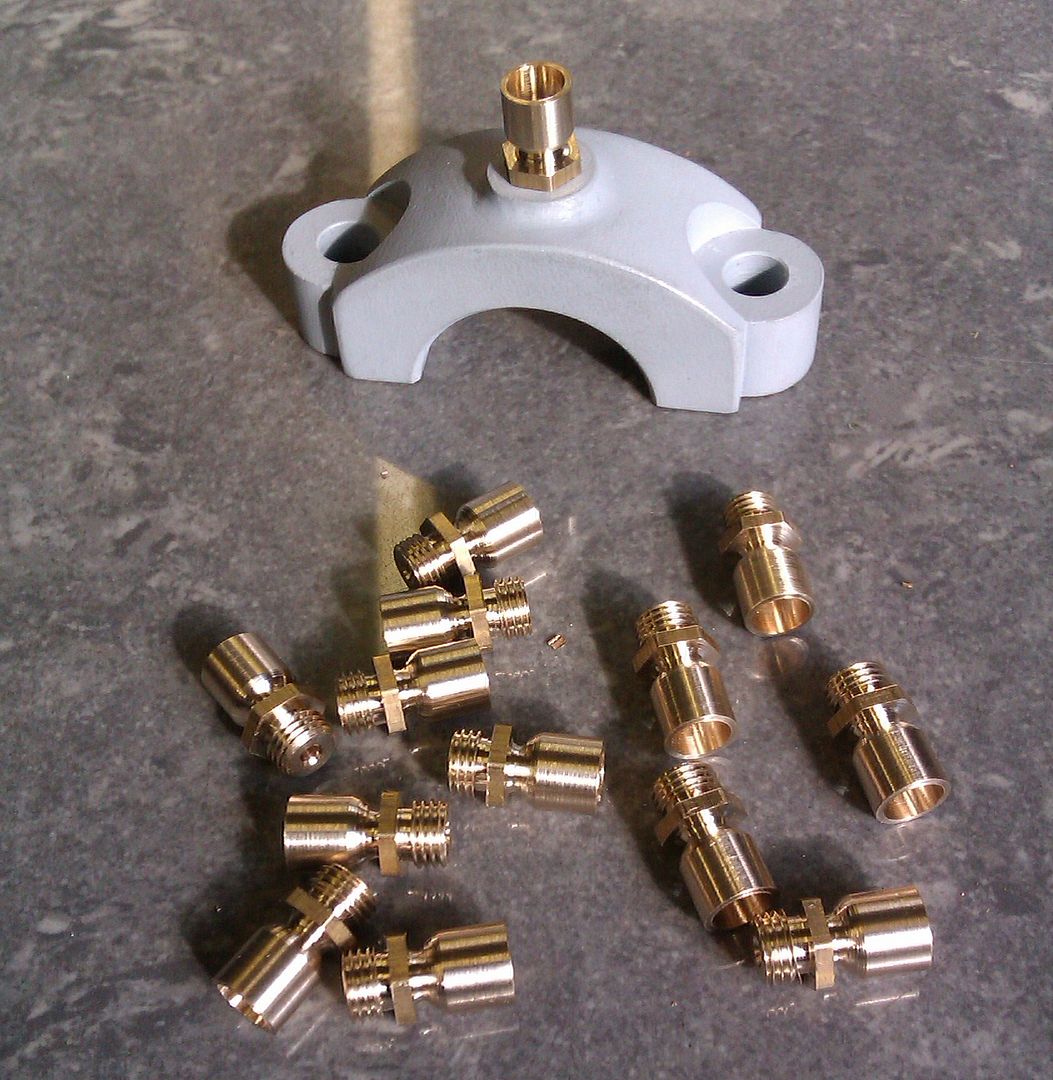
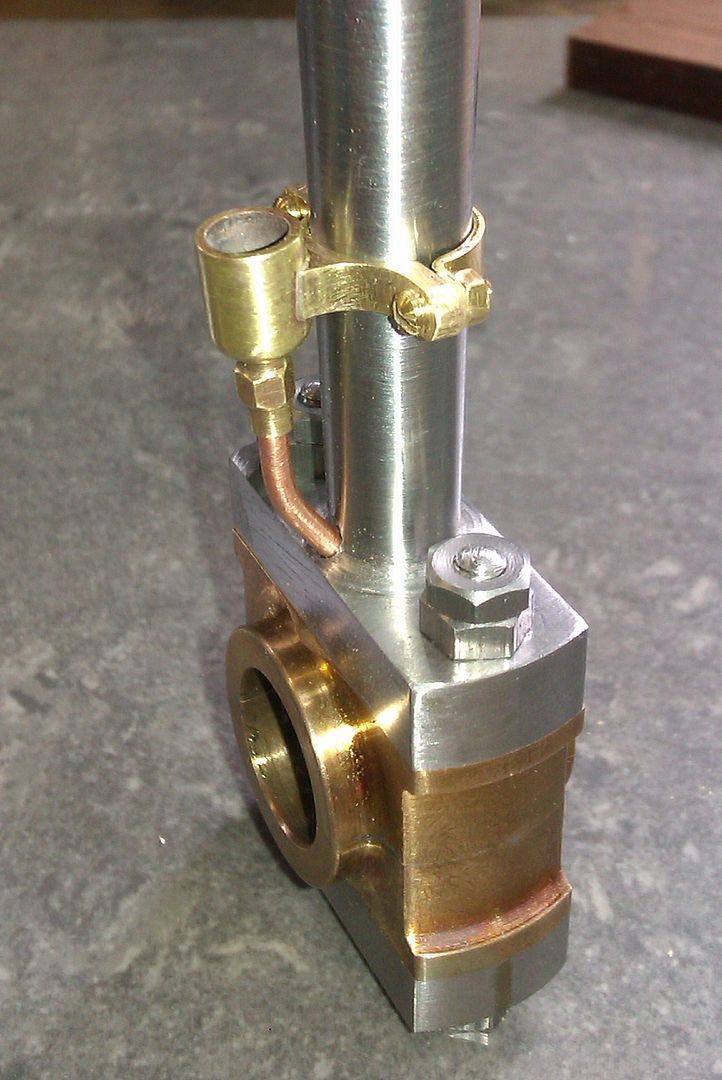
The big end also has a little oil pot clamped to the conrod and the oil is applied via a small dia copper pipe.
The piston rod is also lubricated in a similar way but has a lidded box rather than a pot which fixes to one of the beam supports
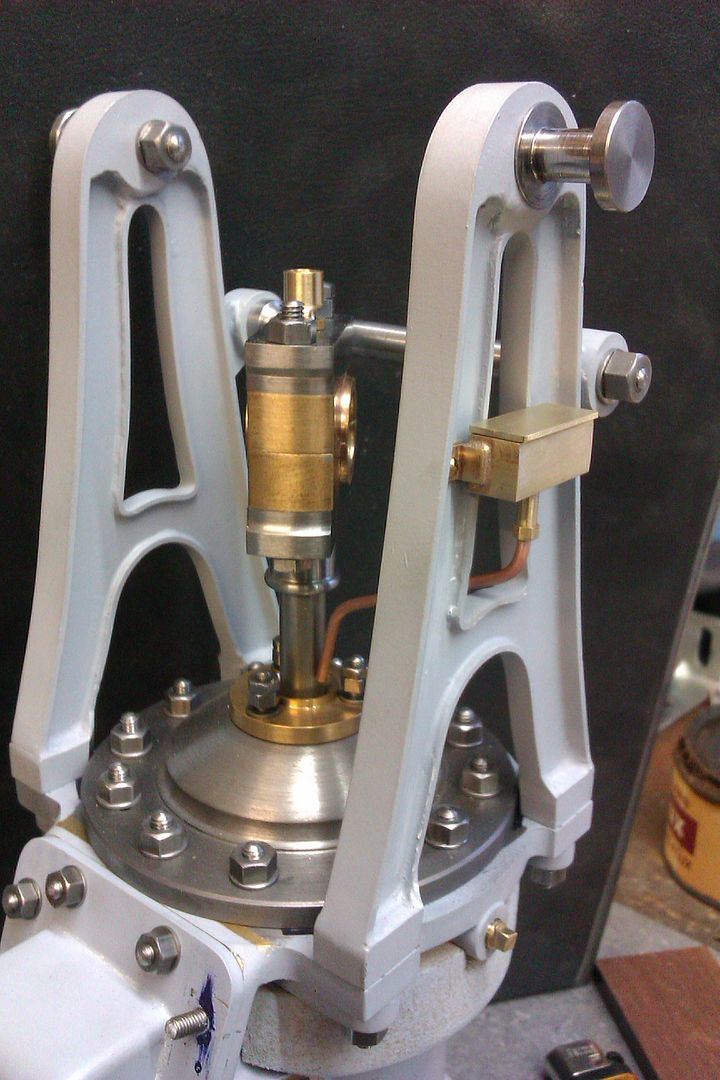
The engine was then stripped down and all the "cast" parts painted, I just used a satin black spray can rather than the airbrush as I find the slightly rougher texture the can gives better suits the surface of the original. Golf tees are handy to stop paint getting into holes and at the same time provide a useful handle to save marking the paint.
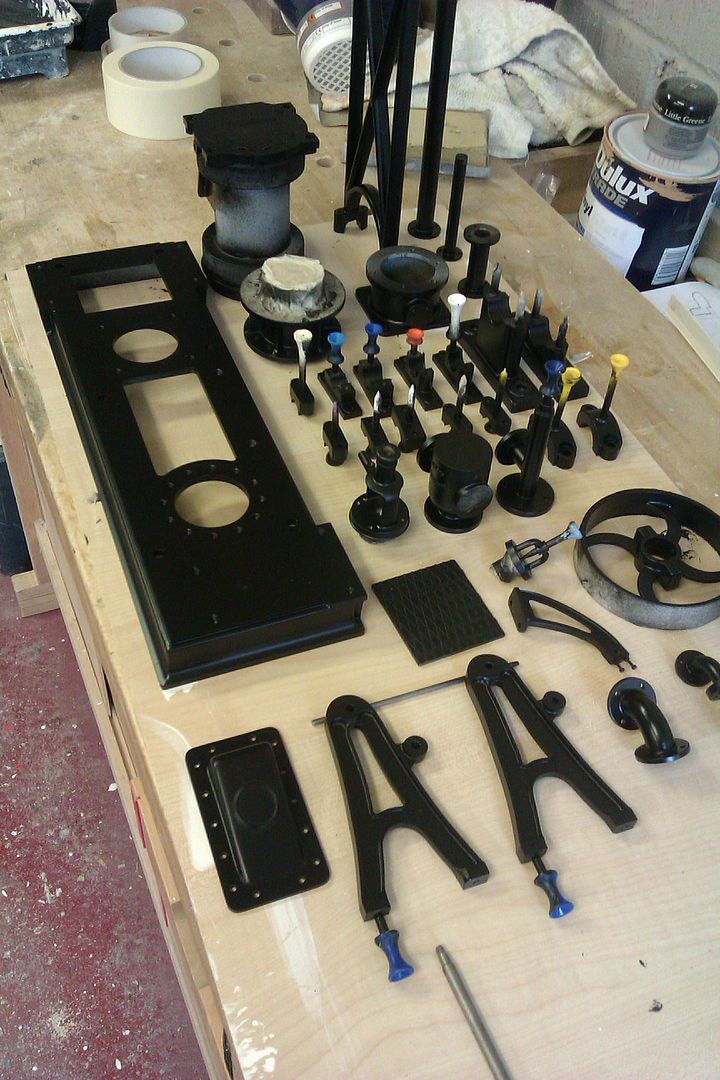
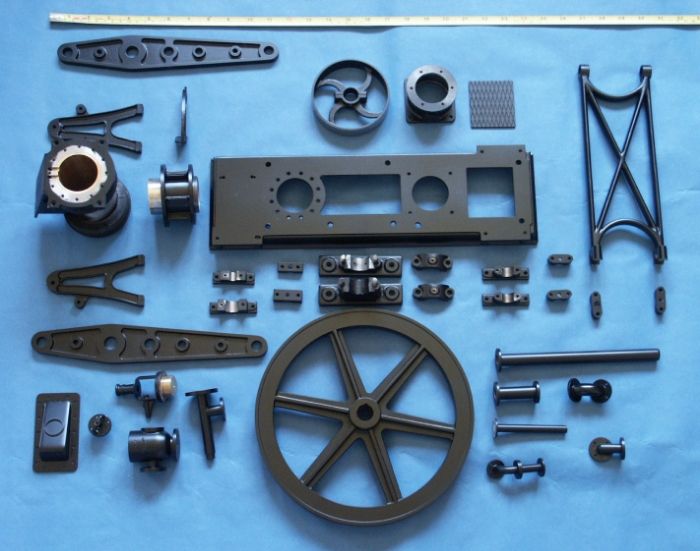
In total there are 38 fabricated parts which would have been castings on the original, I had a littel count up and they are made up from 194 separate pieces of metal.
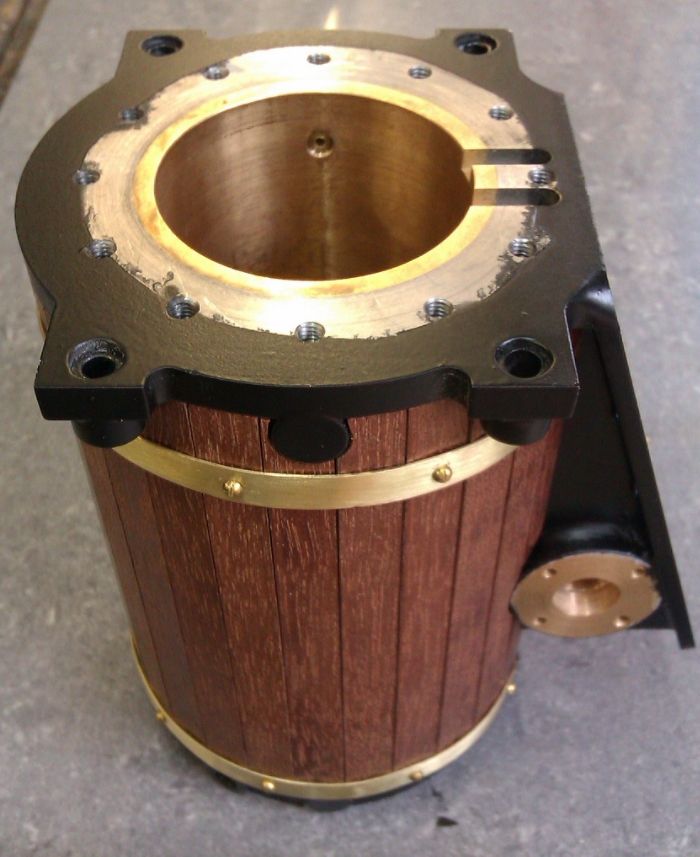
After a couple of days to allow the paint to harden off the cylinder could be lagged. The strips of wood were tacked to the MDF rings I had previously fitted with a small blob of superglue. Then two strips of 1/4" wide brass were cut from sheet (thought I had some boiler banding) and the heads of some 1/16" brass rivits slotted to look like screws and again fixed into their holes with superglue.
Well the next post should be the completed engine.
J
So with just about all the important parts made I like to test the engine before any painting is done which reduces the risk of chipped paint if you have to strip things down again. I did not bother with any gaskets, gland or piston packing but it seems to show promise. The engine tends to speed up a bit on the down stroke due to gravity so a bit of resistance from the packing should help there.
[ame]http://www.youtube.com/watch?v=VesnzqvZ3W4[/ame]
With that out of the way I could get on with a few of the cosmetics. Firstly there are about 14 oil cups needed for the bearings, these were made from 1/4" hex brass using a small form tool to cut the neck.

Job done

The big end also has a little oil pot clamped to the conrod and the oil is applied via a small dia copper pipe.

The piston rod is also lubricated in a similar way but has a lidded box rather than a pot which fixes to one of the beam supports

The engine was then stripped down and all the "cast" parts painted, I just used a satin black spray can rather than the airbrush as I find the slightly rougher texture the can gives better suits the surface of the original. Golf tees are handy to stop paint getting into holes and at the same time provide a useful handle to save marking the paint.

In total there are 38 fabricated parts which would have been castings on the original, I had a littel count up and they are made up from 194 separate pieces of metal.

After a couple of days to allow the paint to harden off the cylinder could be lagged. The strips of wood were tacked to the MDF rings I had previously fitted with a small blob of superglue. Then two strips of 1/4" wide brass were cut from sheet (thought I had some boiler banding) and the heads of some 1/16" brass rivits slotted to look like screws and again fixed into their holes with superglue.

Well the next post should be the completed engine.
J


