Brian's Donkey Engine

Home Model Engine Machinist Forum

Help Support Home Model Engine Machinist Forum:

This site may earn a commission from merchant affiliate links, including eBay, Amazon, and others.
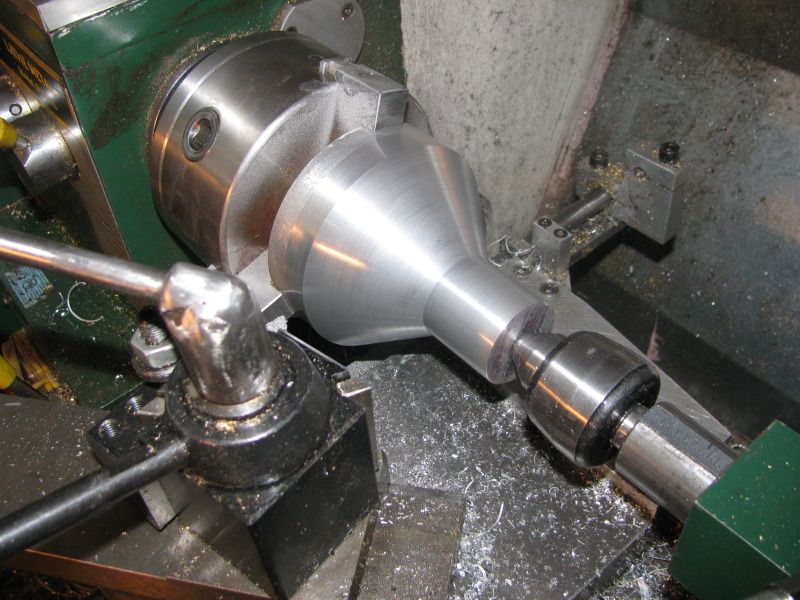
We start this grand foofaraw by using a center finding square to locate the approximate center on one side and putting in a hole with the largest countersink tool I have. When this thing goes up in the chuck, the chuck is holding on with the "Tips of its fingers" and I don't want this coming out of the lathe at speed and hitting me!!!
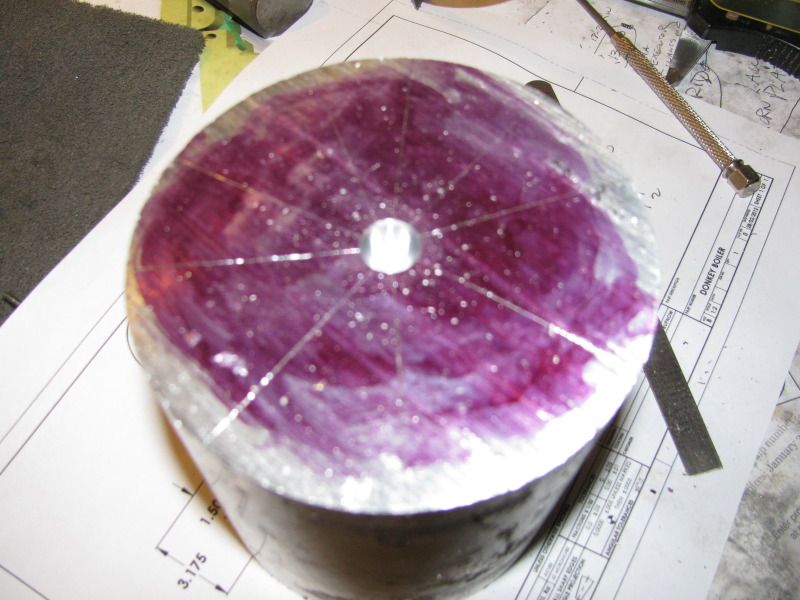
BOILERTRANSITIONCONEONLATHE001-1.jpg
 
Here we have a semi finished transition cone. It still has to have a step machined into the large end to fit snugly into the 4" pipe I machined yesterday. As you can see, my plan changed mid-stream (as often happens) and I decided not to use the smaller "smokestack" pipe, but instead machined it right onto the end of the cone.
BOILERTRANSITIONCONEONLATHE001.jpg
 
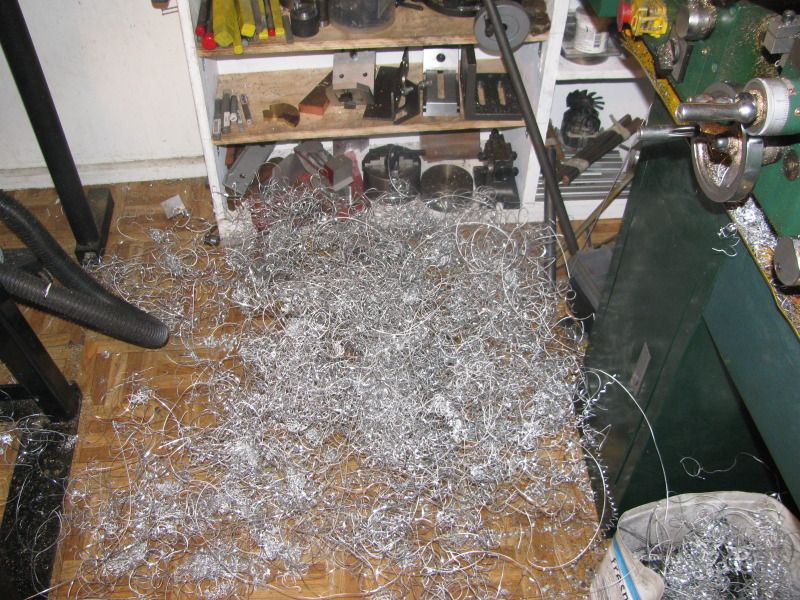
And all morning I've been expecting the Beach Boys (or whoever sang it) to pop up behind me and start singing "Goin' to Swarf City'!!!!
BOILERTRANSITIONCONEONLATHE002.jpg
 
;D Yup - there's $29.35 of your $30 piece right there!
 
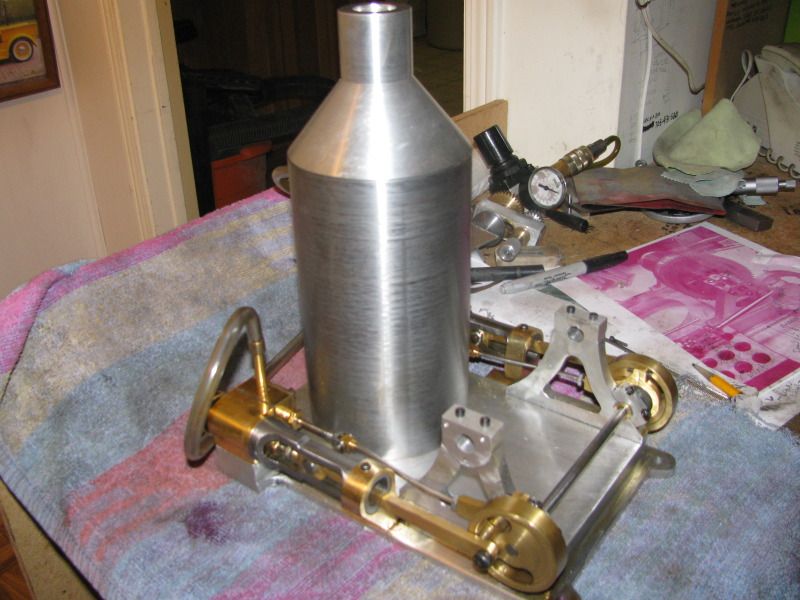
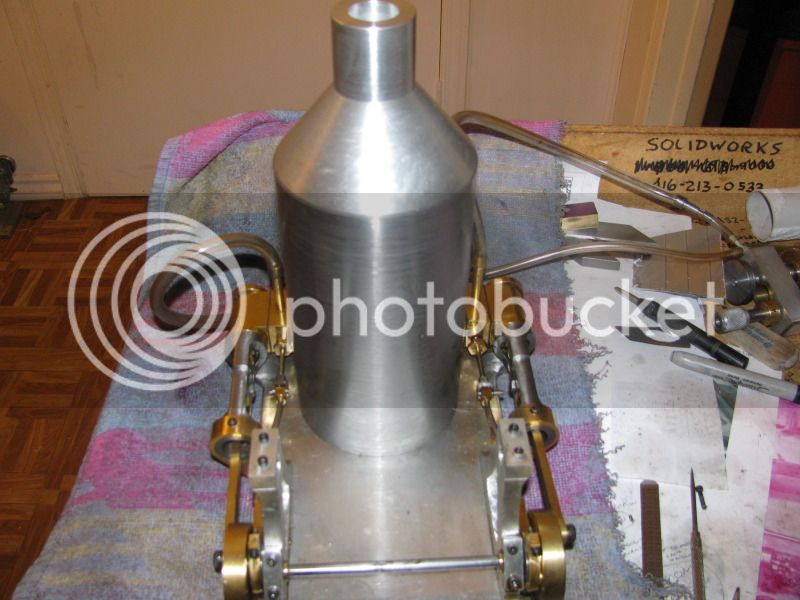
The boiler top is finished. It cost me $30 and a day in my shop. I think its beautiful. There is NO other way to do a transition top like that from raw material to "ready for paint" in one day. I know---I did bodywork and paint for about 5 years, and although you can make something like a boiler top very lovely you absolutely can not do it in a day. If making from sheet metal-----first you lay it out---then assuming you have a set of slip rolls and know how to use them you roll a cone. If the cone comes out the right size the first time (A rare event) then you have to weld it or rivet it to join the ends. Then you prime it---2 or 3 times. Then you spot putty all the divots that show up when its primed. Then you wait for the spot putty to dry---then you sand the spot putty and prime it again----and so on ad infinitum. I know. I've lived it. What I've done today seems like a lot of work, and yes, it used up a day. but all it needs now is some epoxy to hold it in place and a shot of flat black enamel.
boilertransitionfinished001.jpg

boilertransitionfinished002.jpg

boilertransitionfinished003.jpg
 
Brian,

I am building a Bill Harris steam roller. I have the enging mosly completed and am looking for boiler fittings. It appears your boiler is only cosmetic, but have you found scale boiler fittings for any other projects?

I have found several vendors such as PM research, but have not found a scale safety valve or boiler check valve to work on 100 psi.

Any suggestions?

Doug
 
What scale is Harris's roller? You should be able to make your own fittings, I've done it for the 1/12 engine in my avitar and the current 1/6th one.

J
 
1:8 (1 1/2" scale) Finding fitting should not be difficult at all, even easier to make 'em - and anyone who can build the Bill Harris Donkey is well and truly capable of making a few fittings.

I'm very tempted to do one myself - it is a great design.
 
There is NO other way to do a transition top like that from raw material to "ready for paint" in one day.

I dunno Brian, I've made quite a few truncated cones - mainly for reducers in dust extraction lines and I would figure on 2 1/2 - 3 hours top.
 
Plus 1 for American Model engineering Supply!

Dave
 
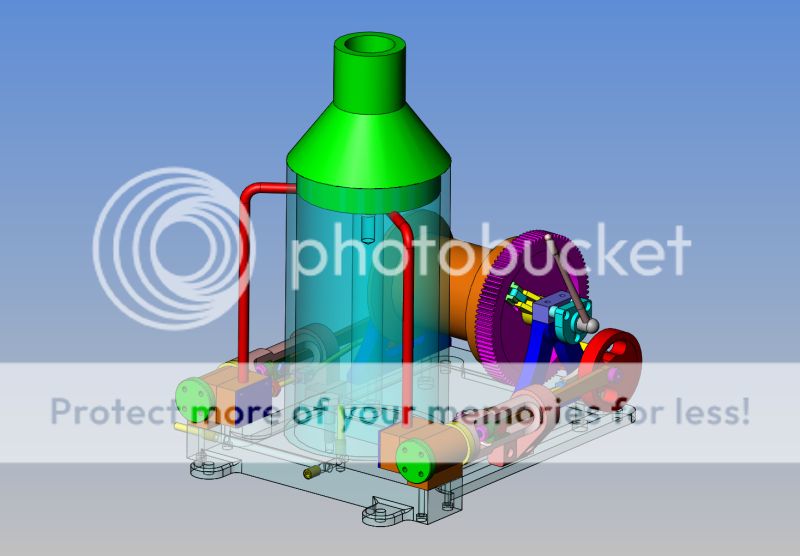
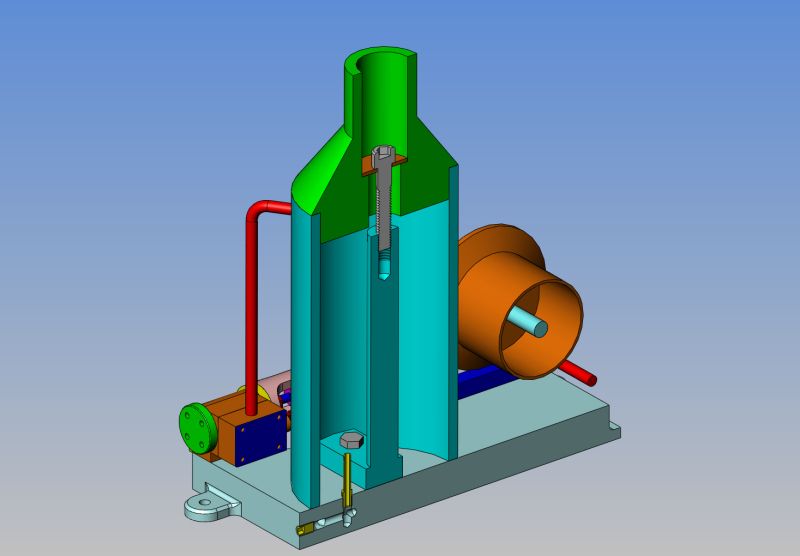
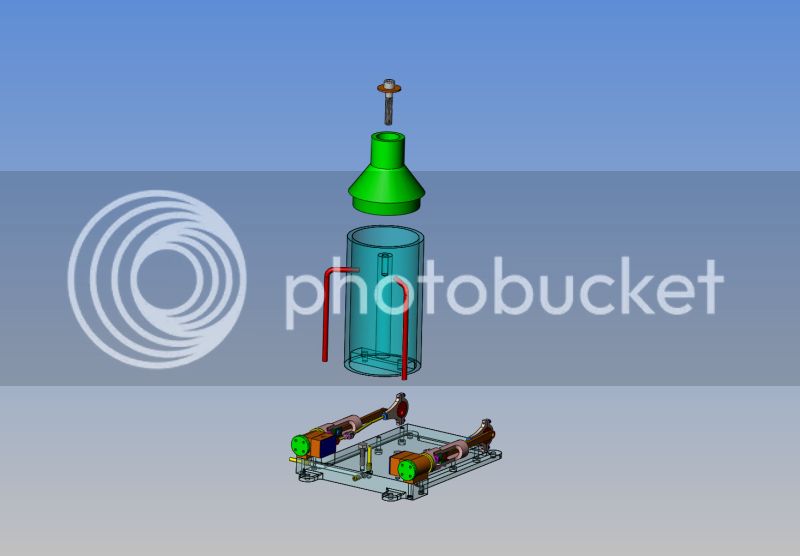
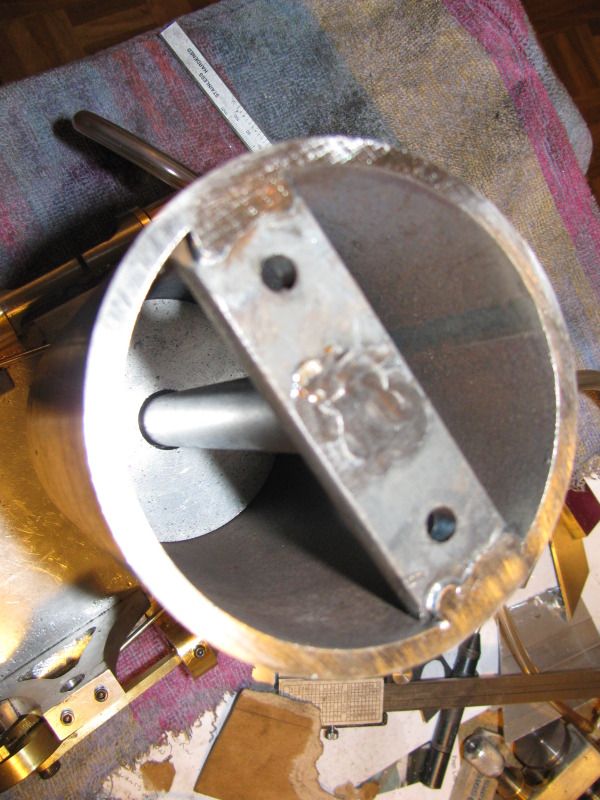
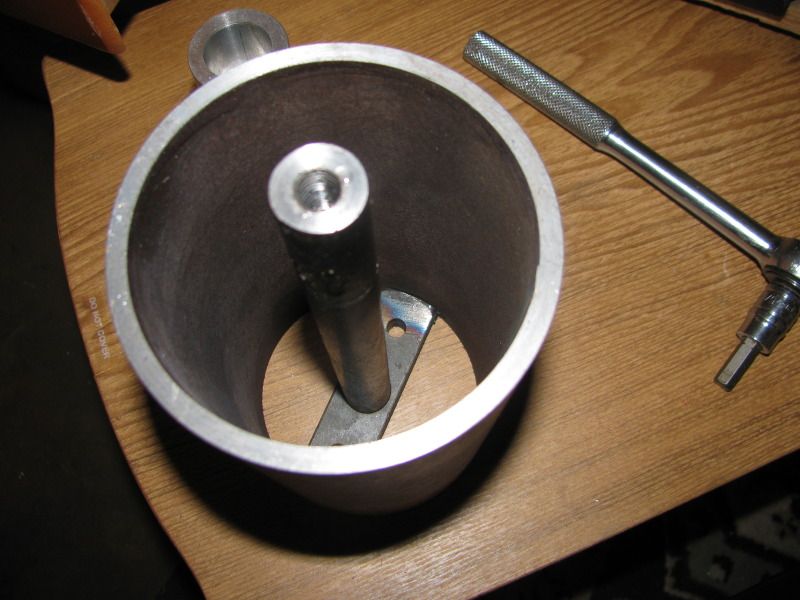
The following 3D models are intended to give a bit of insight as to how the boiler connects to the base and how my airlines will be run. I am kind of making this up as I go along, and since I have to create these 3D models anyways to clarify it for myself, I thought you might want to see. Since the main boiler tube is made of steel, I can weld a piece of 1" x 1/2" flatbar across the bottom inside and put two 1/4" clearance holes through it. These can be used to bolt the boiler to the baseplate. I want the transition cap on the boiler to be removeable, but I don't want somebody to steal it at a show--so---I have welded a piece of 3/4" rod to that crossbar at the bottom of the boiler tube and tapped the top of it 3/8"-16 unc. A stepped bore in the transition cone lets me put a washer down the top that stops at the register (step) and allows a 3/8" bolt to secure the transition cone to the boiler tube. That way I can remove it with a wrench, but grabby fingers can't pocket it and walk away with it. Since this model will run on air and not steam, I have drilled the base for my air inlet just below one of the cylinders and it surfaces inside the boiler tube. The bent tubes which run from the top of the boiler tube down to the cylinders will be connected with a Teed flex line to the air spigot which surfaces inside the boiler. I still haven't totally worked these air tubes to the cylinders out, but since brass is so difficult to bent I am considering making the lines from steel automotive brakeline, which can be bent in quite a tight radius without kinking. I will add a cosmetic fire door and ash cleanouts to the boiler and base as this develops farther.---Brian
BOILERCONSTRUCTION.jpg

BOILERSECTIONED.jpg

BOILERASSEMBLYEXPLODED.jpg
 
Brian

By bolting your boiler to the base like that you will spoil its use as a cocktail shaker! What a shame.

On a less serious point, since you are planning piping from the boiler to the cylinders, where will you put the throttle valve? In full size practice, the steam line passes through a throttle valve within reach of the operating engineer and is then through a tee to the two cylinders. Unlike a mill engine, which runs all day at a constant speed, these things are started, stopped and throttled up and down frequently.

Jerry
 
Jerry--I hadn't thought of that. Thanks for bringing it to my attention. i will have to rethink the plumbing line positions.---Brian
 
Brian I thought you were going to use the scale pipe elbows, tees etc as you mentioned them early on in this thread. PM Research do them to suit your 1/4 pipe. Plus everything can be taken apart if its threaded.

As well as the throttle you may want to add a means of lubrication as well unless you lube teh main air supply anyway.

J
 
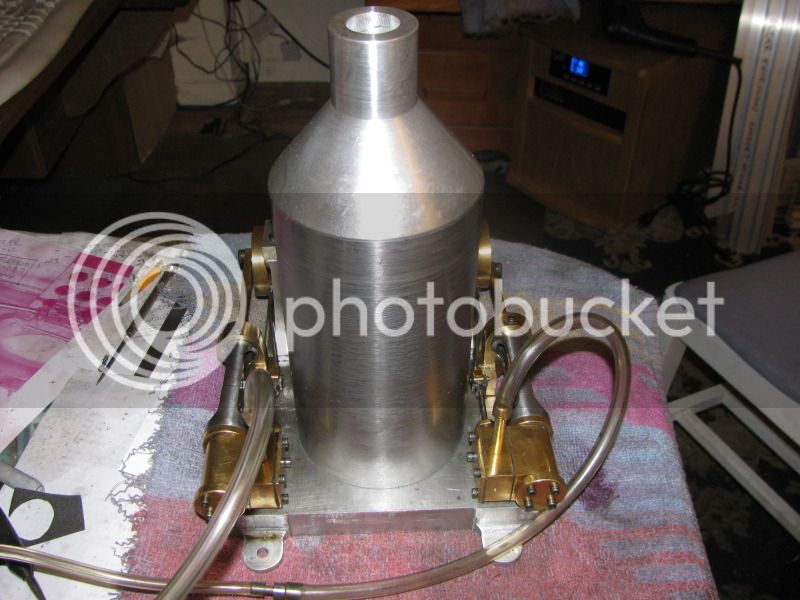
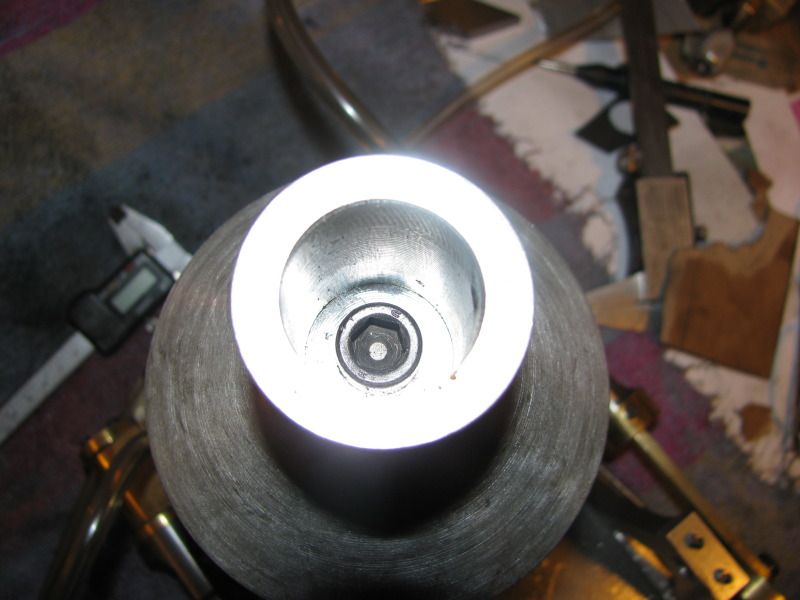
There!!! Nobodys going to rip off my smokestack unless they are carrying the appropriate Allen wrench.---This is a view "down the stack" as well as a very out of focus shot of the strap welded across the bottom inside of the boiler, and a view down the boiler without the cone in place.
BOILERMOUNTING001.jpg

BOILERMOUNTING004.jpg

BOILERMOUNTING005.jpg
 

Latest posts

Back
Top